The Acton sew-along : How to grade between pattern sizes

For many women, your measurements will range across several sizes, and you will need to grade between sizes after you print your pattern. For example, in most patterns, my hip measurement is usually a size or two bigger than my waist measurement, which means I need to grade up from the waist to the hip to account for this difference. It's a really easy adjustment to make, and makes the world of difference when achieving a great fit (and that's one of the main reasons we all sew, right?)

So today, to coincide with the Acton sew-along, I thought I'd show you how it's done!

Print the pattern

acton_grading_sizes_1.gif

To start, take your measurements to work out what size/s you need. Print the Acton dress pattern. In the Folds digital patterns are layered, so you can just print the size/s you need. Check out this tutorial if you need some help with this step (please note : for the Acton, there is just a "Pattern Info" layer that includes the grid and tags). Assemble the pattern as normal.

Mark hip line on the pattern

acton_grading_sizes_2.gif

Mark the hip line on the pattern. You can do this by holding the pattern piece up to your body and marking your hip location. 

Grade between sizes

acton_grading_sizes_3.gif

In the case of the example, I am grading between a size C at the waist, up to a size D at the hip. To do this, simply draw a diagonal line from the size you are at the waist, to the size you are at the hip. As you can see in the illustration, the top of the pattern is still a size C (which means it will still fit together with the size C bodice), but at the waist it is now a size D.

Complete the pattern

acton_grading_sizes_4.gif

Now, there are a couple of options for what to do next. You can either continue the side seam on the size you have reached on the hip, or continue the straight line created by the diagonal line. You can see that the first option creates a shallow point at the hip, but when just grading up one size, it's no big deal - it won't effect the shape of the skirt.

acton_grading_sizes_5.gif

If you're grading between more than one size (or don't mind a little more volume in the hem), then you can just continue the diagonal line, until you reach the hem. 

acton_grading_sizes_6.gif

Complete the hem, by extending the original hemline (you choose which size you prefer at the hem line - according to the length you want) until it intersects the new side seam. 

acton_grading_sizes_7.gif

Move any notches that have been displaced by the new side seam... And you're done!

Cut out the new pattern piece and get sewing.


You may also like:

The Acton sew-along : Small Bust Adjustment

small_bust_adjustment_acton_1

Today, for the Acton sew-along, I'll be showing you how to do a small bust adjustment. Although the pattern I have used for the example is the Acton dress, you can adapt this tutorial to any pattern that includes princess seams. 

WHEN YOU'LL NEED TO DO A Small BUST ADJUSTMENT 

Most indie pattern companies (including In the Folds) draft for a B cup bust. There are of course exceptions to this rule (such as Cashmerette and Colette), so make sure you check on your pattern before assuming the bust cup size.

This means that if your bust cup size is smaller than a B you will need to do a Small Bust Adjustment, otherwise known as a SBA, and if your bust cup size is larger than a B you will need to do a Full Bust Adjustment or FBA

WORK OUT YOUR CUP SIZE

Your cup size in sewing patterns may not always correspond to the bra size you wear. To be safe, check your measurements before deciding if you need to make any adjustments to the pattern. 

small_bust_adjustment_acton_2

Measure your high bust measurement (the area above your breasts, under your arms) as well as your full bust (the fullest part of your chest / horizontal measurement across your nipples) and then take note of each measurement, as well as the difference.

If the difference is 2.5cm (1") your bust is an A cup, 5cm (2") it's a B cup, 7.5cm (3") is a C cup and so on. 

CHOOSE YOUR SIZE

Now, go back to your high bust measurement and add 5cm (2"). This is what your bust measurement would be if you were a B cup and therefore the size you should be choosing from the pattern.

For example, let's say your upper bust measures 81cm (32"). Add 5cm (2") to this measurement to find out what size your bust measurement falls into on the In the Folds sizing chart (and what size you would be if you had B cup breasts). 81cm + 5cm = 86cm which corresponds to a size C. Your actual bust measurement is 83cm though - 3cm (just over 1") smaller than the bust measurement of the pattern. This means you will need to do a SBA and remove this 3cm (1") from your pattern. 

small_bust_adjustment_acton_3

Just like when we did the FBA, we will also need to remove some length from the bust panel, not only width.

To work out how much length you need to remove, measure from your shoulder down to your bust point. Take note of the measurement. The pattern has been drafted to accommodate the following shoulder to bust length:

Size A - 25cm / Size B - 25.5cm / Size C - 26cm / Size D - 26.5cm / Size E - 27.5cm / Size F - 28.5cm / Size G - 29cm / Size H - 29.5cm / Size J - 30cm / Size K - 31cm

Select the pattern size you will be using and deduct your shoulder to bust measurement from the relevant measurement. For example, my shoulder to bust measurement is 24cm, my measurements put me into a size C bust (although my bust measurements tells me I need an SBA) which is designed for a 26cm shoulder to bust length. This means I will need to reduce the bust seam by 2cm. 

GETTING STARTED

small_bust_adjustment_acton_4

Trace a copy of the SIDE FRONT BODICE and CENTRE FRONT BODICE. I always suggest to trace a copy of the pattern, so if you make a mistake you always have the original to go back to (although with digital patterns you can just print another copy if necessary). Be sure to include all pattern markings (in this case: grainline, notches and drill hole) and make sure you trace off the stitching line (the grey line on the pattern) - this is really important. When making pattern alterations, I normally suggest removing the seam allowance, but because the stitch line is marked on the pattern, you can leave it on if you like. 

Mark the bust line

small_bust_adjustment_acton_5

A : Draw a horizontal line across the fullest part of the bust on the SIDE FRONT BODICE. Mark the point where the horizontal line intersects the stitching line at the side seam as point 1

B : Mark this horizontal line (in the same position) on the CENTRE FRONT BODICE. Mark the point where the  the horizontal line intersects the stitching line at the centre front seam as point 2. 

Remove length from the bust

small_bust_adjustment_acton_6

A : From the bust seam, cut into the line you just marked. Cut towards point 1 and stop right on the side seam stitch line. (This will help us remove length from the bust, but not the side seam).

B : Cut in from the other side of the line now (from the side seam), towards point 1, leaving a 1-2mm "hinge" to keep the two parts of the pattern attached (this techniques is called 'Cut and Spread' - for more info on this technique, check out this tutorial).  

small_bust_adjustment_acton_7

A : On the stitching line of the bust seam, measure down from the cut line the the amount you need to remove from the bust length. Mark with a dot or small line and label as point 3. For example, I am removing 2cm from the bust length, so I marked a point 2cm below the cut line.

B : Gently pull the top section of the pattern down, so that it overlaps the lower section, until the cut line intersects point 3. Tape or glue in place.

Repeat process for the centre front bodice panel

It is now to make the same changes on the CENTRE FRONT BODICE piece, so that the CENTRE FRONT and the SIDE FRONT bodice pieces still fit together. 

small_bust_adjustment_acton_8

A : From the bust seam, cut into the horizontal line on the CENTRE FRONT BODICE. Cut towards point 2 and stop right on the centre front stitch line. 

B : Cut in from the other side of the line now (from the centre front seam), towards point 2, leaving a 1-2mm "hinge" to keep the two parts of the pattern attached.

small_bust_adjustment_acton_9

A : On the stitching line of the bust seam, measure down from the cut line the the amount you need to remove from the bust length. Mark with a dot or small line and label as point 4. For example, I am removing 2cm from the bust length, so I marked a point 2cm below the cut line.

B : Gently pull the top section of the pattern down, so that it overlaps the lower section, until the cut line intersects point 4. Tape or glue in place.

small_bust_adjustment_acton_10

A : Re-draw the centre front seam with a straight line (by joining the top of the original centre front stitch line with the bottom).

B : Re-draw the bust seam line with a straight line (by joining the top of the original seam stitch line with the bottom).

C : You will notice that you removed width from the pattern piece when you re-drew the centre front seam and added width when you re-drew the panel seam - which now cancels each other out. 

Remove width from the side front bodice

Now that we've removed some length from the bust, it's time to remove some width. Take your bust measurement and remove it from the pattern's original bust measurement (found on the sizing chart). For example, as I mentioned at the beginning of the tutorial, I am using a size C bodice - which has a 86cm bust. I have a 83cm bust measurement, so I need to remove 3cm overall. 

Remember, we are doing things on the half (as each piece is cut as a pair), so that means we need to remove half of this overall difference from the SIDE FRONT BODICE and CENTRE FRONT BODICE. I will be removing half of 3cm (i.e 1.5cm) from each side of my bodice, which means I need to remove half of that (8mm) from each of the front bodice pieces.

small_bust_adjustment_acton_11

A : Measuring inward from point 3, mark a point the distance you are removing from the SIDE FRONT BODICE. As mentioned in the example, I will be removing 8mm from the width of each pattern piece, so I will mark a point 8mm in from point 3

B : Now re-draw the bust curve, by drawing a line from the original stitch line, through the point marked in part A, and then down to the stitch line at the waistline. As you can see, the bust line is getting a lot flatter, which is what us small busted ladies like to see! 

Re-draw the side seam

small_bust_adjustment_acton_12

A : You will notice that the side seam is no longer a straight line, since we removed some width from the bust. Re-draw as a straight line by joining the top of the original side seam stitch line with the bottom.

B : This will remove a little more width from your bust width. Take a ruler and check how much this new side seam will skim off. 

Trace the new pattern piece

small_bust_adjustment_acton_13

A : Take a fresh piece of pattern paper and trace the SIDE FRONT BODICE. Start by tracing the stitch line. Be careful to check that you are tracing the new side seam line and new bust curve.

B : Add seam allowance to the pattern. You can do this by transferring the original seam allowance lines, or just add yourself - 1.5cm at the side seam, 1.2cm at the waist and bust seam and 1cm around the armhole. Transfer the notches and grainline. 

By this point we have removed width from both sides of the SIDE FRONT BODICE. For example, I removed 8mm from the width at the bust line, and then a further 3mm when I straightened out the side seam. This means that when I cut a pair of this piece, I would have reduced the bust measurement by a total of 22mm {(8mm + 3mm) x 2}. Overall I need to remove 3cm, which means I just have to remove 8mm from the CENTRE FRONT BODICE (half for each piece - i.e. in the case of the example, 4mm either side).

Remove width from the centre front bodice

small_bust_adjustment_acton_14

A : Take the CENTRE FRONT bodice, and measuring from the new bust seam line, on the cut line, mark a point the distance inwards that you still need to remove. For example, I need to remove 4mm from the piece, so I marked a point 4mm in from the new bust stitch line.

B : Re-draw the seam line intersecting this point. You will need to make it slightly curved to intersect. 

Trace the new pattern piece

small_bust_adjustment_acton_15

A : Take a fresh piece of pattern paper and trace the CENTRE FRONT BODICE. Start by tracing the stitch line. Be careful to check that you are tracing the new bust seam line and new centre front.

B : Add seam allowance to the pattern. You can do this by transferring the original seam allowance lines, or just add it yourself -  1.2cm at the waist and bust seam and 1cm around the armhole. Transfer the notches and grainline. You will notice that that we have almost lost the notches on this piece. Transfer the notches from the SIDE FRONT BODICE piece to ensure the notches are in the right place (if you're not quite sure how to do this, don't worry, I've got a tutorial on it coming tomorrow!)

All done! Can you believe it?! It was quite a long post...

Now, before cutting into your real fabric, I suggest making one more toile. Better to be safe than sorry, right?  


You may also like:

The Acton sew-along : Full Bust Adjustment (FBA) on princess panels

cover.gif

Over the past week or two, I've been running through a number of pattern adjustments (such as making a toile or lengthening or shortening the bodice) for the Acton sew-along. Now it's time to get to the juicy ones - the Full Bust Adjustment (FBA) and the Small Bust Adjustment / SBA (coming tomorrow). 

When you'll need to do a Full bust adjustment 

Most indie pattern companies (including In the Folds) draft for a B cup bust. There are of course exceptions to this rule (such as Cashmerette and Colette Patterns), so make sure you check on your pattern before assuming the bust cup size.

This means that if your bust cub size is smaller than a B you will need to do a Small Bust Adjustment, otherwise known as a SBA (tutorial coming tomorrow), and if your bust cup size is larger than a B you will need to do a Full Bust Adjustment or FBA. 

Work out your cup size

Your cup size in sewing patterns may not always correspond to the bra size you wear. To be safe, check your measurements before deciding if you need to make any adjustments to the pattern. 

measurement.jpg

Measure your high bust measurement (the area above your breasts, under your arms) as well as your full bust  (the fullest part of your chest) and then take note of each measurement, as well as the difference.

If the difference is 2.5cm (1") your bust is an A cup, 5cm (2") it's a B cup, 7.5cm (3") is a C cup and so on. 

Choose your size

Now, go back to your high bust measurement and add 5cm (2"). This is what your bust measurement would be if you were a B cup and therefore the size you should be choosing from the pattern.

For example, let's say your upper bust measures 81cm (32"). Add 5cm (2") to this measurement to find out what size your bust measurement falls into on the In the Folds sizing chart (and what size you would be if you had B cup breasts). 81cm + 5cm = 86cm which corresponds to a size C. Your actual bust measurement is 89cm  though - 3cm (1") larger than the cup size of the pattern. This means you need to do a FBA and add this 3cm (1") to your pattern. 

As the bodice is cut on the fold, you need to take the measurement you will be adding and divide it by two. For example, this 3cm (almost 1") mentioned in the example, will be split between either side of the front bodice - 1.5cm (1/2") on each side. 

Getting started

Trace a copy of the SIDE FRONT BODICE and CENTRE FRONT BODICE. I always suggest to trace a copy of the pattern, so if you make a mistake you always have the original to go back to (although with digital patterns you can always just print another copy if necessary). Be sure to include all pattern markings (in this case: grainline, notches and drill hole) and make sure you trace off the stitching line (the grey line on the pattern) - this is really important. When making pattern alterations, I normally suggest removing the seam allowance, but because the stitch line is marked on the pattern, you can leave it on. 

Prepare the bodice for the adjustment

A: On the SIDE FRONT BODICE, draw a straight line from the bottom corner of the pattern, close to the princess panel (1) to the fullest part of the bust curve (2.) The points need to be on the stitch line - not the edge of the pattern. 

B: Mark a point (3) approximately two-thirds of the length of the armhole curve (the portion on the SIDE FRONT BODICE), measuring in from the side seam. Join point 2 to point 3 with a straight line. 

C: Draw a line from point 2 to the side seam (point 4), about 1cm down from the armhole. This line should be on the cut line of the pattern, not the stitch line. 

Transfer guidelines onto centre front bodice

Before getting started on the alteration, you need to transfer the guidelines from the SIDE FRONT BODICE to the CENTRE FRONT BODICE, so that you will be able to make changes to the same areas on each pattern piece. 

A: With your pattern pieces side-by-side and correctly aligned (as if they were being sewn together), draw a horizontal line on the CENTRE FRONT BODICE in line with point 2. Label this line with a 5. 

B: Draw a second line (Line 6) 3-4cm below Line 5 (parallel). Transfer the position of this line onto the SIDE FRONT BODICE, just until the line intersects the line that runs from point 1 to point 2. For the time being, put the CENTRE FRONT BODICE to the side. 

Cut into the bodice

Before cutting into the pattern, place the pattern on top of a piece of pattern paper. This will make it easier when you need to stick the pieces down after you have made the adjustment (it will get really flimsy).

A: Take a pair of scissors and cut into the pattern from the seam allowance below point 1. Cut up to point 2 and then over to point 3.

B: Next, cut in from the armhole towards point 3, being careful to leave a 1-2mm "hinge" intact (it's not a big deal if you accidentally cut through, you can always tape the hinge back together). 

C: Next, cut in from the side seam (point 4) to point 2 - again, leaving a small hinge intact at point 2. Your pattern piece should be very malleable by now! All ready to make the adjustment. 

Make the adjustment

Gently spread the pattern open from point 1 - using point 3 as a hinge. Continue spreading until you have opened up the bodice by the desired amount. Remember, as the bodice is cut on the fold, you need to take the measurement you want to add to the bust measurement and divide it by two. For example, if I wanted to add 3cm (just over 1") I would add - 1.5cm (1/2") on each side. 

Be careful to check that the increase is consistent down through the opening. 

You will notice that when you open this part of the pattern a dart is created at the side seam (point 4). We don't need a dart there, but we'll deal with that later on!

A: Cut through line 7

B : Place a ruler on the waist seam of the pattern (on the stitch line) and continue the line beyond the pattern piece. Line up the detached piece with this line.

Remove the dart

Tape or glue the pattern down onto the pattern paper underneath.

Now it's time to get rid of the "dart" that we created in the previous steps. For ease, I will refer to the wedge created in the side seam as a dart, and will refer to the sides of the opening as the upper and lower dart arms. 

6_3.gif


A: Cut into the pattern through the upper dart arm towards point 2. 

B: Now cut towards point 2 from the opposite side of the pattern - leaving a 1-2mm hinge intact. 

step_7.gif

A: Close the dart by gently pulling the upper dart arm towards the lower dart arm.

B: When the upper dart arm is in line with the lower dart arm, tape or glue in place. You will see that a small wedge has opened up on the bust curve (the fullness from the side seam has been relocated to the bust seam).

Reduce waist back to original length

A: At this stage you will notice that by adding fullness to the bust, we also added fullness to the waist seam (the opening at point 1). In the case of a FBA, you are wanting to increase the bust measurement, without adding any extra to the waist - so this will need to be removed.

B: Remove the excess length from the waist at the side seam. Measure how much was added at point 1 and then remove this from the waistline at the side seam. Redraw the side seam with a straight line up to the pattern's original armhole. 

Make alterations to the centre front panel

It's now time to transfer the changes we have made to the SIDE FRONT BODICE to the CENTRE FRONT BODICE (so that they can be sewn together).

Take another piece of pattern paper and draw a straight line down the right hand side. Label "Centre Front." Take the top section of the CENTRE FRONT BODICE and tape or glue in place, lining up the centre front of the pattern piece with the line marked on the paper. 

step_10_2.gif

A: On the SIDE FRONT BODICE, measure the length of the smaller opening. Take note of the measurement.

B: Now, move to the CENTRE FRONT BODICE and place the middle section of the pattern, the same distance down (as the measurement noted) from the upper section of the pattern. Tape or glue in place. 

A: On the SIDE FRONT BODICE, measure the length of the larger opening. Take note of the measurement. 

B: Now, move to the CENTRE FRONT BODICE and place the lower section of the pattern, the same distance down (as the measurement noted) from the middle section of the pattern. Tape or glue in place. 

Trace the new pattern pieces

Your alterations are done! Now you just need to trace new versions of each piece. 

step_10.gif

A: Take a fresh piece of pattern paper and trace the SIDE BACK BODICE, starting at the stitch line. Be careful to check that you trace the new side seam and not the original side seam.

B: Add seam allowance to the piece - 1.5cm to the side seam, 1.2cm to the bust seam and waist seam and 1cm to the armhole seam (use this tutorial if you need some tips). If you are wondering why the seams meet at different angles - you can learn more about seam returns here. Transfer the notches. 

C: Label the pattern and add the grainline (you can work this out by placing the new piece on the original pattern piece and transferring the grainline). 

Repeat process for the CENTRE FRONT BODICE.

And that's it! Your bodice is bosom ready! 

Keep your eye on the blog for more Acton sew-along posts coming in the next couple of weeks. 


You may also like:

The Acton sew-along : Shorten the bodice (above the bust)

shorten_bodice_1

Over the last few days we’ve been talking about shortening and lengthening the bodice in the Acton sew-along (the principle is exactly the same if you would like to add or remove length from the skirt), and today I’ll be finishing off these posts by showing you how to shorten the bodice above the bust line. By referring to your toile, you should be able to tell where you need to add length - it could be from below the bust line, above the bust line, or even a bit from both. 

GETTING STARTED

shorten_bodice_2

To start, trace a copy of the CENTRE FRONT BODICE and SIDE FRONT BODIE of the Acton pattern (it's always a good idea to trace a copy of the pattern, rather than using the original, in case you make a mistake. Although with a digital pattern you can always print another copy if necessary!), including all pattern markings (in this case the stitch line, grainlines and notches). 

Normally I suggest removing the seam allowance when making pattern alterations, but when it's as simple as this alteration, there really is no need. 

shorten_bodice_3

Draw a horizontal line (perpendicular to the grainline) through each pattern piece the location you need to add length. On the SIDE FRONT BODICE piece, extend the grainline so that it crosses the horizontal line and is on the top part of the pattern piece. As I said, for this tutorial I will be showing you how to remove length above the bust line. If you need to add length below the bust line, check out this tutorial.

CUT THROUGH THE PATTERN PIECES

shorten_bodice_3

Carefully cut through each line, separating each piece into two. 

REMOVE THE EXCESS LENGTH

shorten_bodice_4

Work out how much you will be removing from the length of the bodice by referring to your toile.  For the sake of the example, I will be removing 1cm (5/8") from the pattern. Draw a line parallel to the cut, 1cm (5/8") (or the amount you are removing) on the upper section of both pattern pieces.

shorten_bodice_5

Move the lower section of each piece up to meet the horizontal line. Use the grainline to help keep the pieces straight. Tape or glue in place. 

RE-DRAW THE SEAMS

shorten_bodice_6

Redraw the seam lines that have been effected, by drawing a line of best fit through the original stitching lines. 

shorten_bodice_7

Redraw the seam allowance lines (you may need to stick a bit of extra paper behind the pattern to make room for it, or even trace off the pattern onto a seperate piece of pattern paper).

And that's it, you're good to go with your new (and shorter) bodice! If you need to remove length from the back bodice, just follow the same process.


You may also like:

The Acton sew-along : Shorten the bodice (below the bust)

Last week I showed you how to lengthen the bodice on the Acton dress (or any pattern that's similar) for the Acton sew-along, and now it's time for me to show you how to shorten the bodice. 

To start, trace a copy of the CENTRE FRONT BODICE and SIDE FRONT BODIE of the Acton pattern (it's always a good idea to trace a copy of the pattern, rather than using the original, in case you make a mistake. Although with a digital pattern you can always print another copy if necessary!), including all pattern markings (in this case the stitch line, grainlines and notches). 

Normally I suggest removing the seam allowance when making pattern alterations, but when it's as simple as this alteration, there really is no need. 

By referring to your toile, you will be able to know whether you need to remove length below the bust, or above the bust. The method is exactly the same, just the location of the cut is different. This tutorial will show you how to remove excess from below the bust, and later today I'll show you how to remove length from above the bust. 

Getting started 

Draw a horizontal line (perpendicular to the grainline) through each pattern piece between the lower notches. On the CENTRE FRONT BODICE piece, make sure the line is far enough up the piece that it intersects the centre front of the piece and not through the bottom edge.

Cut through the patter

Carefully cut through each line, separating each piece into two. 

Remove the excess length

Work out how much you will be removing from the length of the bodice by referring to your toile.  For the sake of the example, I will be removing 2.5cm (1") from the pattern. Draw a line parallel to the cut, 2.5cm / 1" (or the amount you are removing) on the upper section of the CENTRE FRONT BODICE piece. 

Move the lower section of the piece up to meet the horizontal line. Check that the centre front on both upper and lower pieces are aligned and then tape or glue in place. 

Re-draw the seams

short_3.gif

Redraw the panel line, by drawing a straight line from the original line at the top of the seam and the bottom. Do this for both the stitching line and the cutting line. 

Re-draw the notches

short_4.gif

Re-draw the notches - so that they won't be trimmed off when you remove the excess from the piece. Cutting along the new line to create the new pattern piece.

Make the same changes to the side front bodice

short_5.gif

Repeat the process for the SIDE FRONT BODICE, before moving onto the back panels and repeating the process.

Keep your eye on the blog for more Acton sew-along posts coming in the next couple of weeks (and check out the link to see what I've covered so far). 


You may also like:

Would you like to test my upcoming pattern?

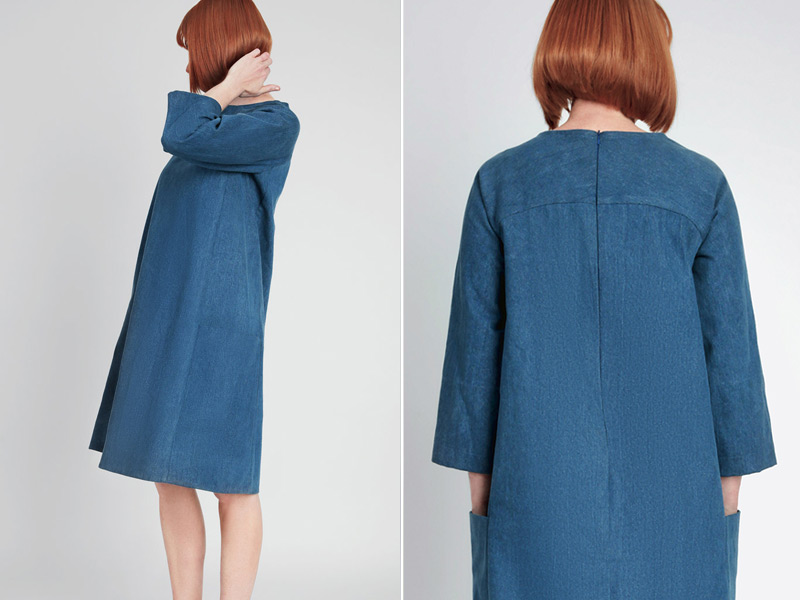
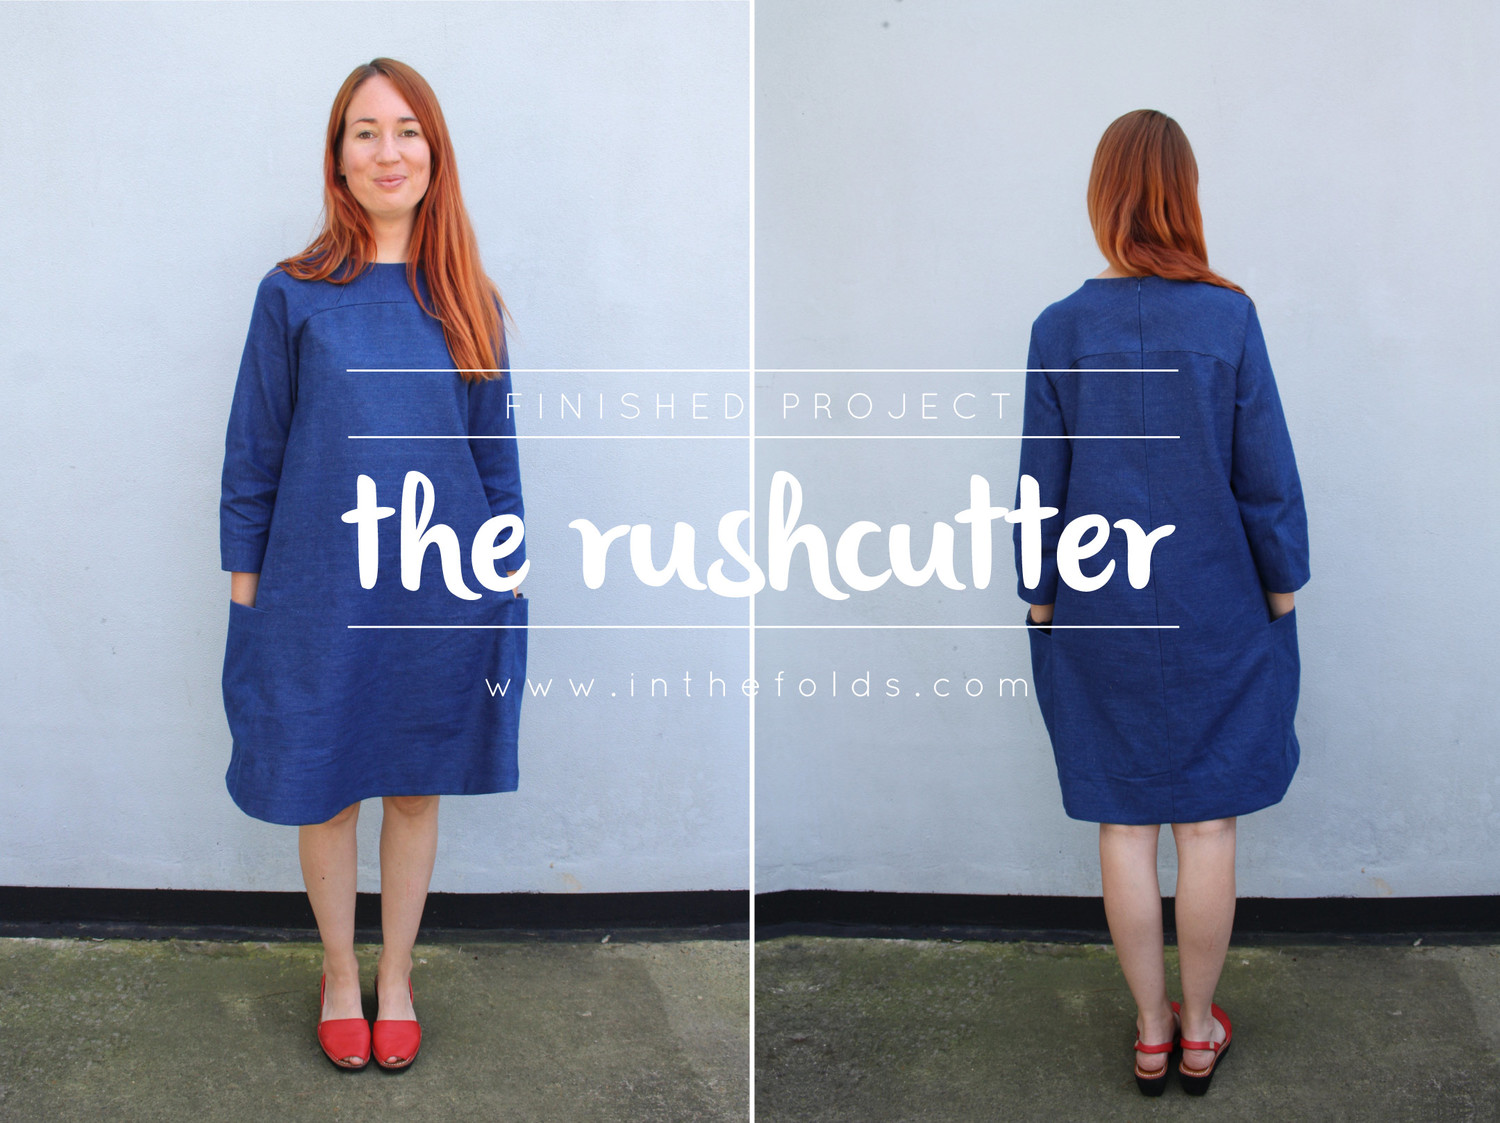
I'm very excited to announce that I am ready to test my next pattern! I am also very excited as this is one is a little more (actually a lot more) beginner friendly than the Rushcutter and the Acton. I am pumped to be able to offer something for sewists who aren't ready to take on my more challenging patterns, but would like to know what In the Folds patterns are all about.

I always feel a little daunted about going into the testing period. Putting a pattern out there for the first time can be a little scary, but also it is a lot of work. I normally select about 20 women to help me test, so testing involves communicating with all the testers, ensuring everyone feels comfortable and knows what to do, as well as being available to answer any questions or discuss suggestions. Through the previous tests I've done, I have somewhat streamlined the process, but I knew that this time I needed to really make a big change to the way I have been doing things. Just going through all the applications is very labour intensive, and as a one-woman show, it just feels like an impossible task.

So I have decided that for this round of testing, I'm going to mix things up a bit. With the hope of being more inclusive, giving everyone a far chance of being selected, and hopefully saving myself some time, I'll be trying out the "first in, best dressed" method. I require two testers for each size in my size range (one for each style), so will go through the emails from the first one down until all spots are filled. I will favour beginners though, as this is a pattern aimed at beginners, so I really need to know how  beginners go with it and if I have scaled it correctly - so will need at least a few beginners in the testing pool.
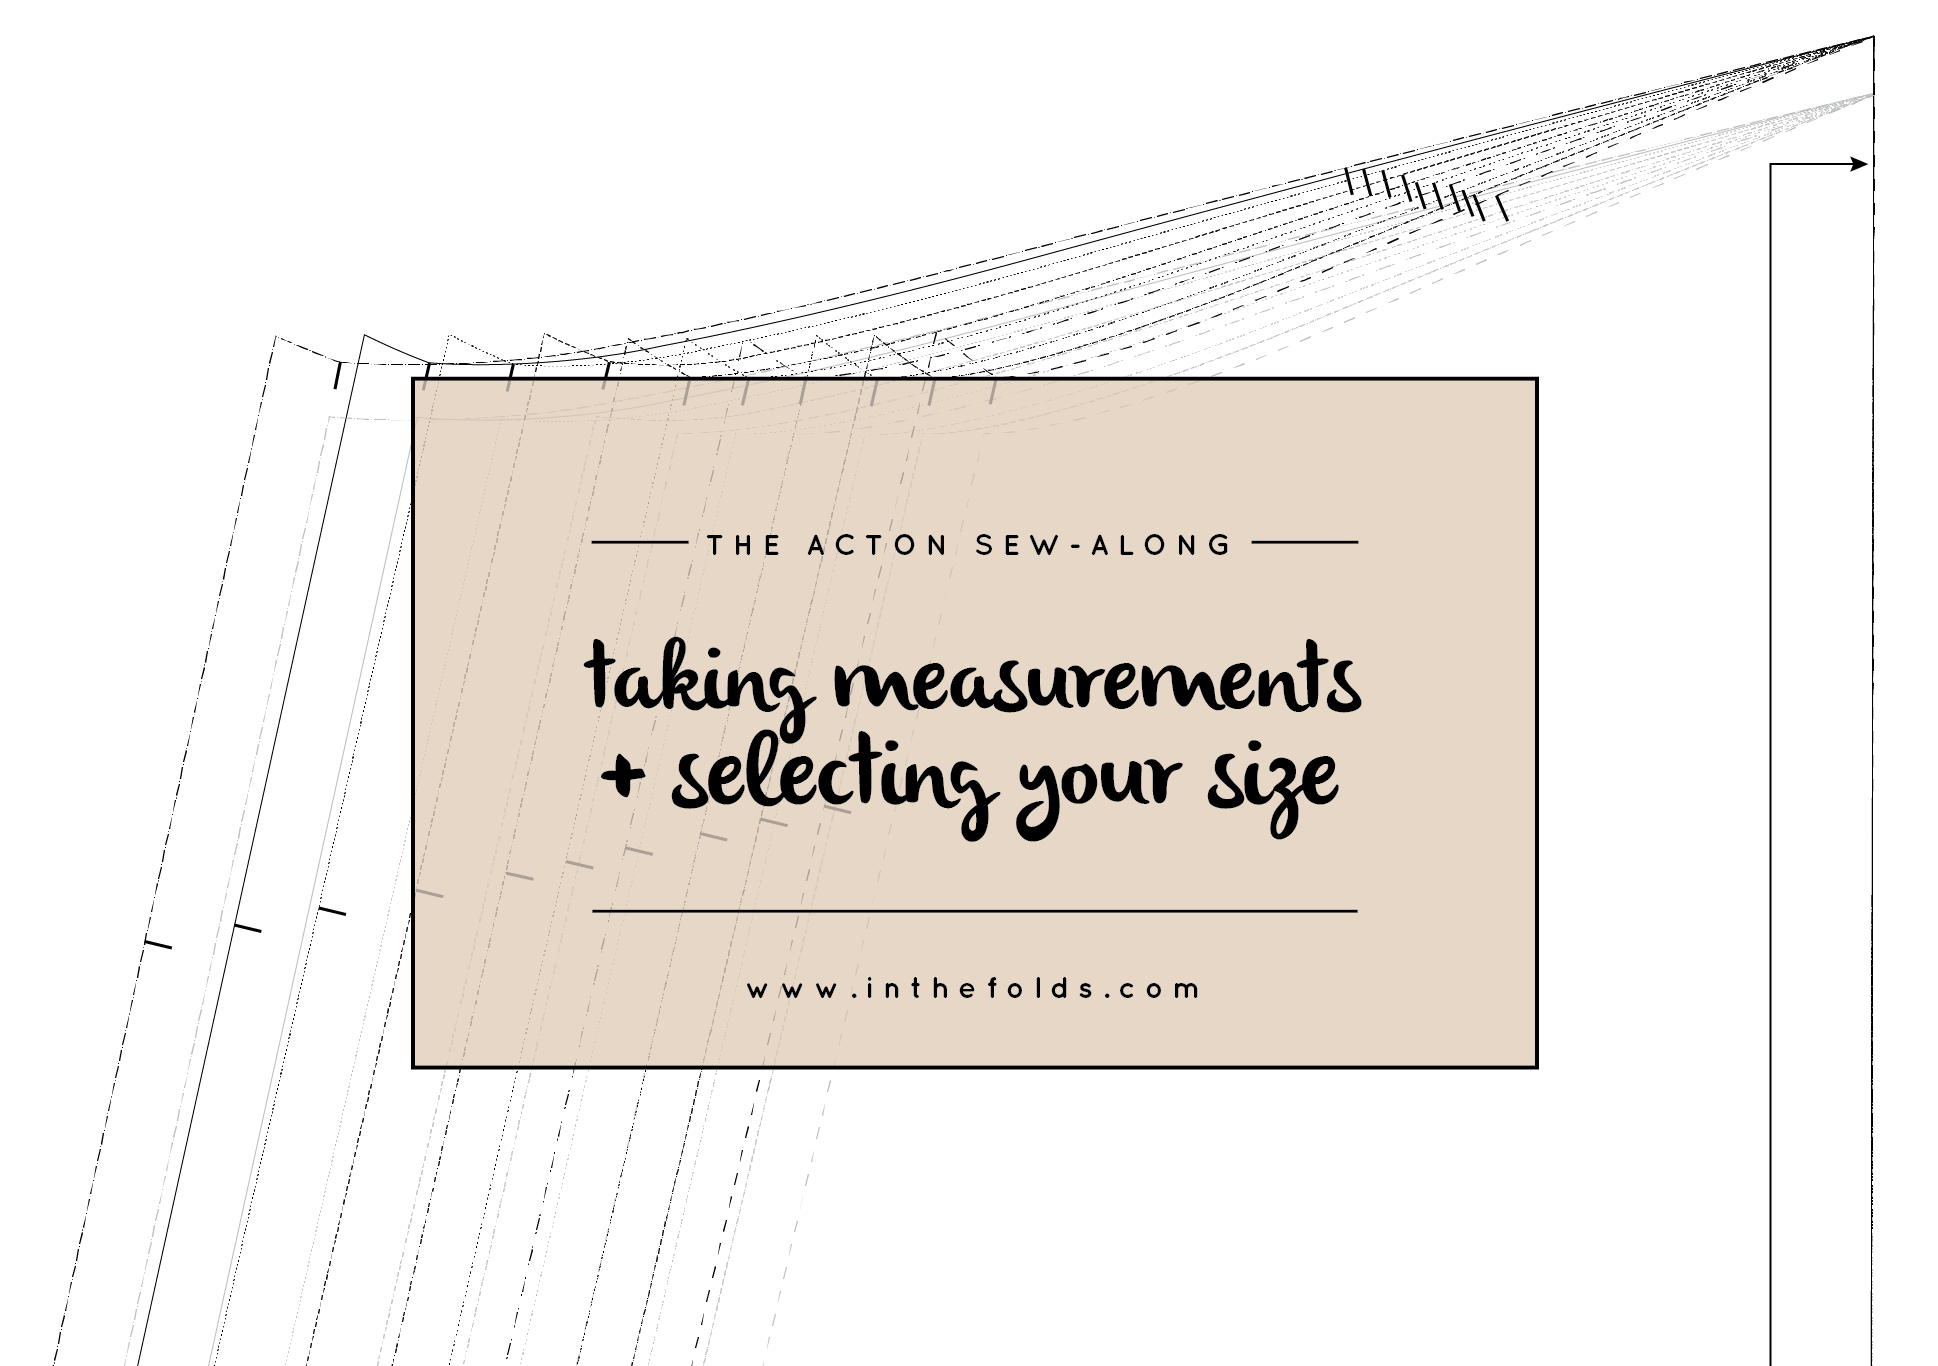
The pattern

I don't want to give too much away, but will give you the garment description (as well as the sneak peak at the top of this post), and hopefully from that you will know if the style is for you. On that note, please only apply if you think it is something you would like to wear. I am very conscious about all that I sew, and I hope you are too. I hate to think of garments being made and never worn, so be mindful of this, and if it doesn't sound like it's for you, then there will always be next time.

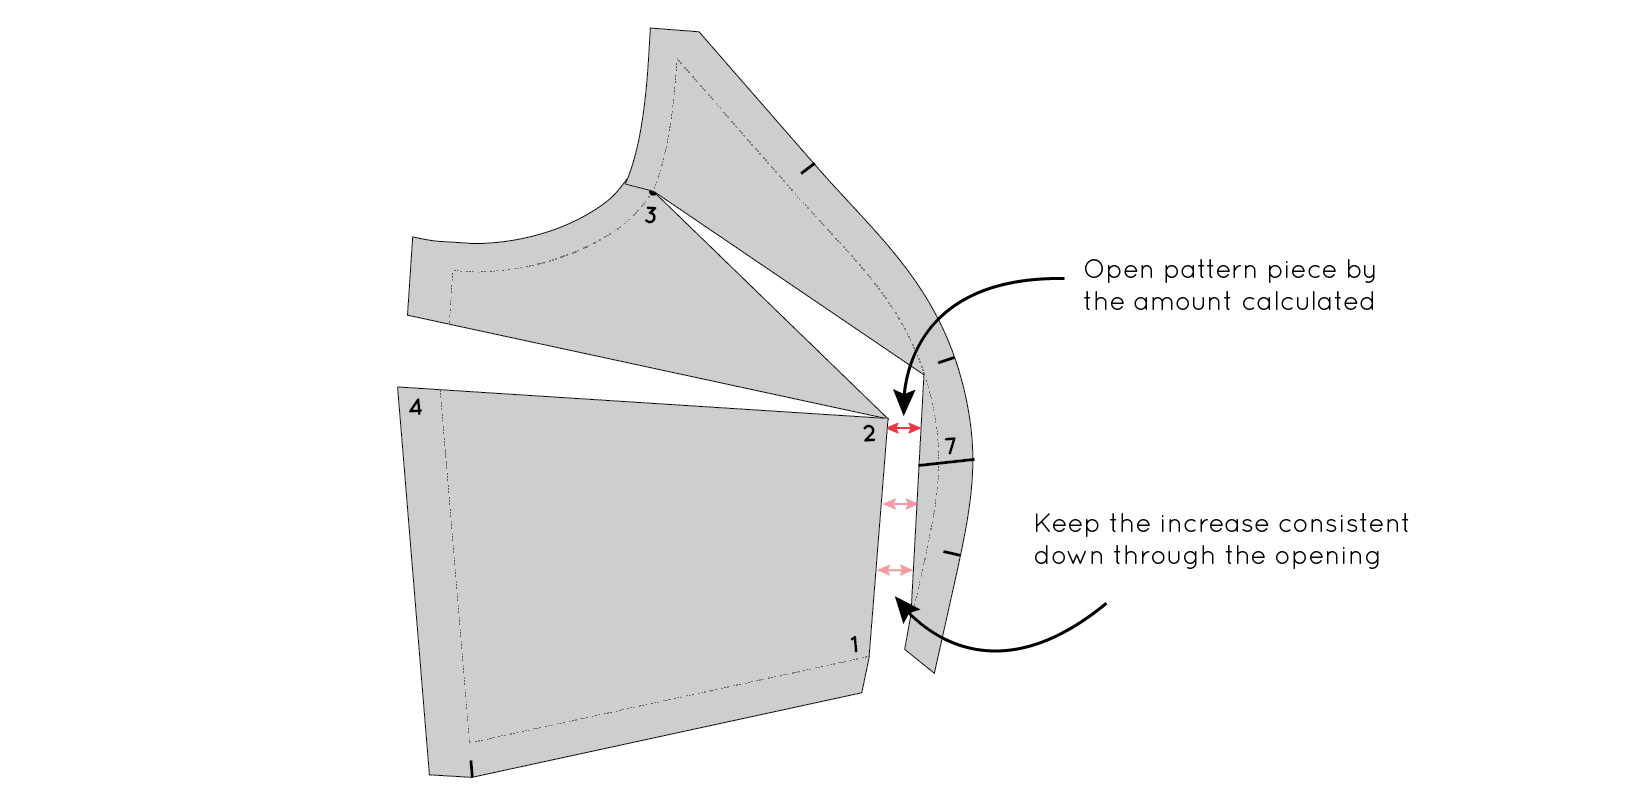
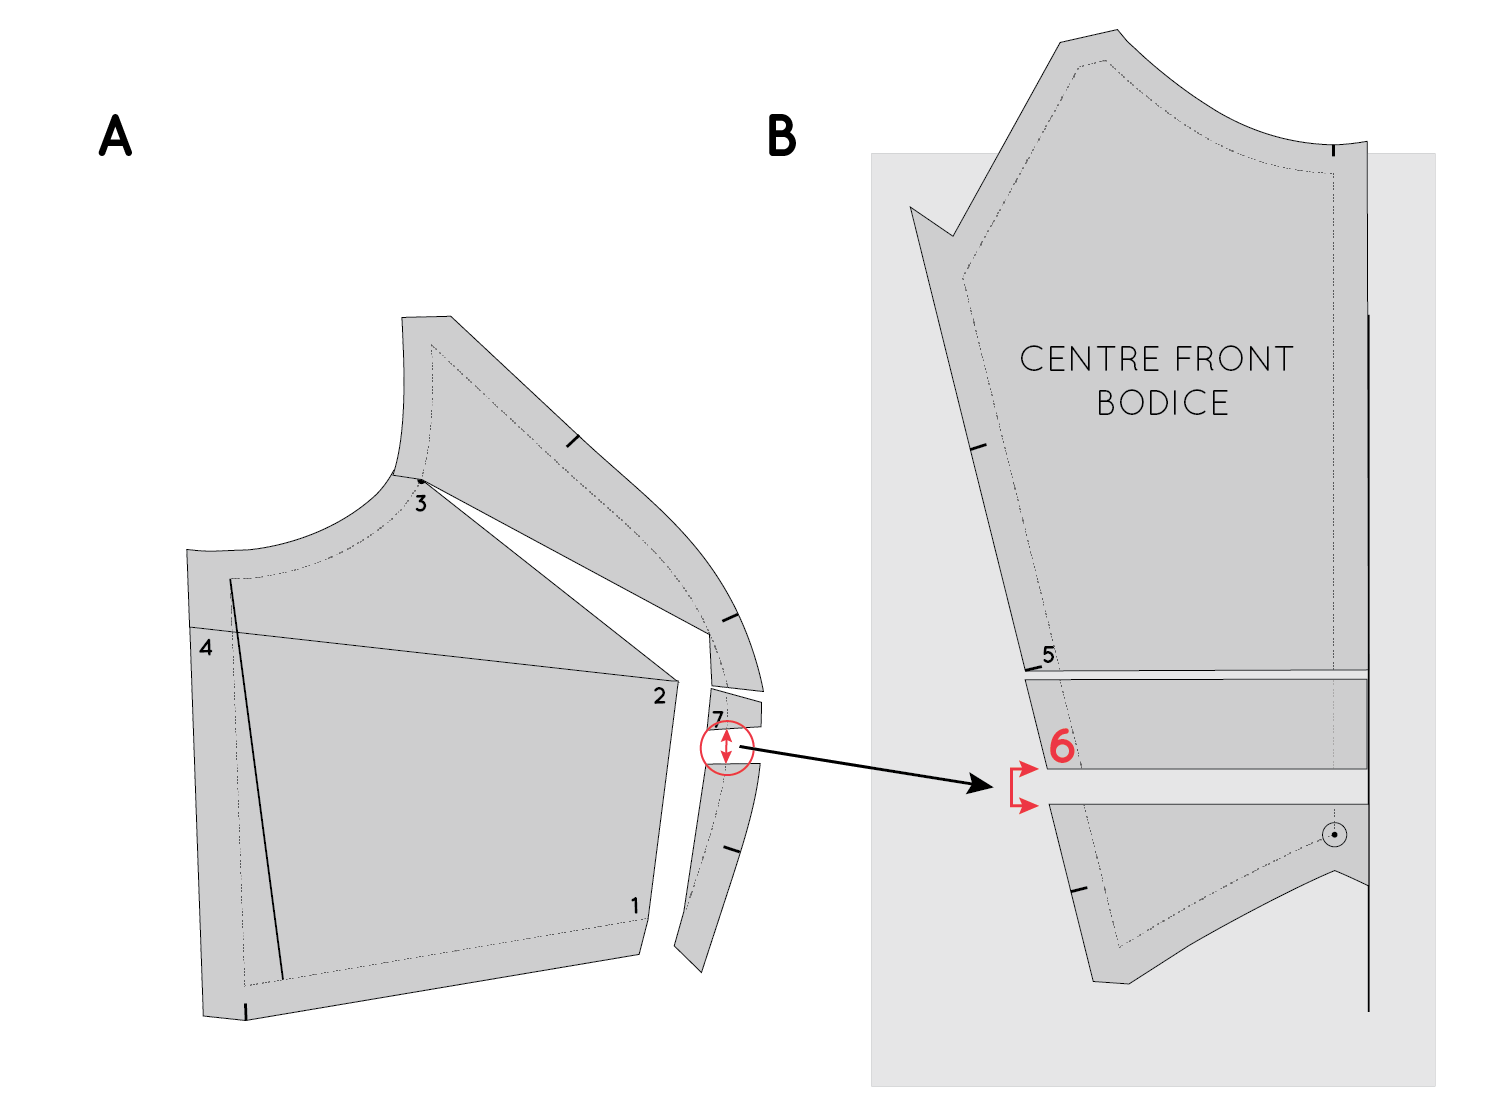
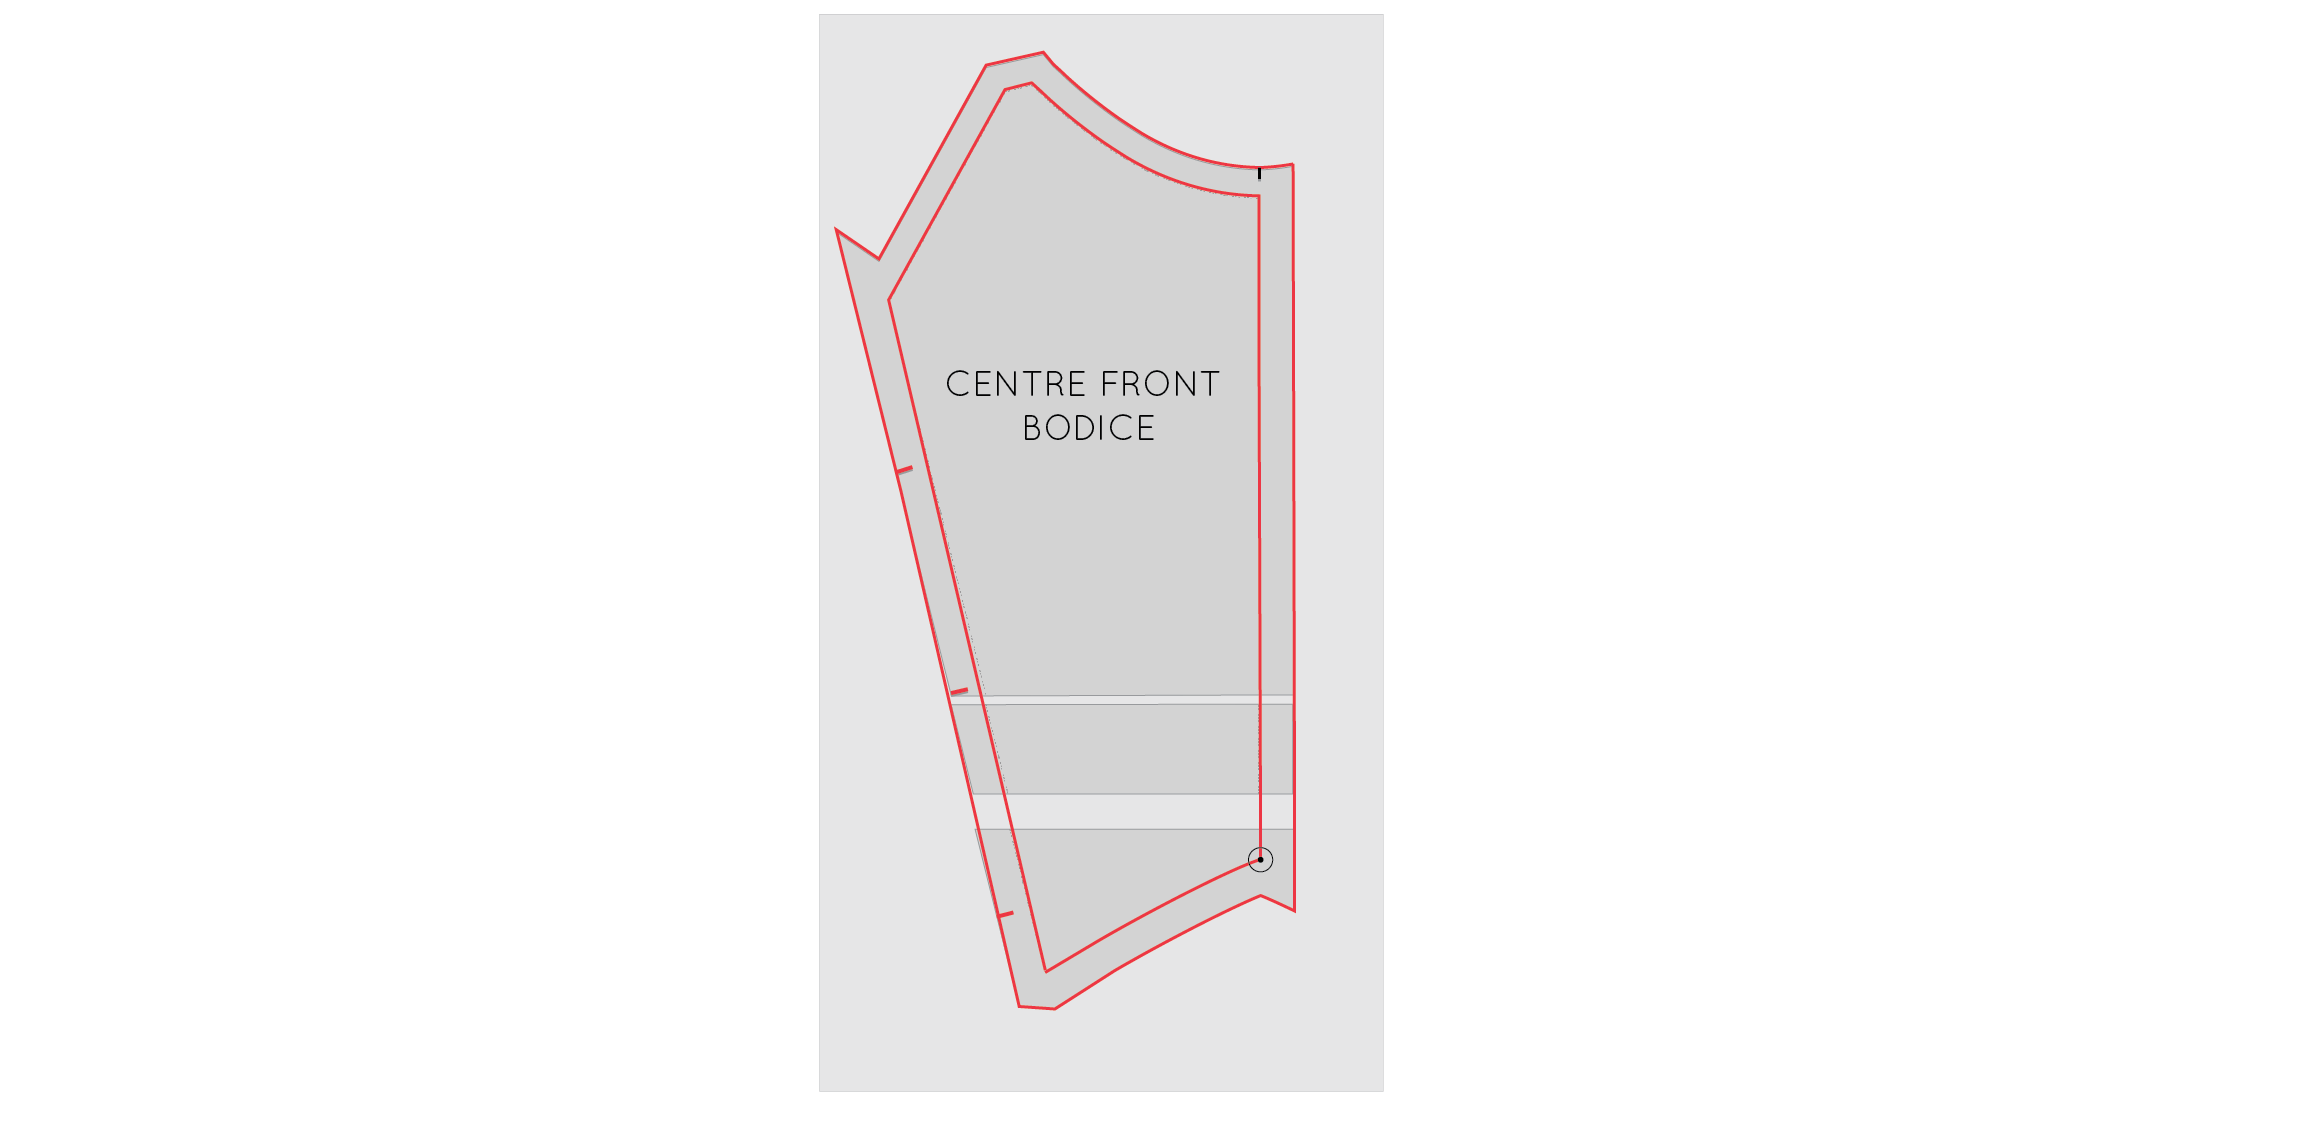
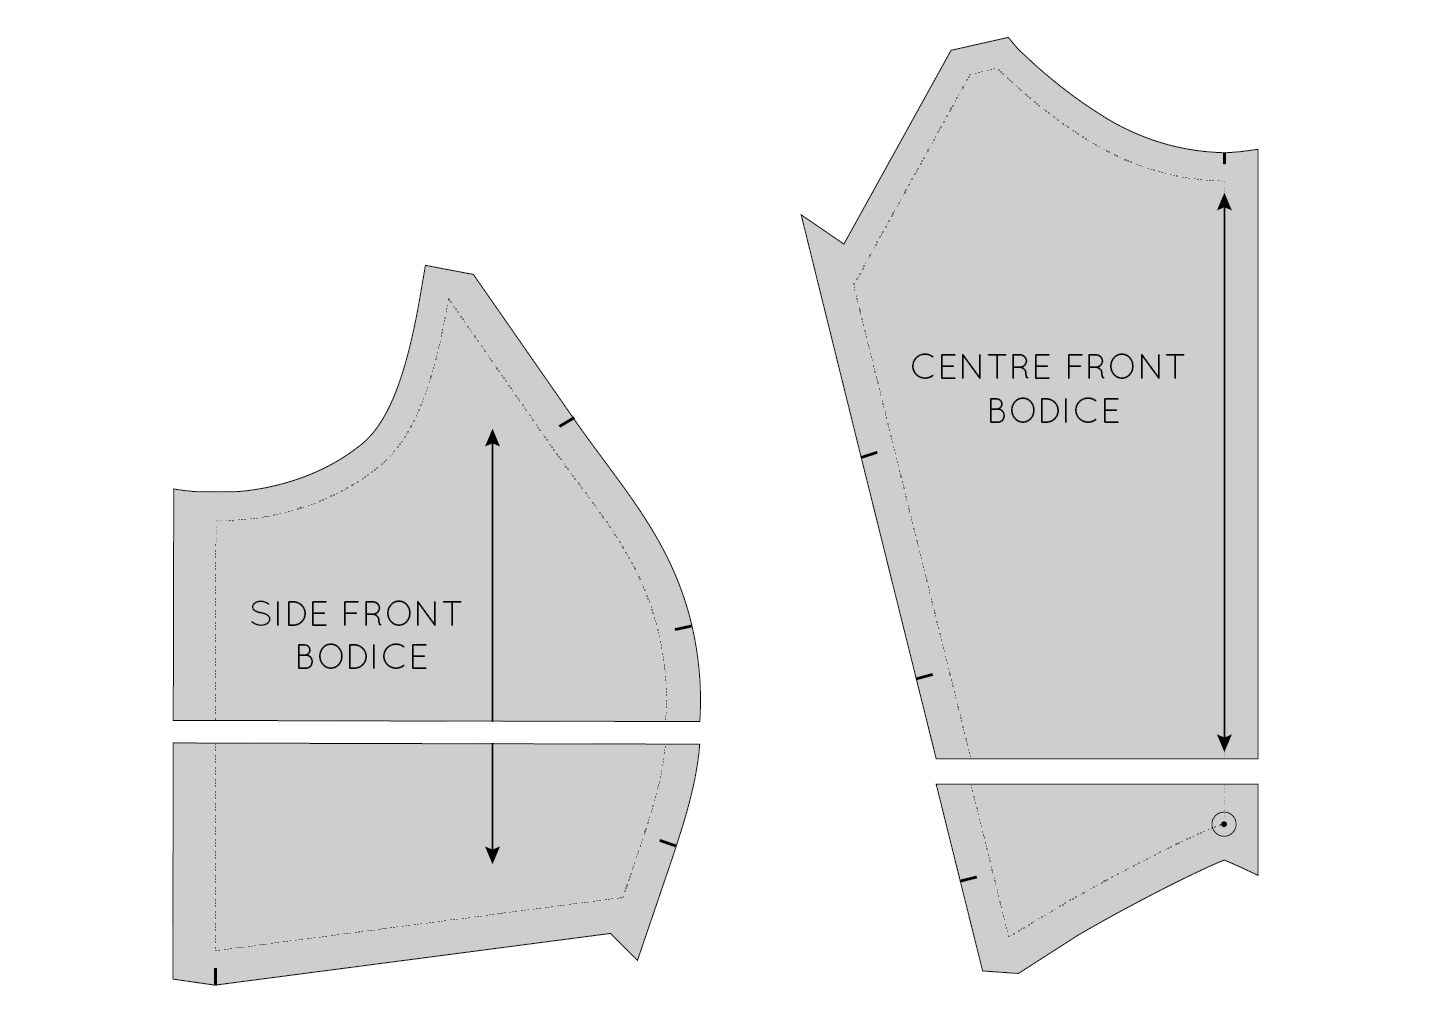
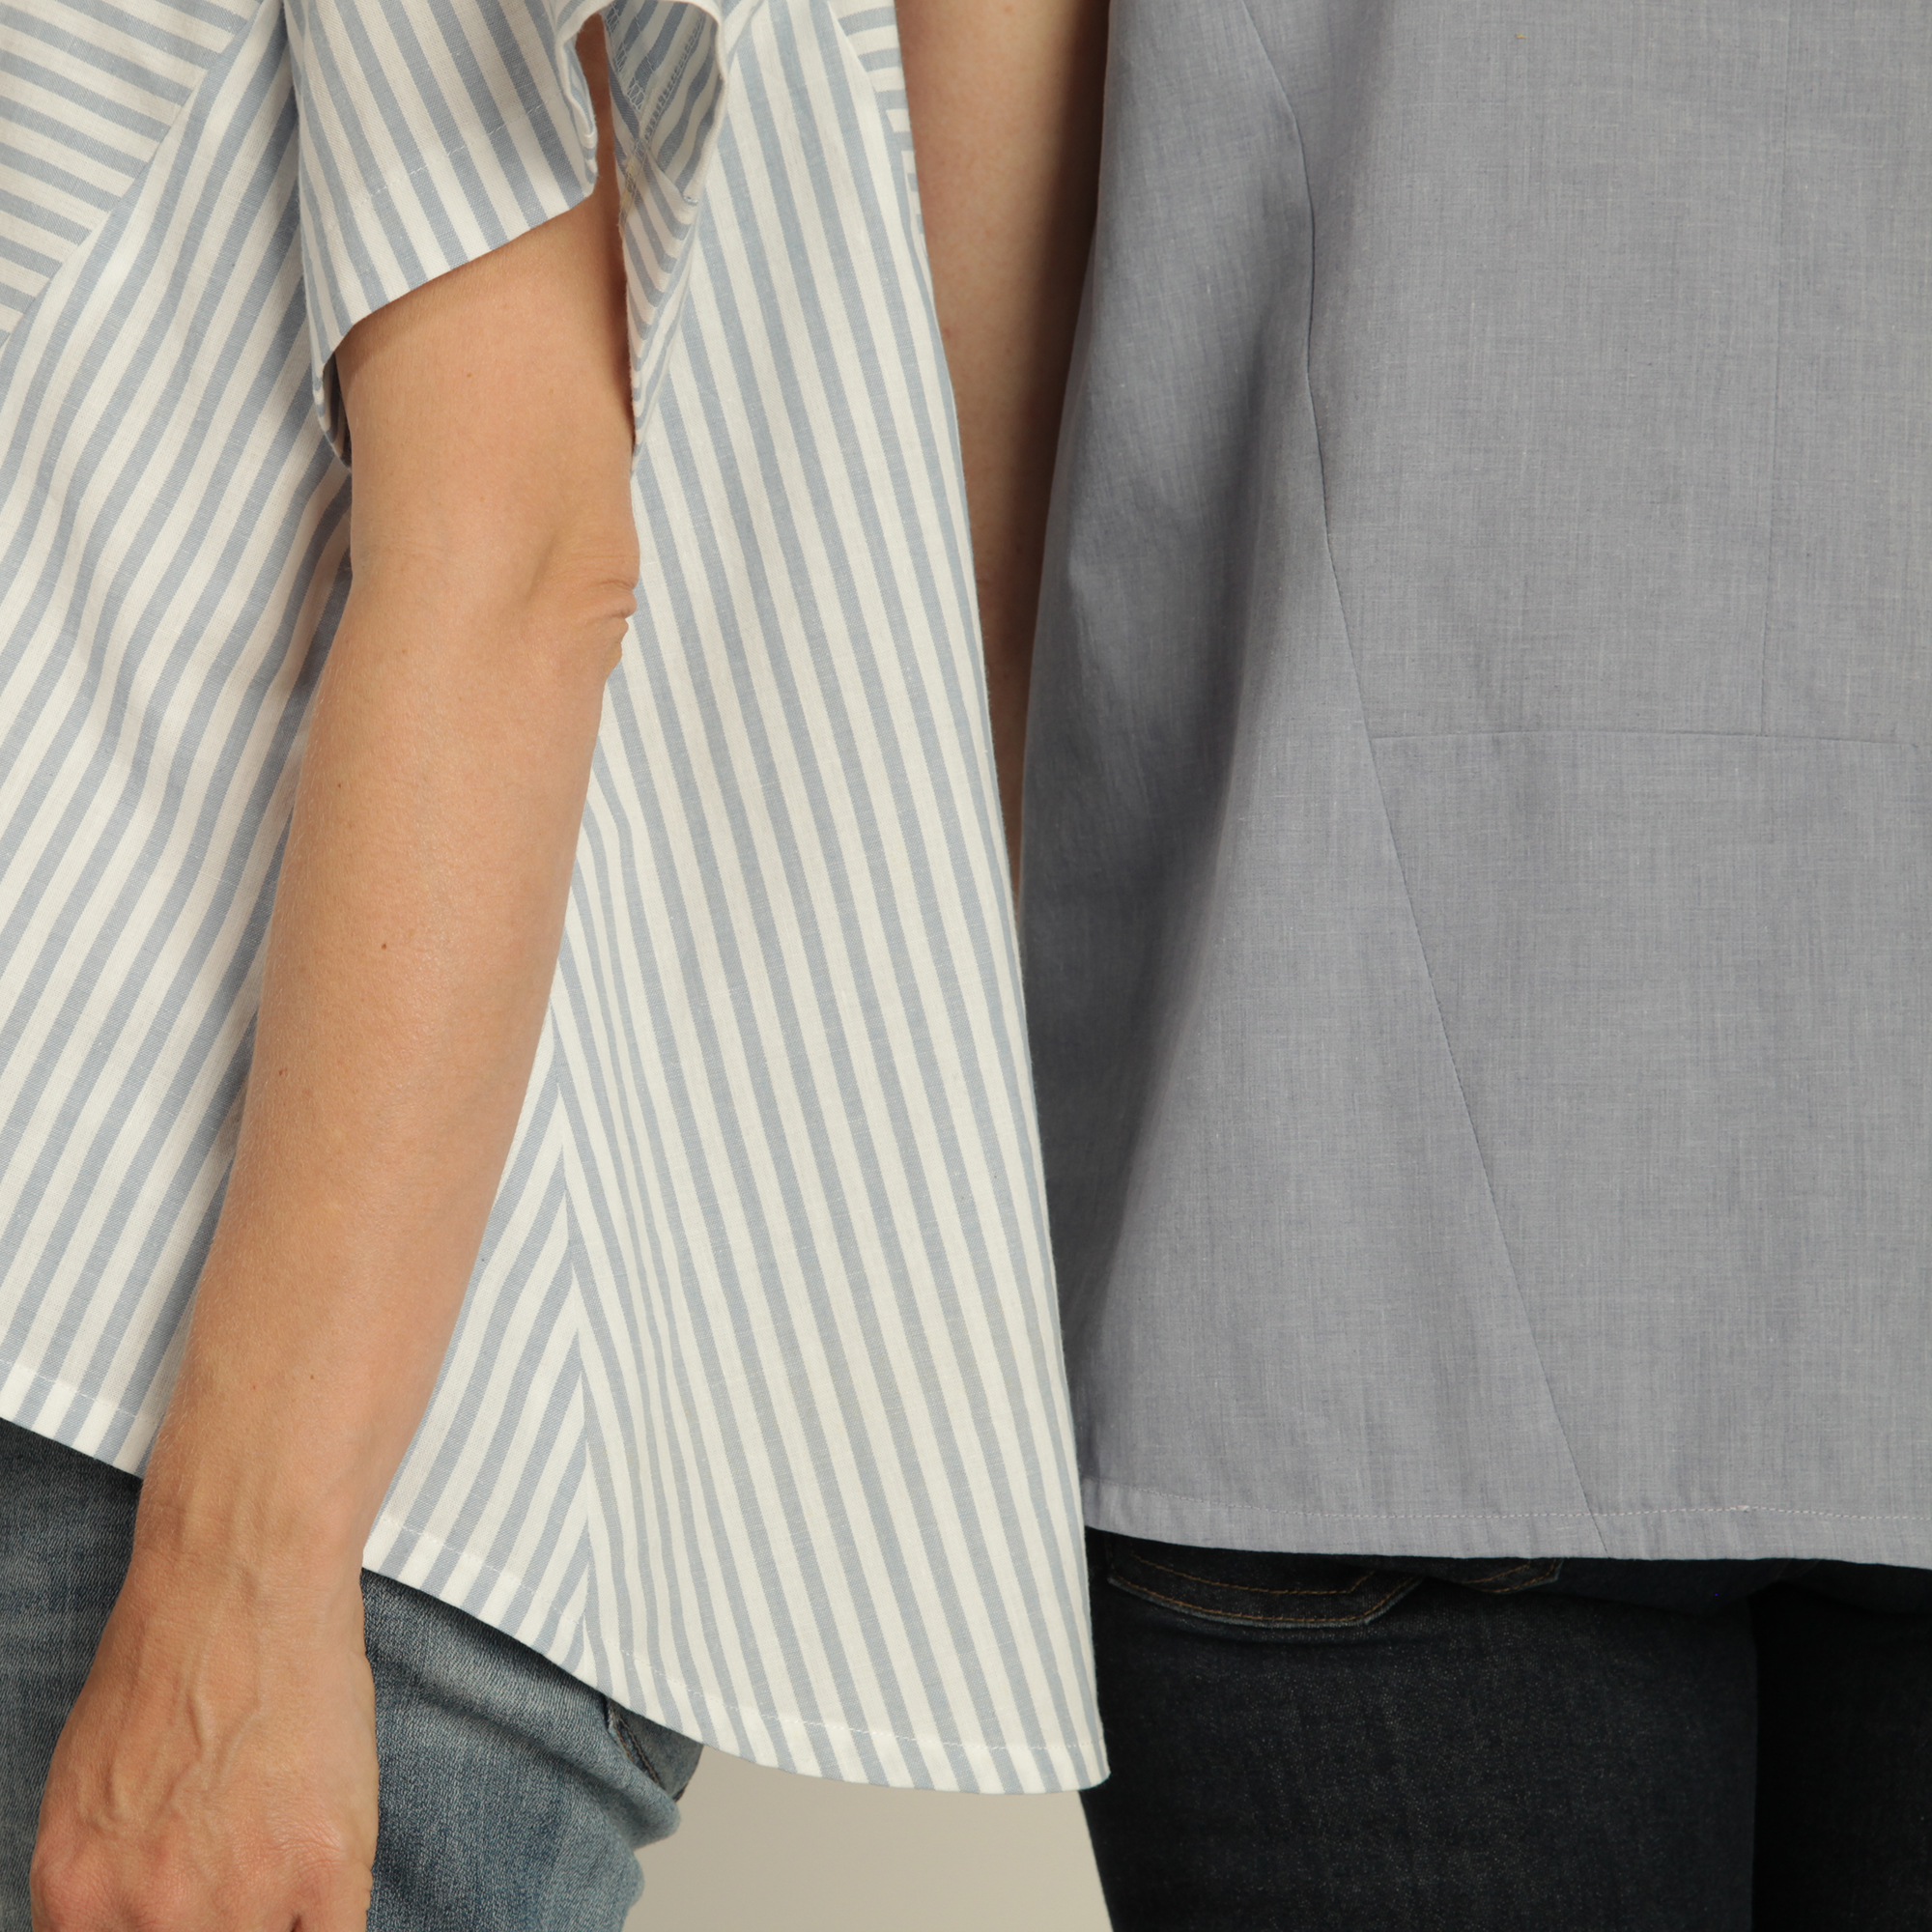
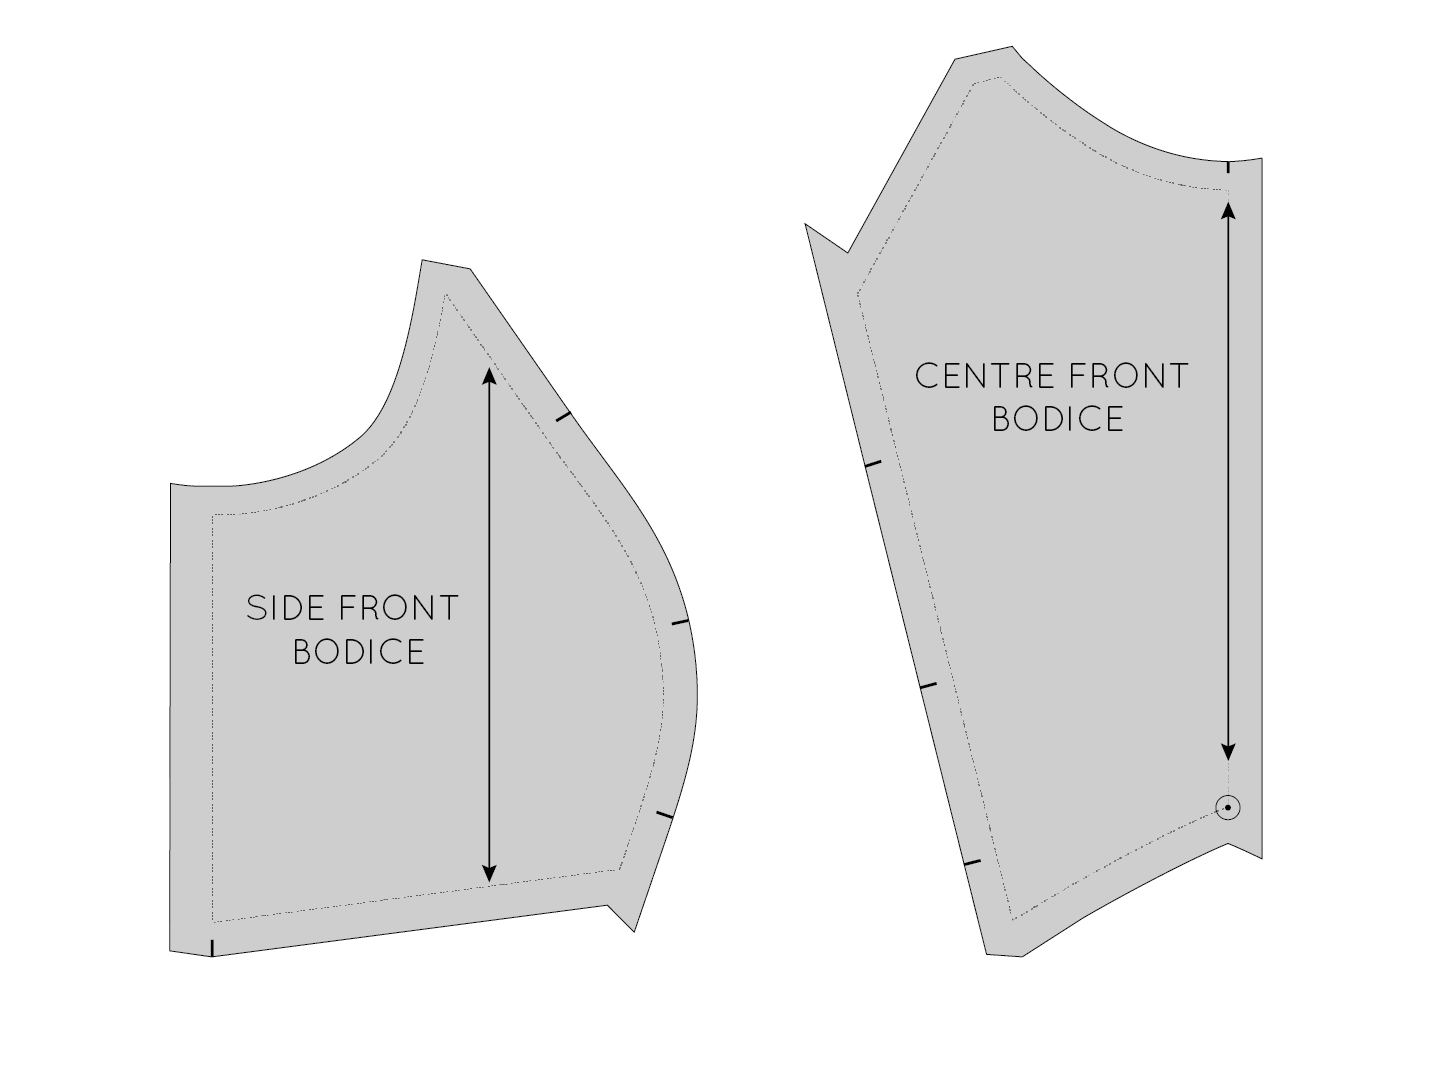
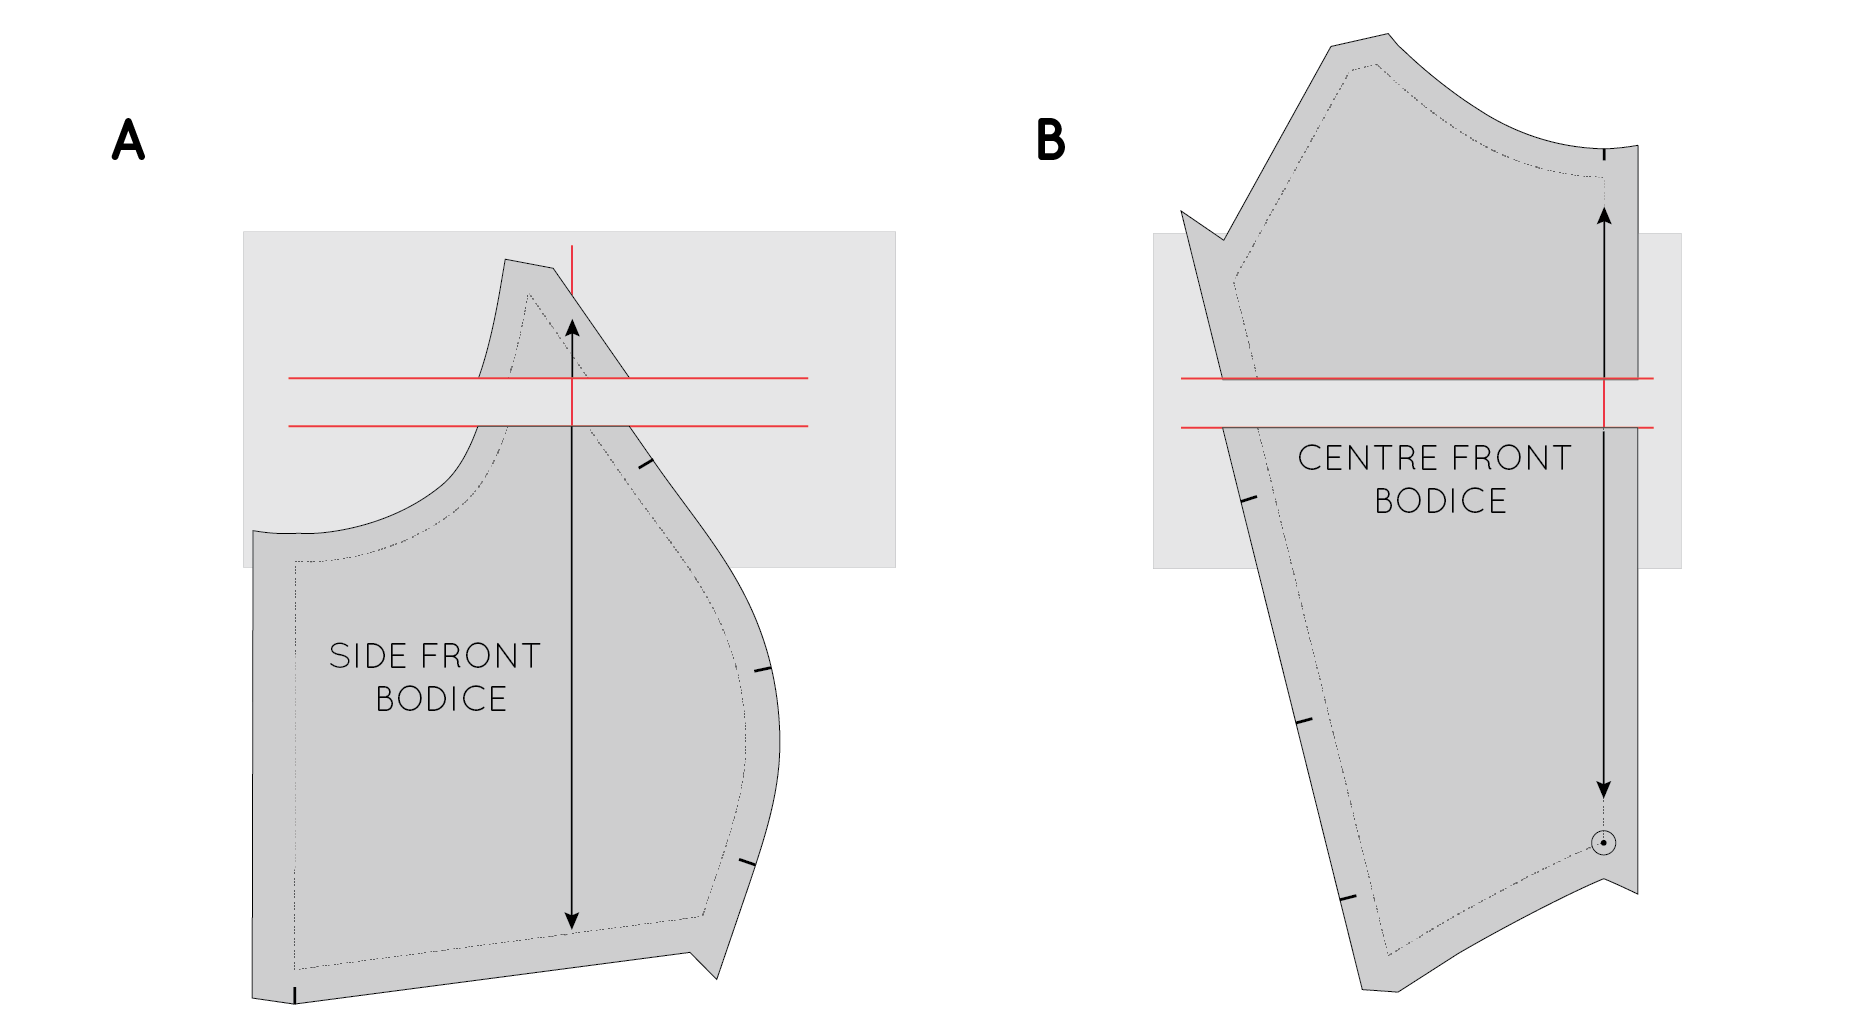
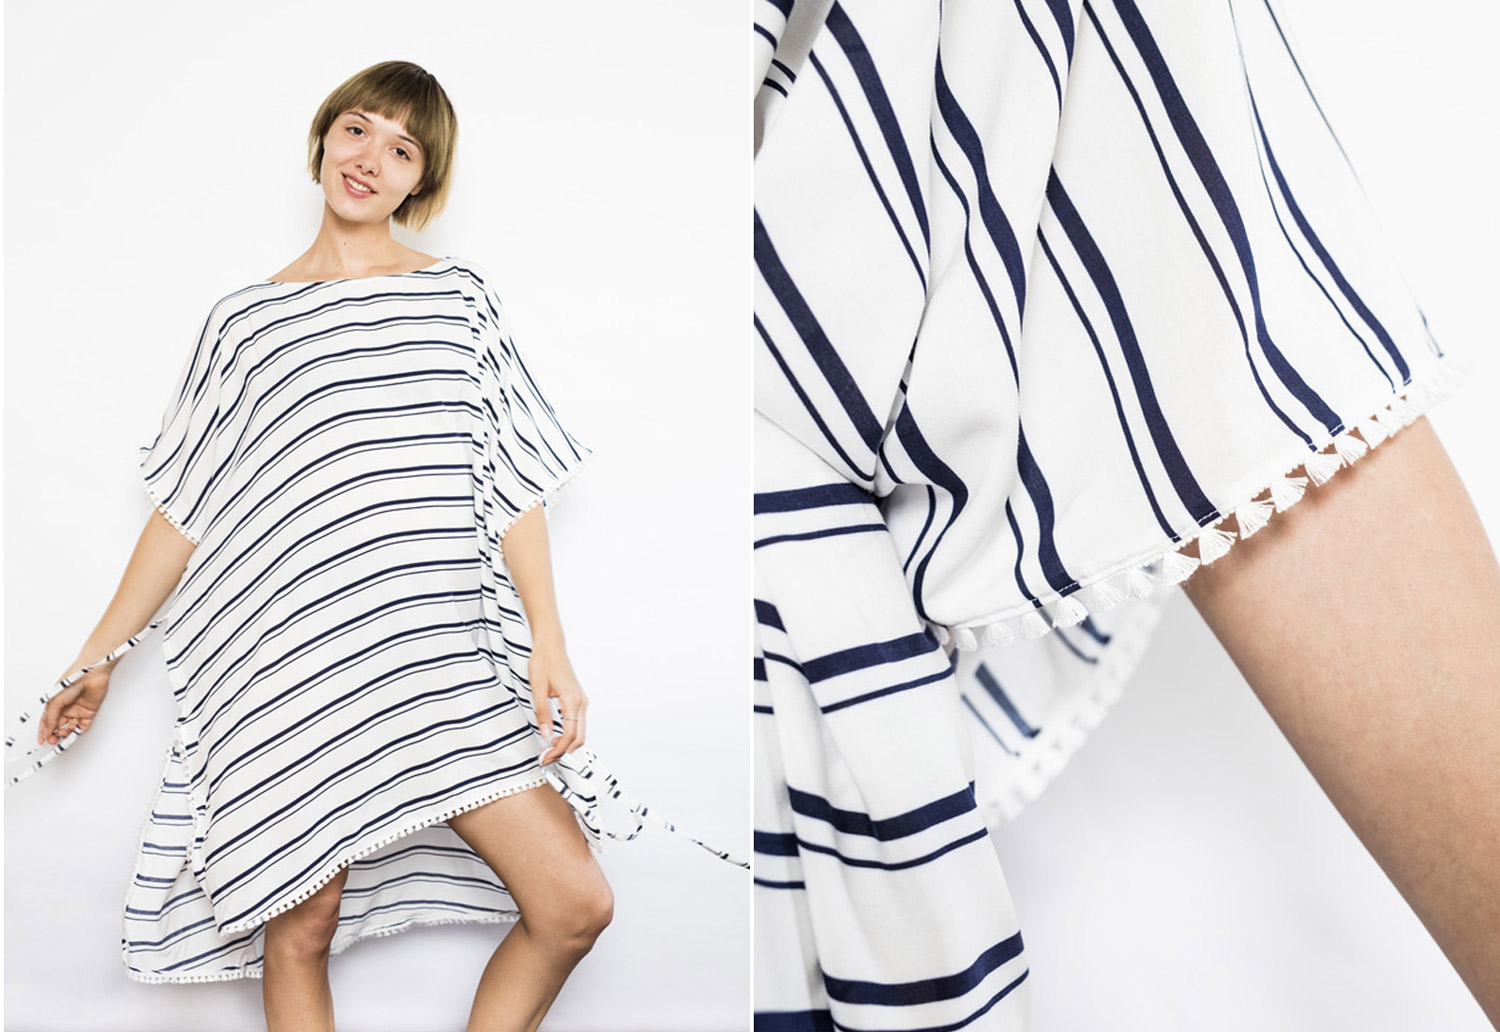
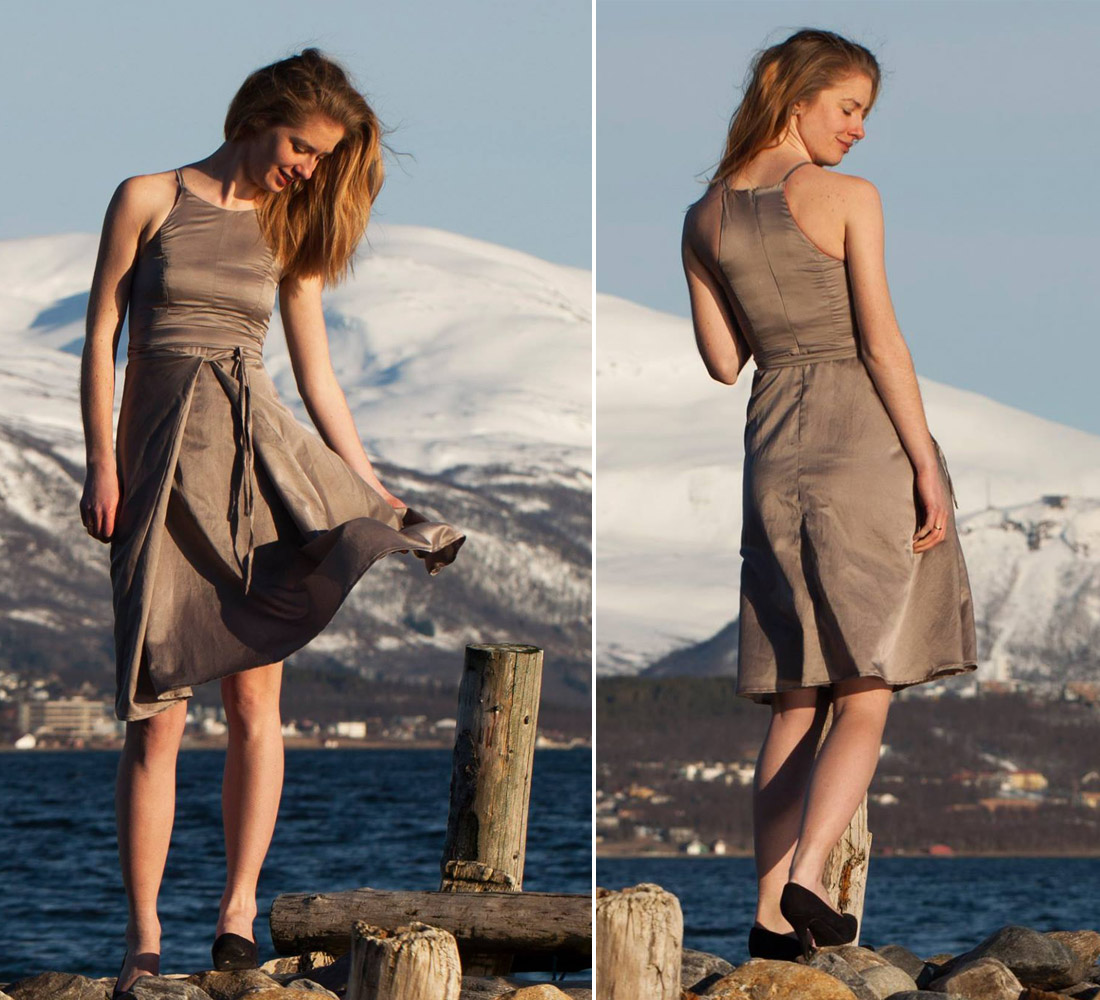
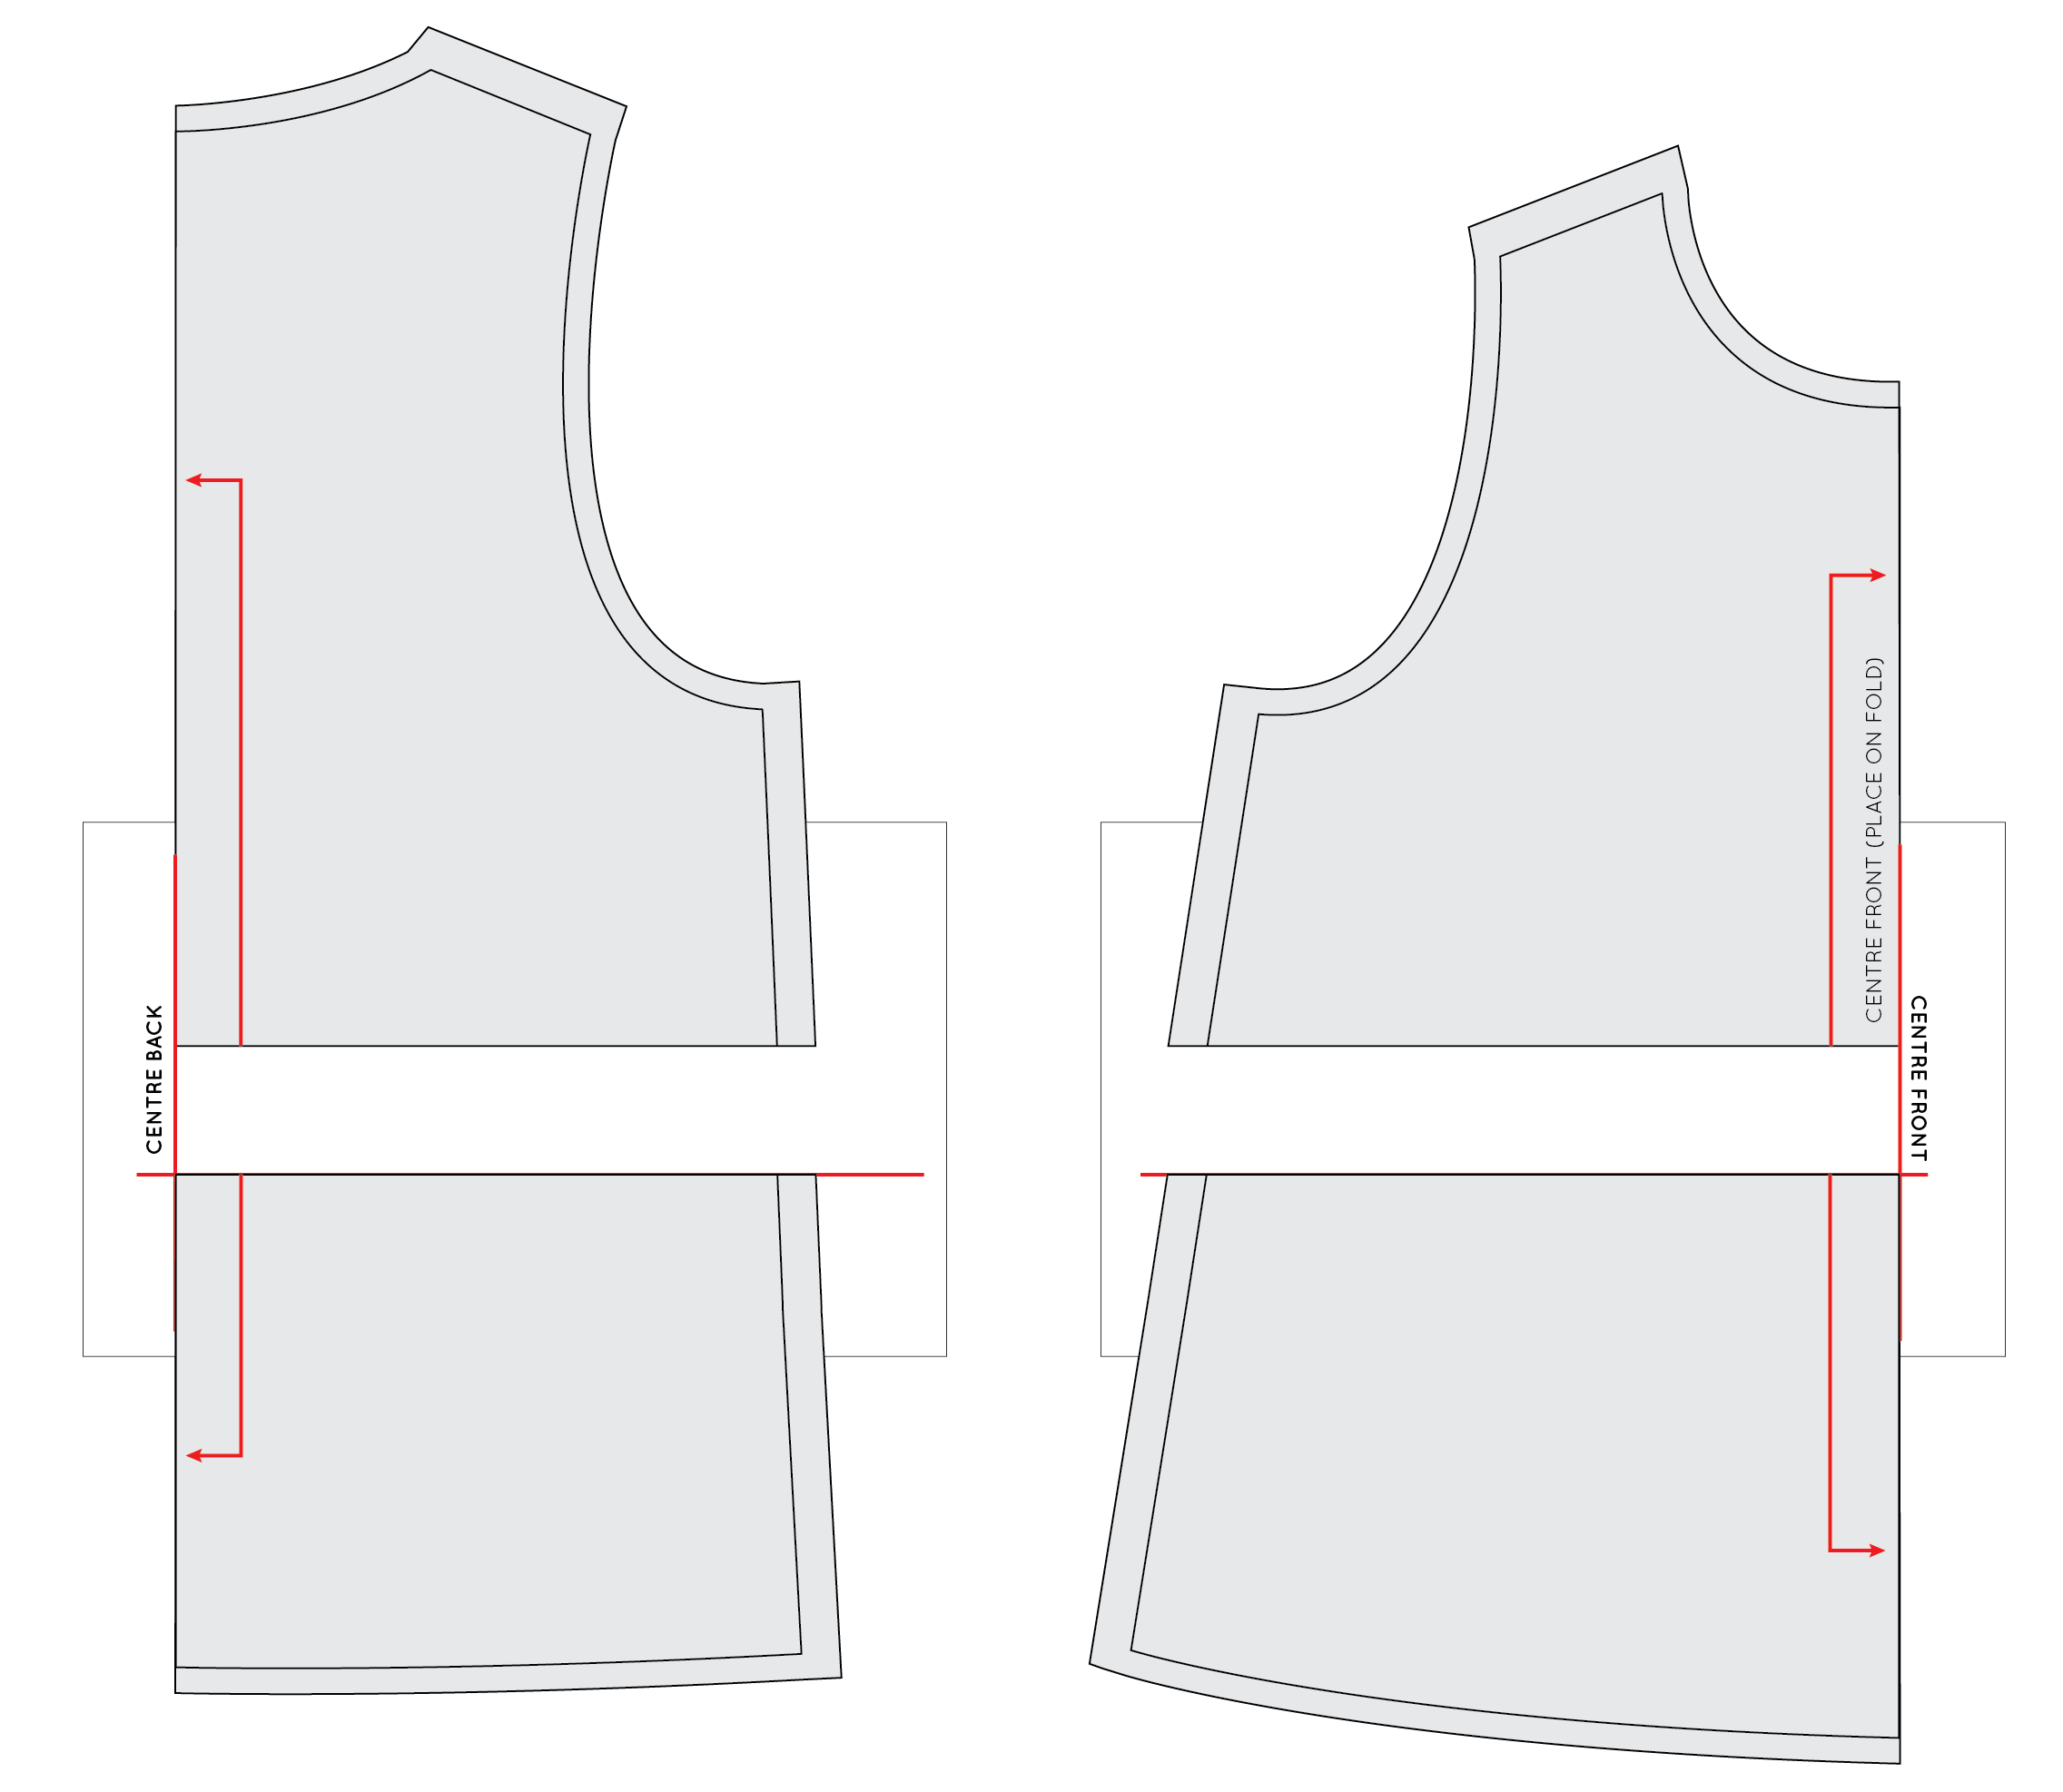
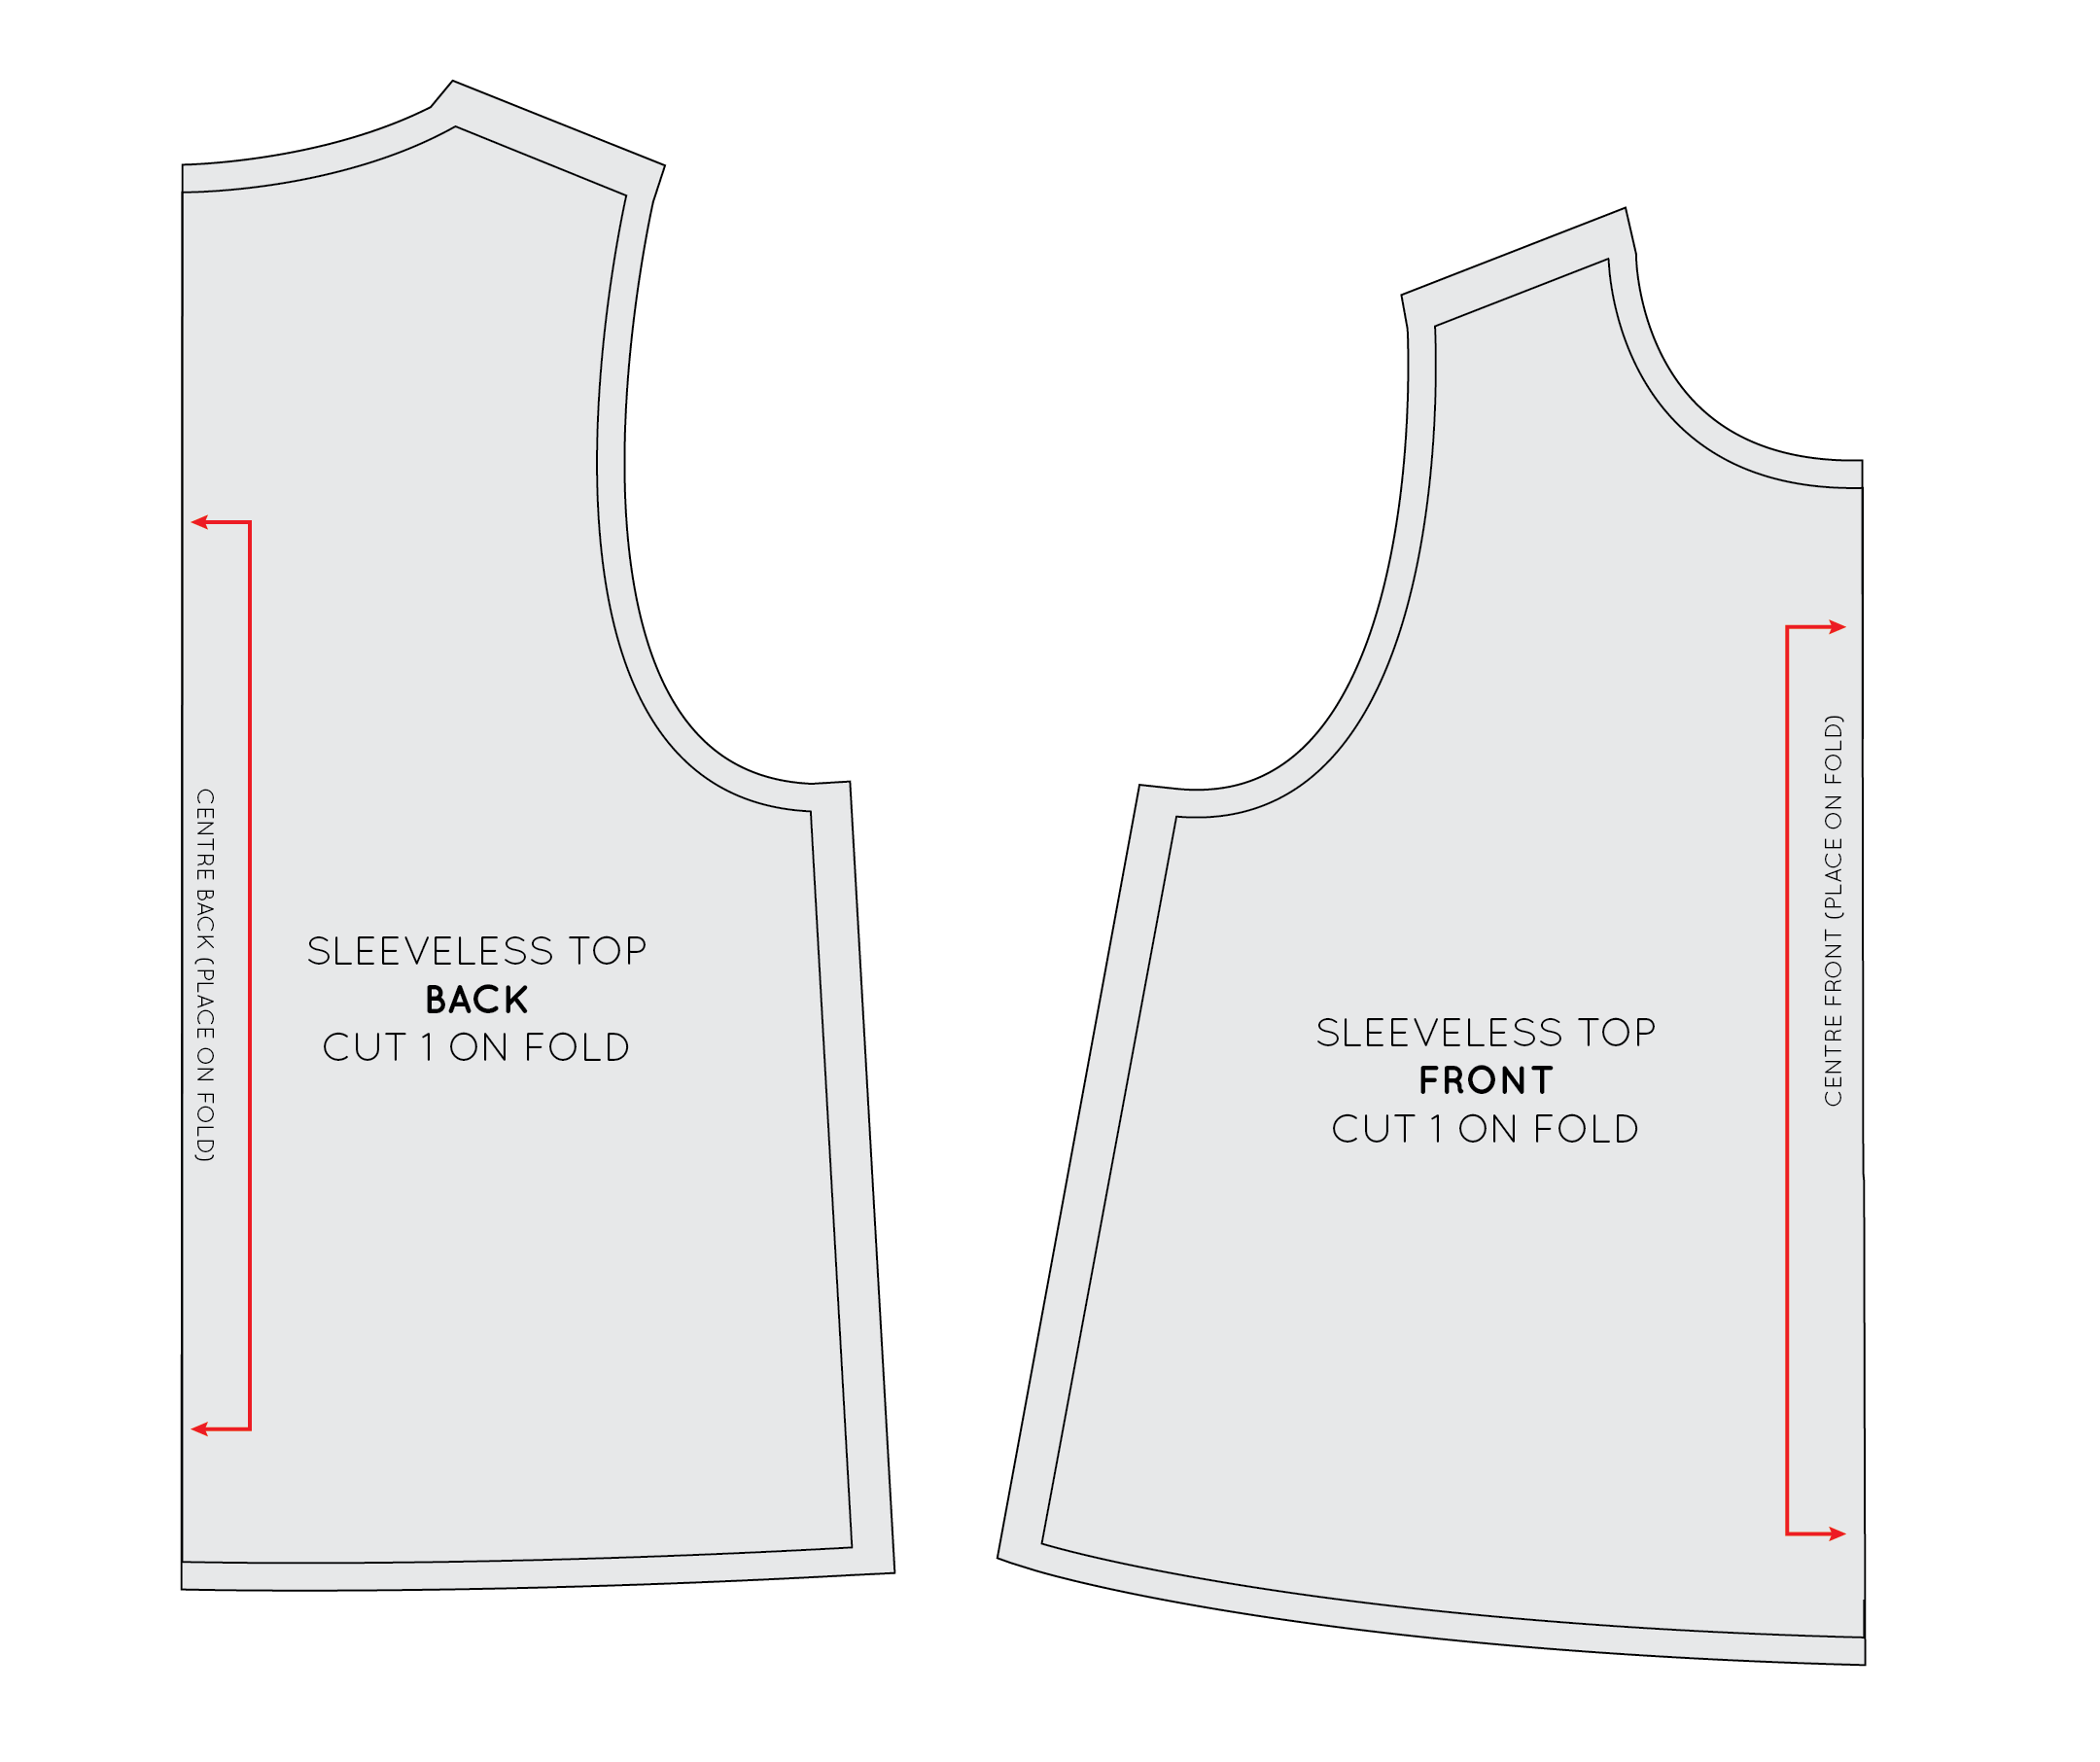
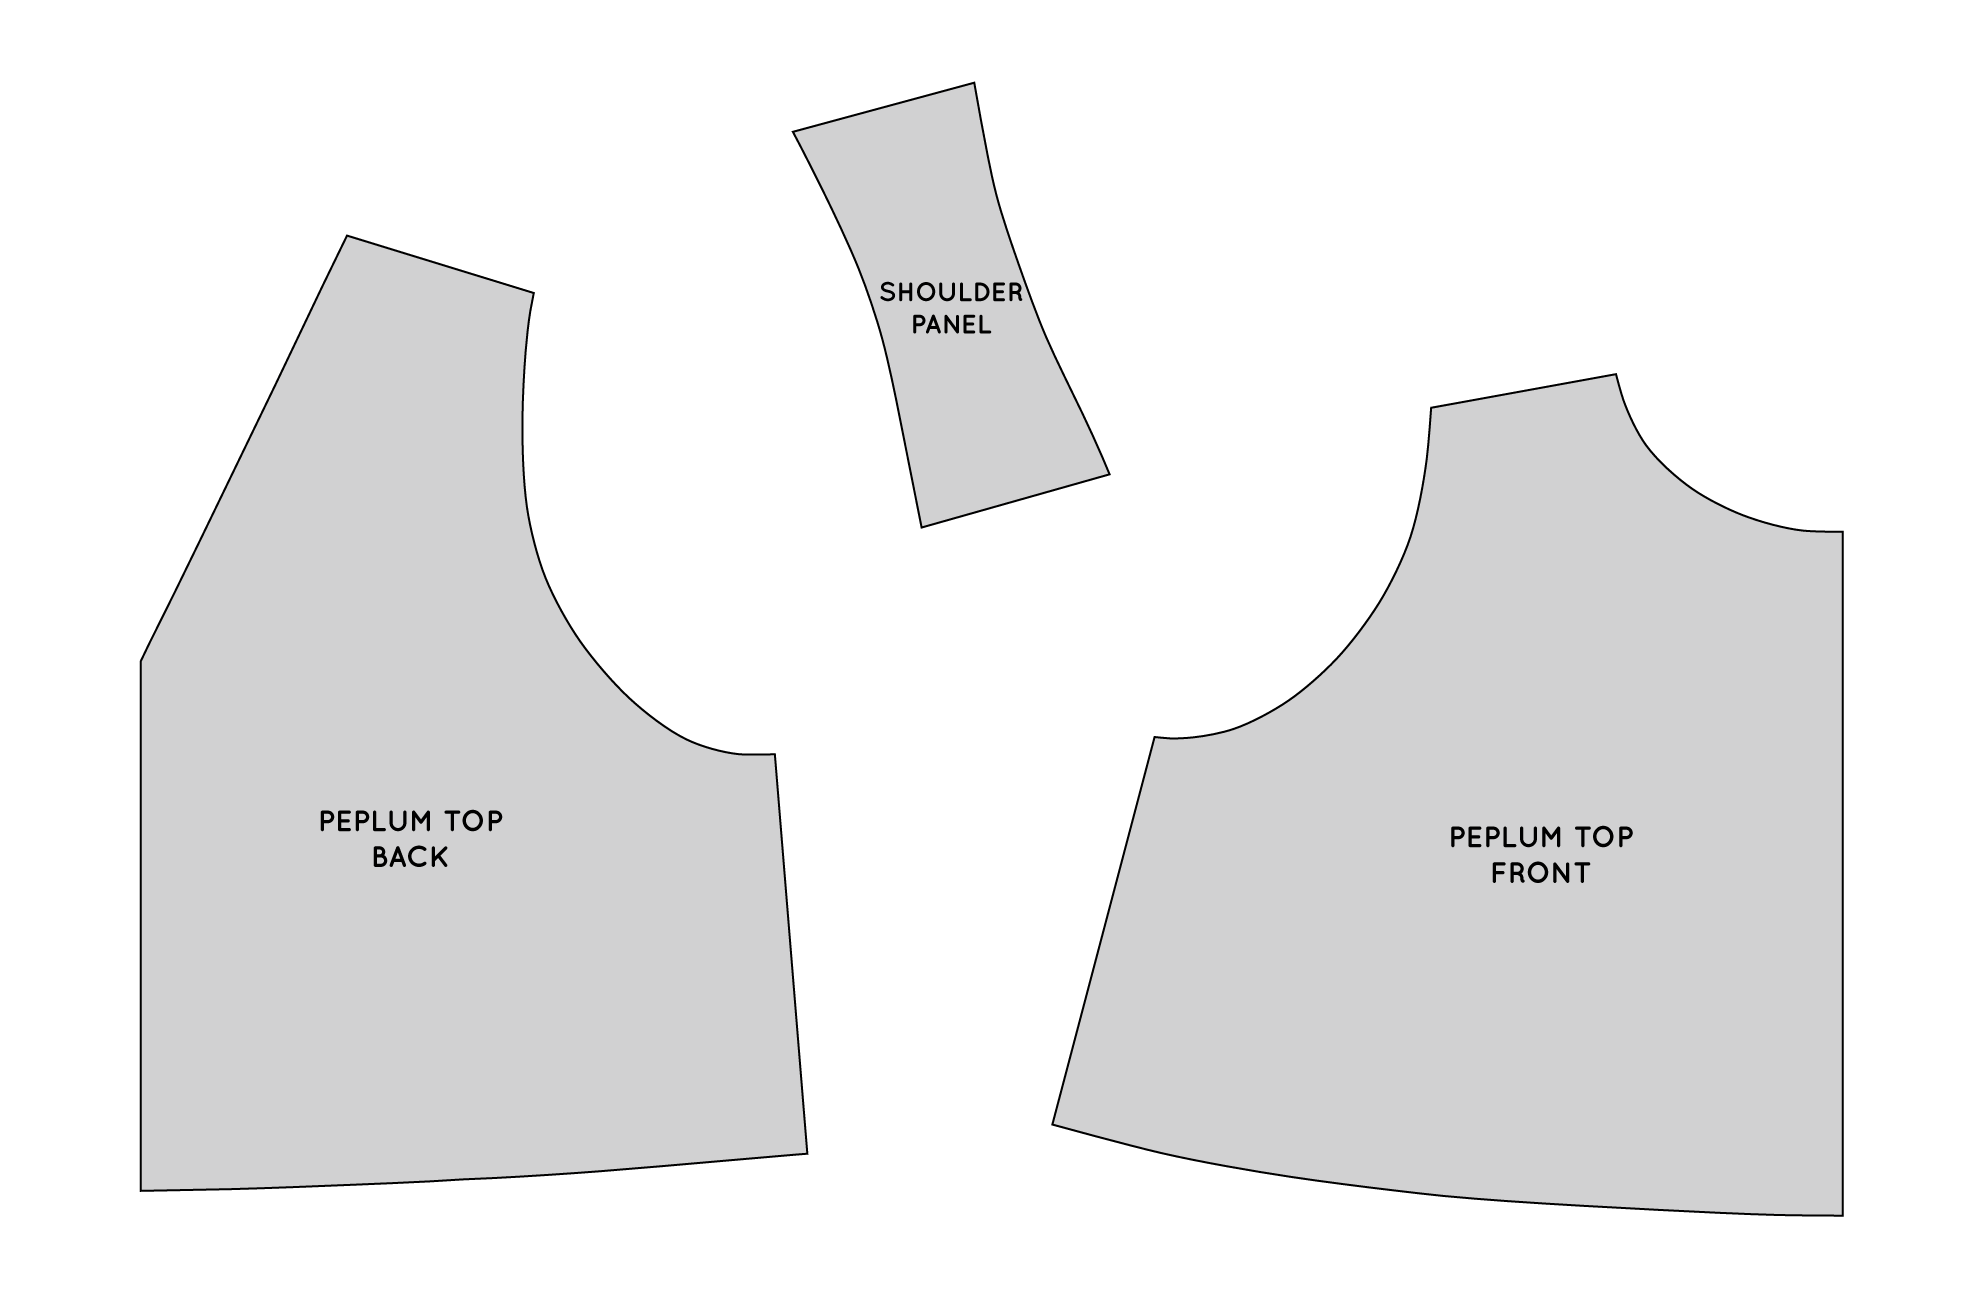
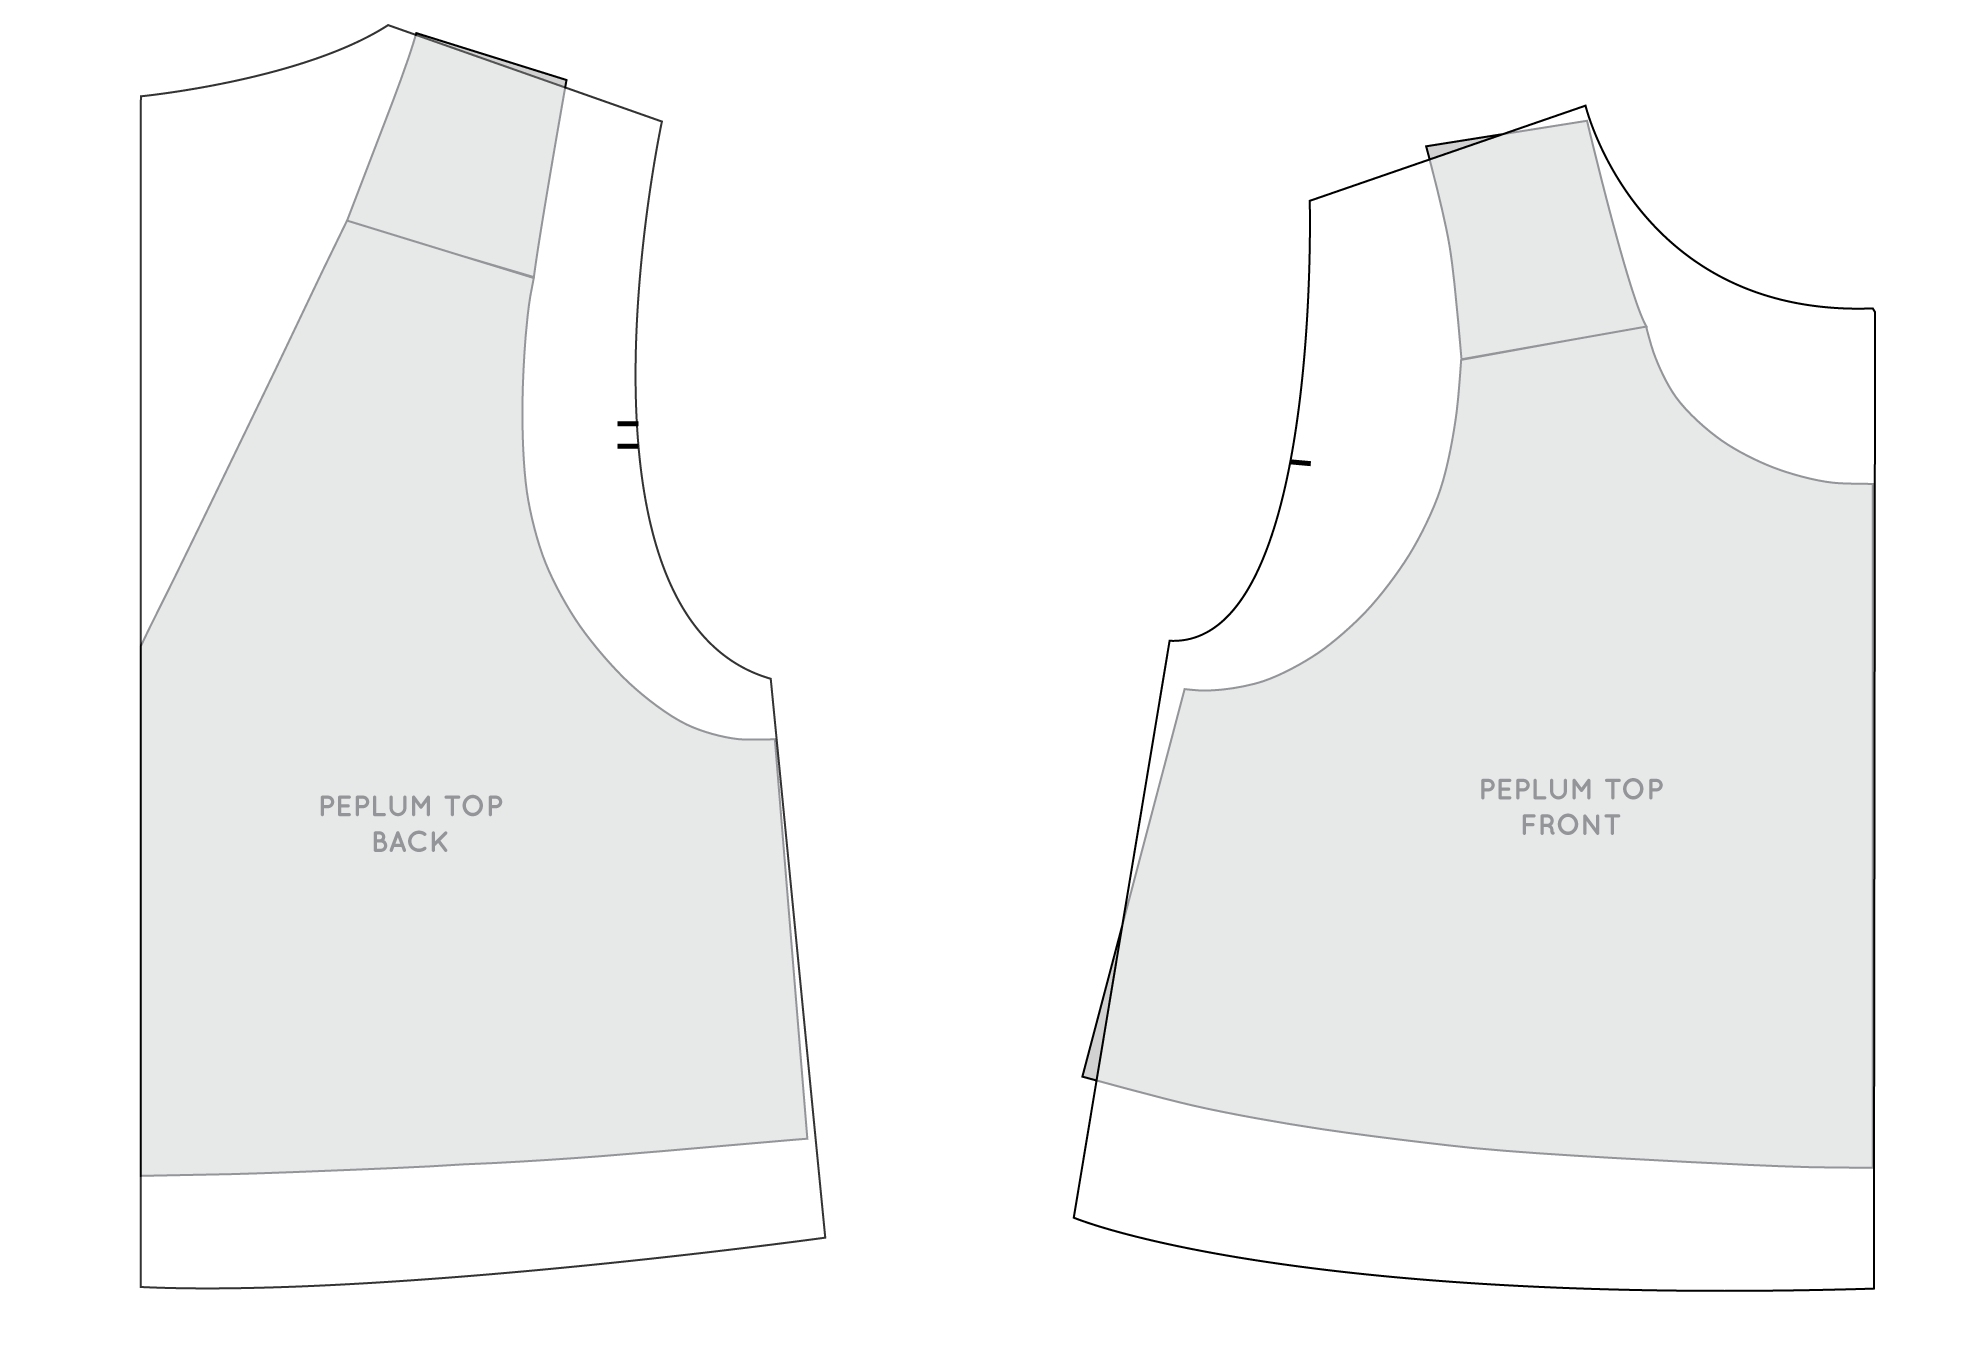
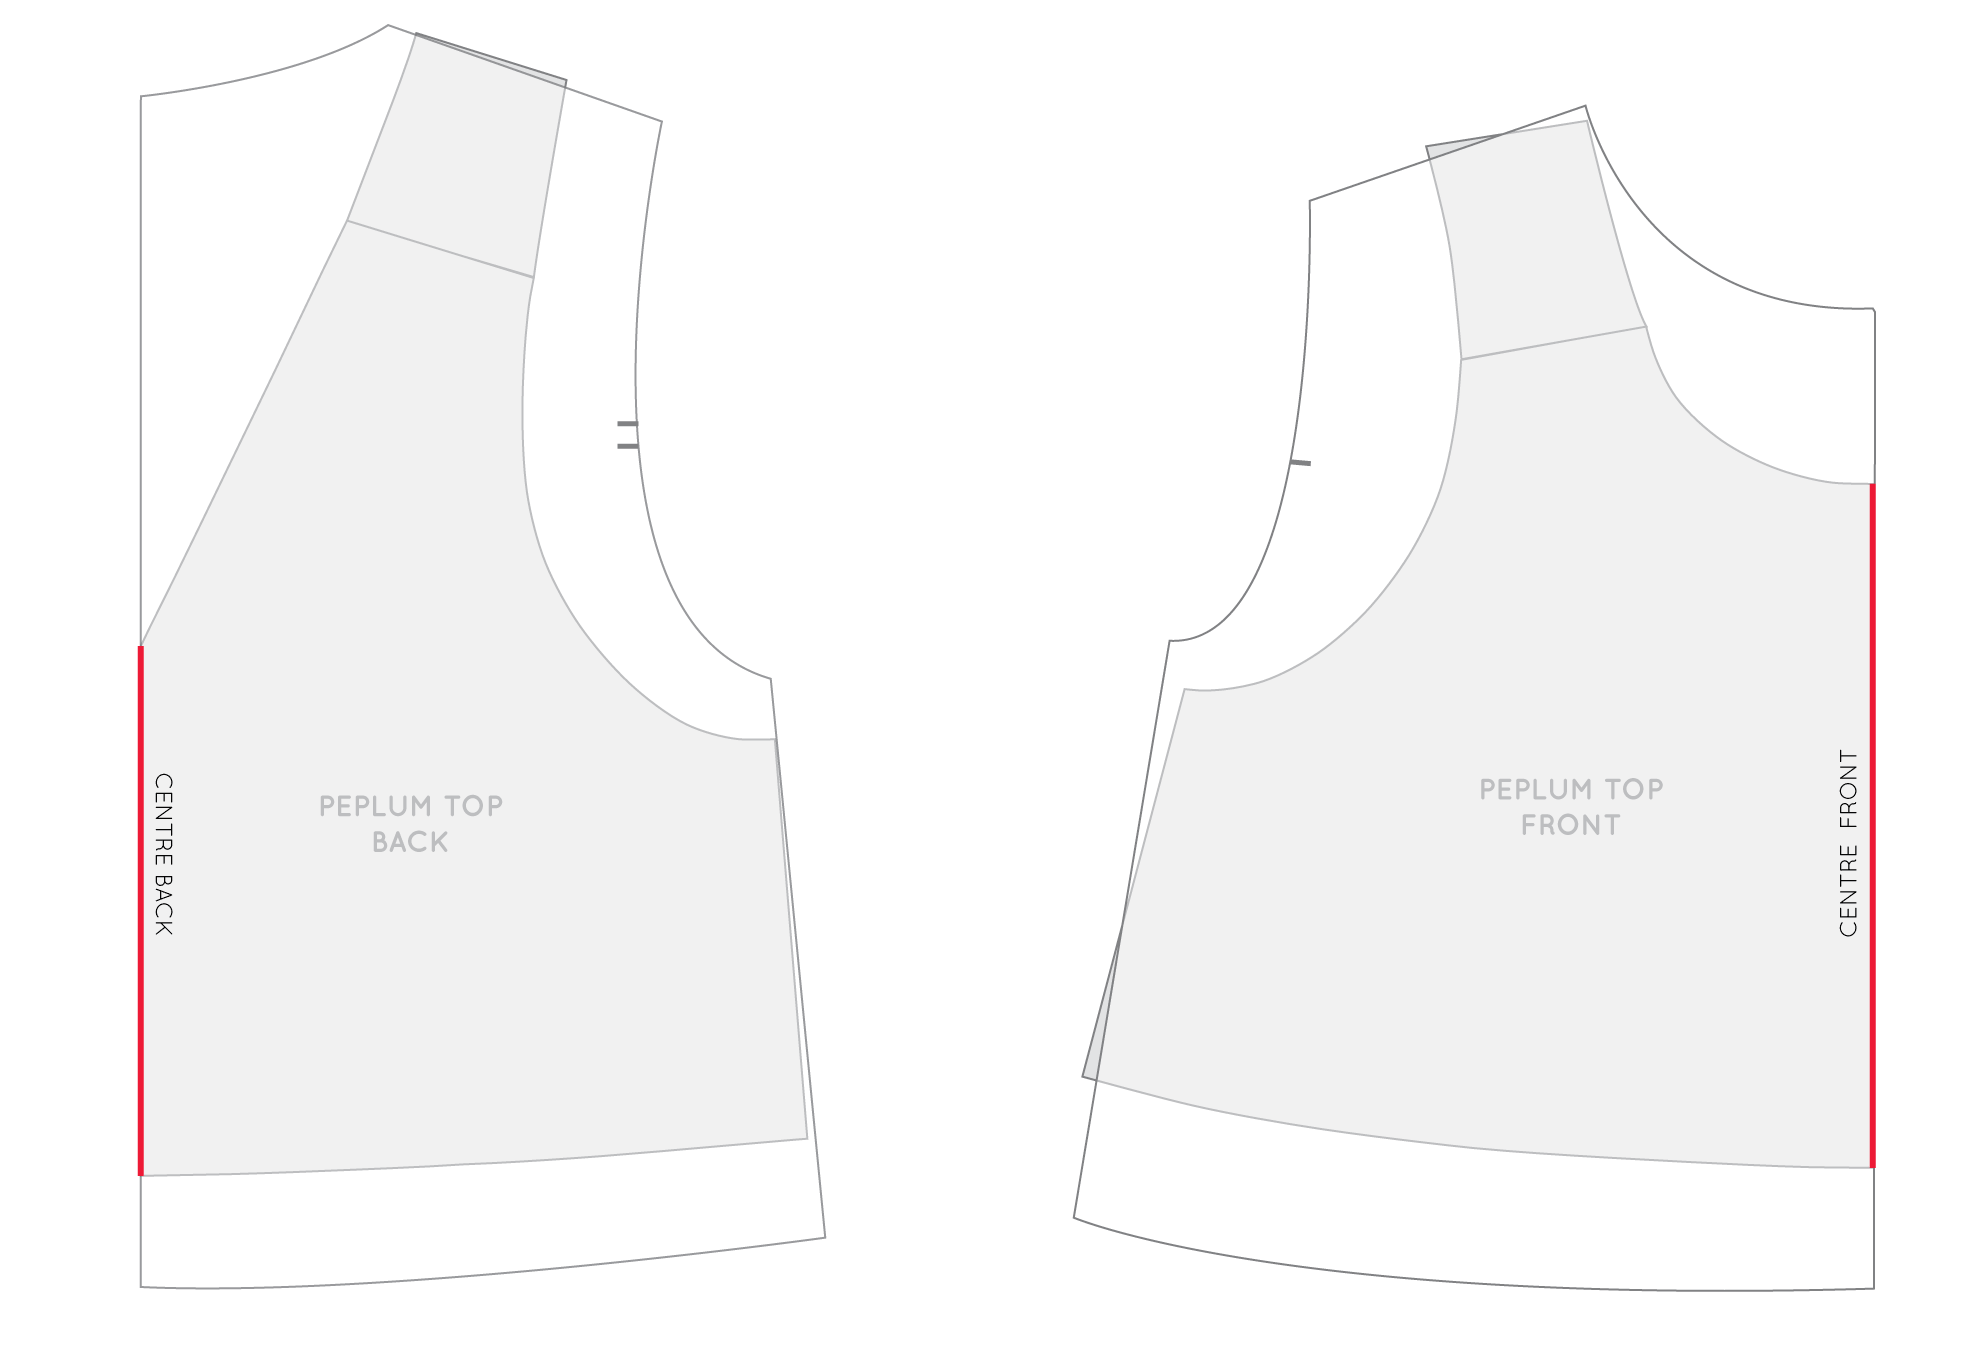
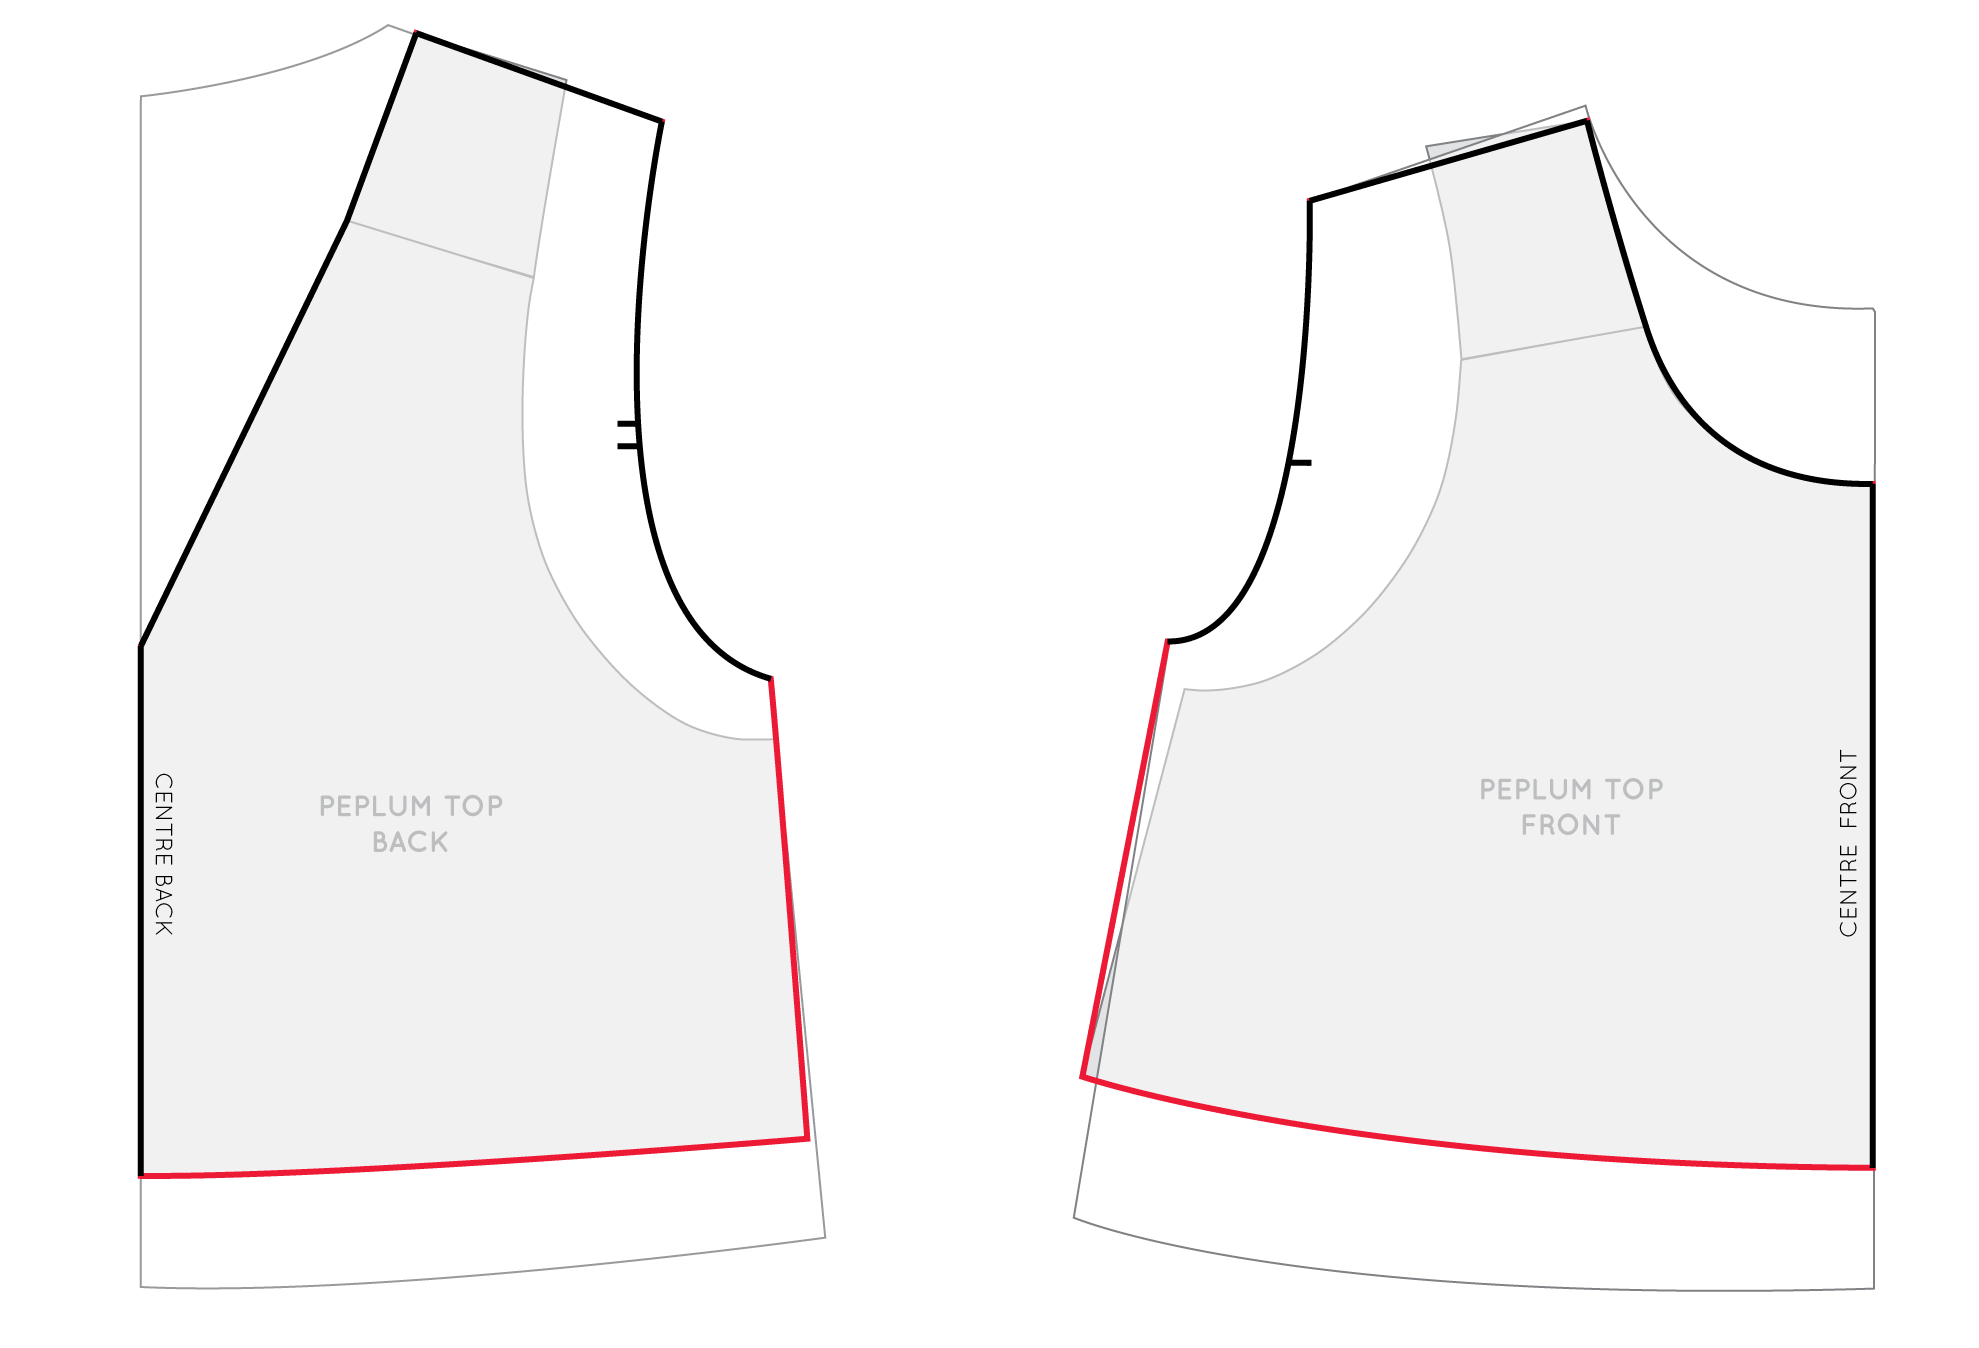
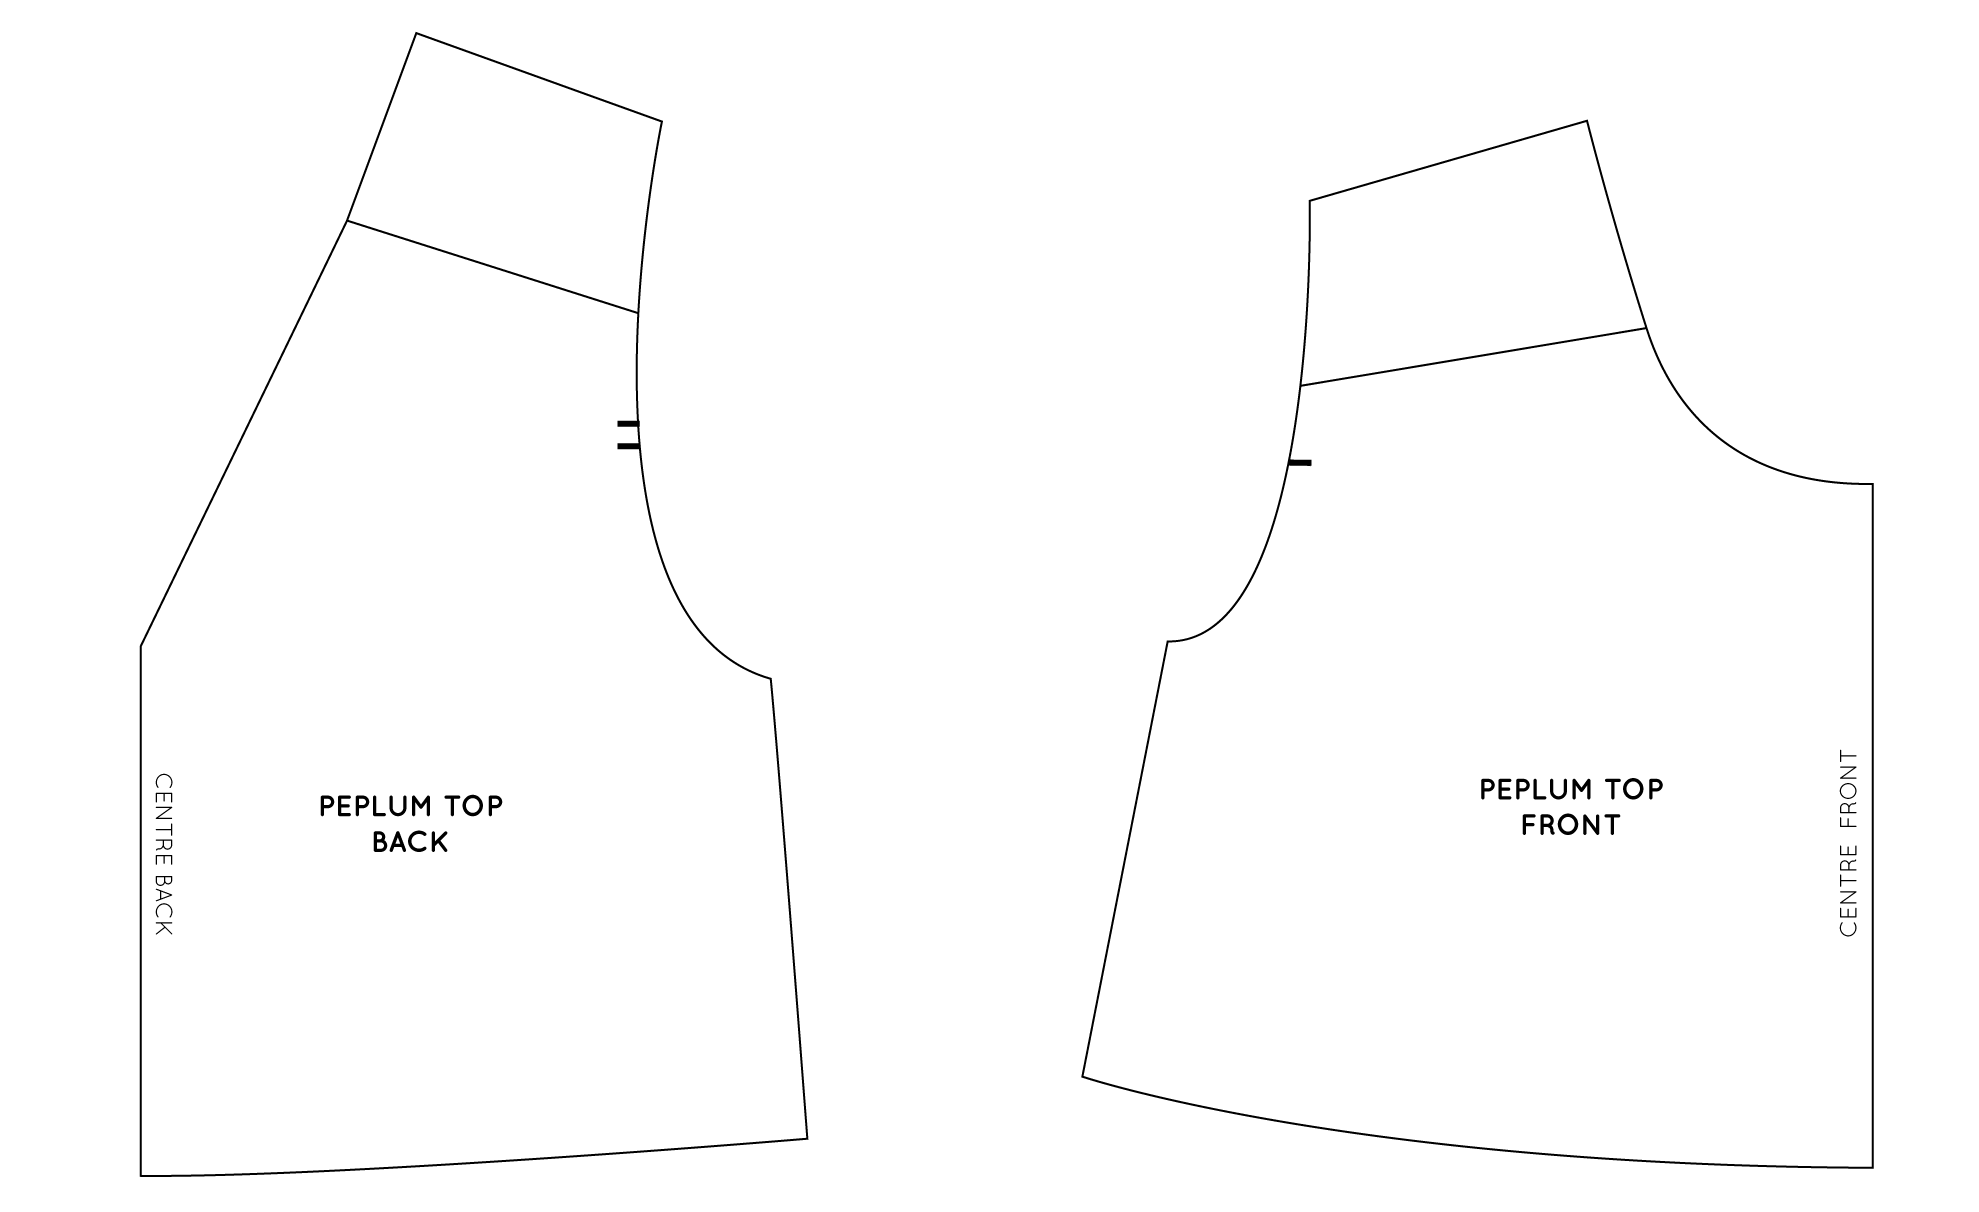
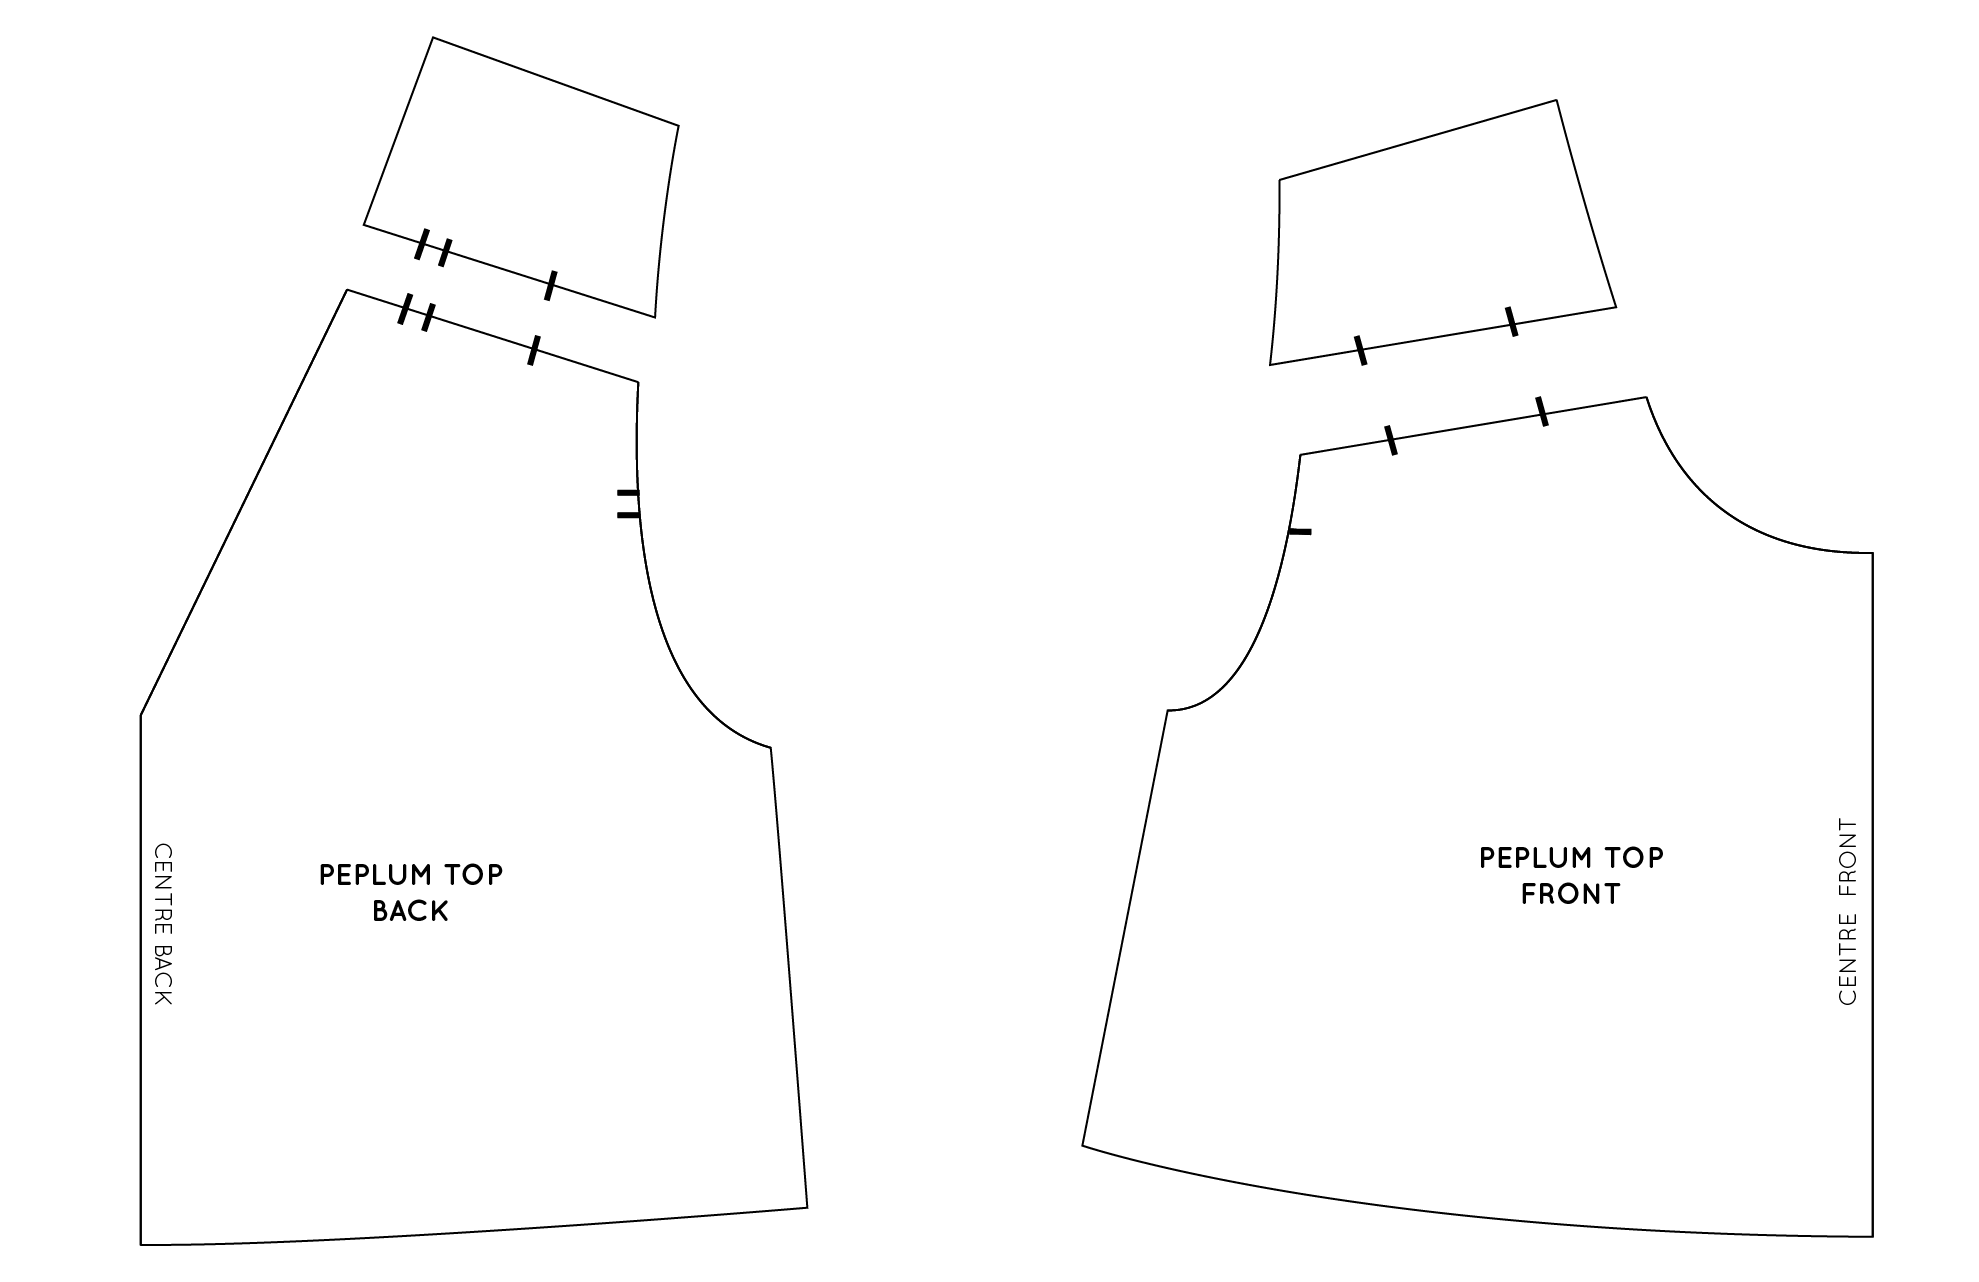
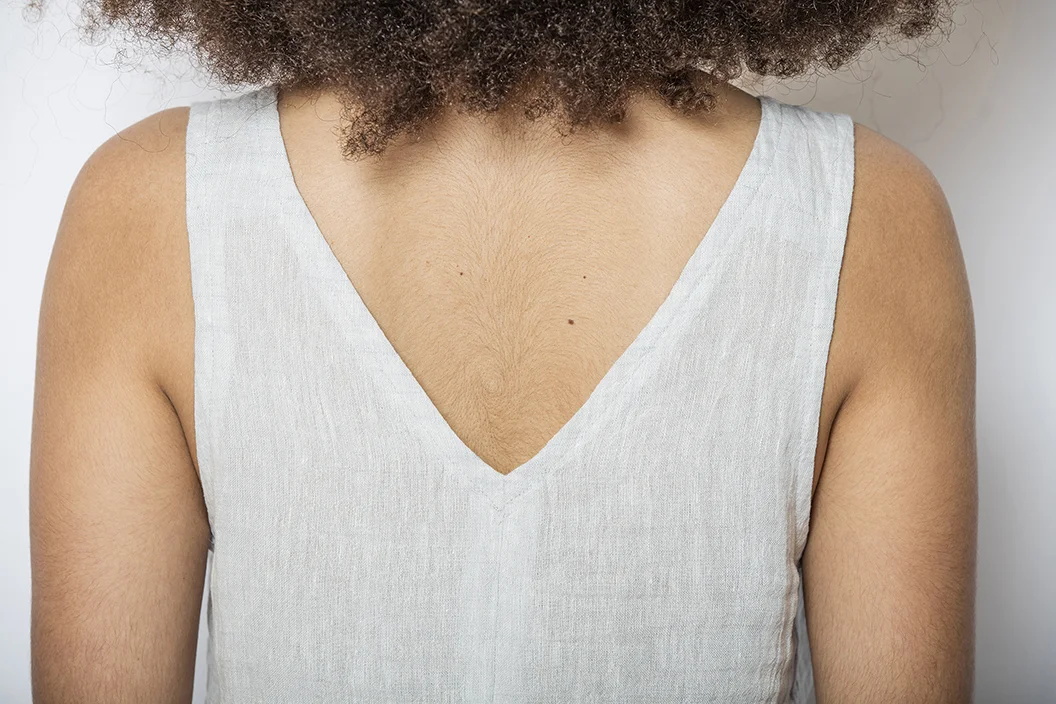
The Collins top is a loose-fitting top designed for woven fabrics. It is A-line in shape and
features a round neck, panel lines, a high-low hem and a centre-back opening, with a button and loop closure.

View A
The Collins top (view A) has a three-piece raglan sleeve with a lot of extra volume, for
those warm summer days. The neckline is finished with bias binding.
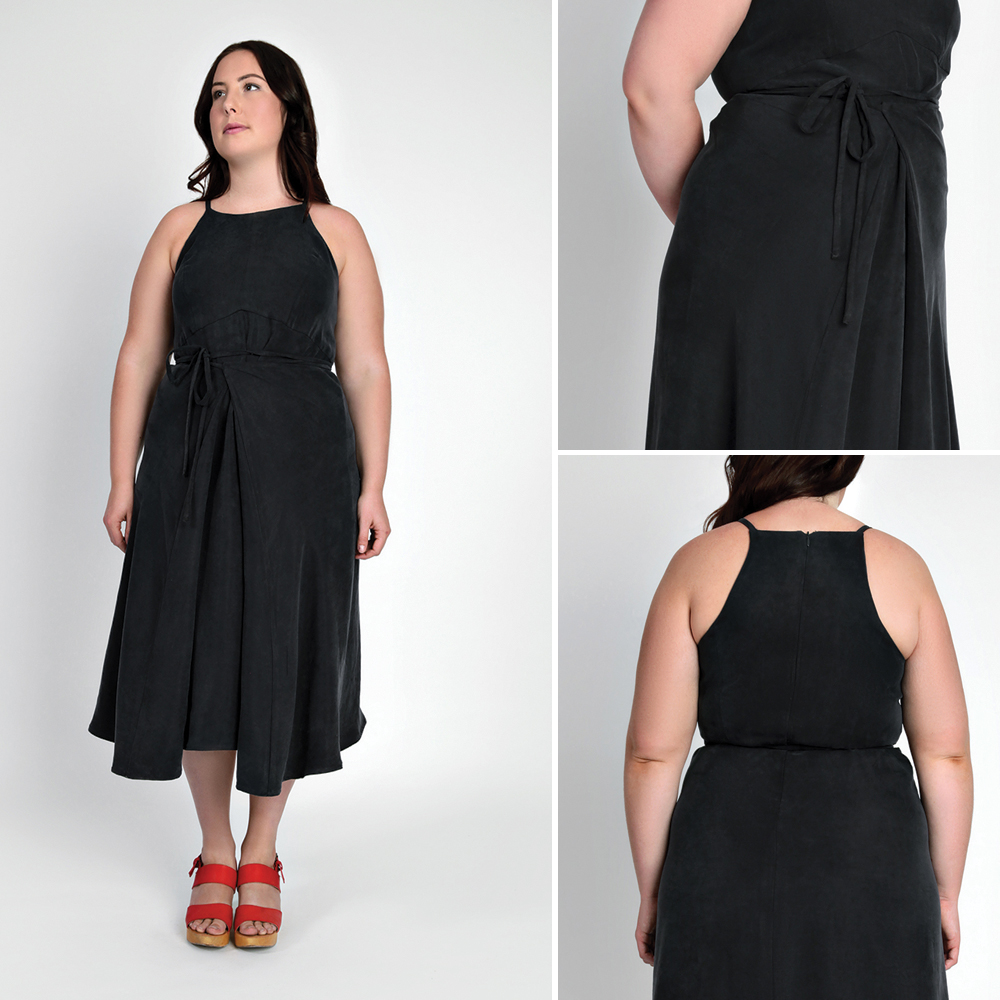
View B
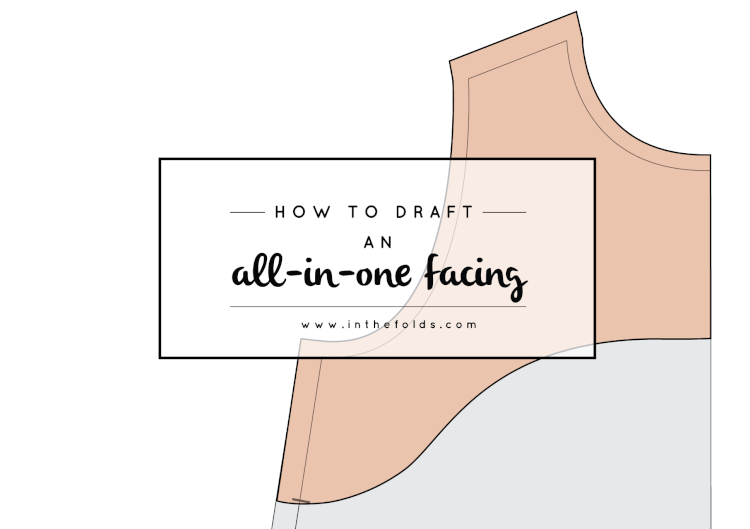
The Collins top (view B) is sleeveless and the neckline and armholes are finished with an all-in-one facing for a really clean and professional finish.

Suggested fabrics: The Collins top is compatible with a range of different fabrics. Your choice of fabric will govern the silhouette you achieve. Consider using light to mid-weight fabrics such as: linen, linen blends, cotton, gauze or chambray. For a softer silhouette, consider sateen, silk (crepe de chine or habotai) or viscose (rayon). Be careful if you are a
beginner though, as these fabrics are a little trickier to sew. 

Here is what you need to know:

  • Testing involves you making the garment - as it was originally intended (no pattern hacking etc.) and providing honest and constructive feedback on the making experience and finished garment. In exchange for your involvement, you will receive a free copy of the pattern on it's release. You will also have my sincere gratitude for being part of it!
  • Testing will run from this weekend (January 13/14) for two weeks. Feedback and fitting photos (these don't need to be styled) will be due on Monday, January 30. Please only apply if you can complete the project in the time frame.
  • Testing will be conducted through a Facbook group, so please only apply to test if you are happy to join the group. I have found that testing in this way makes it much more fun for the testers, as you get to connect with other makers and sew the project together! It also means that if you have a question, there is a large knowledge pool that can get back to you (just in case it's night time here in Australia).

How to apply:

If you would like to apply, please email testers@inthefolds.com - but before doing that, please continue reading. I will not accept applications that do not include the following information in the SUBJECT LINE.

All I need in the email is for you to put three key pieces of information in the subject line so that I can quickly and easily worth through the applications.

I need to know:

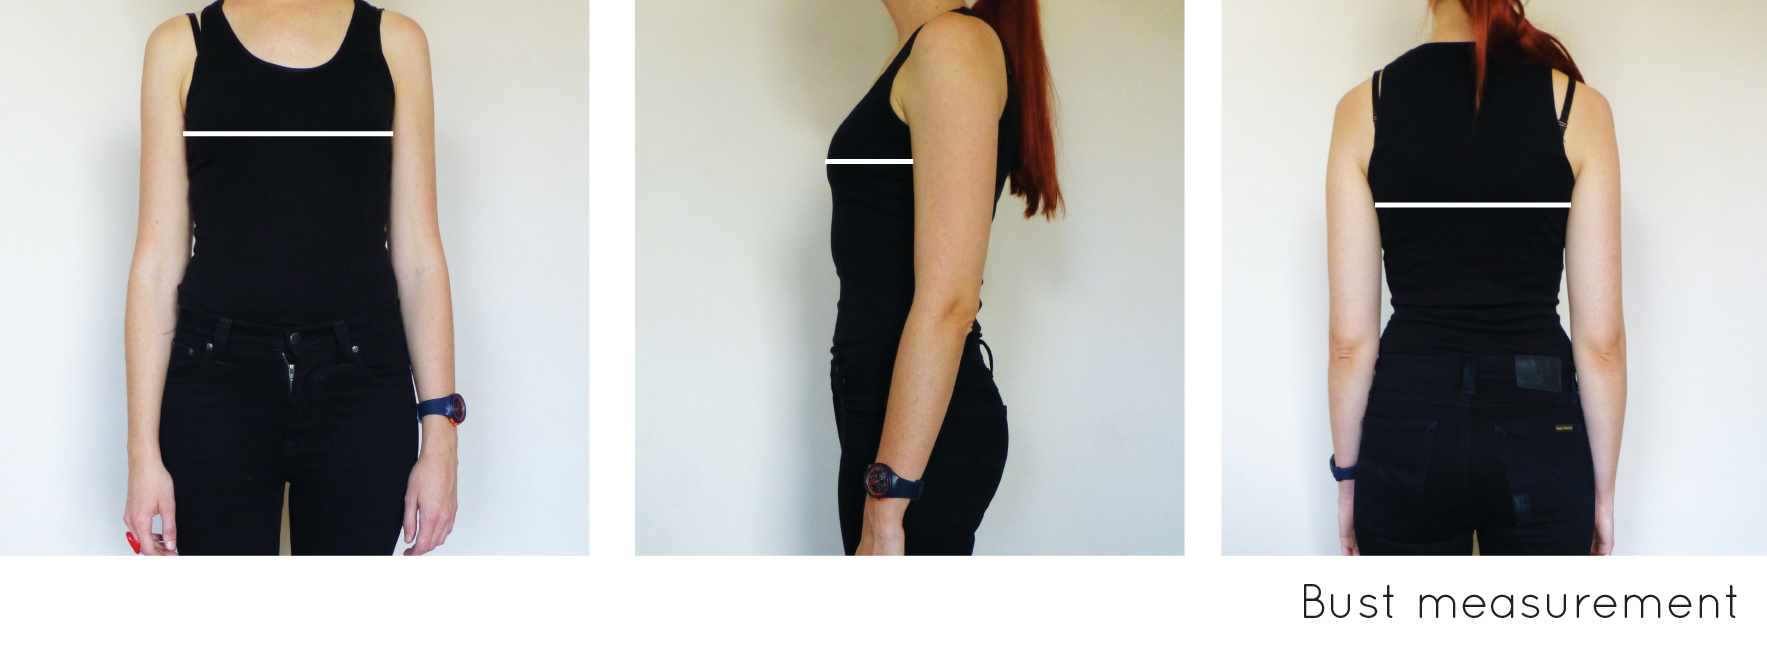
  1. Your size on the In the Folds sizing chart - to work it out look here. Keep in mind that this is a loose fitting top, so your bust measurement is the most important.
  2.  The style you would like to make (sleeveless, sleeves, or either - if you don't have a preference)
  3. Your skill level. Please use this skill scale to place yourself

So for example, you may write: Size C - sleeveless - Level 5

And that's it. That's all I need to know! If you are applying, I will assume you agree to the time frame and being part of the Facebook group. 

I am really looking forward to working with some of you, and hopefully meeting lots of new people in the process!

The Acton sew-along : How to lengthen the bodice (above the bust)

acton_lengthen_bodice_1

If you have been following the Acton sew-along, you will know that we're now onto making pattern alterations! The bodice of the Acton is quite fitted, so making some alterations to get the bodice just right for you, is really important (if the pattern doesn't fit you straight out of the packet).

I know a lot of people get quite daunted about pattern alterations, but the ones required for the Acton aren't too scary at all, as it doesn't have sleeves or shoulder seams - which simplifies it quite a bit. I showed you how to make a toile a few days ago, and now from doing a fitting, you should know what changes you need to make. Lengthening or shortening the bodice is a common adjustment to make, so I thought I'd show you how to add length in two different spots. By referring to your toile, you should be able to tell where you need to add length - it could be from below the bust line, above the bust line, or even a bit from both. 

Getting started

acton_lengthen_bodice_2

To start, trace a copy of the CENTRE FRONT BODICE and SIDE FRONT BODIE of the Acton pattern (it's always a good idea to trace a copy of the pattern, rather than using the original, in case you make a mistake. Although with a digital pattern you can always print another copy if necessary!), including all pattern markings (in this case the stitch line, grainlines and notches). 

Normally I suggest removing the seam allowance when making pattern alterations, but when it's as simple as this alteration, there really is no need. 

acton_lengthen_bodice_3

Draw a horizontal line (perpendicular to the grainline) through each pattern piece the location you need to add length. On the SIDE FRONT BODICE piece, extend the grainline so that it crosses the horizontal line and is on the top part of the pattern piece. As I said, for this tutorial I will be showing you how to add length above the bust line. If you need to add length below the bust line, check out this tutorial.

Cut through the pattern pieces

acton_lengthen_bodice_4

Carefully cut through each line, separating each piece into two. 

lengthen the bodice

acton_lengthen_bodice_5

Take two pieces of pattern paper (this is a great time to use up some of your paper scraps!).

A : For the SIDE FRONT BODICE you will need your piece of paper to be slightly wider than the one for CENTRE FRONT BODICE. Draw a horizontal line straight through the (roughly) middle. In the centre, draw a line perpendicular to the horizontal line, creating a right angle. This will be the grainline of the new SIDE FRONT BODICE piece. 

B : Draw a horizontal line straight through the (roughly) middle. On the right hand side, draw a line perpendicular to the horizontal line, creating a right angle. This will be the grainline of the new CENTRE FRONT BODICE piece. 

acton_lengthen_bodice_6

A : Take the lower section of the SIDE FRONT BODICE and line it up with the horizontal and vertical line you just drew - the grainline matching up with the vertical line (you can now see why this line had to be closer to the middle) and the cut edge aligned with the horizontal line. Tape or glue in place. 

B : Take the lower section of the CENTRE FRONT BODICE and line it up with the horizontal and vertical line you just drew - the centre front matching up with the vertical line and the cut edge aligned with the horizontal line. Tape or glue in place. 

acton_lengthen_bodice_7

By looking at your toile, work out how much extra length you need to add to the pattern. For the case of the example, I will be adding 1.5cm (5/8").

On the vertical line on each pattern piece, mark a point 1.5cm /5/8" (or whatever length you are adding to the pattern) above the cut edge. 

acton_lengthen_bodice_8

Draw a line parallel to the cut edge of the pattern running from the point you marked in the previous step on both the SIDE FRONT BODICE (A) and CENTRE FRONT BODICE (B).

acton_lengthen_bodice_9

A : Take the upper section of the SIDE FRONT BODICE and place the cut edge on the second horizontal line, aligning the grainline with the vertical line. Tape or glue in place. 

B : Take the upper section of the CENTRE FRONT BODICE and place the cut edge on the second horizontal line, aligning the centre front with the vertical line. Tape or glue in place. 

Trace the pattern pieces to create the new pieces

acton_lengthen_bodice_10

Take two pieces of pattern paper to trace the new pattern pieces. 

A : Trace the stitch lines on the SIDE FRONT BODICE. Re-draw the armhole line and princess seam line, by finding a line of best fit between the original stitch lines. 

B : Trace the stitch lines on the CENTRE FRONT BODICE. Re-draw the princess seam line by joining the top of seam to the bottom with a straight line. 

acton_lengthen_bodice_11

Add seam allowance to both pieces - by using the original pattern edges as a guide.

A : Add 1.5cm (5/8") to the side seam, 1.2cm (1/2") to the waist seam and princess seam and 1cm (3/8") to the armhole.

B : Add 1.2cm (1/2") seam allowance to the waist seam, princess seam and centre front. Add 1cm (3/8") to the armhole and neckline. 

acton_lengthen_bodice_12

Be sure to also transfer all pattern markings - notches, drill hole and grainline. 

acton_lengthen_bodice_13

Label the pattern for safe-keeping. You can now cut out your new pattern pieces. Repeat process for the back pattern pieces (if you also need to add length to the back of the bodice).


You may also like:

The Acton sew-along : How to lengthen the bodice

Welcome back to the Acton Sew-along.

In yesterday's tutorial, I gave you all the reasons why you should always make a toile (especially when you're making a fitted garment like the Acton) and showed you how to go about it. In the next few tutorials, I'm going to show you what to do if you have realised that you need to shorten or lengthen the bodice. This is probably one of the simplest pattern alterations you can make, so please don't be daunted by it if you've realised that you'll get a better fit by changing the length of your bodice. 

By referring to your toile, you will be able to know whether you need to remove length below the bust, or above the bust. The method is exactly the same, just the location of the cut is different. This tutorial will show you how to remove excess from below the bust, and later today I'll show you how to remove length from above the bust. 

Getting started

To start, trace a copy of the CENTRE FRONT BODICE and SIDE FRONT BODIE of the Acton pattern (it's always a good idea to trace a copy of the pattern, rather than using the original, in case you make a mistake. Although with a digital pattern you can always print another copy if necessary!), including all pattern markings (in this case the stitch line, grainlines and notches). 

Normally I suggest removing the seam allowance when making pattern alterations, but when it's as simple as this alteration, there really is no need. 

Draw a horizontal line (perpendicular to the grainline) through each pattern piece between the lower notches (below the bust line). On the CENTRE FRONT BODICE piece, make sure the line is far enough up the piece that it intersects the centre front of the piece and not through the bottom edge.

Cut through the pattern pieces

Carefully cut through each line, separating each piece into two. 

lengthen the bodice

Take a piece of pattern paper (this is a great time to use up some of your paper scraps!) and draw a horizontal line straight through the (roughly) middle. On the right hand side, draw a line perpendicular to the horizontal line, creating a right angle. This will be the grainline of the new pattern piece. 

Take the lower section of the CENTRE FRONT BODICE and line it up with the horizontal and vertical line you just drew - the centre front matching up with the vertical line and the cut edge aligned with the horizontal line. Tape or glue in place. 

Add length to the pattern piece

By looking at your toile, work out how much extra length you need to add to the pattern. For the case of the example, I will be adding 2.5cm (1").

On the vertical line, mark a point 2.5cm / 1" (or whatever length you are adding to the pattern) above the cut edge. 

acton_dress_shorten_bodice_3_5.gif

Draw a line parallel to the cut edge of the pattern running from the point you marked in the previous step. 

Take the upper section of the CENTRE FRONT BODICE and place the cut edge on the second horizontal line, aligning the centre front with the vertical line. Tape or glue in place. 

Trace the new pattern piece

A : Take another piece of pattern paper and trace your new pattern piece. Start by tracing the original lines of the pattern which have not been affected by the changes.

B : Redraw the panel seam by drawing a line from the top of the pattern piece, down to the bottom - meeting the original line at each end. Do this for both the cutting line and the stitching line. 

Be sure to trace all pattern markings - notches, drill hole and grainline. Label the pattern for safe-keeping. You can now cut out your new pattern piece. 

Repeat Process for the side front bodice

For the SIDE FRONT BODICE you will need your piece of paper to be slightly wider than the one you used for the CENTRE FRONT BODICE. Again, mark the horizontal and vertical lines on the paper - but this time, place the vertical line closer to the centre of the paper. 

Take the lower section of the SIDE FRONT BODICE and line it up with the horizontal and vertical line you just drew - the grainline matching up with the vertical line (you can now see why this line had to be closer to the middle) and the cut edge aligned with the horizontal line. Tape or glue in place. 

On the vertical line (the grainline in this case), mark a point 2.5cm / 1" (or whatever length you are adding to the pattern) above the pattern edge. This distance needs to be the same amount that you added to the CENTRE FRONT BODICE.

Draw a line parallel to the cut edge of the pattern running from the point you marked in the previous step. 

Take the upper section of the SIDE FRONT BODICE and place the cut edge on the second horizontal line, aligning the grainline with the vertical line. Tape or glue in place. 

You will see that the changes are limited to area where the paper was added, so there is no need to trace the pattern. Simply re-draw the side seam and princess seam and cut the piece out.

Repeat process for the back panels and that's it!

Are you enjoying the Acton sew-along? There are still plenty of posts to come!


You may also like:

The Acton sew-along : Making a toile

how_to_make_a_toile_1

Welcome back to the Acton sew-along! Now that we've taken our measurements and worked out what size (or sizes) matches our measurements the closest, it is time to make a toile!

WHAT IS A TOILE?

A toile (also known as a ‘muslin’) is basically a draft version of a garment. A toile is normally made from a cheaper fabric, so that you can test the fit of a particular garment before cutting into your real (and normally more expensive) fabric. 

It is best to choose a fabric to toile in, that is similar to what you plan to make the actual garment in. If you are using a lovely sandwashed silk, then you will need something with a similar handle and drape as the silk, so you can get a good idea of what the final garment will look like. Making a winter coat? Choose something with a similar thickness and drape. For the Acton, it is designed to be used with 'drapey' fabrics, but to get a good idea of the fit of the bodice, I would use something stiffer than suggested - such as calico or cotton. 

WHY SHOULD I TOILE?

how_to_make_a_toile_or_muslin_1

We all come in different shapes and sizes, and although I may have the same measurements as the girl next to me, this does not at all mean we have the same body shape. Some of us may have a sway back, forward sitting shoulders (that’s me!), narrow shoulders, longer torso etc. By making a toile, you can quickly see if any adjustment needs to be made. As you sew more garments for yourself, you will get better at knowing what to look for, as you will often notice the same fitting problem across the board. You may think that In the Folds patterns would fit me straight out of the packet. They don't! My patterns are drafted to fit a "standard" (is there such thing?) size 10 fit model, which means that before making something from one of my patterns, I must make a few alterations too... So I am right here with you!

HOW DO I MAKE A TOILE?

After choosing your size, printing the pattern, and making any alterations that are standard to you (such as an FBA or SBA), make up the garment in your chosen toiling fabric. You don’t have to add facings, collars or pockets etc when making a toile. I never bother with buttonholes or zips either, I just pin the opening closed when it’s on. For the Acton, if you're short of time, you can get away with just toiling and fitting the bodice. 

You just want to check the overall fit of the garment, so you will only need the main pattern pieces (in the case of the Acton, you just need to cut the bodice pieces, not the lining). There is no need to even finish the seams!

To Start

how_to_make_a_toile_or_muslin_2

Cut out your bodice pieces in your chose size. Remove the seam allowance from the neckline and armholes, as well as the waistline seam. This will help you get an accurate idea of the fit, without getting confused by the seams that have not been finished. 

For loose fitting garments, that have enough ease to fit a wide range of shapes (such as The Rushcutter) you can go right ahead and cut out your toile and get sewing, but for fitted garments like the Acton, it is best to mark some guidelines on your pieces first. This will really help when it comes to fitting the bodice and working out what changes need to be made. 

Mark guidelines on your pattern pieces

how_to_make_a_toile_or_muslin_4

Take your pair of SIDE FRONT BODICE pieces and draw a horizontal line through the fullest part of the bust. Transfer this line onto the CENTRE FRONT BODICE too (at the same level).

Draw a vertical line through each piece too. This doesn't have to be exact - these lines will just act as reference points when you are fitting. They will help you tell if the bodice is sitting as it should. 

It can be a good idea to try a toile on inside out, so transfer these guidelines onto the wrong side of the fabric too.

how_to_make_a_toile_or_muslin_5

Do the same for the CENTRE BACK BODICE and SIDE BACK BODICE pieces. 

Sew the toile

Sew the bodice together, according to the instructions in the pattern (leaving the centre back seam open). When sewing, consider using a long stitch length, so that you can quickly and easily unpick any seams that need to be altered. You can also use a contrasting thread to make it even easier to see your stitches (and remove them if necessary).

Press all seams open before stay-stitching around the top edge of the bodice (neckline and armholes) - this will prevent the toile from stretching while you are fitting it. Press the centre back seam allowances in by 2cm - these creases will help you pin the bodice closed in the correct place. 

WHAT’S NEXT?

Tie a piece of elastic (or similar) around your natural waist. This will act as a reference point for your bodice so that you are able to check the bodice length, as well as act as a guideline to check that the bodice sits correctly.

how_to_make_a_toile_or_muslin_6

Line up the bust line on the bodice with your actual bust line (the line that runs through the fullest part of your bust - or across your bust apex / nipples), and get pinned into the bodice (up the centre back seam) with the bodice inside out. It is a really good idea to have a friend around to help you with the fitting. It can be a little tricky if you're on your own! If you are on your own, try turning the bodice around so that the centre back is at the front and pin the back seam closed before twisting it around the right way.

As the bodice doesn't have straps yet, it can be helpful to try the bodice on with the fitted jersey top on underneath. This way you can pin the bodice to the top if it's not staying up on its own! 

Get in front of the mirror and take a look.

Fitting is a process, one change will effect another part of the toile, and so on and so forth - so it is important to do your fitting in a methodical way. When working on a full garment, work from the top down - fitting the bust, the waist and then the hips. 

Check the side seam

how_to_make_a_toile_or_muslin_7

First things first, check the side seam. Is it sitting perpendicular to the elastic you have around your waist? If it is being pulled forward, it could be a sign that you need to do a FBA. 


Check the bust

Check the overall fit of the bust. The Acton is designed to be quite fitted (there is only 2cm / 1" ease at the bust).

If the bust is too small...

how_to_make_a_toile_or_muslin_8

A : If the bodice feels as if it's pulling across the bust (or you can't even get the bodice closed at the centre back), unpick the princess panels from the bust line up, and then the bust line down - releasing the fabric - but not unpicking the whole seam. Make sure you do this to both sides so you can get a correct gauge of the fit with the extra width added.

B : Measure how much your princess panels are opening up at the bust line. Measure the opening on both sides. If they are not the same, add them together and divide by 2 (to find the average), so that you add the correct amount when you do your Full Bust Adjustment (tutorial coming soon). Take note of this number, so that you can use it when doing your FBA.

If the bust is too big...

how_to_make_a_toile_or_muslin_9

A : If you have the opposite problem, and the bust area is too big, carefully pin down the princess seams, removing the excess. Do this on both princess seams, being careful to remove an even amount from each side.

B & C : Take a pen or marker and draw the new panel line on both sides of the princess panel by following the pins.

how_to_make_a_toile_or_muslin_10

A : On the bust line, on the CENTRE FRONT BODICE, measure the difference between the original stitch line and the marked line, take note of the measurement. Repeat for the other princess panel. 

B : On the bust line, on the SIDE FRONT BODICE, measure the difference between the original stitch line and the marked line, take note of the measurement. Repeat for the other princess panel. 

Add up these four measurements to find the total you need to remove from the bodice when you do a Small Bust Adjustment. 


Check the bodice length below the bust

Once the bust is sorted, it is time to check the length of the bodice.

how_to_make_a_toile_or_muslin_11

A : Measure down from the bottom edge of the bodice at the centre front seam to your waist. The bodice was designed to sit roughly 12cm above the natural waist. Take note if your bodice sits above or below the 12cm mark. In a later tutorial I will show you how to add / remove length to the bodice if your bodice is too long or too short. 

B : Measure down from the bottom edge of the bodice at the centre back seam to your waist. The bodice was designed to sit roughly 5cm above the natural waist at the back. Take note if your bodice sits above or below the 5cm mark. 

Check the bodice length above the bust

You may notice that your bodice is sitting in the right place in relation to the waist, but there may be too much (or too little) fabric above the bustline. 

how_to_make_a_toile_or_muslin_12

I have two dressforms with very similar measurements, you will notice that in photograph B the bodice sits much closer to the neckline than in photograph A. This shows that the dressforms have different proportions above the bustline only (as the bodice sits 12cm above the natural waist on both).

Work out where the problem is, do you need to remove length above the armhole? Or is the armhole sitting too close to the armpit too? (if this is the case you will need to remove length from the side seam across the whole bodice)

Remove length above the bust

how_to_make_a_toile_or_muslin_13

The best way to really work out the fit issues you have in a toile is to start cutting into your fabric and making changes. This way you can get a real idea of the changes as you make them, and hopefully save yourself from making too many toiles!

A : Cut through the bodice at the point that has too much length - this may be above the armhole, below the armhole but above the bust line, or below the bust line.*

B : Move the detached piece down until it is sitting in the correct position. Pin in place and measure how much length has been removed. 

*You may need to add length in more than one place

Add length above the bust

how_to_make_a_toile_or_muslin_14

A : Cut through the bodice at the point that is too short - this may be above the armhole, below the armhole but above the bust line, or below the bust line. (Again, length may be needed in multiple spots).

B : Take a strip of scrap fabric and pin to the lower portion of the bodice. Move the detached piece up until it is sitting in the correct position. Pin in place and measure how much length has been added.  

how_to_make_a_toile_or_muslin_15

Repeat the process of cutting and opening (or cutting and closing) to add / remove the length from the places it is needed. If you want to get a really good idea of how the new bodice is fitting, you can stitch the strips of fabric in place on the machine, before trying on the bodice again. 

Add the straps

how_to_make_a_toile_or_muslin_16

Once you have the bodice right, use thin straps of fabric (or bias binding or tape - whatever you have around) to make two "straps" (this will save you sewing up straps) and pin in place. Getting the right strap length is crucial to getting a good fit with the Acton. Make sure your straps allow the bodice to sit comfortably, and the peak of the bodice (the bust guideline) remains on the peak of your bust. Take note of the strap length so you have it for when you are making the real thing.


What's next?

If this fitting has revealed that you have lots of changes to make to the pattern, make the changes and make another toile. It is always good to check the fit of a pattern after making significant changes.

And don't worry, I won't leave you hanging now that you know what pattern alterations need to be made!

In the coming days I have the following tutorials lined up for you:

January 12 and 13 : Lengthening the bodice

January 16 and 17 : Shortening the bodice

January 18 : Full bust adjustment (FBA)

January 19 : Small bust adjustment (SBA)

January 20 : Grading between sizes


You may also like:

The Acton sew-along : Selecting your size

To kick off the Acton sew-along series, we'll be talking about selecting your size.

The Acton sewing pattern is available in sizes A - K (approximately equivalent to AU size 6-24).

TAKE YOUR MEASUREMENTS

To select the appropriate size, first take your measurements.

It is best to take your measurements while wearing only underwear, or otherwise very tight clothing, so that you can get true measurements. Get someone to help you, if you can. Otherwise take your measurements in front of the mirror, so that you can check that your tape measure remains parallel to the floor, and is not twisted, as it is wrapped around your body.

First, measure your bust and take note of the measurement. 

As the Acton has quite a fitted bodice, you should also take your high bust measurement. This will help you determine whether or not you will need to do a Full or Small Bust Adjustment. The 'high bust' is the area above your breasts and under your arms.

waist.jpg

Measure your waist... and (if you want to be able to eat in your Acton) don't suck in your tummy like me!

And then measure your hips. Make sure you are measuring your low hip (i.e. the fullest part of your hips - that includes your butt!)

BODY MEASUREMENTS

Now look at the size chart and circle where your measurements lie. Your measurements may lie across several sizes or between sizes - that's no problem at all!

Before going ahead, we need to check that you are choosing the right size for your bust measurement (you may need to select a different size to your measurements and then to a full or small bust adjustment to get a good fit).

WILL YOU NEED TO DO A FULL / SMALL BUST ADJUSTMENT?

Most indie pattern companies (including In the Folds) draft for a B cup bust. There are of course exceptions to this rule (such as Cashmerette and Colette), so make sure you check on your pattern before assuming the bust cup size.

This means that if your bust cub size is smaller than a B you will need to do a Small Bust Adjustment, otherwise known as a SBA (tutorial coming soon), and if your bust cup size is larger than a B you will need to do a Full Bust Adjustment or FBA (tutorial coming soon). 

WORK OUT YOUR CUP SIZE

Your cup size in sewing patterns may not always correspond to the bra cup size you wear. To be safe, check your measurements before deciding if you need to make any adjustments to the pattern. 

Find the difference between your bust measurement and your high bust measurement.

If the difference is 2.5cm (1") your bust is an A cup, 5cm (2") it's a B cup, 7.5cm (3") is a C cup and so on. 

CHOOSE YOUR SIZE

Now, go back to your high bust measurement and add 5cm (2"). This is what your bust measurement would be if you were a B cup and therefore the size you should be choosing from the pattern.

Change your size selection on the chart if necessary.

For example, let's say your upper bust measures 81cm (32"). Add 5cm (2") to this measurement to find out what size your bust measurement falls into on the In the Folds sizing chart (and what size you would be if you had B cup breasts). 81cm + 5cm = 86cm which corresponds to a size C. Your actual bust measurement is 89cm though - 3cm (1") larger than the cup size of the pattern. This means you will need to do a Full Bust Adjustment and add this 3cm (1") to your pattern. 

An example - looking at my measurements

I thought I'd show you my measurements and how I go about selecting my size, to give you a concrete example of this process. As my patterns do not fit me straight out of the packet! Some designers use themselves as a fit model, but I choose to use a "standard" size 10 model as a base, which means I have to make alterations to my patterns before I can get sewing too.

Bust : My high bust measurement is 82cm. I will add 5cm to this measurement to check whether or not I need to do a FBA or SBA. The result is 87cm - which puts me in a size C. My actual bust measurement is only 84cm though (not the 86cm of the size C bust measurement), which means I will need to do a Small Bust Adjustment to remove the excess 2cm from this area.

Waist : My waist measures 72cm. This is slightly bigger than the size C waist measurement (which is 71cm), so before choosing to use a size C, I will check the pattern's finished garment measurements to see if that will work. 

Looking at the "Finished Measurements" table, you can see the finished waist measurement of the size C is 81.5cm (there is about 10cm ease in the waist), which means that the fact that my waist measurement is 1cm bigger than the size C measurement, is absolutely fine.

Hips : My hip measurement is 100cm, which moves me from the size C, up to the size D. Again, my measurement is 1cm over the size D measurement, but by looking at the Finished Measurement table, I can see that again this won't be  problem due to the amount of ease in the hip, so I can stick to a D.

NOTE : The wrap on view B is deigned in such a way that there is A LOT of extra room at the hips (to allow for the wrap). If your hip measurement is only slightly outside your waist size range, I would not bother grading up at the hips (there will be ample room). If your hip size is more than a size bigger than your waist I suggest grading up. For my measurements, C at the waist and D at the hips, for the wrap version (view B), I just made a straight C (with only alterations made to the bust). 

What size to print?

The pattern has been made with embedded layers so that you can just print the size/s you need! Layers make it much less confusing to cut the right size, and also saves on ink (and paper, in some sizes). Take note of the size or sizes you need to print and then check out this post how to print and assemble your PDF pattern


You may also like : 

The Acton sew-along is coming!

I am officially back in the studio today (I did do a few sneaky hours in here last week) and getting myself and my little business organised for 2017. I am so excited about all that I have planned, with the first thing being the sew-along for the Acton, which will start this week! 

Will you be sewing along with me?

Here's the schedule so you can stay tuned to the posts you would like to see:

January 10 : Taking your measurements and selecting your size

January 11 : Making a toile

January 12 and 13 : Lengthening the bodice

January 16 and 17 : Shortening the bodice (Post 1 and Post 2)

January 18 : Full bust adjustment (FBA)

January 19 : Small bust adjustment (SBA)

January 20 : Grading between sizes

January 23 : Sewing with silk (or other slinky fabrics)

January 24 : Sewing princess seams (assembling the bodice - both views)

January 25 : Sewing in-seam pockets

January 26 : Attach the skirt to the bodice (view A)

January 27 : Inserting an invisible zip

January 30 : Making and attaching the straps (View A and View B)

January 31 : Attach the lining

January 1 : Hemming

February 2 : Attach the skirt to the bodice (view B)

February 3 : Adding the waist ties

February 6 : Finishing up (view B)

February 7 : Pattern hack - add a full circle skirt

New Pattern : The Beach Coverup - in collaboration with Peppermint Magazine

BEACH_COVERUP_cover.jpg

It just ticked over into Summer here in the Southern Hemisphere and I'm celebrating the turn of season with the release of a new pattern in collaboration with Peppermint Magazine!

If you have been following my blog this year, you would have seen the Sweater Dress we released together in Winter and then the Peplum Top that followed in Spring. And the best bit is, you can download them all for free! 

The Beach Cover-up is a simple summer kaftan with a comfortable and relaxed fit, perfect for hot summer days on the beach.

It features a scooped neck, high-low hem and an optional waist tie (that can give you a range of different silhouettes).

Through the creation of this garment you will gain confidence in:
- sewing with light-weight woven fabrics
- sewing straight seams
- sewing curved seams
- attaching bias binding
- attaching trims

Download the pattern now for free from the Peppermint Magazine website (along with heaps more free sewing patterns). 


You may also like:

New images : The Rushcutter

COVER.jpg

When I decided to do a shoot for the release of the Acton dress, I thought it would be a good time to get some images of the Rushcutter too! So today I'd show some of them too, as you may have missed the updates to the product listing.

For View A I chose to use a beautiful mid-weight denim. Really, since I made my own denim Rushcutter, it's just hard to think about using anything else!

It really holds the shape beautifully - especially the pockets - and it shows all the details really well. And I knew it would work beautifully with my model's (Caz from Useful Box) lovely red hair. So that was just a no brainer!

For View B it was a little trickier. I wanted something summery, but also something that wouldn't overtake the details. Enter cotton stripe! I am really pleased with how this one turned out. I had lots of fun playing with the stripe direction and I think overall it works really well.

The only problem was that I din't realise how sheer it was until I got it home, which meant I had to omit the in-seam pockets and my model (my sis') had to wear a nude slip underneath. Lesson learned for next time!


You may also like:

The Acton : Tester round-up

As you have probably seen by now, last week I released The Acton dress pattern. This pattern was a long time in the works, as I really wanted to fine tune my process, so there was  a lot of learning and experimenting to be done. I tested the pattern earlier this year, along with some incredible makers, and today is the day that I can finally share these pictures with you (I know they are all pumped to finally share their Actons too!) and a few of the comments that were made about the pattern.


Andreia - In a Manner of Sewing

acton_dress_inthefolds_1

"The pattern is perfectly designed and i really need to try it on a fabric that is more suited for my skills, because all the notches, pivots, seam allowances match so perfectly it´s just impossible not to enjoy sewing it."

Check out Andreia's blog (and Acton review) here


Henna - Stitch Study

"I like that you listed the pages I needed to print for my view and size. I just plugged it in and printed, and everything was there. I also like that the pattern is arranged in chunks. I have limited space for taping, so this helped tremendously."

Check out Henna's blog here


Erin - Brooklyn Pattern Co

 "What I liked about making the Acton was how well the pieces came together. It made it very satisfying to finish with all things lining up. I really nailed the CF point and that felt great."

Check out Erin's blog here


Megan - Pigeon Wishes

acton_dress_inthefolds_4

"I love the way this dress fits on a pear shape and I think the bodice is really flattering. The skirt hangs in a very elegant way and moves beautifully (I made my garment in Cupro so it feels very floaty too)."

Check out Megan's blog here


Sue - Sewin' Steady

"It's a unique bodice style for me, not falling across the natural waistline, and I think the result is flattering, helping the skirt skim across any lumps and bumps in ones midsection. I also appreciate the princess seams making it easy to adjust the fit."

Check out Sue's blog (and Acton review) here.


Shannon - Adventures in Ordinary

"Really like the shaped, paneled bodice and A-line skirt. I think it'll look good in various lengths, too (I have a maxi-length in mind next!)."

Check out Shannon's blog here.


Katina - I'm Not Tina Wheeze

"I like the option of having the sizes on different layers (although I didn't use it because I got my husband to print it for me this time and didn't want to complicate the request). I also really like the way the pieces were arranged so you could just tape together the pattern parts that you needed."

Check out Katina's blog here


Helen - Helen's Closet

"The Acton dress is very figure flattering and comfortable to wear. I can even wear it bra-less because I chose a heavier fabric! The length is very nice, not too short or too long. I love the princess seams and the tiny straps. The way the straps angle up towards the neck is beautiful."

Check out Helen's blog here


Kate - Sewing with Kate

"I enjoyed the second version much more. It came together very quickly. I have never sewn a princess seam bodice before. I thought it would be hard. It wasn't!"

Check out Kate's blog (and Acton review) here


Caz - Useful Box

"Emily - I love your patterns and how they fit together. Especially how the corners are prepared and then fit together nicely. It reminds me of all my pattern making classes at college. They appeal to my logical brain! ... I love the princess bust line - that fits me perfectly. I also love how the bodice to waist seam is so flattering. I also love there is lots of room in the skirt for hips and bumpy tummies. Also love the pockets - everything should have a pocket!"

Check out Caz's blog here


Åsa Maria - Made by A M Borg

"I especially like the a-line skirt and the narrow neckline and the shape of the bodice. I feel very comfortable in this "shape". Looking forward to summer here in Norway so I get to use it. It's way to cold here now."

Check out Åsa Maria's blog (and Acton review) here. 


Suzanne - Dressed in Pretty Little Things

"The Acton dress is exactly what I have come to expect from an indie sewing pattern, well executed with a whole lot of love and attention behind it... I really like the fit of this pattern, being bigger busted I normally avoid higher necklines and under bust seams as they normally sit on top of my bust. But this a beautifully drafted pattern."

Check out Suzanne's blog here


Sarah Walker 

acton_dress_inthefolds_12

"I love bodices that are shaped with seams rather than darts - somehow just more satisfying to sew. And the lined bodice meant sewing was quick as you didn't need to worry about finishing seams... I love the design - it's actually different, rather than another fit and flare dress, and the instructions strike a good balance between explaining the steps and understanding nobody wants to spend half of their sewing time reading!"


Marie-Fleurine - Sew Marie Fleur

"The fit is great, I love having the pattern both with and without seam allowances and the instructions are detailed. It's definitely one of the indie patterns with high quality fit and instructions."

Check out Marie-Fleurine's blog (and Acton review) here.


Cindy - Caliana Design

"It is super detailed and each notches line up perfectly. As I made my muslin and my final dress, I thought how quick and simple it seemed to be when I was sewing it together. After the initial fit issues, I was able to complete the dress in less than 2 hours, kids interruption included ;)."

Check out Cindy's blog here.


Lilith - Old Maiden Aunt

**Lilith added an extension to the bodice. This section is not part of the pattern.  

"I learned a couple of things about curved seams as it's my first time sewing a fitted bodice that joins a curved line to a straight line (joining the two front bodice pieces together) - it creates a really flattering fit!"

Check out Lilith's blog here

Think you'd like to make yourself an Acton? Take a look at the product listing


You may also like:

The Acton pattern is finally here!

I am so excited to let you know that the Acton pattern is finally here!

For those of you who have been following along with me for a while, you will know that this lady has been in the works for a long time! But I must say that after all the hours spent on it, I couldn't be happier. She is a real beauty and I am ecstatic to be sharing her with you today.

The pattern is available in 10 sizes, from bust 76cm (30in) - 131cm (51.5in). 

View A features a fitted bodice with a low back and thin shoulder straps. The skirt is A-line, and includes (optional) in-seam pockets in the side seams.

View B features a fitted bodice with racer-back and thin shoulder straps. The skirt is a wrap that can be tied in a number of ways to achieve different silhouettes.

By working through this pattern, you will gain confidence in: achieving a great fit, working with tricky fabrics, sewing princess seams, inserting an invisible zip and lining a garment. 

I also chose to do things a little differently this time, and decided to illustrate the instructions (after I learned that the general consensus is for illustrations instead of photos). 

Check out the pattern now.


You may also like: 

How to : Lengthen a pattern

inthefolds_lengthen_a_pattern_1

You may have seen that earlier this week I did a post on "How to Shorten a pattern," so today I thought I'd do a post on how to lengthen a pattern! The principle is exactly the same, you just need to add access length, instead of removing it. 

As I said in the previous post, sometimes you can simply add some length to the hem of a garment, I would use this method in the case of a straight skirt, sleeve or trousers. But there are times when you may want to add the excess length to the interior of a pattern piece, so that the piece still fits properly with the rest of the pattern. For example, if you wanted to lengthen a sleeve that had a cuff, you wouldn't want to just add the extra length to the bottom. You would be extending the length of the placket too, and maybe even changing the shape of the sleeve overall. This is also the case if you have a pattern with an interesting shape - such as an A-line dress. You would not want to just add the extra length to the bottom of an A-line dress, as you could end up with a shape far more extreme than you anticipated!

For the case of the example, I will use the simple summer top pattern I showed you how to draft a few weeks ago

Trace the original pattern

inthefolds_lengthen_a_pattern_2

Take a copy of the pattern, with seam allowance. Normally when making alterations to a pattern I suggest to remove the seam allowance, but with something as straight-forward as this, there's really no point removing it. Take note of any important details, such as pattern markings (notches etc.) and the grainline.

inthefolds_lengthen_a_pattern_3

Draw a horizontal line through the pattern, roughly half-way between the armhole and the hem, on the side seam. If you are using a ready-made pattern, it is likely that your pattern will have a "Lengthen and shorten line" already on it, so you can skip this step. 

inthefolds_lengthen_a_pattern_4

Cut through the horizontal line, splitting each piece in two. 

Add paper to compensate for excess length

inthefolds_lengthen_a_pattern_5

Work out how much length you would like to add to the pattern. This is when a toile can really come in handy!

For the sake of this example, I will be adding 5cm (2") to the length of the top.

Take two small pieces of pattern paper (this is a great way to use up those scraps of paper you have laying around) and stick  to the back of the top half of both your pattern pieces (ensuring you have enough room below the pattern piece to add the excess length).

inthefolds_lengthen_a_pattern_6

On the paper that you just attached, draw a horizontal line 5cm (or whatever length you are adding) down from the cut line (parallel to the bottom edge of the pattern). 

inthefolds_lengthen_a_pattern_7

At this stage you can also extend the centre front and centre back lines of both your pattern pieces onto the attached pieces of pattern paper (if your pattern doesn't include the centre front or centre back - for example, on a sleeve - you can just extend the grainline).

Add length

inthefolds_lengthen_a_pattern_8

Take the lower pieces of your pattern, and using the lines as guides, stick the pieces in place on the paper.

Re-trace pattern

inthefolds_lengthen_a_pattern_9

Take a separate piece of pattern paper and trace the new pattern pieces, creating a new side seam that runs smoothly between the underarm and the hem. 

Finalise the pattern

inthefolds_lengthen_a_pattern_10

Be sure to add all pattern markings, as well as the grainline. And you're done!


You may also like:

How to : Shorten a pattern

inthefolds_shorten_pattern_1

There are times you are going to want to shorten or lengthen a pattern, and I thought I'd show you how to do that today.

Sometimes, you can simply cut off some length from the hem of a garment, but there are times when you may want to remove (or add) the excess length to the interior of a pattern piece, so that the piece still fits properly with the rest of the pattern. For example, if you wanted to shorten a sleeve that had a cuff, you wouldn't want to just lop the excess off the bottom. The sleeve would no longer fit the cuff correctly, and you could also lose important details like the placket position. This is also the case if you have a pattern with an interesting shape - such as an A-line dress. You would not want to just cut the excess off the bottom of an A-line dress, as it is likely you would lose the shape of the A-line. 

For the case of the example, I will use the simple summer top pattern I showed you how to draft a few weeks ago

inthefolds_shorten_pattern_2

Take a copy of the pattern, with seam allowance. Normally when making alterations to a pattern I suggest to remove the seam allowance, but with something as straight-forward as this, there's really no point removing it. Take note of any important details, such as pattern markings (notches etc.) and the grainline.

inthefolds_shorten_pattern_3

Draw a horizontal line through the pattern, roughly half-way between the armhole and the hem, on the side seam. If you are using a ready-made pattern, it is likely that your pattern will have a "Lengthen and shorten line" already on it, so you can skip this step. 

inthefolds_shorten_pattern_4

Cut through the horizontal line, splitting each piece in two. 

inthefolds_shorten_pattern_5

Work out how much length you would like to remove from the pattern. This is when a toile can really come in handy!

For the sake of this example, I will be removing 5cm (2") from the length of the top. On one of the pieces, draw a horizontal line 5cm (or whatever length you are removing) from the cut line (parallel to the cut line). 

inthefolds_shorten_pattern_6

Now, simply move the lower half of the pattern up to the line drawn on the upper half of the pattern and tape (or glue) in place. 

inthefolds_shorten_pattern_7

Take a separate piece of pattern paper and trace the new pattern pieces, creating a new side seam that runs smoothly between the underarm and hem. 

inthefolds_shorten_pattern_8

Be sure to add all pattern markings, as well as the grainline. And you're done!


You may also like:

Pattern hack : Add sleeves to the peplum top (or any other sleeveless top pattern)

You may have seen (or even already made) the Peplum Top that I released a couple of months ago in collaboration with Peppermint Magazine.

When it was first released, a number of people asked whether sleeves could be added, and I thought it would be a great tutorial to do, as I'm sure for a lot of you there are sleeveless patterns you would love to add sleeves to. This tutorial will walk you through adding sleeves to this particular pattern, but could be used for almost  any sleeveless pattern.

Why can't you just add a sleeve to a sleeveless pattern?

It's not a difficult process, but unfortunately it's not as simple as just adding a sleeve to the sleeveless top and hoping for the best. Above I've drawn two very basic tops - one with sleeves and one without. You can see that the armhole on each pattern is not the same. 

When you place one pattern on top of the other, you can clearly see this difference (which is highlighted in red on the illustration on the right). If you were to put a sleeve on the sleeveless top, without making any changes to the armhole, the sleeve would have to reach across the difference (the red area), which would leave you with an awkward looking garment and an ill-fitting sleeve. 

To rectify this, you will first need to change the armhole on your front and back pattern pieces, and then you will be able to fit the sleeve.

For this tutorial you will need a sleeveless top pattern as well as another top (or dress) pattern that has sleeves that you like the fit / style of. 

Trace a copy of the pattern

Trace a copy of your sleeveless top pattern without seam allowance (it is much easier to make alterations to a pattern without seam allowance). Mark any design features and notches.

The Peplum Top pattern has a seperate shoulder panel. To make this alteration easier, you will need to reattach the shoulder panel to the front and back pieces (I will show you how to get it back later on in the tutorial). To do this, draw a line (or fold a line) through the middle of the shoulder piece and cut the piece in half. Label each piece so you don't get them mixed up - as they are very similar in shape. 

Attach the shoulder panel pieces to the front and back of the top, so that you have to complete pieces - the front and the back. 

Take the front and back pieces from your other pattern (the one with sleeves) and place on top of the sleeveless pattern pieces, lining up the centre front / centre back, shoulder seams and side seams (as close as you can). This is when transparent paper helps!

Use weights to hold pieces in place.

Trace the pattern

With a fresh piece of pattern paper, trace the lines from each pattern piece needed for the new pattern. Begin by marking the centre front and centre back - taking the lines from the original (sleeveless top) pattern.

Next, trace the front and back neckline - using the lines from the original pattern. 

Re-draw the shoulder seam - starting at the neckline end of the seam on the original pattern (sleeveless top) and joining with the end of the shoulder seam from the second pattern (top with sleeves). This will ensure that the neckline binding still fits the neck of the top, whilst the sleeve will fit in the armhole. 

Trace the armhole curve from the pattern with sleeves - being sure to also transfer the sleeve notches. 

Transfer the side seam - starting at the new armhole and joining to the side seam of the sleeveless pattern at the hemline. Trace the original hemline. 

Before removing the pattern, transfer the shoulder panel lines onto the new pattern. 

You now have the pattern with armholes ready for sleeves!

Re-create the shoulder panels

You will need to re-cut the panel lines to re-create the shoulder panel pieces. Before cutting through the lines, add notches to the panel lines on both the front and back (you can transfer notches from the original pattern if you like).

Seperate the shoulder panels from the main front and back pieces. 

Re-attach the front and back shoulder panel pieces at the centre line, before tracing a new copy of the piece onto a seperate piece of pattern paper. Use a smooth curve down either side to remove any sharp points.

Complete the pattern by adding seam allowance to each piece. You will be able to use the original pattern to transfer the seam allowance to the hem, side seams and neckline. You will need to add seam allowance on your own to the armhole, shoulder panel and sleeve - this tutorial will help with that!


You may also like:

Pattern release : The Peplum Top

You may have noticed that recently I have been releasing seasonal patterns in collaboration with Peppermint Magazine.  

The first one I made was a sweater dress (perfect for those of you in the northern hemisphere) and then just recently our Spring pattern was released - a nice little peplum top, perfect for warm summer days. 

The best bit about this collaboration, is that the patterns are free! You can just jump on their site, browse through their pattern archive and take your pick.

This pattern is a nice easy one - sewing up beautifully in light-weight summer fabrics like cotton, linen, silk or viscose/rayon.

Perhaps my favourite thing about this pattern is the v-neck back. The pattern includes a bias cut pieces to help you get a really nice finish on the 'v,' without too much fiddling.

Think this top is for you? Download it for free now!


You may also like:

Are you a photographer or illustrator who loves sewing?

As a lot of you would know, I recently hit my one year in business milestone. I'm one of those people who, when I hit some kind of big milestone - whether it be a birthday, ten years since finishing high school (this year.... ahhhhhhh!!), even just new years eve, I can't help but look back and reflect on the time that has passed. Which means that this last few weeks has included a lot of reflection time as I think about how far this little business has come, as well as what hurdles I need to overcome to keep this little gal going. 

The main thing that keeps coming to mind is that I just can't do it all. No matter how much I think I can, no matter how diligent I am, no matter how many hours I work, I just cannot do it all, and I think that (maybe) I have finally accepted that. If I want this business to grow, it can't be up to me to do every little task involved in the process. There is truly not enough hours in the day, and to be honest. I started 2016 thinking I could release 6 patterns in the year. You may have noticed that I have not even released one (except for a couple of patterns in collaboration with Peppermint Magazine)! Obviously something is not working how it should.

As some of you may have read on social media, I recently held a photo shoot for my upcoming pattern (which is coming in two weeks! Yay!) The photos look great and I am really pleased with how it went, but all the photos need a little retouching. Nothing major... a bit of overall brightening up, removing a bra strap here, some stray hairs there etc. My first thought was 'I am sure I could work out how to do it myself.' Although I can use Photoshop, I am by no means an expert, but generally if I apply myself (and watch a tonne of YouTube videos and read a few blogs) I can work most things out. And then I really thought about it. I could spend days learning how to do it and days actually retouching the photos, and at the end, they probably wouldn't even be that good. Because, as I said, I'm not a pro. And that's when I realised I really had to change my mindset about these things get serious about finding someone to help me do the job. I jumped online, scoured the internet for possibilities and found a company I was happy with. Then they edited the photos (for not too much money at all) and I saved myself hours of frustration and heartache. Job done!

This little transaction made me realise that with the growth of online freelancing sites like Air Tasker, Freelancer, Upwork etc. there just has to be people out there in the world that have the skills to help me with some of the tasks that make up my business. And that is why I am coming to you!

I have been thinking about all the jobs I do in a day, and have been trying to think about the things that are really important that I do myself (blogging, social media posts, designing, pattern making, writing pattern instructions) and those that just aren't (illustrating pattern instructions, photographing sew-alongs, cutting samples, sewing samples) and trying to work out how to get help with the steps I need so that I can focus on other things. I have put a couple of positions on a freelancing website, and then it occurred to me that I should also ask here. I know a lot of you are great sewers, but I don't know what your other talents, hobbies or jobs are, and maybe it's illustrating or photograhy! (Which are the two things I am looking for help with first) 


So if this sounds like something that may interest you, read on ...

Illustrator - technical illustrations needed for sewing patterns

I am currently looking for someone to help with the technical drawings that accompany the instructions for my patterns. The illustrations need to be created in Adobe Illustrator as I would want access to the original files so that I could tweak them if necessary. 

Each pattern requires around 40 - 60 illustrations - depending on the complexity of the pattern. I have previously done the illustrations myself so will hand over my illustrations for reference (as they need to be in the same style for the sake of consistency) as well as a document with all the strokes etc. that I want used. I really need to them to be at the same level as they are currently (or to a higher standard).

The complexity ranges, depending on the step - some being quite simple and only taking a few minutes, while others take a bit longer. I will provide digital copies of the pattern pieces, which I find are handy to start the illustrations with, as well as photographs of each step of the process for reference. I will also provide written instructions to make it very clear what each illustration needs to include.

I am really hoping to find someone who I can work with on an ongoing basis. I would like to get started straight away with 1-2 patterns that are ready to go, but I plan to release patterns regularly in the new year and having someone reliable, who I can count on to do this work to a high standard is my ultimate goal.

Is this something you might be interested in?
- Great sewing and construction knowledge is required
- You will need to have strong Illustrator skills
- Job will be done remotely through email communication, so I really need someone trustworthy and reliable
- You need to have a great eye for detail and the ability to understand a brief
- I want the illustrations to be drawn in the same style that I have done so far so that things remain consistent for my brand - so you must be able to do this

If you want more examples of the kind of illustrations I am talking about, please check out the free pattern I released with Peppermint Magazine a few months ago. 

I would love to work with someone who loves sewing as much as I do, is friendly, organised and willing to go the extra mile to do a great job. If this sounds like you and you have all the skills previously mentioned, please get in touch (email hello@inthefolds.com) telling me a little about yourself, why you think you´d be a great fit for this project and some examples of your work.


The second thing I am looking for is a little trickier. I am not sure if I will find the right person for this one, but I did want to put it out there to see! 

Photographs required for sew-alongs

I am looking for someone to take step-by-step photos for tutorials on my blog (as well as an aid to the illustrations that are created for pattern instructions).

I am currently taking the photos myself, but don´t have a great set-up, so would love to find someone who has the set-up, skills and creativity to take some really great photos for the blog.

I would provide the freelancer with the pattern and fabric (or we could discuss you purchasing the fabric at my expense), as well as written instructions and you would need to make the garment, taking clear and beautiful photos of each step in the process. Some of my patterns can be quite tricky, so you will need to be a great sewer. 

I am really hoping to find someone who I can work with on an ongoing basis. I would like to get started straight away with one pattern that is ready to go, but I plan to release patterns regularly in the new year and having someone reliable, who I can count on to do this work to a high standard is my ultimate goal.

Is this something you might be interested in?
- Great sewing and construction knowledge is required
- You will need to have strong sewing and photography skills
- Job will be done remotely through email communication, so I really need someone trustworthy and reliable
- You need to have a great eye for detail and the ability to understand a brief

Photos would need to be up to the same standard (or preferably of a higher standard) that I currently have on my blog. I don't really mind where you are based as it could all be done online through email and the occasional Skype call. 

If it sounds like you tick all the boxes, please send me an email (hello@inthefolds.com) telling me a little about yourself, why you think you´d be a great fit for this project and some examples of your work / link to your blog.


YOU MAY ALSO LIKE: