pdf sewing pattern

New pattern : Introducing the Collins Top

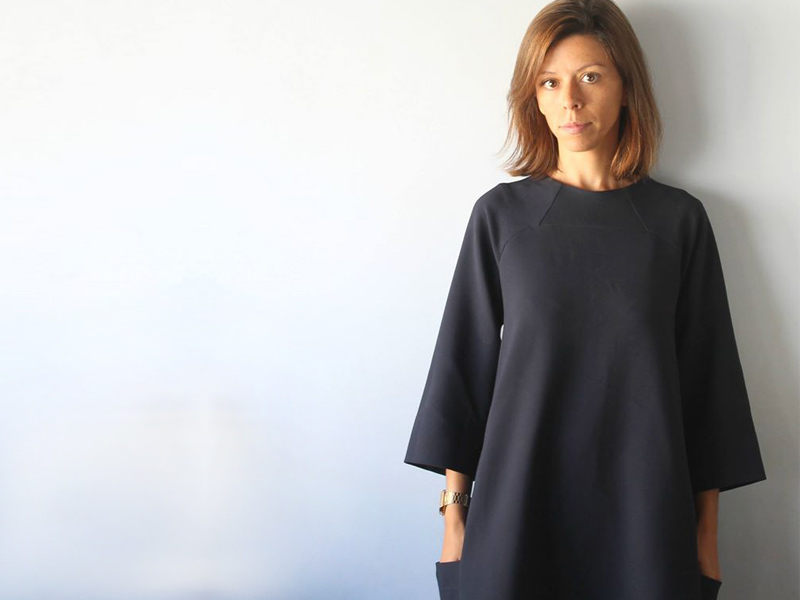
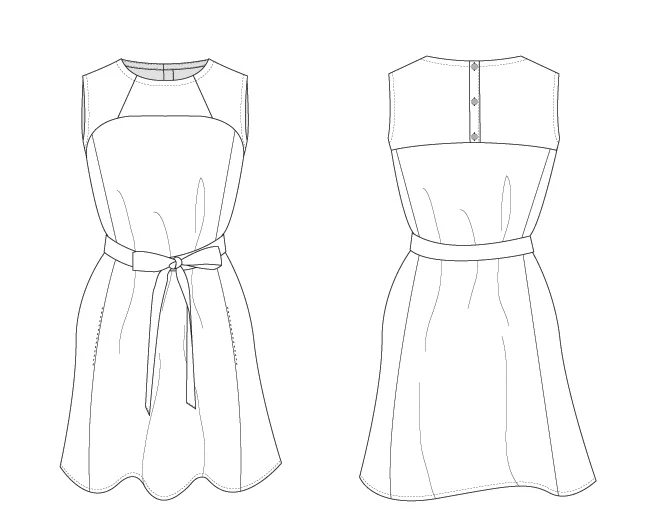
I am so excited to be here telling you all that my new pattern is here! Meet the Collins Top -  a loose-fitting trapeze-shaped top designed for woven fabrics. 

The Collins top is It is A-line in shape, perfect for hot summer days. It features a round neck, panel lines, a high-low hem and a centre-back opening, with a button and loop closure.

Due to its length, the Collins Top is the perfect top to pair with skirts or trousers that sit on or above the natural waist.

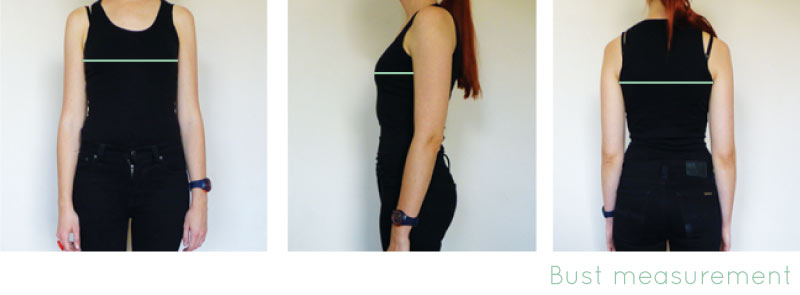
As always, this pattern is available in 10 sizes, from bust 76cm (30in) - 131cm (51.5in).

What I am most excited about when it comes to the Collins Top is that I designed this pattern specifically for beginners. Okay, I know, I know, there are a lot of pattern pieces and panel lines (I really can't help myself, can I?), but I believe that if you have mastered sewing a straight seam and a curved seam, you can make the Collins. Also, due to the loose nature of the top, there are not too many fitting issues to worry about (possibly just a full bust adjustment), which makes it even more beginner friendly! And, although I designed it specifically for beginners, it does not mean that you more seasoned stitchers won't enjoy it too. It is a really fun pattern to sew up, and lots of room to play! 
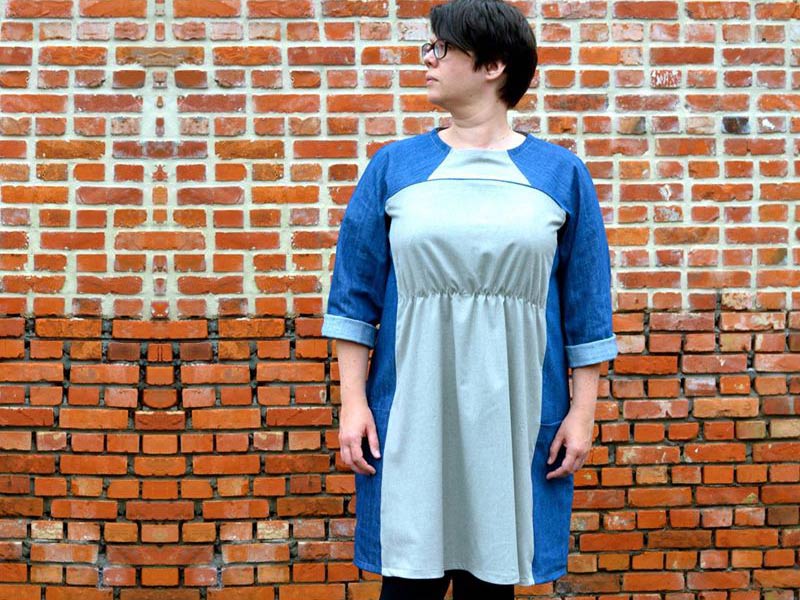
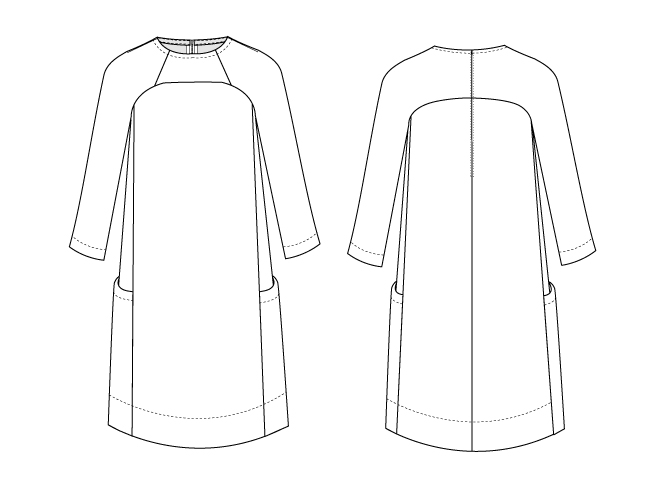
View A

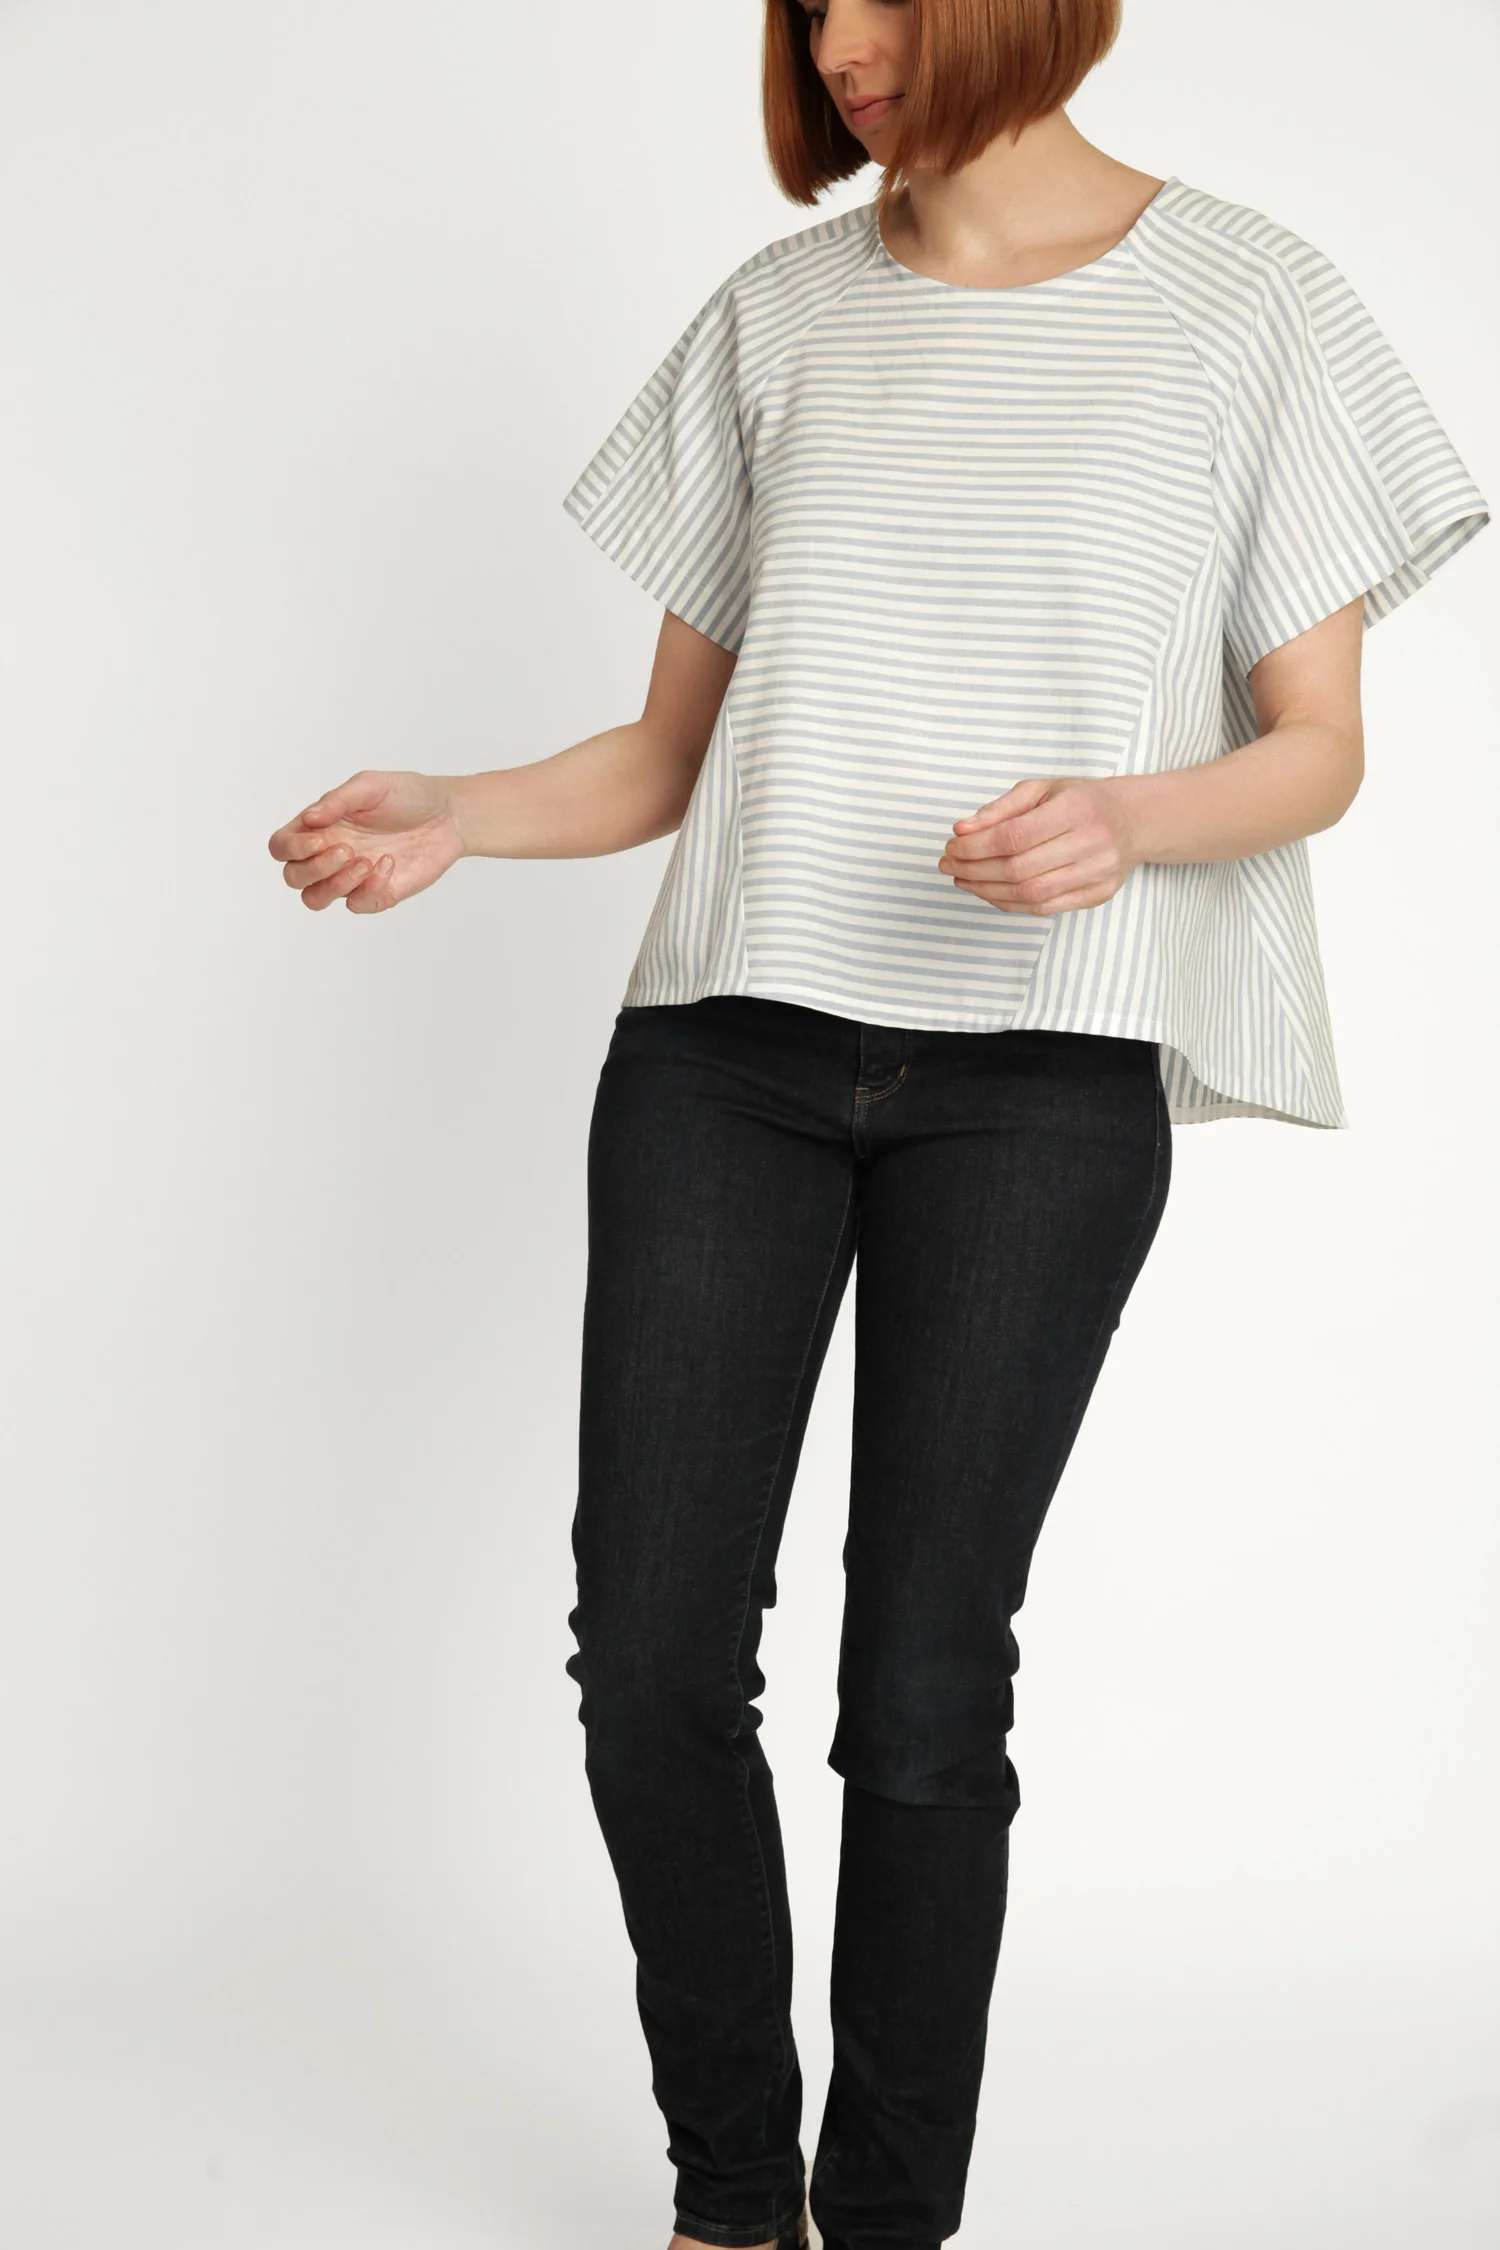
The Collins top (view A) has a three-piece raglan sleeve with some extra volume, which creates a fun and interesting shape. Due to the nature of a raglan sleeve, there is no sleeve setting in required (it is all done flat), so it comes together really quickly and easily. 

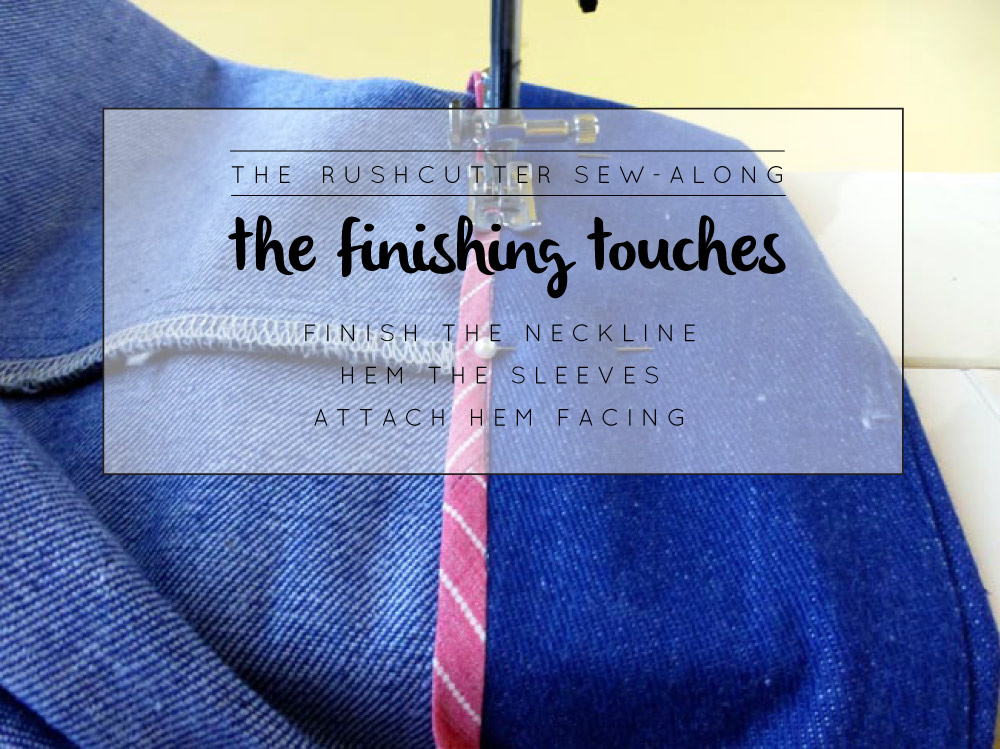
The neckline is finished with bias binding.

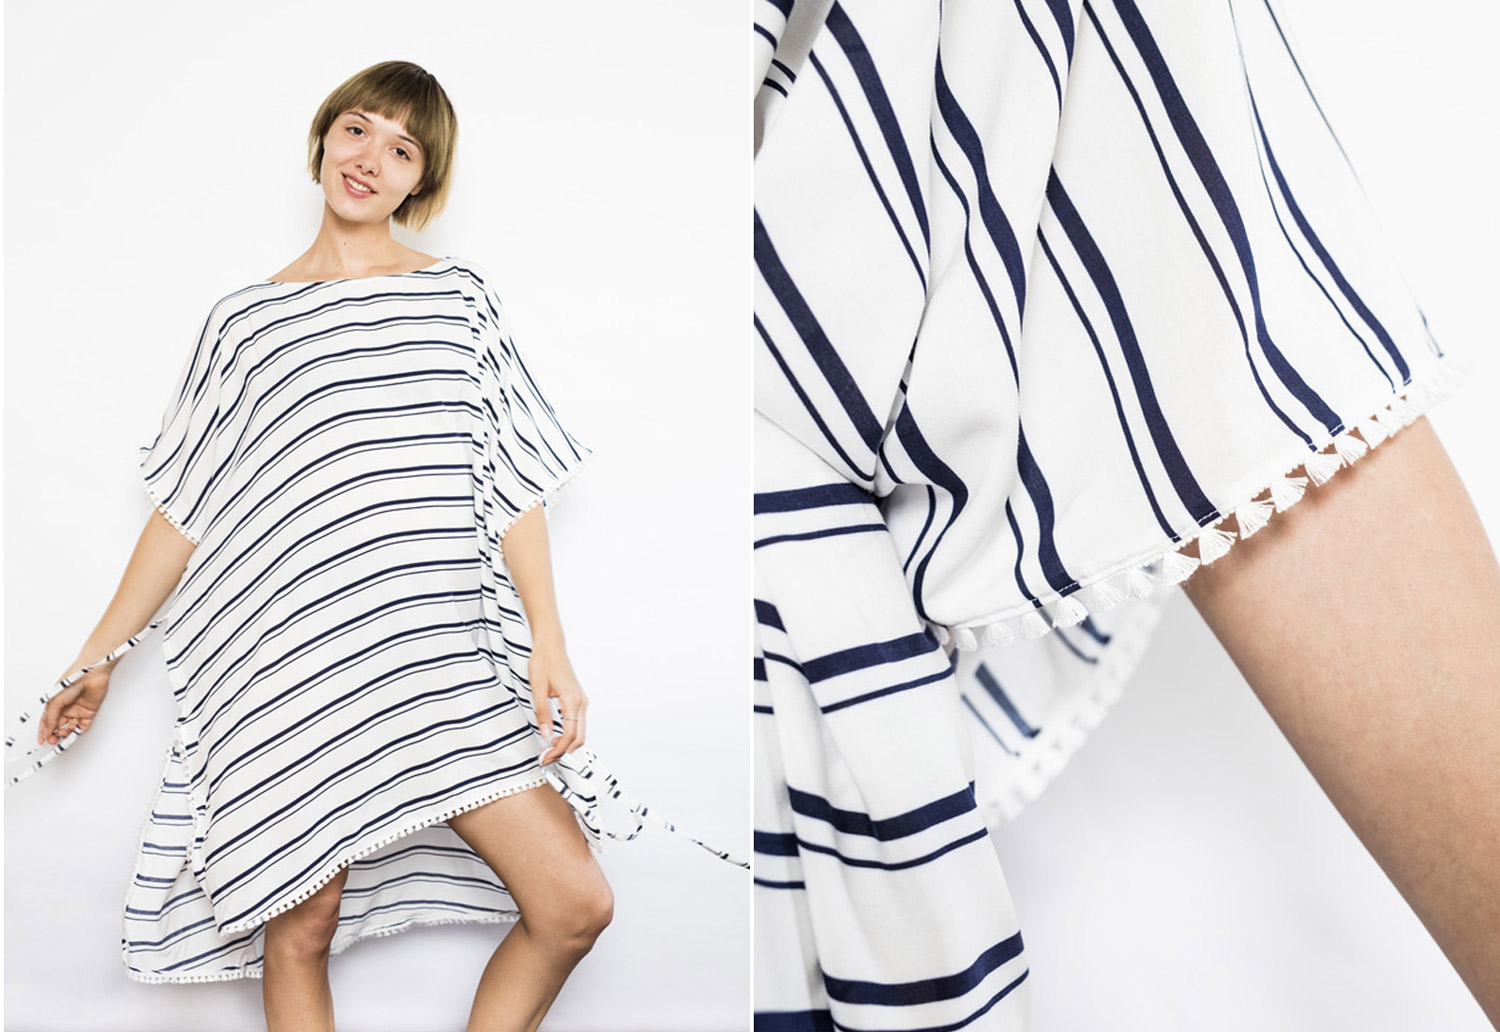
As you can see in this sample, this pattern leaves a lot of room for playing with stripes (or colour blocking), which really highlights the panel lines in the design. As I knew this was something a lot of you would get excited about, I created a little template that you can download for free and experiment with your ideas of colour blocking and stripe direction, before cutting into your fabric. Download it now. 
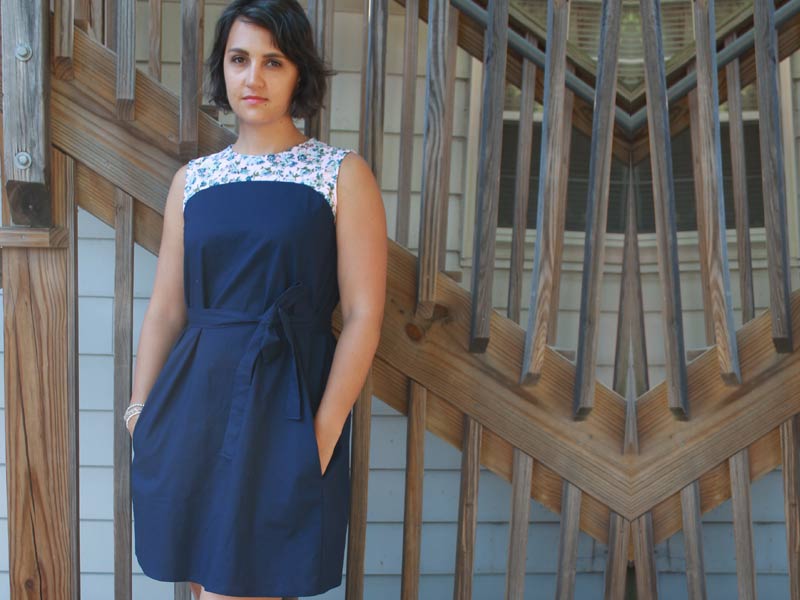
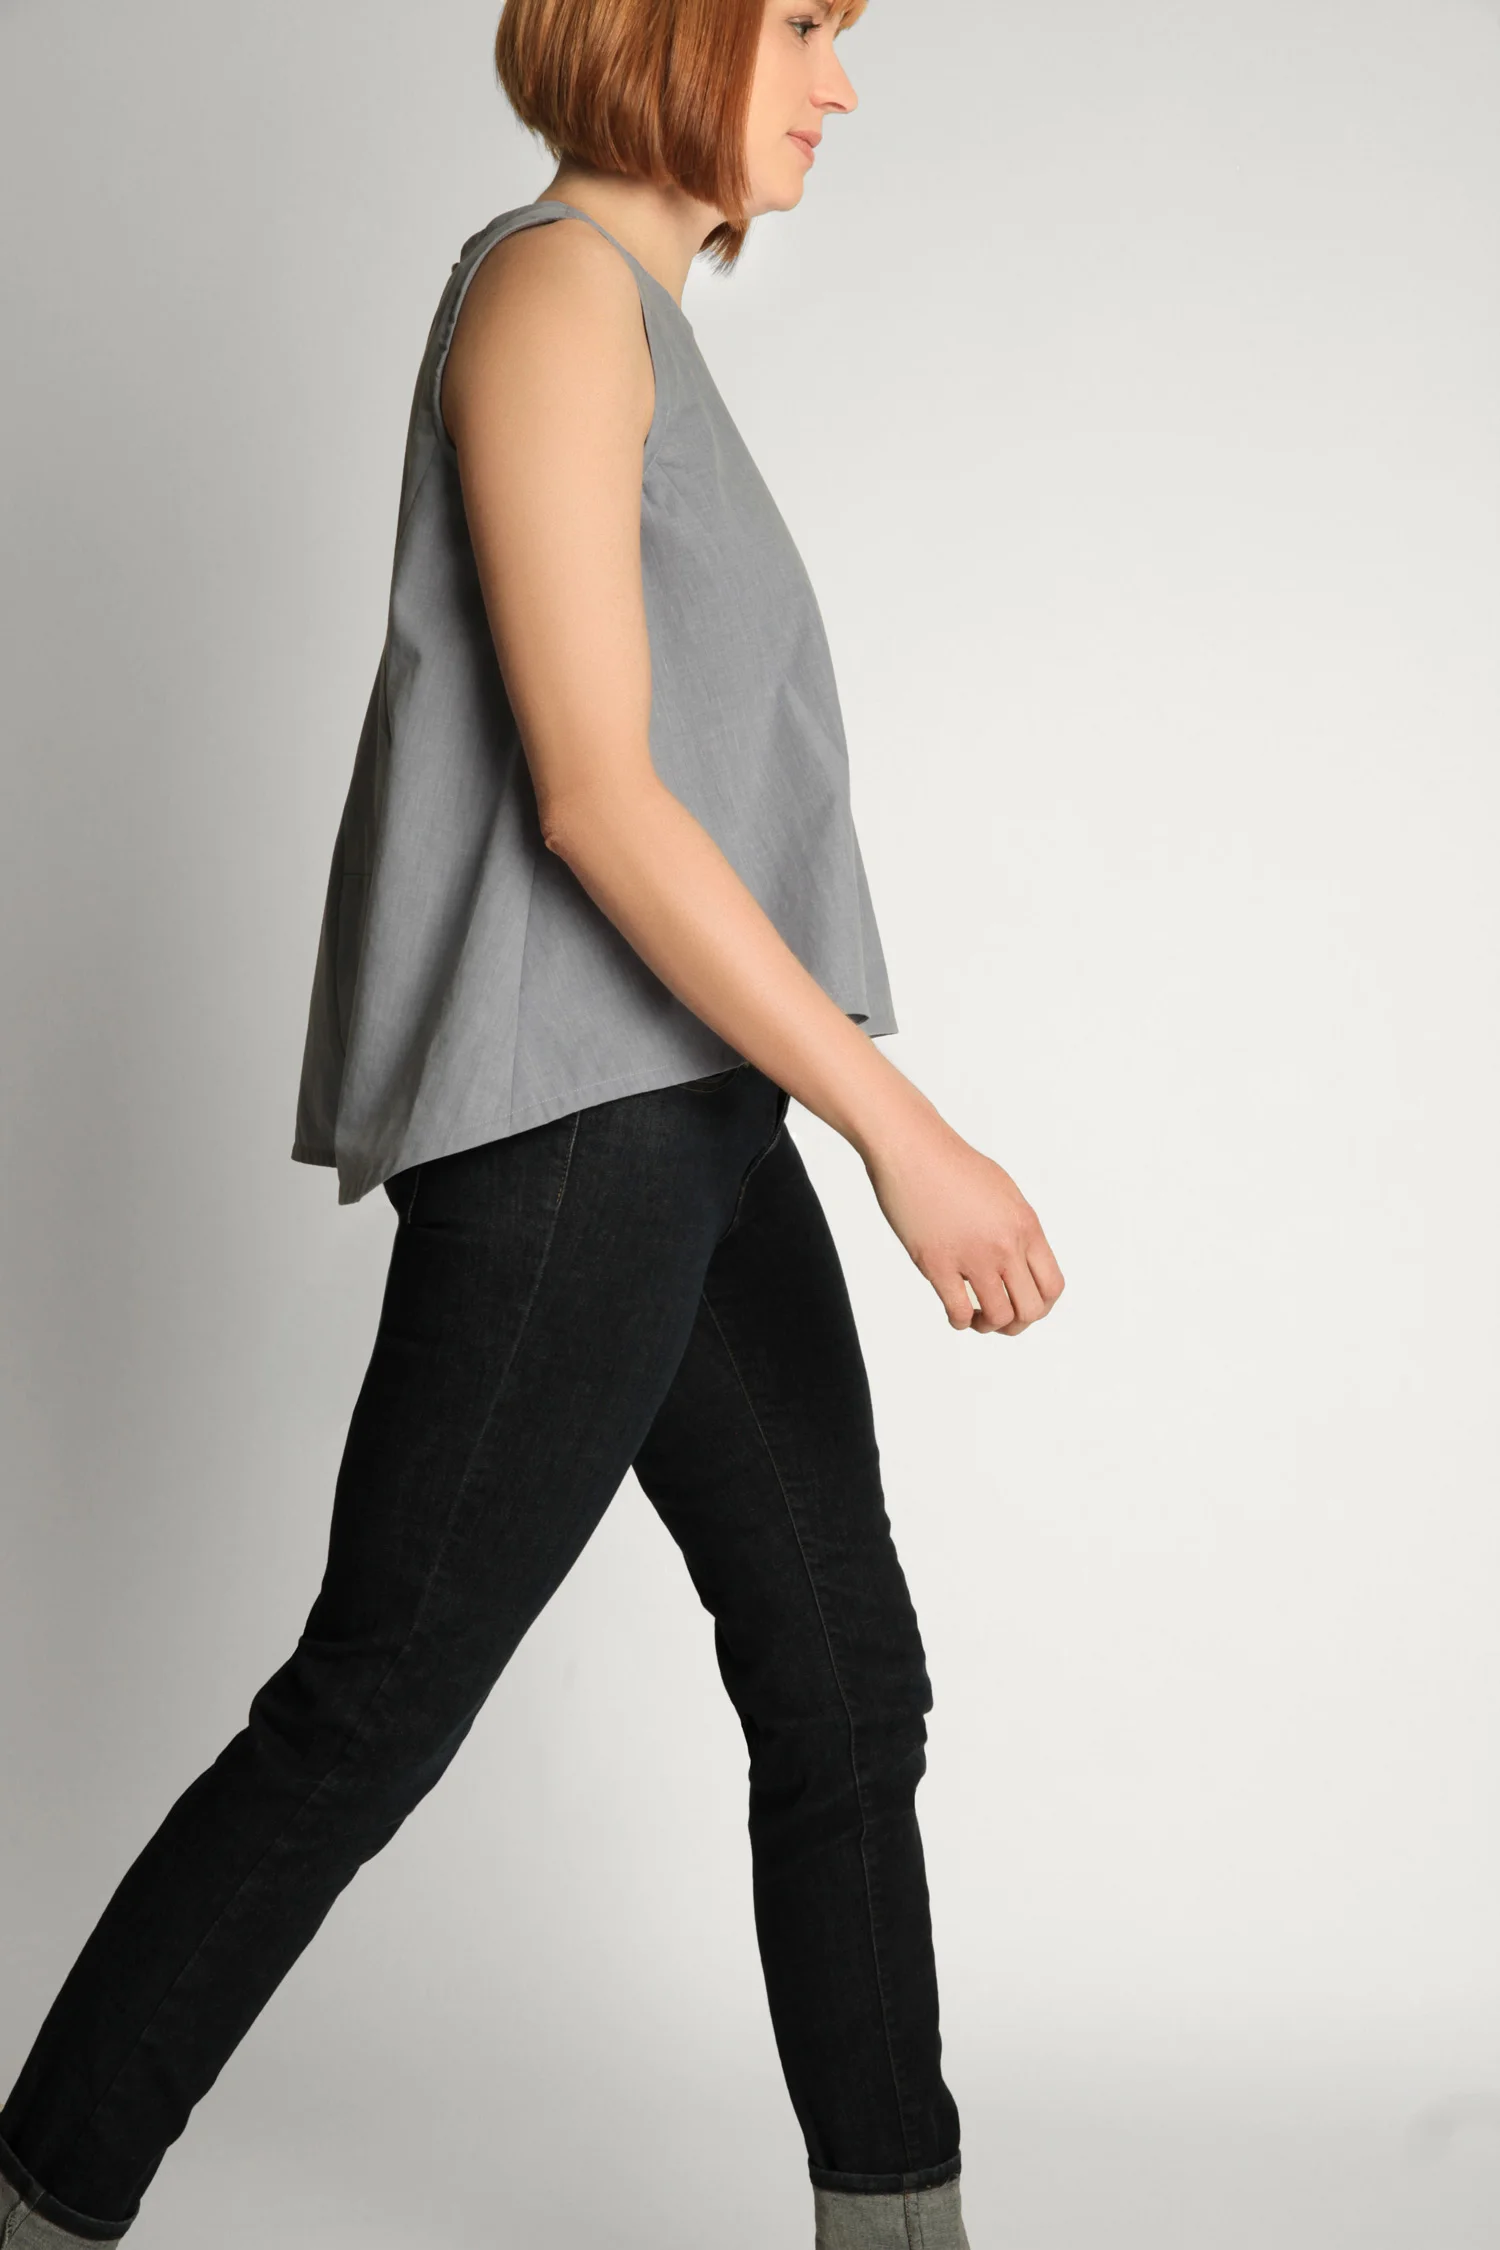
View B

The Collins top (view B) is sleeveless and the neckline and armholes are finished with an all-in-one facing for a really clean and professional finish. 

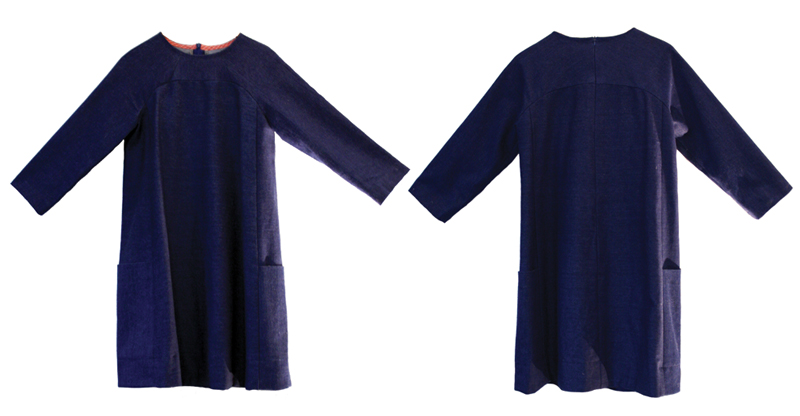
The Collins top is compatible with a range of different fabrics. Your choice of fabric will dictate the silhouette you achieve. Consider using light to mid-weight fabrics such as: linen, linen blends, cotton, gauze or chambray. For a softer silhouette, consider sateen, silk (crepe de chine or habotai) or viscose (rayon). These two versions were made from cotton, so I can't wait to share all the tester versions next week, so you can see the range of silhouettes you can achieve with this pattern!

Learn more about the pattern and grab your copy here. 

What do you think? I'd love to hear your thoughts about the new member of the In the Folds pattern family


You may also like:

New Pattern : The Beach Coverup - in collaboration with Peppermint Magazine

BEACH_COVERUP_cover.jpg

It just ticked over into Summer here in the Southern Hemisphere and I'm celebrating the turn of season with the release of a new pattern in collaboration with Peppermint Magazine!

If you have been following my blog this year, you would have seen the Sweater Dress we released together in Winter and then the Peplum Top that followed in Spring. And the best bit is, you can download them all for free! 

The Beach Cover-up is a simple summer kaftan with a comfortable and relaxed fit, perfect for hot summer days on the beach.

It features a scooped neck, high-low hem and an optional waist tie (that can give you a range of different silhouettes).

Through the creation of this garment you will gain confidence in:
- sewing with light-weight woven fabrics
- sewing straight seams
- sewing curved seams
- attaching bias binding
- attaching trims

Download the pattern now for free from the Peppermint Magazine website (along with heaps more free sewing patterns). 


You may also like:

How to print and assemble your PDF sewing pattern

ASSEMBLING PDF HEADER.jpg

Today in the Rushcutter sew-along, it's time to print out our PDF pattern!

Some of you may already have the printing, trimming and cutting of PDF patterns down to a fine art, but for those of you who hear the phrase 'PDF pattern' and shudder, I'm going to show you that it's not too bad at all!

Opening the file

Download the pattern to your desktop and save it (this way you will be able to access it whenever you want).

The file is a zip file. This reduces the size of the file so that all elements are compressed together and can be delivered to you quickly. You will need to open (or unzip) the compressed folder so that you can access what’s in the folder.

When you buy the Rushcutter dress pattern, you will receive four different files inside the pattern folder:

  • A read me file that gives you an introduction to what is included in the pattern

  • The pattern - in both print-at-home (A4 / US letter size) and copy shop format (A0 / US 36” wide printing)

  • The instruction booklet

Screen Shot 2021-06-03 at 3.29.54 pm.png

Open the PDFs in your preferred PDF viewer. I use Adobe Acrobat (if you don’t have it, you can download it for free here).

How to use layers

The pattern has been designed to have layers embedded. This means that you can select only the size (or sizes) you would like to print. Layers make it much less confusing to cut out the pattern, and also saves on ink (and paper in some cases).

Artboard 1.jpg


When you have the pattern file open in Adobe Acrobat, look to the left hand side of the screen. You will see a vertical panel with a few options available. Click on the icon that is called ‘Layers’ (third one down). This will open up your layers panel, so you can see what layers are available in the file.

LAYERS.jpg

You will see that there is a separate layer for each of the available sizes. The ‘PATTERN INFO’ layer has all the elements that are the same between sizes, such as the page numbers, the pattern key and the grainlines and pattern labels. There is an eye icon next to each layer, and this lets you know whether the layer is visible or not.

LAyers-cropped.png

Turn off (by clicking on the eye) all the layers you don’t require. Remember to keep the ‘TAGS,’ ‘GRID’ and ‘PATTERN INFO’ layers on for all sizes.

Printing the pattern

Before printing the file, you will need to check the scaling settings on your printer.

PRINT BOX.jpg

You want to print the pattern at its true scale (the scale it was designed in). To do this, go into your print settings and select “actual size” or set page scaling to ‘none’ or ‘turn off page scaling.’ The wording will depend on your printer and the program you are using to view your PDF.

Checking scaling

IMG_4710.JPG

Print only Page 1 of the pattern, and check that the test square measures exactly 5cm x 5cm or 1in x 1in. It really needs to be precise, so if it is not quite right, you will need to go back and check your printer settings again. 

Check both the vertical and horizontal measurement of the test square, to ensure the scaling is right in both directions.

When you have the scaling right, you can print the remainder of the pattern. In some cases, you won't need to print all the pages. This will depend on the size and style you have chosen to maker. There is a printing plan in the instruction booklet that you can refer to before printing.

Assemble the pattern

Cut around the border of each page - one long side and one short side (keep your choice of sides consistent between pages).

ASSEMBLE PDF CIRCLES.jpg

Align the circles so that 1A matches up to 1A, 2A with 2A etc, and tape or glue in place.

Continue working along the columns and rows until you have attached all pages. Loosely cut around each pattern piece required so that the pieces are easier to manage. And you are ready for cutting!


You may also like:

The Rushcutter Sew-along: Selecting your size

So now that we are all feeling inspired (hopefully) and have chosen our fabric, it is time to think about sizing. The Rushcutter sewing pattern is available in sizes A - K (approximately equivalent to AU size 6-24).

Take your measurments

To select the appropriate size, first take your measurements.

It is best to take your measurements while wearing only underwear, or otherwise very tight clothing, so that you can get true measurements. Get someone to help you, if you can. Otherwise take your measurements in front of the mirror, so that you can check that your tape measure remains parallel to the floor, and is not twisted. 

First, measure your bust and take note of the measurement. 

Measure your waist... and don't suck in your tummy like me!

And then measure your hips.


Body measurements

Now look at the size chart and circle where your measurements lie. Your measurements may lie across several sizes or between sizes. 


Rushcutter finished measurements 

You should also look at the finished measurements of the Rushcutter. This dress is designed to be oversized, so there is A LOT of ease included (14cm at the bust, 43cm at the waist, and 28cm at the hip). If your bust measurements  fit one size and then your waist and hips are another, it is likely that you can go with the size of your bust, but do check the finished measurements and make a decision based on them. It is no problem if your size ranges between  multiple sizes. It is very easy to grade between sizes, as the pattern is nested, and I will show you how to do this next week in the sew-along. 

Take note of which size/s you need to print, as the pattern has been made with embedded layers so that you can just print the size/s you want! Layers make it much less confusing to cut the right size, and also saves on ink (and paper, in some sizes).

In the next post in the sew-along, I will show you how to print and assemble your PDF pattern


You may also like:

The Rushcutter Sew-Along : Finding inspiration

inspiration.jpg

Yay! It's the first day of my very first sew-along, and I couldn't be more excited to get started.

For those of you who are just joining us, in the last post I introduced you to my brand new sewing pattern, the Rushcutter! If you missed the memo, you can check out all the details here.

I thought the best place to start the Rushcutter sew-along would be with some inspiration.

I had the most amazing group of women volunteer to test the pattern for me (thanks again ladies!) and they really did an incredible job of showing how different this dress can look, depending on your fabric choice. They each really made the dress their own.

As I mentioned in the last post, she is quite a versatile pattern and will make up well in a variety of different fabrics. Your fabric choice will really govern the end result, so before running off to the fabric shop, have a think about the kind of silhouette you would like to achieve and then go from there. I hope this images help!

therushcutter_sewingpattern_1

If you think you would like a dress that is quite structured or boxy, consider using a mid-weight cotton, sateen or twill or or brocade. Jennifer used a beautiful jacquard weave to make hers, and achieved a really beautiful silhouette, which works both belted and un-belted. 

If you prefer something a little softer or more relaxed, I suggest light to mid-weight cotton shirting, poplin, sateen, viscose (rayon) or silk. Cindy achieved quite a soft silhouette using mid-weight cotton, and created a nice detail by using exposed binding on the armholes and neckline.

Claire also achieved a relaxed look, perfect for a casual summer dress, using this striped light-weight cotton shirting. 

For something in between the soft look and the structured look, consider using chambray or linen. Kimberly used a bottom weight denim wash cotton to achieve this silhouette. 

As the Rushcutter is made up of a few different panels, there is a lot of room to play with the pattern, with piping or colour blocking... or both, like Marie-Paule. She also attached some elastic at the waist to achieve a more fitted silhouette.

I really love the dress Corey made. She cut the bodice panels in the same fabric to make it look like a standard yoke, and then used a solid colour for the remaining panels, to create a lovely contrast between the two sections. 

This lovely relaxed Rushcutter by Indu is just the perfect summer dress. She shows how beautiful it can look with, or without, the waist sash. 

There is a lot of room for playing with stripes or contrasting fabrics in this dress, and Sneha really showed what is possible. Didn't she do an incredible job of this dress? 

Megan made this lovely light-weight cotton Rushcutter, which she shortened considerably to tunic length. I will show you how to do this during the sew-along, so keep your eyes peeled, if this is something that interests you! I think it goes perfectly with those black tights and shoes, although I think this dress will work just as well in spring.

Sarah also made a couple of changes to the pattern. She shortened the dress, as well as the sleeves, and also widened the neckline. I really love the changes she made and I think this fabric (wool boucle) just works perfectly.

Ann made this lovely blue Rushcutter, with a fabric that has a slightly quilted texture. It goes wonderfully with her red hair, don't you think?

And last, but not least, is Andreia. I am a huge fan of this dress. She really thought outside the box when it came to selecting fabric, and went for a Ponte di Roma. It has a lovely modern aesthetic, and I just love how the sleeves sit when the fabric has a bit more body to it.


These wonderful ladies have provided me with a lot of inspiration (and I hope they have provided you with some too) - now I just have to work out which one to make first! I'd love to know what you are planning to make your Rushcutter in?


You may also like:

Introducing the Rushcutter

theruhcutter_sewingpattern_inthefolds

Yipee!!! I am so pleased to introduce you to my very first sewing pattern! Her name is The Rushcutter and I think she's a bit of a beauty.

She is a relaxed knee length A-line dress, which is flattering to pretty much all figure shapes. My main mission when designing the Rushcutter was to create a dress that is comfortable, wearable, effortlessly cool, and would fit comfortable into many different women's existing wardrobes. She can easily be dressed up and down, and is perfect for all seasons.

She comes in two variations, which means she is perfect for all you people in the northern hemisphere too!

therushcutter_viewA_technicalsketch

View A has three-quarter raglan sleeves, large pockets on the side (optional), an invisible zip, bound neckline and a large hem facing.

therushcutter_viewb_technicalsketch

View B is a sleeveless dress with back button closure. It has in-seam pockets and the neckline and armholes are finished with bias binding.

Included in the pattern is an optional waist sash, that is suitable for both styles.

theruhcutter_sewingpattern_inthefolds

The Rushcutter was designed with woven fabrics in mind and is quite a versatile pattern. She makes up beautifully in a wide range of fabrics (and I would know, as I have made at least eight versions over the last two months!). My lovely testers also showed how different this dress can look depending on the fabric - and I will include some of their incredible dresses in the next post

As well as these two variations, I will also be showing you as many hacks as I can possibly come up with (and am open to suggestions, if you want to send an idea through to me), in the coming weeks, so we can get all you sewers pattern making too (and hopefully seeing how un-scary it is - yes, I made up a word)!

theruhcutter_sewingpattern_inthefolds

The pattern is suitable for brave advanced beginners and beyond. I have placed it a 'Level 4' on my skill scale, as I think a sewer with a few projects under their belts, along with some pins and patience (and probably a few cups of tea) would be able to handle this project.

You can make the project as simple or as challenging as you like. Add piping for an interesting detail or play with stripes on the various panels to make it a more challenging sew.

theruhcutter_sewingpattern_inthefolds

The pattern also comes with instructions alongside full colour photographs that hold your hand every step of the way (there is also a 'cheat sheet' available for those of you who don't want your hand held) which can be printed at home, or simply viewed on a computer, tablet or smartphone. 

Would you like to sew your Rushcutter along with me? I will be doing a sew-along over the next few weeks (starting on Monday October 19th) and will be giving you some fitting tips, showing you how to get a lovely clean finish with bias binding, and my method for sewing invisible zips! So stay tuned...

And even if you are not planning on buying the pattern, I'm sure you will find some great tips in the sew-along that can help you with other projects that find their way to your sewing table.


What do you think? I'd love to know what you think. Is there room for the Rushcutter in your wardrobe? 


You may also like: