patternmaking

The Acton sew-along : Full Bust Adjustment (FBA) on princess panels

cover.gif

Over the past week or two, I've been running through a number of pattern adjustments (such as making a toile or lengthening or shortening the bodice) for the Acton sew-along. Now it's time to get to the juicy ones - the Full Bust Adjustment (FBA) and the Small Bust Adjustment / SBA (coming tomorrow). 

When you'll need to do a Full bust adjustment 

Most indie pattern companies (including In the Folds) draft for a B cup bust. There are of course exceptions to this rule (such as Cashmerette and Colette Patterns), so make sure you check on your pattern before assuming the bust cup size.

This means that if your bust cub size is smaller than a B you will need to do a Small Bust Adjustment, otherwise known as a SBA (tutorial coming tomorrow), and if your bust cup size is larger than a B you will need to do a Full Bust Adjustment or FBA. 

Work out your cup size

Your cup size in sewing patterns may not always correspond to the bra size you wear. To be safe, check your measurements before deciding if you need to make any adjustments to the pattern. 

measurement.jpg

Measure your high bust measurement (the area above your breasts, under your arms) as well as your full bust  (the fullest part of your chest) and then take note of each measurement, as well as the difference.

If the difference is 2.5cm (1") your bust is an A cup, 5cm (2") it's a B cup, 7.5cm (3") is a C cup and so on. 

Choose your size

Now, go back to your high bust measurement and add 5cm (2"). This is what your bust measurement would be if you were a B cup and therefore the size you should be choosing from the pattern.

For example, let's say your upper bust measures 81cm (32"). Add 5cm (2") to this measurement to find out what size your bust measurement falls into on the In the Folds sizing chart (and what size you would be if you had B cup breasts). 81cm + 5cm = 86cm which corresponds to a size C. Your actual bust measurement is 89cm  though - 3cm (1") larger than the cup size of the pattern. This means you need to do a FBA and add this 3cm (1") to your pattern. 

As the bodice is cut on the fold, you need to take the measurement you will be adding and divide it by two. For example, this 3cm (almost 1") mentioned in the example, will be split between either side of the front bodice - 1.5cm (1/2") on each side. 

Getting started

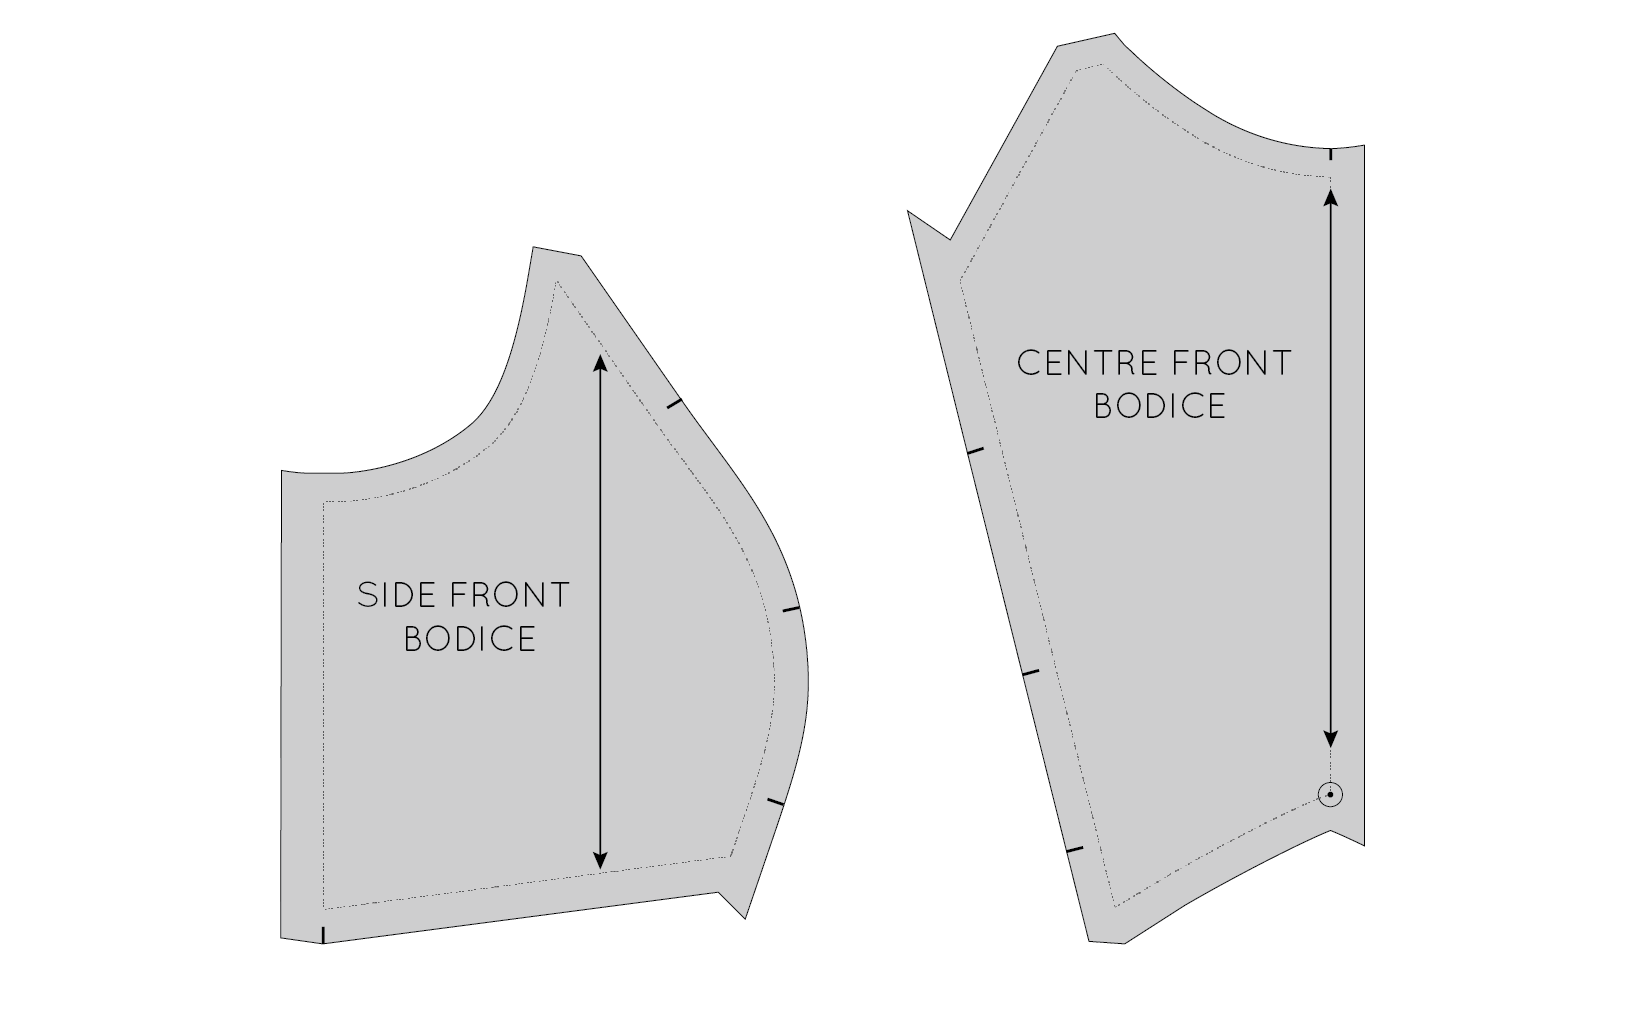
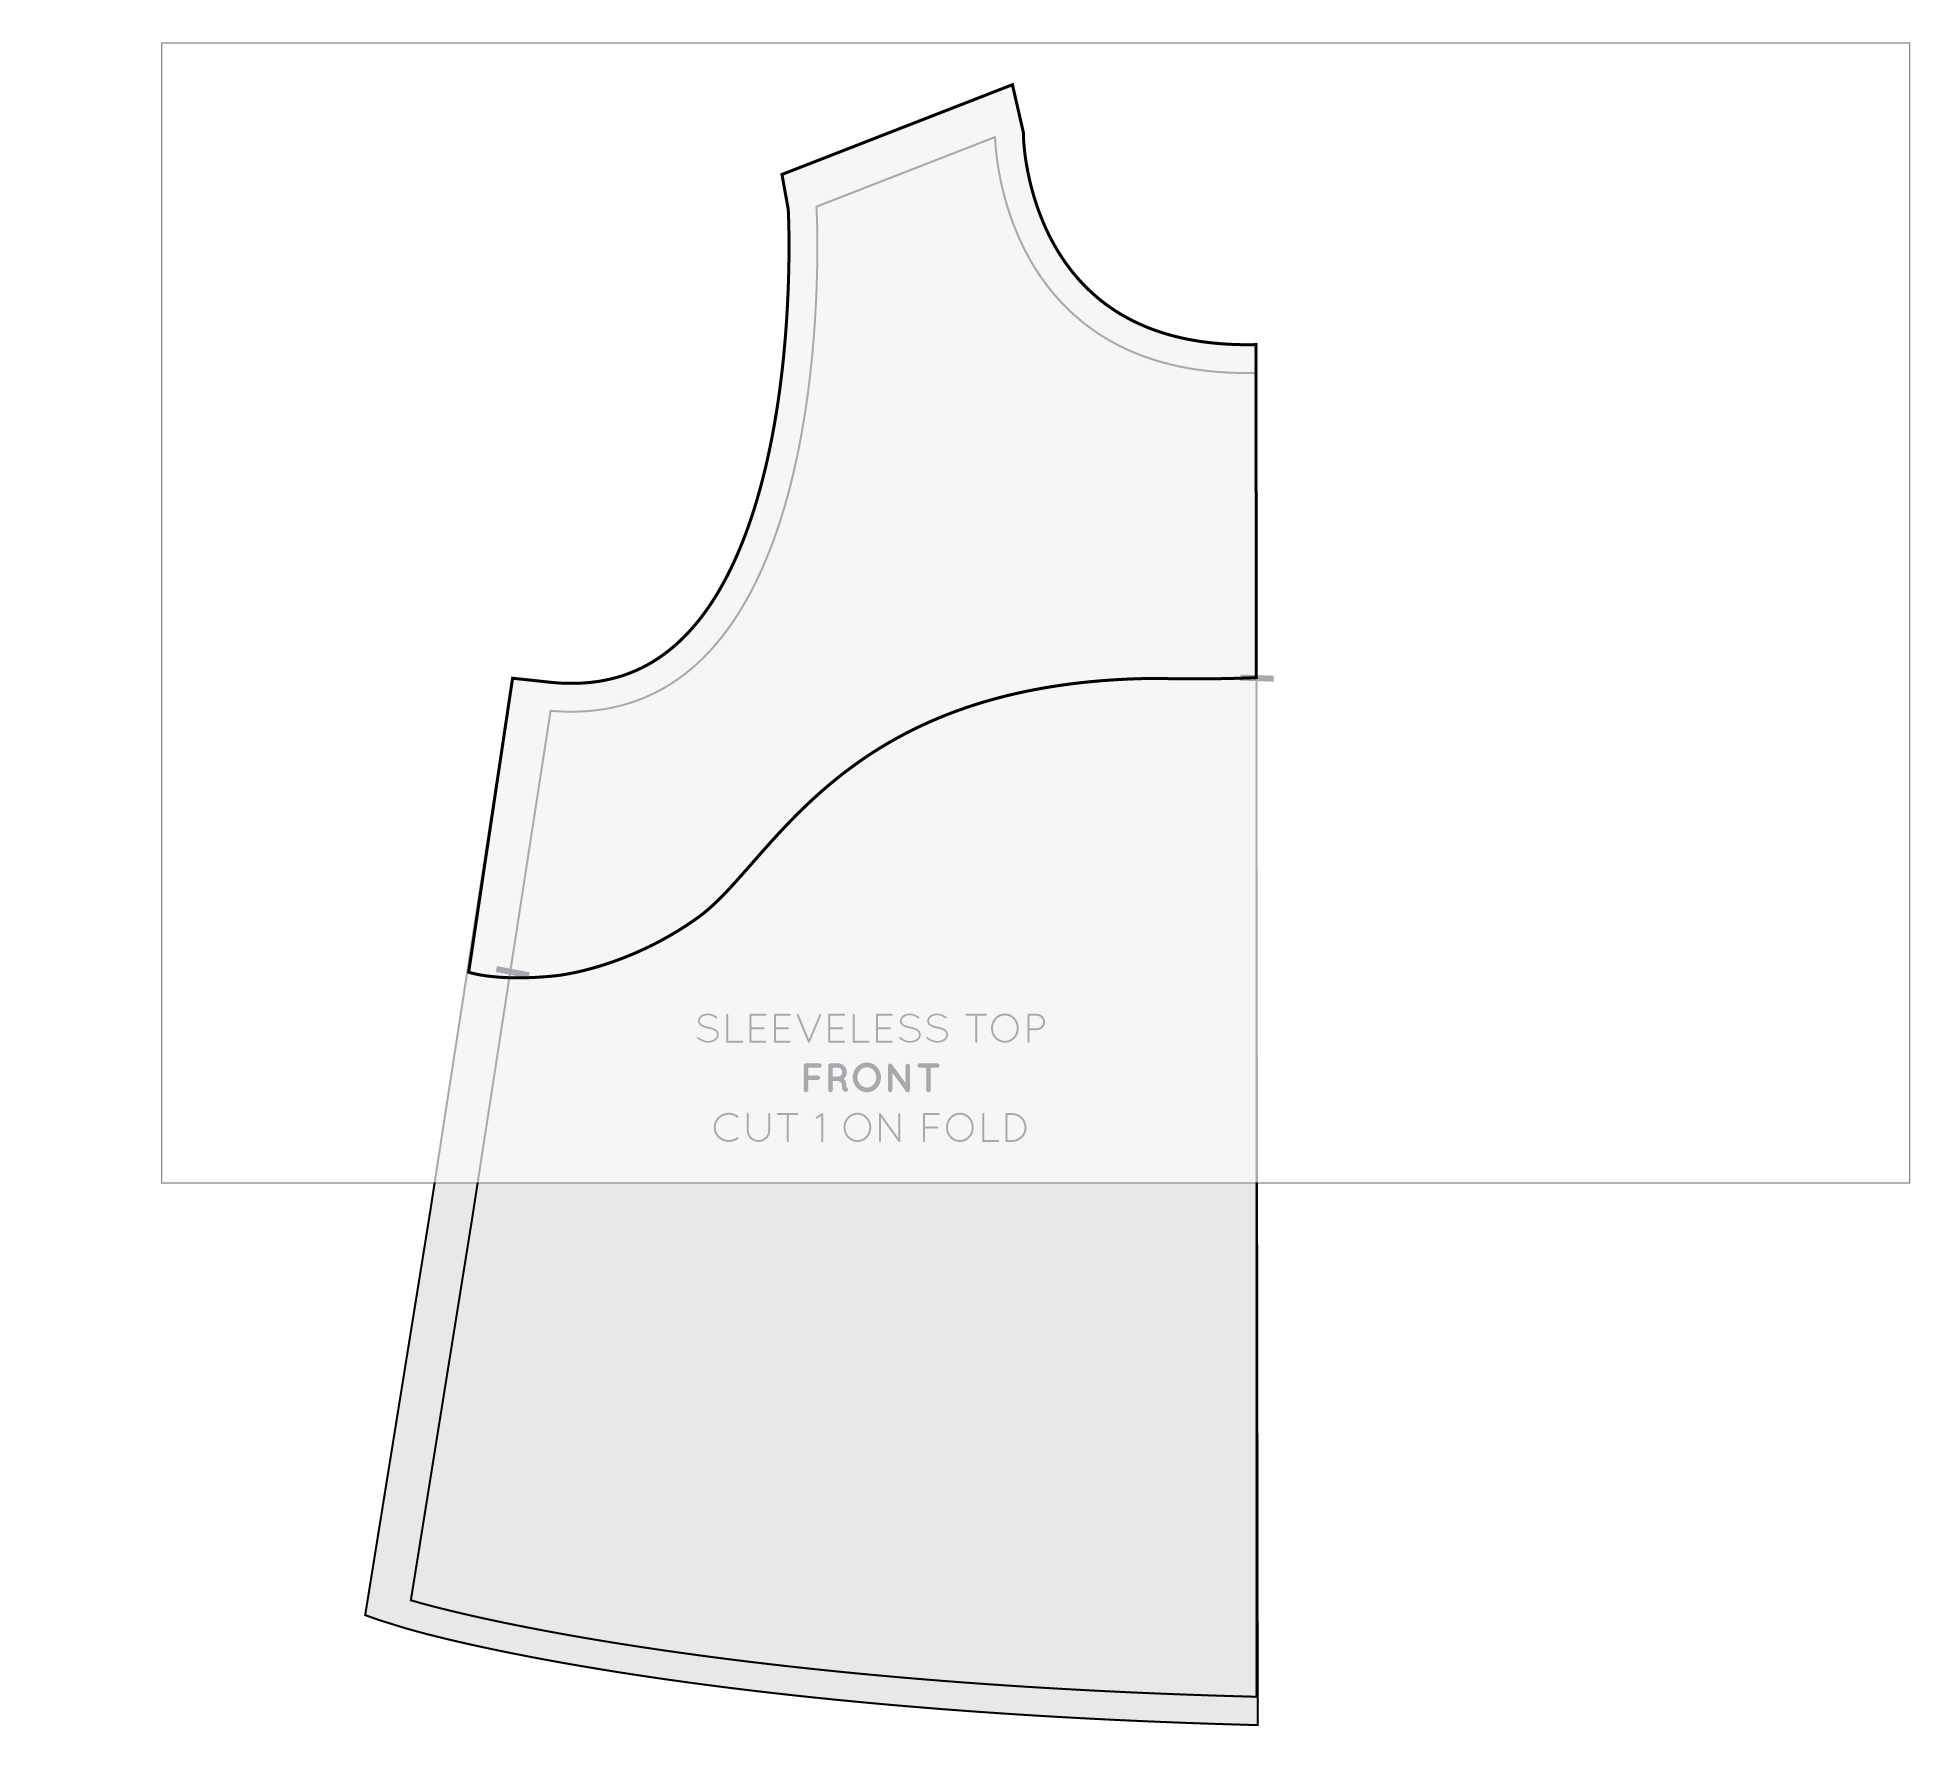
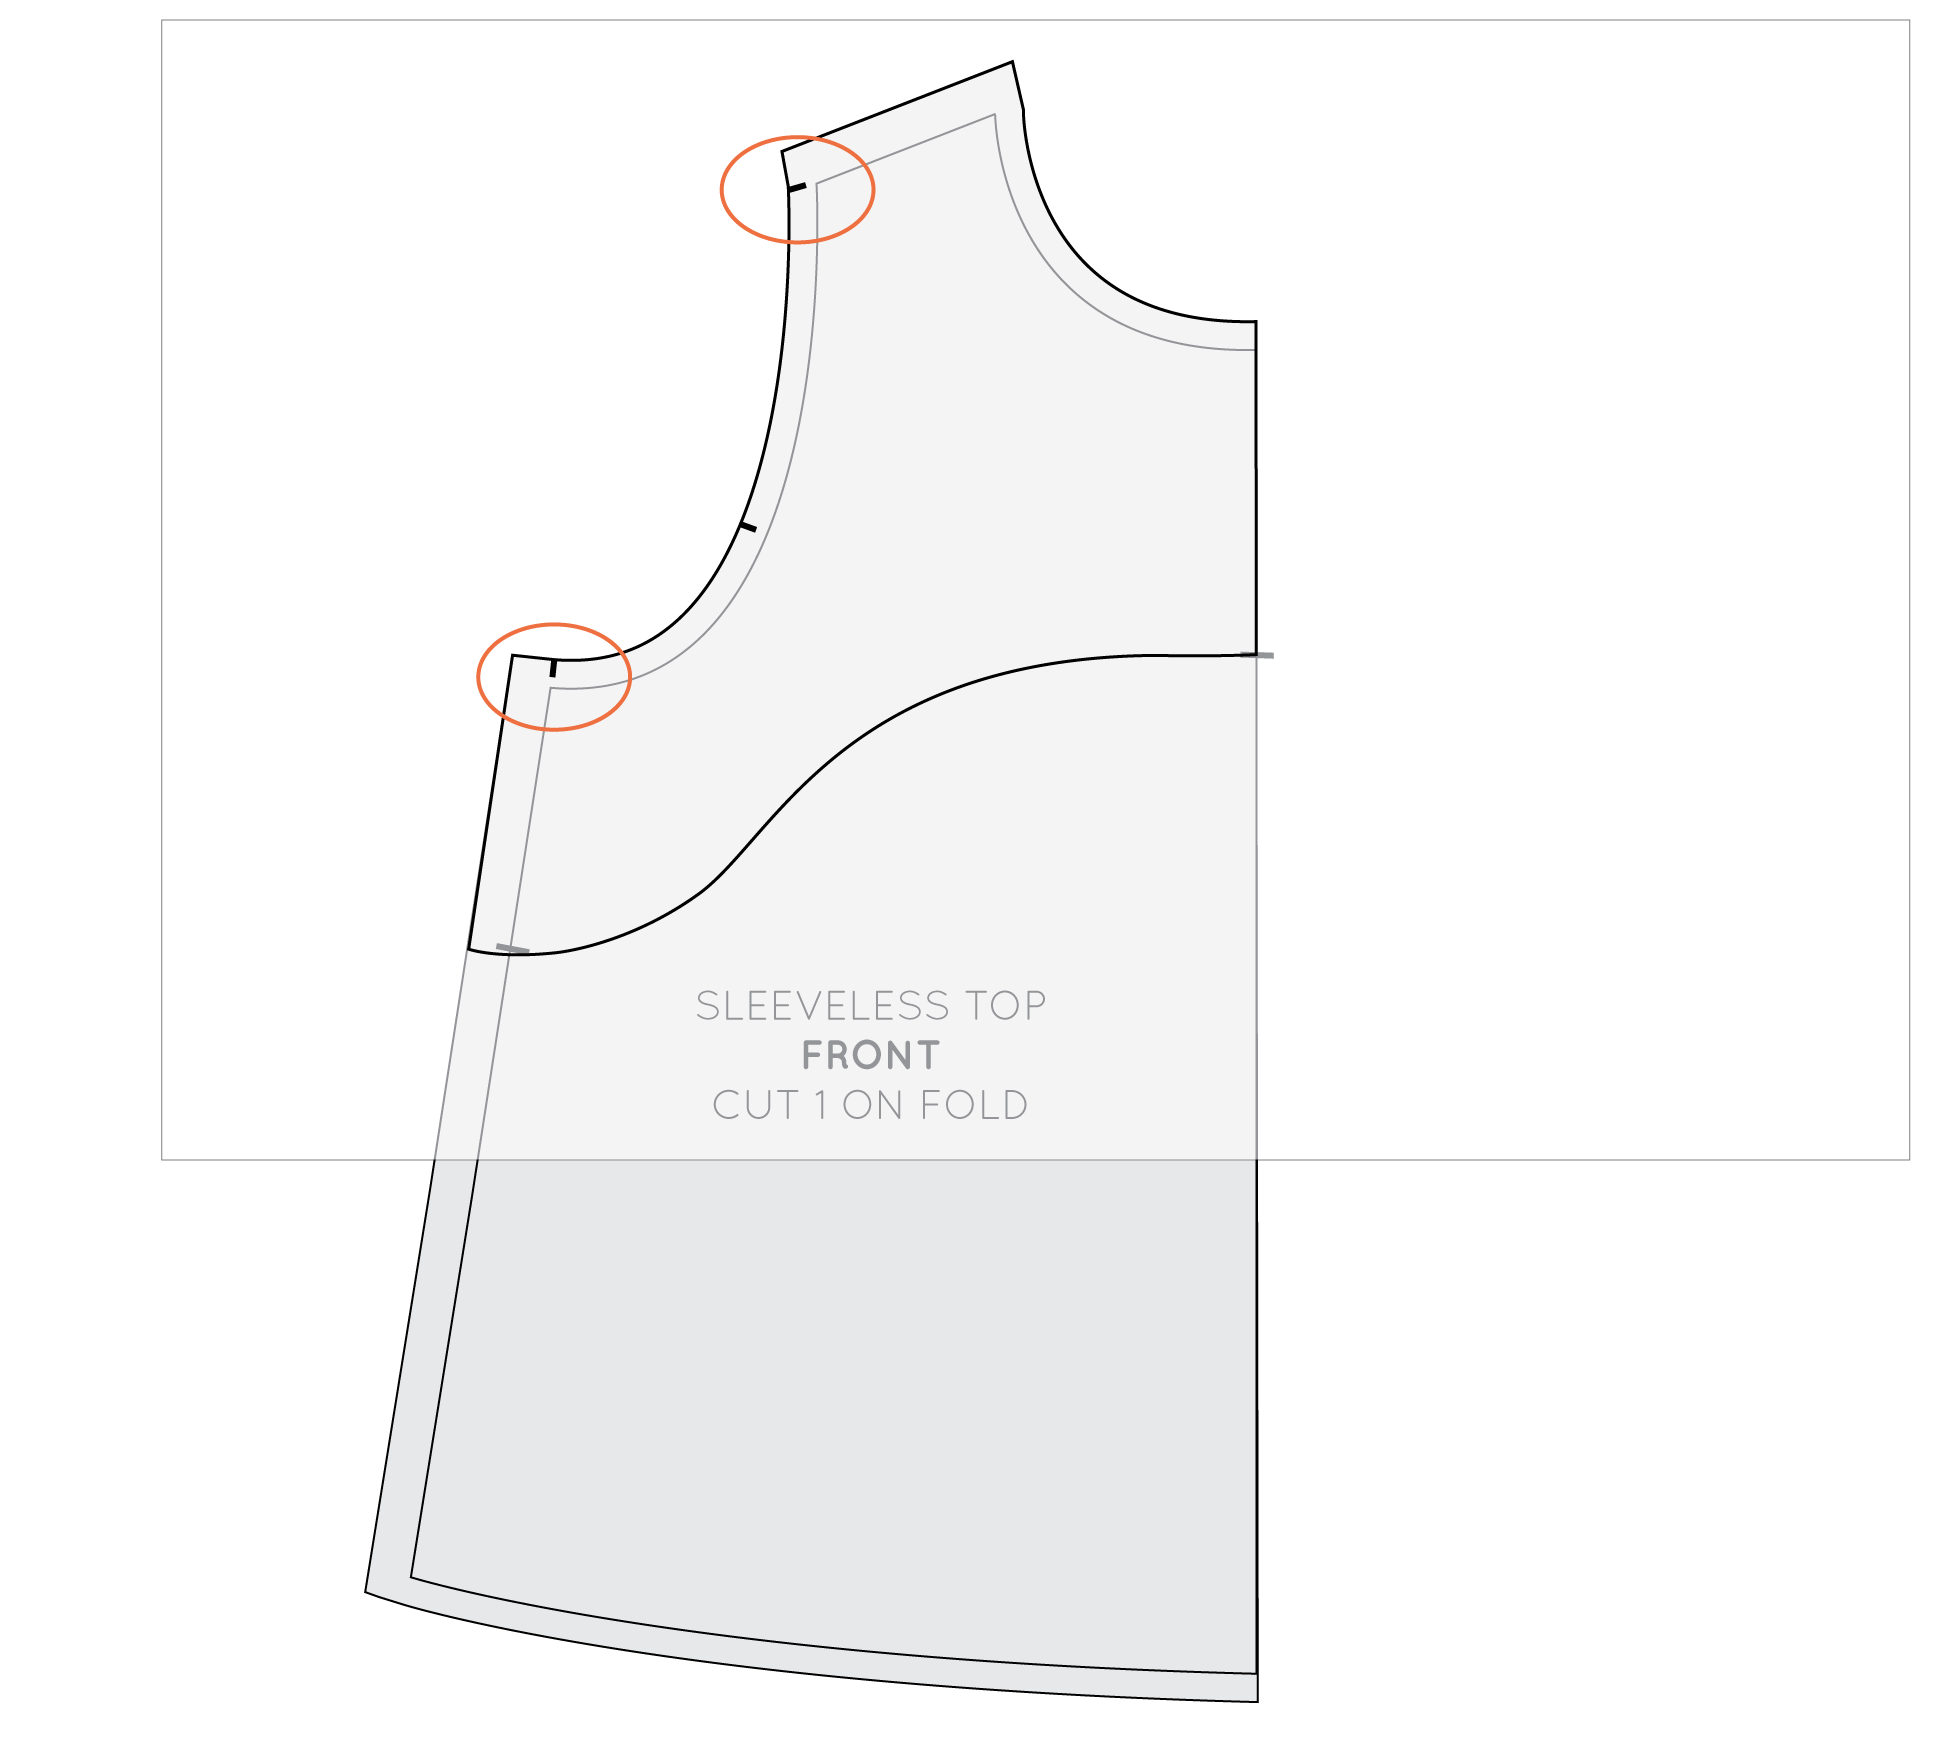
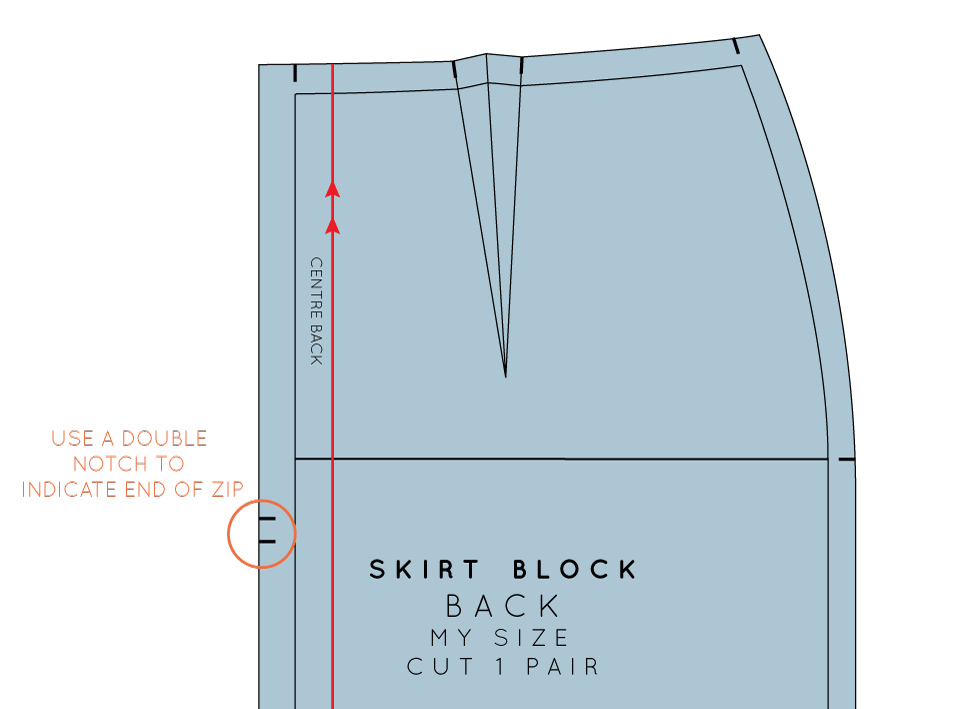
Trace a copy of the SIDE FRONT BODICE and CENTRE FRONT BODICE. I always suggest to trace a copy of the pattern, so if you make a mistake you always have the original to go back to (although with digital patterns you can always just print another copy if necessary). Be sure to include all pattern markings (in this case: grainline, notches and drill hole) and make sure you trace off the stitching line (the grey line on the pattern) - this is really important. When making pattern alterations, I normally suggest removing the seam allowance, but because the stitch line is marked on the pattern, you can leave it on. 

Prepare the bodice for the adjustment

A: On the SIDE FRONT BODICE, draw a straight line from the bottom corner of the pattern, close to the princess panel (1) to the fullest part of the bust curve (2.) The points need to be on the stitch line - not the edge of the pattern. 

B: Mark a point (3) approximately two-thirds of the length of the armhole curve (the portion on the SIDE FRONT BODICE), measuring in from the side seam. Join point 2 to point 3 with a straight line. 

C: Draw a line from point 2 to the side seam (point 4), about 1cm down from the armhole. This line should be on the cut line of the pattern, not the stitch line. 

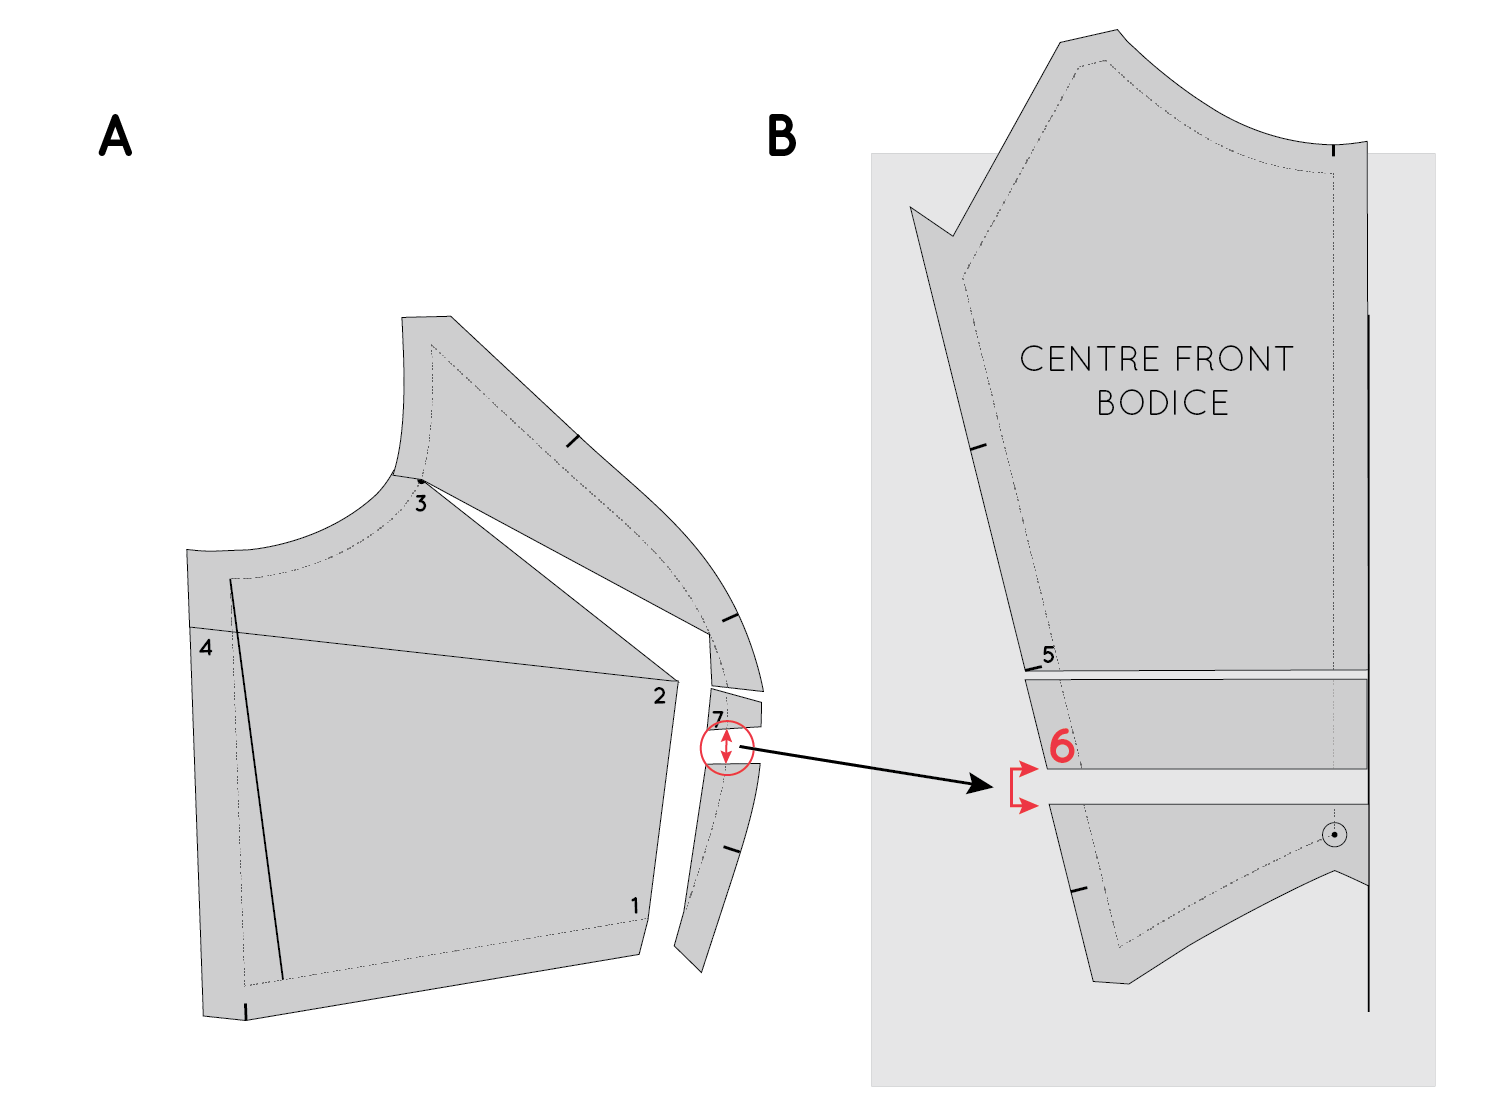
Transfer guidelines onto centre front bodice

Before getting started on the alteration, you need to transfer the guidelines from the SIDE FRONT BODICE to the CENTRE FRONT BODICE, so that you will be able to make changes to the same areas on each pattern piece. 

A: With your pattern pieces side-by-side and correctly aligned (as if they were being sewn together), draw a horizontal line on the CENTRE FRONT BODICE in line with point 2. Label this line with a 5. 

B: Draw a second line (Line 6) 3-4cm below Line 5 (parallel). Transfer the position of this line onto the SIDE FRONT BODICE, just until the line intersects the line that runs from point 1 to point 2. For the time being, put the CENTRE FRONT BODICE to the side. 

Cut into the bodice

Before cutting into the pattern, place the pattern on top of a piece of pattern paper. This will make it easier when you need to stick the pieces down after you have made the adjustment (it will get really flimsy).

A: Take a pair of scissors and cut into the pattern from the seam allowance below point 1. Cut up to point 2 and then over to point 3.

B: Next, cut in from the armhole towards point 3, being careful to leave a 1-2mm "hinge" intact (it's not a big deal if you accidentally cut through, you can always tape the hinge back together). 

C: Next, cut in from the side seam (point 4) to point 2 - again, leaving a small hinge intact at point 2. Your pattern piece should be very malleable by now! All ready to make the adjustment. 

Make the adjustment

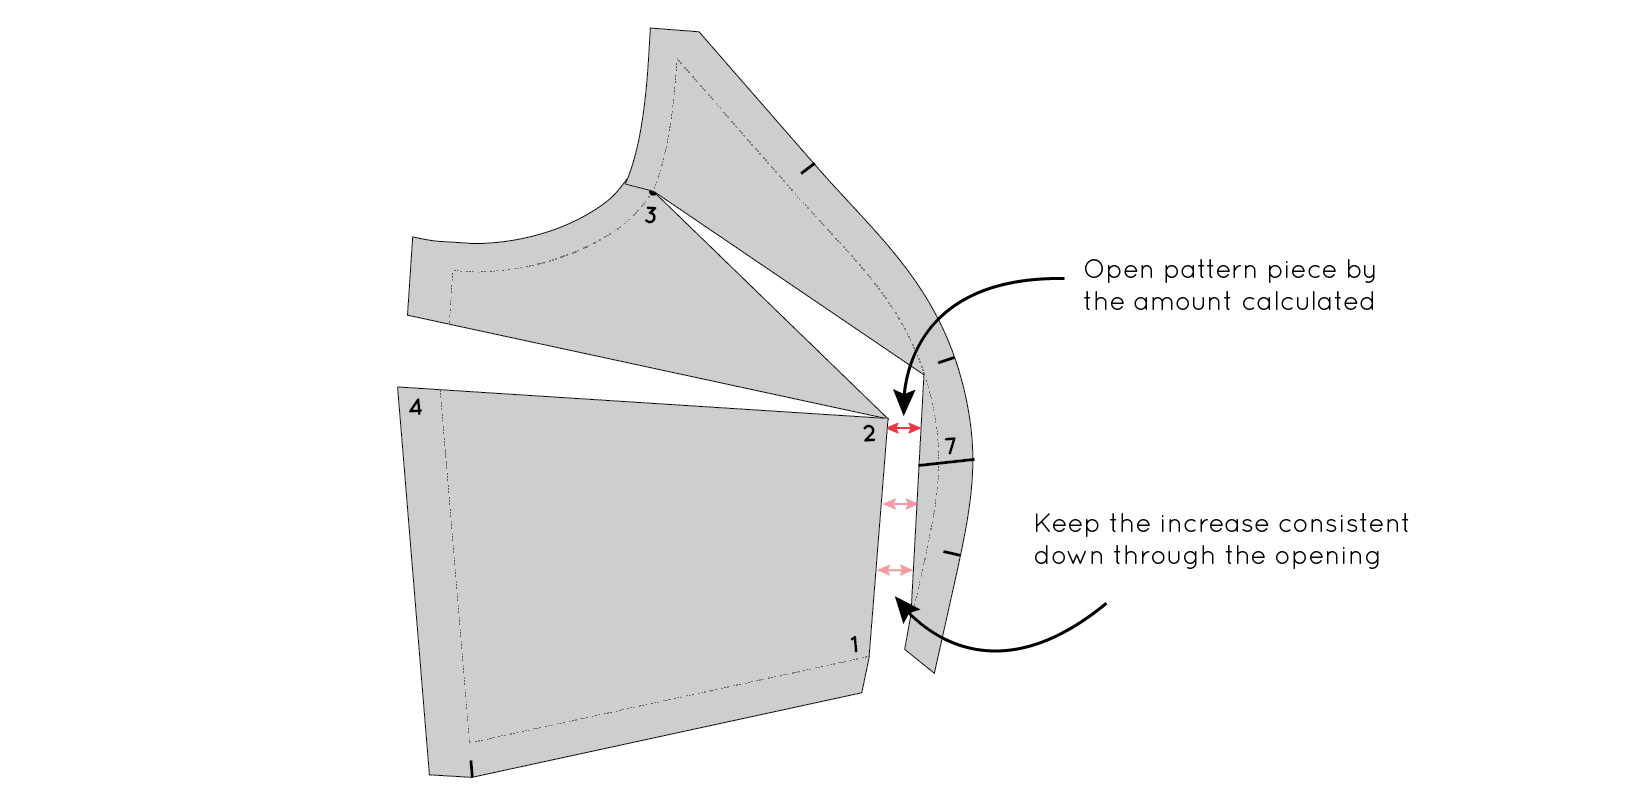
Gently spread the pattern open from point 1 - using point 3 as a hinge. Continue spreading until you have opened up the bodice by the desired amount. Remember, as the bodice is cut on the fold, you need to take the measurement you want to add to the bust measurement and divide it by two. For example, if I wanted to add 3cm (just over 1") I would add - 1.5cm (1/2") on each side. 

Be careful to check that the increase is consistent down through the opening. 

You will notice that when you open this part of the pattern a dart is created at the side seam (point 4). We don't need a dart there, but we'll deal with that later on!

A: Cut through line 7

B : Place a ruler on the waist seam of the pattern (on the stitch line) and continue the line beyond the pattern piece. Line up the detached piece with this line.

Remove the dart

Tape or glue the pattern down onto the pattern paper underneath.

Now it's time to get rid of the "dart" that we created in the previous steps. For ease, I will refer to the wedge created in the side seam as a dart, and will refer to the sides of the opening as the upper and lower dart arms. 

6_3.gif


A: Cut into the pattern through the upper dart arm towards point 2. 

B: Now cut towards point 2 from the opposite side of the pattern - leaving a 1-2mm hinge intact. 

step_7.gif

A: Close the dart by gently pulling the upper dart arm towards the lower dart arm.

B: When the upper dart arm is in line with the lower dart arm, tape or glue in place. You will see that a small wedge has opened up on the bust curve (the fullness from the side seam has been relocated to the bust seam).

Reduce waist back to original length

A: At this stage you will notice that by adding fullness to the bust, we also added fullness to the waist seam (the opening at point 1). In the case of a FBA, you are wanting to increase the bust measurement, without adding any extra to the waist - so this will need to be removed.

B: Remove the excess length from the waist at the side seam. Measure how much was added at point 1 and then remove this from the waistline at the side seam. Redraw the side seam with a straight line up to the pattern's original armhole. 

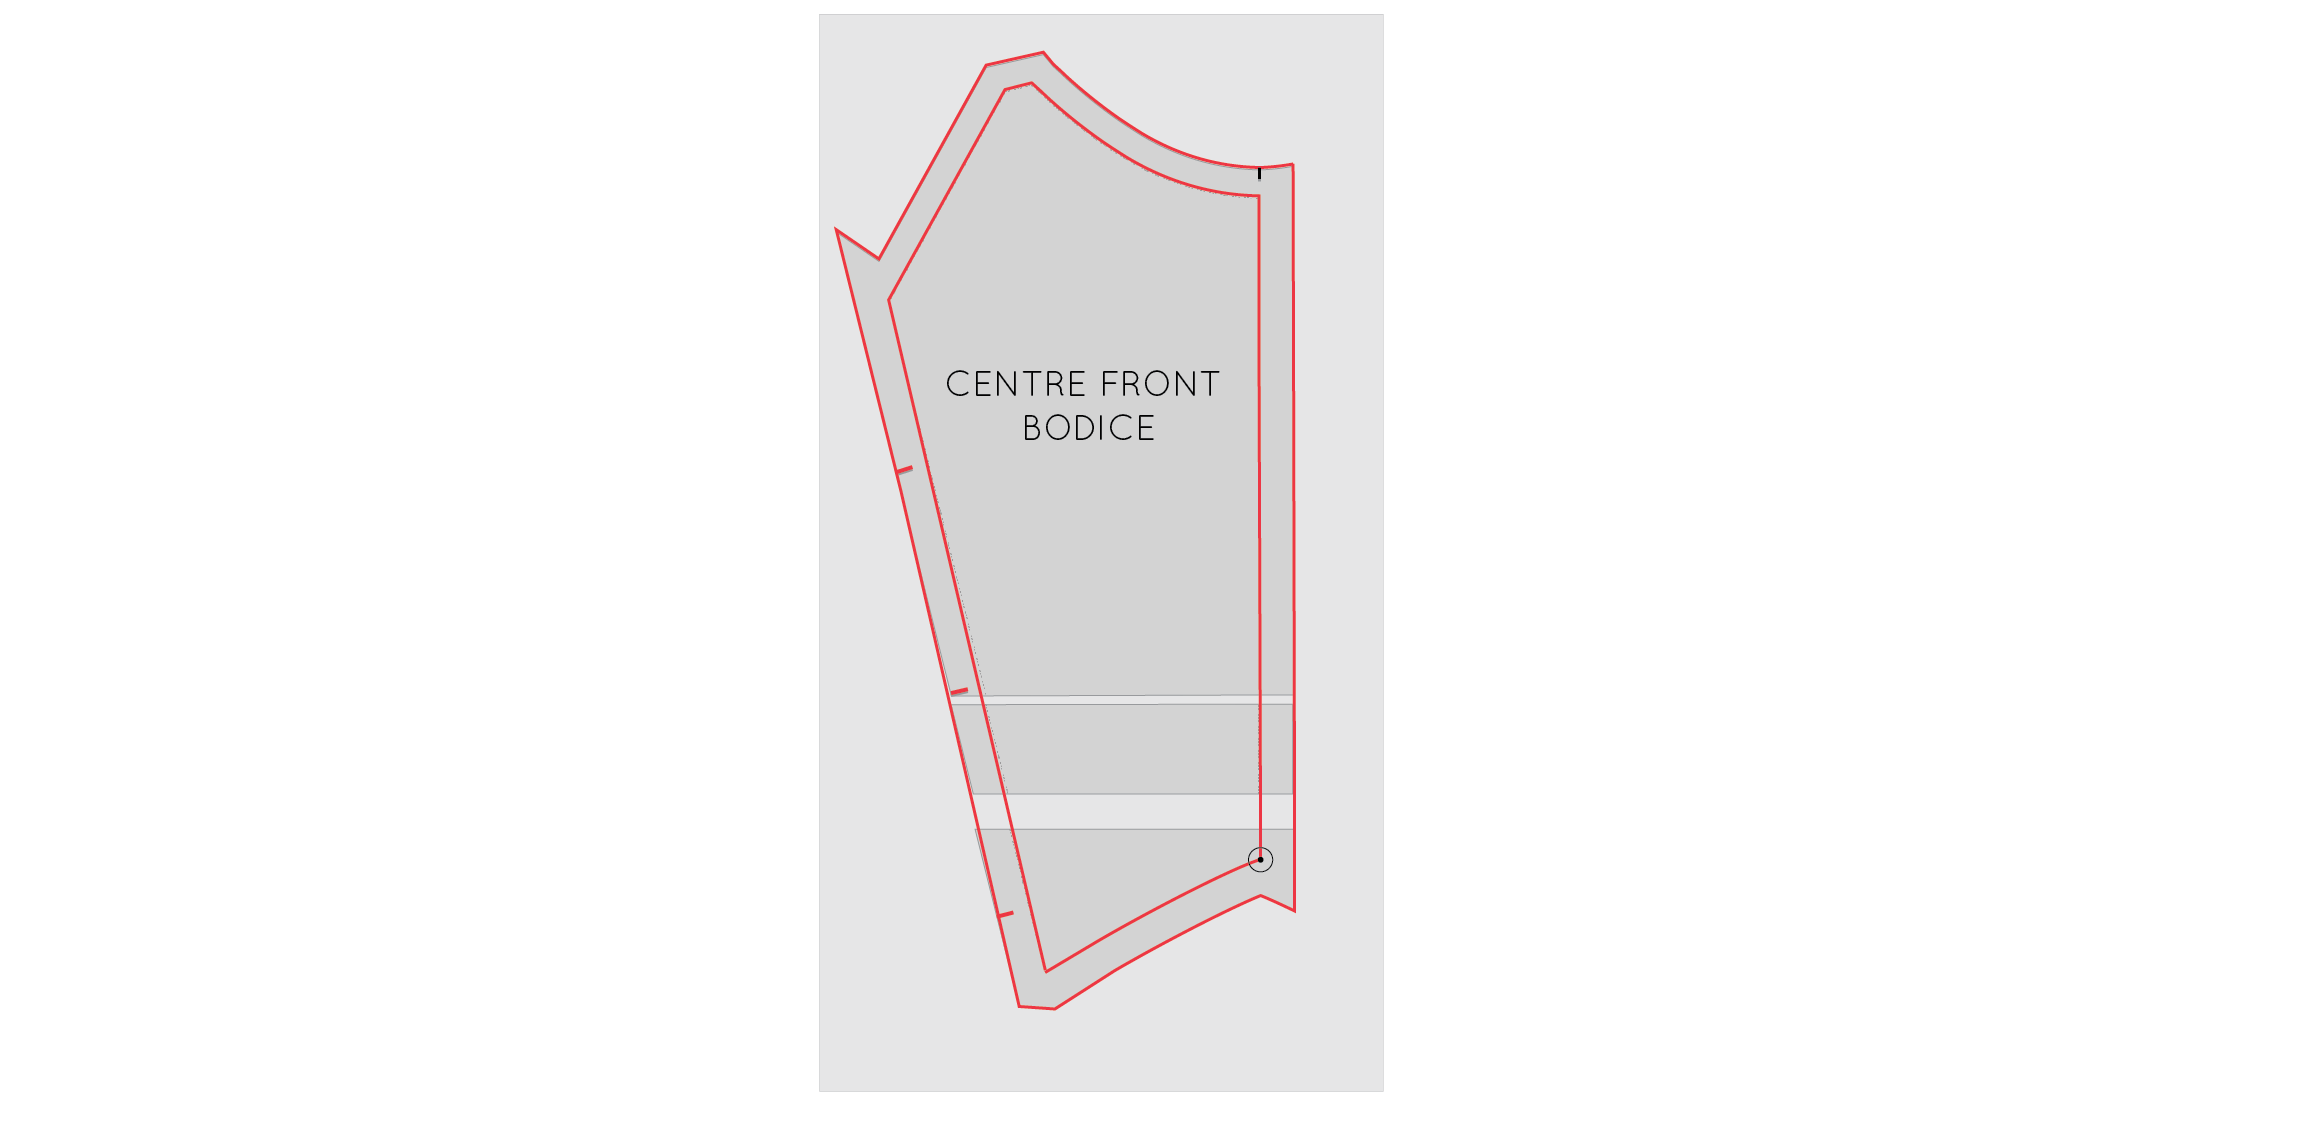
Make alterations to the centre front panel

It's now time to transfer the changes we have made to the SIDE FRONT BODICE to the CENTRE FRONT BODICE (so that they can be sewn together).

Take another piece of pattern paper and draw a straight line down the right hand side. Label "Centre Front." Take the top section of the CENTRE FRONT BODICE and tape or glue in place, lining up the centre front of the pattern piece with the line marked on the paper. 

step_10_2.gif

A: On the SIDE FRONT BODICE, measure the length of the smaller opening. Take note of the measurement.

B: Now, move to the CENTRE FRONT BODICE and place the middle section of the pattern, the same distance down (as the measurement noted) from the upper section of the pattern. Tape or glue in place. 

A: On the SIDE FRONT BODICE, measure the length of the larger opening. Take note of the measurement. 

B: Now, move to the CENTRE FRONT BODICE and place the lower section of the pattern, the same distance down (as the measurement noted) from the middle section of the pattern. Tape or glue in place. 

Trace the new pattern pieces

Your alterations are done! Now you just need to trace new versions of each piece. 

step_10.gif

A: Take a fresh piece of pattern paper and trace the SIDE BACK BODICE, starting at the stitch line. Be careful to check that you trace the new side seam and not the original side seam.

B: Add seam allowance to the piece - 1.5cm to the side seam, 1.2cm to the bust seam and waist seam and 1cm to the armhole seam (use this tutorial if you need some tips). If you are wondering why the seams meet at different angles - you can learn more about seam returns here. Transfer the notches. 

C: Label the pattern and add the grainline (you can work this out by placing the new piece on the original pattern piece and transferring the grainline). 

Repeat process for the CENTRE FRONT BODICE.

And that's it! Your bodice is bosom ready! 

Keep your eye on the blog for more Acton sew-along posts coming in the next couple of weeks. 


You may also like:

How to: Draft an all-in-facing

dradt_facing_1

In the last couple of weeks I have been showing you how to draft a simple summer tank top. Today I thought it would be a good time to show you how to finish the armholes and neckline. 

There are generally two methods used to finish the armholes and neckline of a sleeveless top - you could finish them with bias binding (shown in the image above), or draft a facing. I use both variations and make my choice depending on the fabric I am using and the style of the top (or dress) I am making. 

Where to start

dradt_facing_2

Drafting a facing is really easy, and only takes a couple of minutes. Take the pattern you would like to make a facing for - in this case I am using the sleeveless top pattern that I showed you how to draft in this tutorial

dradt_facing_3

Consider how deep you would like your facing to be. When it comes to facings, I don't think there's anything worse than a really shallow facing that pops out of the neck or armhole at any opportunity it gets. For this reason, I always draft a nice wide facing.

On your front pattern piece, measure down the side seam the depth of your facing. I would suggest anywhere between 7-10cm (3-4in), but have a look at your ready-to-wear garments with facings, and get an idea of what you like (or don't like). Also mark a point on the centre front (this doesn't have to be exactly the same as the measurement on the side seam, just have a think about how far down you would like the facing to run at the centre front).

dradt_facing_4

Draw the shape of the facing onto the pattern. You will want it to be a smooth curve so that the edge is easy to finish (with bias binding or overlocking). 

dradt_facing_5

The section above the curved line is the facing piece.

dradt_facing_6

Take a separate piece of pattern paper and trace off the facing piece.

dradt_facing_7

Before removing the facing piece, mark a notch on the armhole (this will come in handy when you are sewing the facing to the body of the top). Using a tracing wheel, transfer the notch onto the top front. 

dradt_facing_8

Mark a notch on the shoulder seam and side seam too. 

dradt_facing_9

To complete the pattern piece, add the grainline and cutting instructions (cut 1 on fold). Repeat process to create the back facing, and you're done! 

When attaching the facing, make sure you understitch it to get a really nice clean and professional finish. 


You may also like:

How to : Draft a top with yoke

draft_top_yoke_1

Recently I have been well and truly in summer sewing mode, as I have been working on another pattern for Peppermint magazine (see my first pattern for Peppermint here). As it's a quarterly publication, the next release will be in Spring, which makes me feel as though spring is just around the corner. And makes me very excited! I am not a winter person at all, so I have been very much enjoying pretending it's spring and using luscious linen to make the sample. 

So, to keep the dream alive, that it is actually spring (I know I shouldn't whinge as winter in Sydney is very mild) I thought I'd post a follow up post to the post I did a couple of weeks ago on drafting a summer top.

I thought a good place to start would be with a few simple adjustments you can make to your simple top pattern (or even an existing top pattern you have) to add a bit more interest, starting with adding a yoke. 

What is a yoke?

A yoke is a panel that is inserted in the top of a garment to add interest. For example, yokes are often used on the back shoulders of shirts, but can also be found on blouses, tops, skirts and trousers. 

Trace the pattern

draft_top_yoke_2

To start, trace a copy of the pattern you would like to add a yoke too. I am using the simple sleeveless top pattern that I drafted from my basic bodice block

Style lines

draft_top_yoke_3

Think about the shape of the yoke you would like to create, and draw the style line on the pattern. I have included a few examples, but there are countless options of what you could do. Be sure to bring the style line to a right angle at the centre front (more details about this can be found here). 

draft_top_yoke_4

For the sake of the example, I decided to go with a simple straight yoke through the armhole.  Before going any further, put a notch on the style line. This will help match the two pieces back together once they become two separate pattern pieces. 

draft_top_yoke_5

Cut along the style line (or trace each piece onto paper) to create two independent pattern pieces.

What next?

draft_top_yoke_6

There are a number of things you could choose to do now. You could leave the pattern as is (just add seam allowance and pattern markings) for a simple tank with a yoke panel line (which you could choose to also repeat on the back pattern piece).

draft_top_yoke_7

You could consider adding volume to the lower panel to create more of a trapeze silhouette. You can do this by cutting and spreading the pattern until you achieve the desired silhouette (look at this tutorial for more details about how to do this).

draft_top_yoke_8

Or even consider adding a box pleat at the centre front (this is a personal favourite of mine).

Finish the pattern by adding seam allowance and cutting instructions.


You may also like:


The Maker's Glossary : How to pivot a pattern

patternmaking_glossary_1

Introducing 'The Maker's Glossary'

Today I am working on finishing up the wrap skirt tutorial that I posted last week, and I realised that it is about time to start some kind of glossary on this site. There are many techniques that I use in almost every pattern I cut, and would make much more sense if I could just link straight to the technique I'm talking about - rather than writing the same thing over and over (which will give me time to write more new tutorials!)

Recently, I was doing a freelance project for some lovely women that needed a pattern made. They came into my studio to discuss the project, and while they were here, they asked what my favourite pattern making tool is. I instantly picked up my tracing wheel and my stiletto, and said I couldn't choose between them. They are definitely the tools I reach for the most when I'm pattern making, and they really do make some of the processes and techniques used in pattern making much easier. So I thought I'd share one of those techniques today, which is pivoting a pattern piece. 

What is pivoting?

Pivoting is a technique used to check that seam lines match together. A ruler is normally sufficient when a seam is straight, but when it comes to curved seams, pivoting is a fast and easy way to check that the seams are exactly the same length.  It is also a good way to make sure you are placing your notches in the right place. 

What do I need?

stiletto.png

To pivot a pattern piece, I use a stiletto (also known as an awl), but if you don't have one of those, a sharp pencil or pin will do the trick.

How to pivot a pattern piece

patternmaking_glossary_2

For the example, I am using the back pattern piece and waistband from my wrap skirt. I want to check that the waistband is the right length for the waistband, as well as mark notches at any points of interest (for example, side seam and centre front), to make it easier to attach the waistband when it gets to sewing up the skirt.

patternmaking_glossary_3

Align your pattern pieces, like you were sewing the pieces together. For the example, the centre back line on the waistband needs to be lined up with the centre back on the skirt back. Remember that if your pattern pieces have seam allowance already added, you need to match the stitching lines and not the edge of the pattern. 

patternmaking_glossary_4

Take your stiletto (or pin) and place it through both pattern pieces, at the point where the two seams no longer fit together. 

patternmaking_glossary_5

Use your hand (or a weight) to hold the underneath pattern in place (in this case, the skirt), while you carefully pivot the top pattern, until the seams are aligned again.

patternmaking_glossary_6

Hold both pattern pieces in place, and once again, take your stiletto, and place it where the seams diverge, before pivoting the top pattern until the seams are aligned again. 

patternmaking_glossary_7

Continue pivoting until you get to the end of the seam (or to a point of interest). In the example, I have reached the side seam.

patternmaking_glossary_8

Before removing the waistband pattern, I need to mark the location of the side seam with a notch.

Now, to check the front, all I would need to do, is match the side seam notch on the waistband, with the side seam on the front pattern piece and continue pivoting. 


And that's it! You now know how to pivot! 

Please let me know if there are any techniques you'd like to learn and I'll do my best to get it up on the blog.


You may also like:

How to : Add panel lines to a skirt pattern

how_to_add_panel_lines_skirt_1

Panel lines are a great way to add interest to a design. There are countless variations and it is a way to include more than one fabric in your design if you would like. I really struggle to keep a design limited to one fabric, so often add a contrast fabric with panel lines. Panel lines are also a good way to eliminate darts, without losing the fitted shape of the garment.

Now that our skirt blocks are done, it's time to have a play! In today's post I will show you the basics of creating panel lines on a pattern. This same principle can be used on all different patterns, so keep reading, even if it's a bodice or dress you're planning to add panels to. 

how_to_add_panel_lines_skirt_2

I will show you how to add panel lines where the darts are on the original skirt block. With these panels, you will no longer need darts, as the shaping required will be provided by the panel lines.

Mark panel lines

how_to_add_panel_lines_skirt_3

1. Take your skirt pattern and draw a line from the tip of the dart to the hemline, ensuring it is parallel to the centre front (or entre back if you are working on the back pattern piece).

2. Add notches to the line. This will help when you are matching the two pieces together later. I suggest putting one in line with the dart point and another on the straight part of the line.

Now that you have the line marked, you can cut the pattern into two pieces, or you can trace the pieces onto seperate pieces of paper (my preferred method).

Create side front panel piece

how_to_add_panel_lines_skirt_

3. Take a separate piece of pattern paper, and place it on top of your skirt block. To start, you will be tracing the left side panel. Trace down the side seam, along the hemline, up the line you drew (Step 1), along the left dart arm (being sure that the transition between line and dart is a smooth curve) and then along the waistline. Transfer the notches from the panel line, and notch the hip line on the side seam.

4. Before removing the tracing, transfer the grainline, which should be parallel to the original grainline. Add pattern information and cutting directions (Front side panel / cut 1 pair).

Create centre front panel piece

how_to_add_panel_lines_skirt_4

5. Next, you will need to trace the centre front panel. Take another piece of pattern paper and trace down the centre front, along the hemline, up the panel line, up the right-hand dart arm and along the waistline. Once again, make sure your transistion from panel line to dart line is nice and smooth. Transfer the notches on the panel line.

6. Before removing the tracing, transfer the grainline, which should be parallel to the original grainline. Add pattern information and cutting directions (Centre front panel / cut 1 on fold).

Add seam allowance

how_to_add_panel_lines_skirt_5

7. Add seam allowance to both pattern pieces. I suggest 1.2cm - 1.5cm (1/2in - 9/16in). You may want to add more to the hemline, but for the sake of the example I have left the seam allowance consistent. Repeat process for the back pattern, and now you have a skirt with panels, instead of darts!


You may also like:

The Rushcutter sew-along: more pattern alterations

the_rushcutter_pattern_alterations

In yesterday's post, I showed you a few alterations that you may want to make to The Rushcutter: lower the neckline, add or removing volume, shortening and lengthening the pattern.

Today I have a follow on post for you, as I was worried I might intimidate you if I put all the alterations in the one post!

Create a slimmer Rushcutter

The Rushcutter sewing pattern is designed to be over-sized, so there is a lot of ease in it. It may be a little too much for some of you, so, in today's post, I will show you how to slim down the dress a little. It is not overly complicated, but is slightly more difficult  than it would be on a more conventional pattern, as it does not have side seams!

I would suggest, before making any major adjustments to the pattern (like this one) make a toile, so you know exactly how much width you can afford to remove from the pattern.

1. To start, take the 'Side Panel' pattern piece. This is where we will be removing some width from the pattern piece. The grainline, which runs right through the middle of the pattern piece (and therefore down the side of the body) is where you will be removing the fabric from.

2. Work out how much you would like to remove, by referring to your toile. You will want to take the amount evenly from both sides of the dress. Divide the total amount by 2 and then distribute this measurement either side of the grainline (on the stitching line) - half on the front section  of the pattern piece (indicated by the single notches) and half towards the back (indicated by the double notches).

3. Cutting from the top, cut along the grainline, down towards the hemline. Do not cut all the way through the pattern. Stop a 2-3mm from the bottom, so that a small "hinge" of paper remains intact. You will now notice that you can separate the two sides of the pattern quite easily, without detaching them entirely. 

4. Now, swing one side of the pattern over the other (doesn't matter which one) until the points that you marked overlap. You will see that, by doing this, you have removed a slice from the middle of the pattern. Tape (or glue) in place.

5. By taking out this slice, the underarm curve will now come to a sharp point. Redraw the stitch line and the cutting edge, with a nice smooth line, to correct this. 

Now that you have removed some width from the side panel, you will need to remove the same amount from the raglan sleeve - as these two pieces are sewn together. 

1. Remember the amount we distributed either side of the grainline on the side panel? Take this measurement and divide it by 2. Measuring in from the underarm seam (remember to measure from the stitch line, if your pattern still includes seam allowance), marking a point the distance determined. Repeat for the second side.

2. Draw a line from the points marked, down towards the hemline, meeting with the original stitch line, at the line that indicates where to fold up the sleeve hem.

3. Redraw the cutting line, by adding 1.5cm seam allowance to the new line.

Re-draft the pocket

You may decide to make a short version of the Rushcutter. Megan, one of my lovely testers, decided to shorten hers to tunic length. Nice, right? The only problem is that you end up losing quite a bit of pocket depth. The easiest way to solve this is to simply re-draft the pocket piece, so that it will be your desired depth.

I will show you how I drafted the original pattern piece, so your new pattern will fit perfectly, just like the original!

the_rushcutter_altering_the_pocket_1

1. Work out how deep you would like to make the pocket, you can do this by referring to the original pattern piece, or by holding the 'Side Panel' pattern piece up to your side and marking where you would like the pocket to start. Mark the point on the grainline of your pattern piece.

2. Draw a line, perpendicular to the grainline, from the marked point. Extend the line 5mm past stitching line on both ends (this is because the pocket panel was drafted to be slightly wider than the piece it is stitched to, to add a little volume).

3. Starting at one endpoint, draw a straight line that meets the bottom corner of the pattern piece, easing back into the original stitch line. Repeat for the other side.

the_rushcutter_altering_the_pocket

4. Take a seperate piece of paper and trace a copy of the new pattern piece, being sure to also transfer grainline and notches onto the new pattern piece.

5. Add seam allowance to both sides and the hem (not the top edge, just yet). The seam allowance needs to be 1.5cm on each side and 1cm at the hem. 

6. Draw a line that runs parallel to the top edge of the pocket, 4cm above the original line. Fold along the top edge of the pocket.

7. Trace the seam lines onto the pocket hem (you want to do this so that when the piece is cut, and you fold the top hem of the pocket back to finish the edge, it meets the pocket smoothly).

8. You now have your pocket piece! Add markings and get sewing!

Relocating the shoulder dart

After trying on your toile, you may feel that the dart does not quite sit on your shoulder. If this is the case, you may want to move the dart slightly forward or backwards, from its original position.

move_a_dart_raglan_sleeve_1
move_a_dart_raglan_sleeve_2

1. Work out where your dart needs to be (by measuring in relation to the original dart) and draw a straight line running from the new location on the neckline, to the original dart point.

2. Focusing on the original dart, cut down the outside dart arm, from the neckline to the dart point. Don't cut all the way to the end, stop when you are 2-3mm away. Do the same with the line you just marked, also stopping a few millimetres from the end. This will create a small 'hinge,' which allows you to move this section of the pattern, whilst still keeping the pieces attached.

move_a_dart_raglan_sleeve_3
move_a_dart_raglan_sleeve_4

3. Rotate the cut section until you have closed out the original dart (one dart arm overlaps the other), and tape in place.

4. You will now see that you have opened up a new dart. To complete it, you will need to add dart shaping, and seam allowance to the new dart.


Okay, thats it for today's post. And guess what, tomorrow it's finally time to cut some fabric! Yippee! Let me know if there is an alteration that I didn't include in today or yesterday's post that you need!


You may also like:

Adding pattern markings to your patterns

adding_pattern_markings_to_you_patterns_inthefolds

For those of you have been following along with The Skirt Series, we have almost finished our blocks! We have drafted the pattern, added shaping to the darts, added seam allowance, and today we are going to finish it all off by adding pattern markings.

Pattern markings

There are a number of markings you should always add to your pattern pieces. They help you with laying patterns on the fabric correctly when cutting your fabric, and also help when sewing your garment together. 

The grainline

The grainline ensures that the pattern is placed on the fabric the right way. If the grain is not straight (and it is intended to be), you may end up with a badly fitted garment.

The grainline usually runs vertically through a pattern, although in some cases it will run horizontally or even diagonally (bias cut patterns). I like to use arrows to indicate the top and bottom of the pattern - this can help when you have a directional print or a pattern piece that is an unconventional shape. The double arrow points towards the top, and the single arrow points towards the bottom. I also like to draw grainlines so they run from one edge of the pattern to the other, this is really hand when using a striped fabric, to ensure your placement is exactly right. 

Notches

Notches are small cuts in the fabric that guide you while you are sewing (they are also commonly indicated with small triangles). If you have sewn The Rushcutter, you will know how much I love a good notch! 

Notches are used to indicate:

  • seam allowance
  • dart arms
  •  the location of design details such as: pleats, gathers or pockets
  • the centre front
  • the centre back
  • balance points

Balance points are pointers on your pattern that help you put pieces together correctly, as well as help you when you are sewing a very long, or curved seam.

For example, I tend to add a balance point (or even two or three - depending on the length of the seam) part way down a side seam to ensure that the pieces are sewn together correctly and I am not left with excess fabric on one side of the seam at the end. Balance points also help to prevent stretching the seam when sewing. In the skirt block, for example, the notch at the hip line acts as a balance point.

A notching no-no

Try to avoid notching both sides of a corner as this can weaken the fabric (as well as the pattern itself). 

Double notches

Double notches are normally used to indicate the direction a piece should be sewn in (and generally indicate the back of the pattern piece). For example, a double notch is used on a sleeve cap to indicate where the sleeve cap meets the back armhole. In a side panel, a double notch is also often used to show where the piece meets with the back pattern piece.

I also like to use a double notch to indicate the end of a zip (if I am using a zip in the centre back).

Drill holes

Drill holes are used to indicate a dart point. I prefer to place drill holes 1cm - 1.5cm up from the actual dart point, so that when the dart is sewn, the marking is hidden inside the dart.

Drill holes can be used to indicate other design features, such as:

  • placement of patch pockets
  • placement of belt loops
  • or any other design feature that is in an area where you are unable to mark a notch on a seam

Pattern instructions

Pattern instructions are your way of keeping track of, and identifying, pattern pieces.

On each pattern piece, you should include:

  • the name of the pattern
  • the name of the pattern piece
  • size
  • cutting instructions
  • number of pieces
  • date

Some of these things may seem quite obvious, but the clearer your markings are, the easier your pattern will be to use. Particularly if you decide to use the pattern in a month, or even a year! If the instructions are clear, you won't waste any time trying to remember the details of your pattern. 

And that's it! You can go ahead and make a toile of your skirt block and see how it fits!


In the coming weeks I am planning on showing you some different ways to hack the skirt block into a different design. Do you have anything you would like to see in particular?


You may also like:

Throwback Thursday: Tools for patternmaking

in-the-folds-patternmaking-tools-1

Welcome to the very first post in my 'Throwback Thursday' blog series. In this series I will go back to some of my most popular blog posts from my previous blog, Em Makes Patterns. 

For today's post, I thought it would be good to start with a post about pattern making tools. If you are keen to start making adjustments to your store bought patterns, or want to start drafting from scratch, there are a few things you are going to need!

There are probably a million different gizmos and gadgets that you could buy to help you with your patterns, but I like to keep things simple, so this post will guide you through just the most useful tools. I learned this from experience... When I moved to London a few years ago, I arrived with very little (a 15kg backpack to be specific), and that very little did not include pattern making tools. Being in that situation, meant that I needed to work out what I really needed and learn to live without the abundance of things I had accumulated over the years in my home sewing room. Now I am back at home, I still try to stick to the basics.

So here goes... The pattern making tools I cannot live without are:

in-the-folds-patternmaking-tools-patternpaper

The first necessity is pattern paper. Without it there is no chance! 

While at university I fell in love with ‘dot and cross’ pattern cutting paper. It makes drawing parallel and perpendicular lines a piece of cake, and is transparent enough that you can easily trace off patterns when you are making changes. It is also nice and wide, so you don’t end up sticking twenty pieces of paper together to make a dress. I can't even remember where I bought mine from, because it seems it's a never ending roll! But there are lots of supplies around, or you can even check eBay.

But, all that said, you can live without it if need be. Some good old fashioned butcher’s paper or brown wrapping paper will also do the trick!

Next in my “pattern cutting tools I cannot live without” round-up is a pacer pencil. 

in-the-folds-patternmaking-tools-pacer

Okay, a good old lead pencil will do just fine, but a pacer gives you the kind of accuracy you need when making patterns. Think about it, if you use a thick lead pencil it may add 2 millimetres to your patterns. This may not seem like much, but if you continue to trace your patterns in this way, over and over, eventually that 2 millimetres will lead to a lot! And an added bonus... A pacer normally comes with an eraser on the end, so it crosses one piece of equipment off the list! An eraser in absolute pattern making staple. We would all like to think that we are perfect and won’t make a mistake. But we will. So always have an eraser in arm’s reach.

Another pattern cutting necessity is a ruler. Any ruler will do, but if you would like to make your life easier, invest in a grading ruler. 

in-the-folds-patternmaking-tools-ruler

Another pattern cutting necessity is a ruler. Any ruler will do, but if you would like to make your life easier, invest in a grading ruler. A grading ruler is long (so you can draw nice long lines in one go), transparent (great for adding seam allowance) and flexible (perfect for measuring curves).

in-the-folds-patternmaking-tools-tracingwheel

 Some pattern cutting tools look like weapons. The tracing wheel is one of them. This is one tool you really do want a case for! Without it, the tracing wheel has been known to poke through handbags and poke legs. 

Apart from the danger surrounding this tool – it really is a handy tool to have when pattern cutting. It is great for tracing patterns (if your paper isn't transparent) or if you are tracing onto card. It is also good for transferring lines, markings, dart shaping or notches to the pattern.

in-the-folds-patternmaking-tools-tape-measure

A dressmaking tape measure is needed for taking body measurements, whilst also being handy for measuring long or curved seams.

in-the-folds-patternmaking-tools-patternmaster

The Patternmaster is a bit of a luxury when it comes to pattern making. I struggled to decide whether it should actually be on my list of “pattern cutting tools I cannot live without,” but it just managed to scrape in. I know a lot of people swear by them, but I often find it much easier to draw a curved line by pivoting with a straight ruler. The main thing I use my Patternmaster for is drawing right angles – it is very good for that!

in-the-folds-patternmaking-tools-stiletto-awl

The other contender for the most dangerous pattern cutting tool in the round-up is the stiletto (often known as an awl). This is another one to be careful with. It’s sharp point is great for making drill holes, as well as keeping the pattern in the right place when using the pivot technique to eliminate a dart or to add volume.

in-the-folds-patternmaking-tools-scissors

Scissors are a must, for obvious things like cutting out your patterns. You also need scissors for some pattern cutting techniques and tricks, like the ‘cutting’ counterpart of the ‘cut and spread’ technique.

in-the-folds-patternmaking-tools-masking tape

Masking tape is another essential. I could not live without it when pattern making. You will need it when making additions or changes to a pattern (like lengthening or shortening). Masking tape is better than regular sticky tape as you can draw lines over it.


That brings me to the end of my “pattern cutting tools I cannot live without” list.

I'm wondering if there is a tool that I haven't mentioned that you cannot live without?


You may also like: