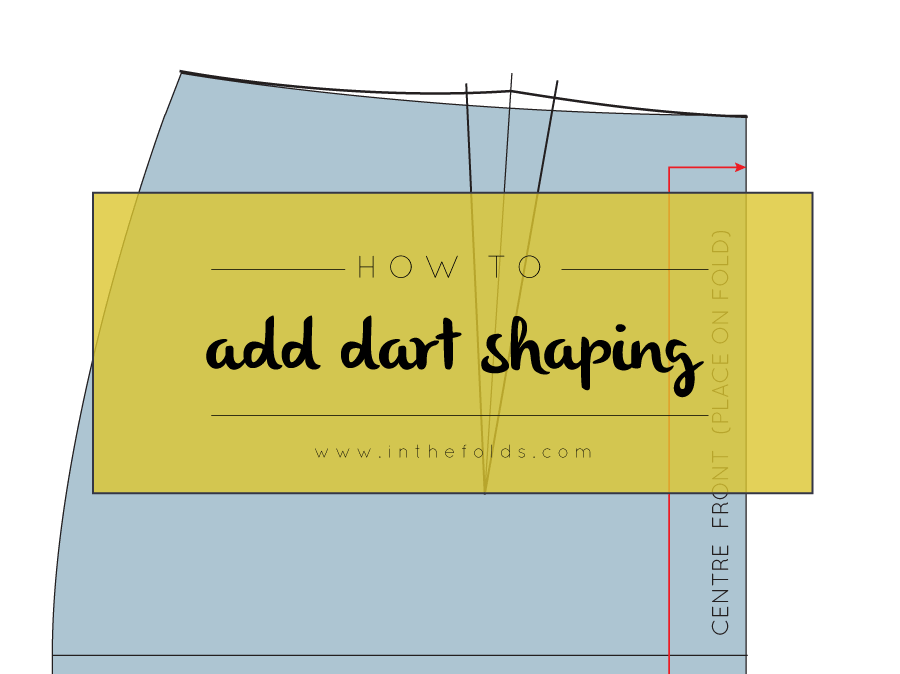
skirt block

How to : Add panel lines to a skirt pattern

how_to_add_panel_lines_skirt_1

Panel lines are a great way to add interest to a design. There are countless variations and it is a way to include more than one fabric in your design if you would like. I really struggle to keep a design limited to one fabric, so often add a contrast fabric with panel lines. Panel lines are also a good way to eliminate darts, without losing the fitted shape of the garment.

Now that our skirt blocks are done, it's time to have a play! In today's post I will show you the basics of creating panel lines on a pattern. This same principle can be used on all different patterns, so keep reading, even if it's a bodice or dress you're planning to add panels to. 

how_to_add_panel_lines_skirt_2

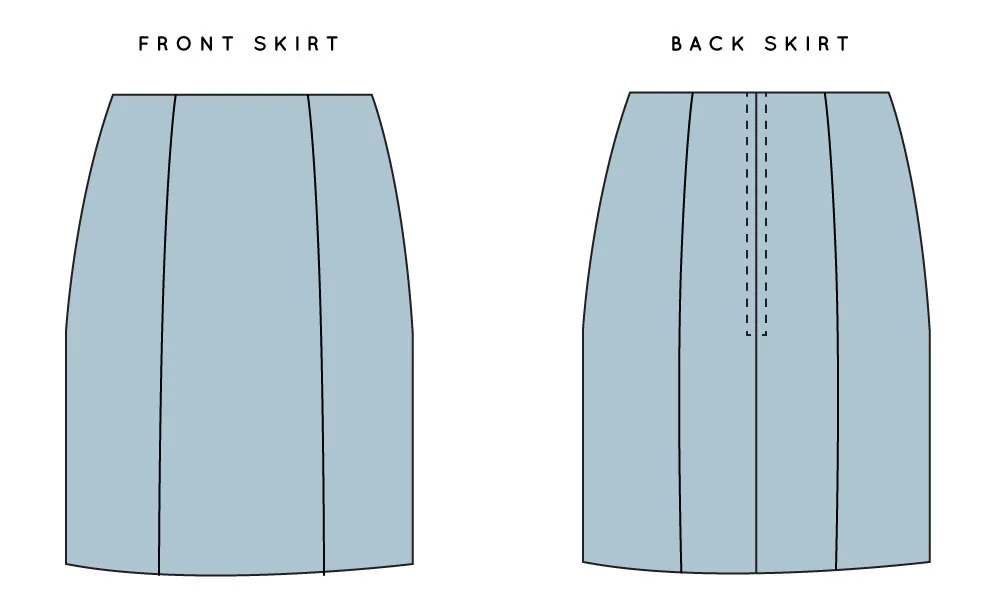
I will show you how to add panel lines where the darts are on the original skirt block. With these panels, you will no longer need darts, as the shaping required will be provided by the panel lines.

Mark panel lines

how_to_add_panel_lines_skirt_3

1. Take your skirt pattern and draw a line from the tip of the dart to the hemline, ensuring it is parallel to the centre front (or entre back if you are working on the back pattern piece).

2. Add notches to the line. This will help when you are matching the two pieces together later. I suggest putting one in line with the dart point and another on the straight part of the line.

Now that you have the line marked, you can cut the pattern into two pieces, or you can trace the pieces onto seperate pieces of paper (my preferred method).

Create side front panel piece

how_to_add_panel_lines_skirt_

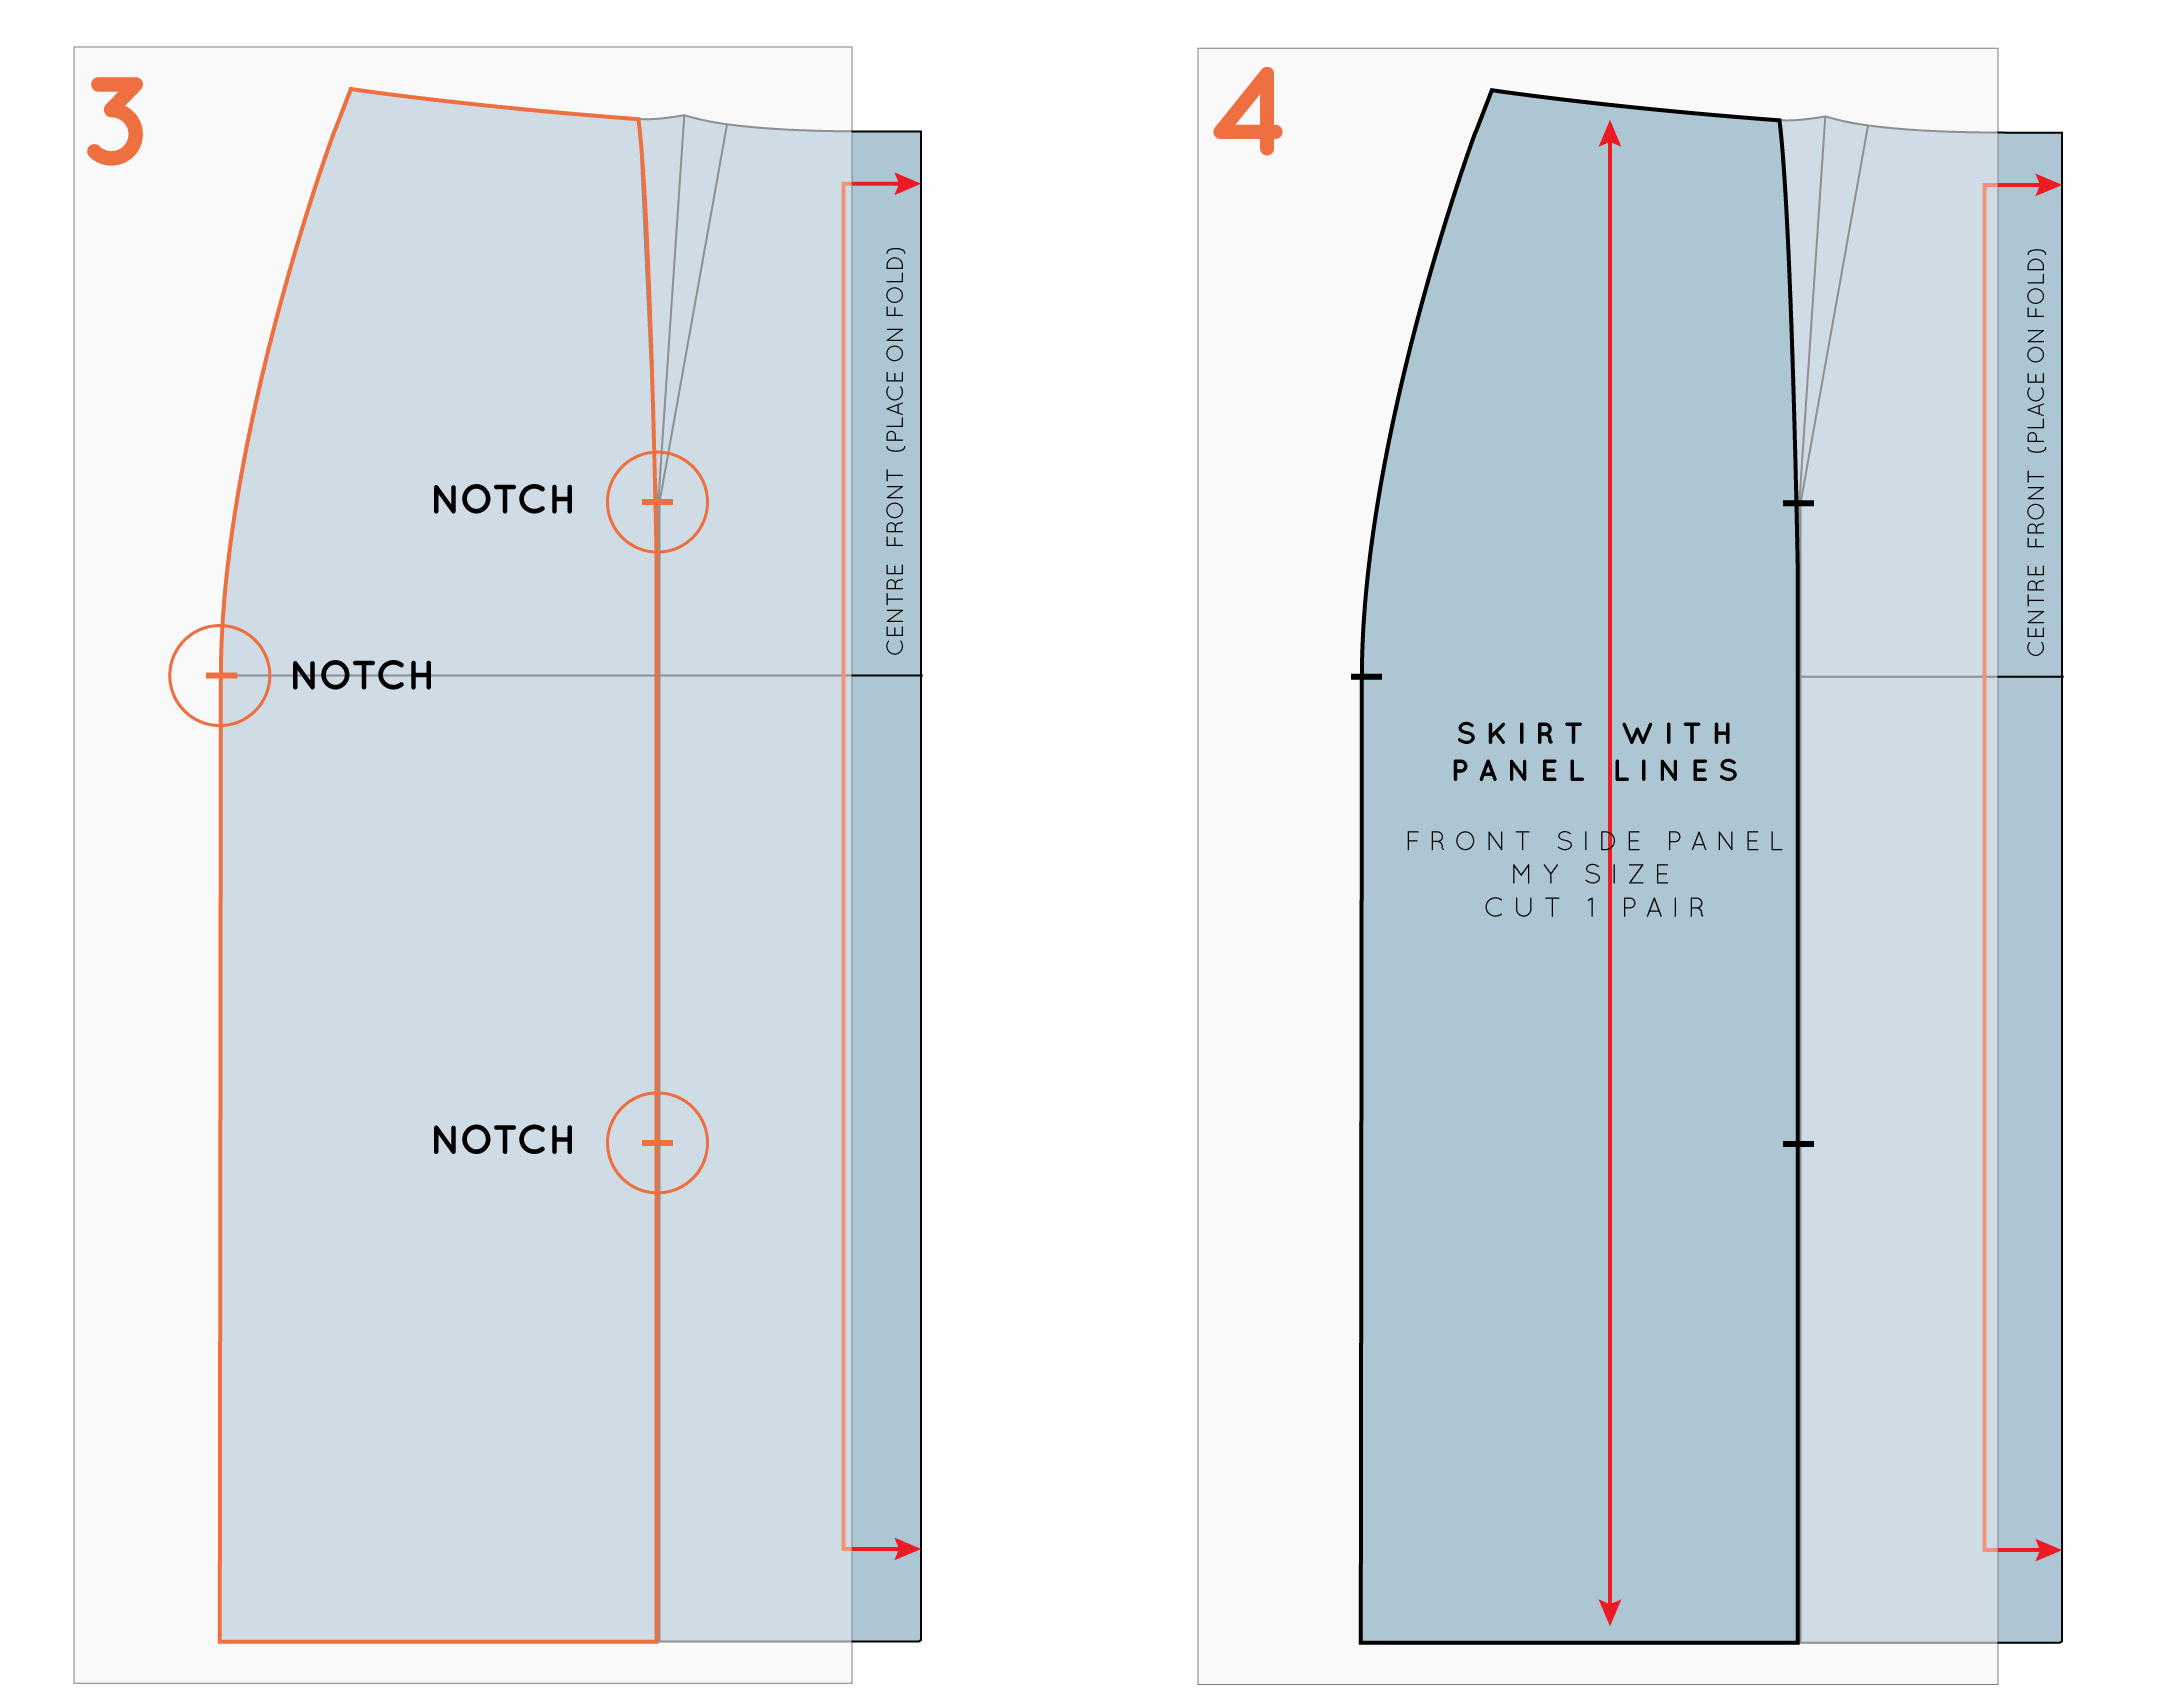
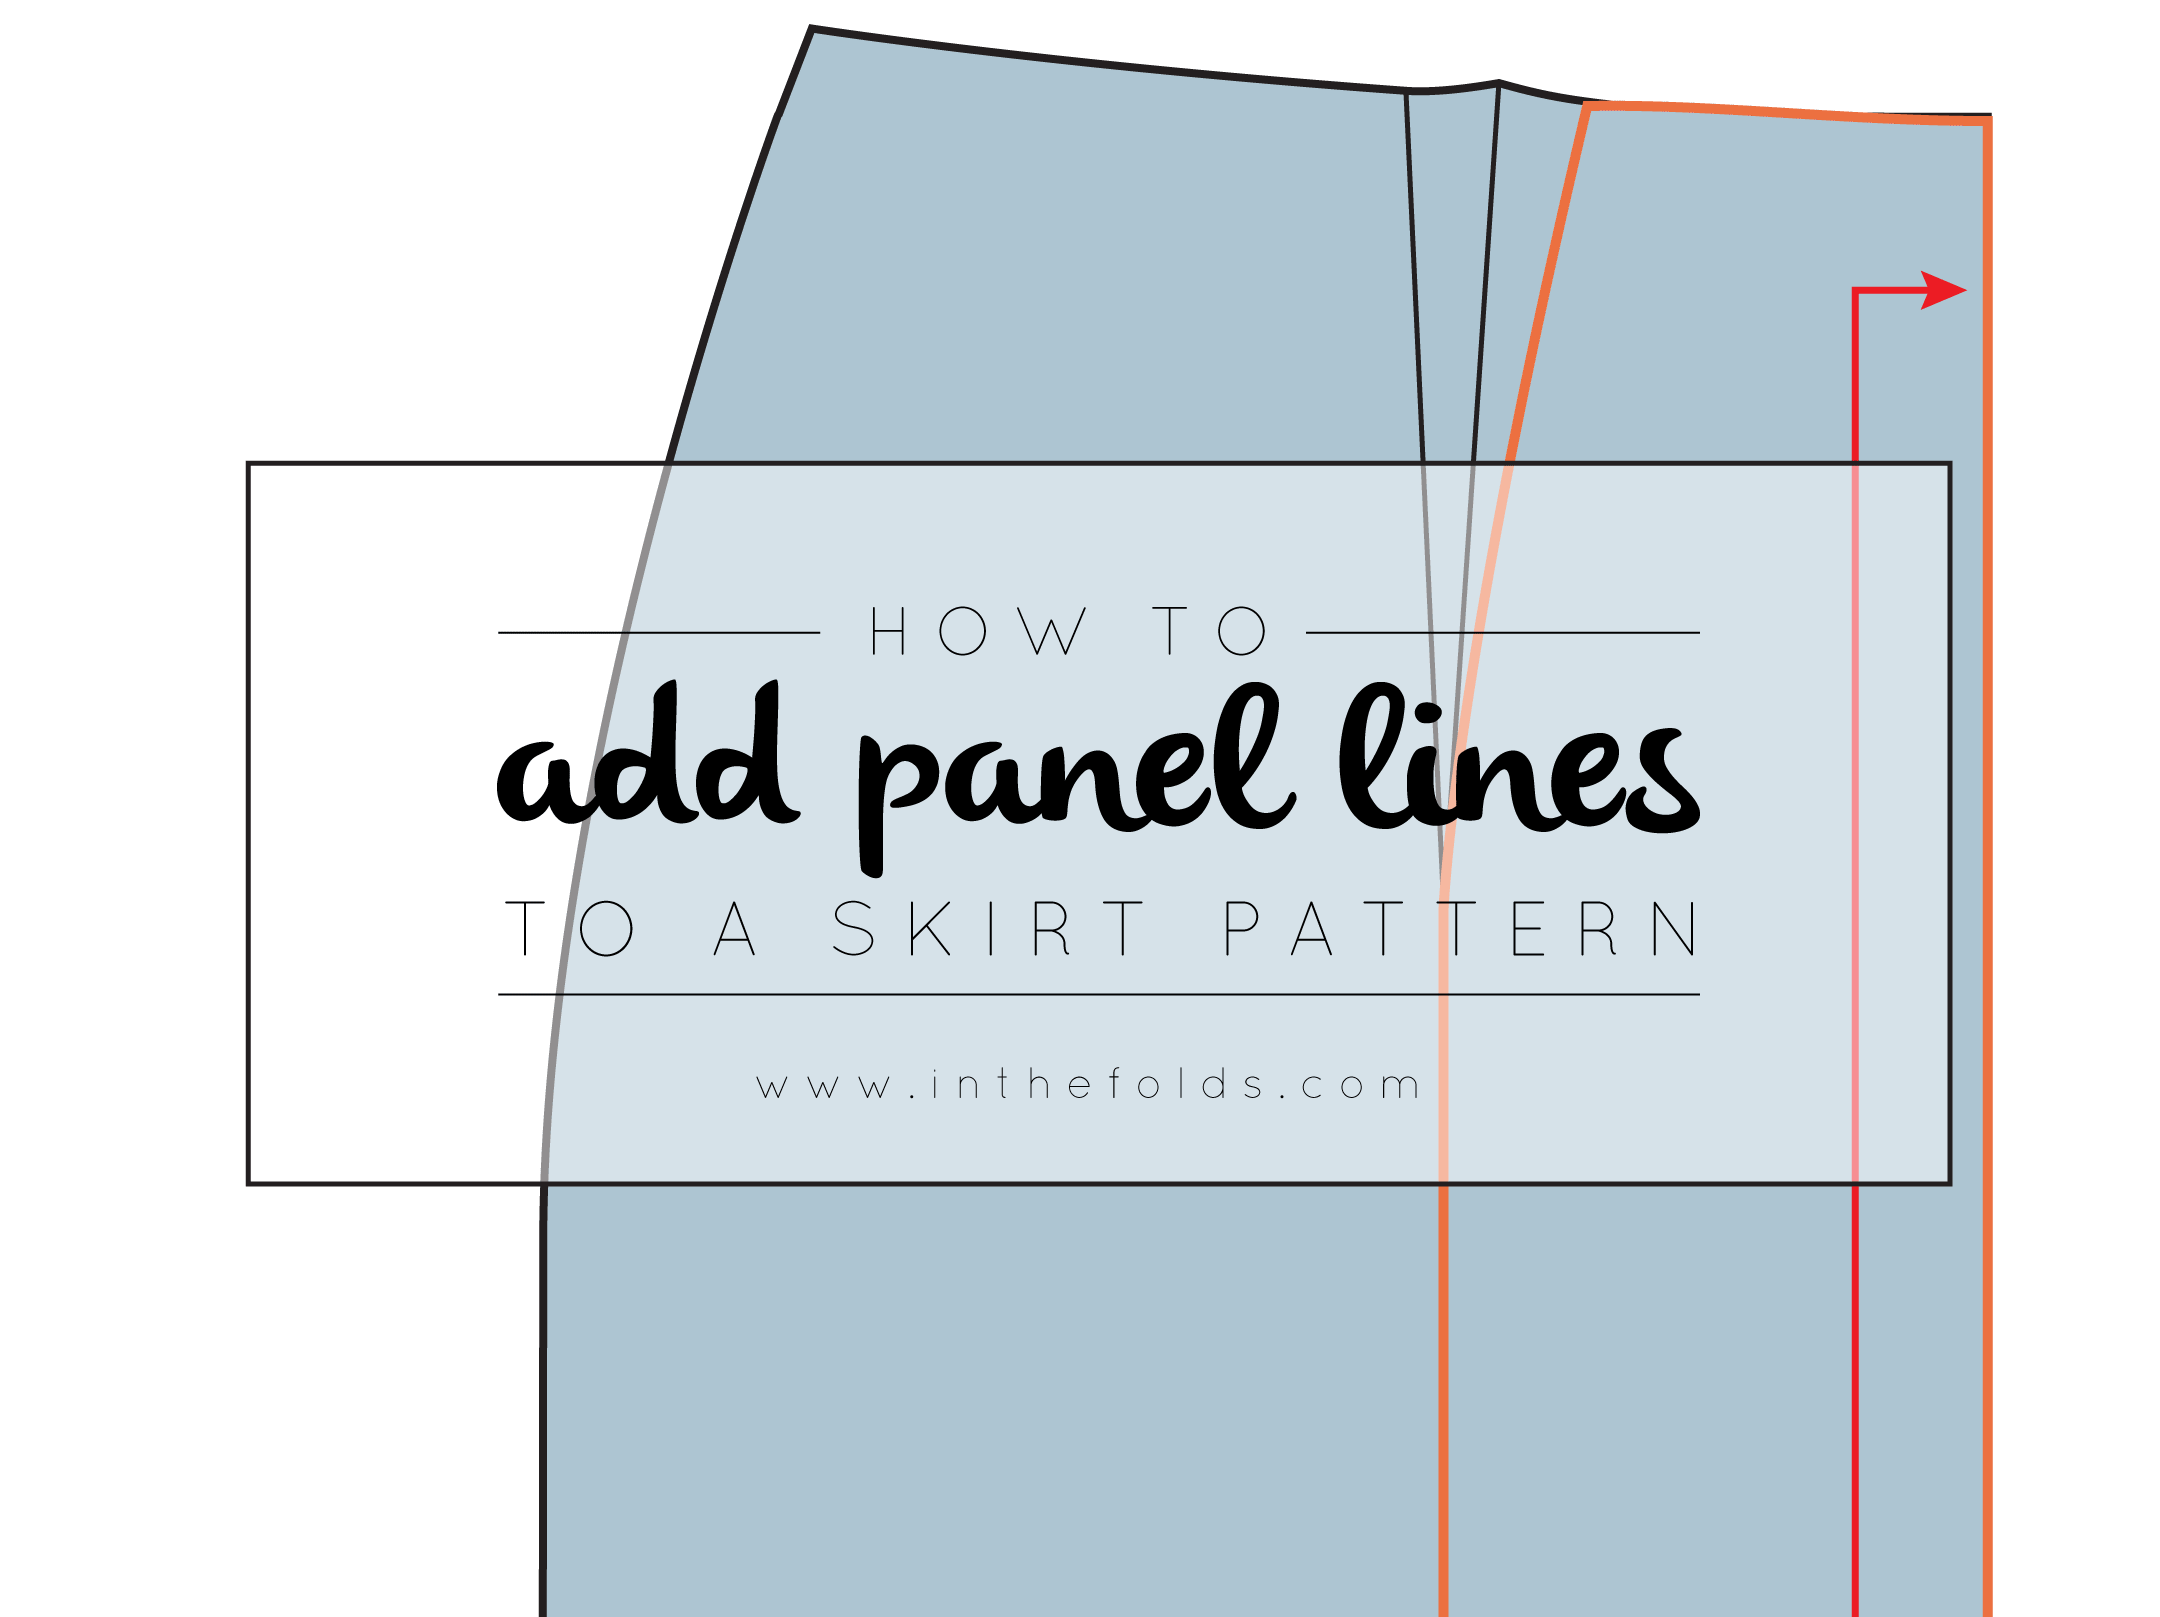
3. Take a separate piece of pattern paper, and place it on top of your skirt block. To start, you will be tracing the left side panel. Trace down the side seam, along the hemline, up the line you drew (Step 1), along the left dart arm (being sure that the transition between line and dart is a smooth curve) and then along the waistline. Transfer the notches from the panel line, and notch the hip line on the side seam.

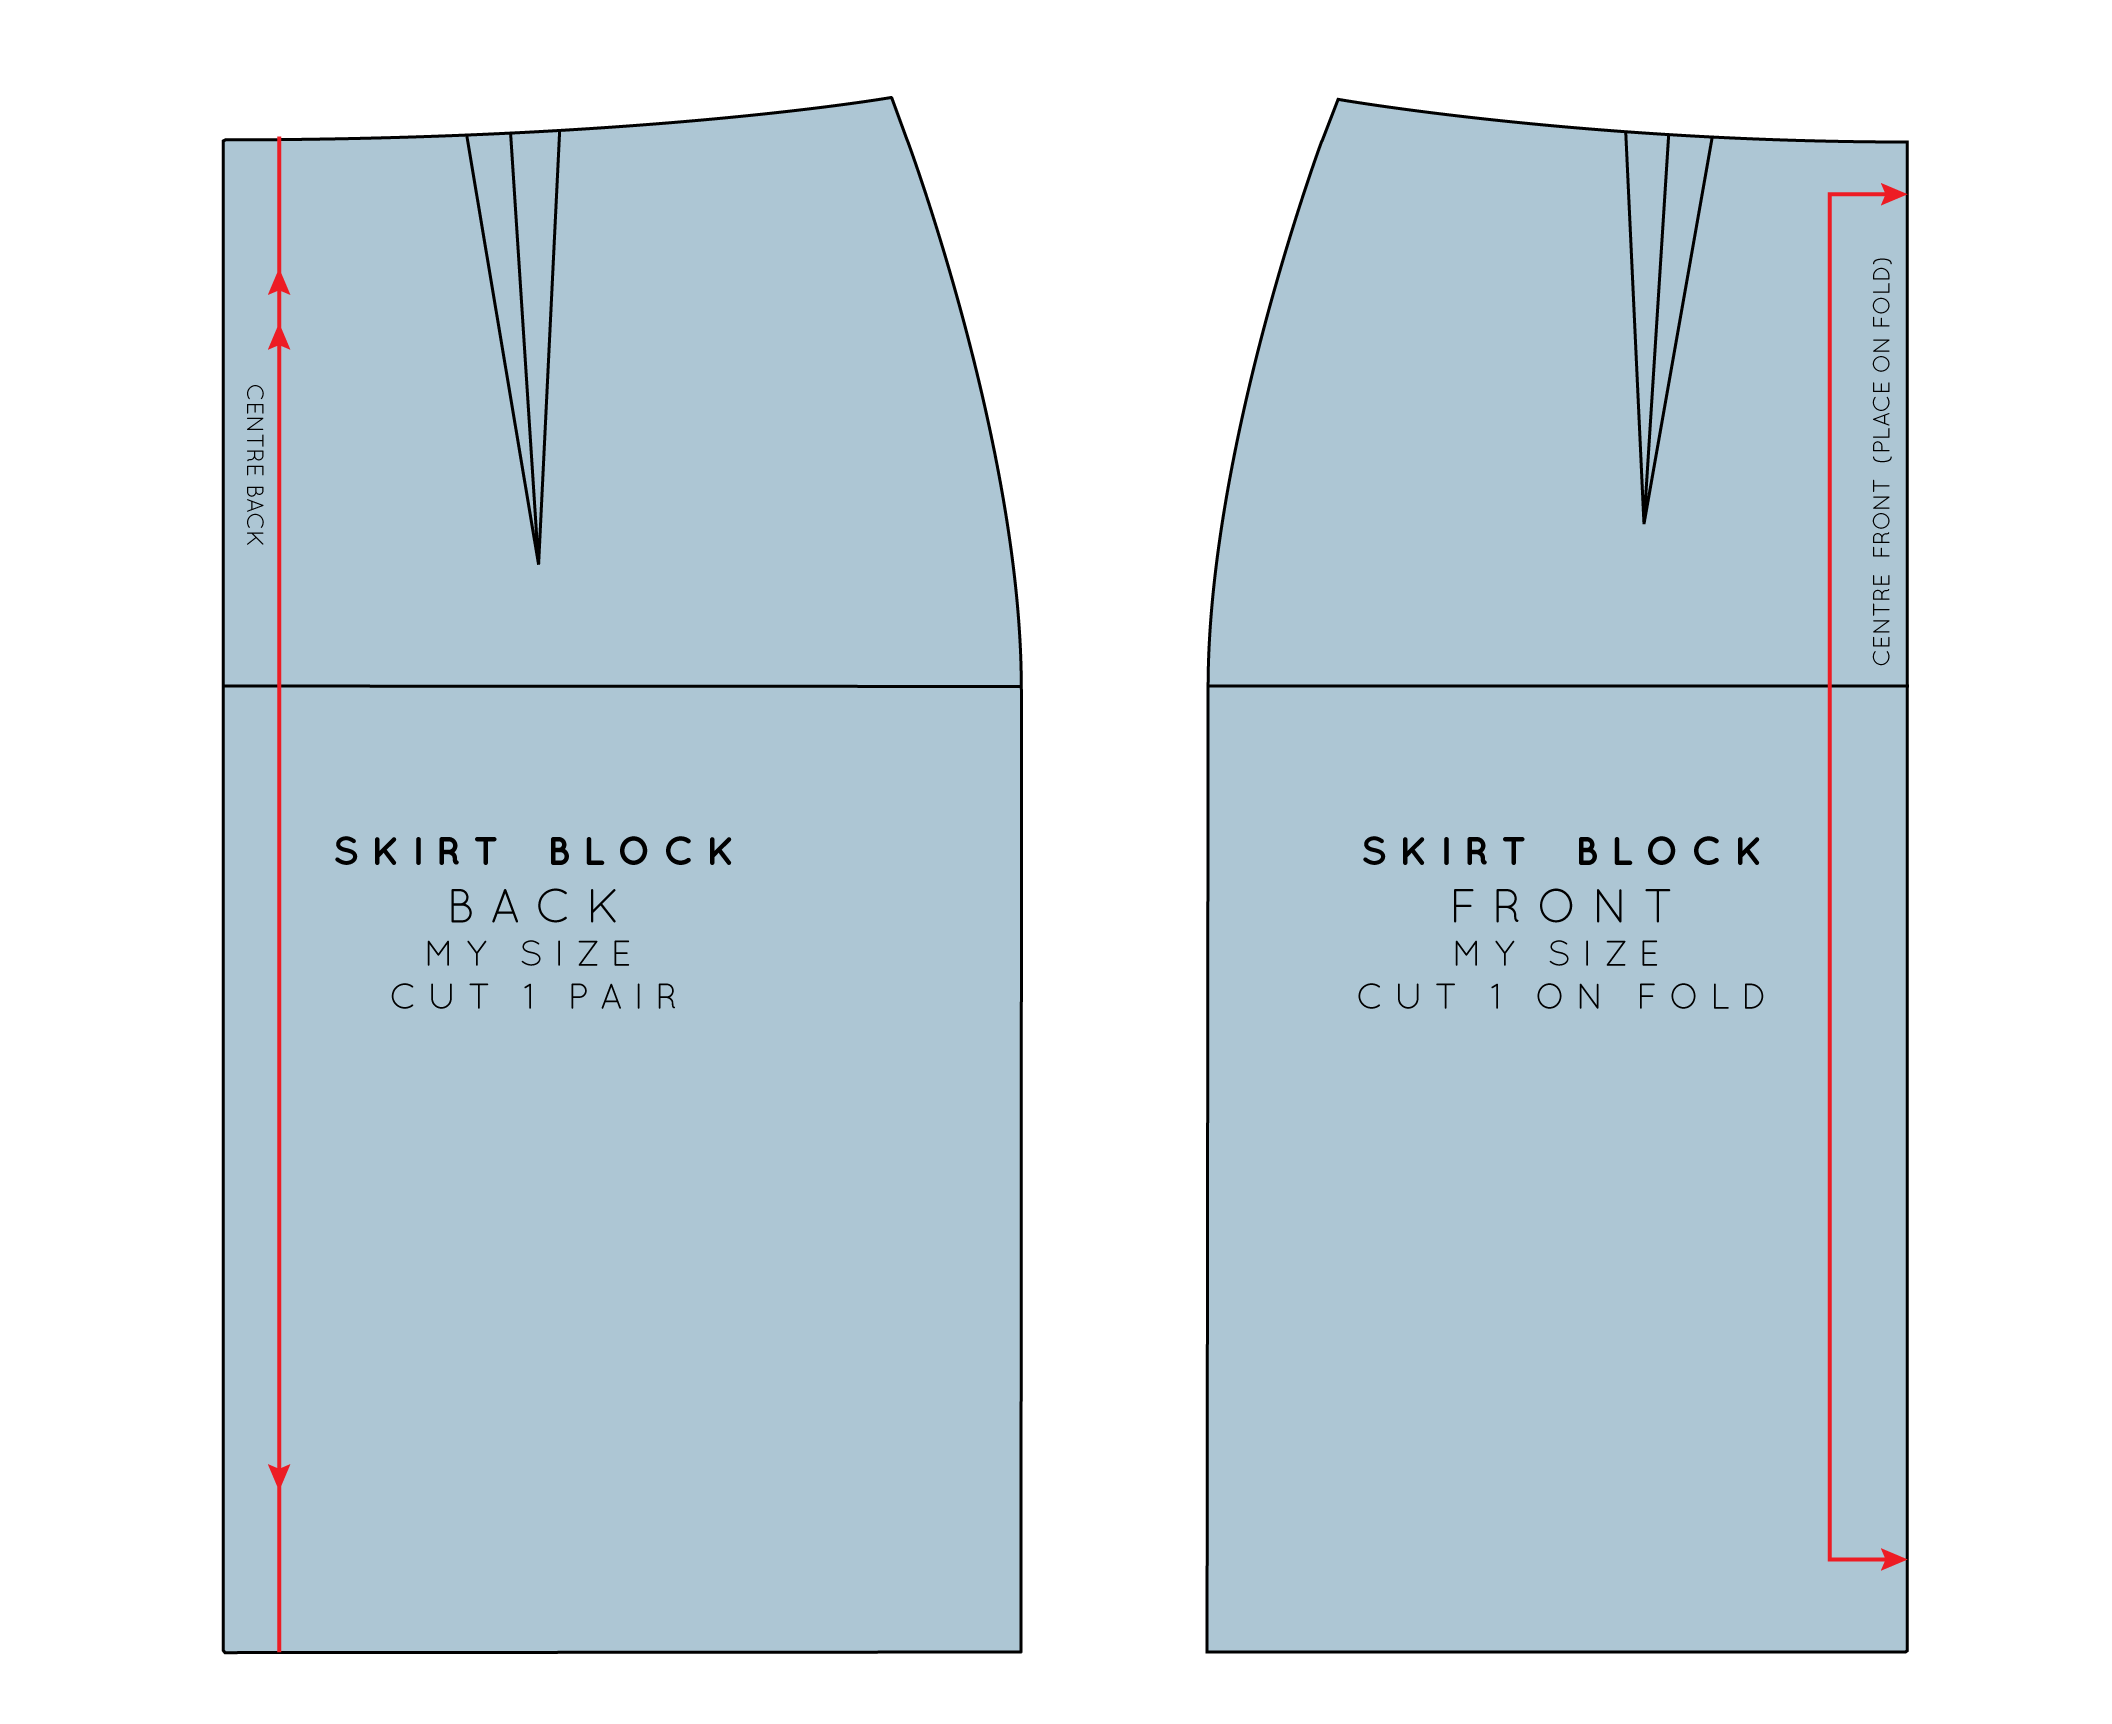
4. Before removing the tracing, transfer the grainline, which should be parallel to the original grainline. Add pattern information and cutting directions (Front side panel / cut 1 pair).

Create centre front panel piece

how_to_add_panel_lines_skirt_4

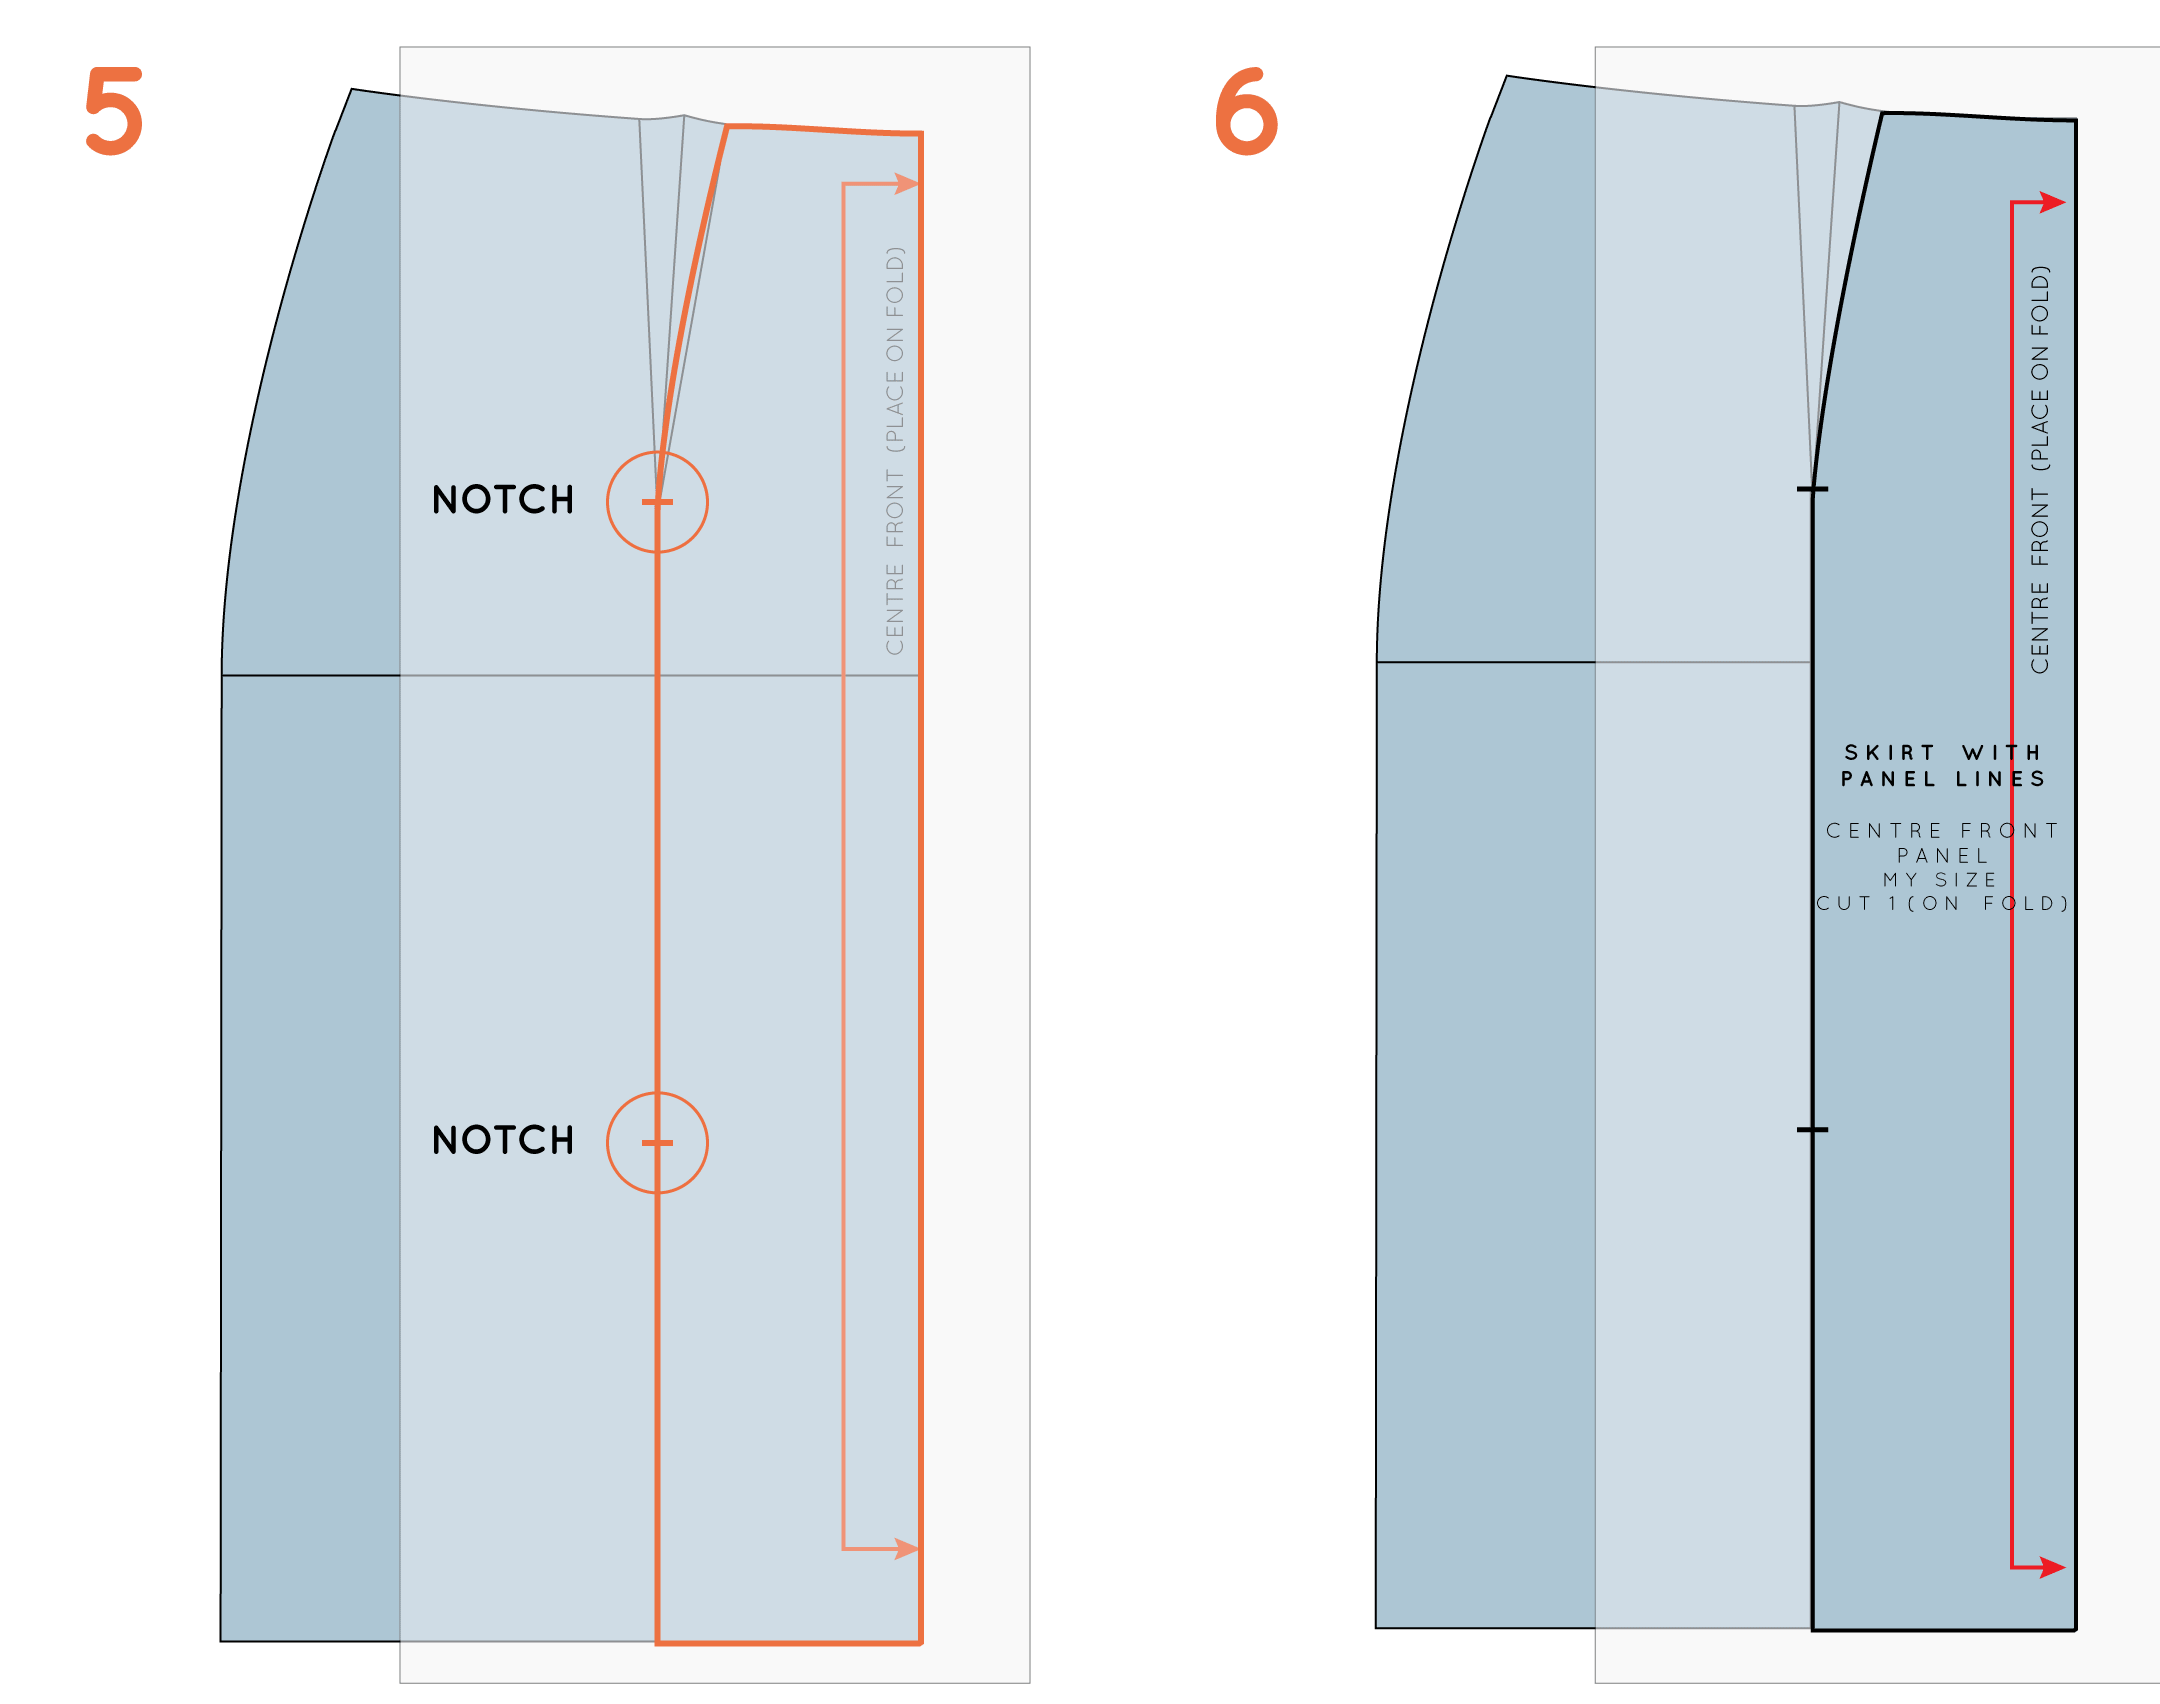
5. Next, you will need to trace the centre front panel. Take another piece of pattern paper and trace down the centre front, along the hemline, up the panel line, up the right-hand dart arm and along the waistline. Once again, make sure your transistion from panel line to dart line is nice and smooth. Transfer the notches on the panel line.

6. Before removing the tracing, transfer the grainline, which should be parallel to the original grainline. Add pattern information and cutting directions (Centre front panel / cut 1 on fold).

Add seam allowance

how_to_add_panel_lines_skirt_5

7. Add seam allowance to both pattern pieces. I suggest 1.2cm - 1.5cm (1/2in - 9/16in). You may want to add more to the hemline, but for the sake of the example I have left the seam allowance consistent. Repeat process for the back pattern, and now you have a skirt with panels, instead of darts!

You may also like:

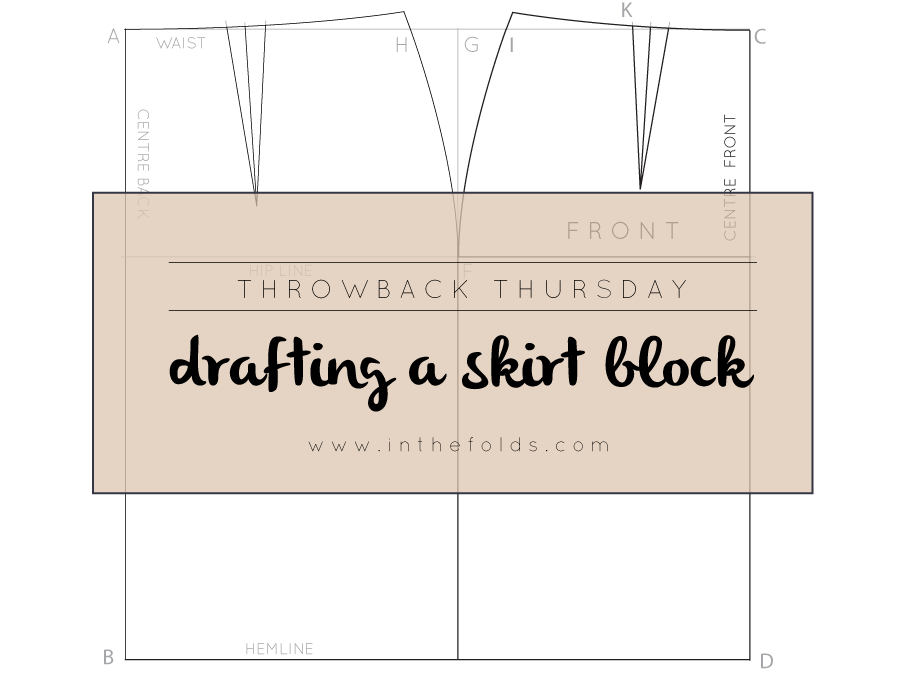
Throwback Thursday : Drafting a skirt block

inthefolds_draftaskirtblock_tutorial

As I mentioned last week, I will be diving into the Em Makes Patterns archives every Thursday to bring you some juicy pattern making goodness. 

For this weeks Throwback Thursday post, I thought it was worth starting right at the very beginning. If you are thinking about learning to your own patterns, then the best place to start is by drafting a skirt block. 

The skirt series

This is the first post of the skirt series, and each week I will be adding more posts, so that by the end of it, you will have a skirt block made to your measurements, and also have some pattern making techniques under your belt, so that you can make the skirt of your dreams!

What is a pattern block?

A pattern block is a basic pattern drafted to specific (or custom) measurements.

It is the starting point for most patterns (when flat pattern cutting), and can be manipulated and adjusted to meet individual design preferences.

It is a good idea to transfer your blocks onto cardboard, to keep them strong, as once you have a set of these, you will be using them a lot!
The skirt block

A skirt block is a fitted skirt that sits on the waist. Generally skirt blocks have two darts in the front and two in the back, although it is common to see a variation on this (for example, four darts in the back). By drafting a skirt block, you will get to know some basic techniques, and also get a sense of flat pattern making.

Tools + supplies

To draft a skirt block, you will need:

  • a piece of pattern paper

  • a ruler

  • a pencil

  • a tape measure

  • You may also want a french curve (or plate) for drawing the hip curve. To be honest, I don't use a curved ruler very often, and would rather use a standard ruler to draw my curves. But I will leave that tutorial for another day!

Measurements required

For this tutorial, you will need the following measurements: 

This distance will depend on how long/short you would like to make your skirt block - I made mine to finish just above my knee. 

Let's get drafting!

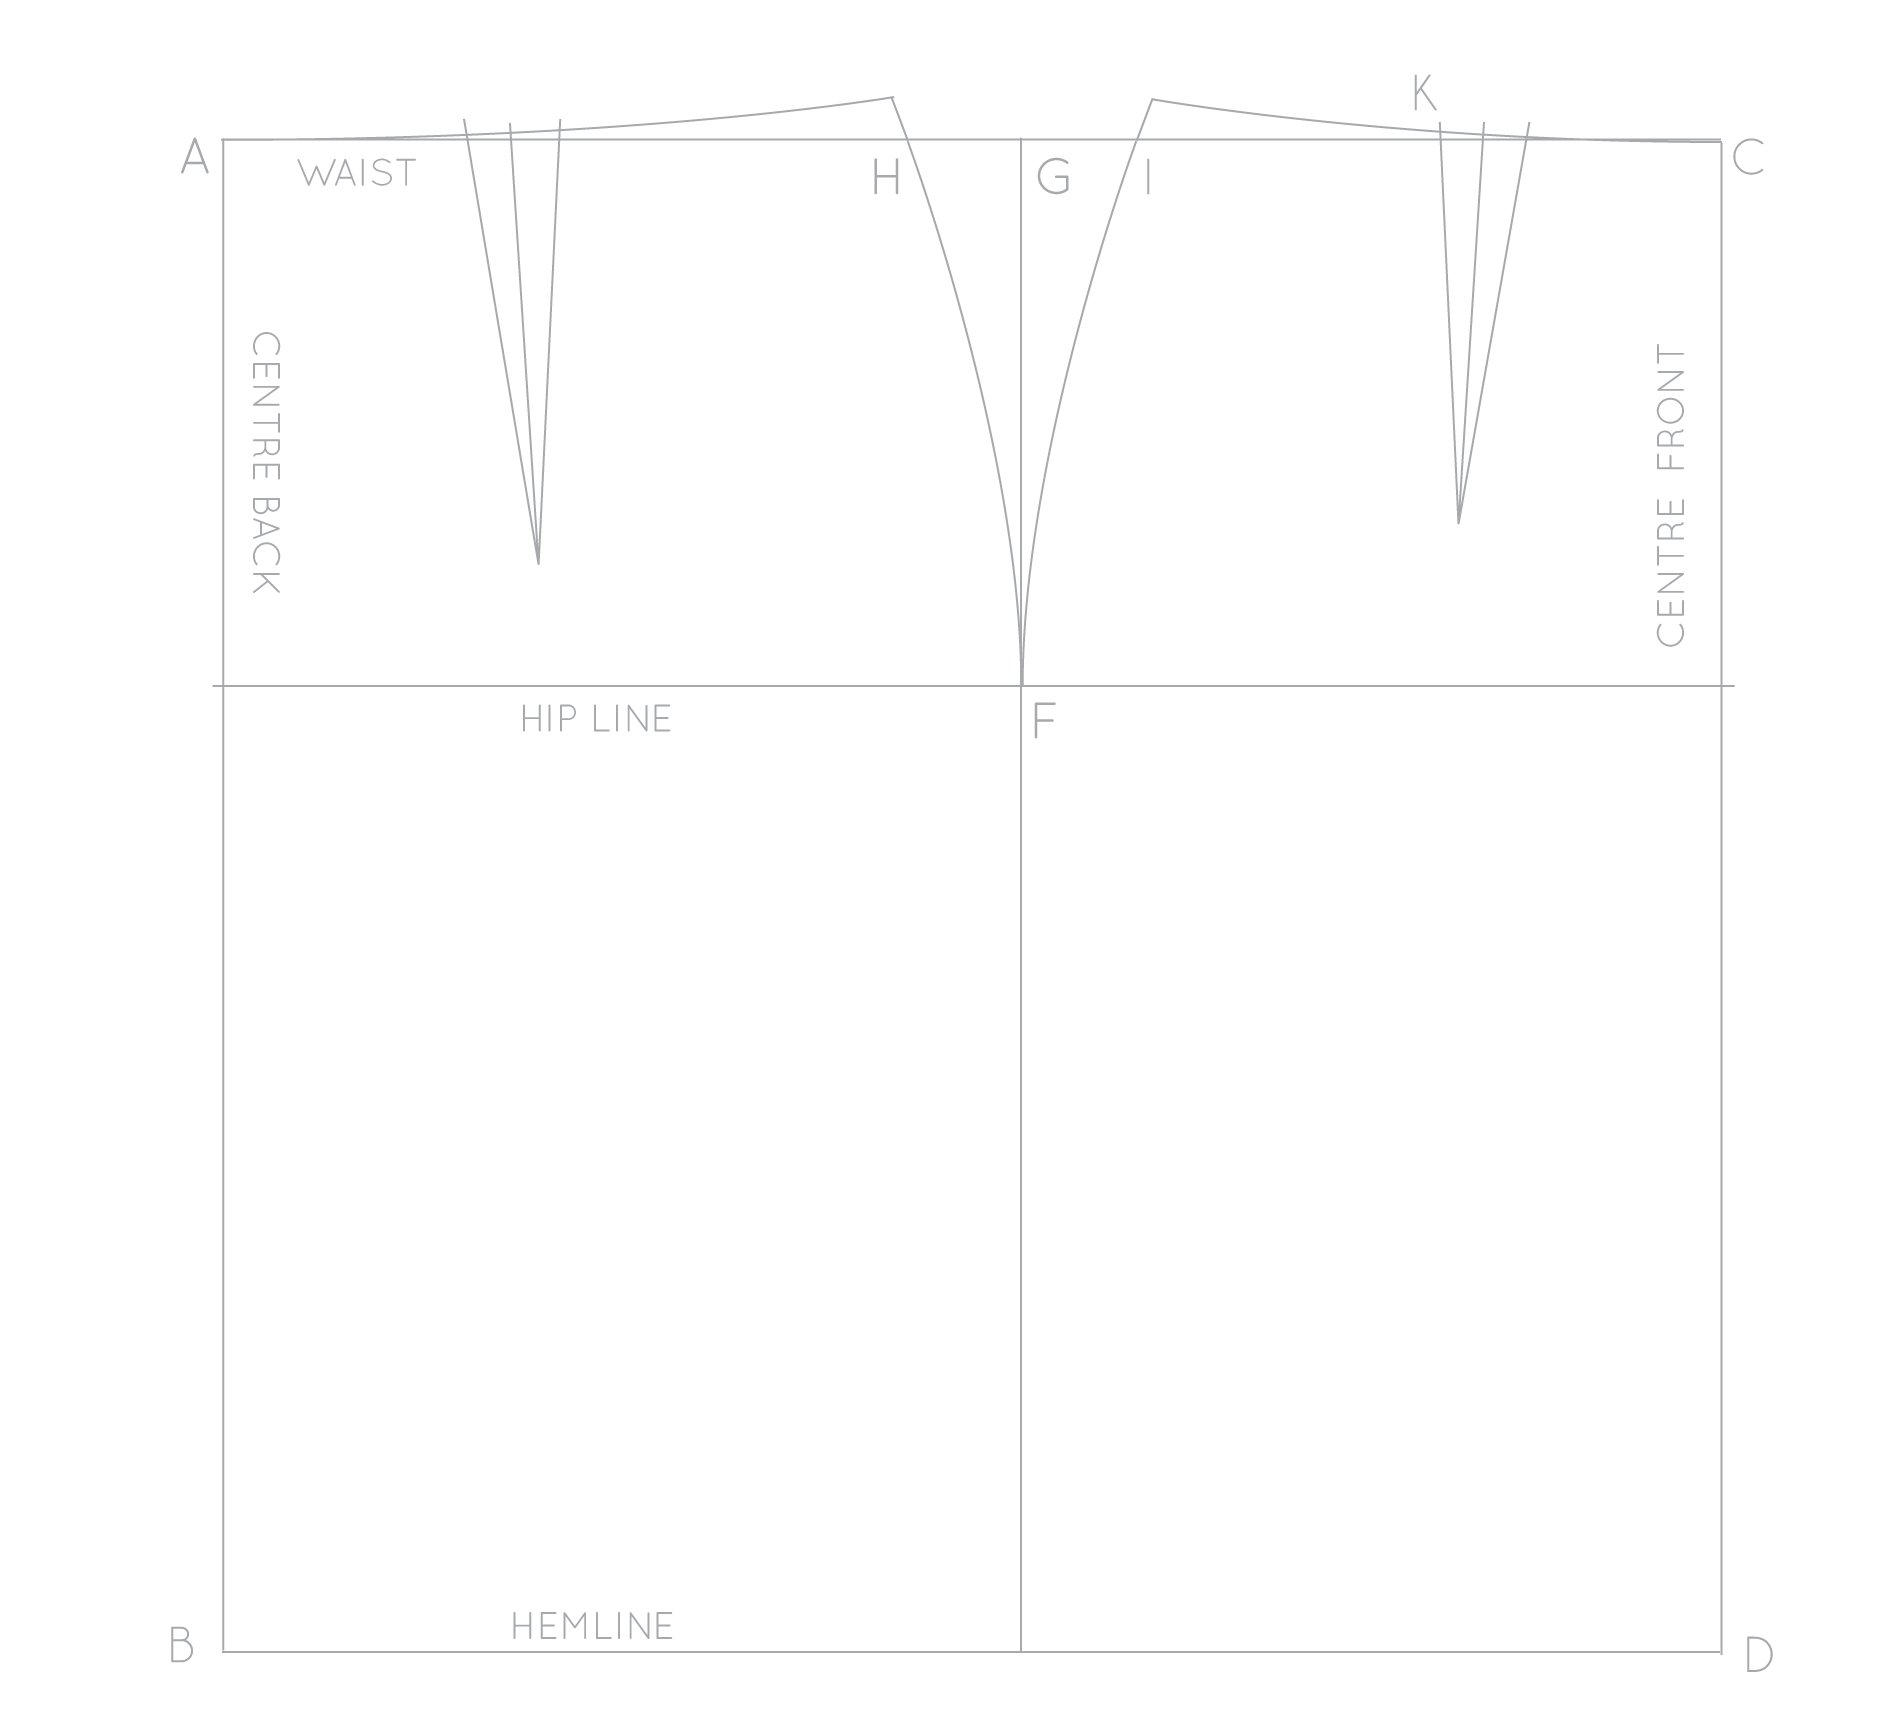
Mark the centre back

inthefolds_draftaskirtblock_1

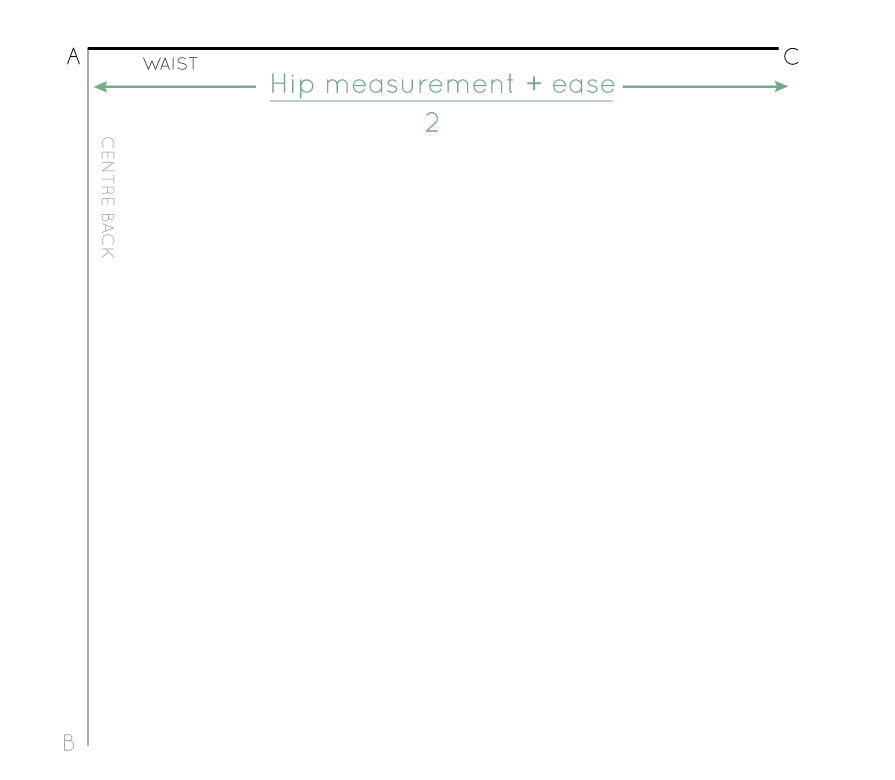
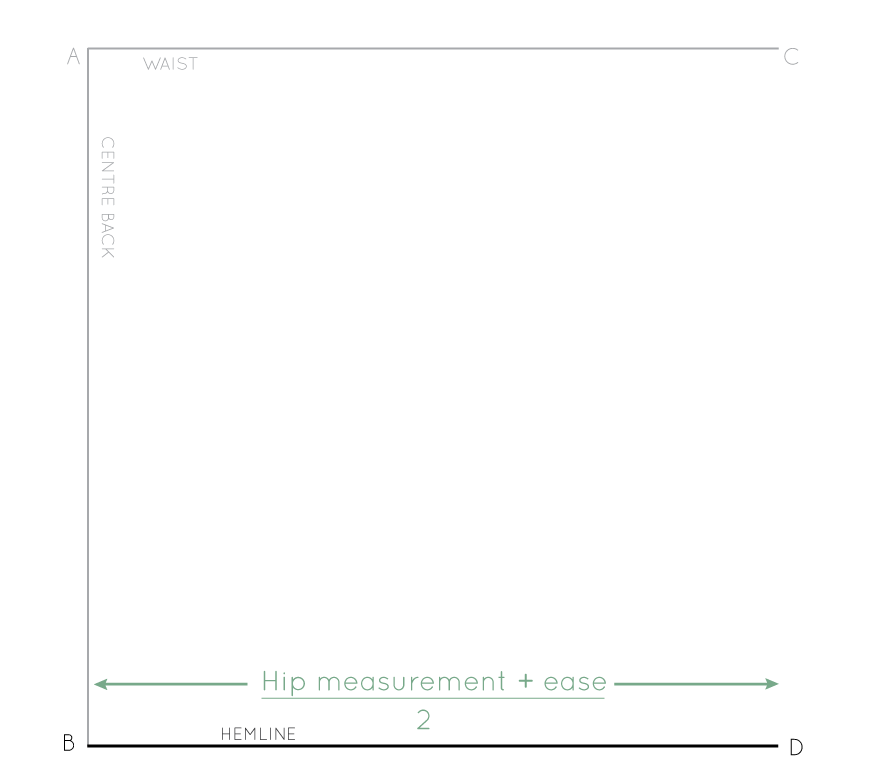
To start, draw a straight line down the left hand side of your pattern paper, the length of your WAIST TO HEM measurement.

Label the ends as A and B. 

This will become the CENTRE BACK seam in your skirt.

Mark the waistline

inthefolds_draftaskirtblock_2

You will need to add a small amount of ease to the pattern (which will allow you to walk/sit/dance in your skirt). It is up to you how much ease you add - but as it is a block it should be quite close fitting, I suggest adding about 5cm to the HIP measurement and 3cm to the WAIST measurement.

Take your HIP measurement and add ease to this measurement, then divide result by two. As for all symmetrical patterns, you will be making half the skirt pattern (as the front pattern will be cut on the fold, and a pair of backs will be cut, to create a full skirt).

Draw a line from A (perpendicular to the CENTRE BACK seam ie. AB) the length of the measurement you found above. Label the end point as C.

This line (AC) will become the waistline of the skirt.

Mark the hemline

inthefolds_draftaskirtblock_3

Move down to point B and draw a line, perpendicular to the CENTRE BACK, the same length as the waistline. Label the endpoint as D.

This line (BD) will become the HEMLINE of the skirt.

Mark the centre front

inthefolds_draftaskirtblock_4

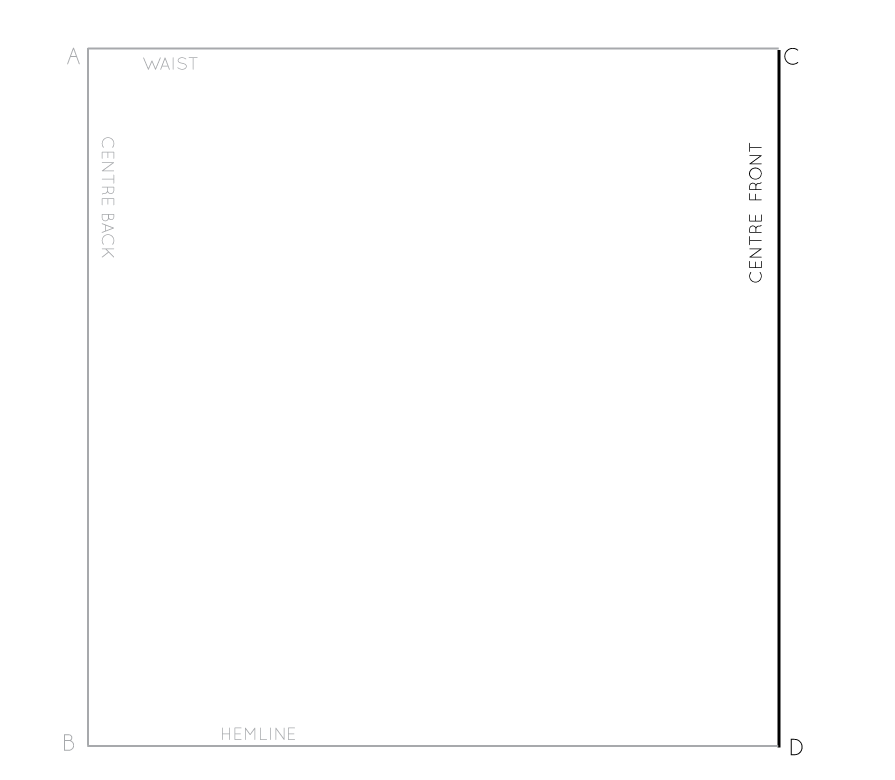
Join points C and D. This will be the Centre Front of the skirt.

Mark the hip line

inthefolds_draftaskirtblock_5

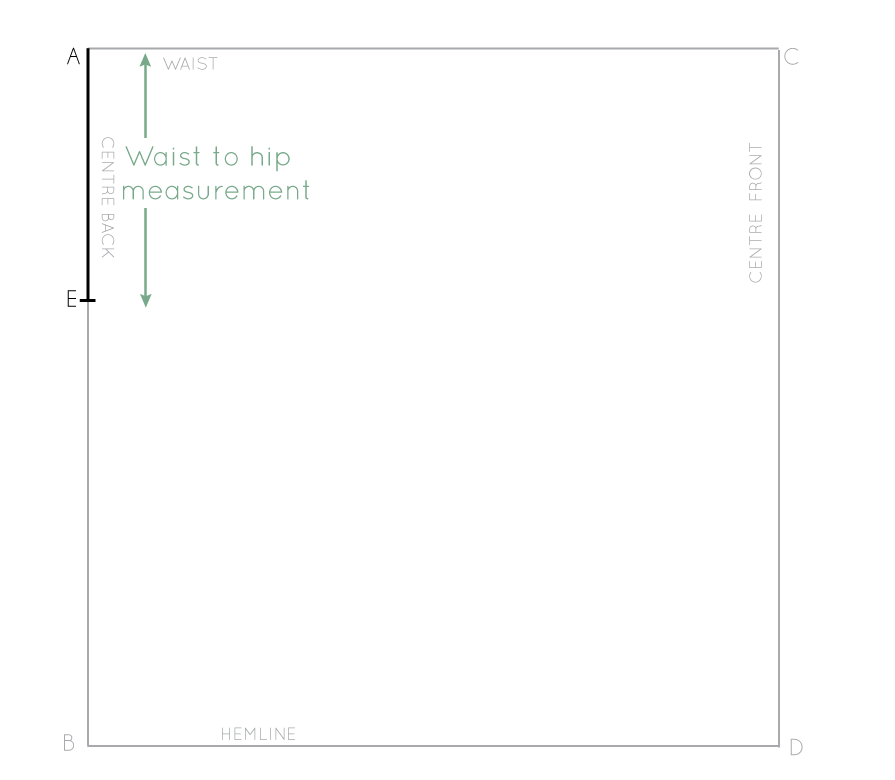
Take your WAIST TO HIP measurement and mark a point this distance from A, down the CENTRE BACK line. Mark point as E.

inthefolds_draftaskirtblock_6

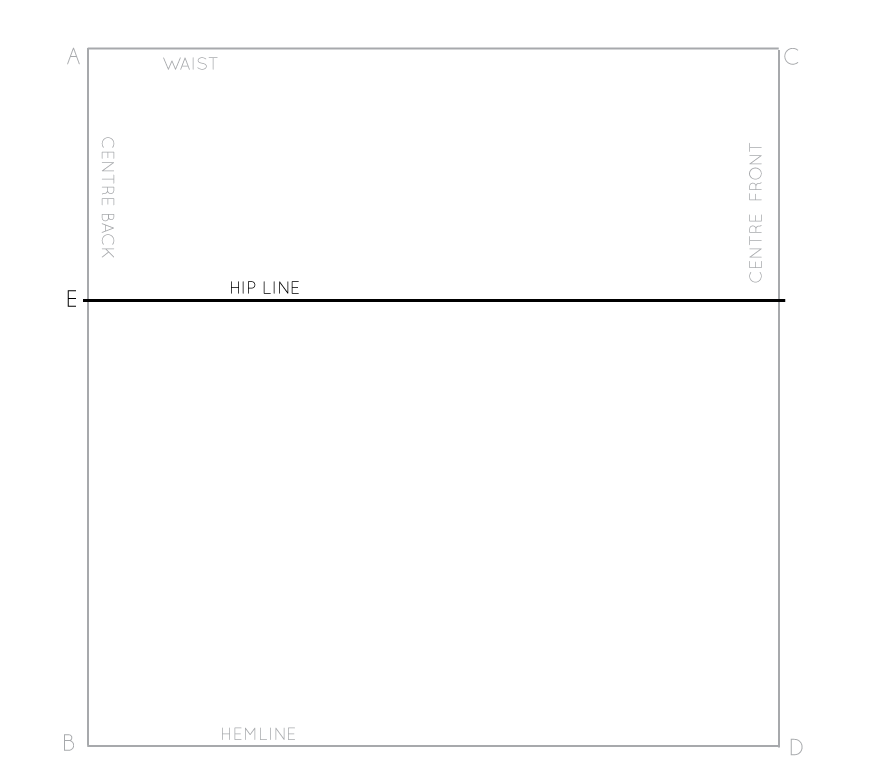
Draw a perpendicular line from E that intersects with the CENTRE FRONT (CD).

You can mark this line as the HIP LINE.

Mark the side seam

inthefolds_draftaskirtblock_7

It is now time to mark the side seam. 

Take your full HIP MEASUREMENT and divide by four (once agin because we will be cutting on the fold). Add 1.5cm to the result. This extra 1.5cm will move the side seam slightly beyond the halfway point - to allow room for your derriere in the back of the skirt.  

Mark this measurement on your HIP LINE, measuring from point E. 

Mark point as F.

inthefolds_draftaskirtblock_8

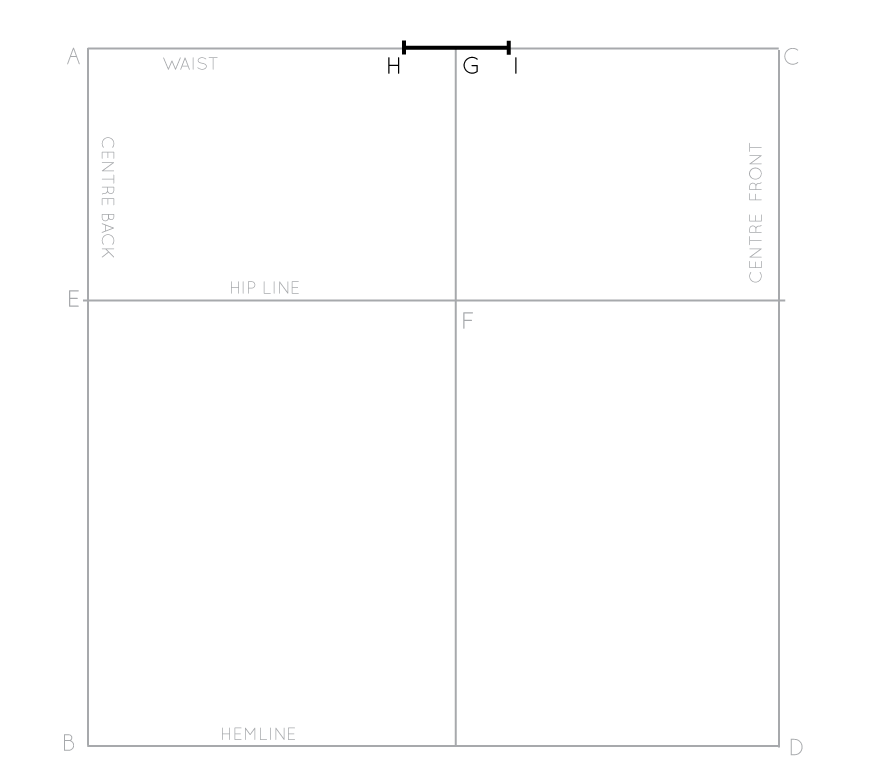
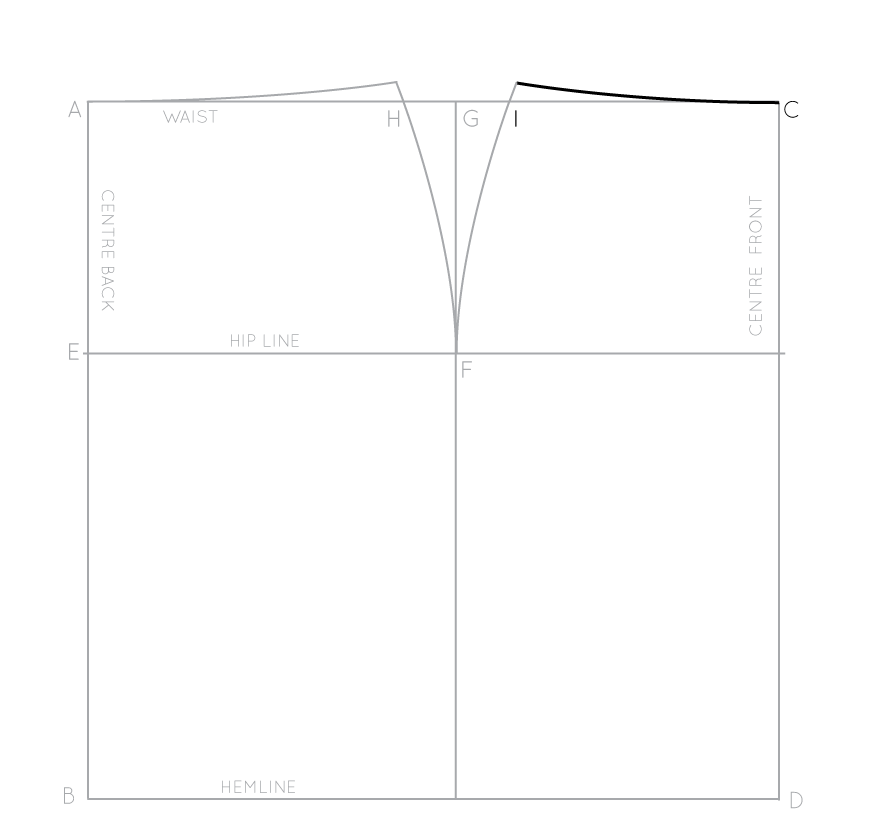
Draw a perpendicular line from F, that extends up to the WAISTLINE (mark intersection point as G) and down to the HEMLINE. 

inthefolds_draftaskirtblock_9

At this stage, your waistline is the same length as your hip line. This is not the case in most women's bodies, so you will need to remove some width from the waistline. This will be done by creating four darts (two in the front and two in the back) and curving the hip line at the side seam.

To do this, take you WAIST measurement and subtract it from your HIP measurement. 

With your result, subtract the width of your four darts (4 darts measuring 3cm each = 12cm). The result is how much you need to remove from the side seams. 

Take the result and divide by two (as we are making half the pattern) and distribute either side of point G, on the waistline (half the measurement on the front pattern and half on the back). Mark points as H and I.

inthefolds_draftaskirtblock_10

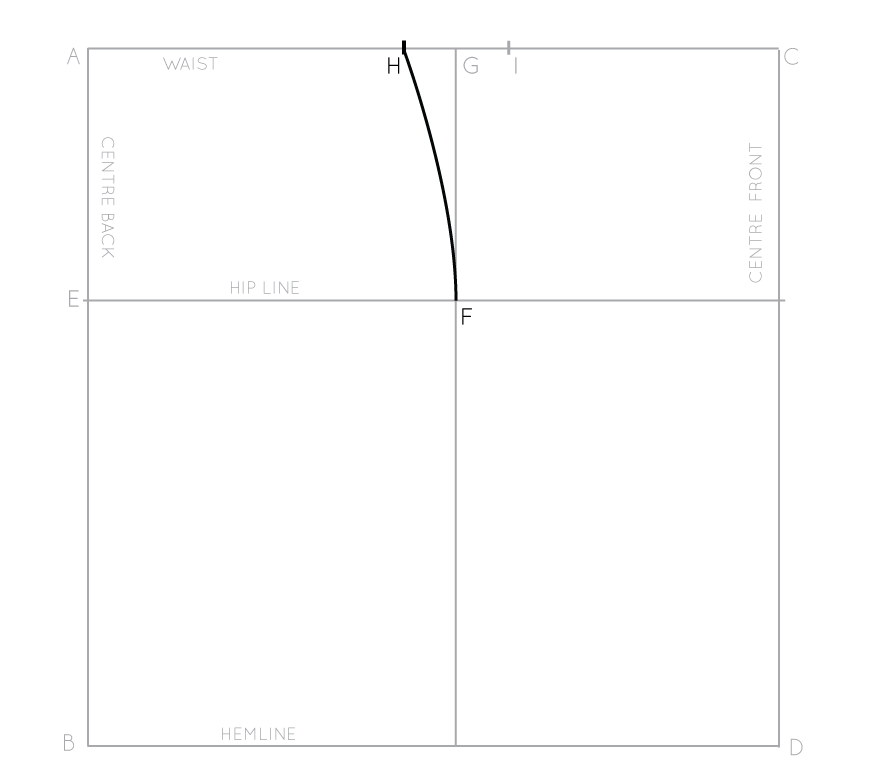
Join H to F with a smooth curve. 

If you have quite a big difference between your waist and hip measurements and are worried that the hip curve is too extreme, you may choose to increase the width of your darts to compensate. 

inthefolds_draftaskirtblock_11

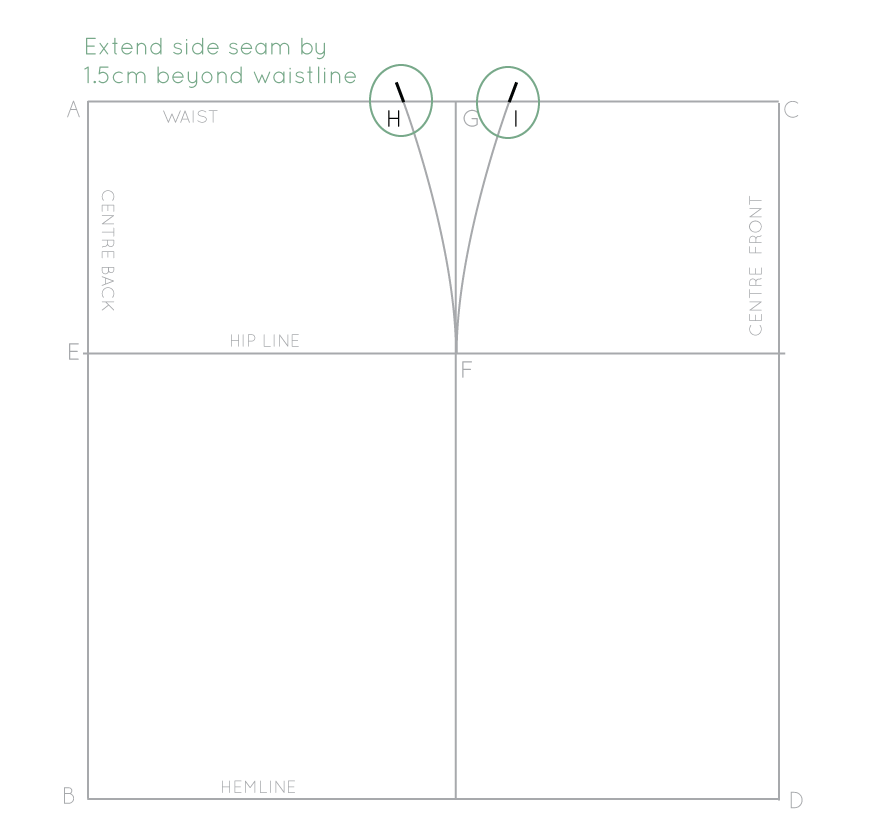
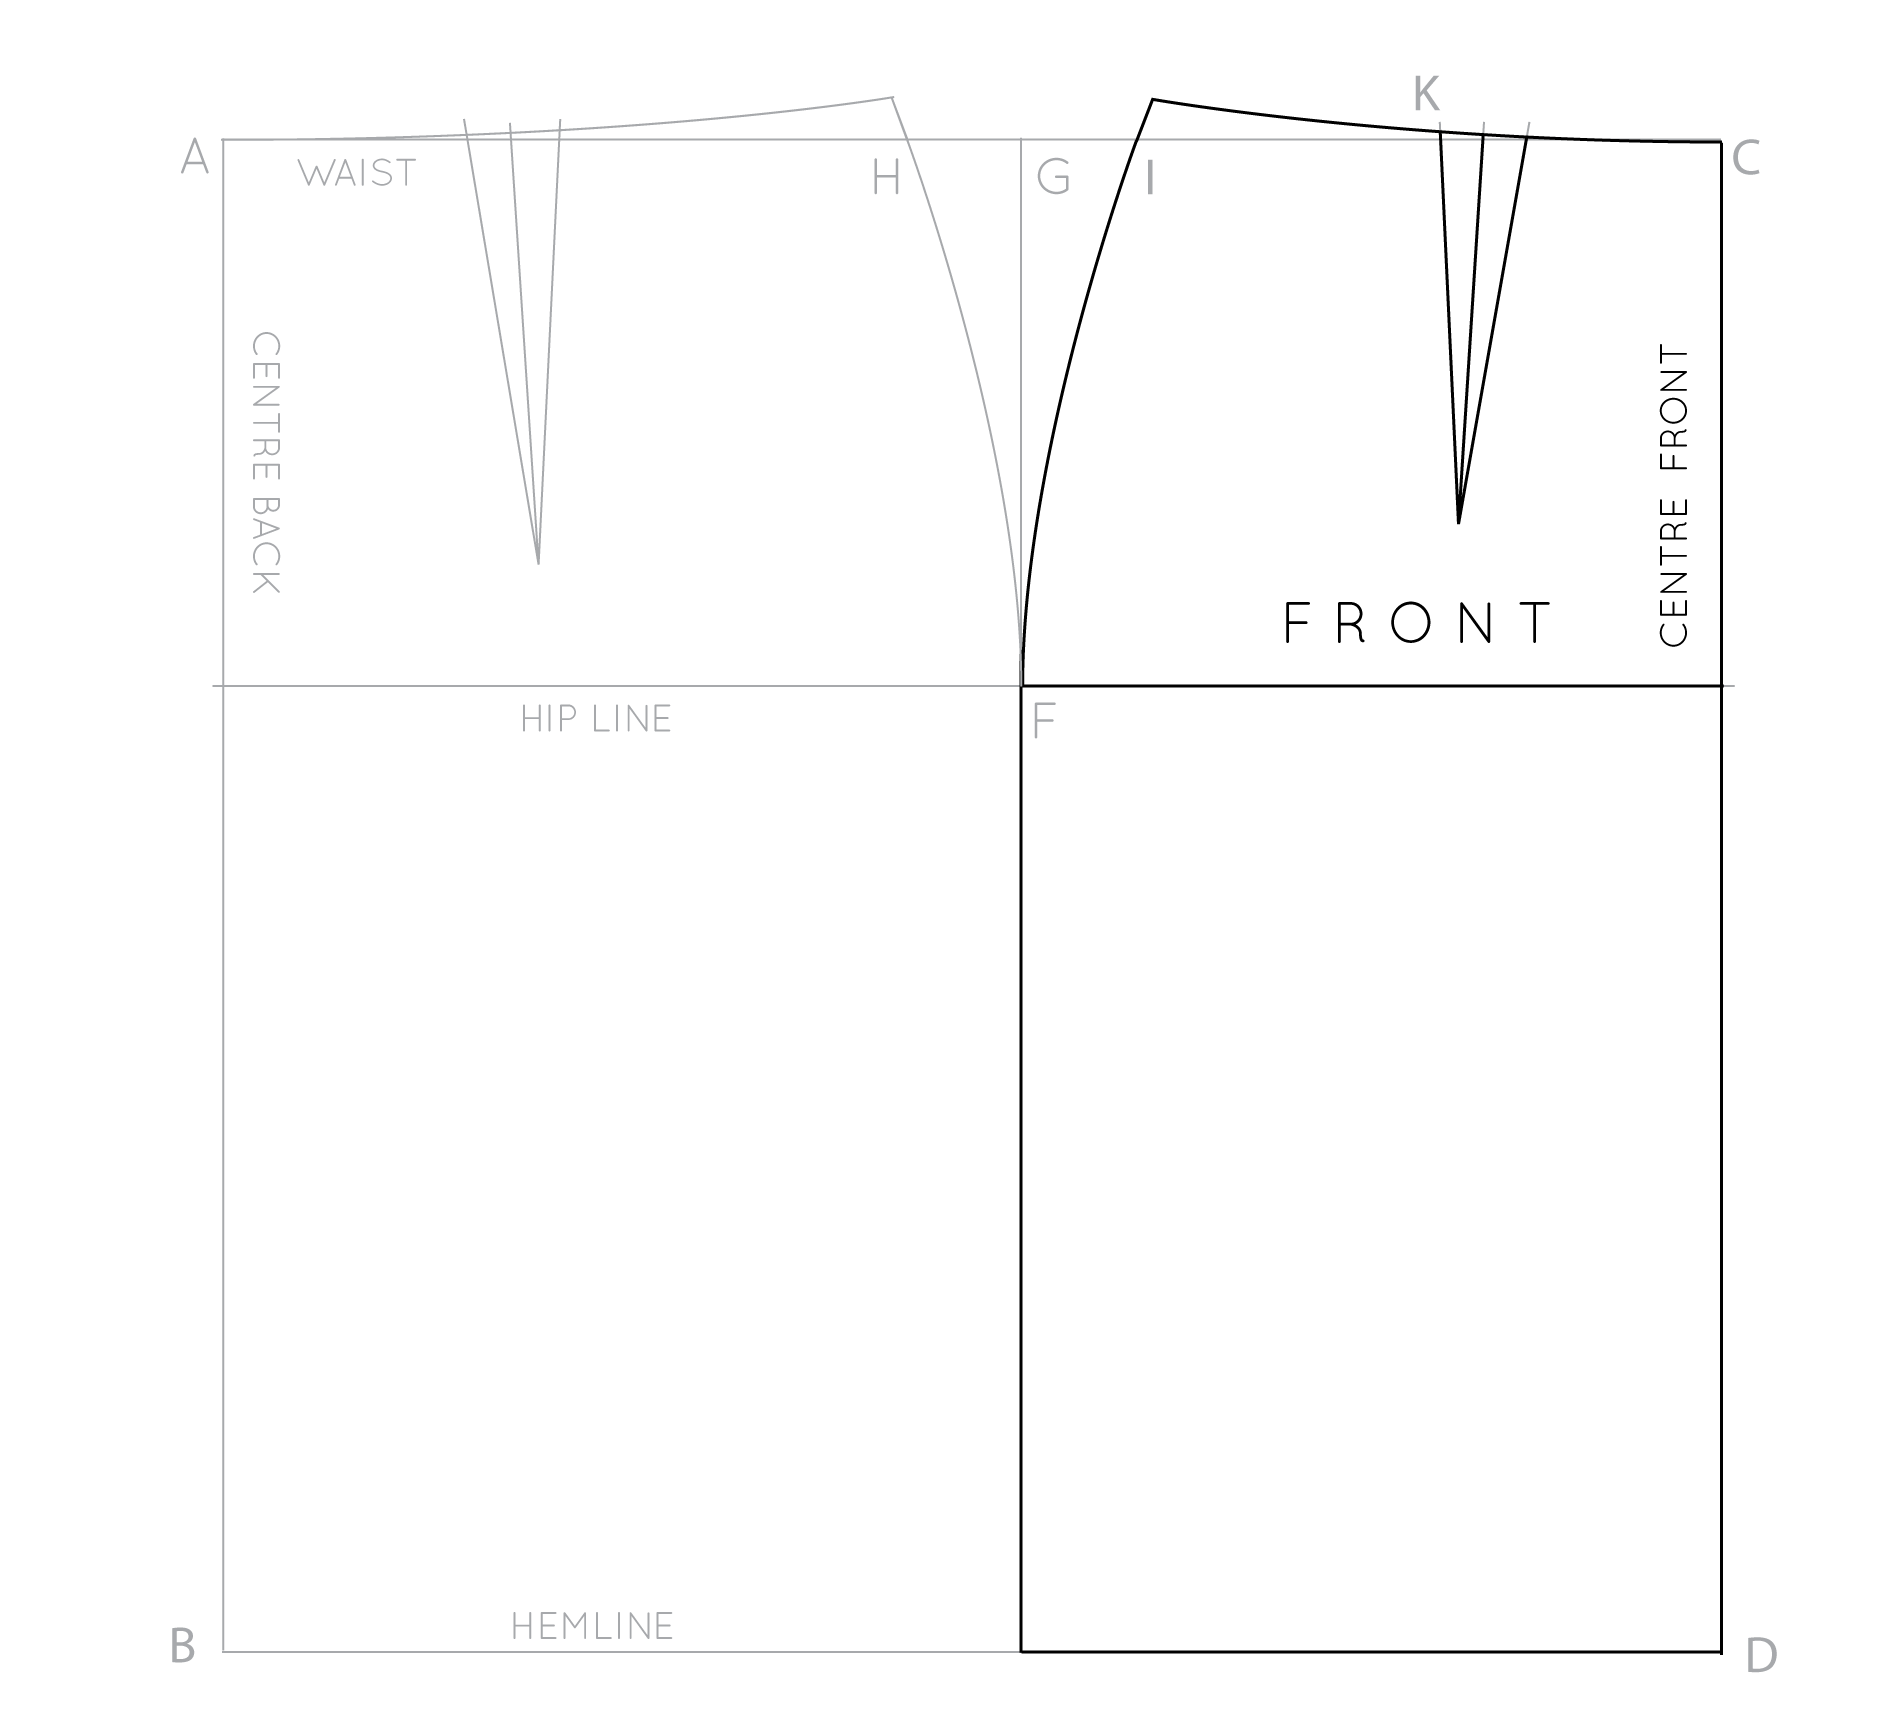
Repeat for the front by joining I to F with a smooth curve. 

inthefolds_draftaskirtblock_12

You will need to extend your side seams slightly beyond the WAISTLINE to accommodate the curve of your hips. Extend lines from H and I by 1.5cm, at the same angle as the curved hip line so that each becomes one continuous line.

Waistline

inthefolds_draftaskirtblock_13

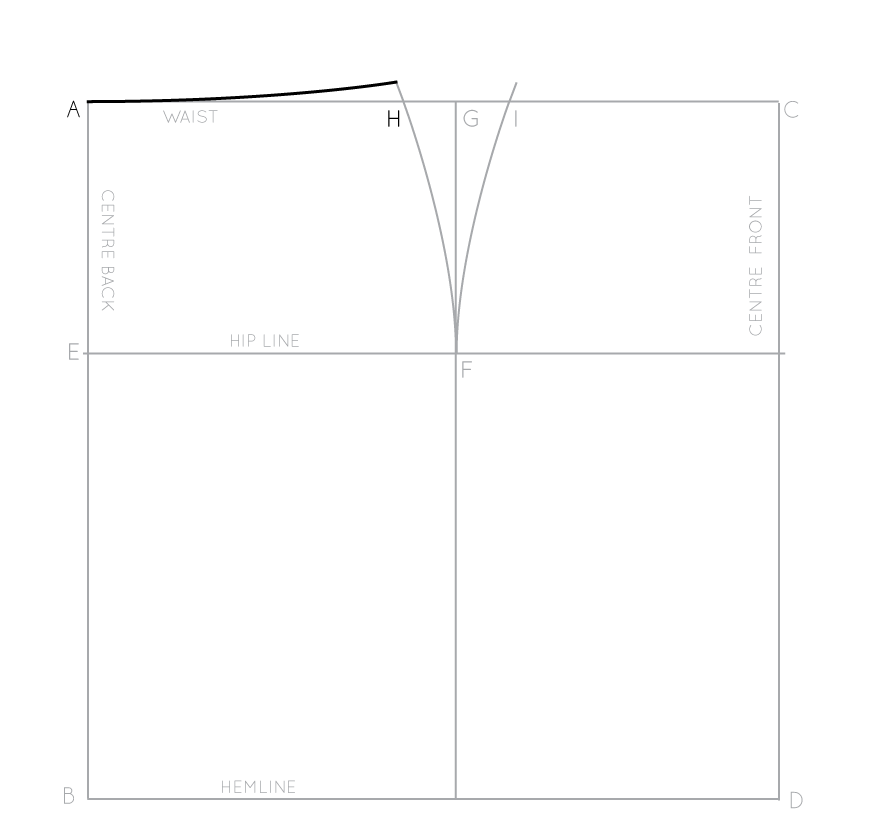
Join the new point (extension from H) to A with a smooth curved line. You have now created the back waistline of the skirt.

inthefolds_draftaskirtblock_14

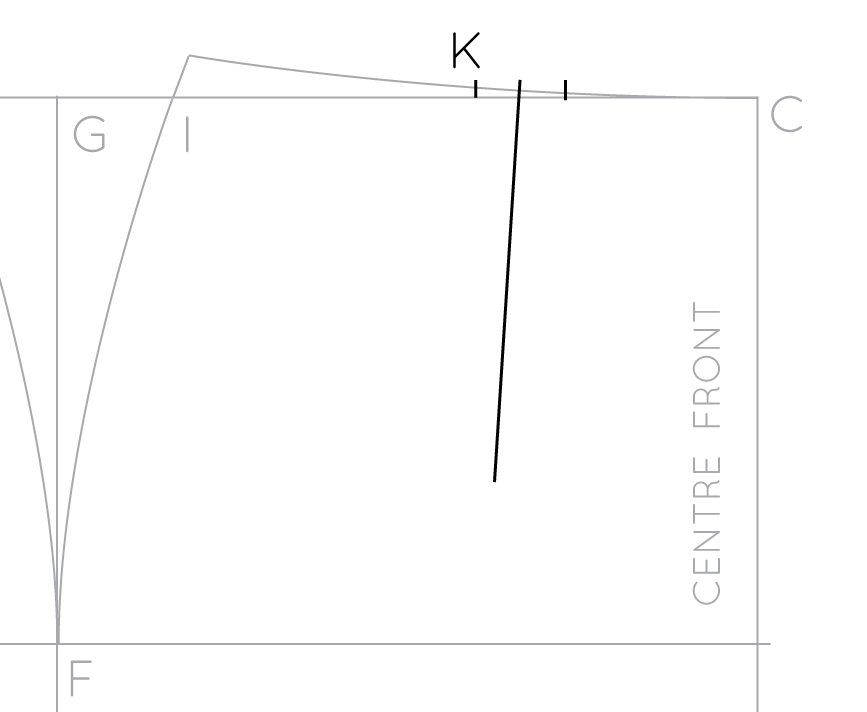
Repeat for front pattern. Join the new point (extension from I) to C with a smooth curved line. This is now the front waistline.


DOWNLOAD THE LITTLE BOOK OF SEAM FINISHES

Would you like to make clothes that are as beautiful on the inside as they are on the outside?

Sign-up to the newsletter to stay in the loop to receive inspiring content that will help you become a more confident maker. And get started with a free e-book!


Darts

inthefolds_draftaskirtblock_15

Now it is time to draw in the darts.

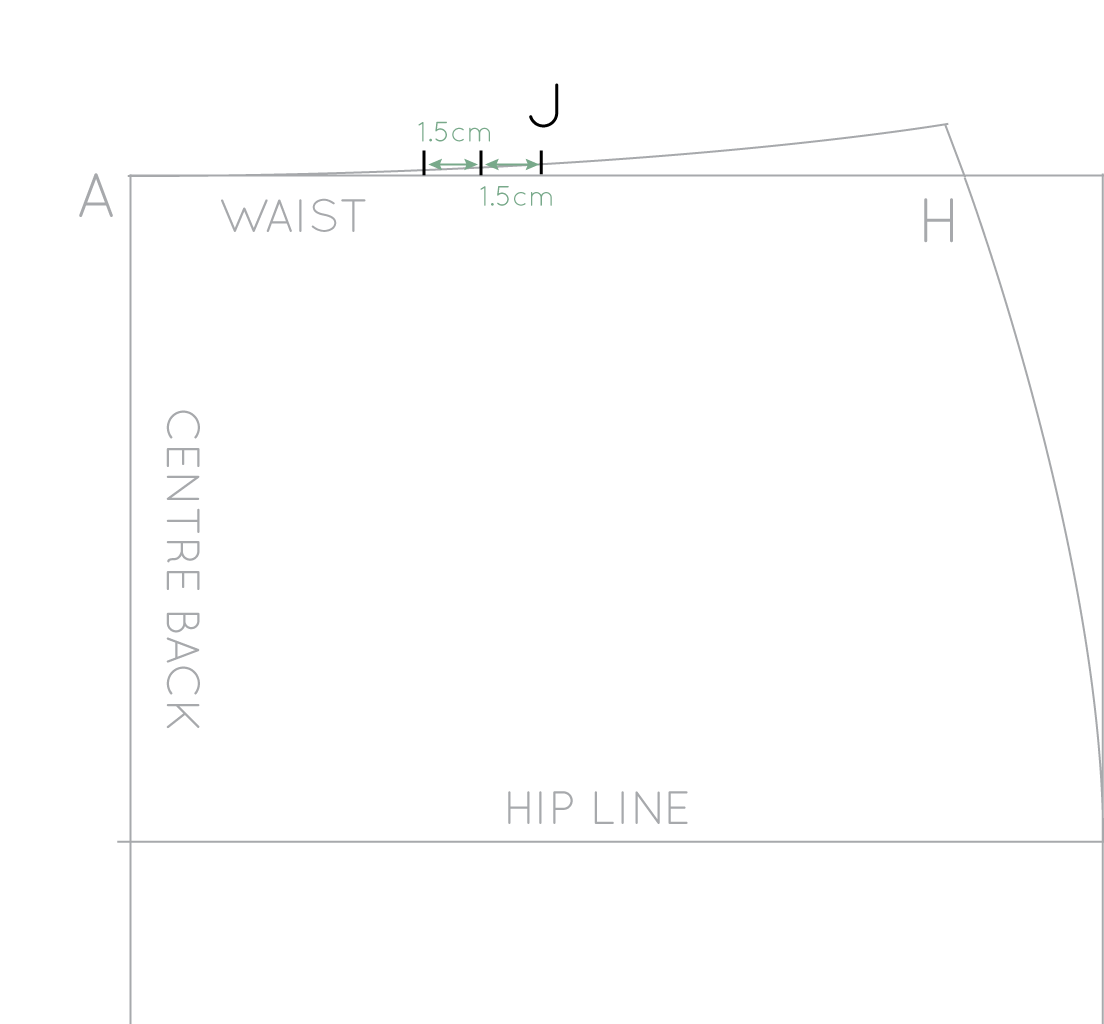
Mark the midpoints of both front and back waistlines. Label the midpoint of the back waistline as J and front waistline as K.

inthefolds_draftaskirtblock_16

From point J, mark a point 1.5cm towards the CENTRE BACK. From this new point, mark another point 1.5cm towards the CENTRE BACK.

If you have decided to increase your dart width, then make sure you remember to add in this width now. For example, if you plan to make the darts 3.5cm wide, then mark your points 1.75cm apart. If your dart value goes beyond 4cm, I would suggest creating two smaller darts instead - you will get a more flattering shape that way.

inthefolds_draftaskirtblock_17

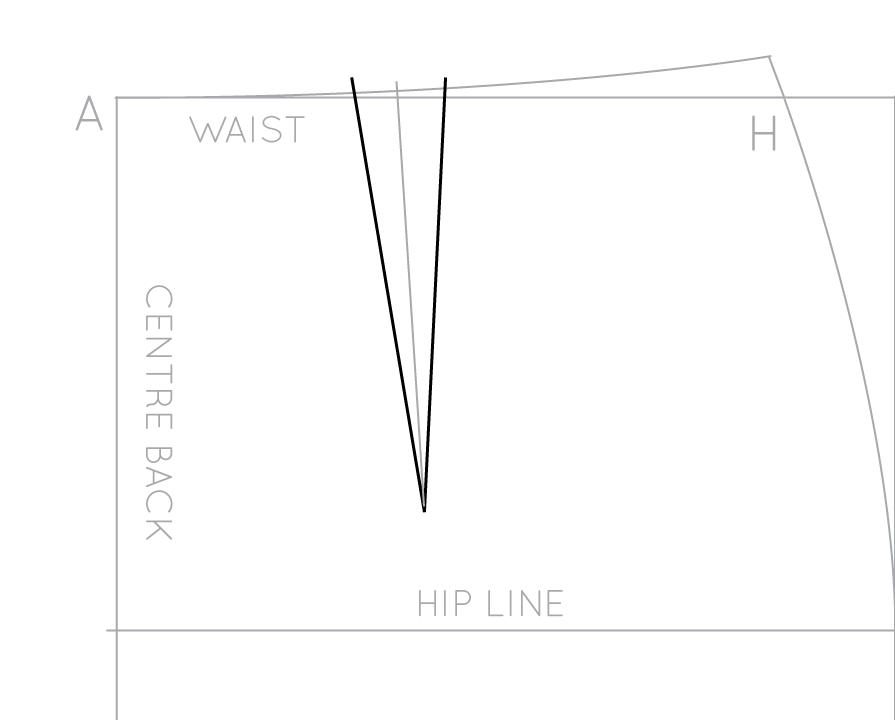
These points mark the centre of the back dart, and the dart arms 1.5cm either side (to create a dart that is 3cm wide).

Draw a line that is 14cm long (this will be the length of your back dart) from the middle point. The line should be perpendicular to the waistline.

inthefolds_draftaskirtblock_18

Join the points either side to the endpoint of the line you just drew. You have now created the two dart arms.

inthefolds_draftaskirtblock_20

Move to your front waistline.

From point K, mark a point 1.5cm towards the CENTRE FRONT. From this new point, mark another point 1.5cm towards the CENTRE FRONT. These points mark the centre of your front dart, and the dart arms 1.5cm either side (to create a dart that is 3cm wide).

inthefolds_draftaskirtblock_21

Draw a line that is 13cm long (this will be the length of your front dart) from the middle point. This line should be perpendicular to the waistline. This will be the centre line of your front dart.

inthefolds_draftaskirtblock_22

Join the points either side to the endpoint of the dart centre line. This will complete your front dart.

inthefolds_draftaskirtblock_23

By this point, it should really be starting to look like a skirt pattern!

Finishing up

inthefolds_draftaskirtblock_24

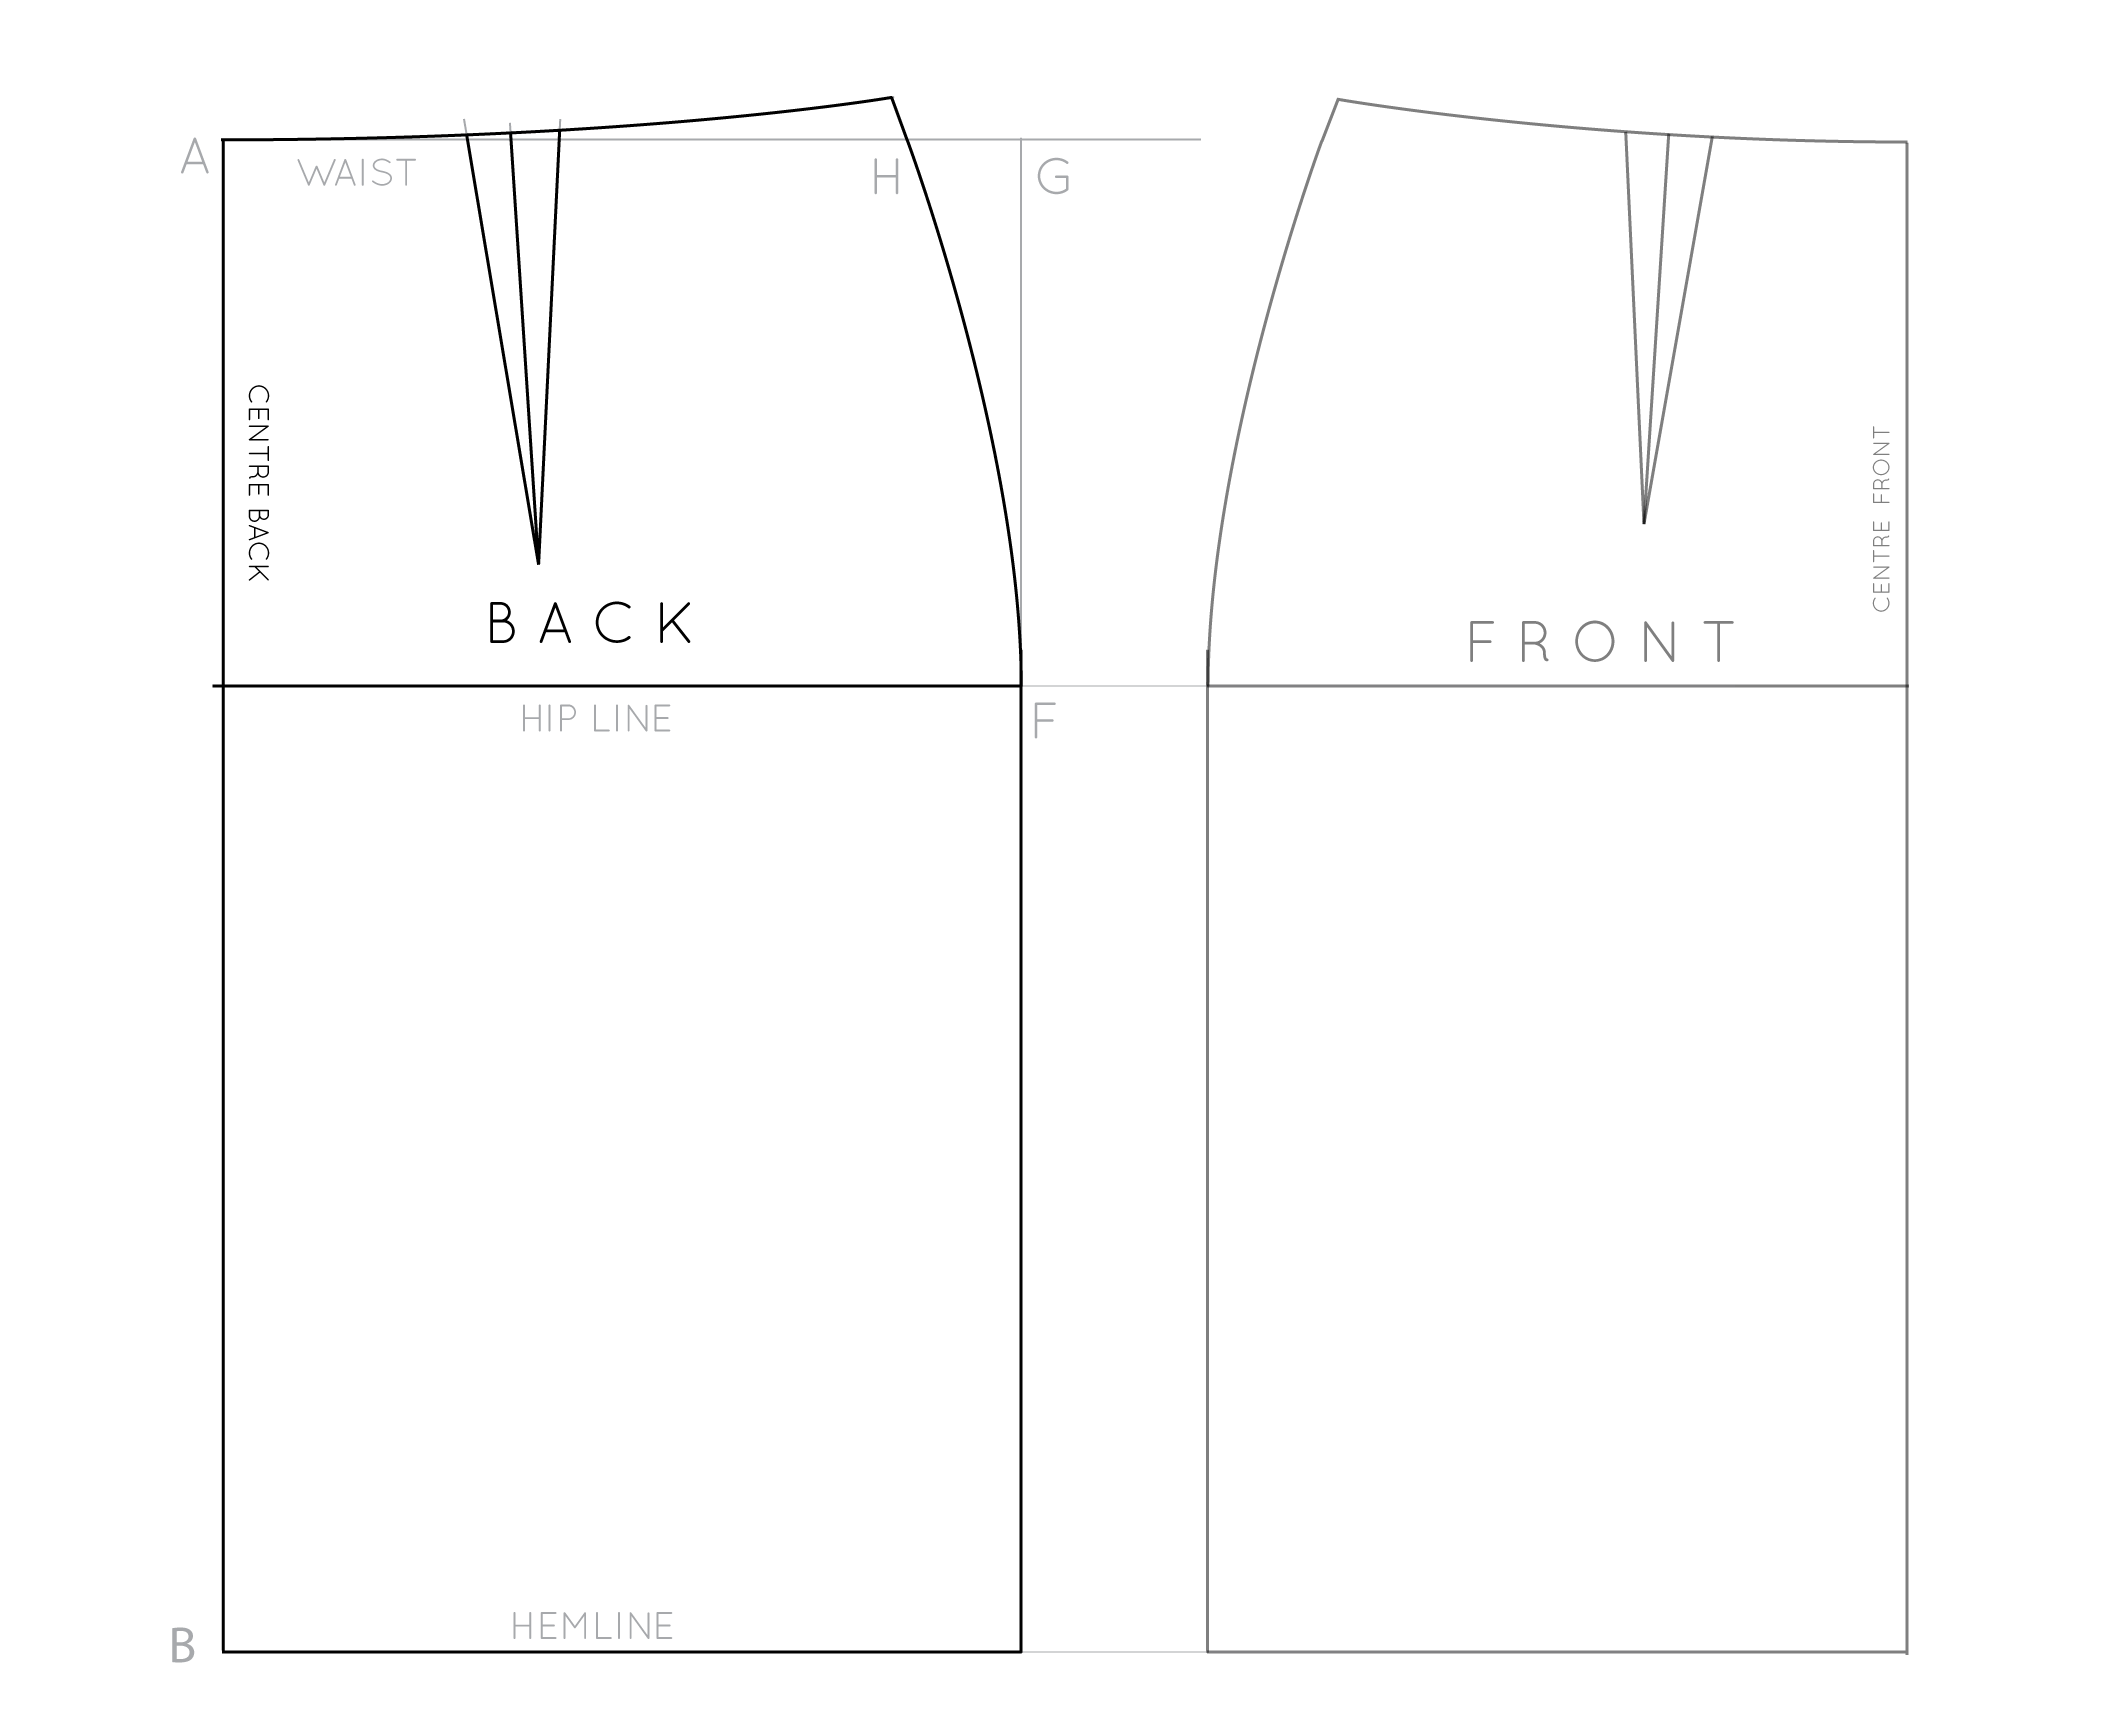
Take a seperate piece of pattern paper and trace a copy of the front pattern. Remember to include all markings (hip line, dart, centre front). 

inthefolds_draftaskirtblock_25

Leaving some space between the pattern pieces (you still haven't added seam allowance), trace around the back pattern piece - once again, marking all important points. 

inthefolds_draftaskirtblock_26

And now you have a front and back skirt pattern! Add grainlines (parallel to the centre front and centre back) and label each piece.

For labelling I always use the format:

  • pattern name

  • name of pattern piece

  • sizing information (if required)

  • cutting instructions

  • You can also add the date and whether or not there is seam allowance added

Some of these things may seem very obvious, but I'm telling you, it makes it much easier if you pick the pattern up in a few months time!

Before cutting out the pattern, you will need to add shaping to the dart at the waistline, and seam allowance. You can go right ahead and do this, or you can wait for me to show you on the blog (very soon)!


profile pic.jpg

DID YOU ENJOY THIS TUTORIAL?

It is our vision to empower you to make a wardrobe that you will wear, love and cherish - long into the future.

If this tutorial has helped you, it would be greatly appreciated if you could give thanks with a small donation. This will help us to continue to create content like this tutorial and continue offering it for free - so it can be accessed by all.

We greatly appreciate your support!


How did you go? Would love to know if you have any questions related to drafting a skirt block?


You may also like: