pattern cutting

Top tips for pattern hacking

Top tips for pattern hacking


Making clothing you love to wear is about having the ability to tailor garments to fit your body, your preferences and your needs. This is why, for Issue 2 of Curated by ITF, we are sharing the foundations of patternmaking with you.

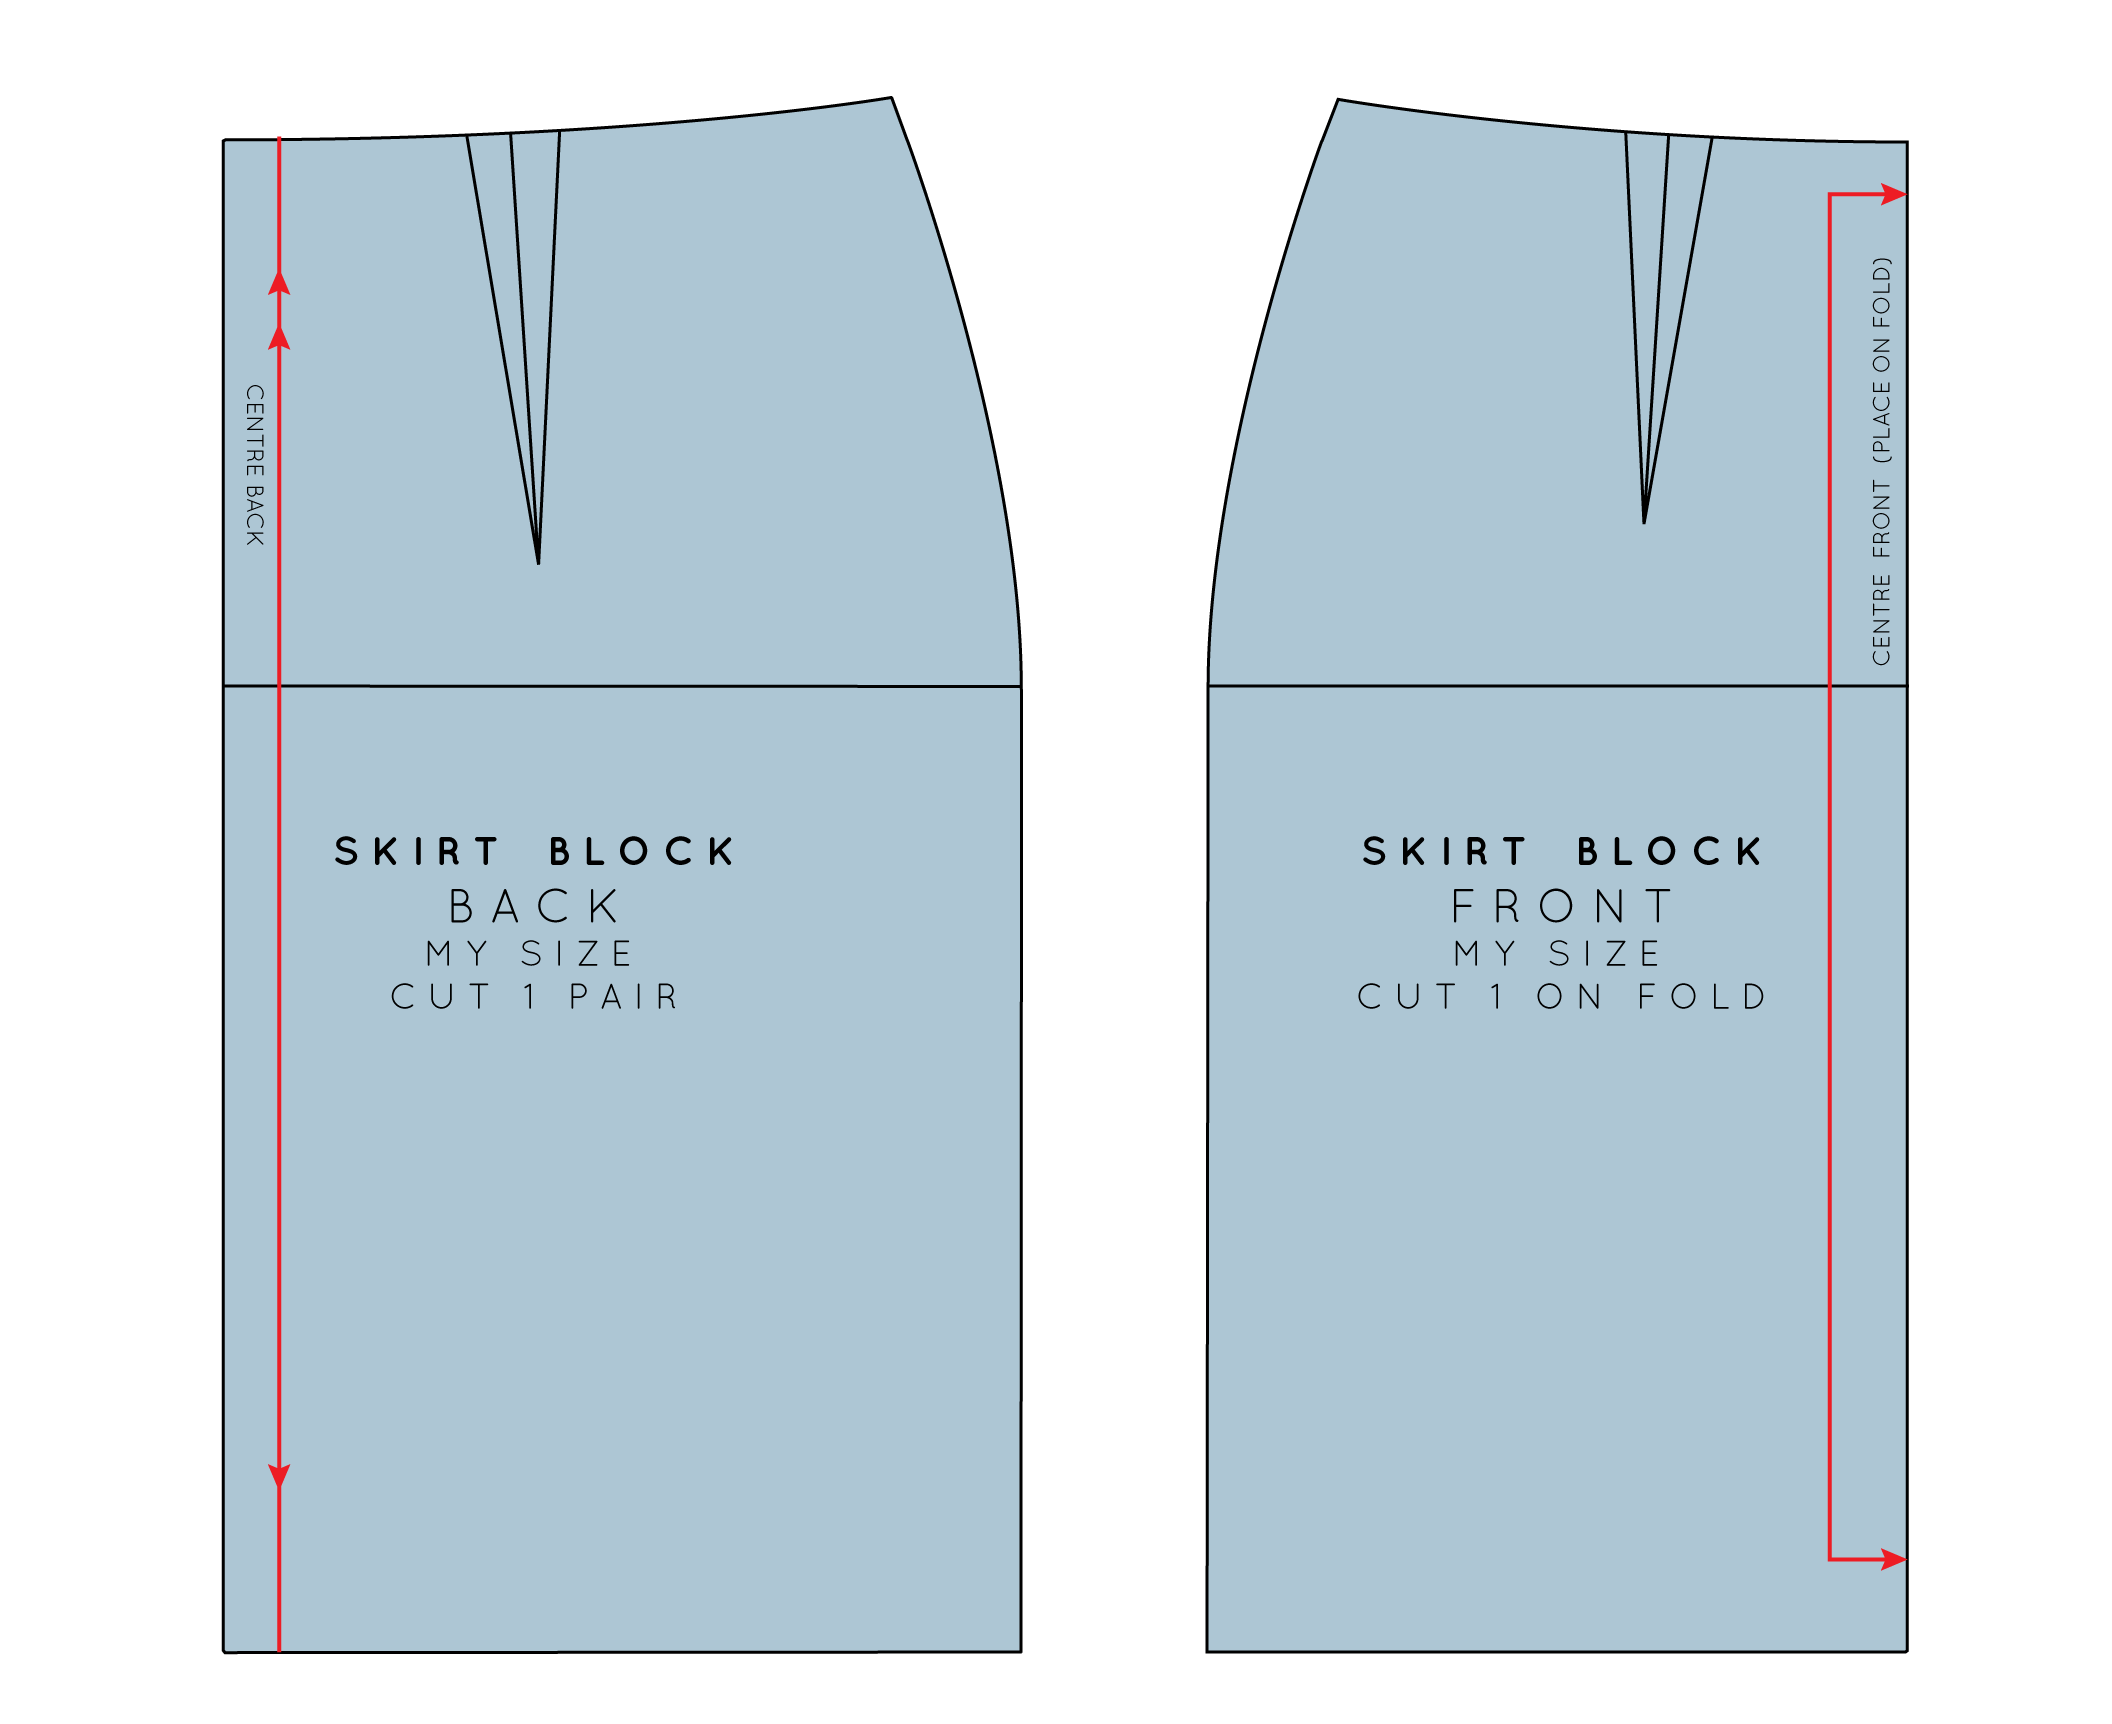
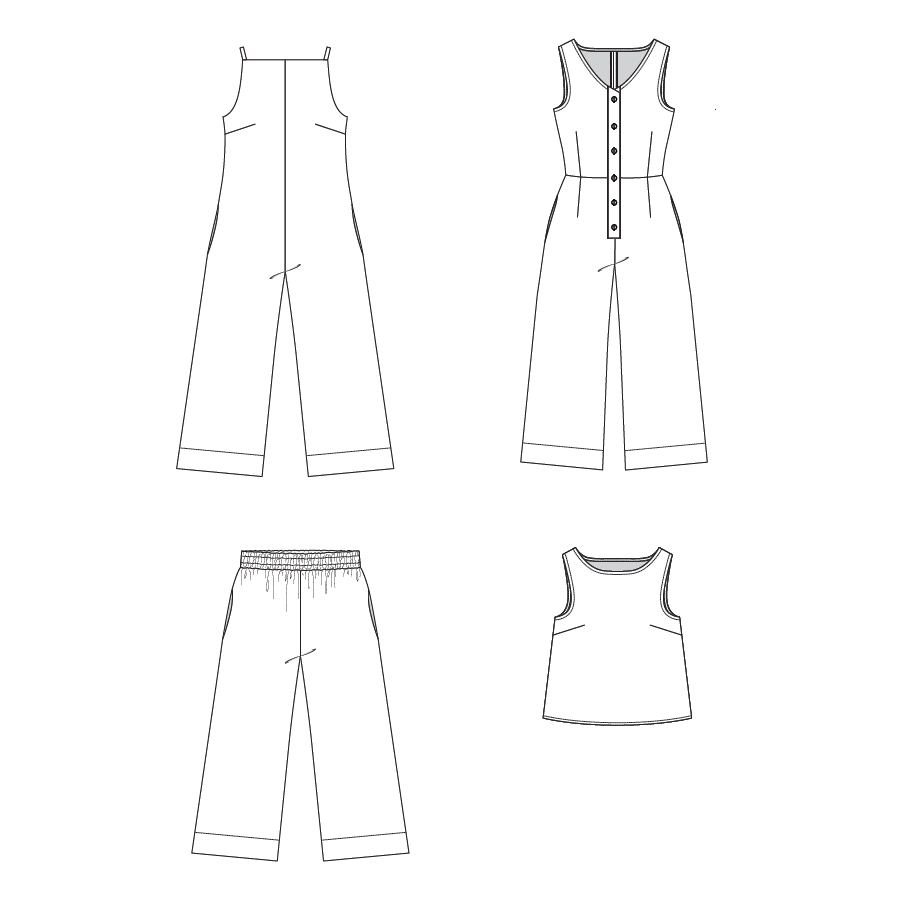
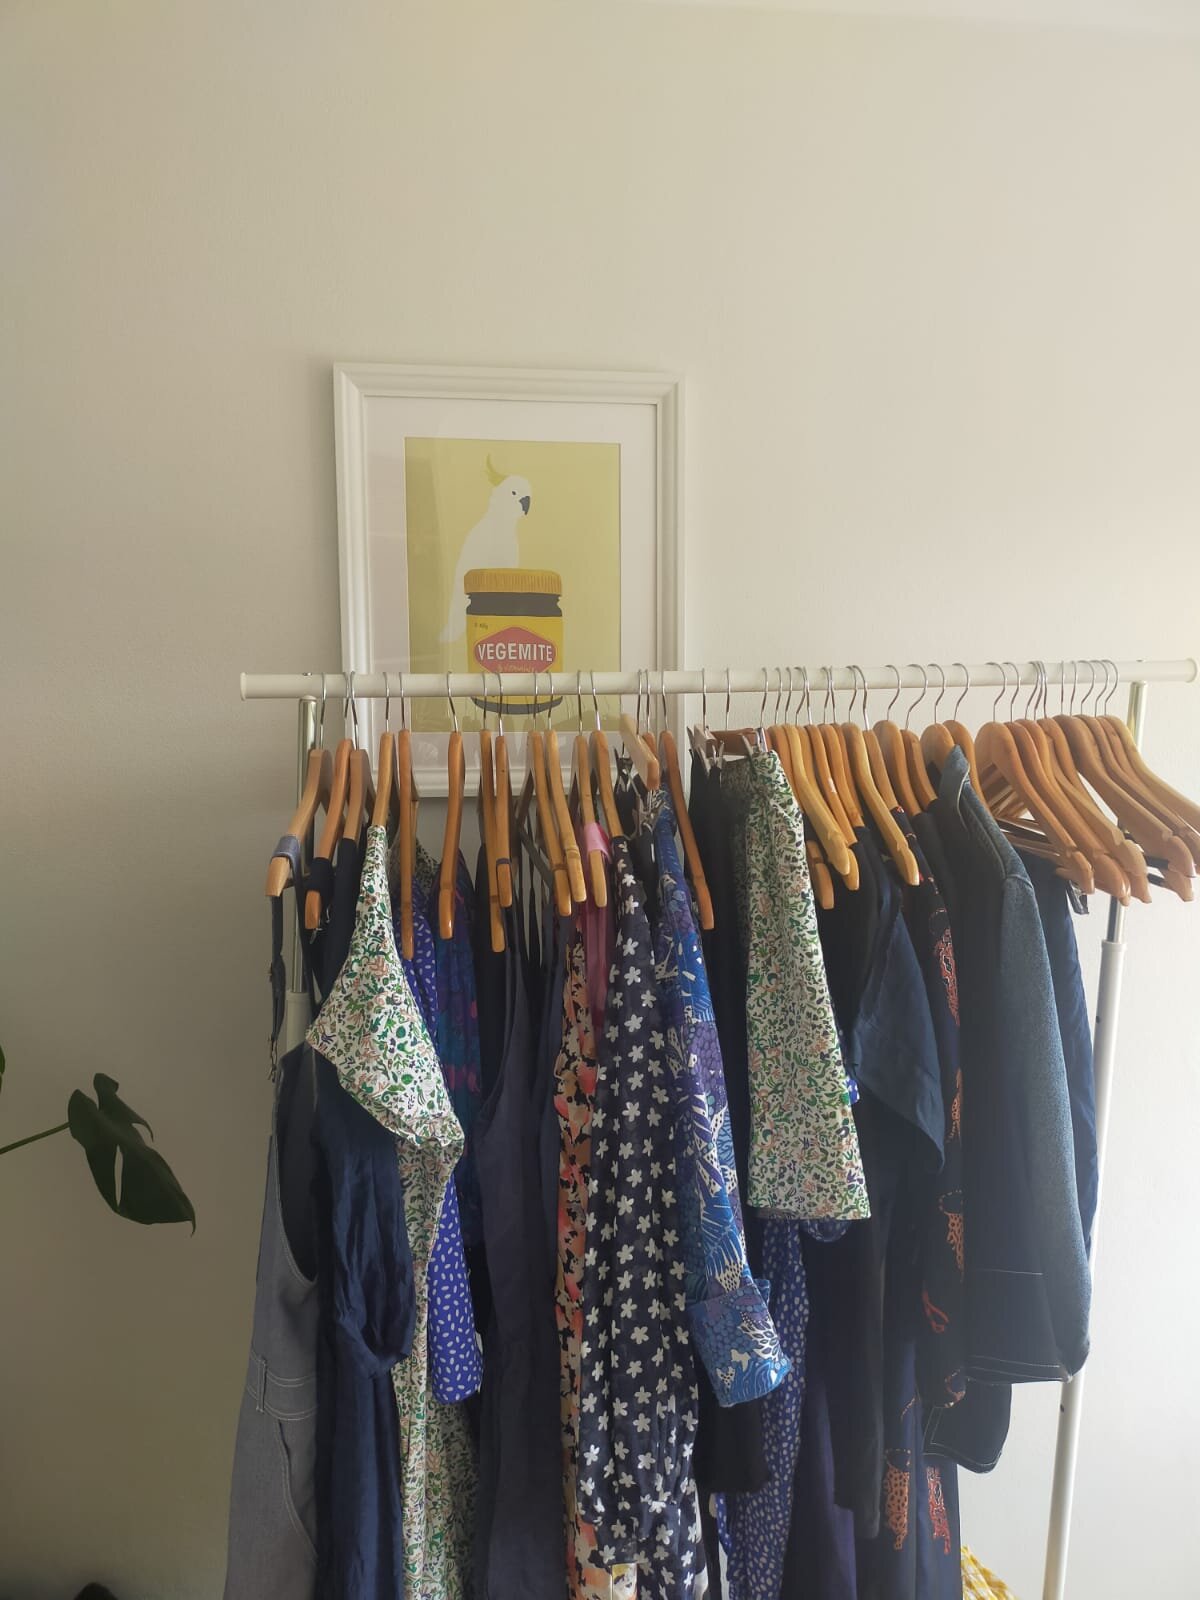
We'll be taking our Neale jumpsuit pattern that fits us so well and pattern hacking it into the designs below. So we thought that in today's email, we'd share a few of our top tips for successful pattern hacking with you.

What is pattern hacking?

Pattern hacking means that you use an existing pattern to draft a new pattern. This could mean small changes, such as adding a pocket or changing the neckline. It could also mean large-scale changes such as adding a sleeve to a sleeveless pattern or combining multiple patterns to create a new design.


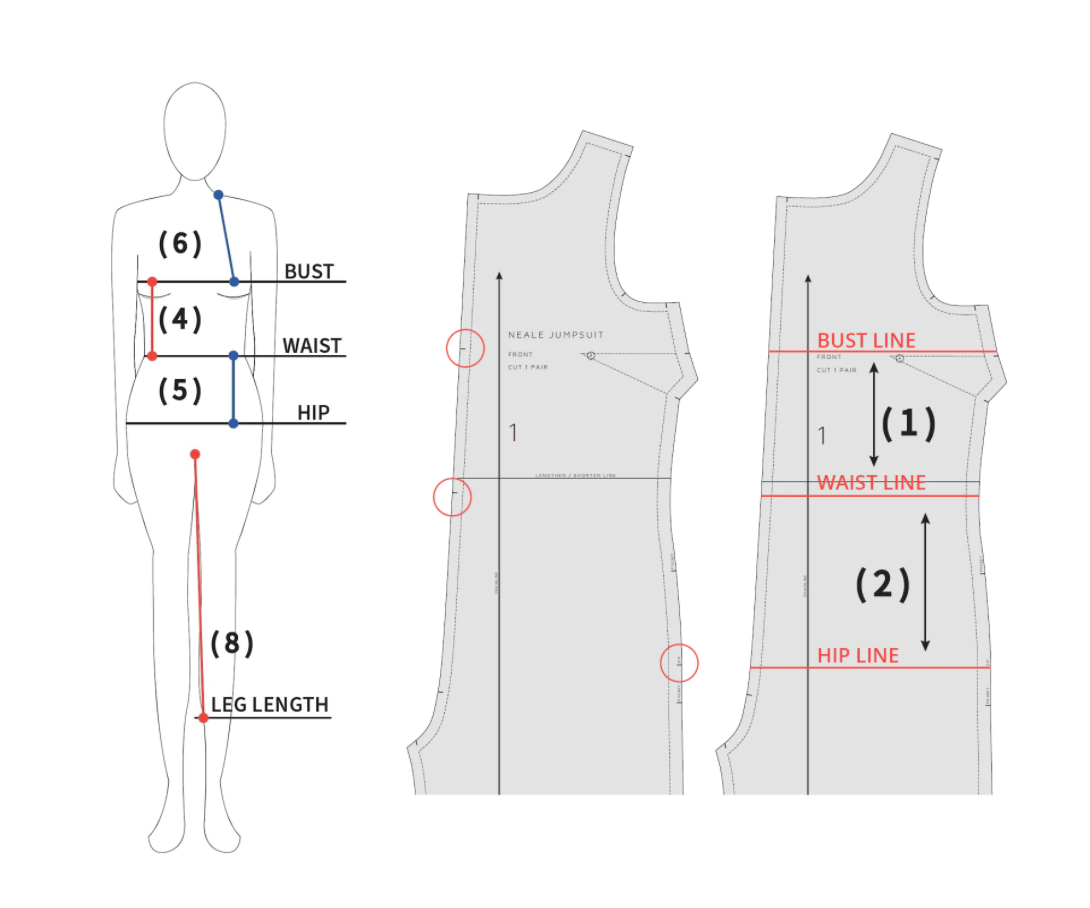
1. Choose a pattern that fits you well! 

The main benefit of pattern hacking is that you can take a pattern that you know fits you and create a new design. This means you don't need to dive back into assessing the fit all over again, as you have already done that work with the original pattern. For large scale hacks, you may still need to make some fit alterations after checking your toile, but this will be far less than if you had started with a new pattern.

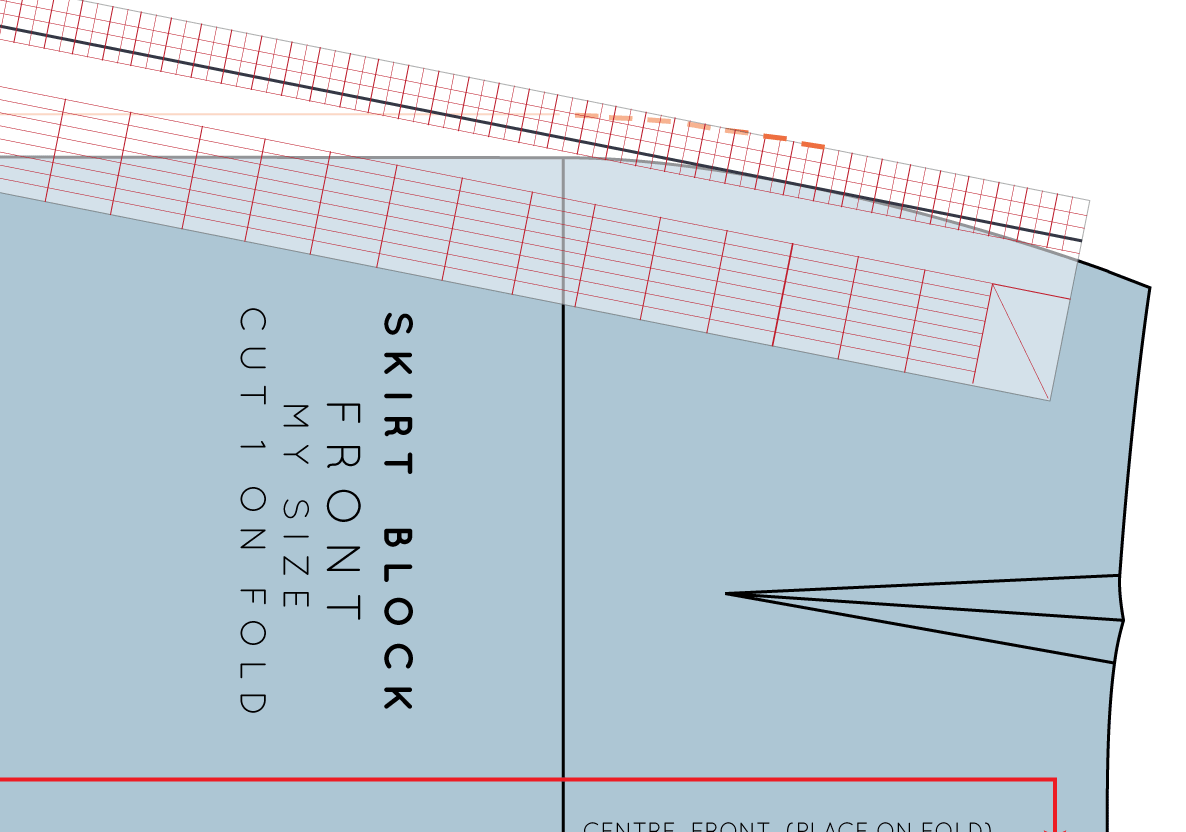
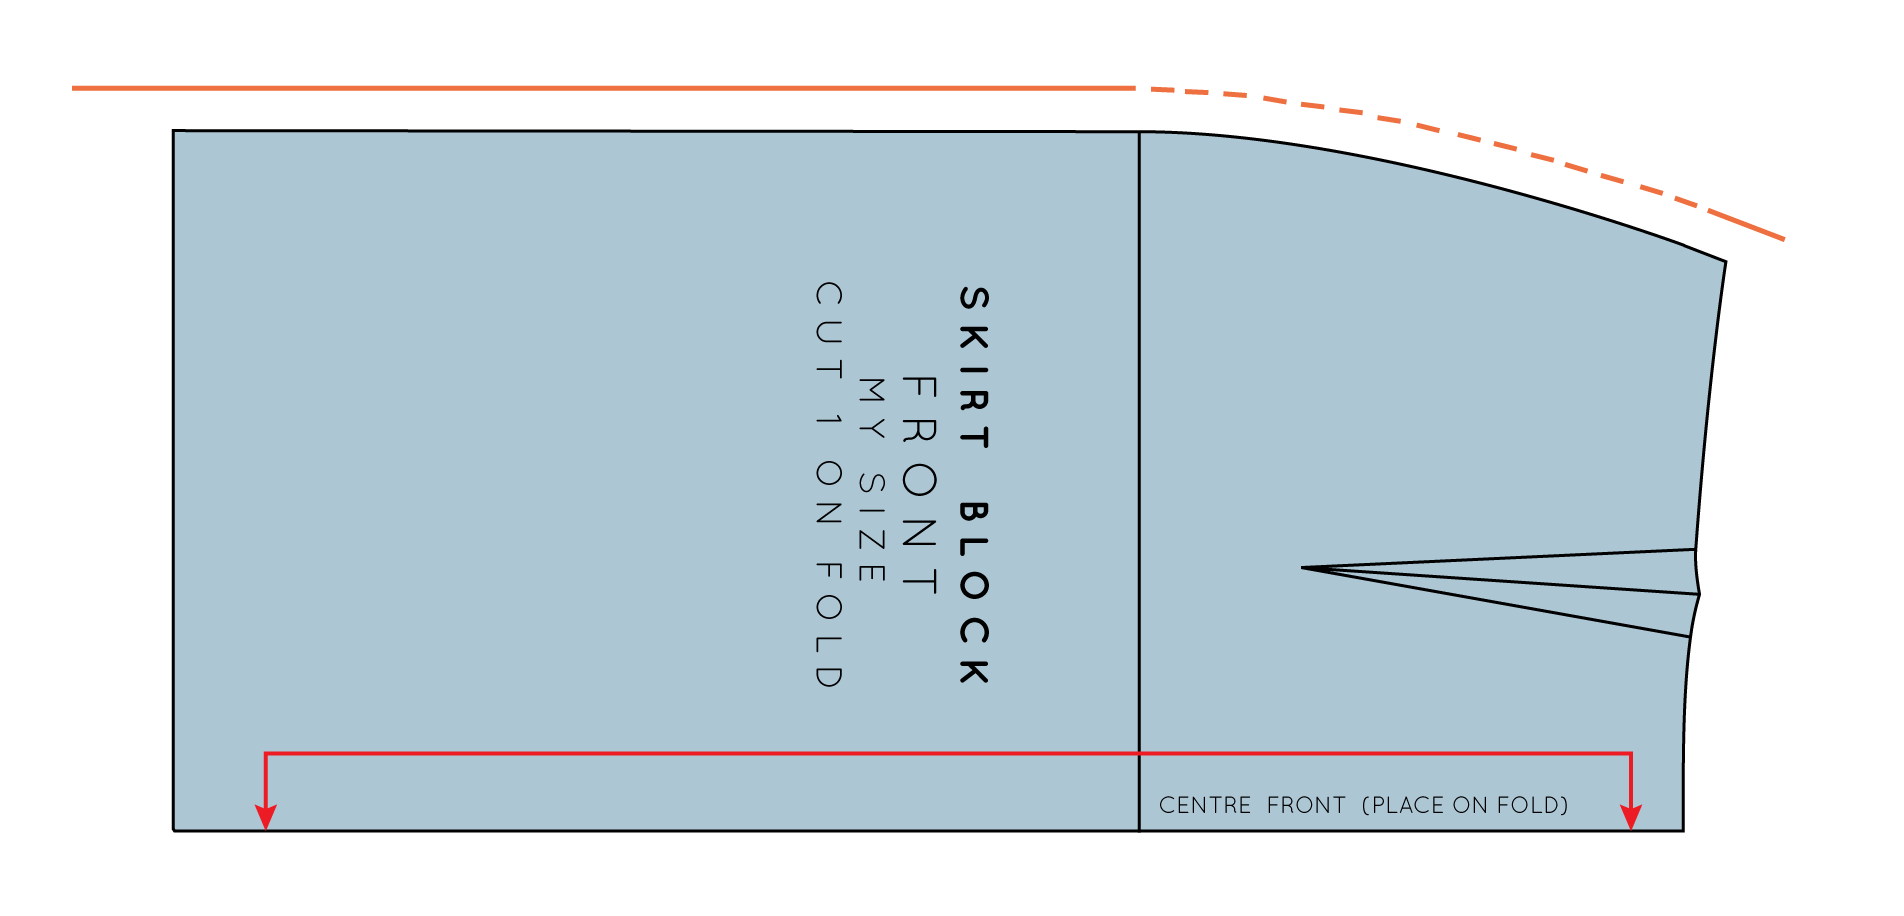
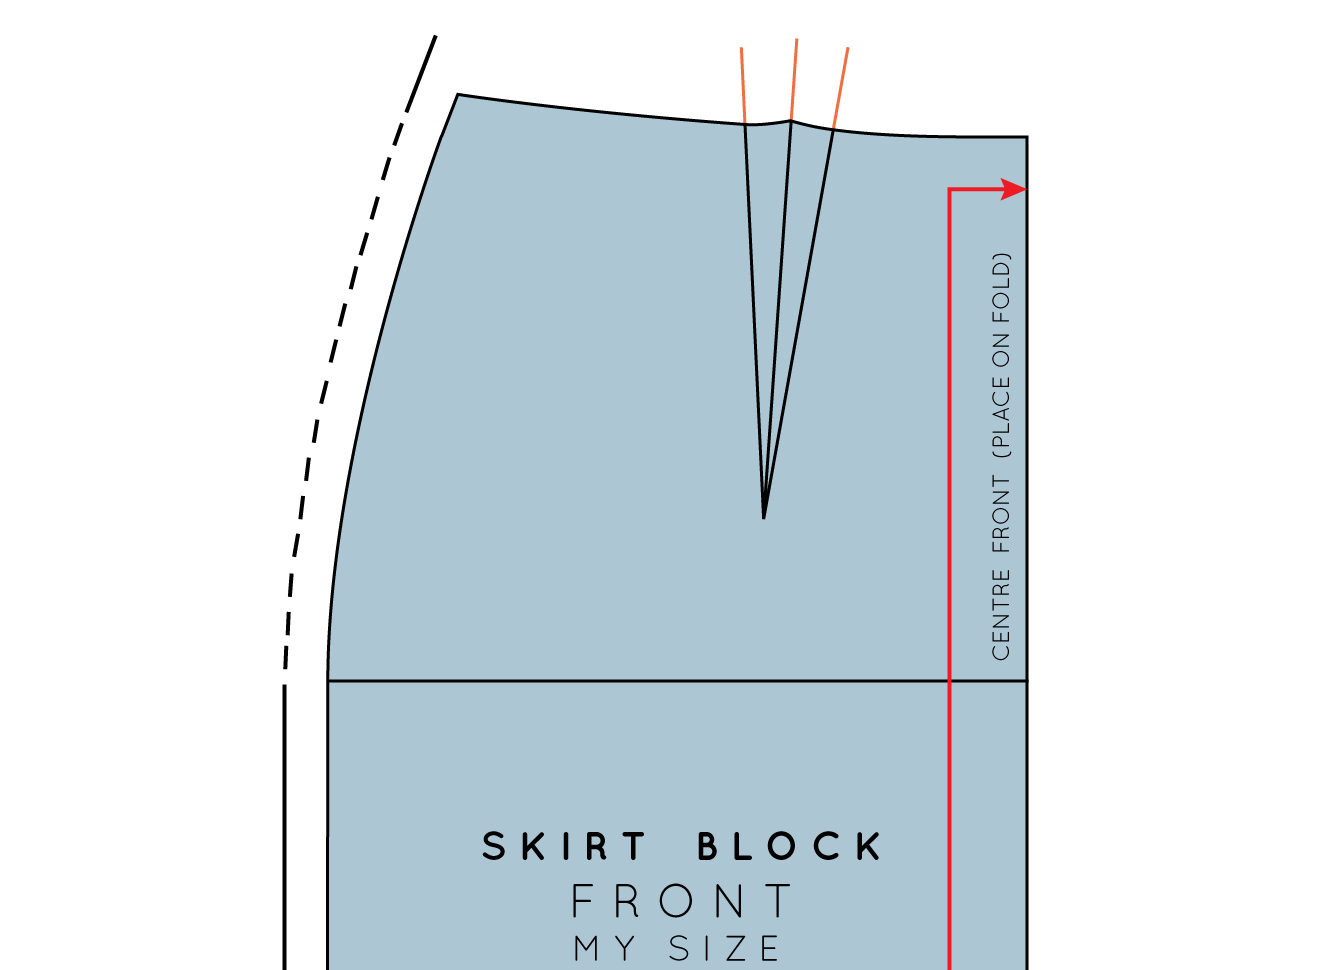
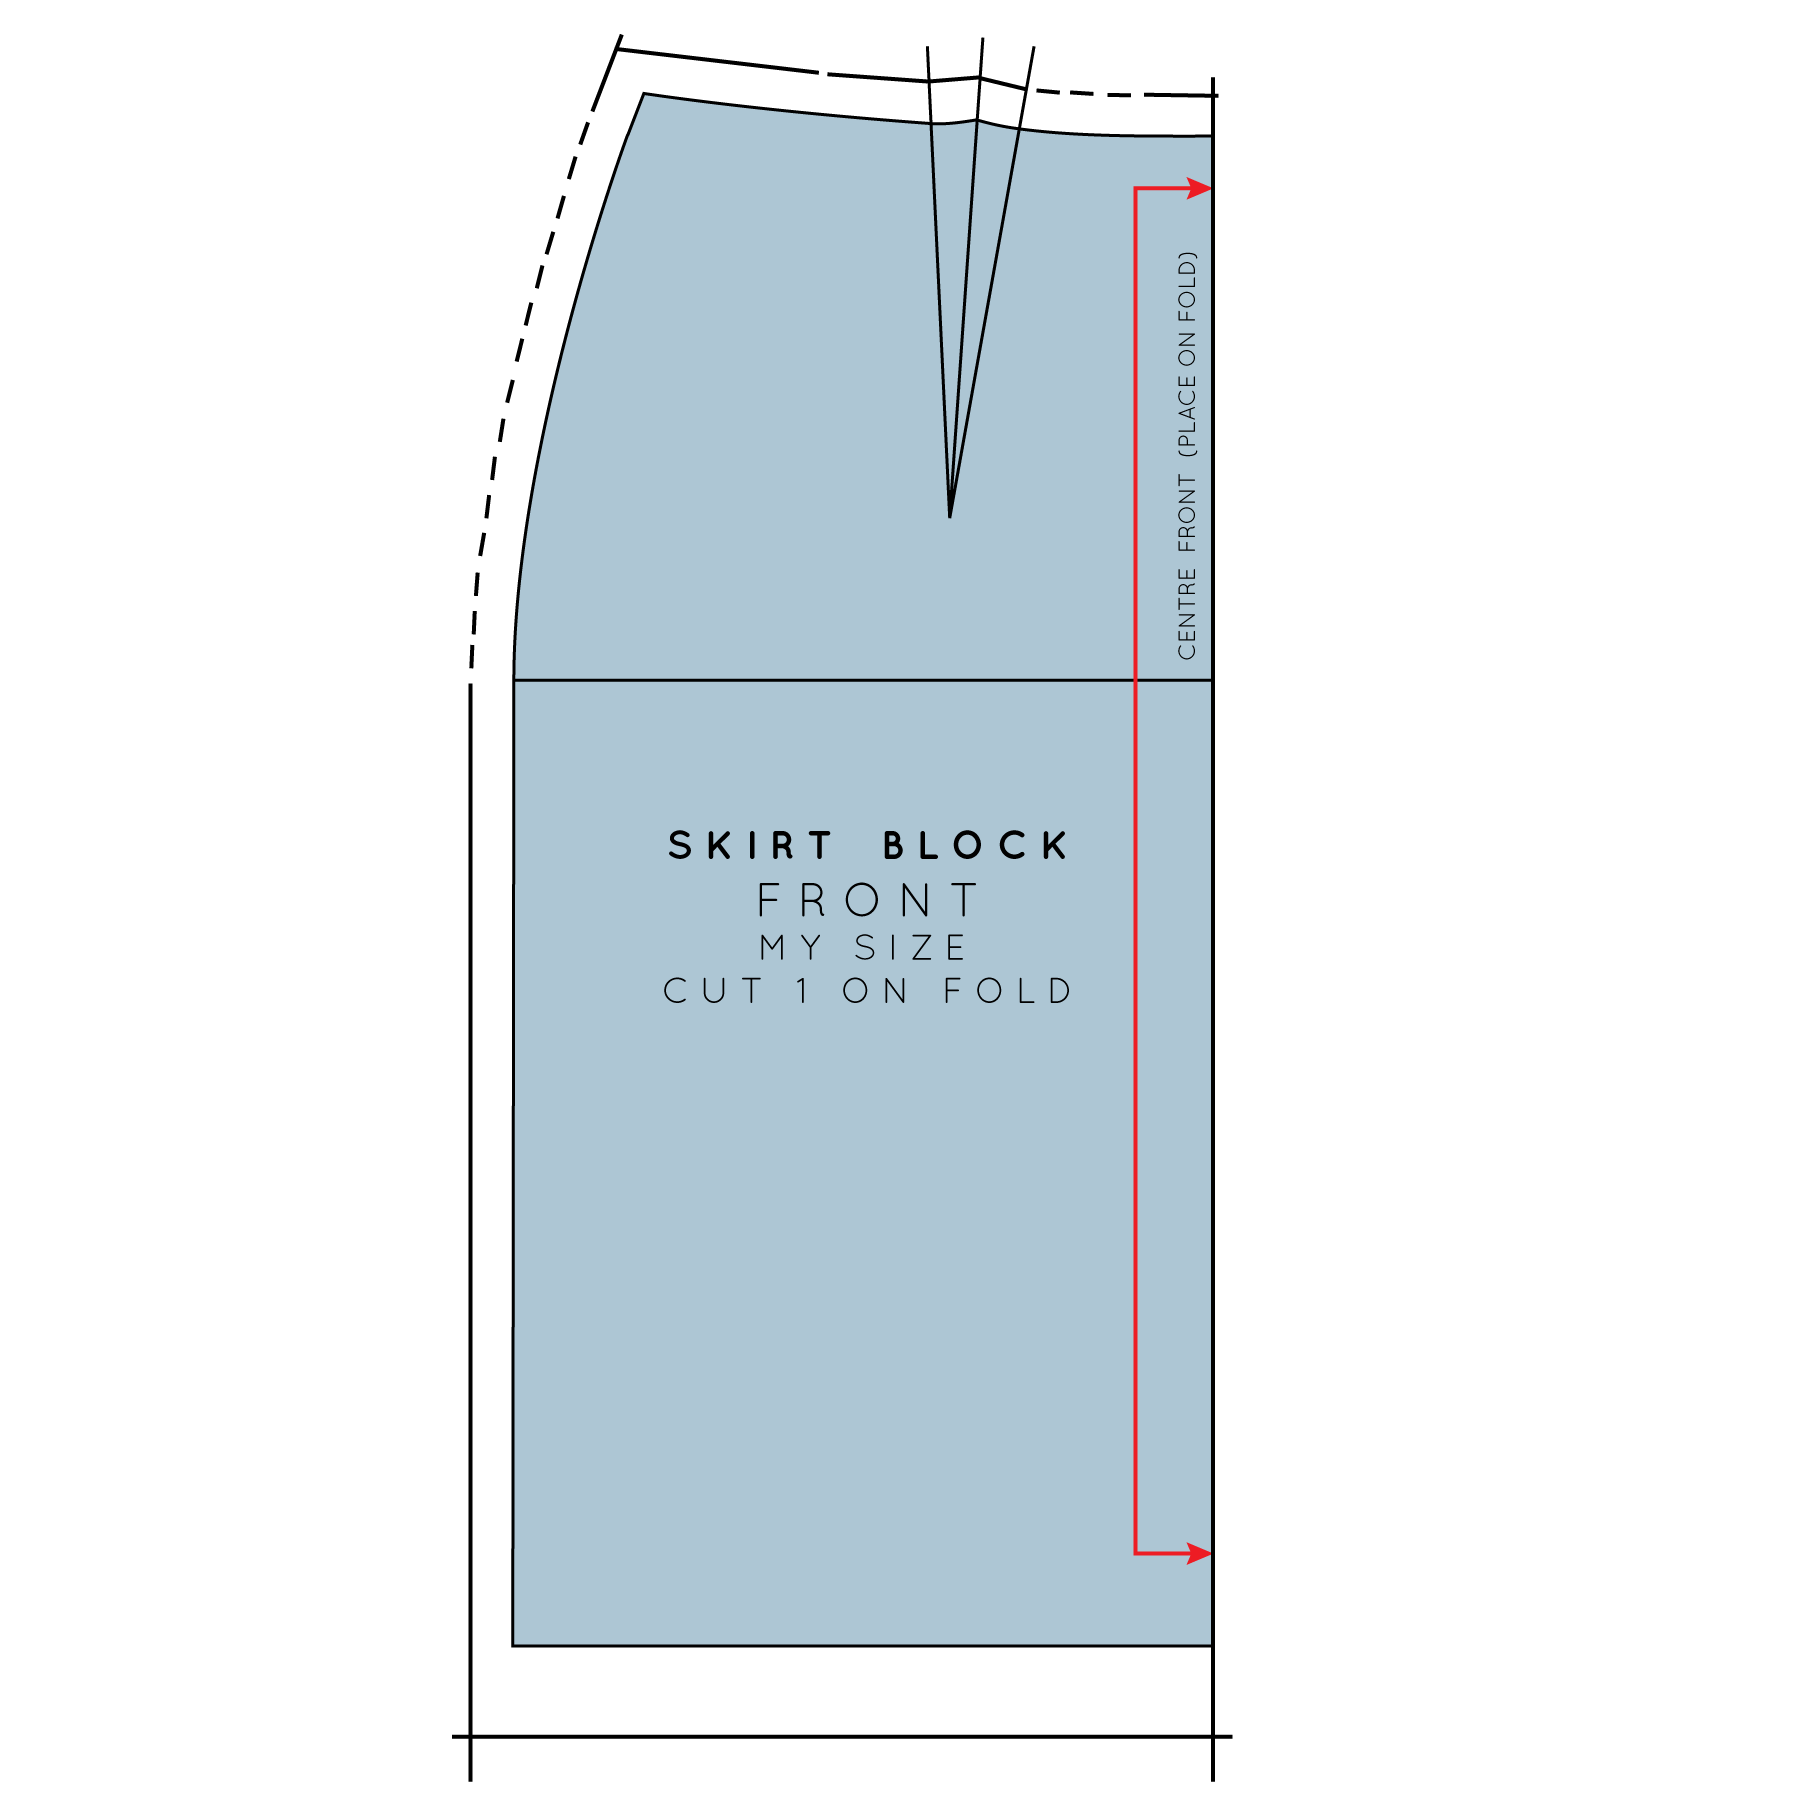
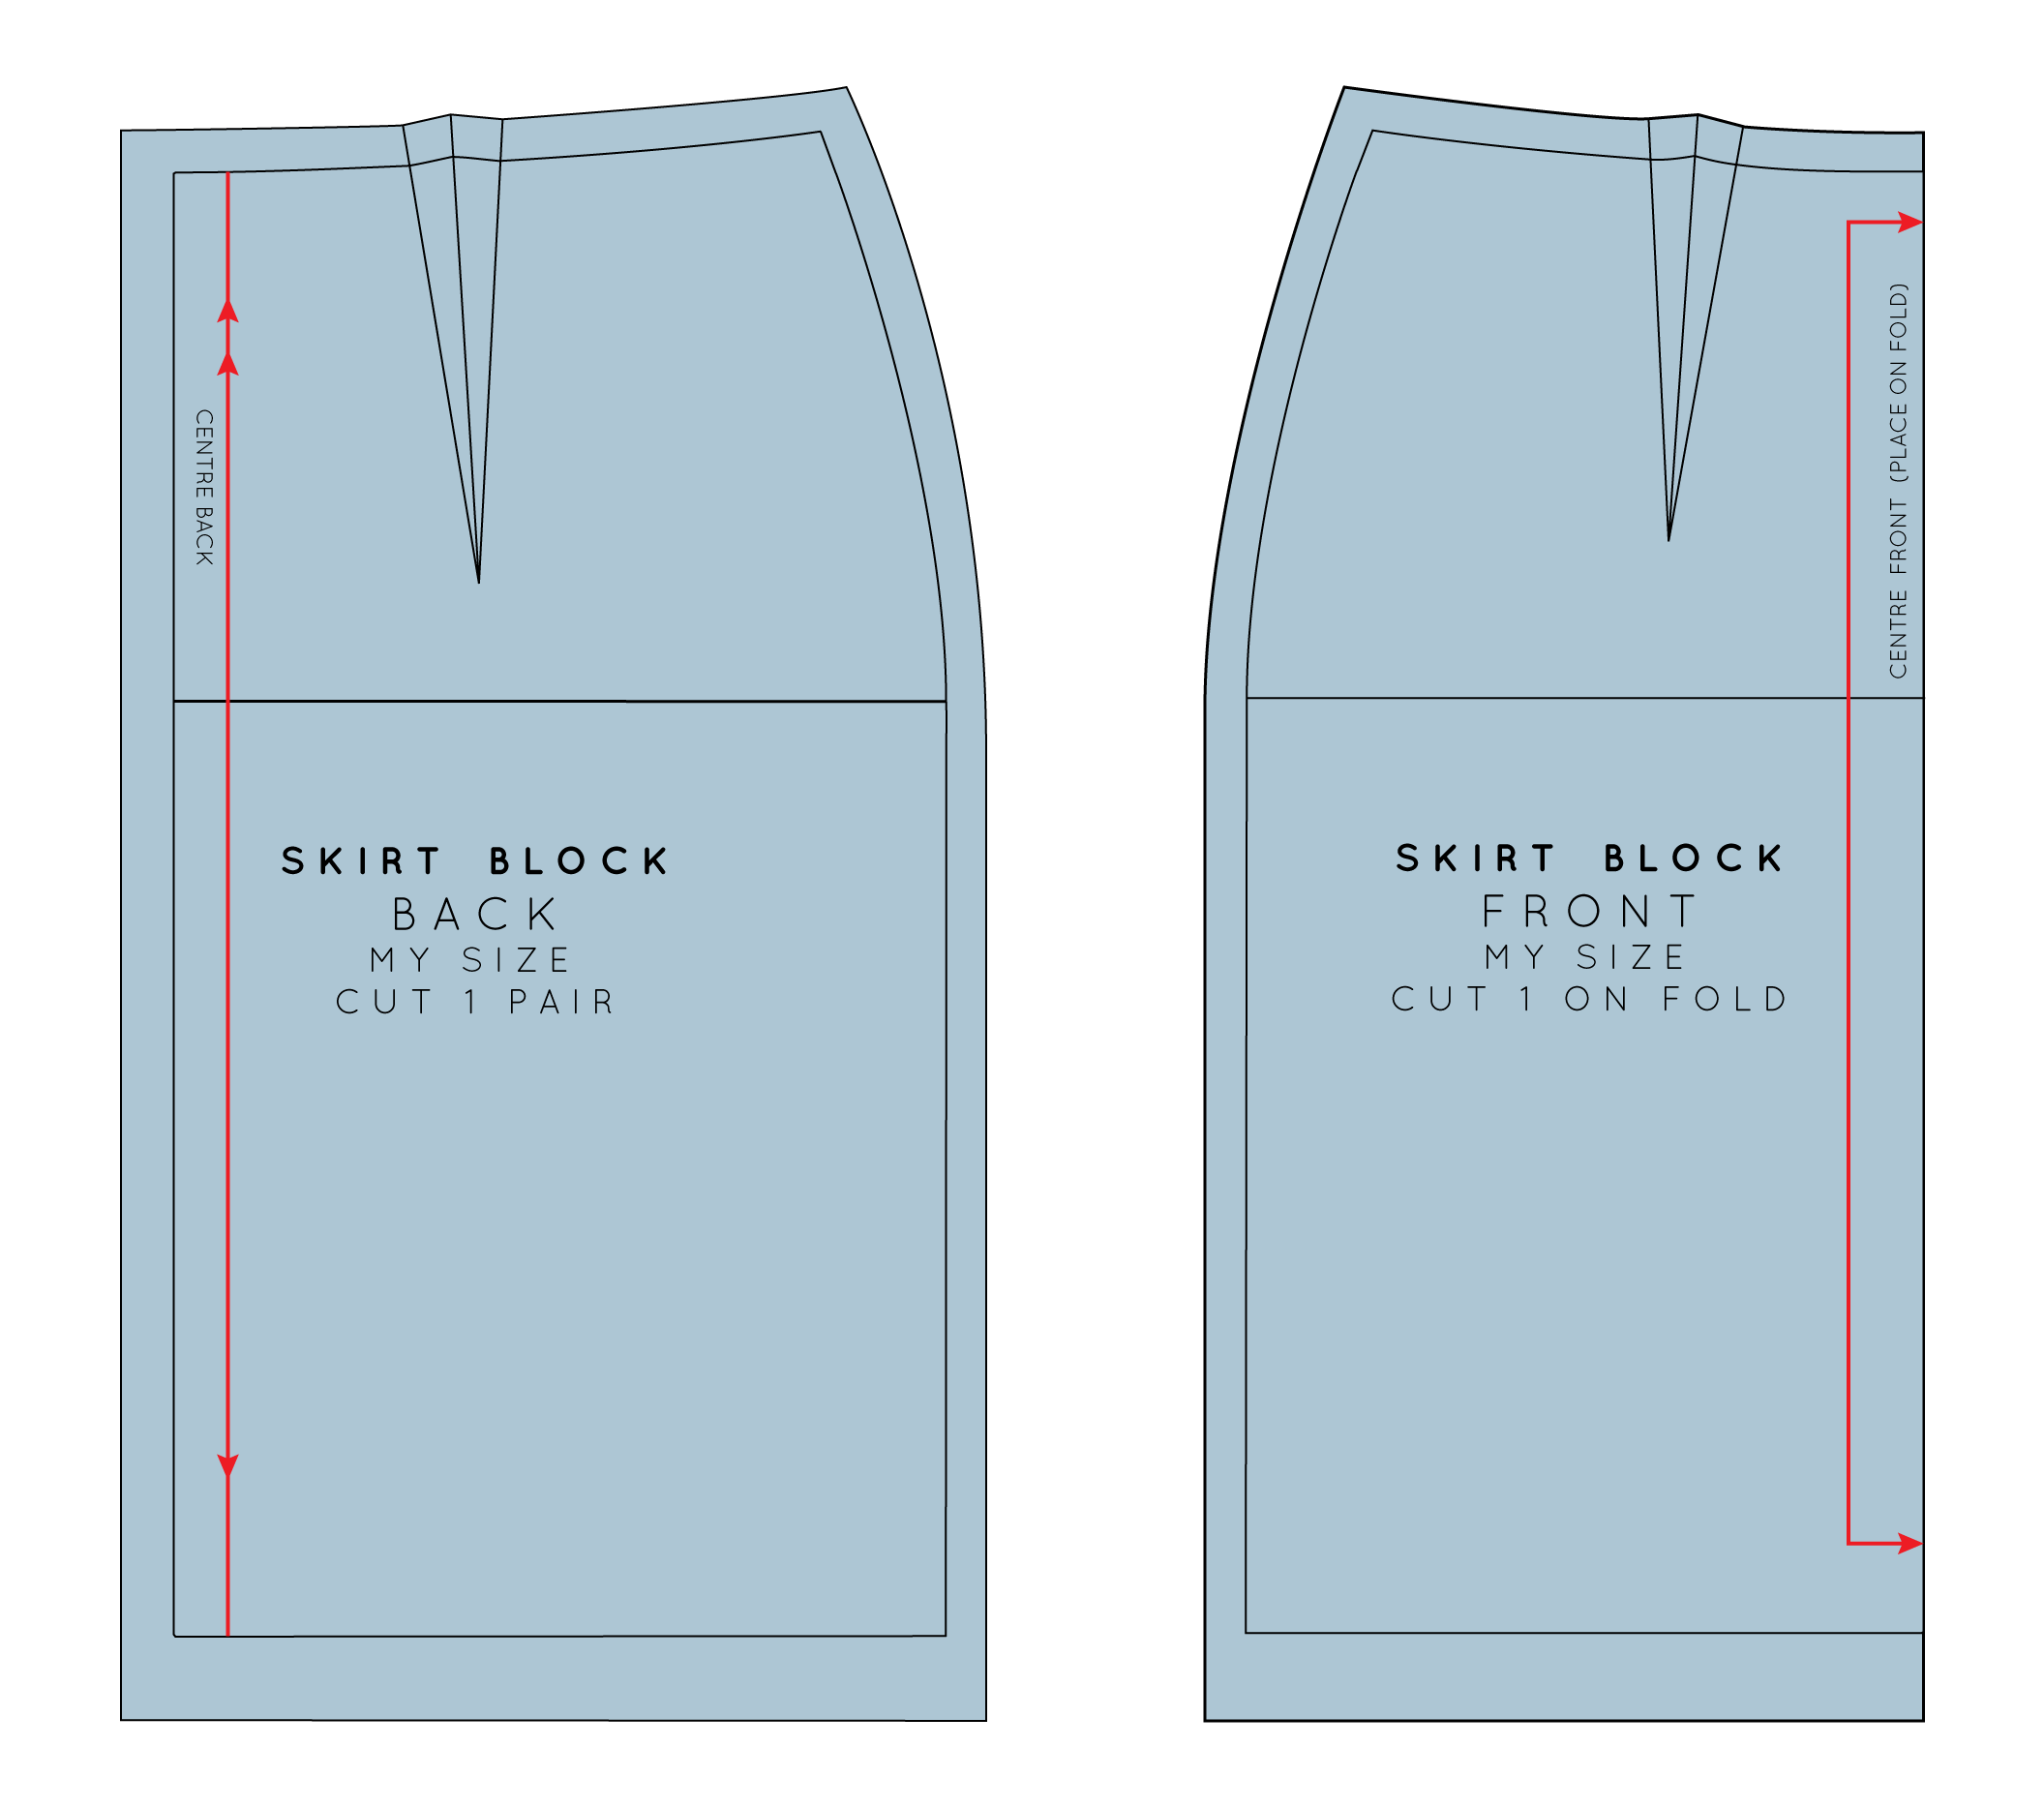
With Curated by In the folds - we teach you pattern hacking on patterns from previous issues, for example. Issue 1 focused on fitting the Neale jumpsuit and Issue 2 takes that pattern and creates 4 new designs! So you’re learning new skills as well as making clothes you know you’ll love!

Ready to join us but don't have the Neale jumpsuit pattern? Not a problem. After you sign-up, you will receive a link to purchase the jumpsuit pattern as a standalone pattern (for the same price as your monthly subscription).

2. Use the clothes you wear the most to determine what you sew

bb9812b0-d261-4af2-ba46-fb46aed22daf.jpeg

Another reason you might choose to hack a pattern is because sometimes it is difficult to know what changes you would like to make until after you have spent some time wearing a garment.

You may have worn a garment you have made and soon be thinking, 'if only it was longer' or 'if only it had pockets.' Pattern hacking gives you a chance to make the clothing you want to wear, without needing to draft patterns from scratch.

Learning pattern hacking will give you confidence to take ownership of the garments you sew and help you make exactly the kind of garment you want to wear.

3. Choose the right pattern to hack

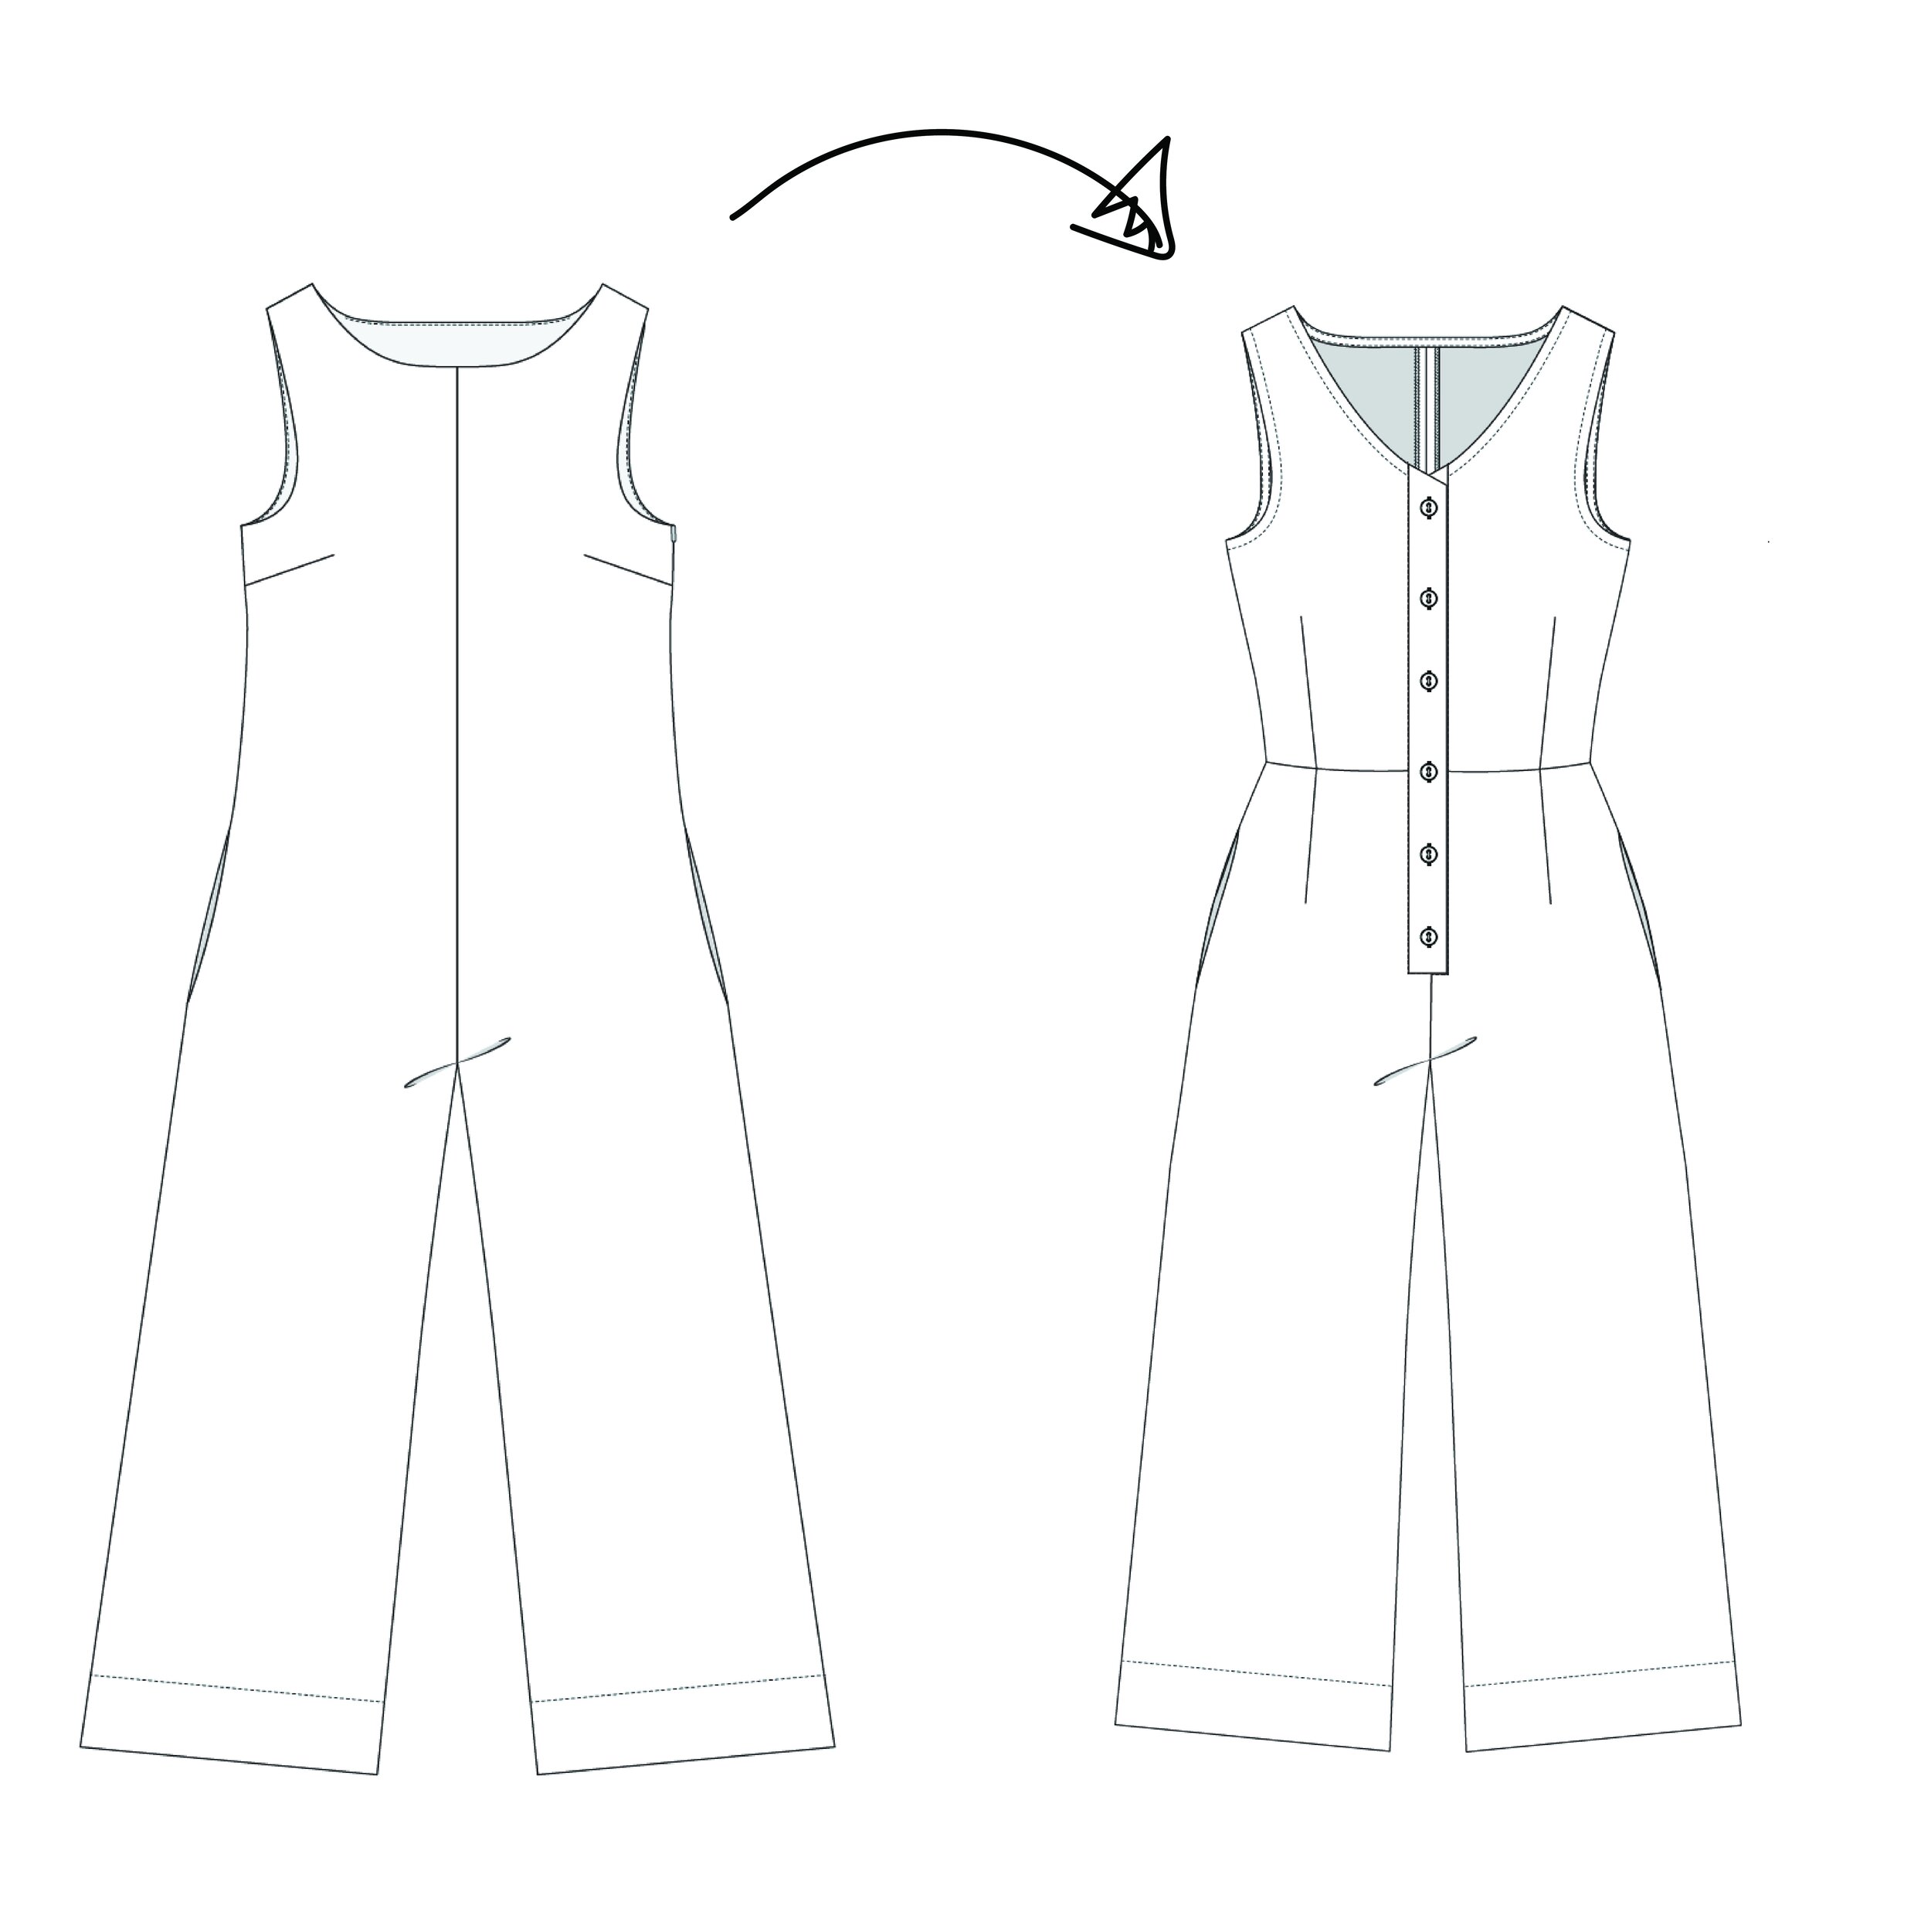
It’s important to think about the main features of your design and cleverly pick which patterns you hack from. For example, if you want to make a dress with a big sleeve and a V-neck, you wouldn’t start with a sleeveless dress. You can always mash two patterns together if needed! 

In Issue 2 we’re using the Neale jumpsuit from Issue 1 and we’ve selected hacks that would work well using this jumpsuit or a similar one to start! (For example, you could apply some of these hacks to the Peppermint jumpsuit pattern).

4. Learn new skills at your own pace

Pattern making is a craft! It takes years to train and become a pattern maker. Pattern hacking is a great opportunity to learn pattern making skills and build on these skills gradually over time. Like any new skill or hobby, getting good at it will take time. Be patient and enjoy the process. That's what it's all about!

Start with simple hacks and work your way up to more complex ones. With Curated by ITF we introduce you to the basic concepts, techniques and tools for pattern hacking and take you through step by step until you’re ready to create your own! The hacks in this issue have been designed so that no matter what your patternmaking experience is, there will be something for you. Start with the beginner friendly hacks and work your way up to the more complex hacks if you are working on gradually building up your skills.

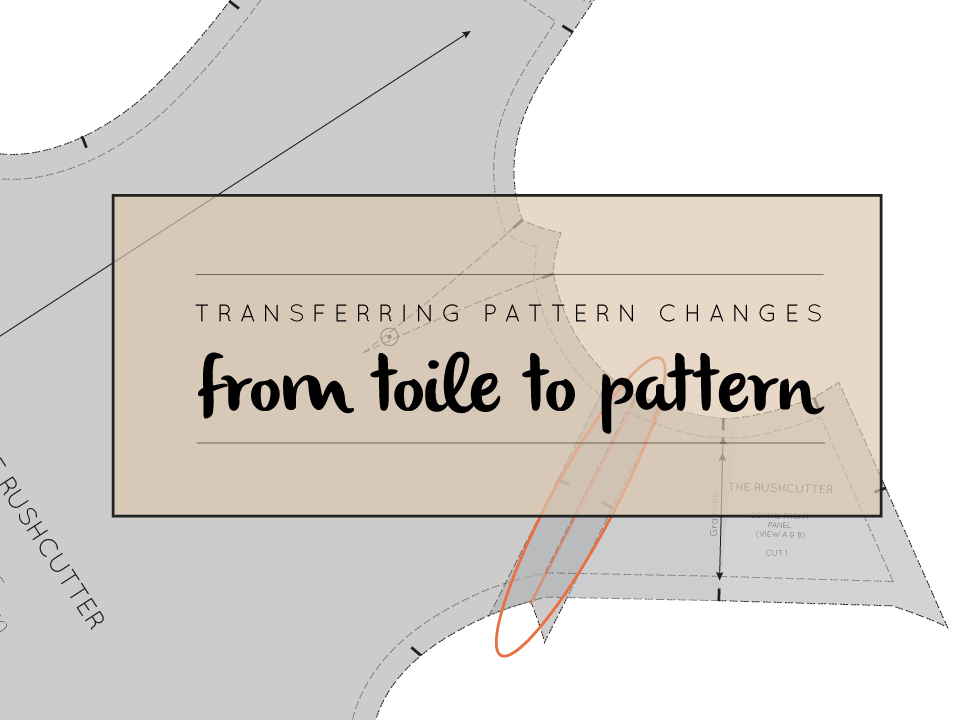
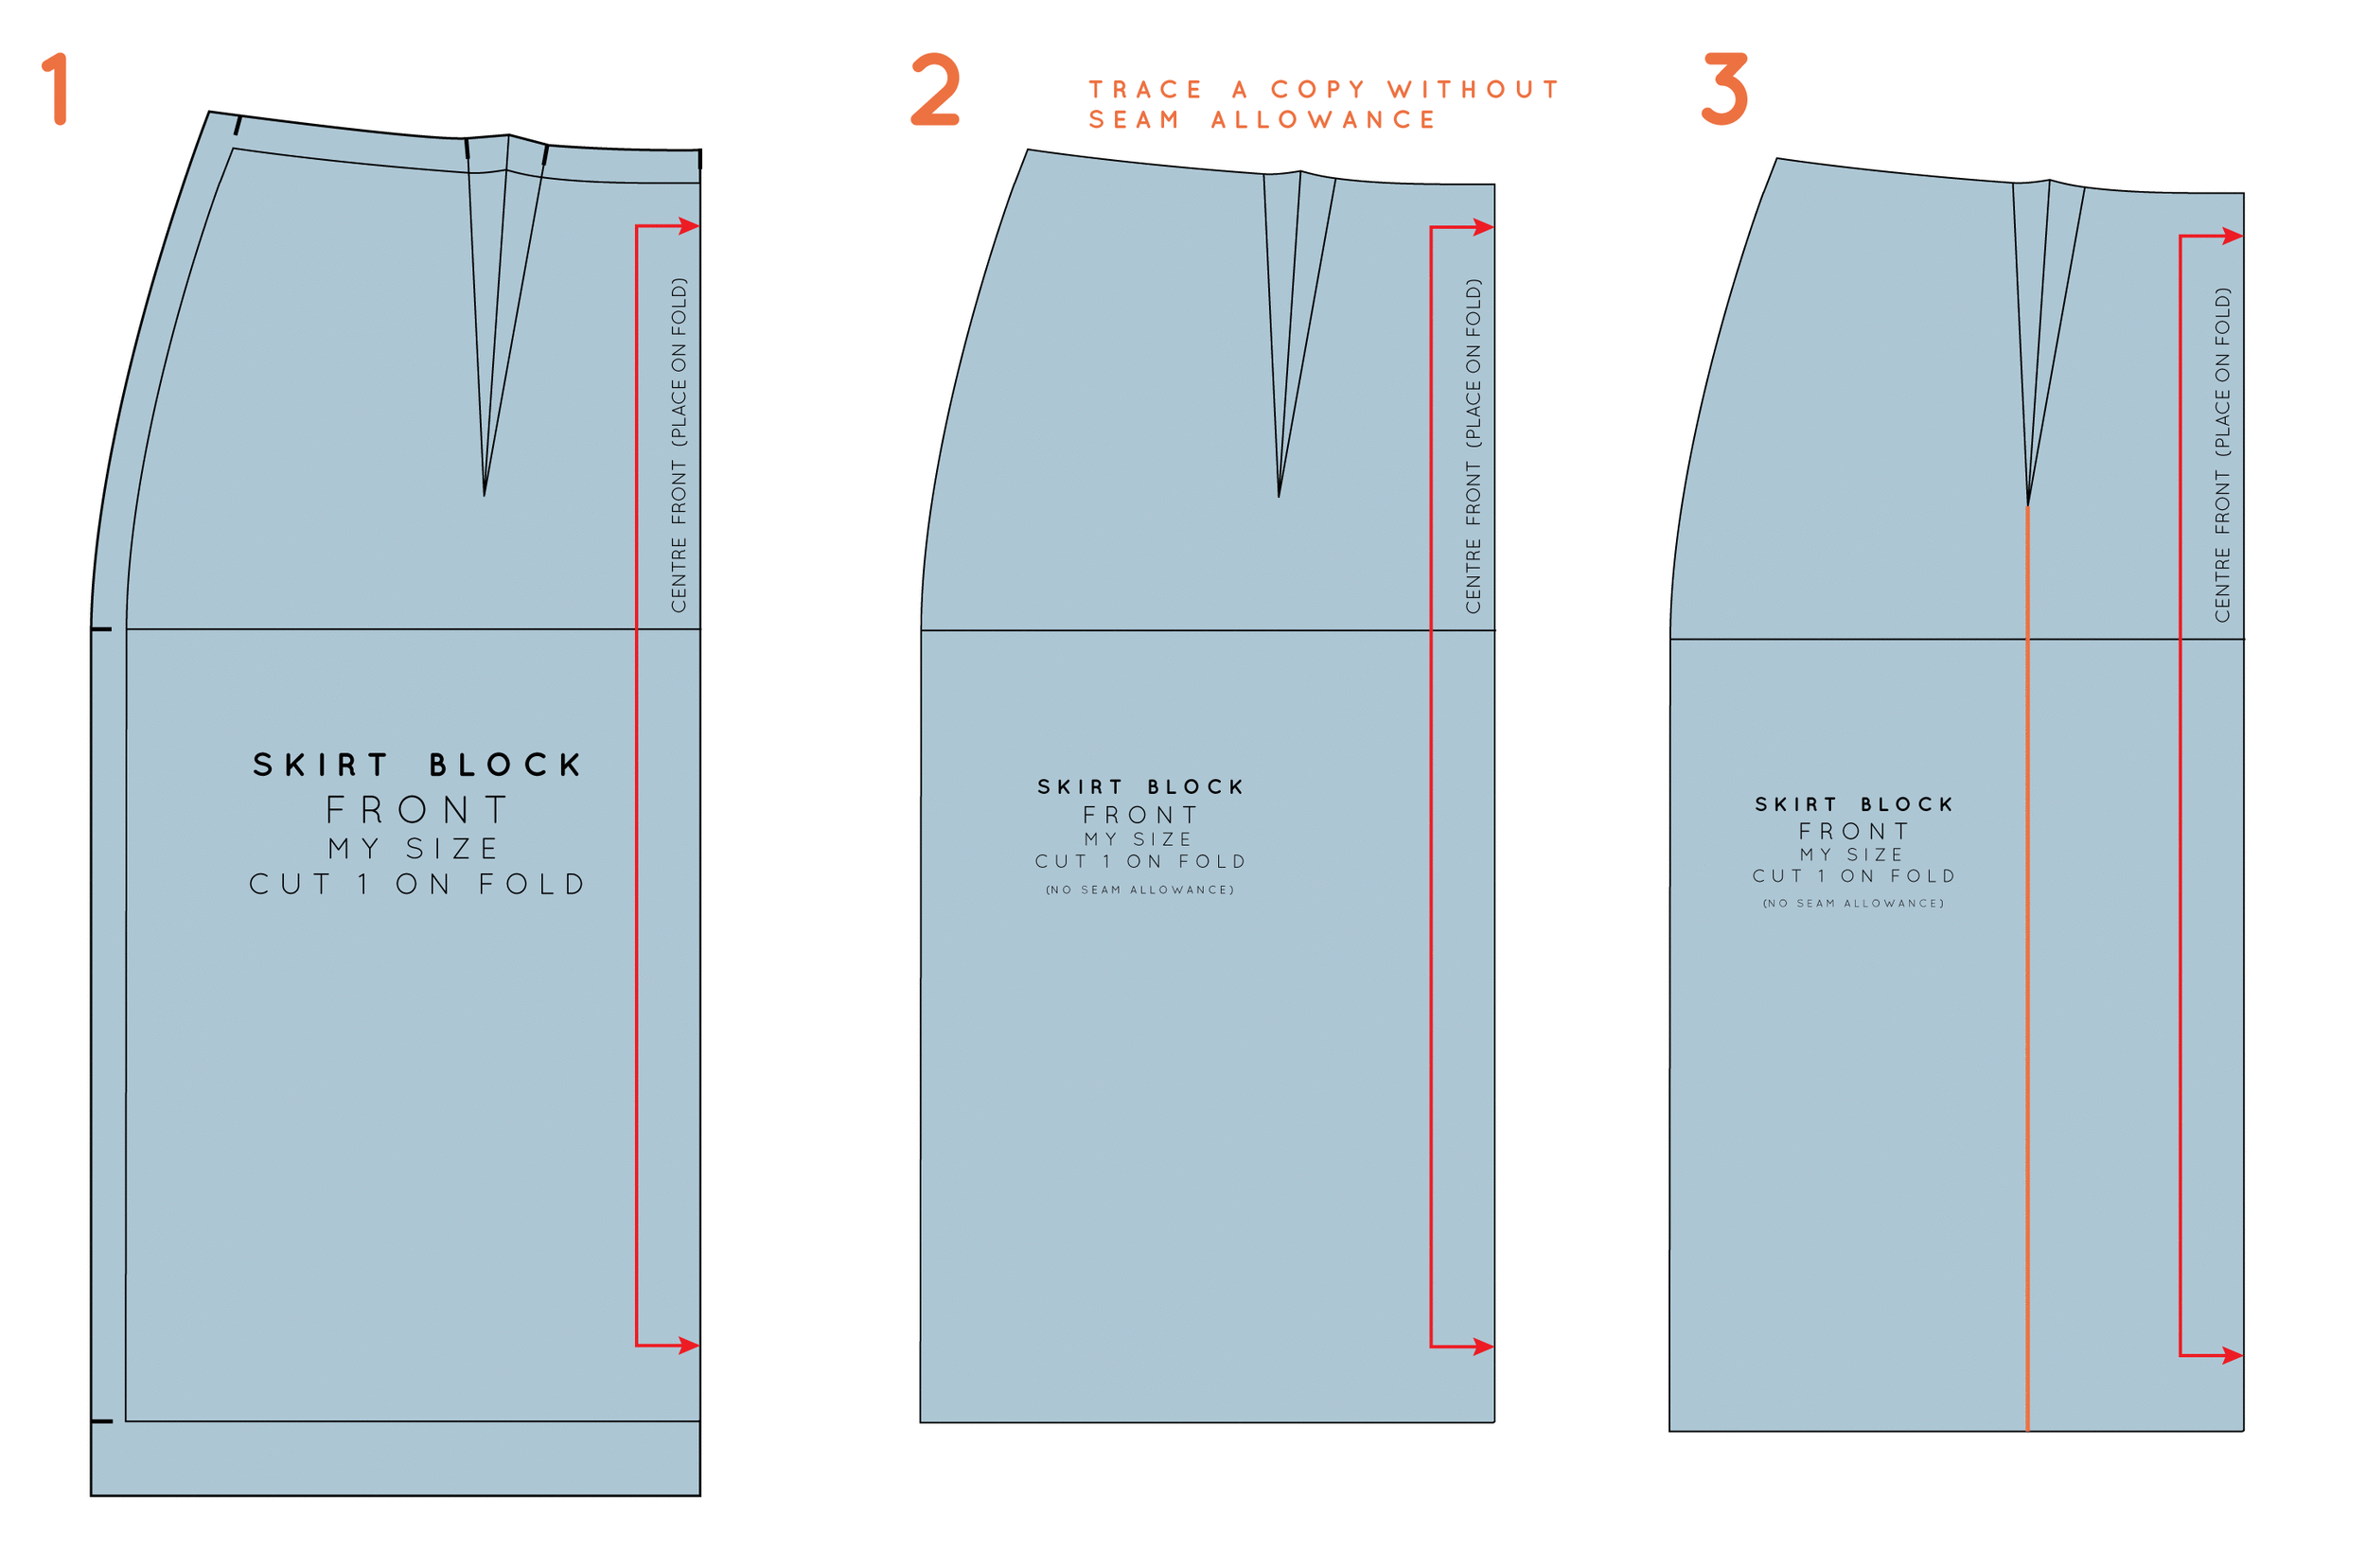
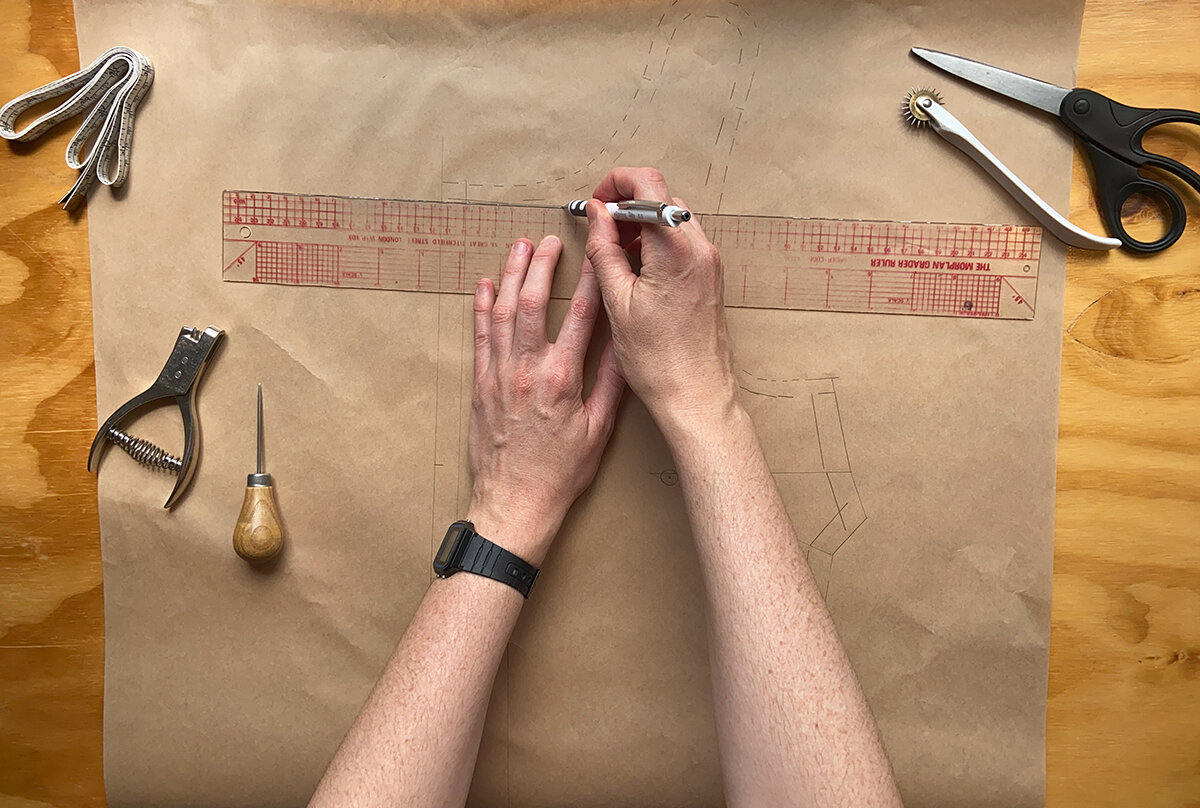
5. Always trace a copy and keep your drafts

When you are happy with the fit of the original pattern, trace a copy of the pattern so that you can always refer to or return to the original. In pattern making we also keep our drafts - which are the work in progress patterns, so we can have a ‘history’ of what we’ve done to the pattern. It's a good idea to put a date on each version of a pattern, so you always know which pattern is the most up to date.

Until the patterns are completely finalised (and beyond!) you never know when you might need to refer back to these previous versions.
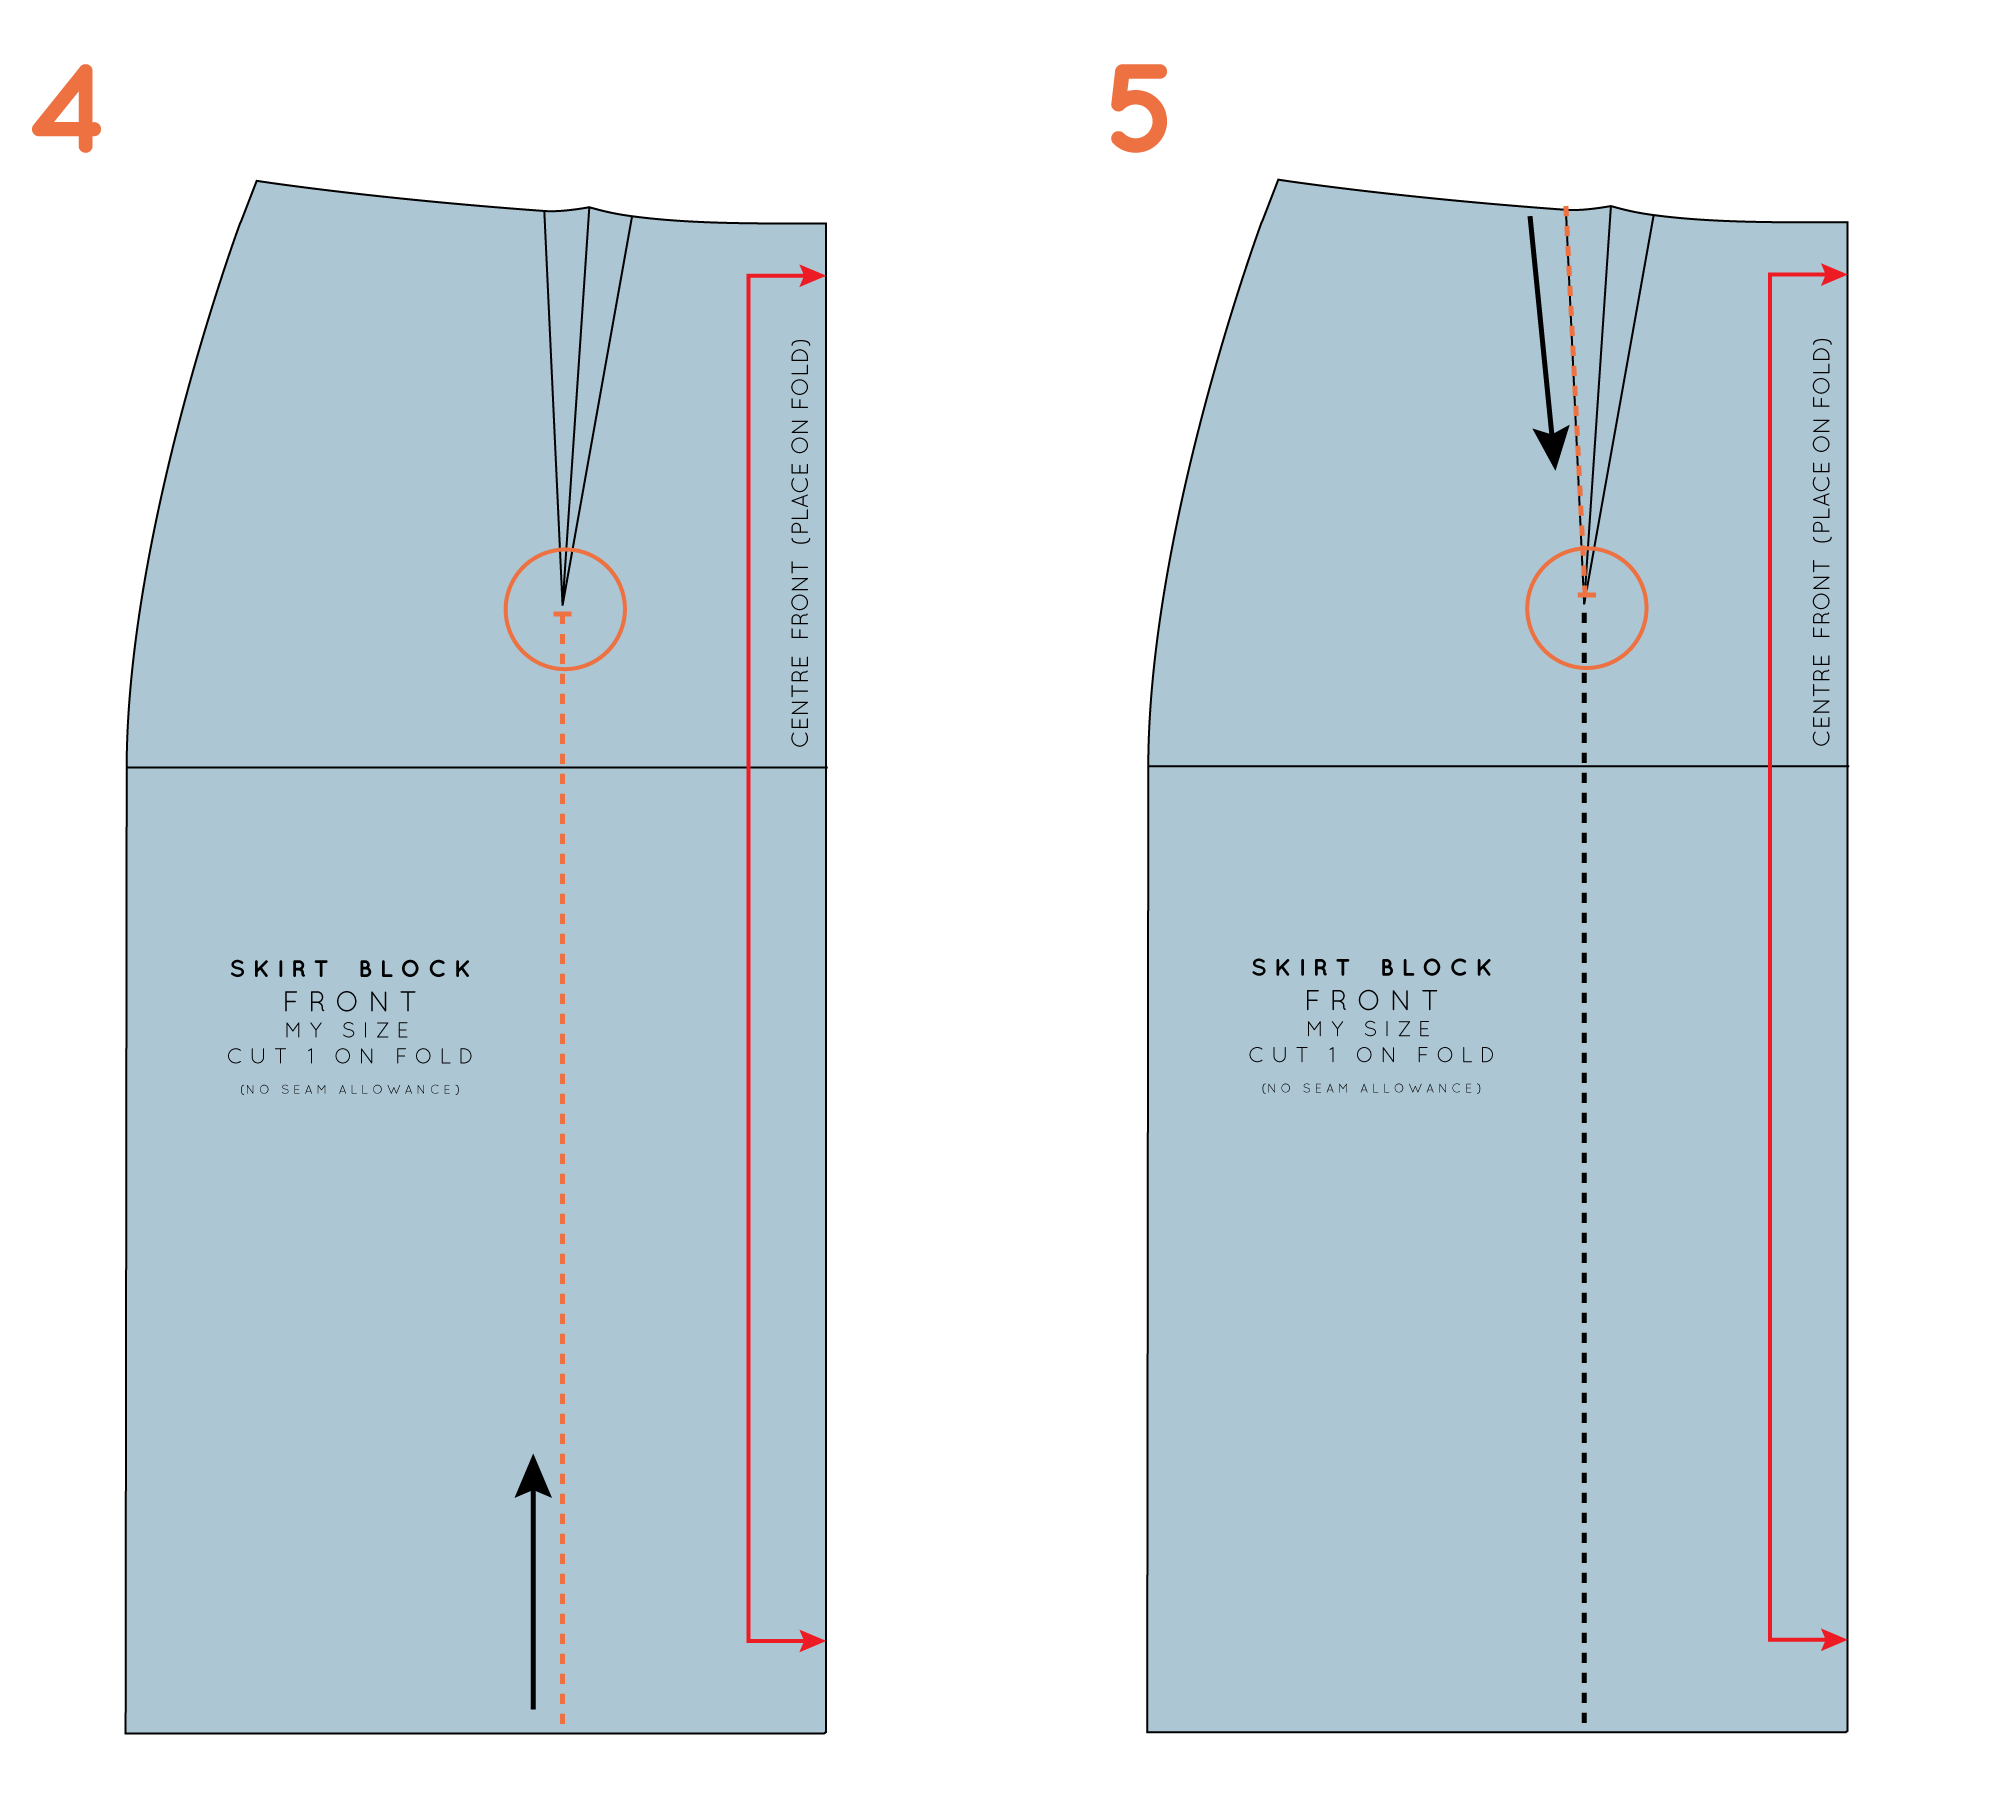
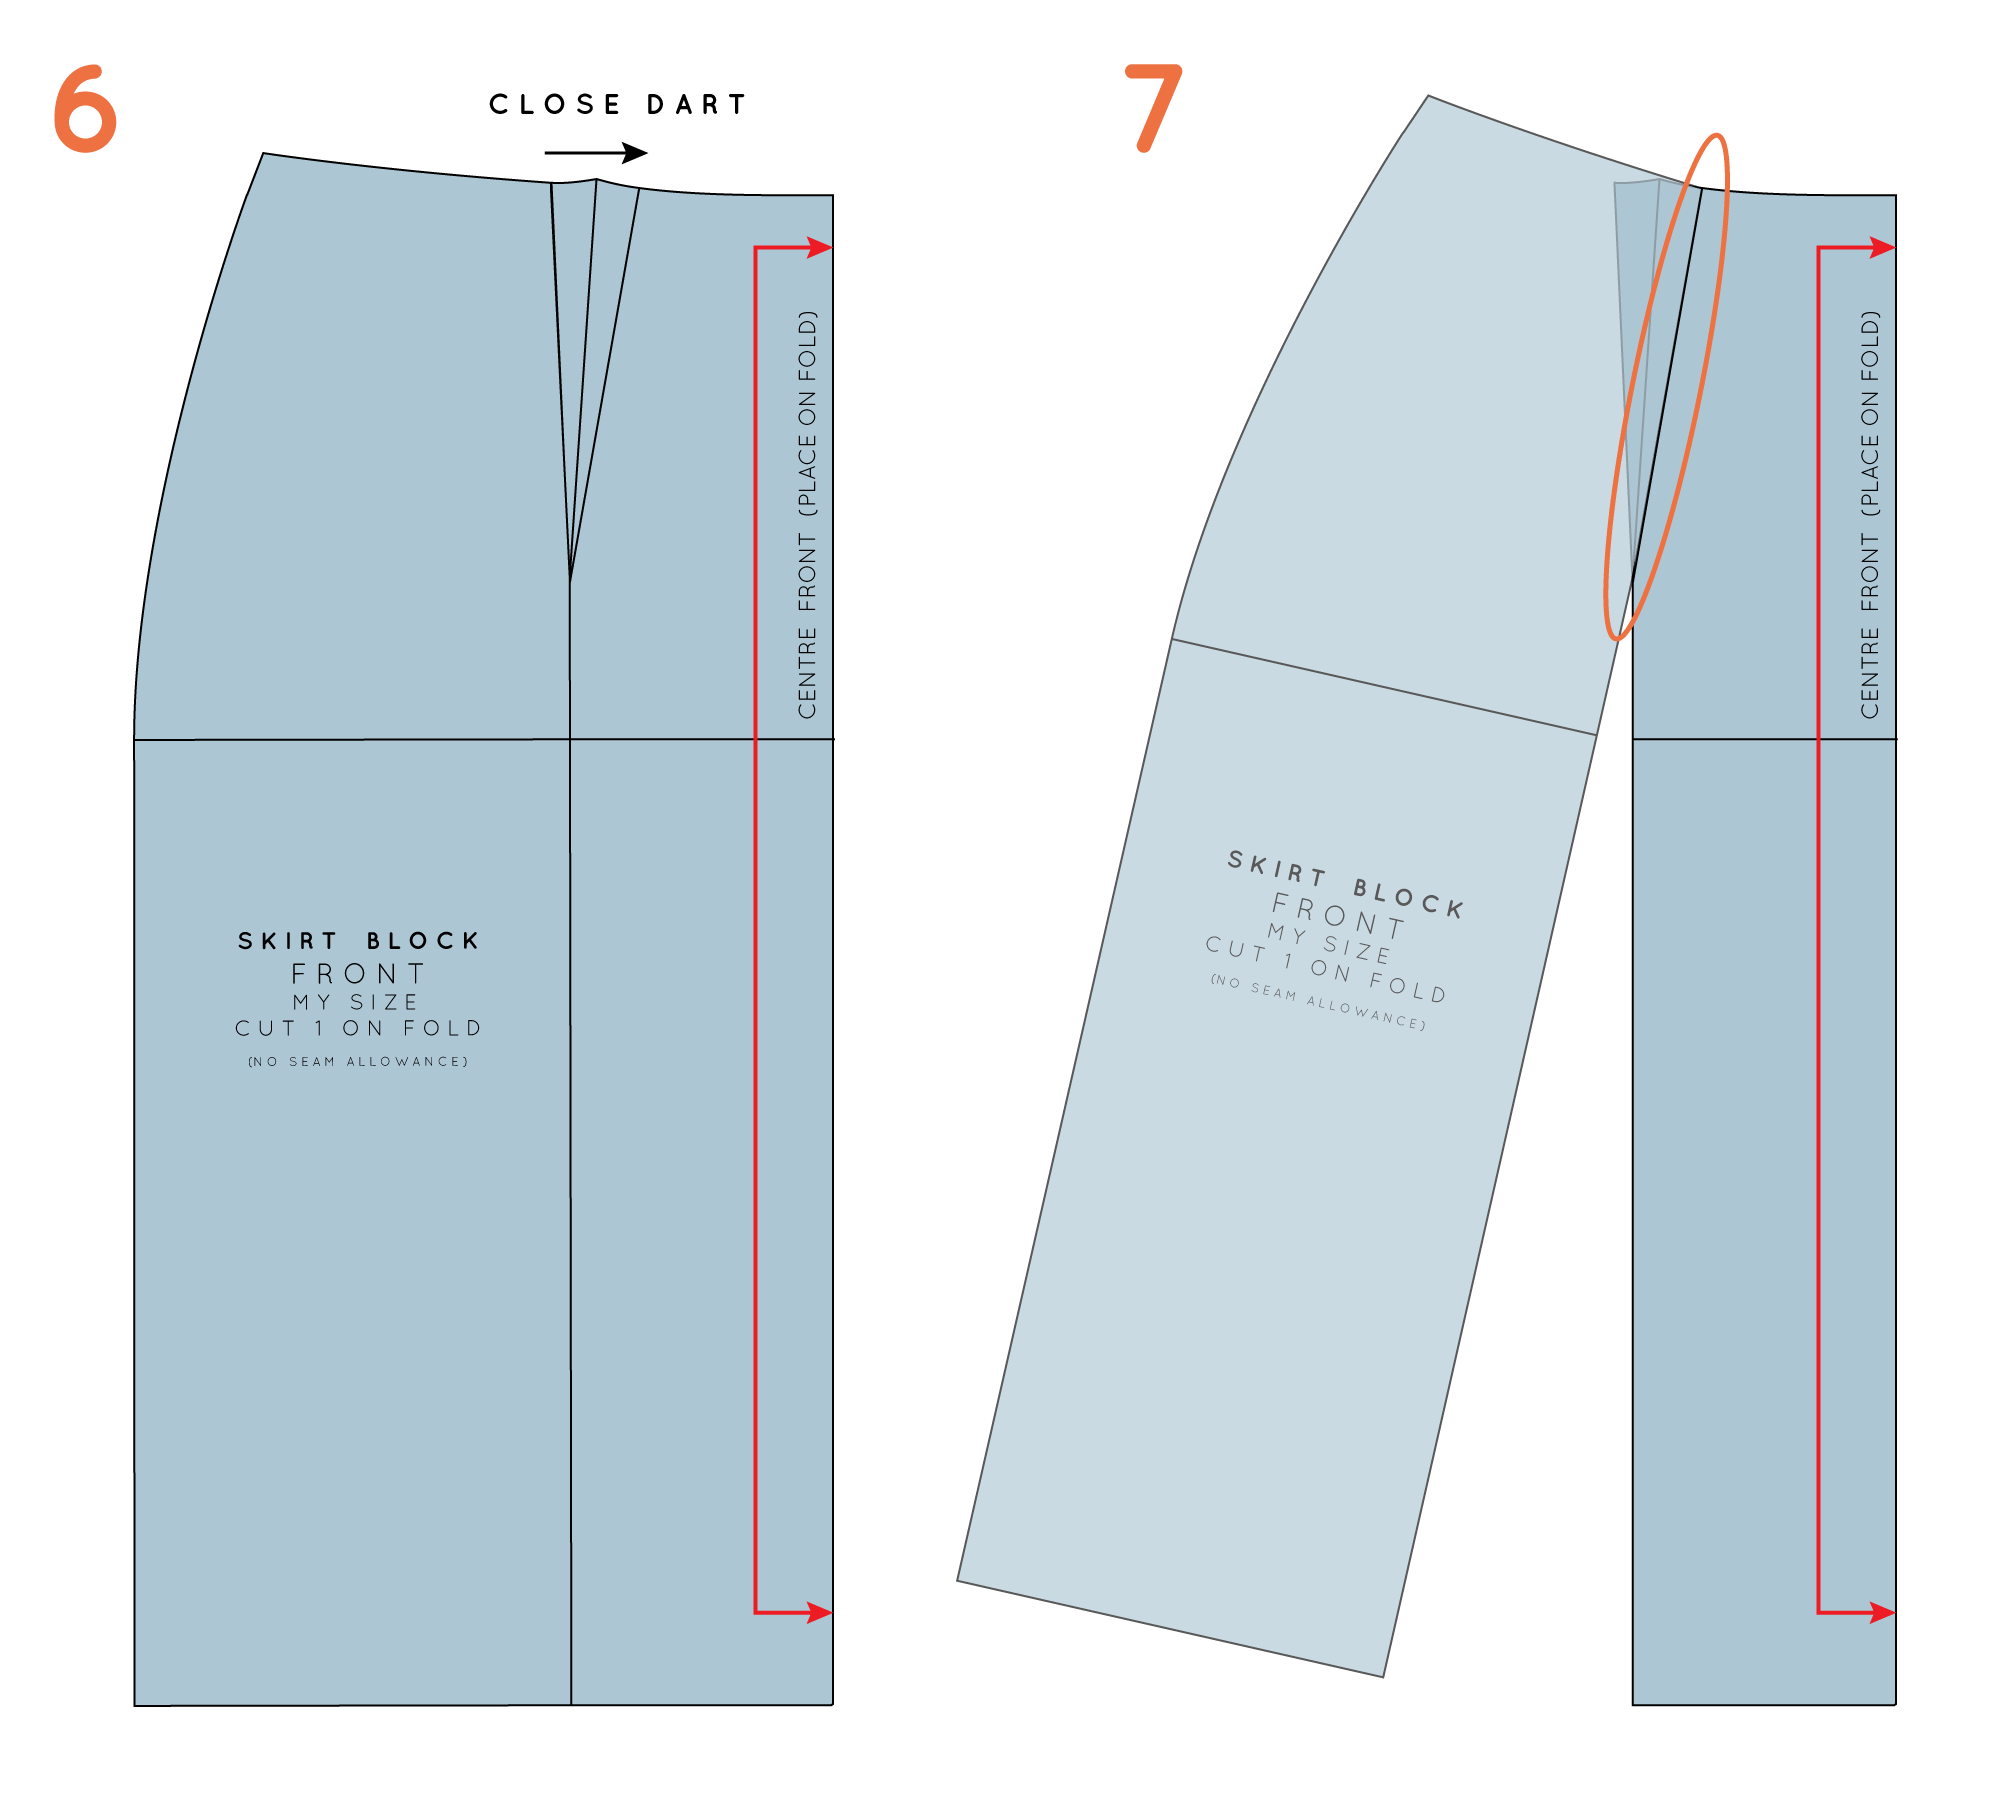
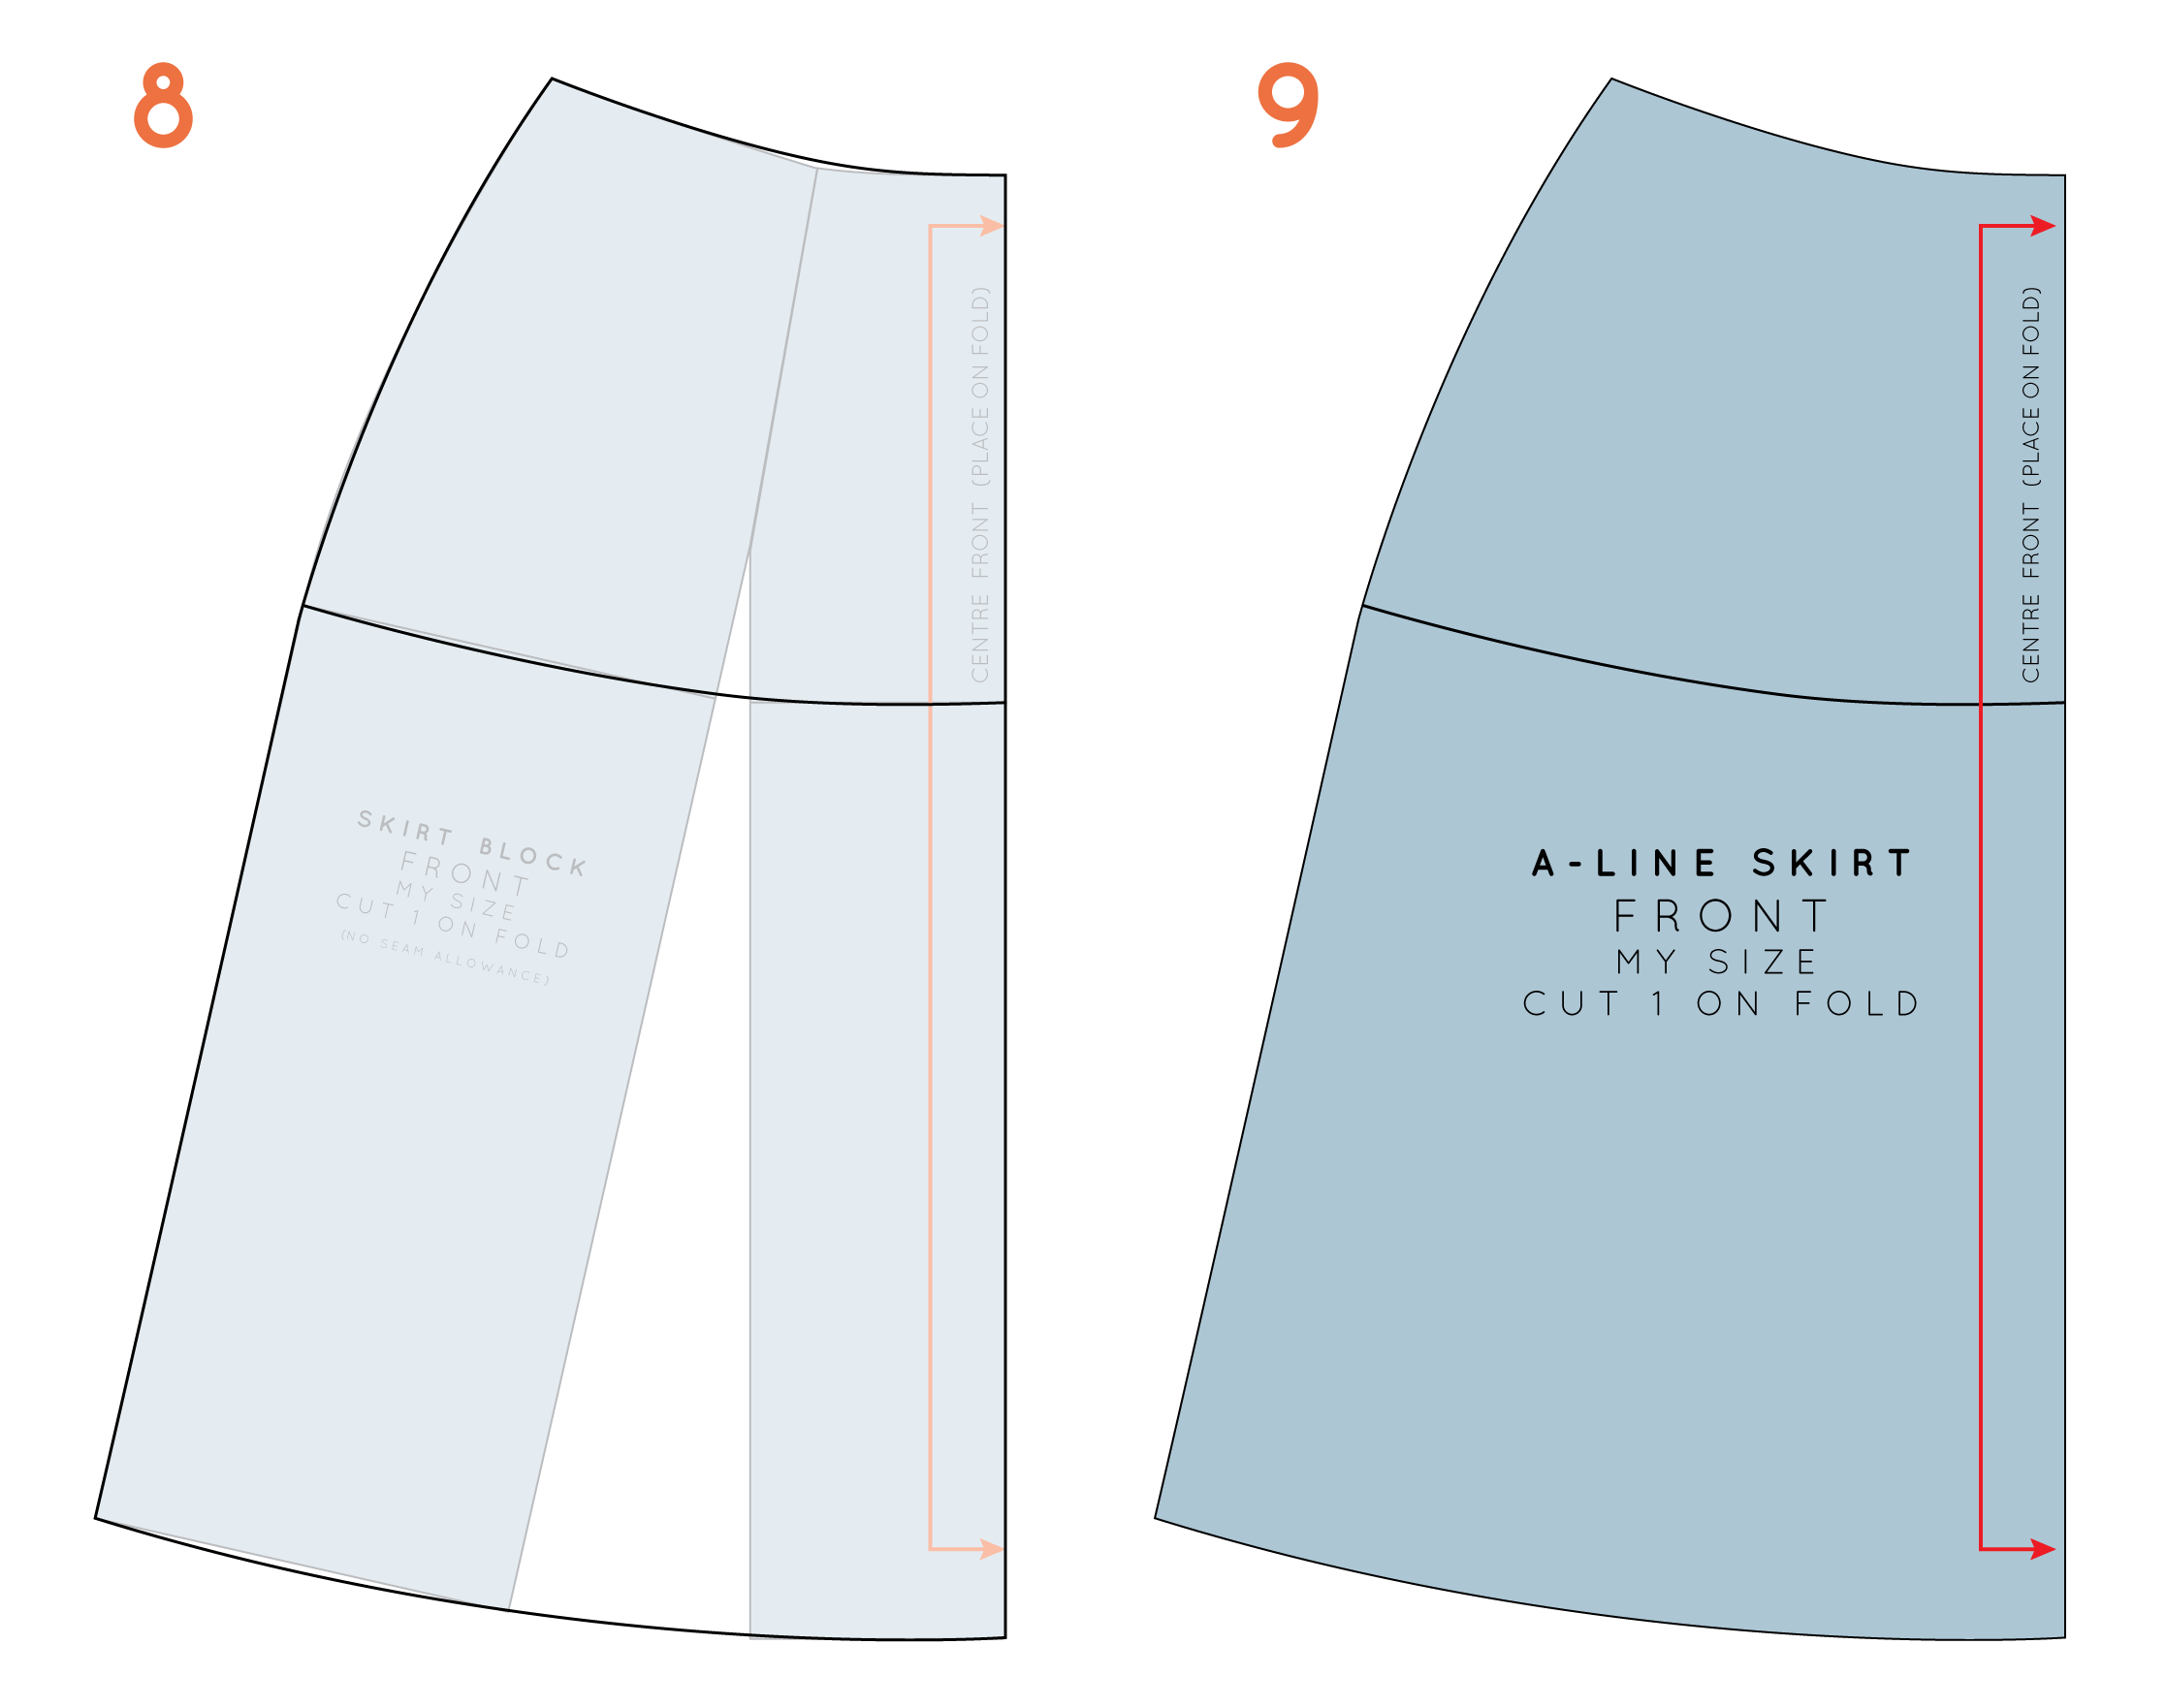
6. Learn the basics

It's so important to learn the basics of patternmaking before you dive in. This will allow you to grasp the concepts and prevent you from getting overwhelmed when you get started. These techniques will take you a long way and once you learn a few basics you can get creative and have fun with the rest! 

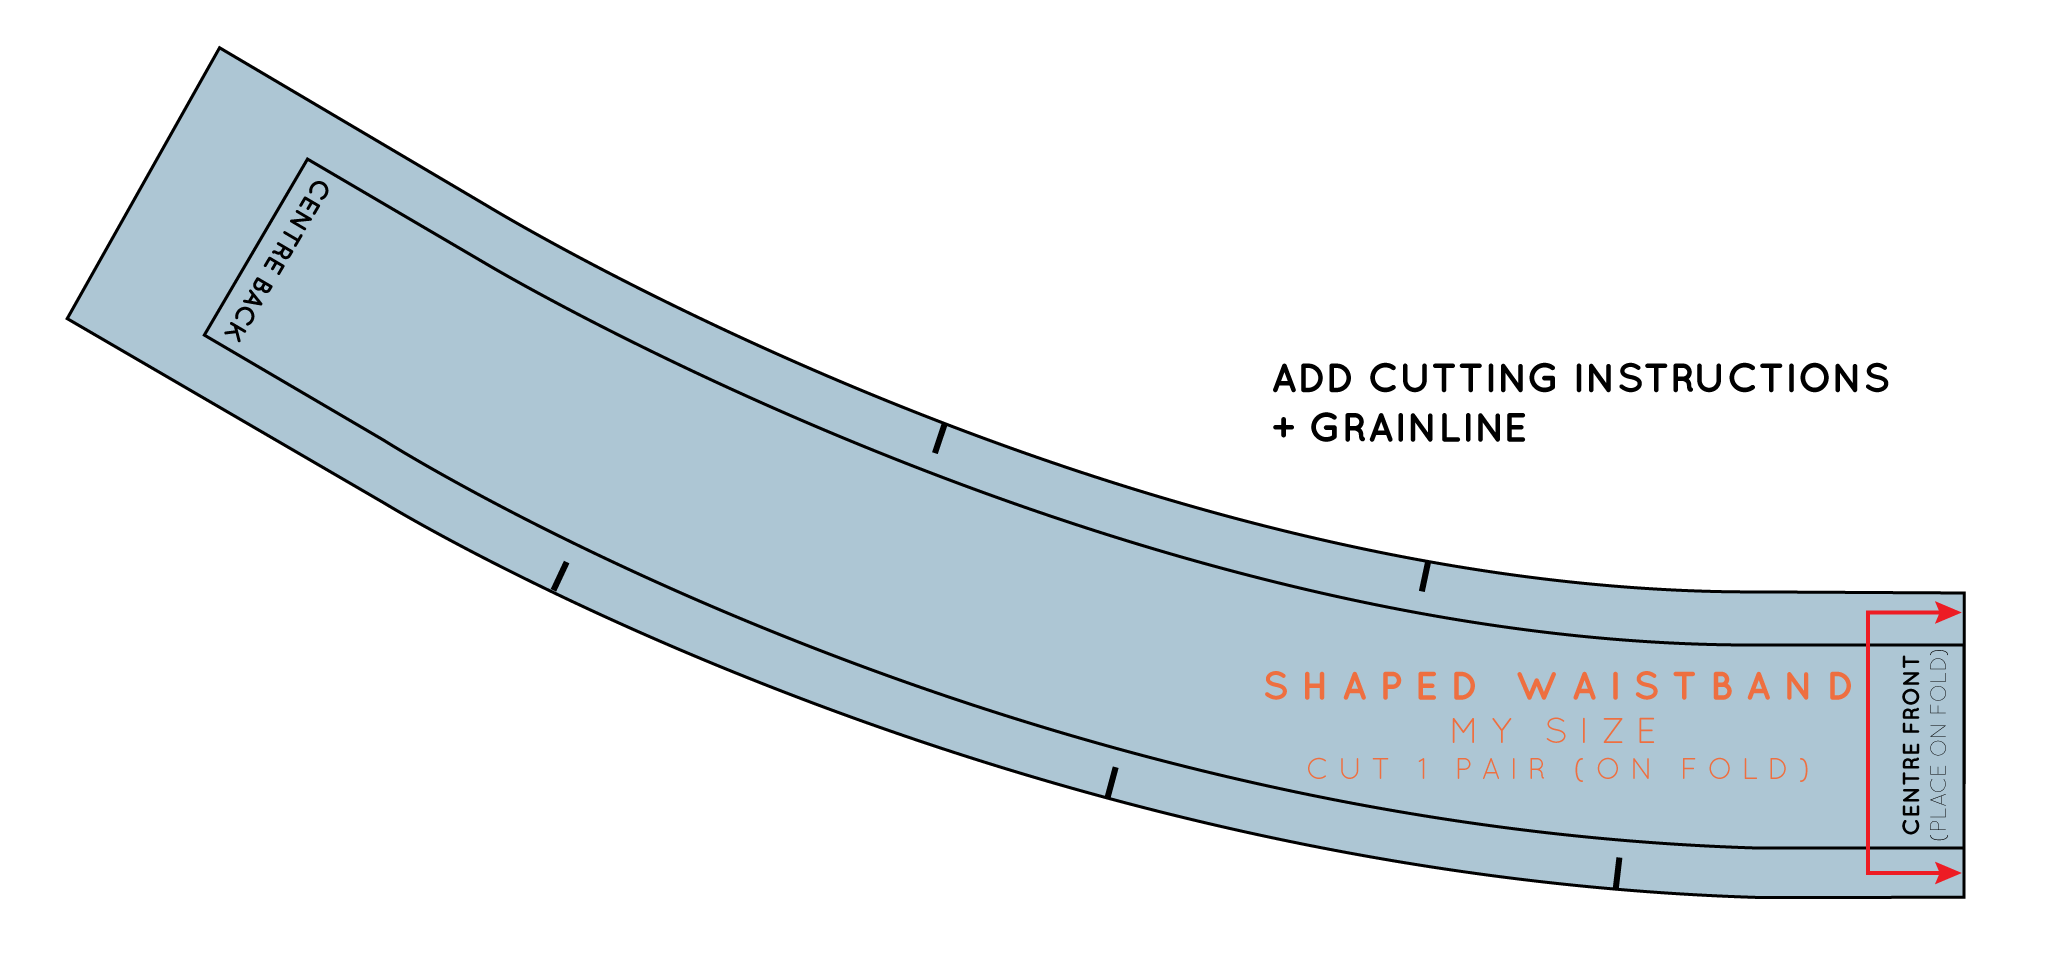
We recommend knowing how to:

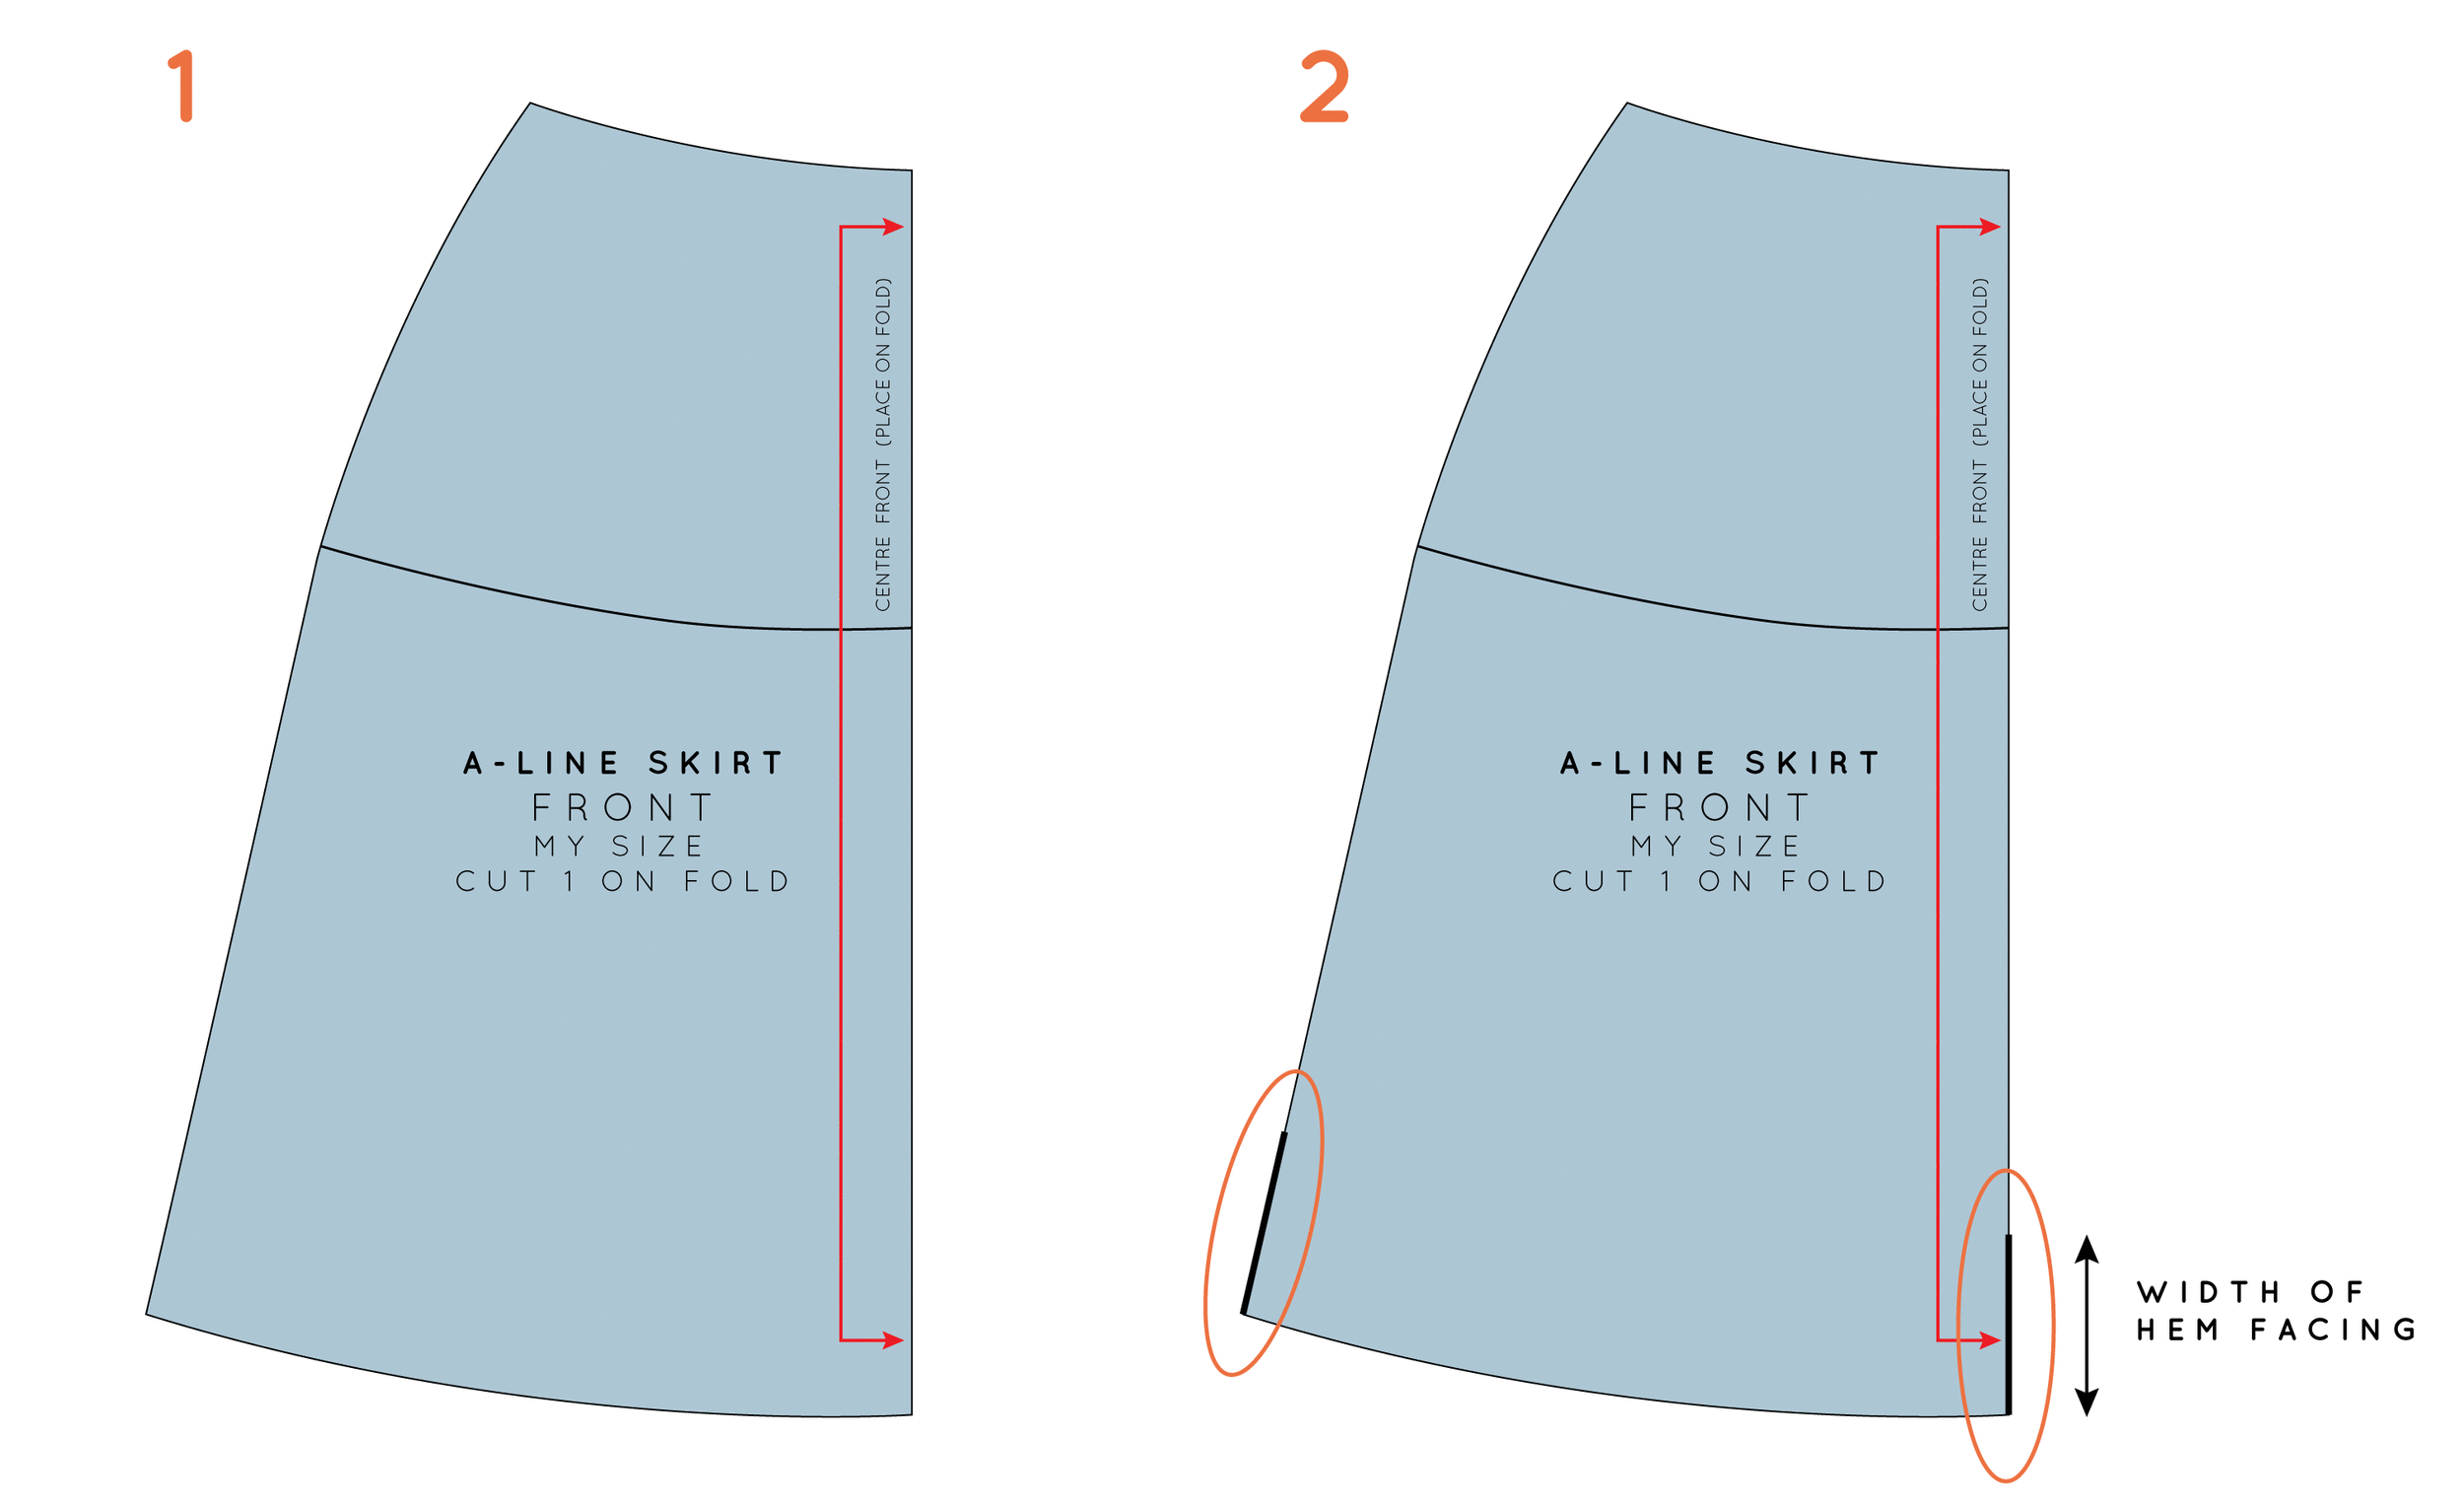
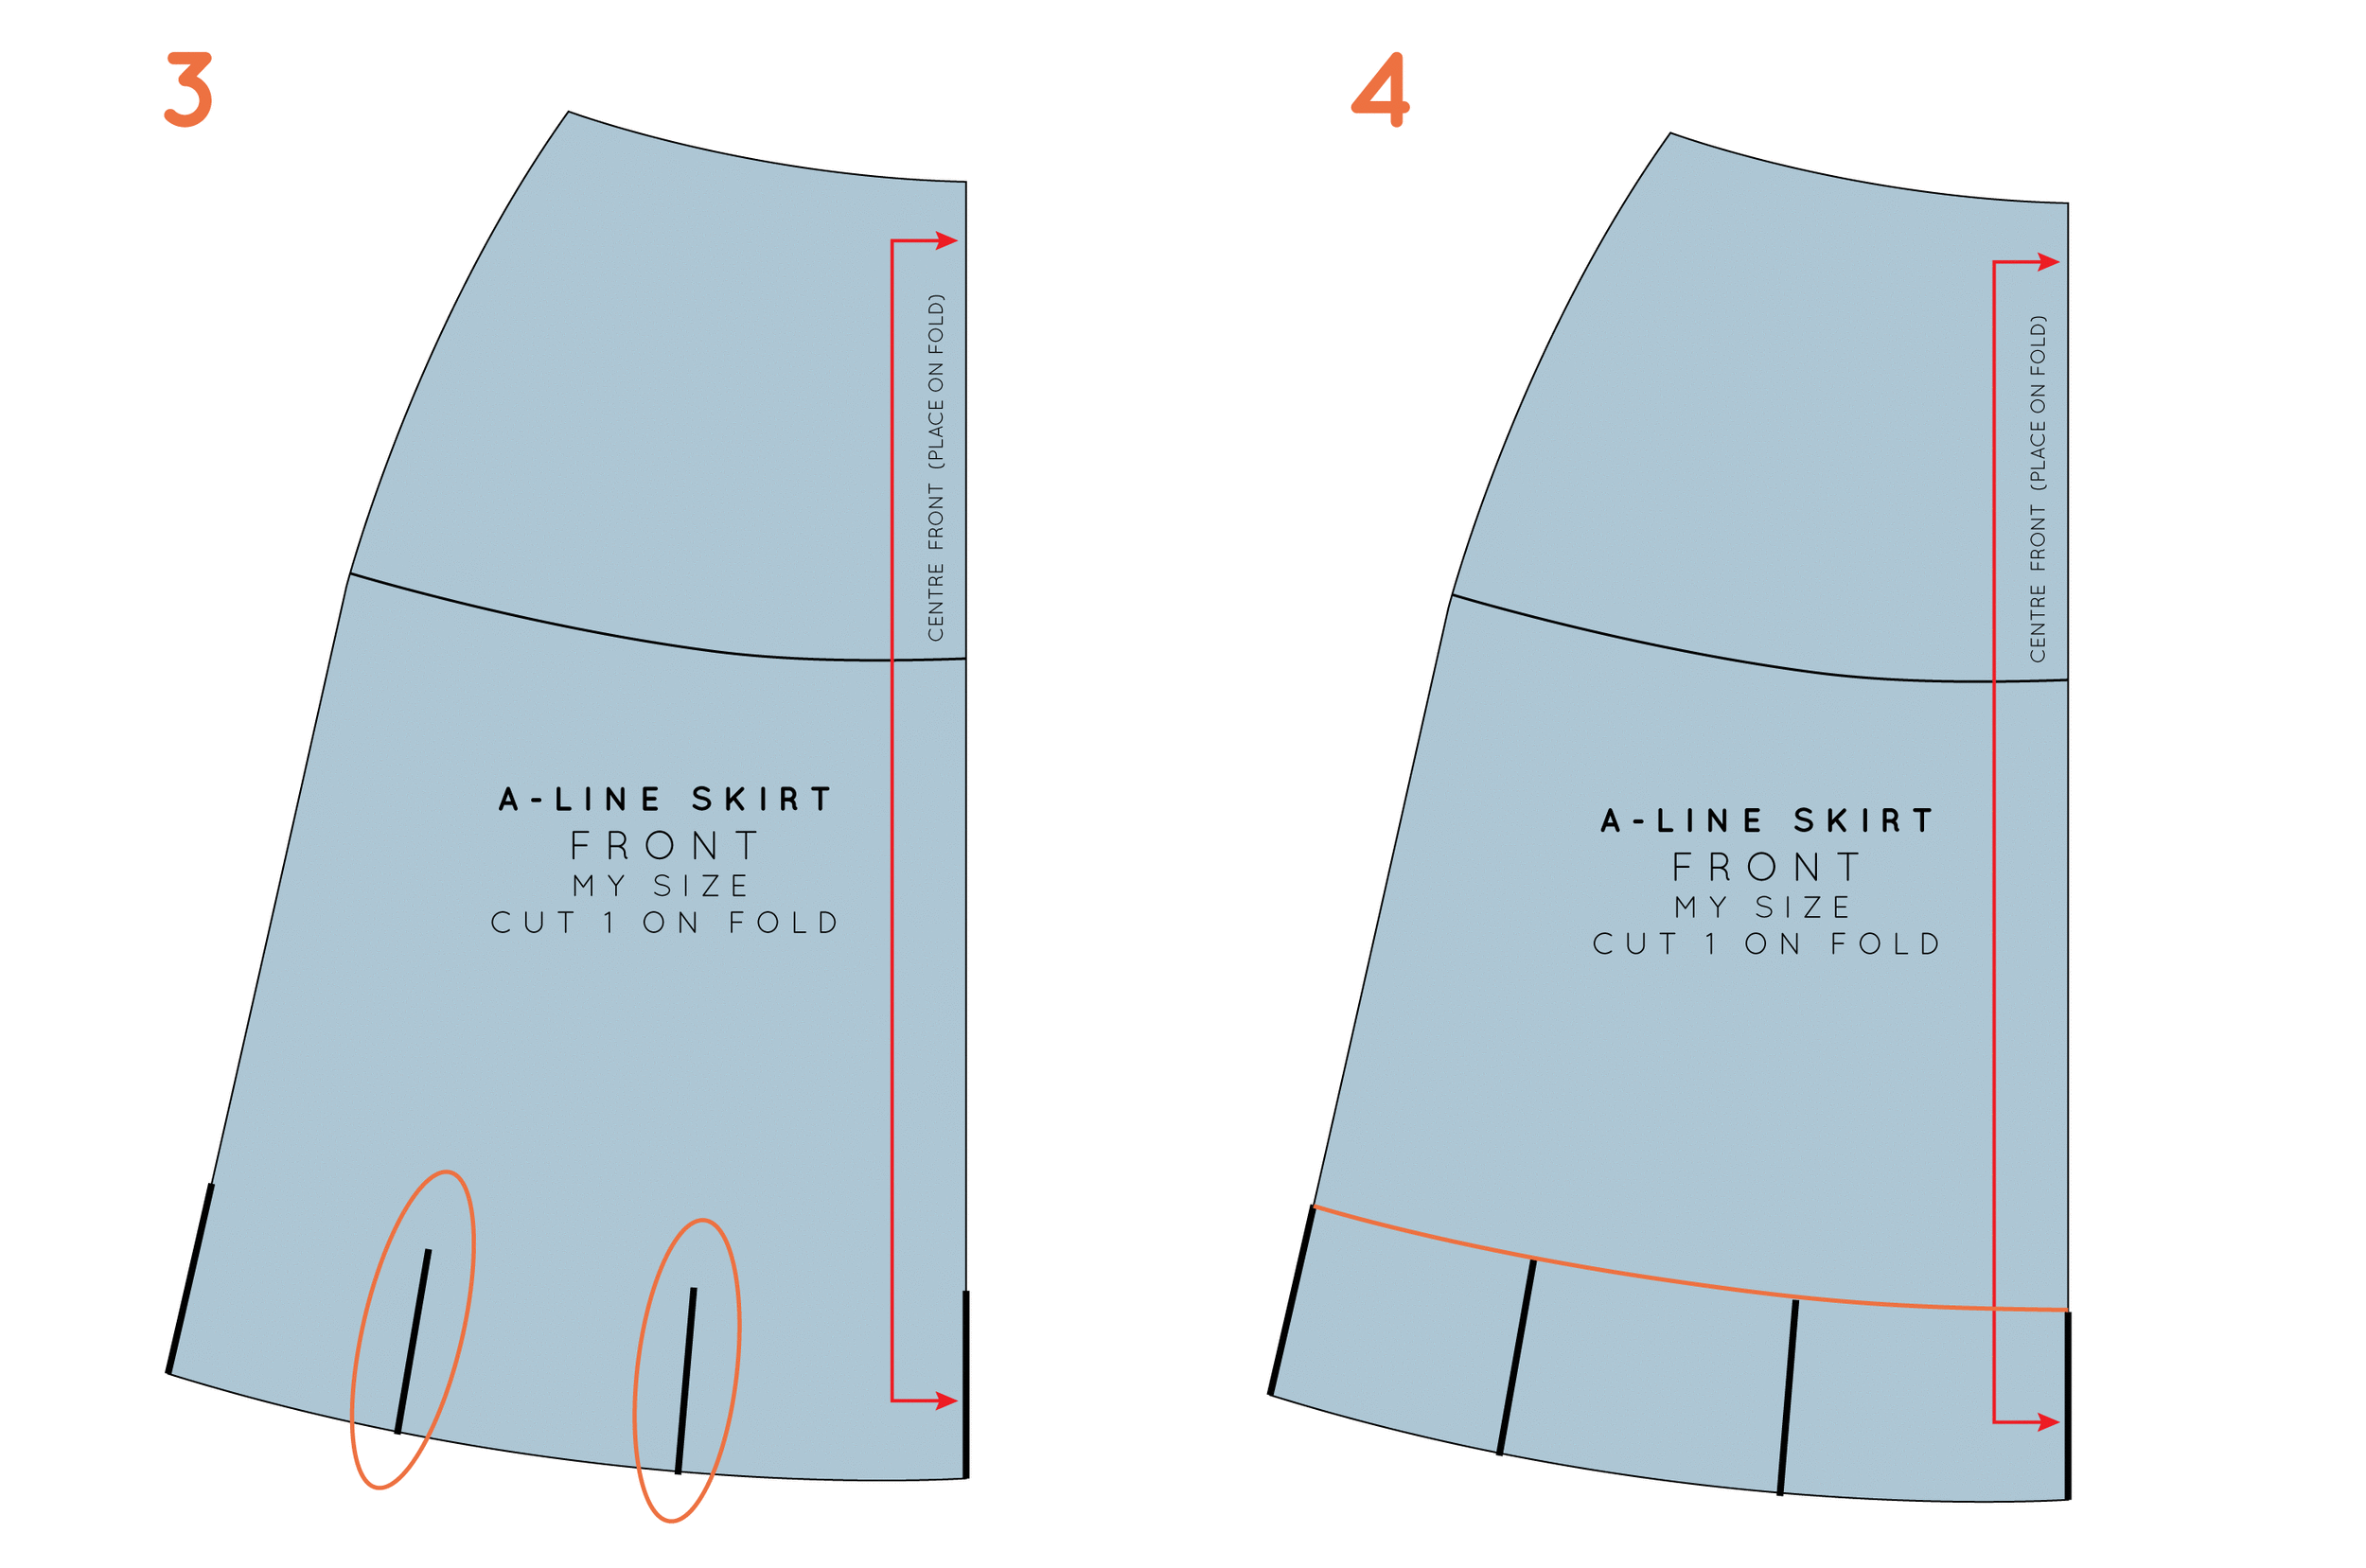
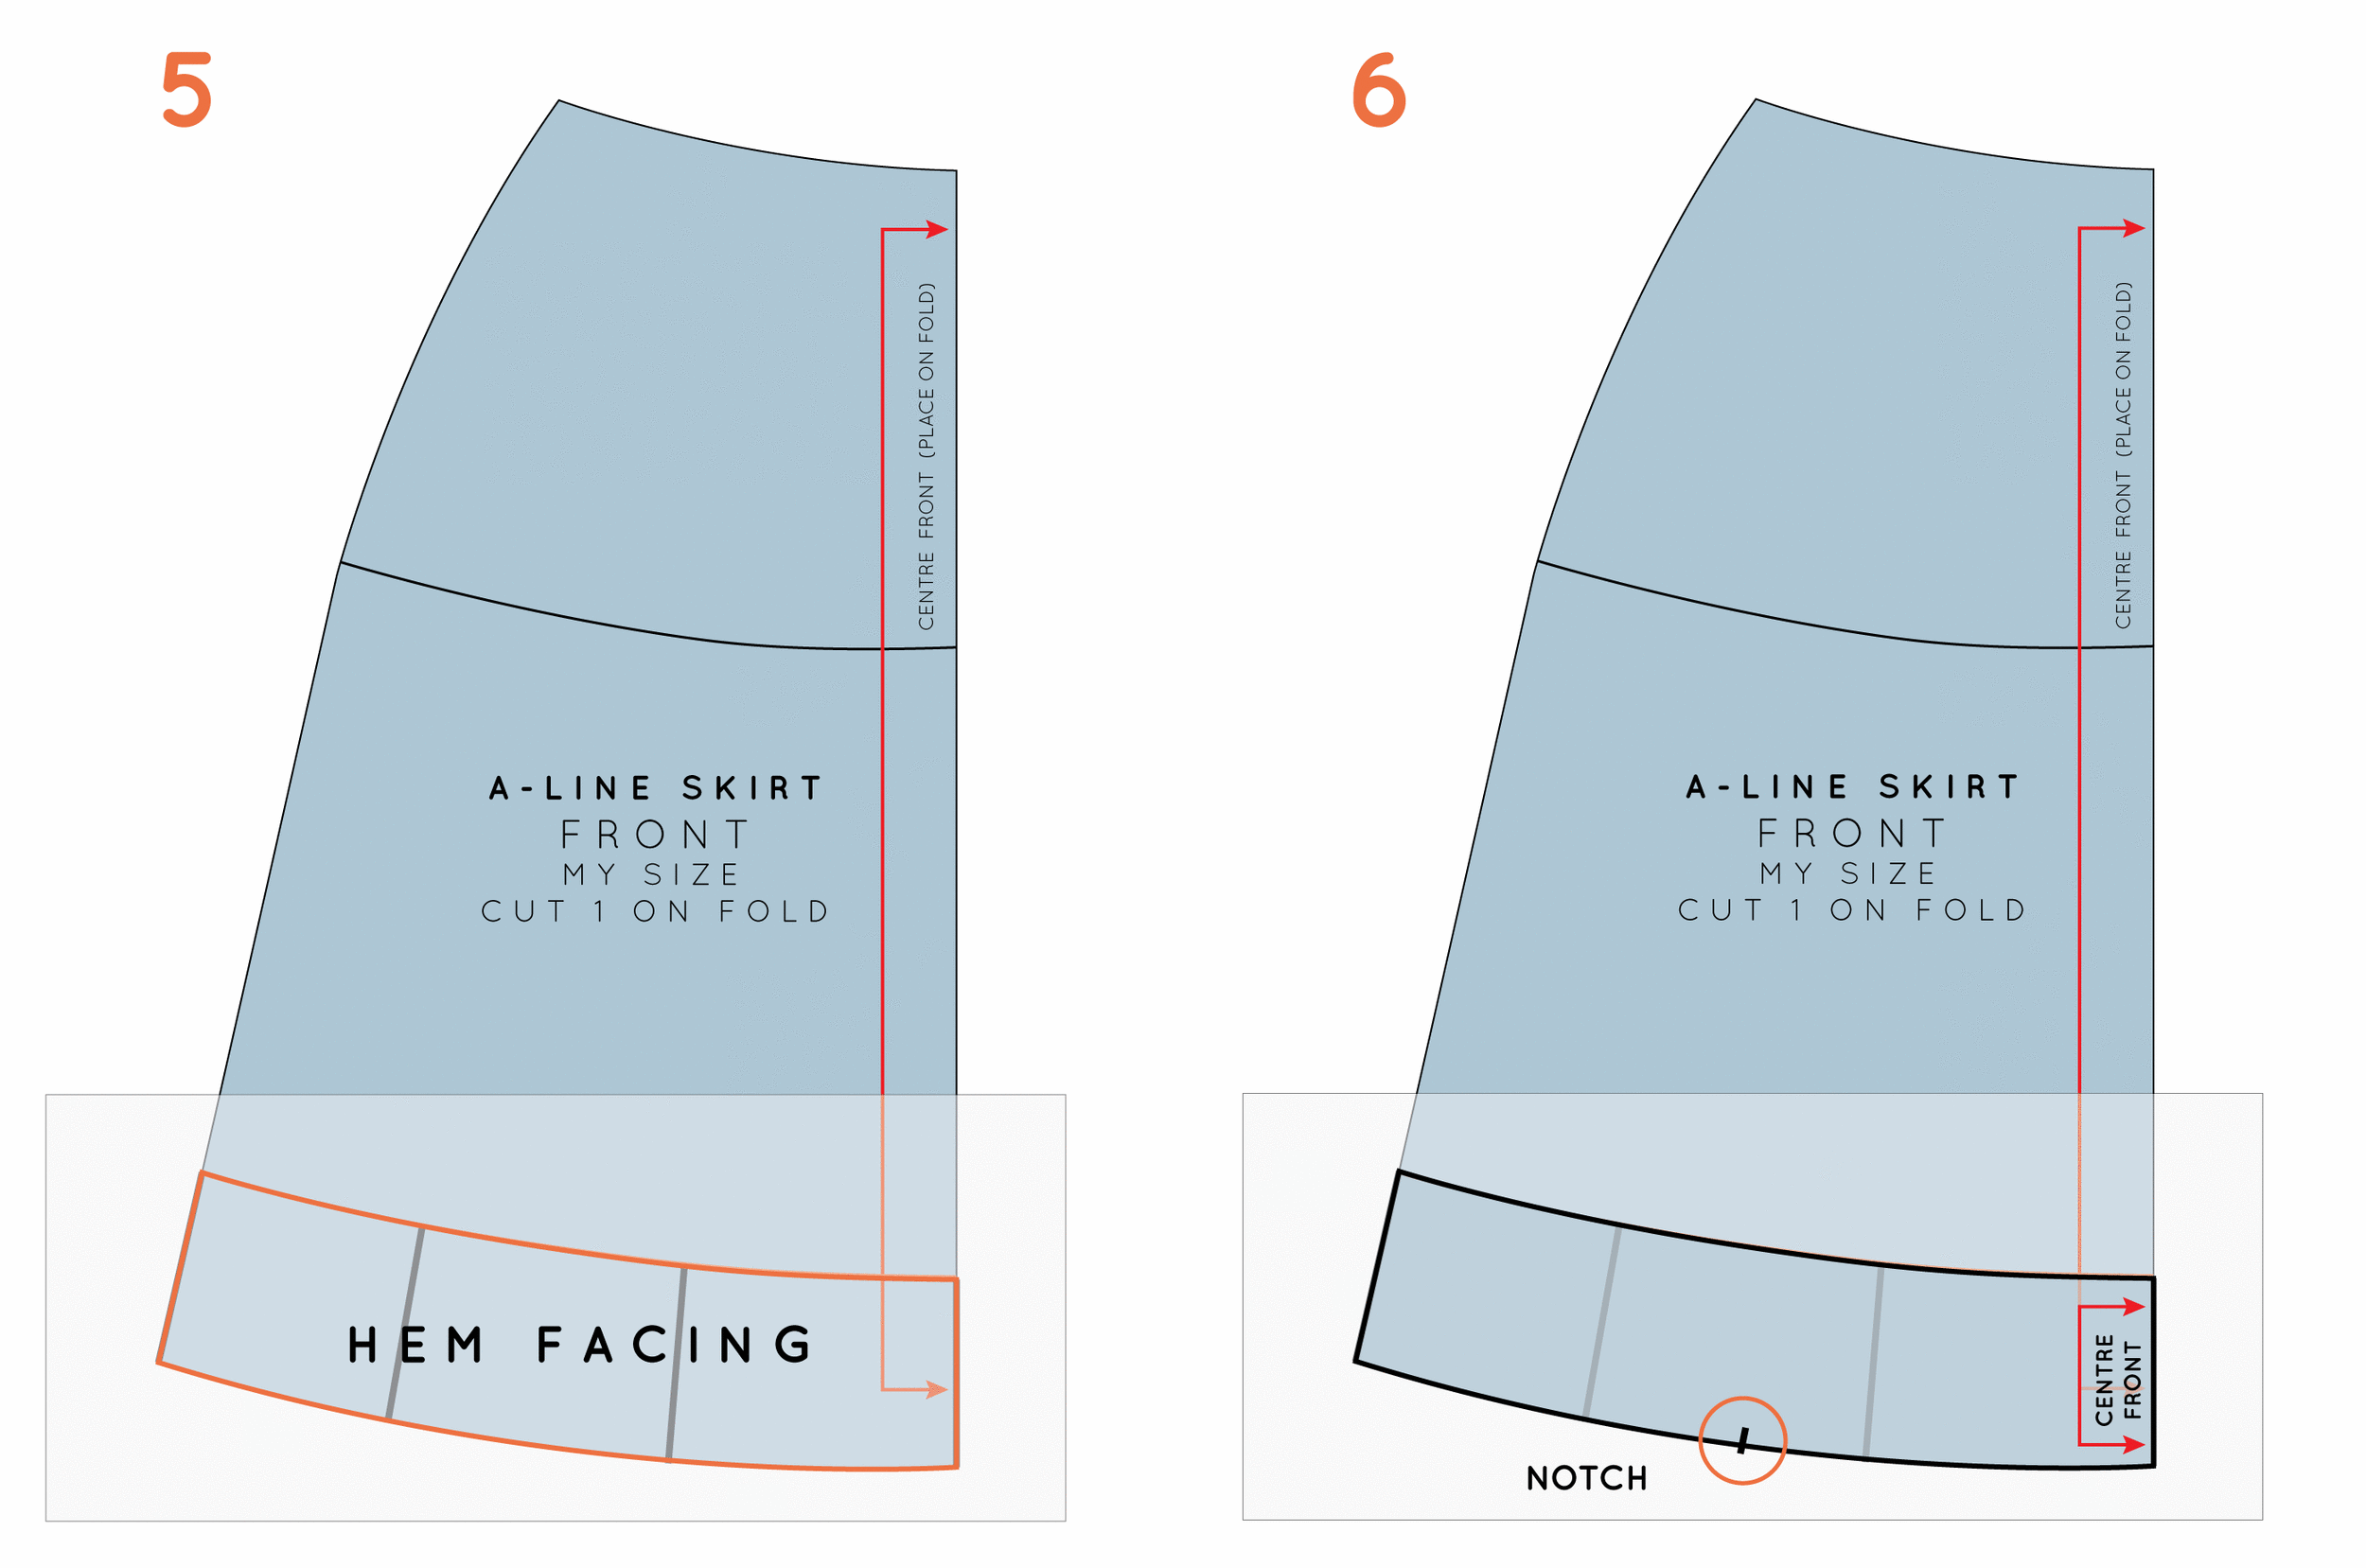
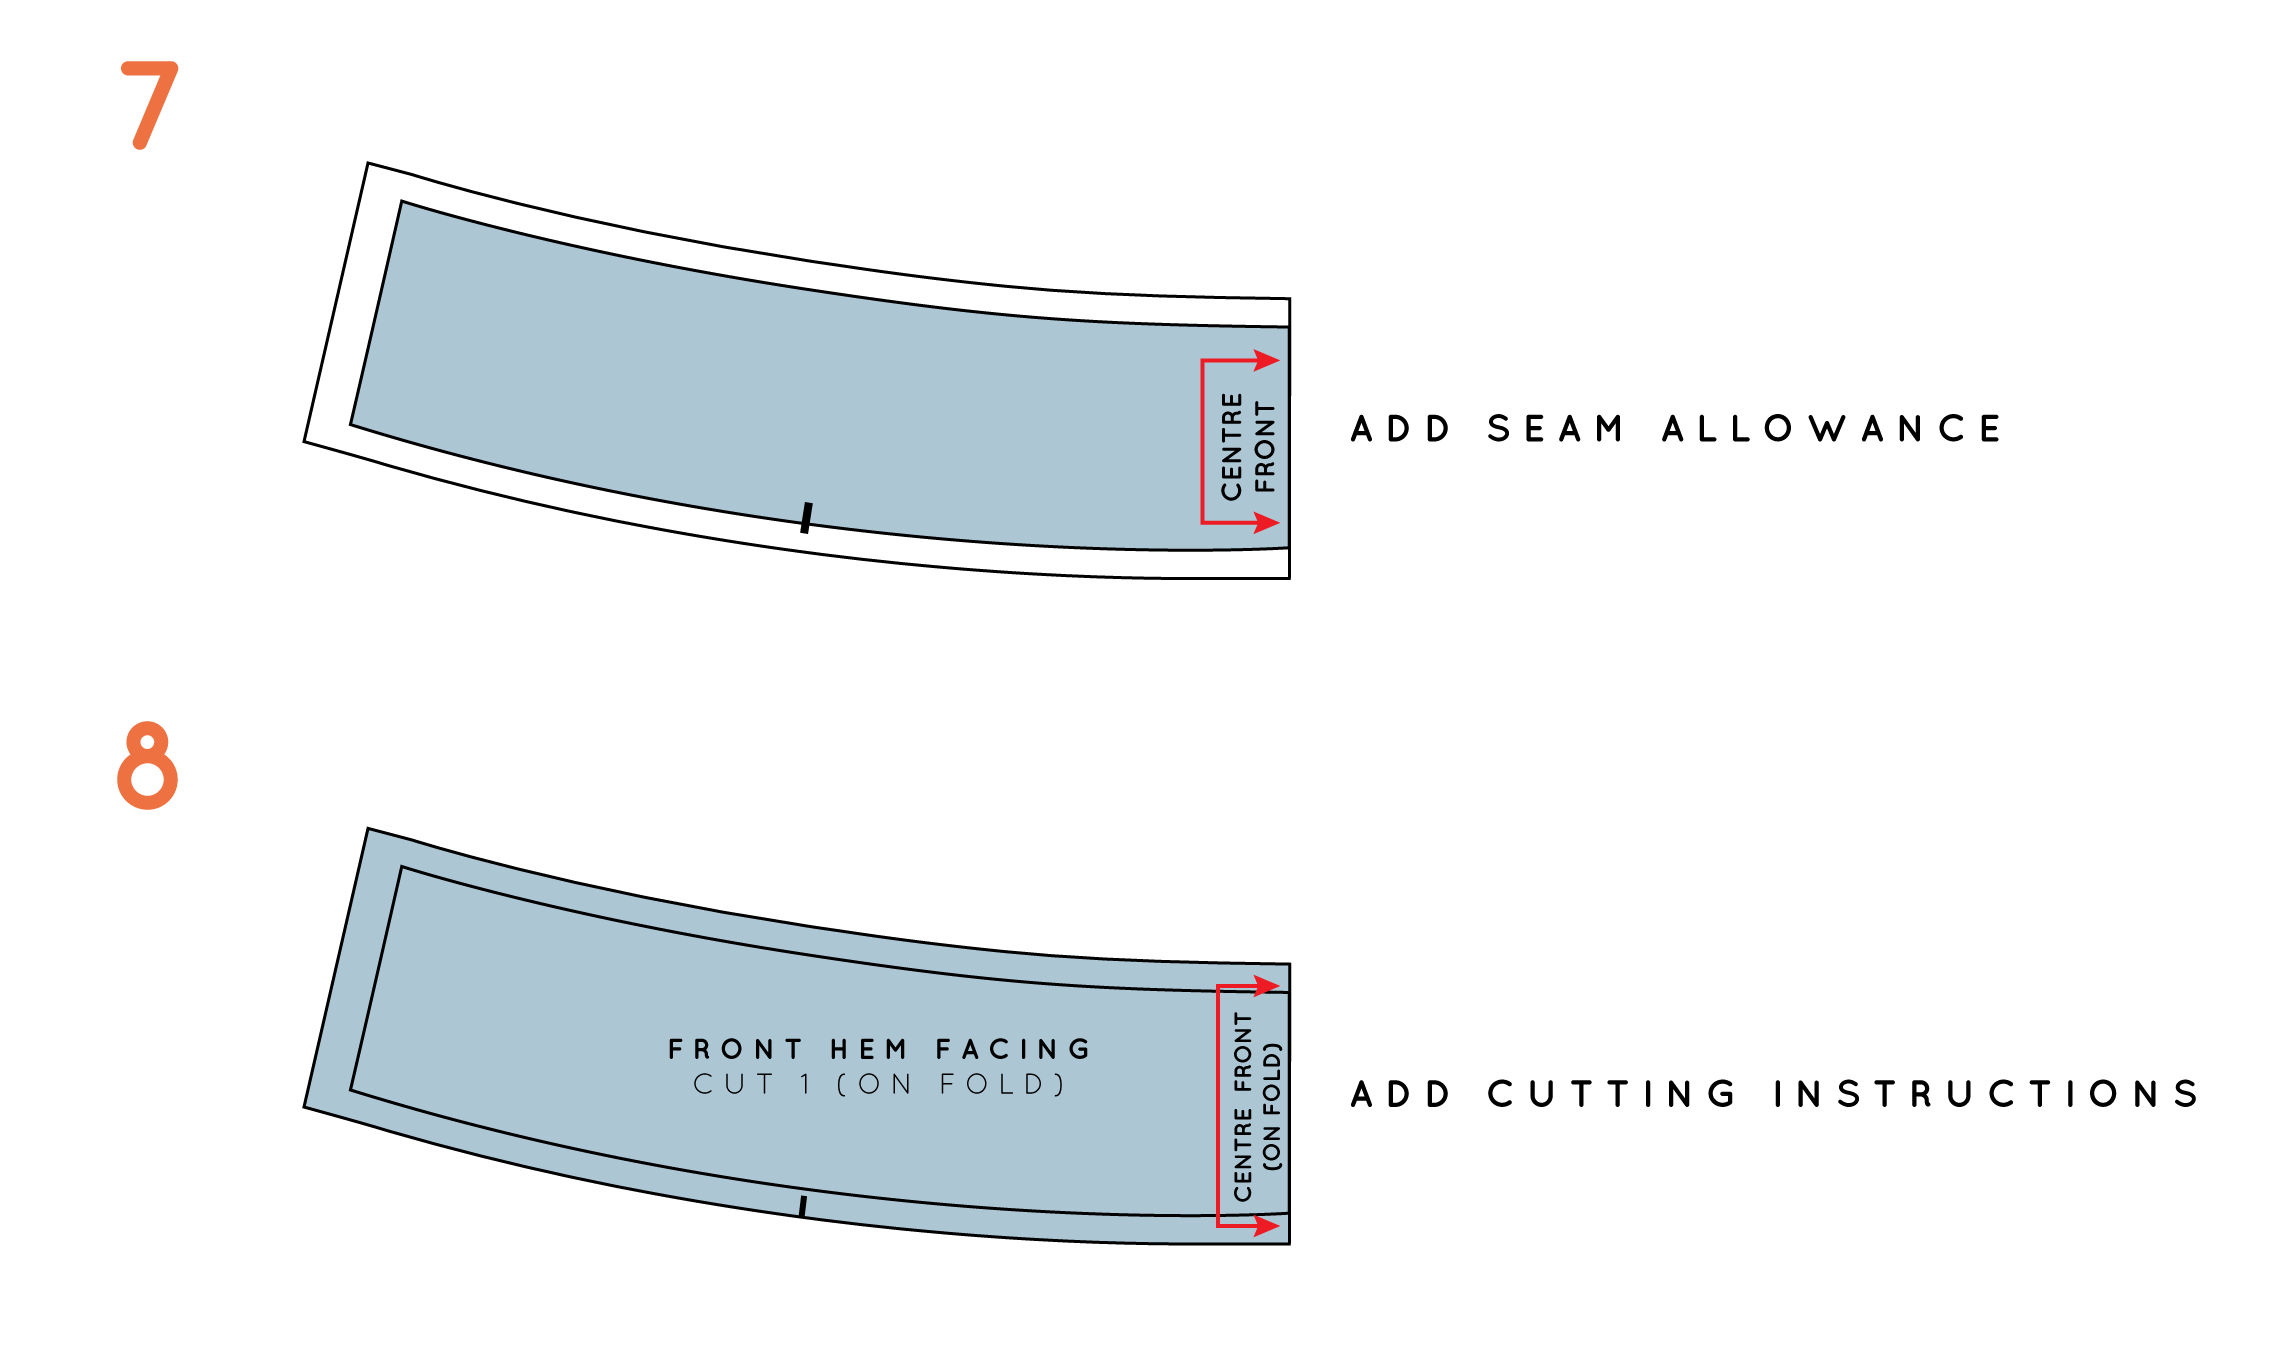
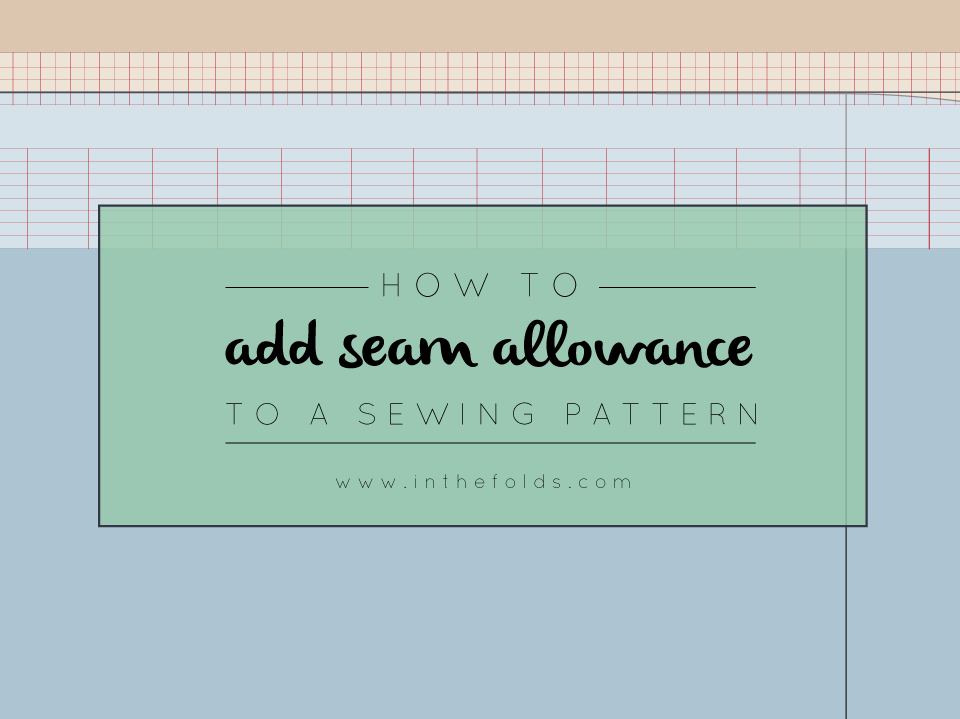
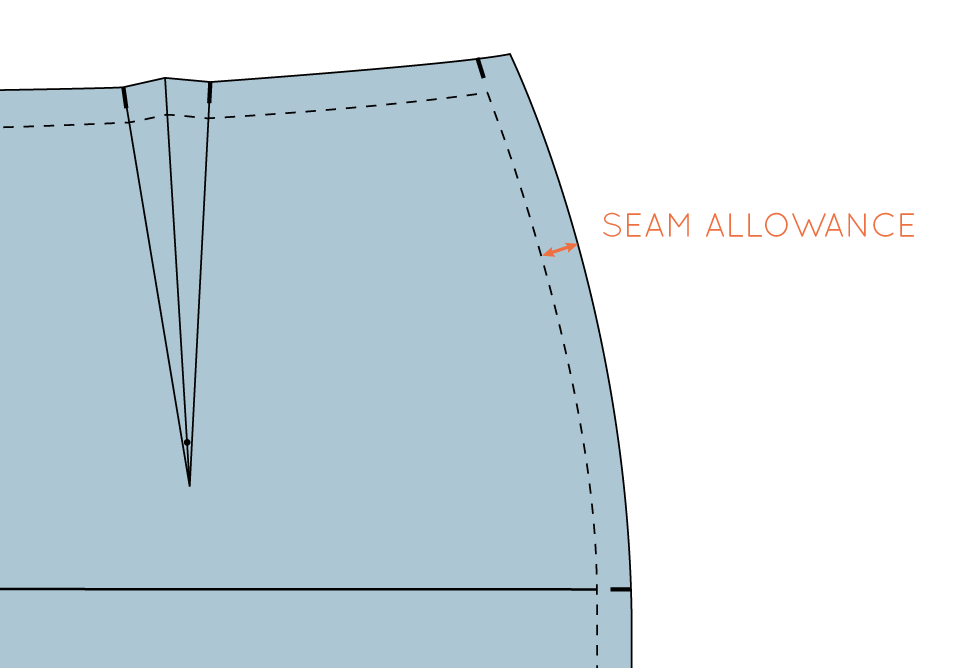
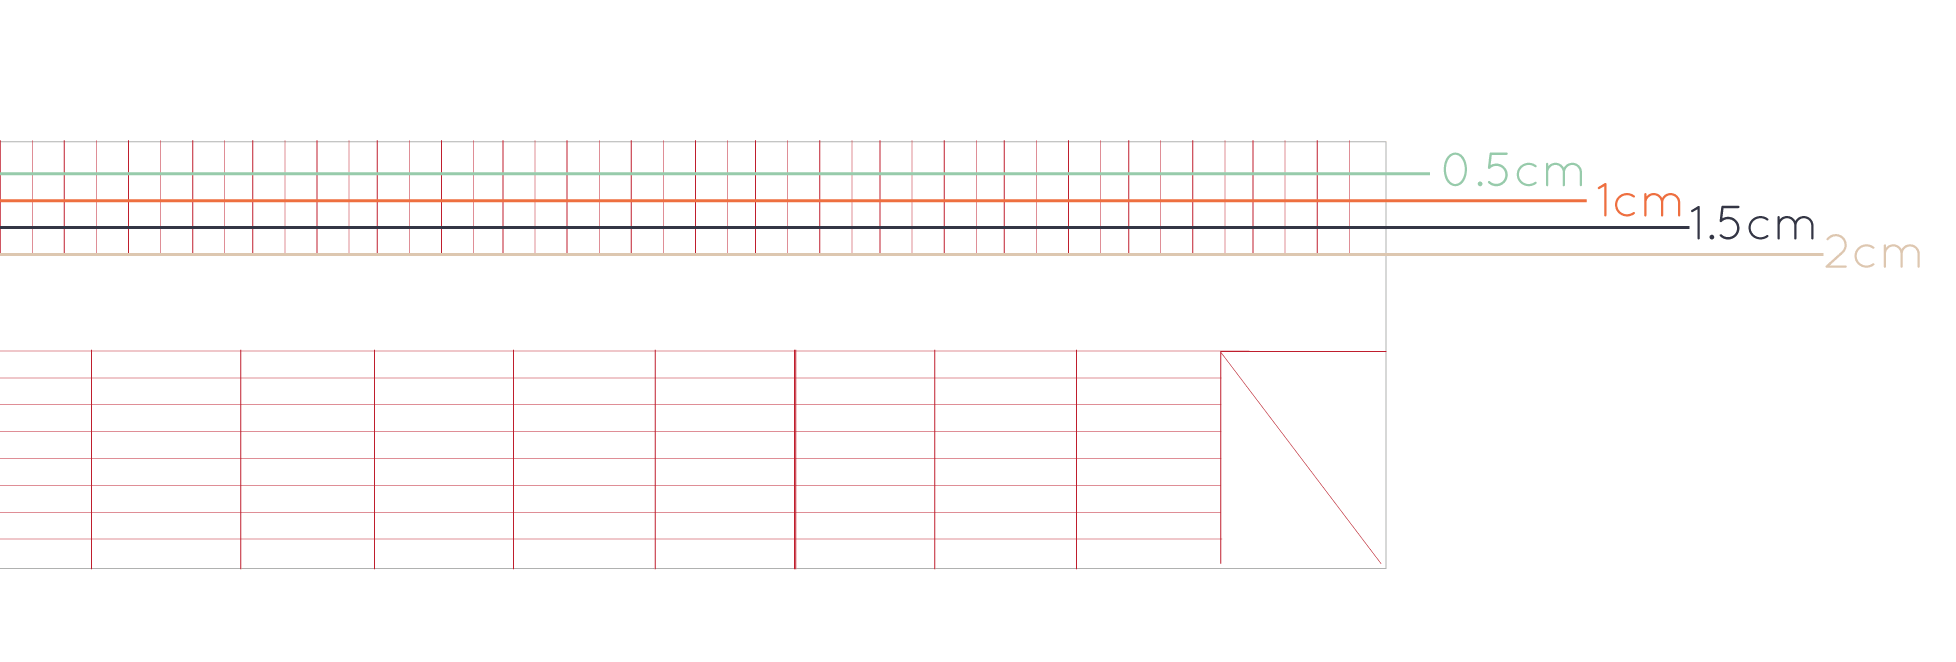
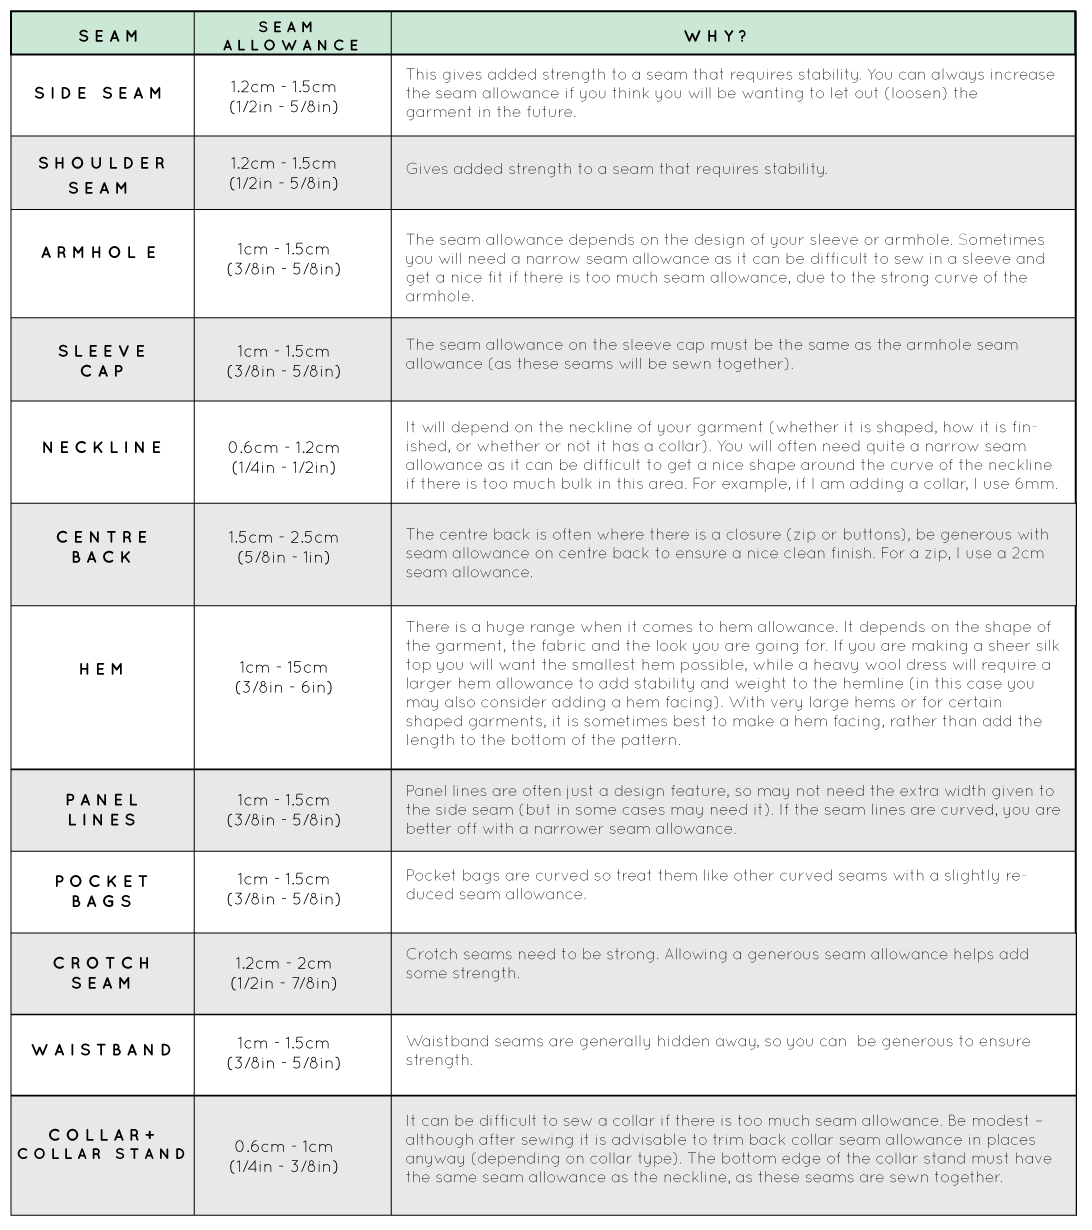
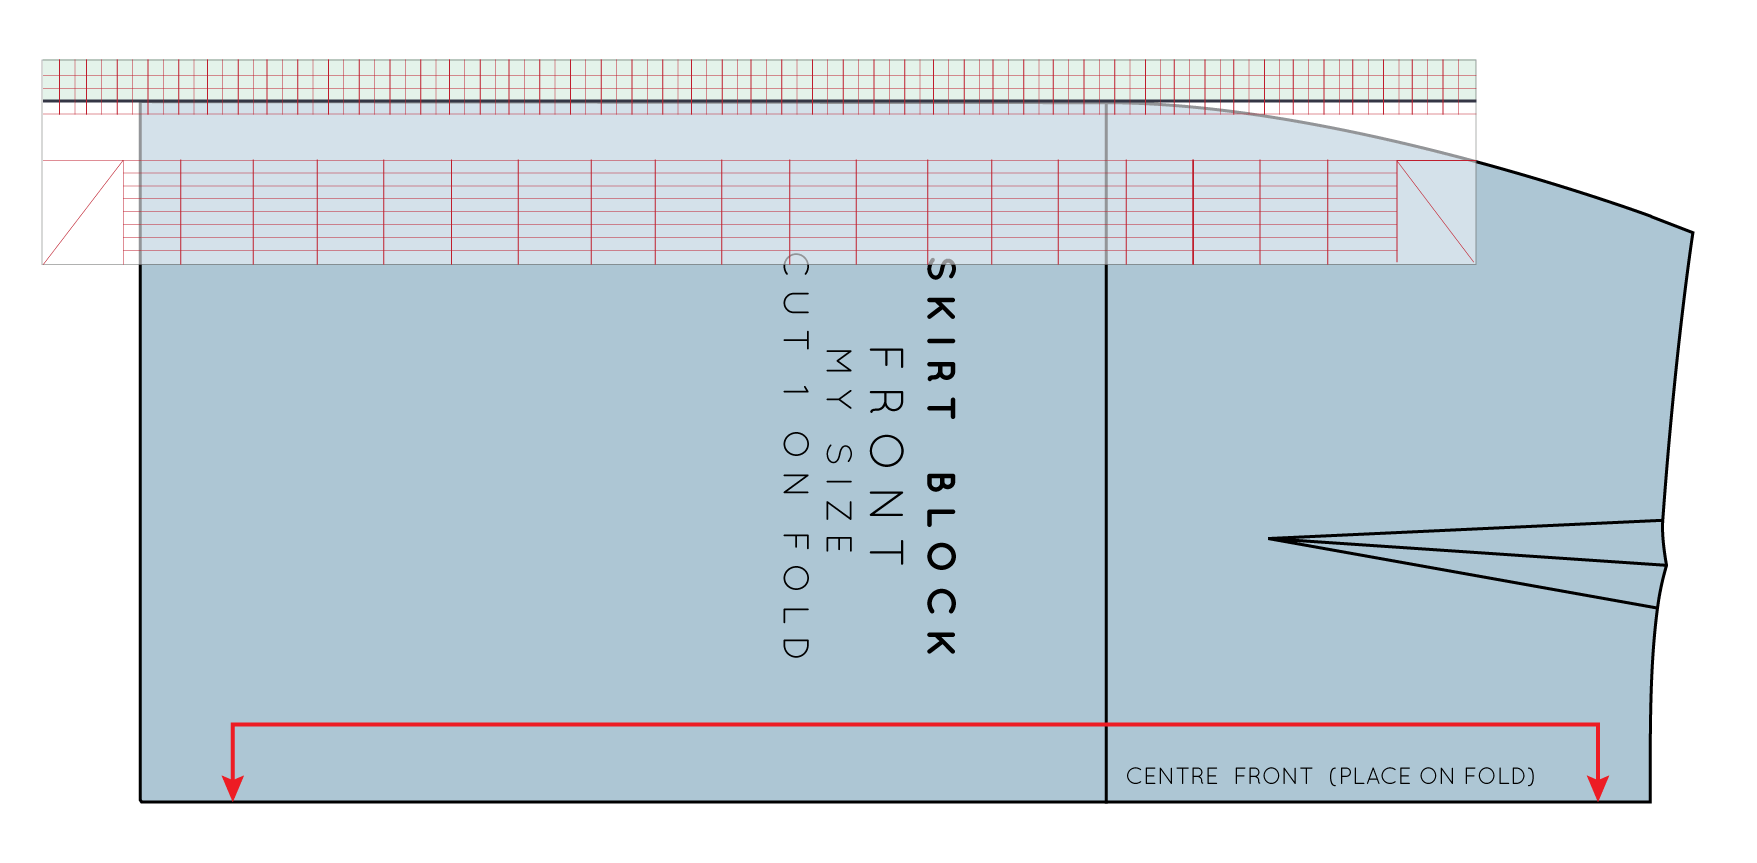
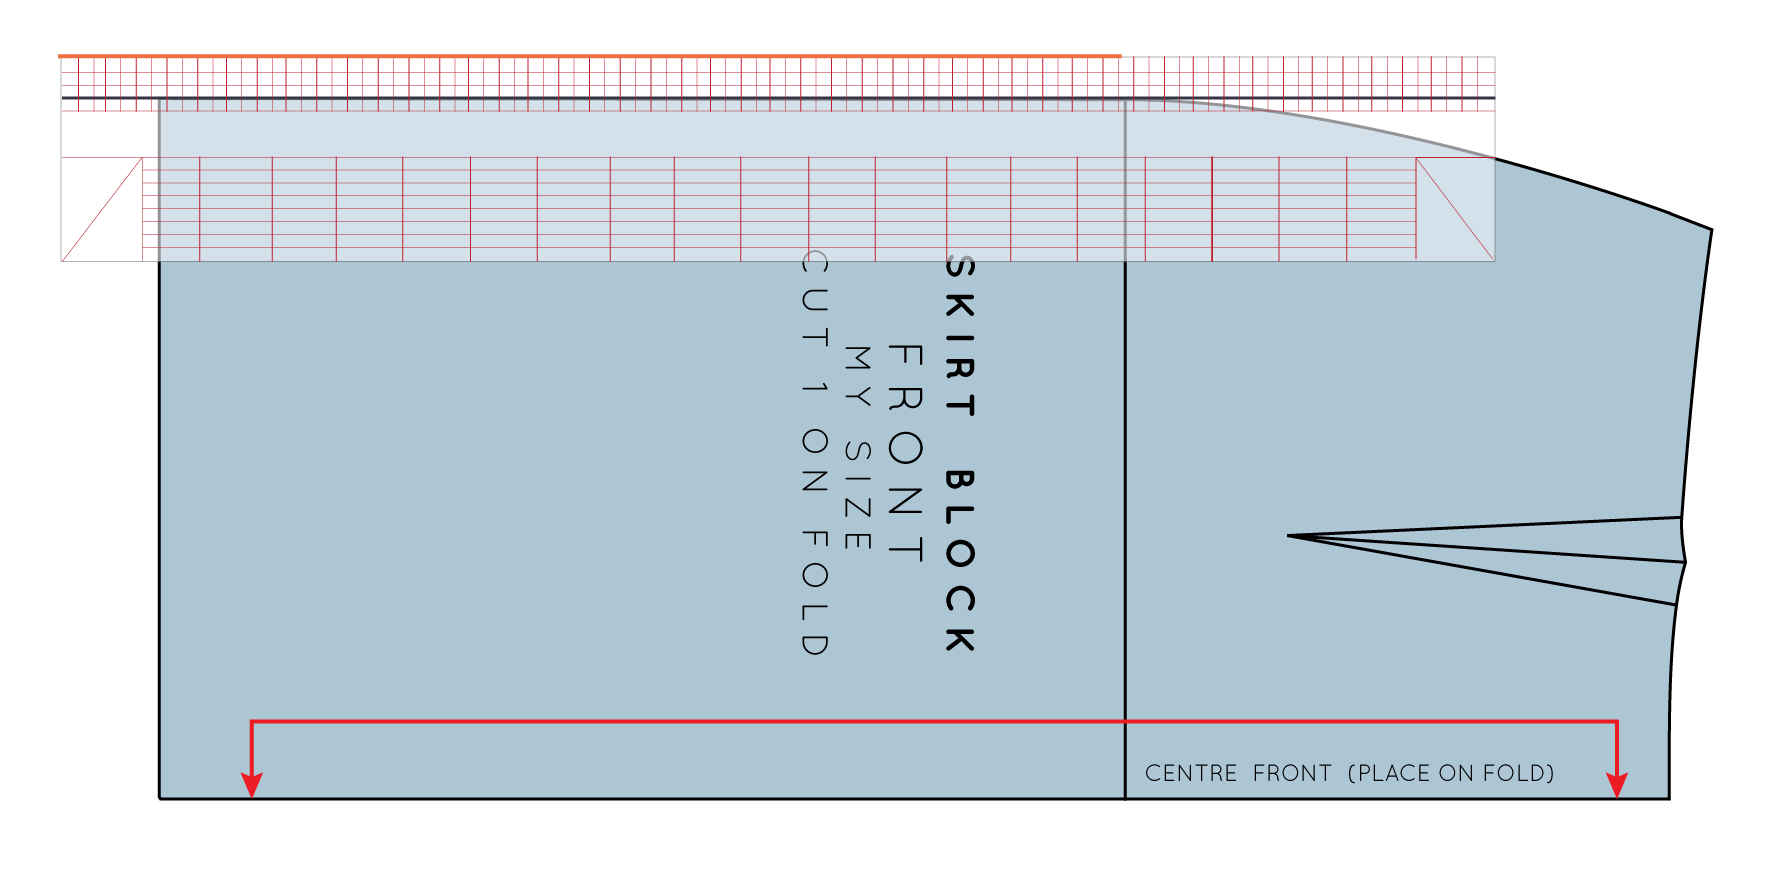
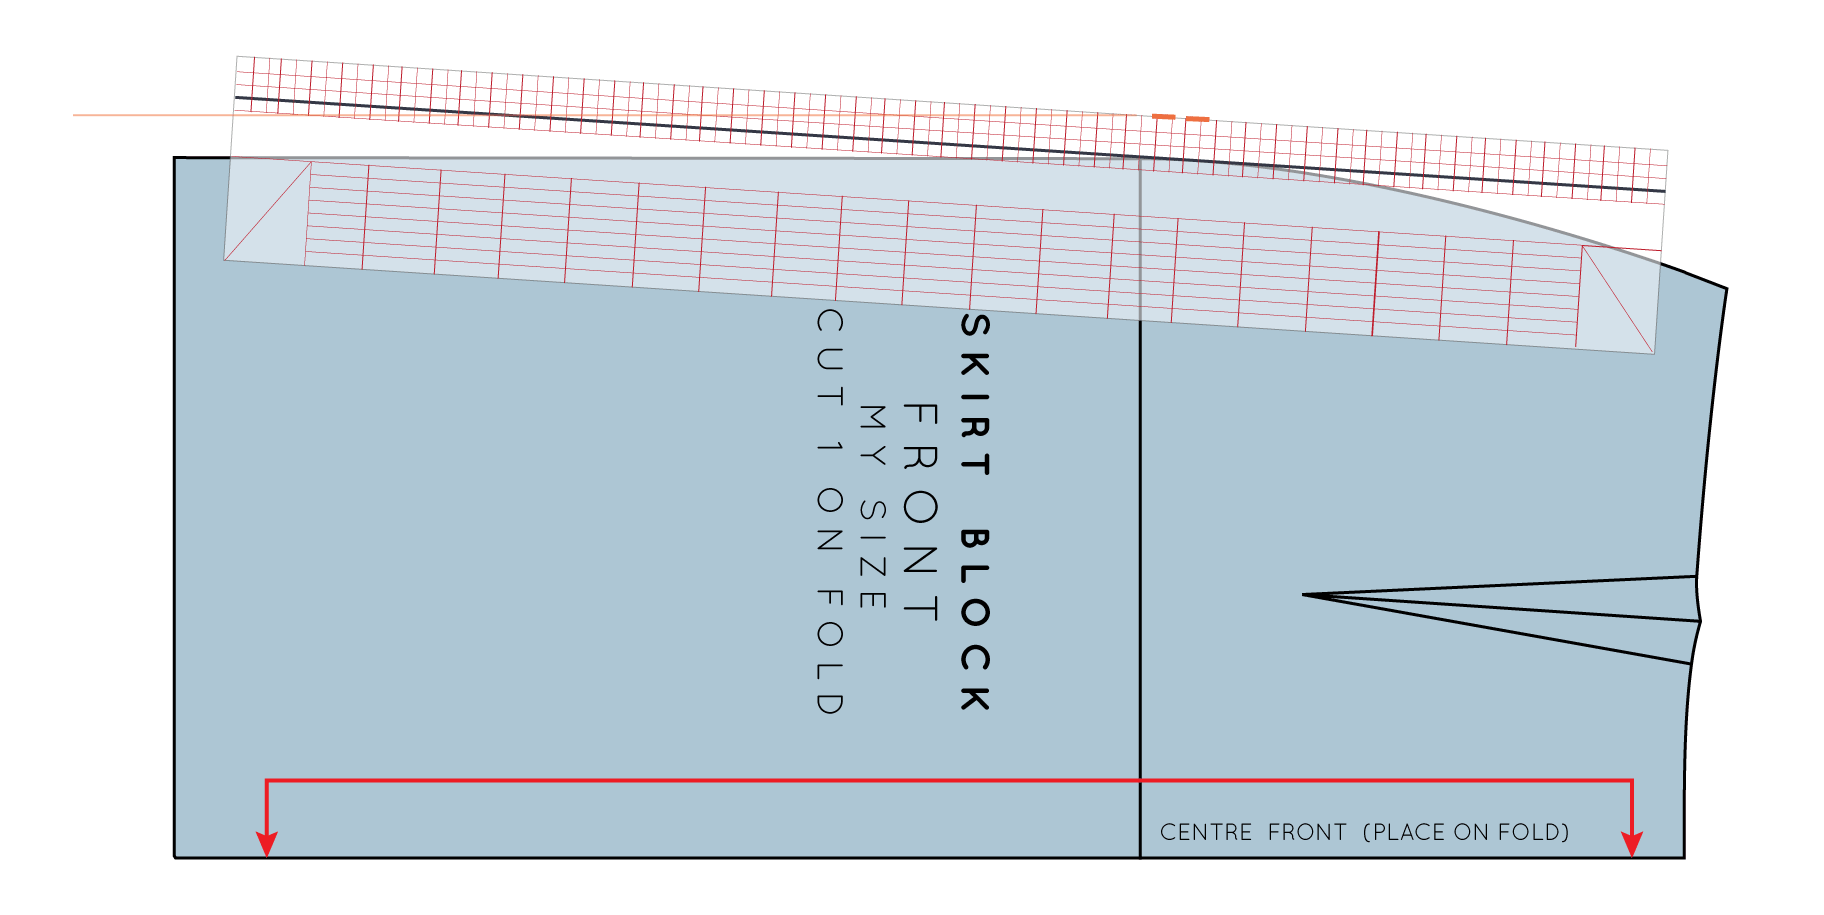
  • Add and remove seam allowance
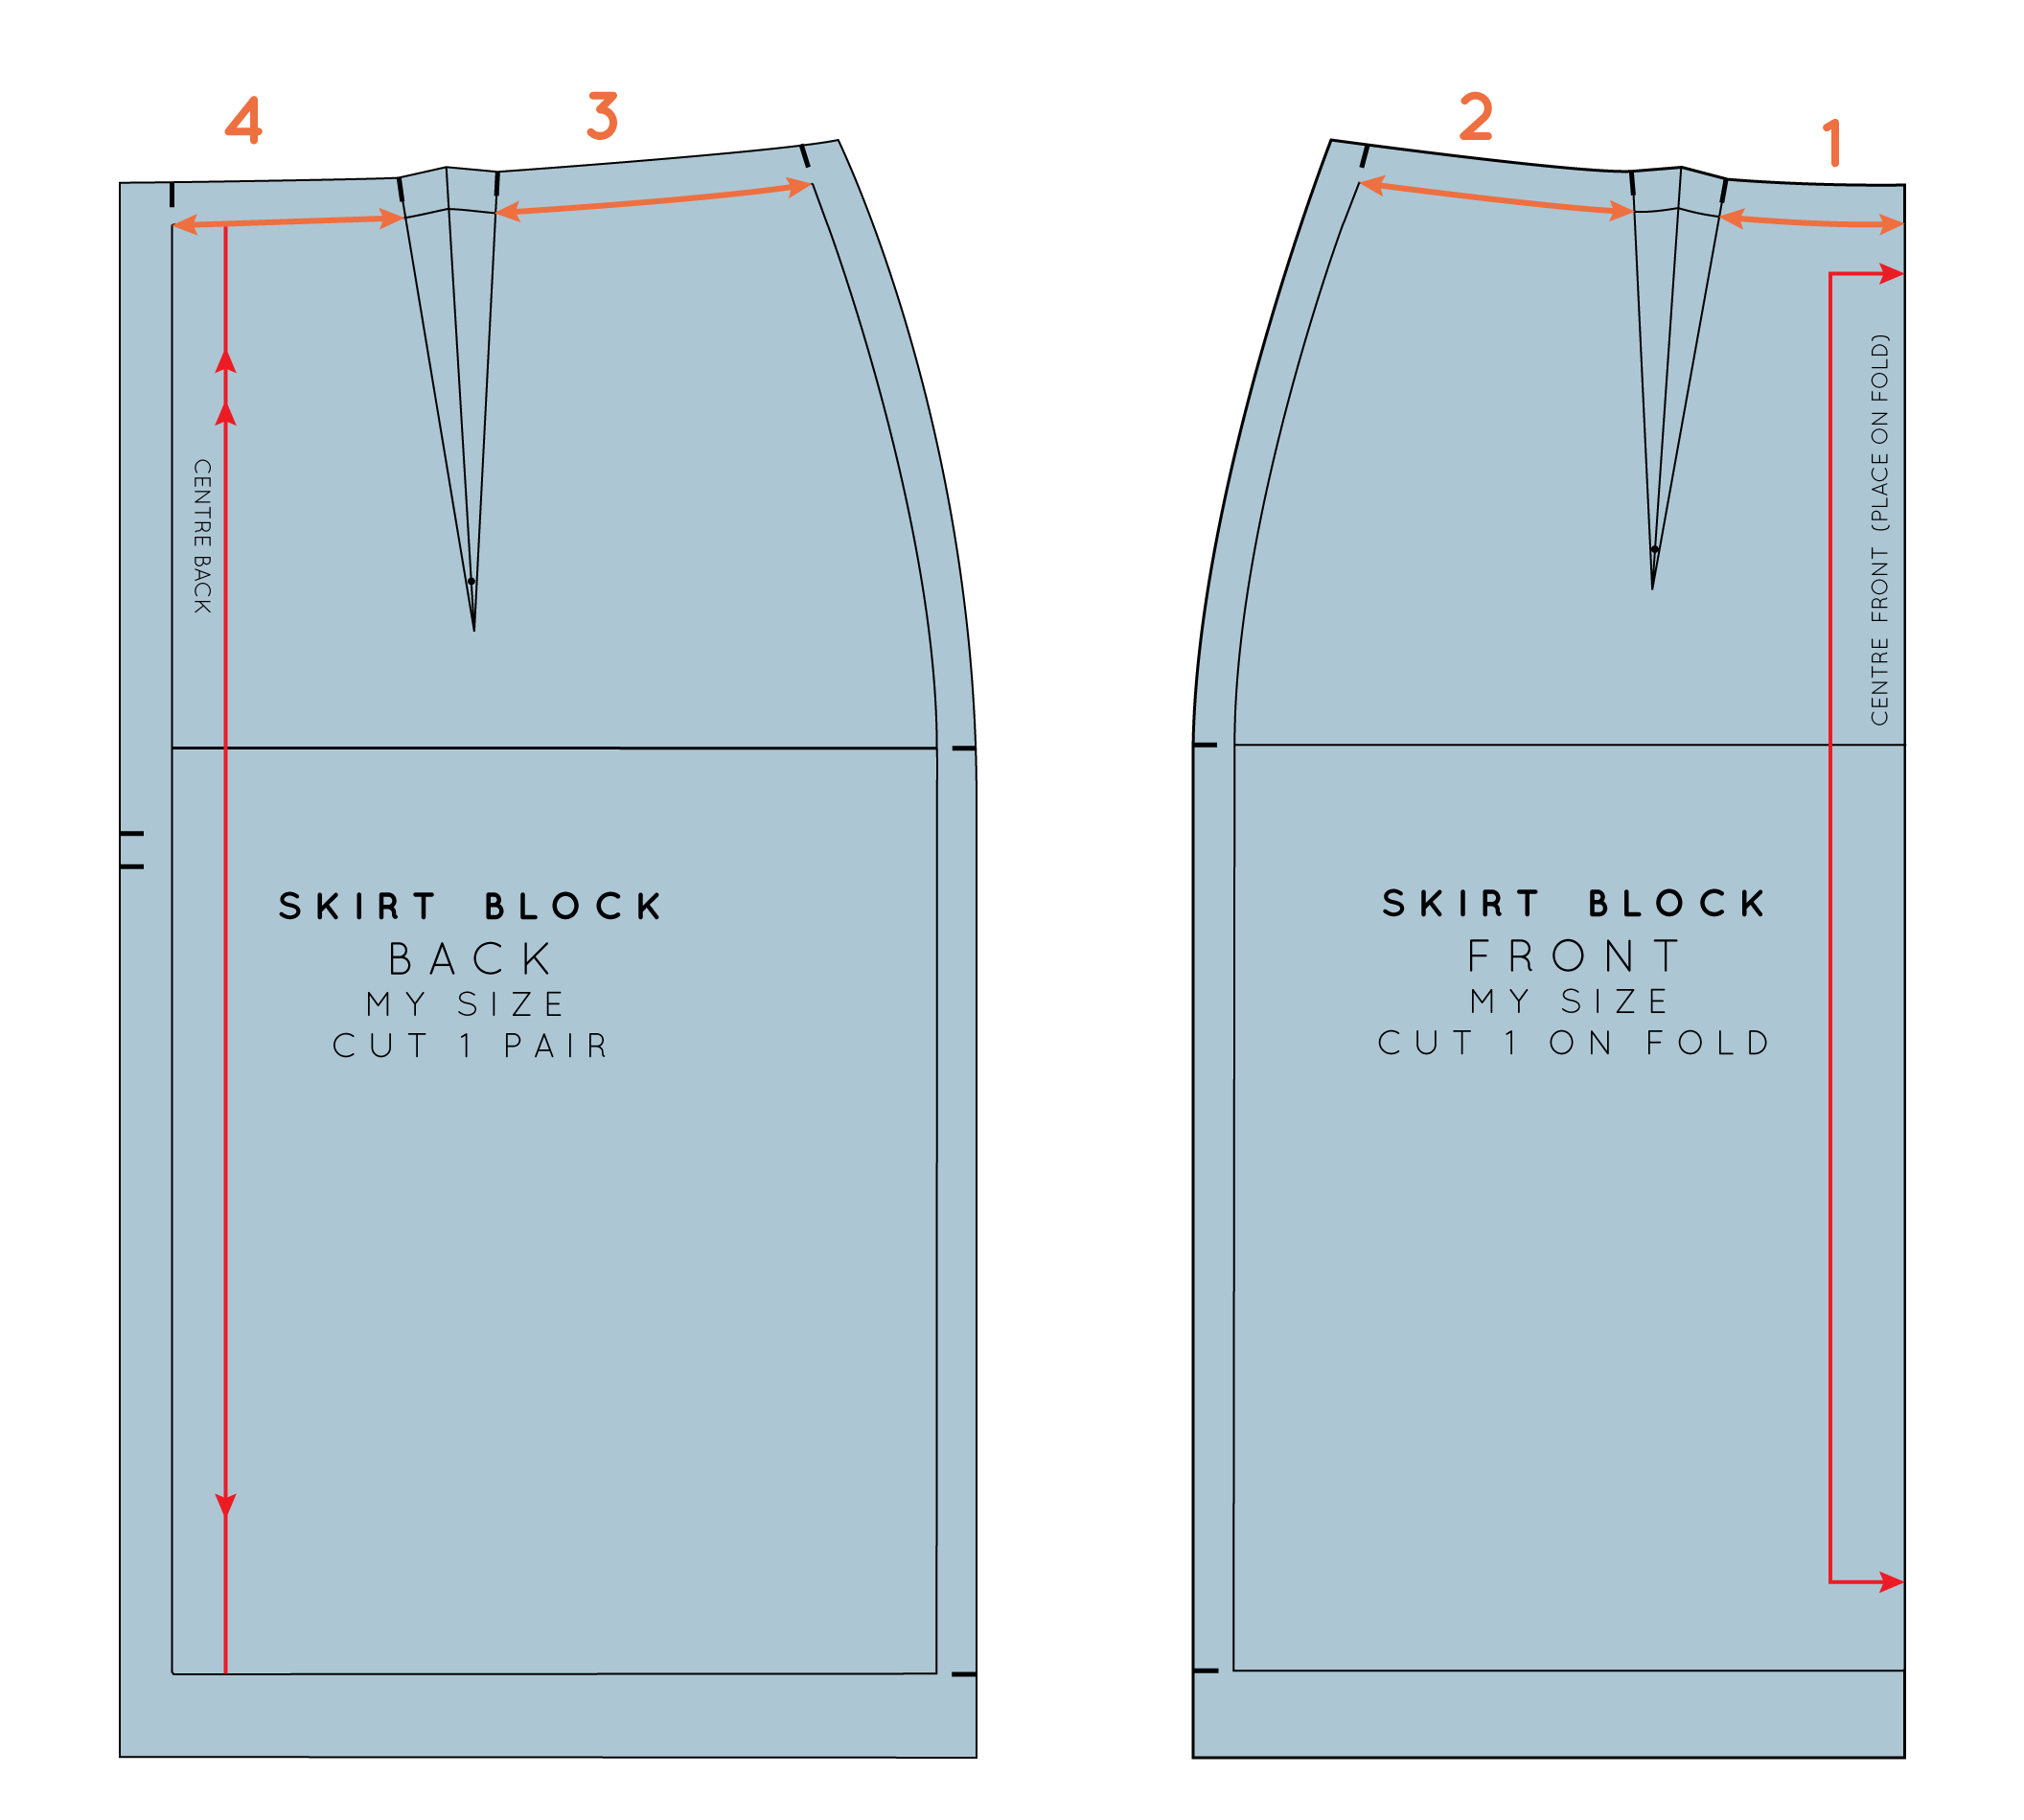
  • Check seam lengths

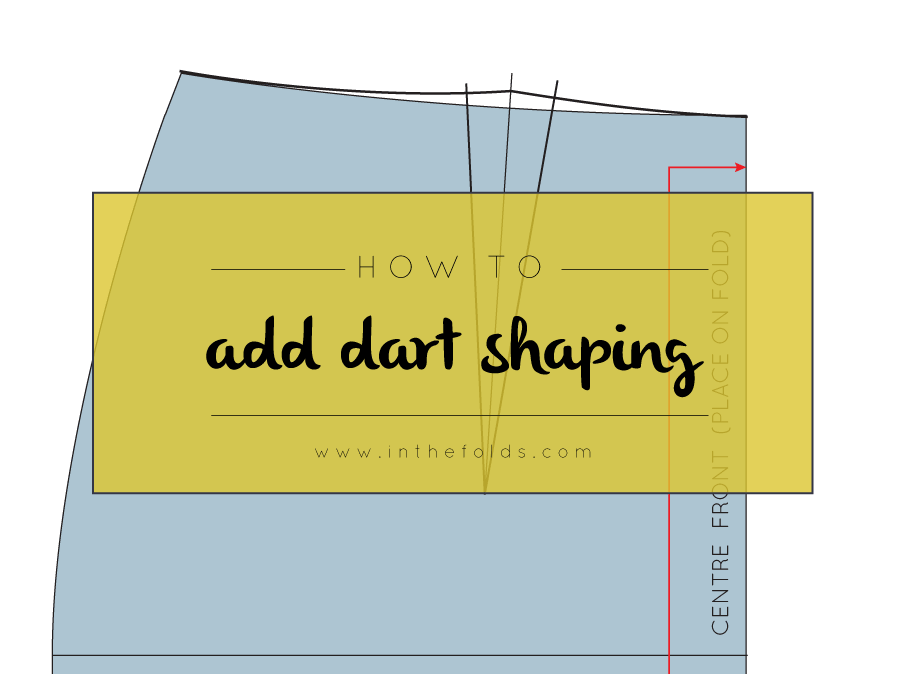
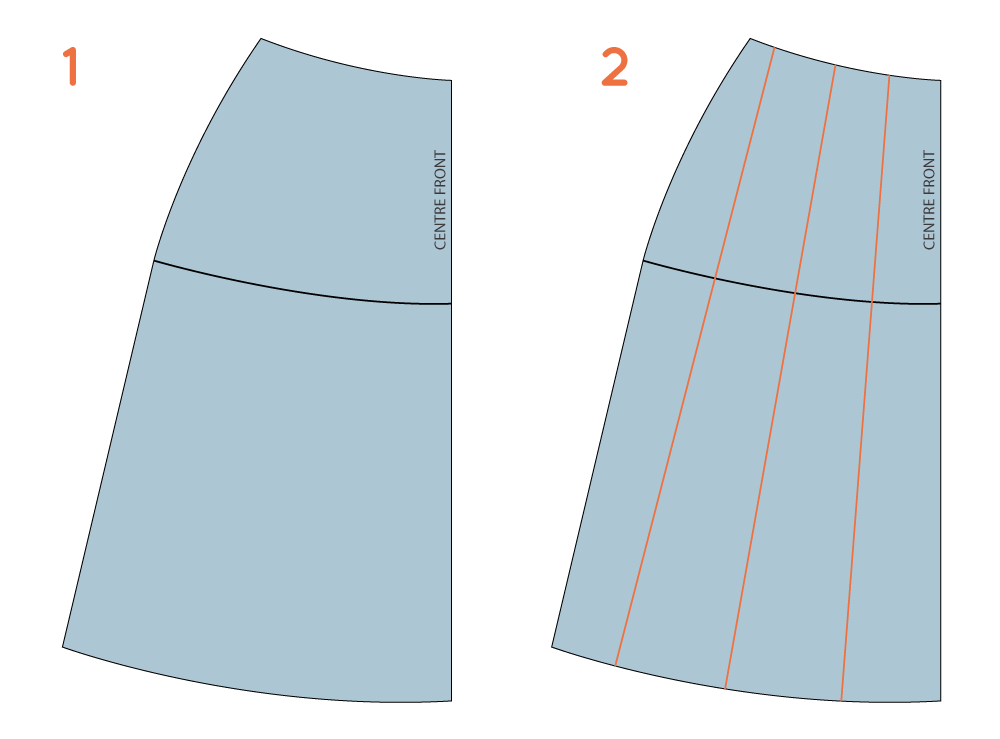
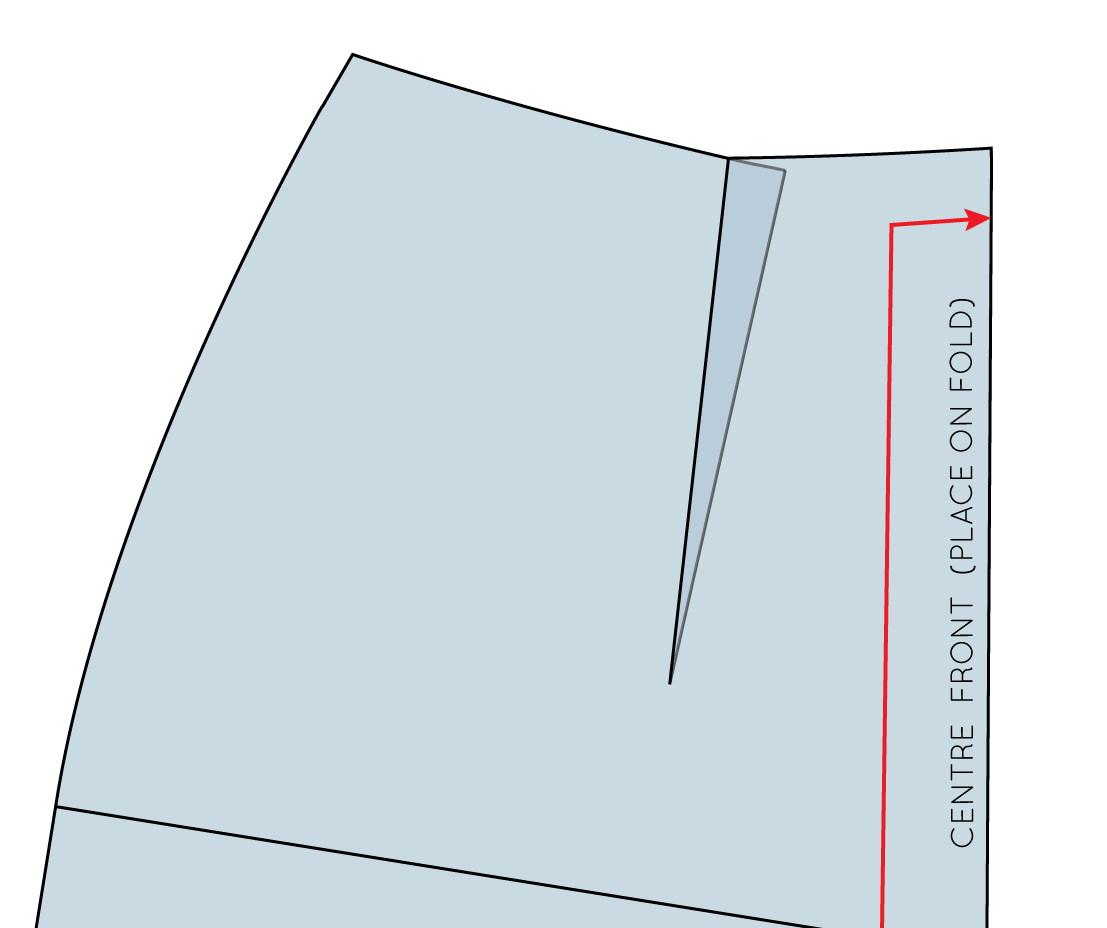
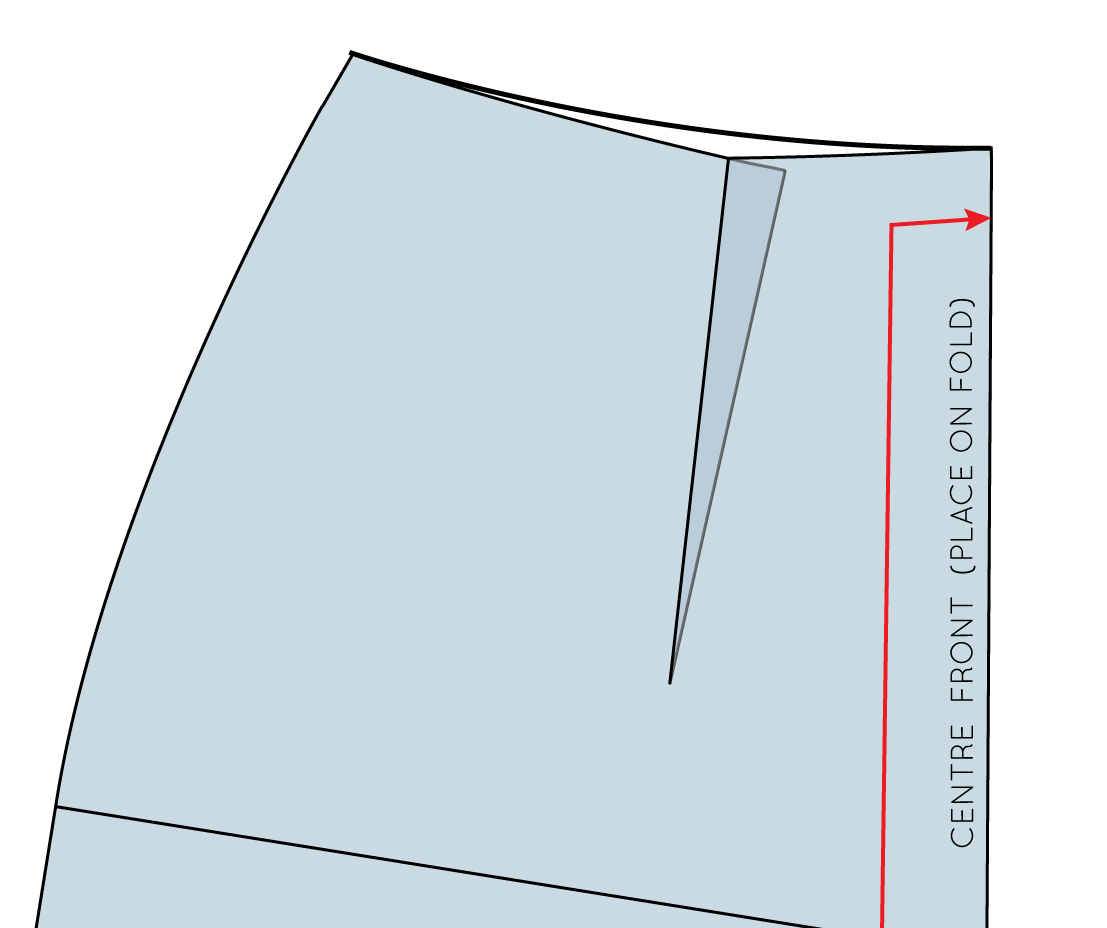
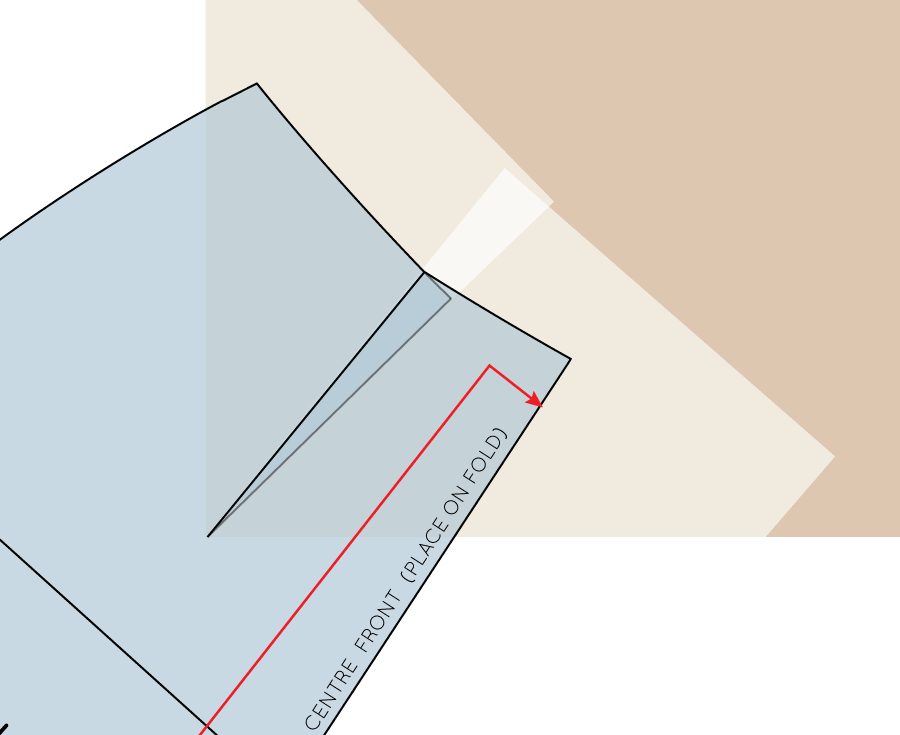
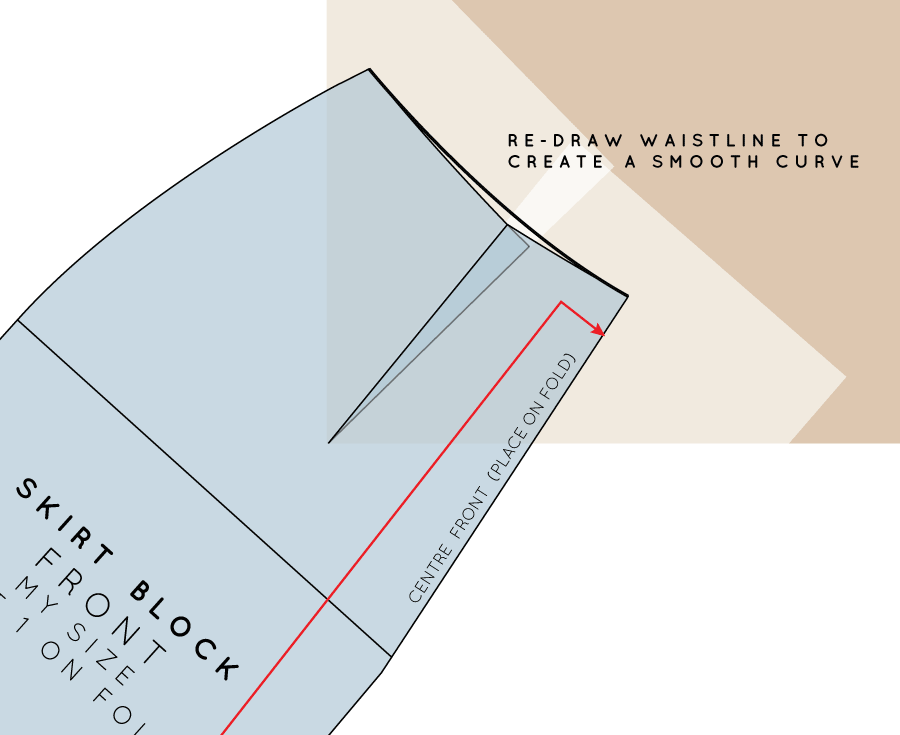
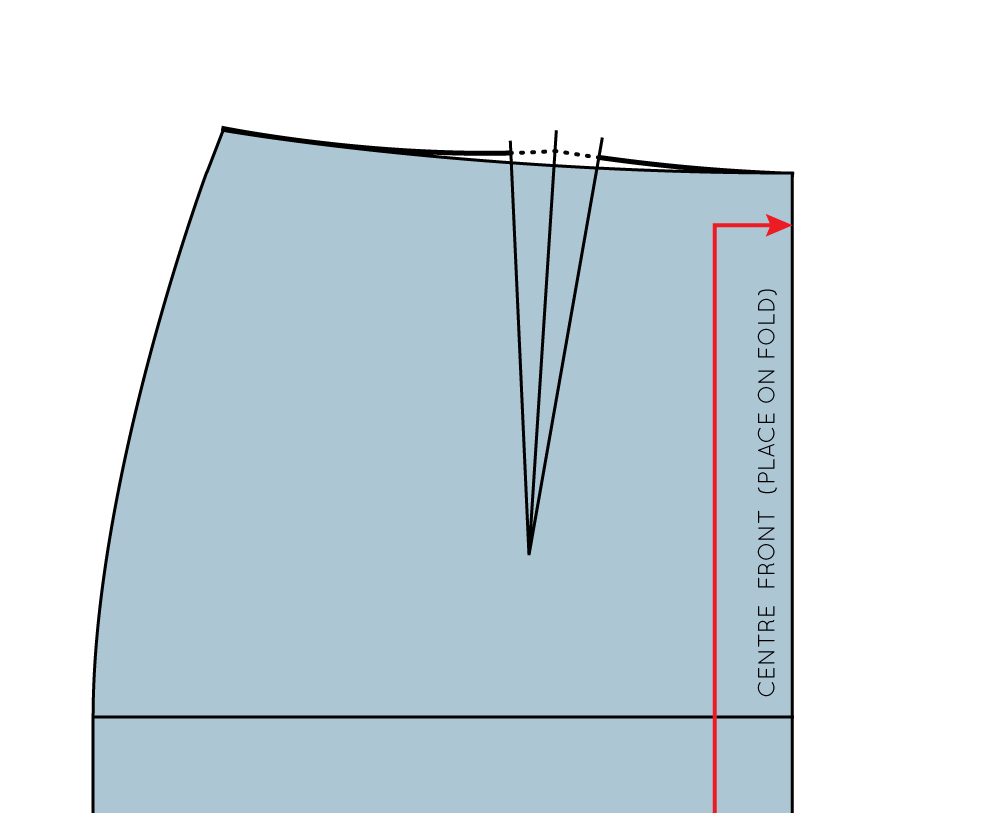
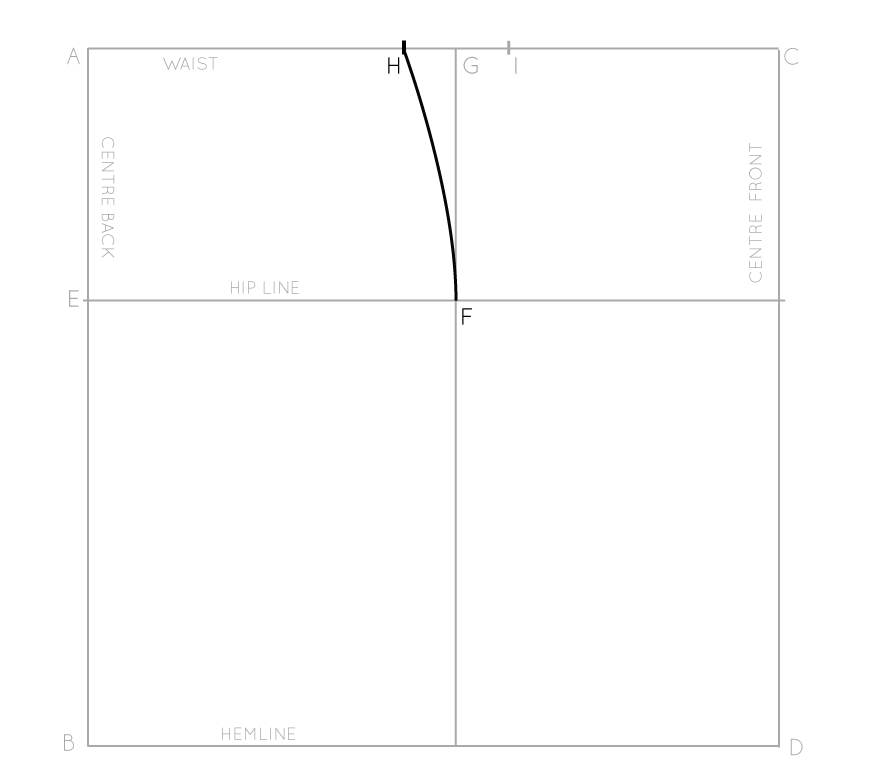
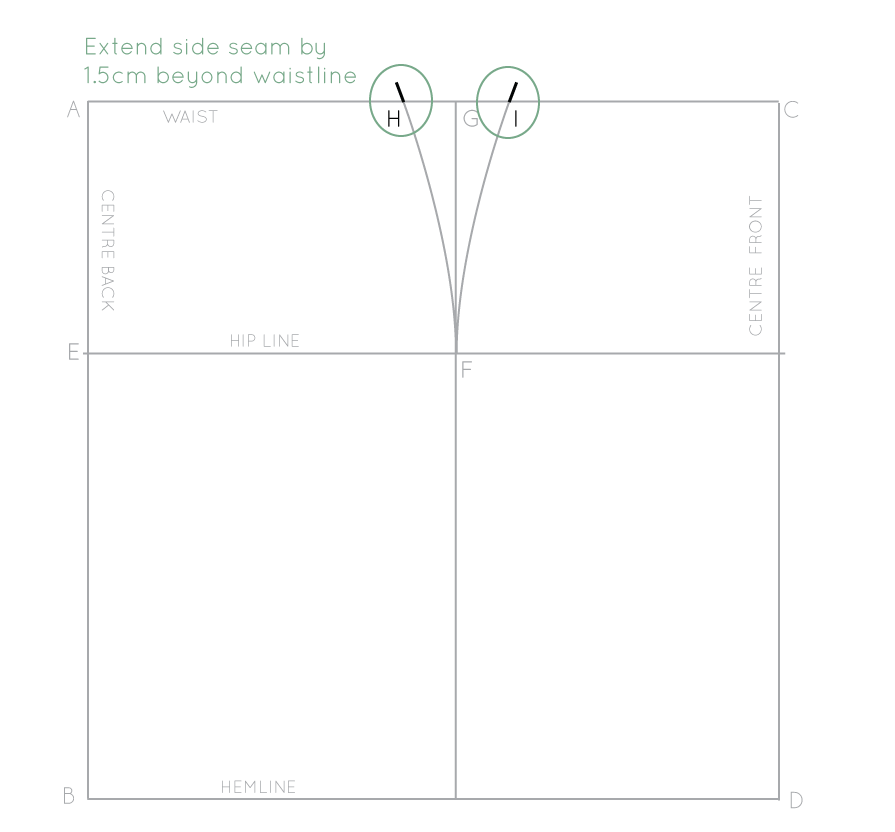
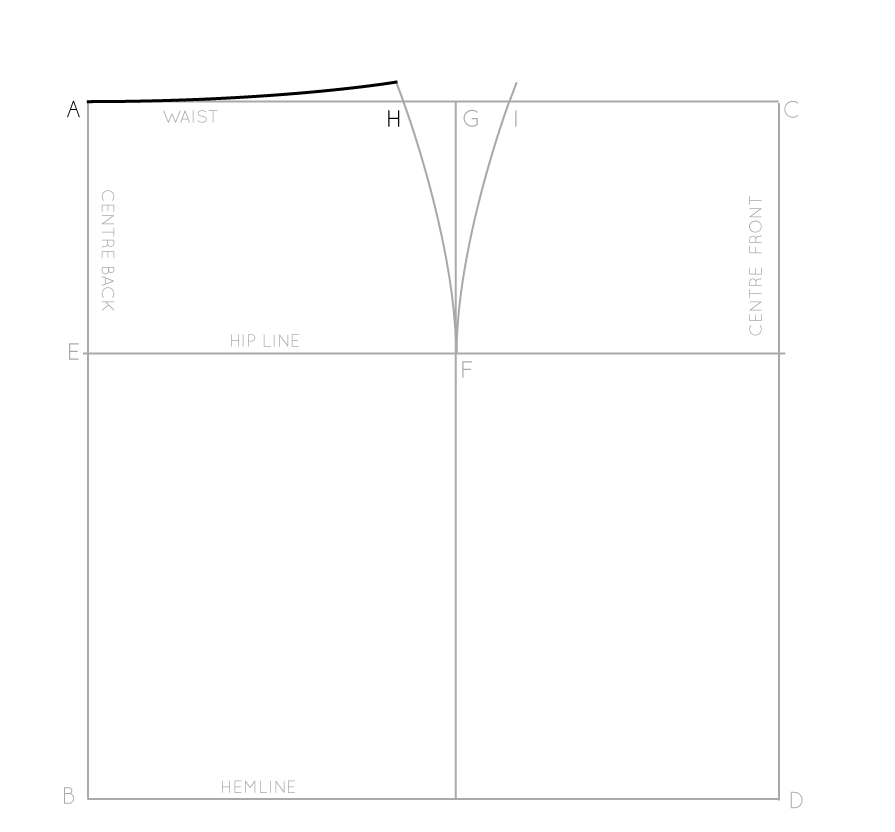
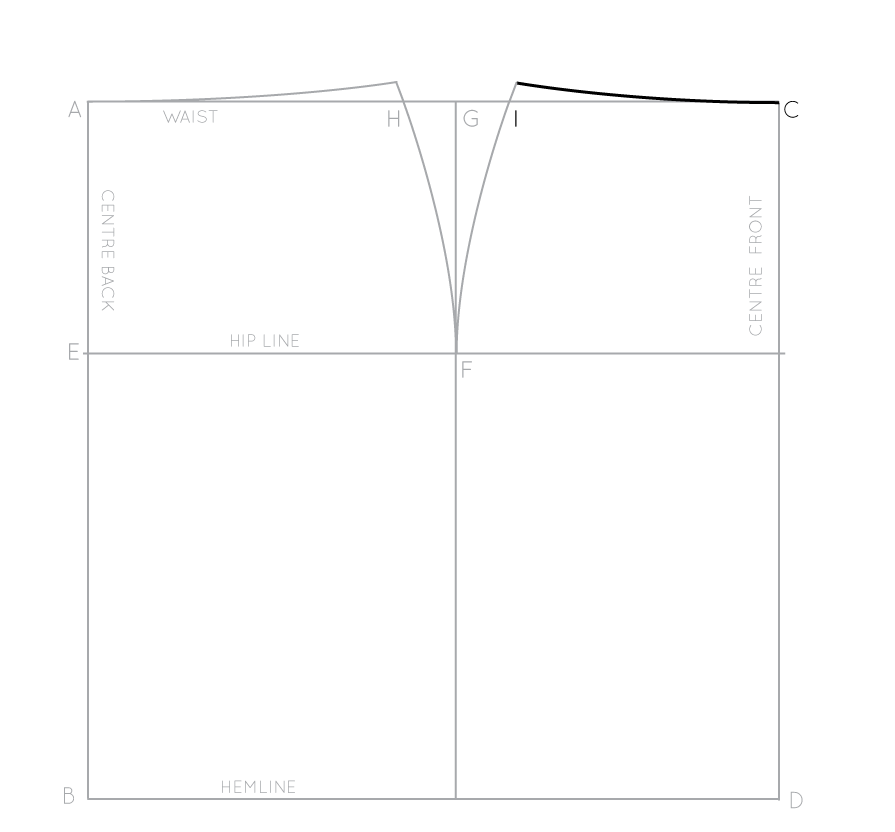
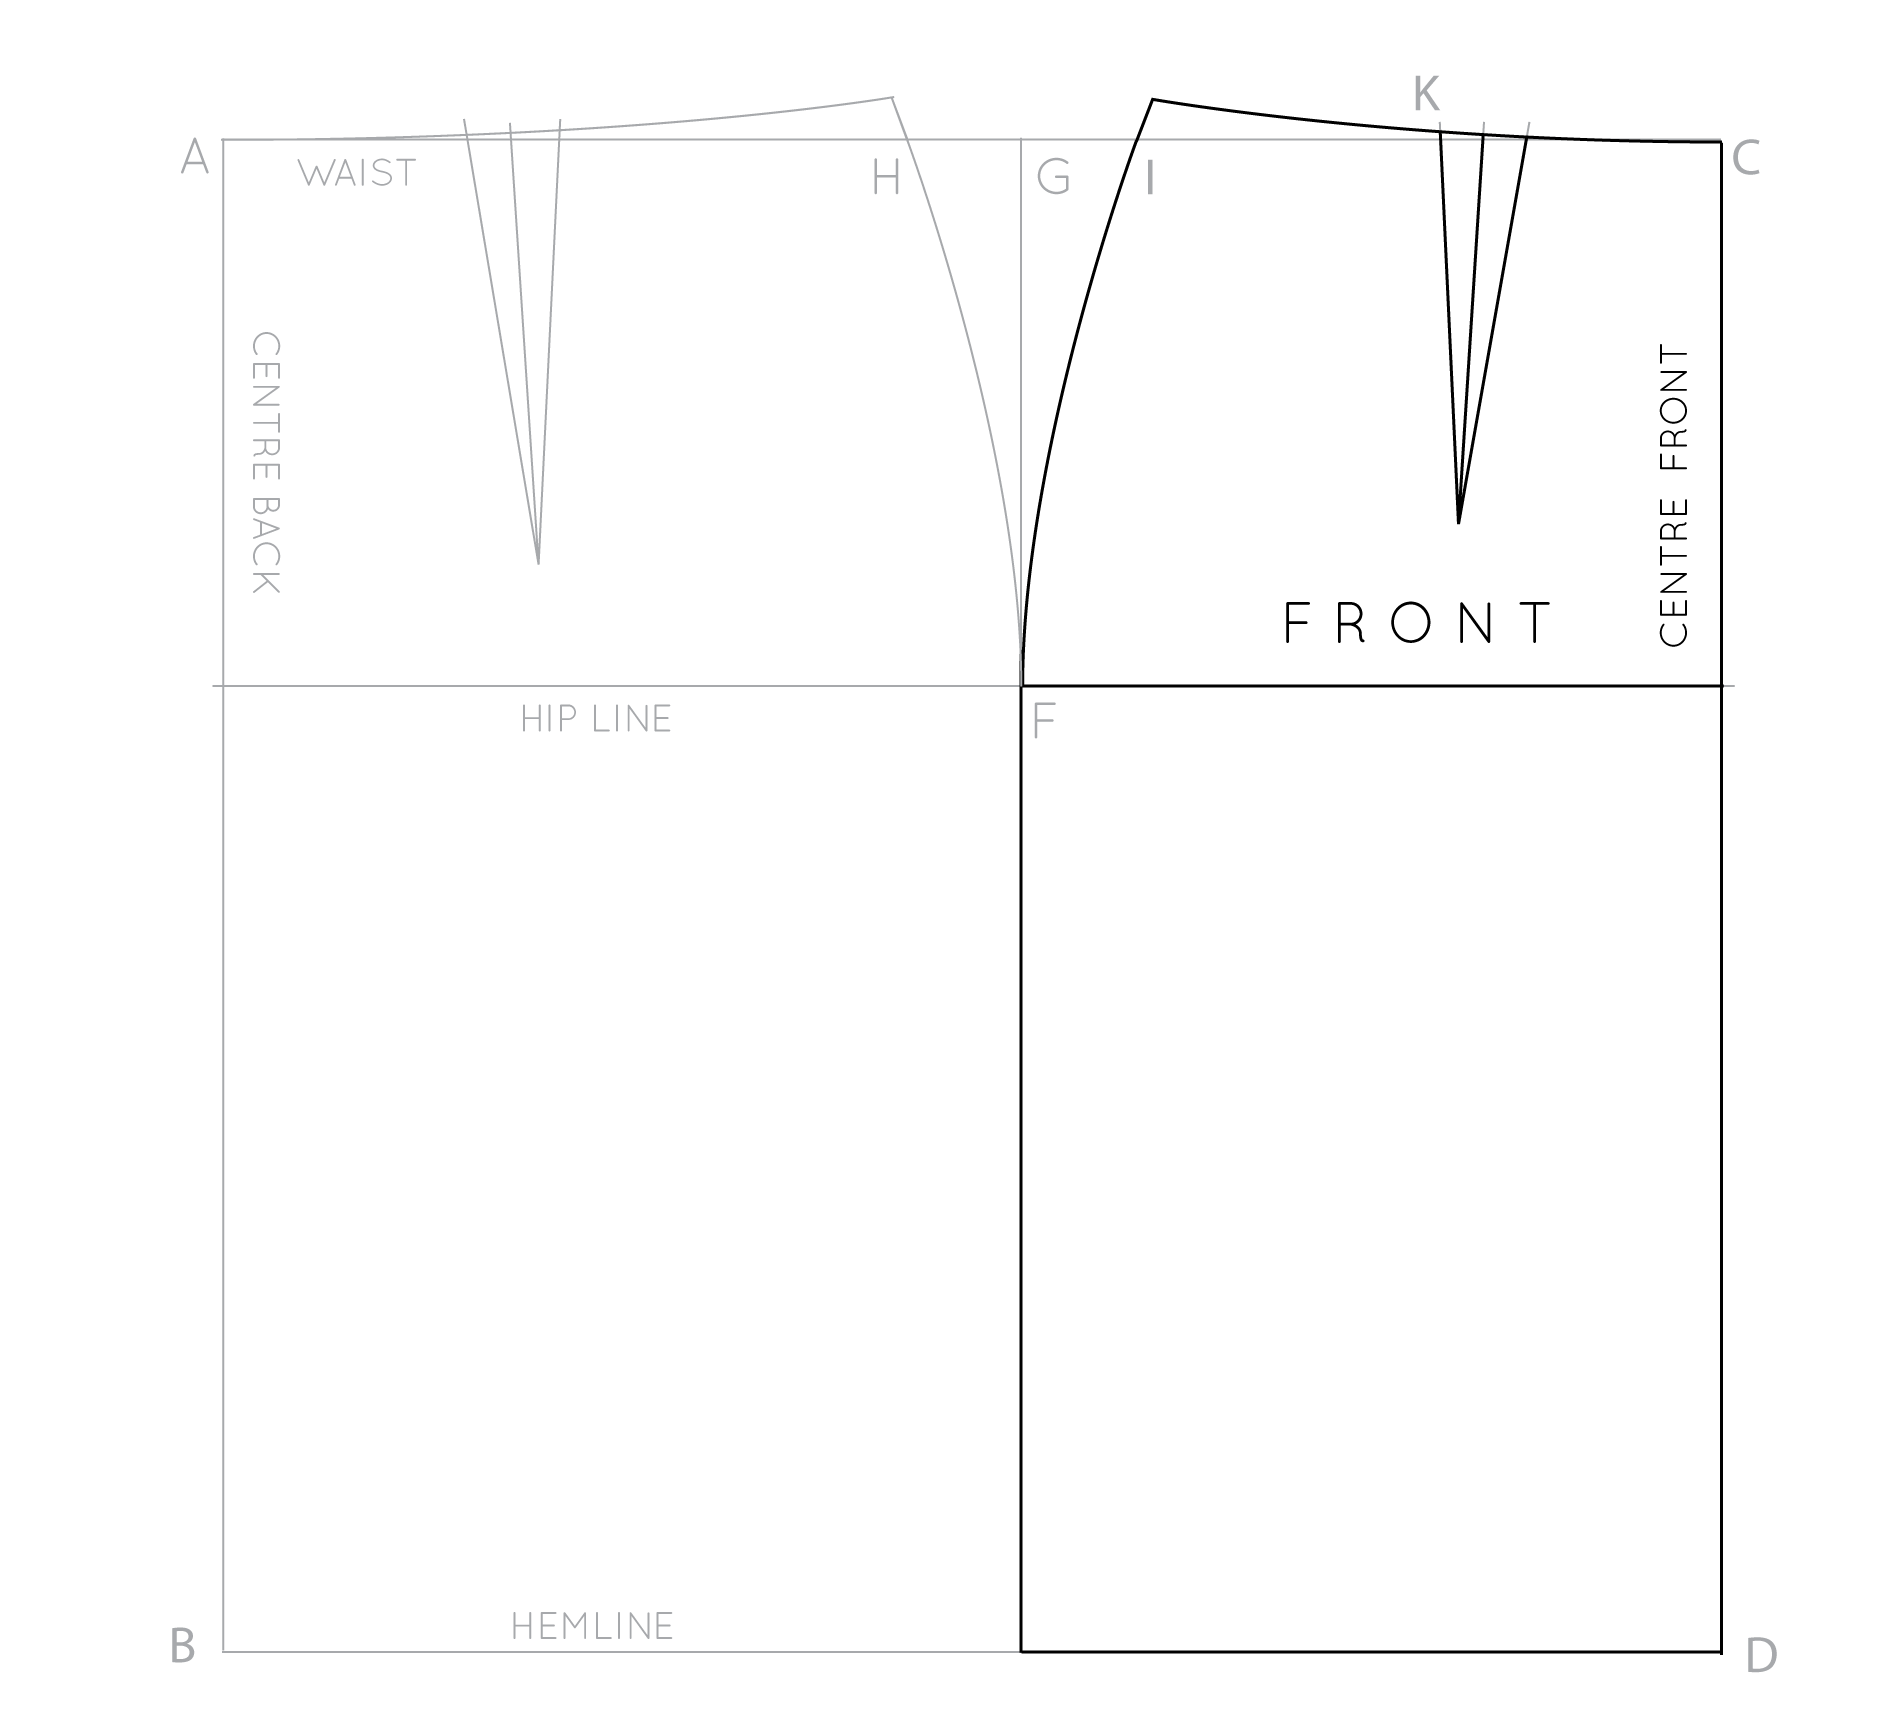
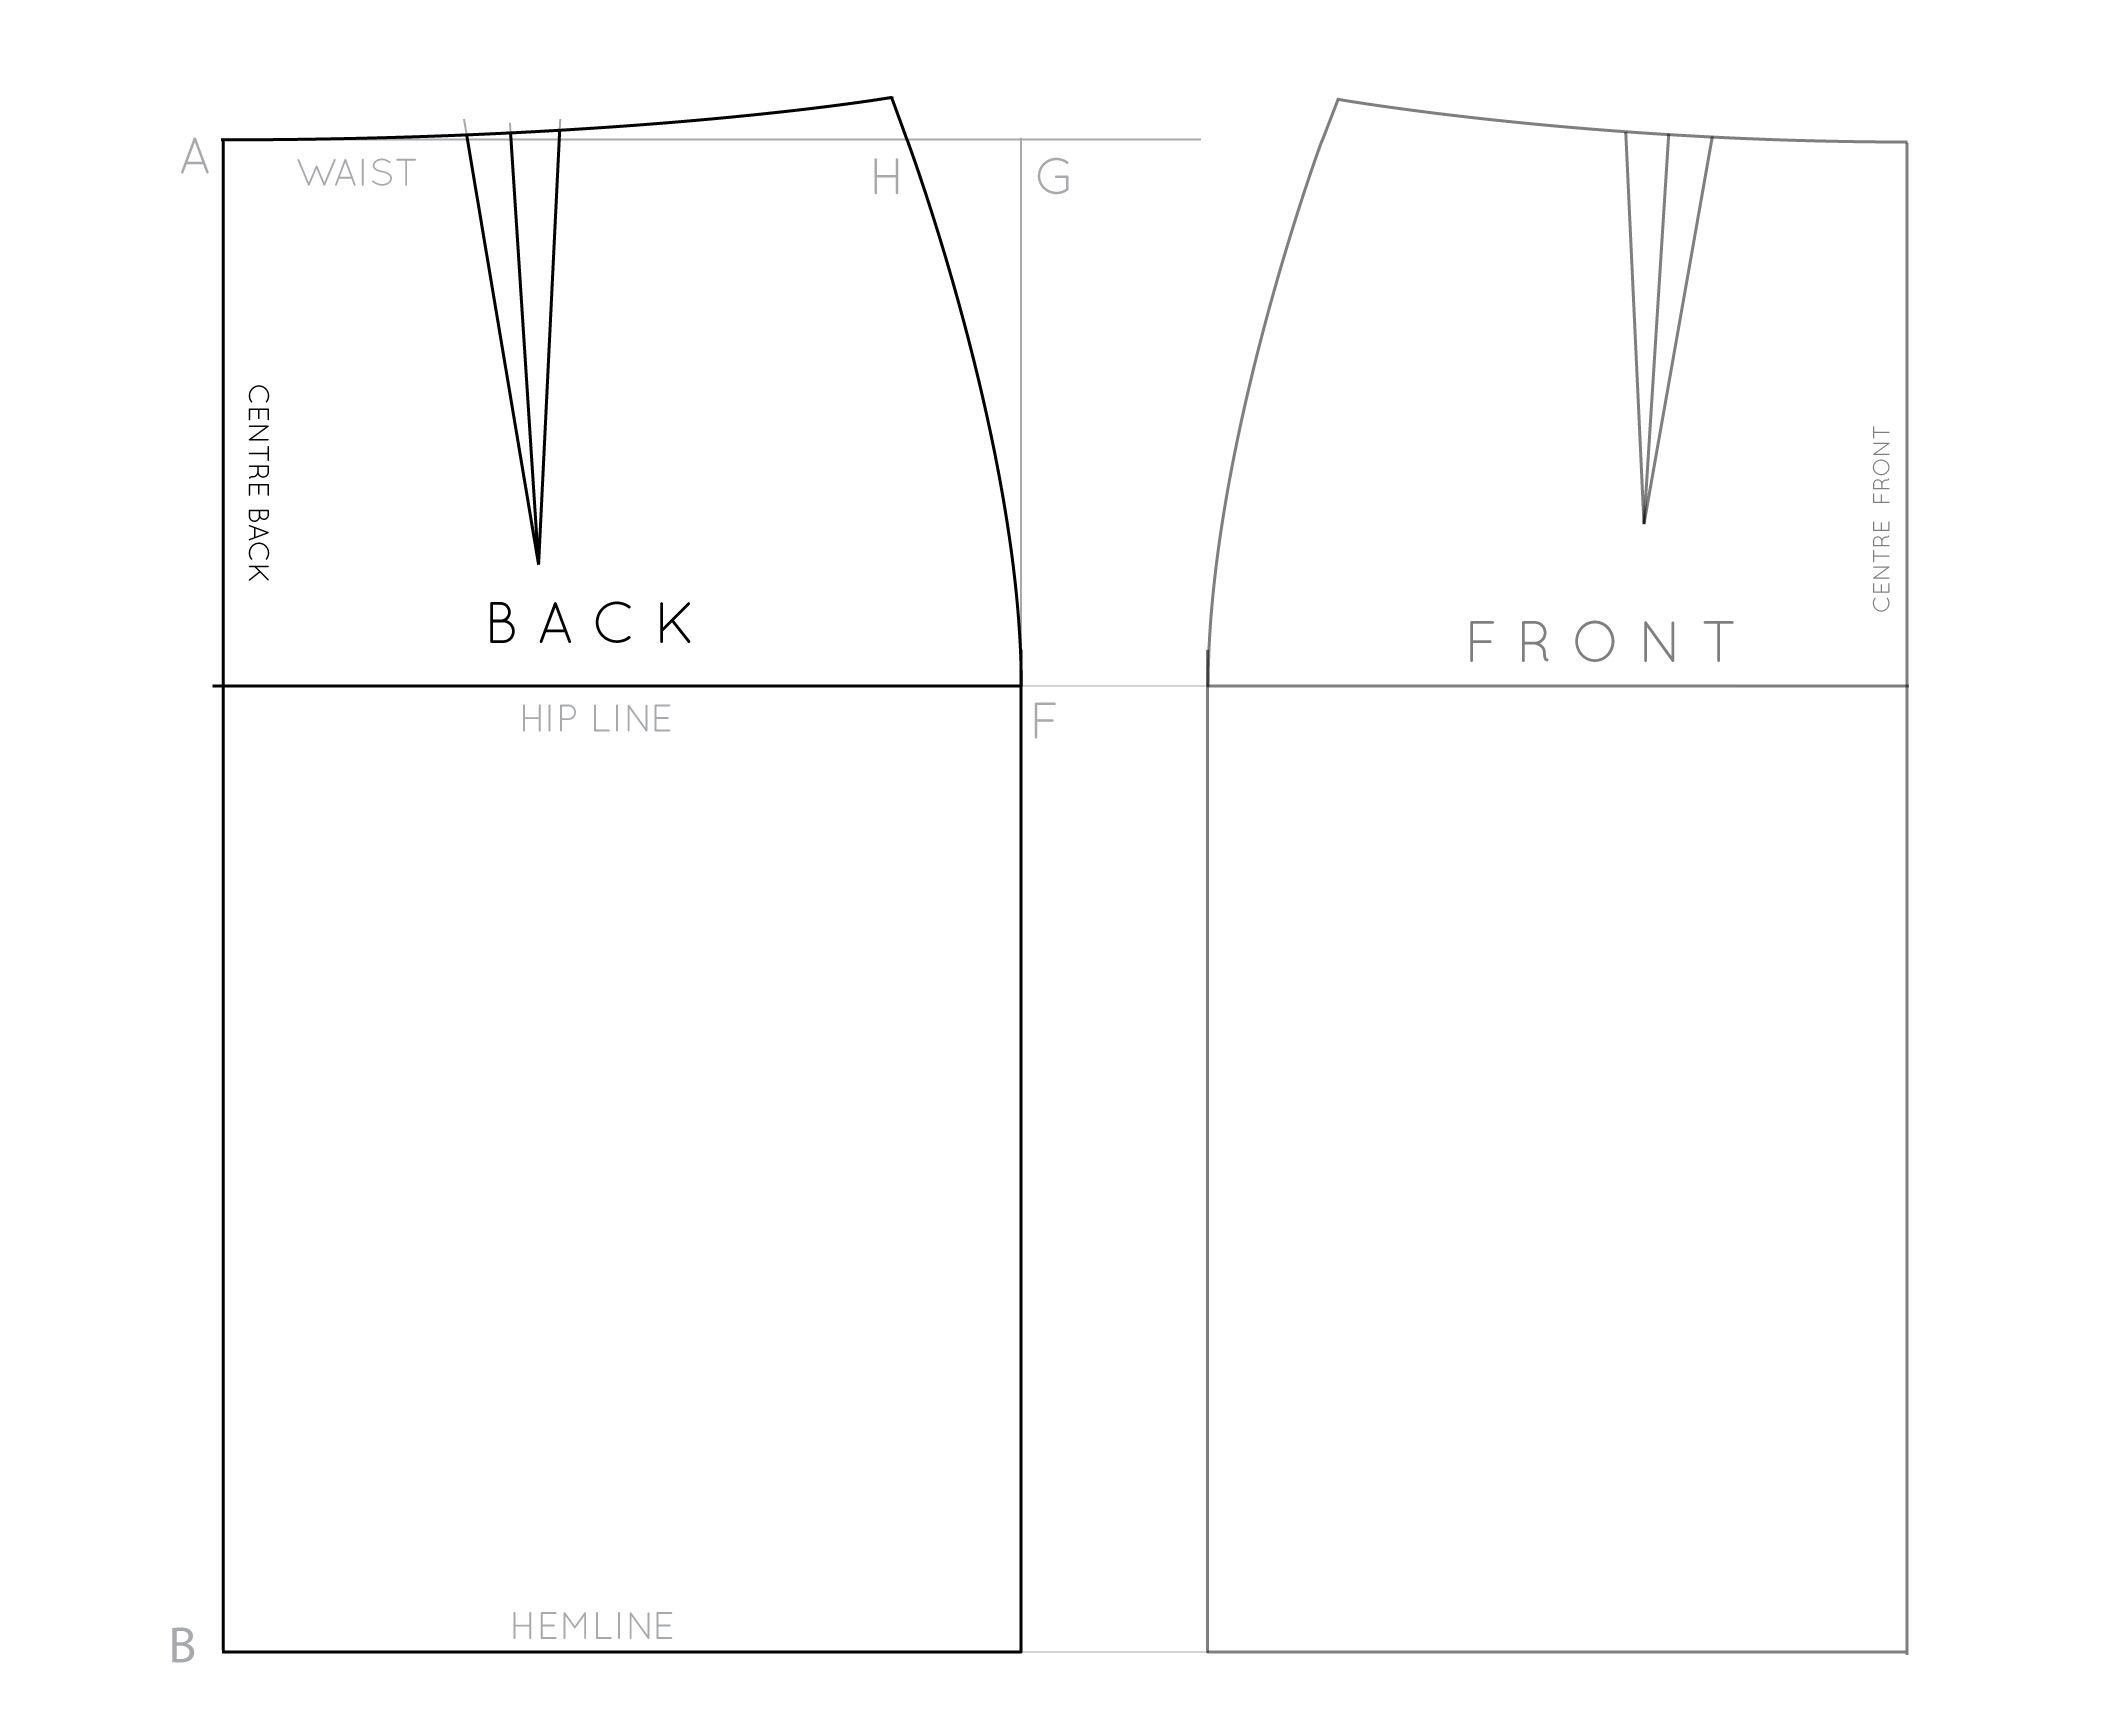
  • True seams, curves and darts

  • Check patterns are squared off
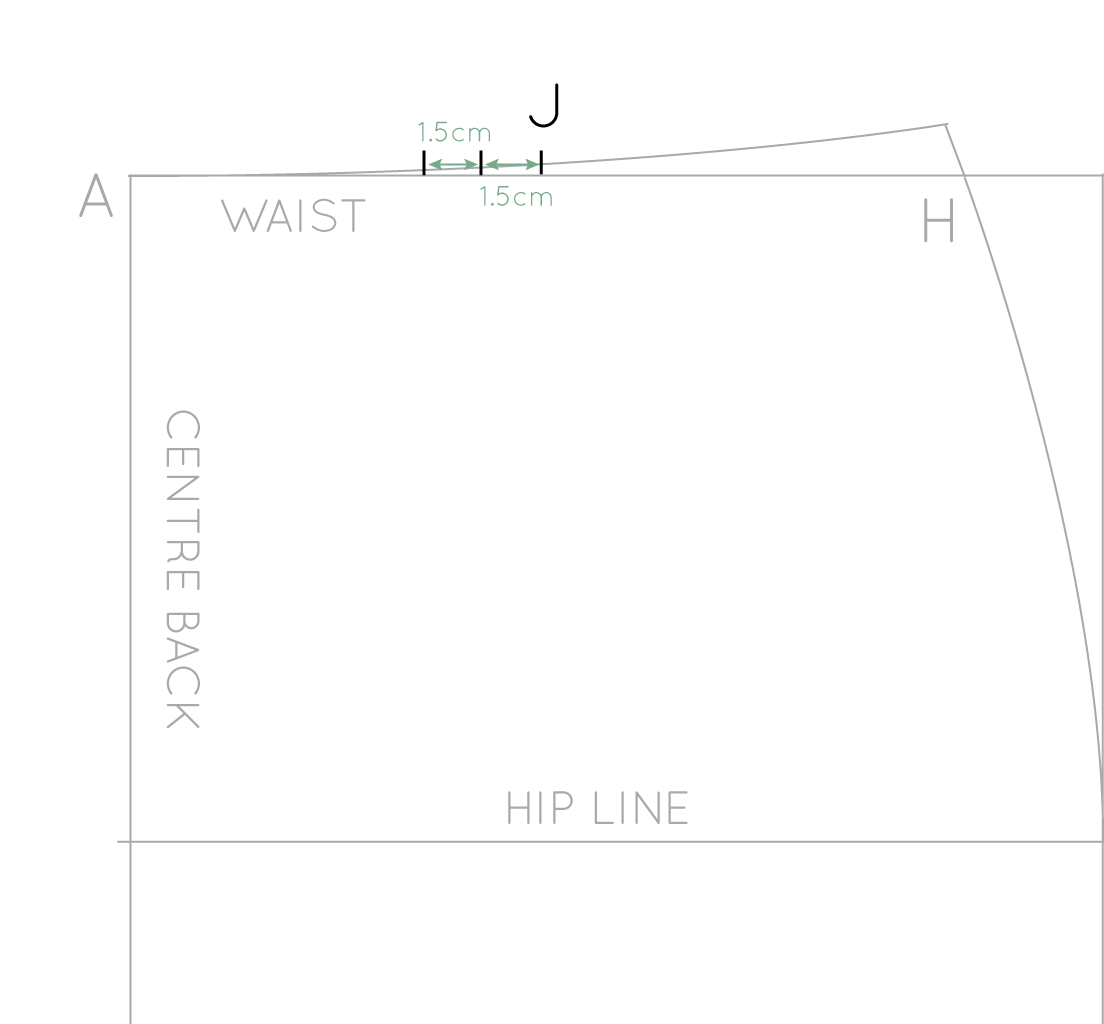
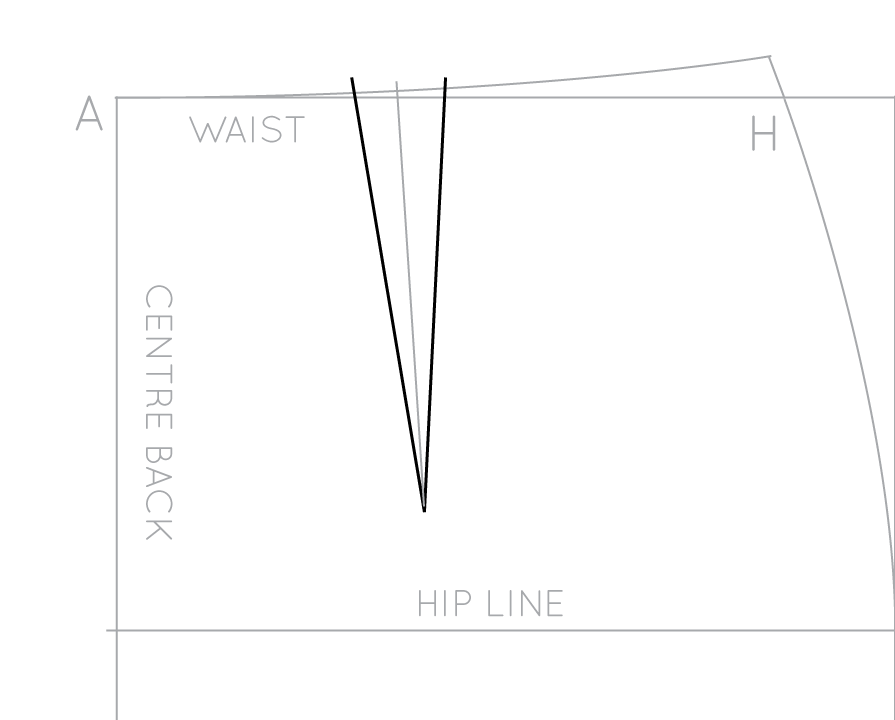
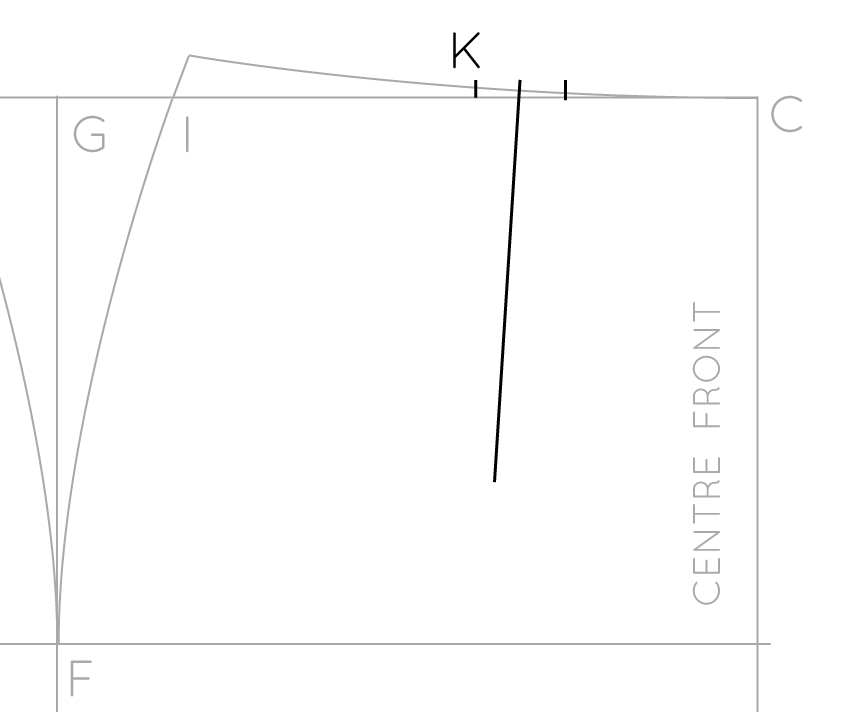
  • How to move a dart

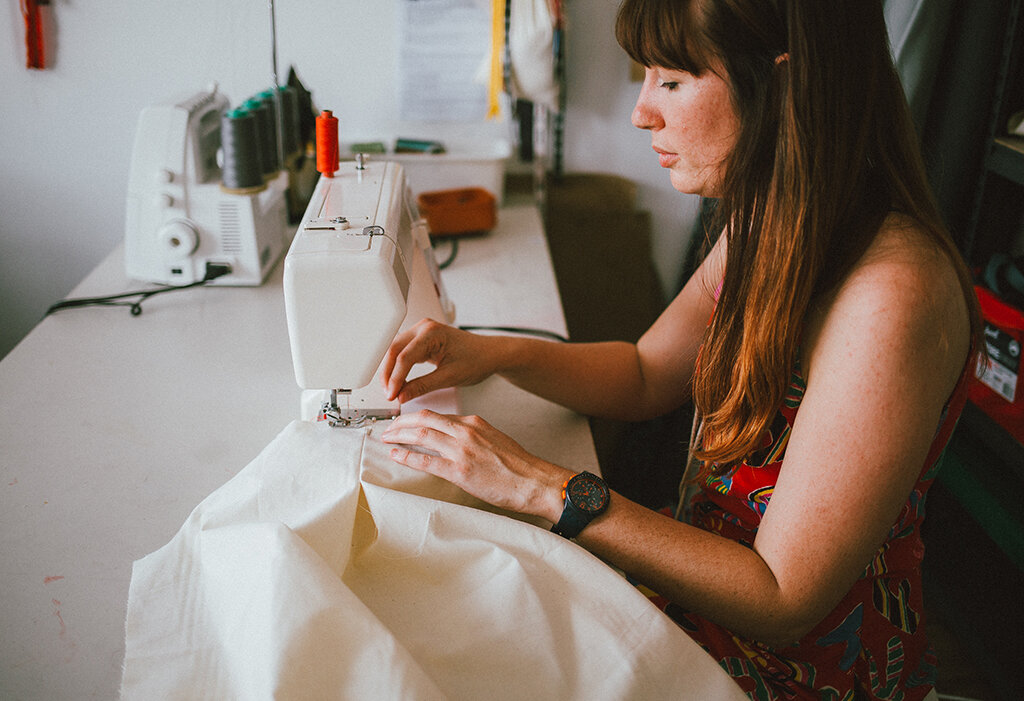
We cover all of these in our Hack kit for Issue 2 of Curated by ITF, as well as extra articles throughout the month with photos and videos in our community group. This is a great place to ask questions and see the process and questions from others as they’re working on the same thing.

7. Read through the instructions before you start

If you’re following instructions or a blog for a pattern hack then we recommend reading them through from beginning to end before you get started, so you can get an overview of what you are aiming to achieve. This will help when you come back to doing the earlier steps!

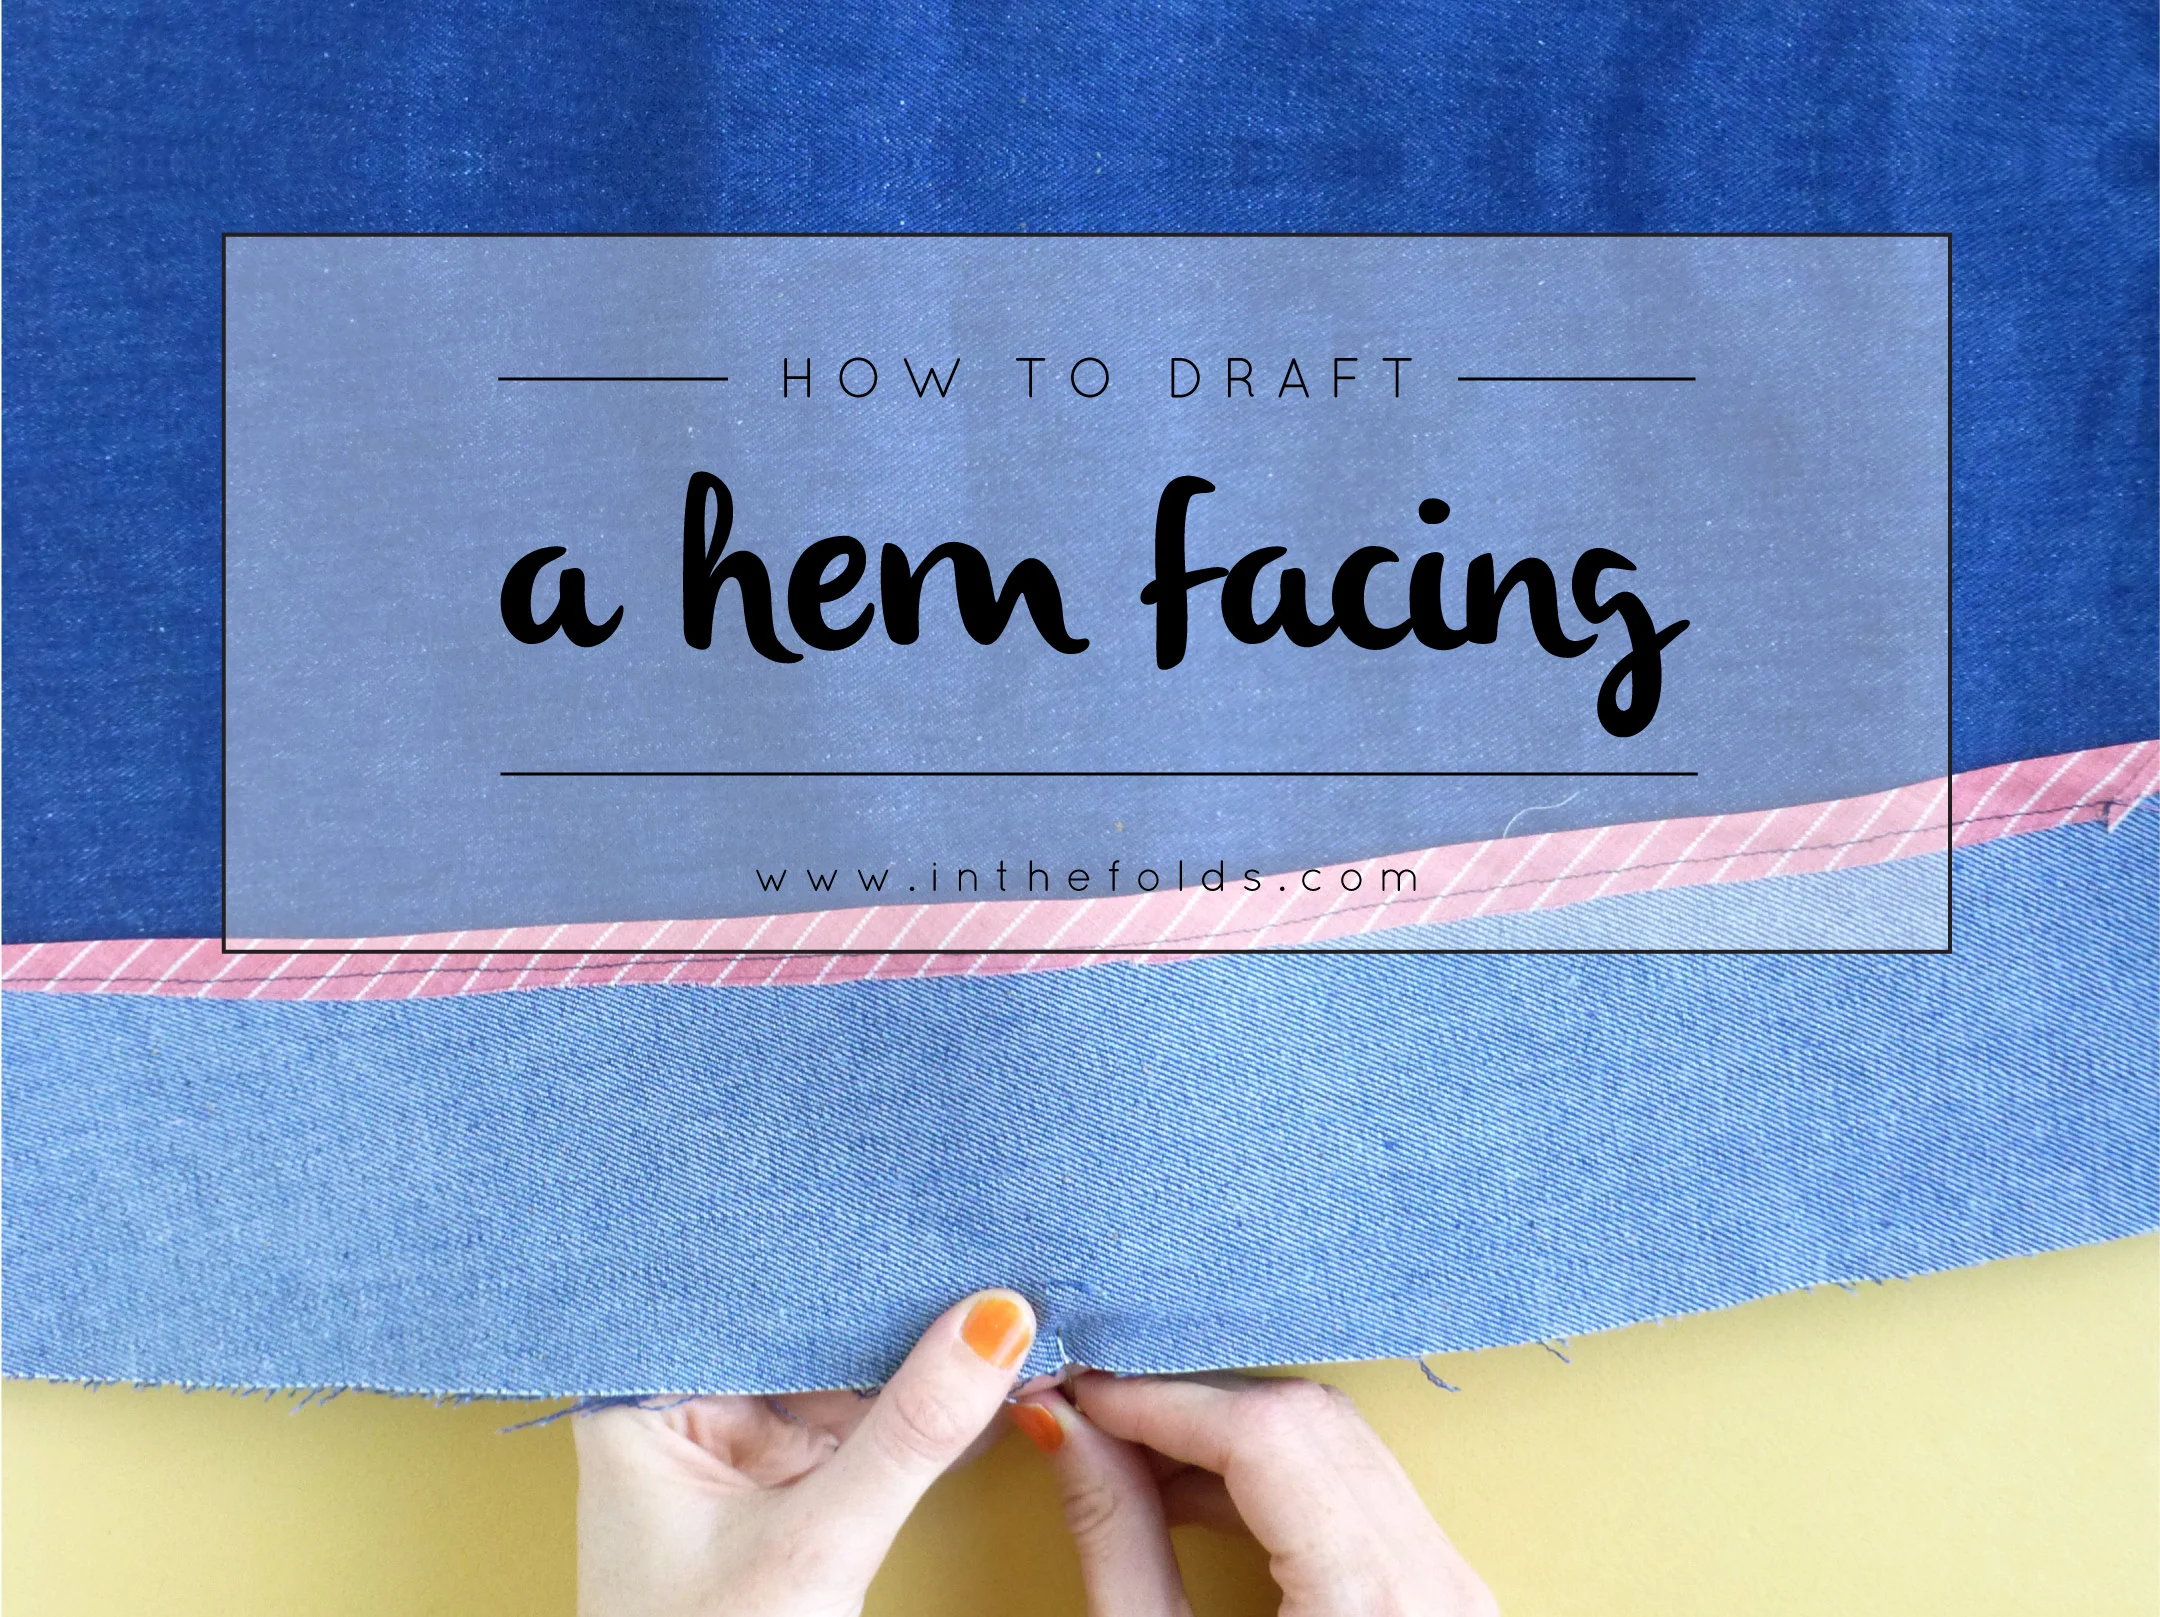
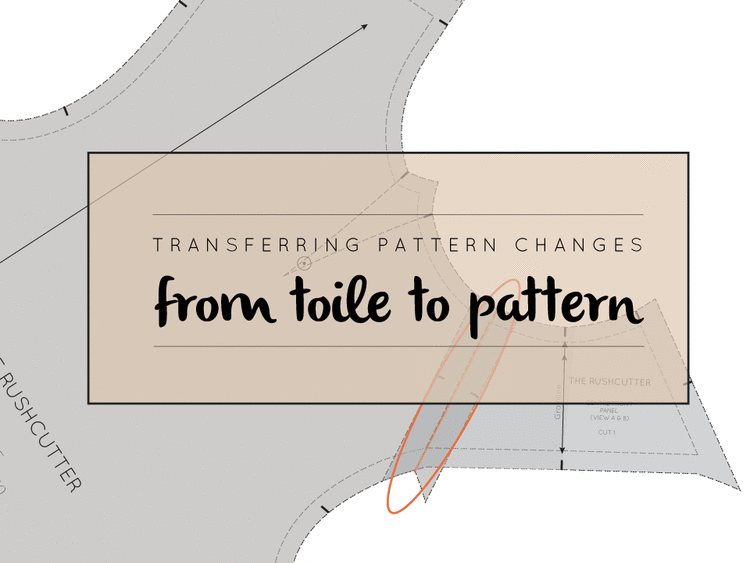
8. Make a toile to check you’re happy

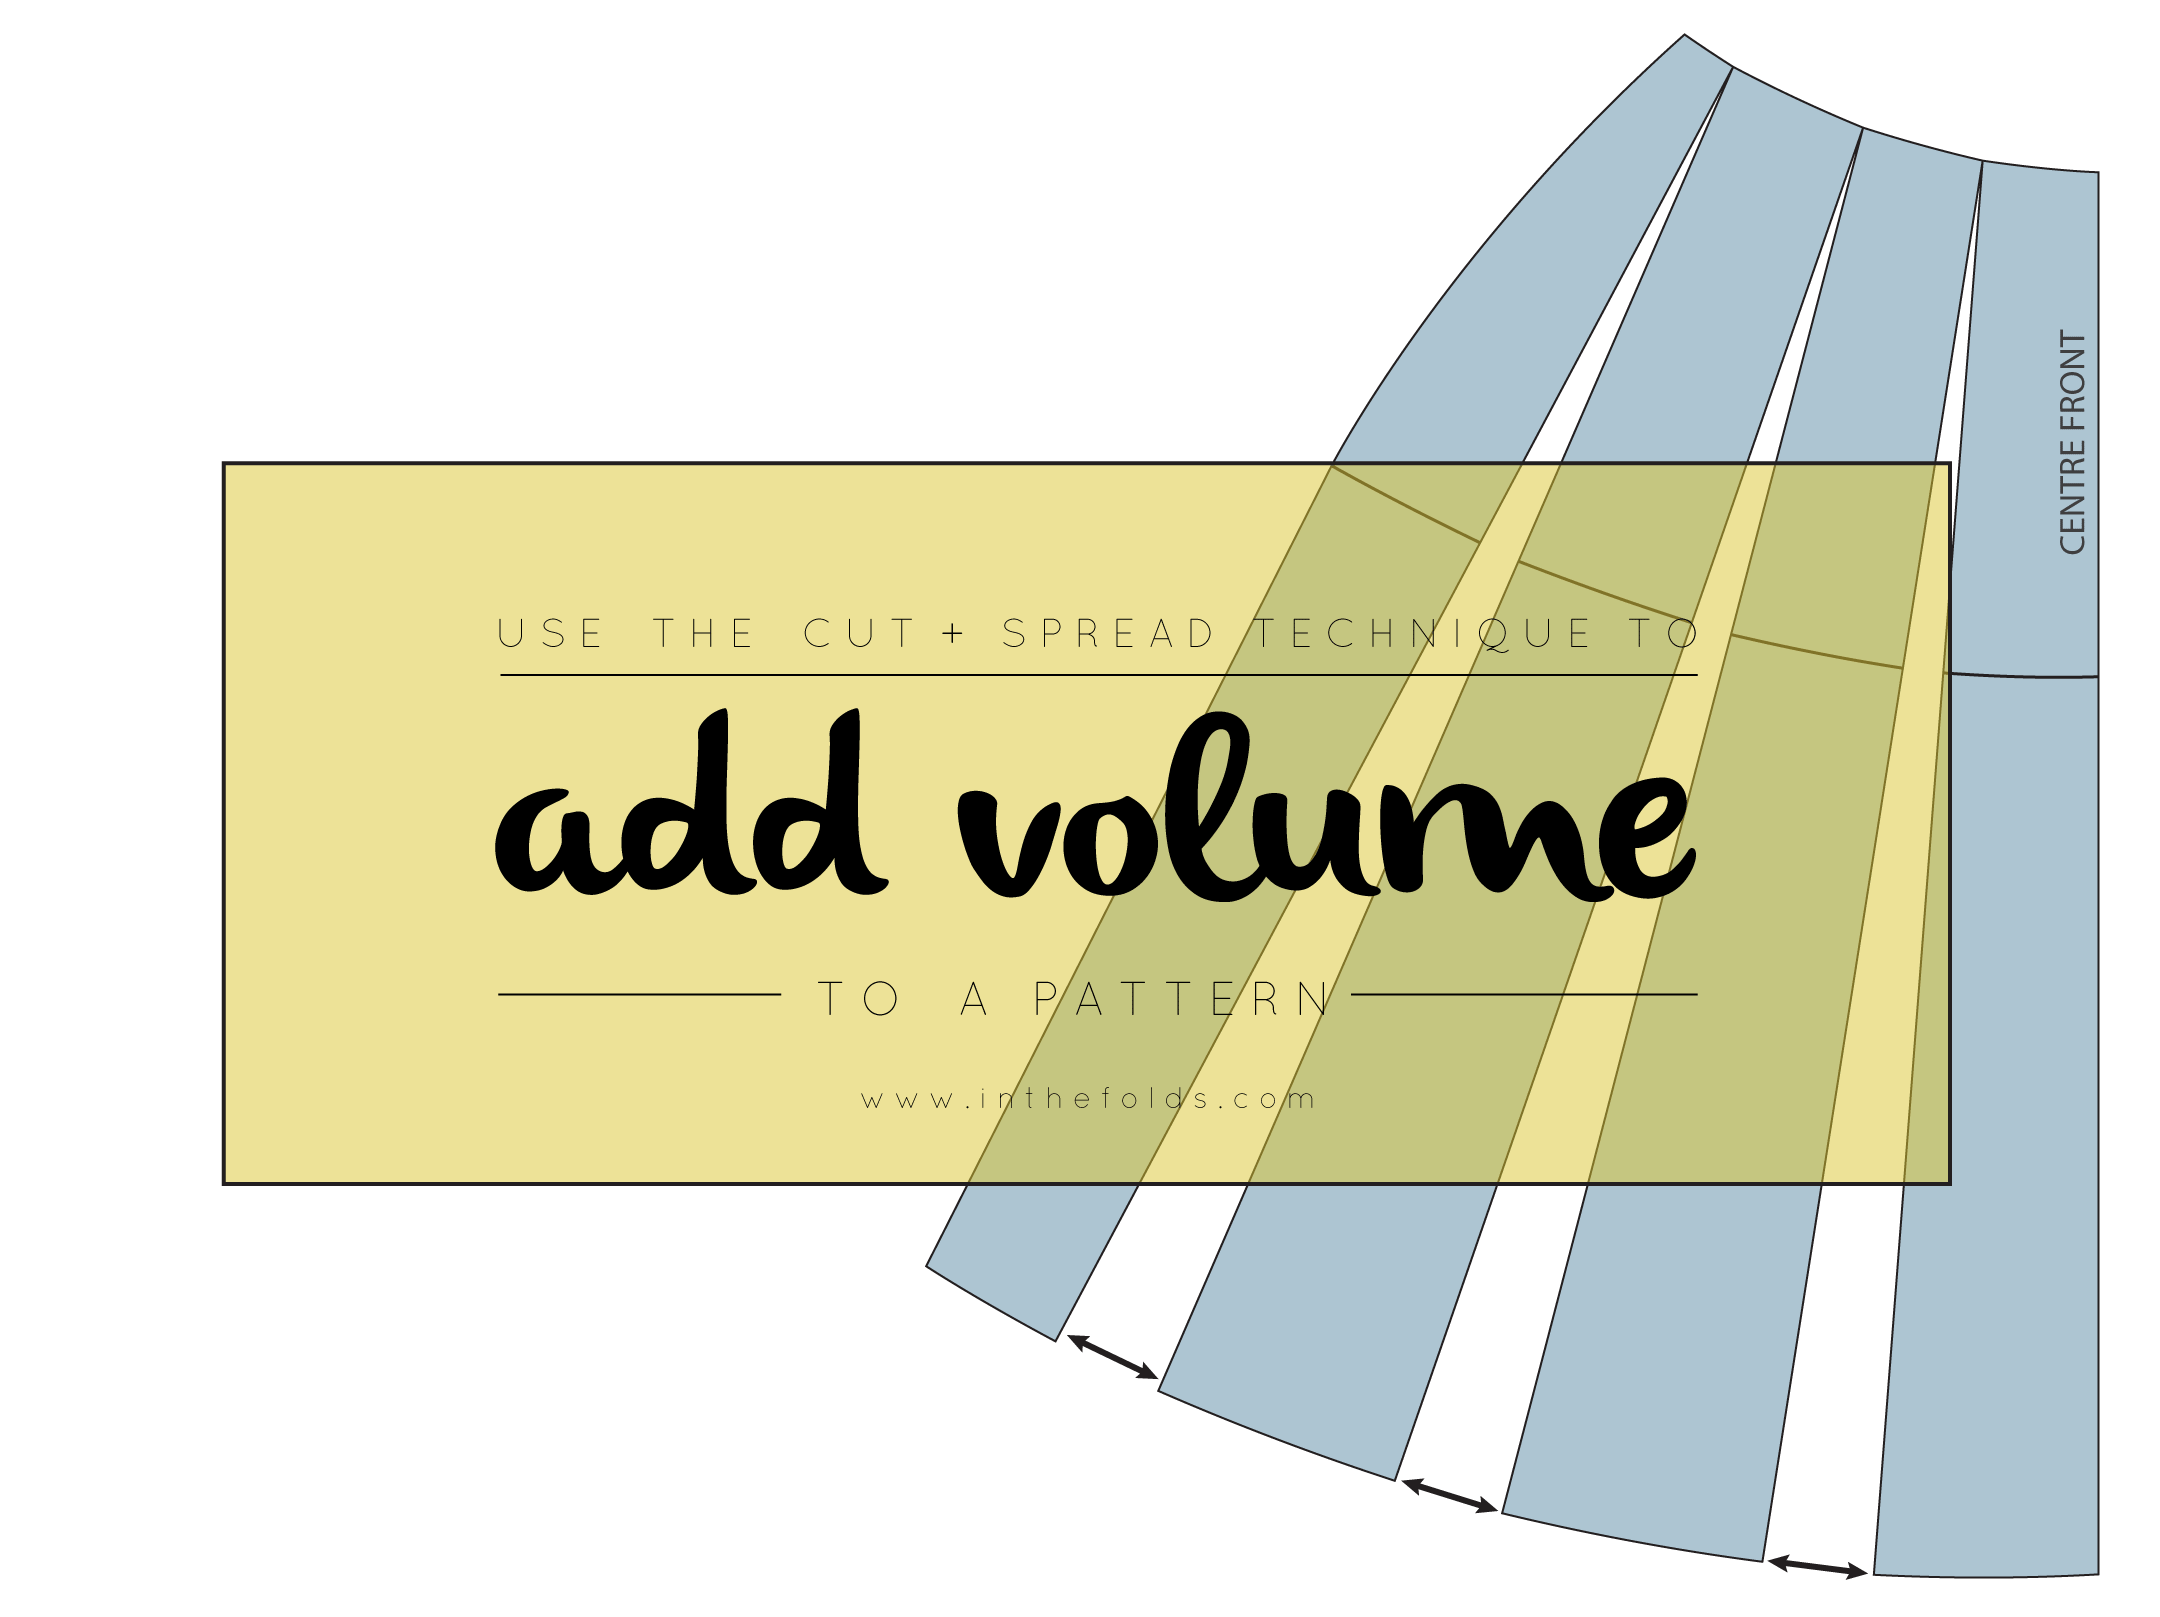
Make a toile / muslin to check that you are happy with the design and fit of the garment before cutting the pattern from your final fabric. Because you’ve started with a pattern where you’re happy with the fit, this should help a lot when toiling. If you’re making small changes you can sometimes just go for it, but when you’re making bigger changes, especially adding volume etc. then it's always best to toile and check that you’re happy with style lines, silhouette and fit.

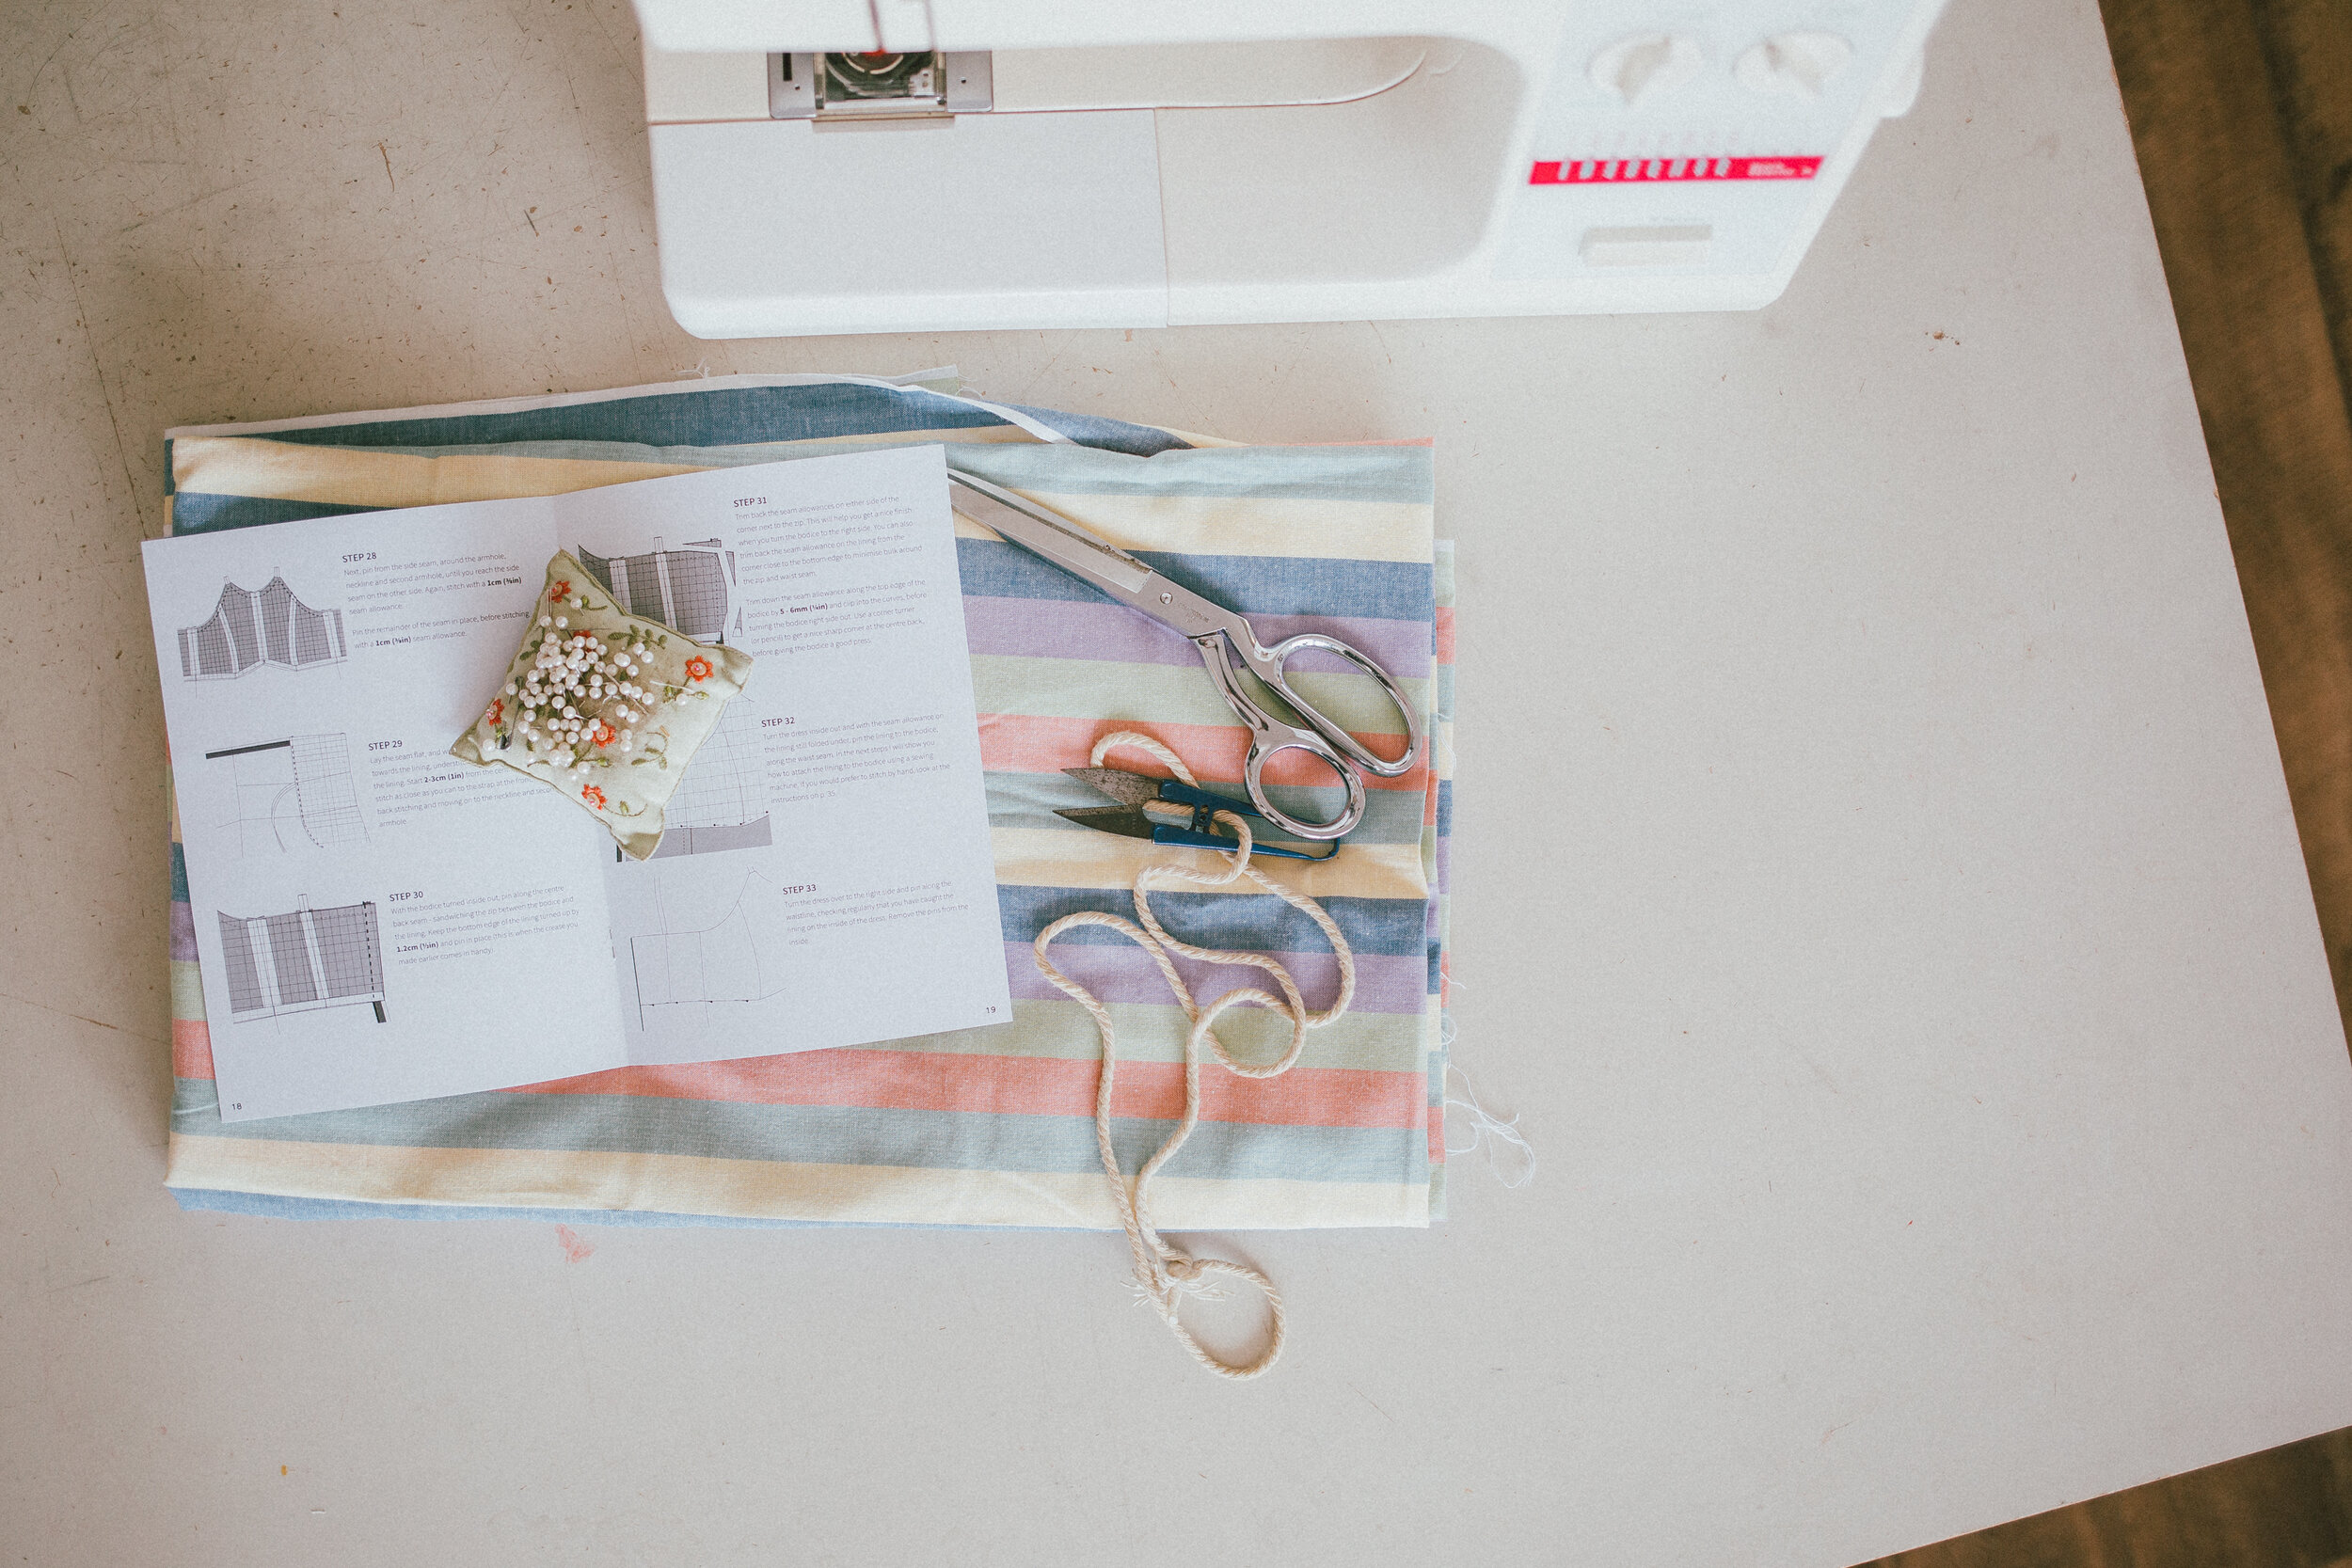
One of the challenges of pattern hacking is that you no longer have instructions for how to make the garment. We've solved this problem in Issue 2 of Curated by including a construction resource, that goes through everything from working out fabric yardage, order of construction for the hacks and then does a deep dive into specific dressmaking techniques.

9. As always, remember to enjoy the process!

b26c0b09-d9b8-4ac2-ad4a-ca42a0284f02.jpeg

Remember pattern making takes time, so be patient and enjoy the process!

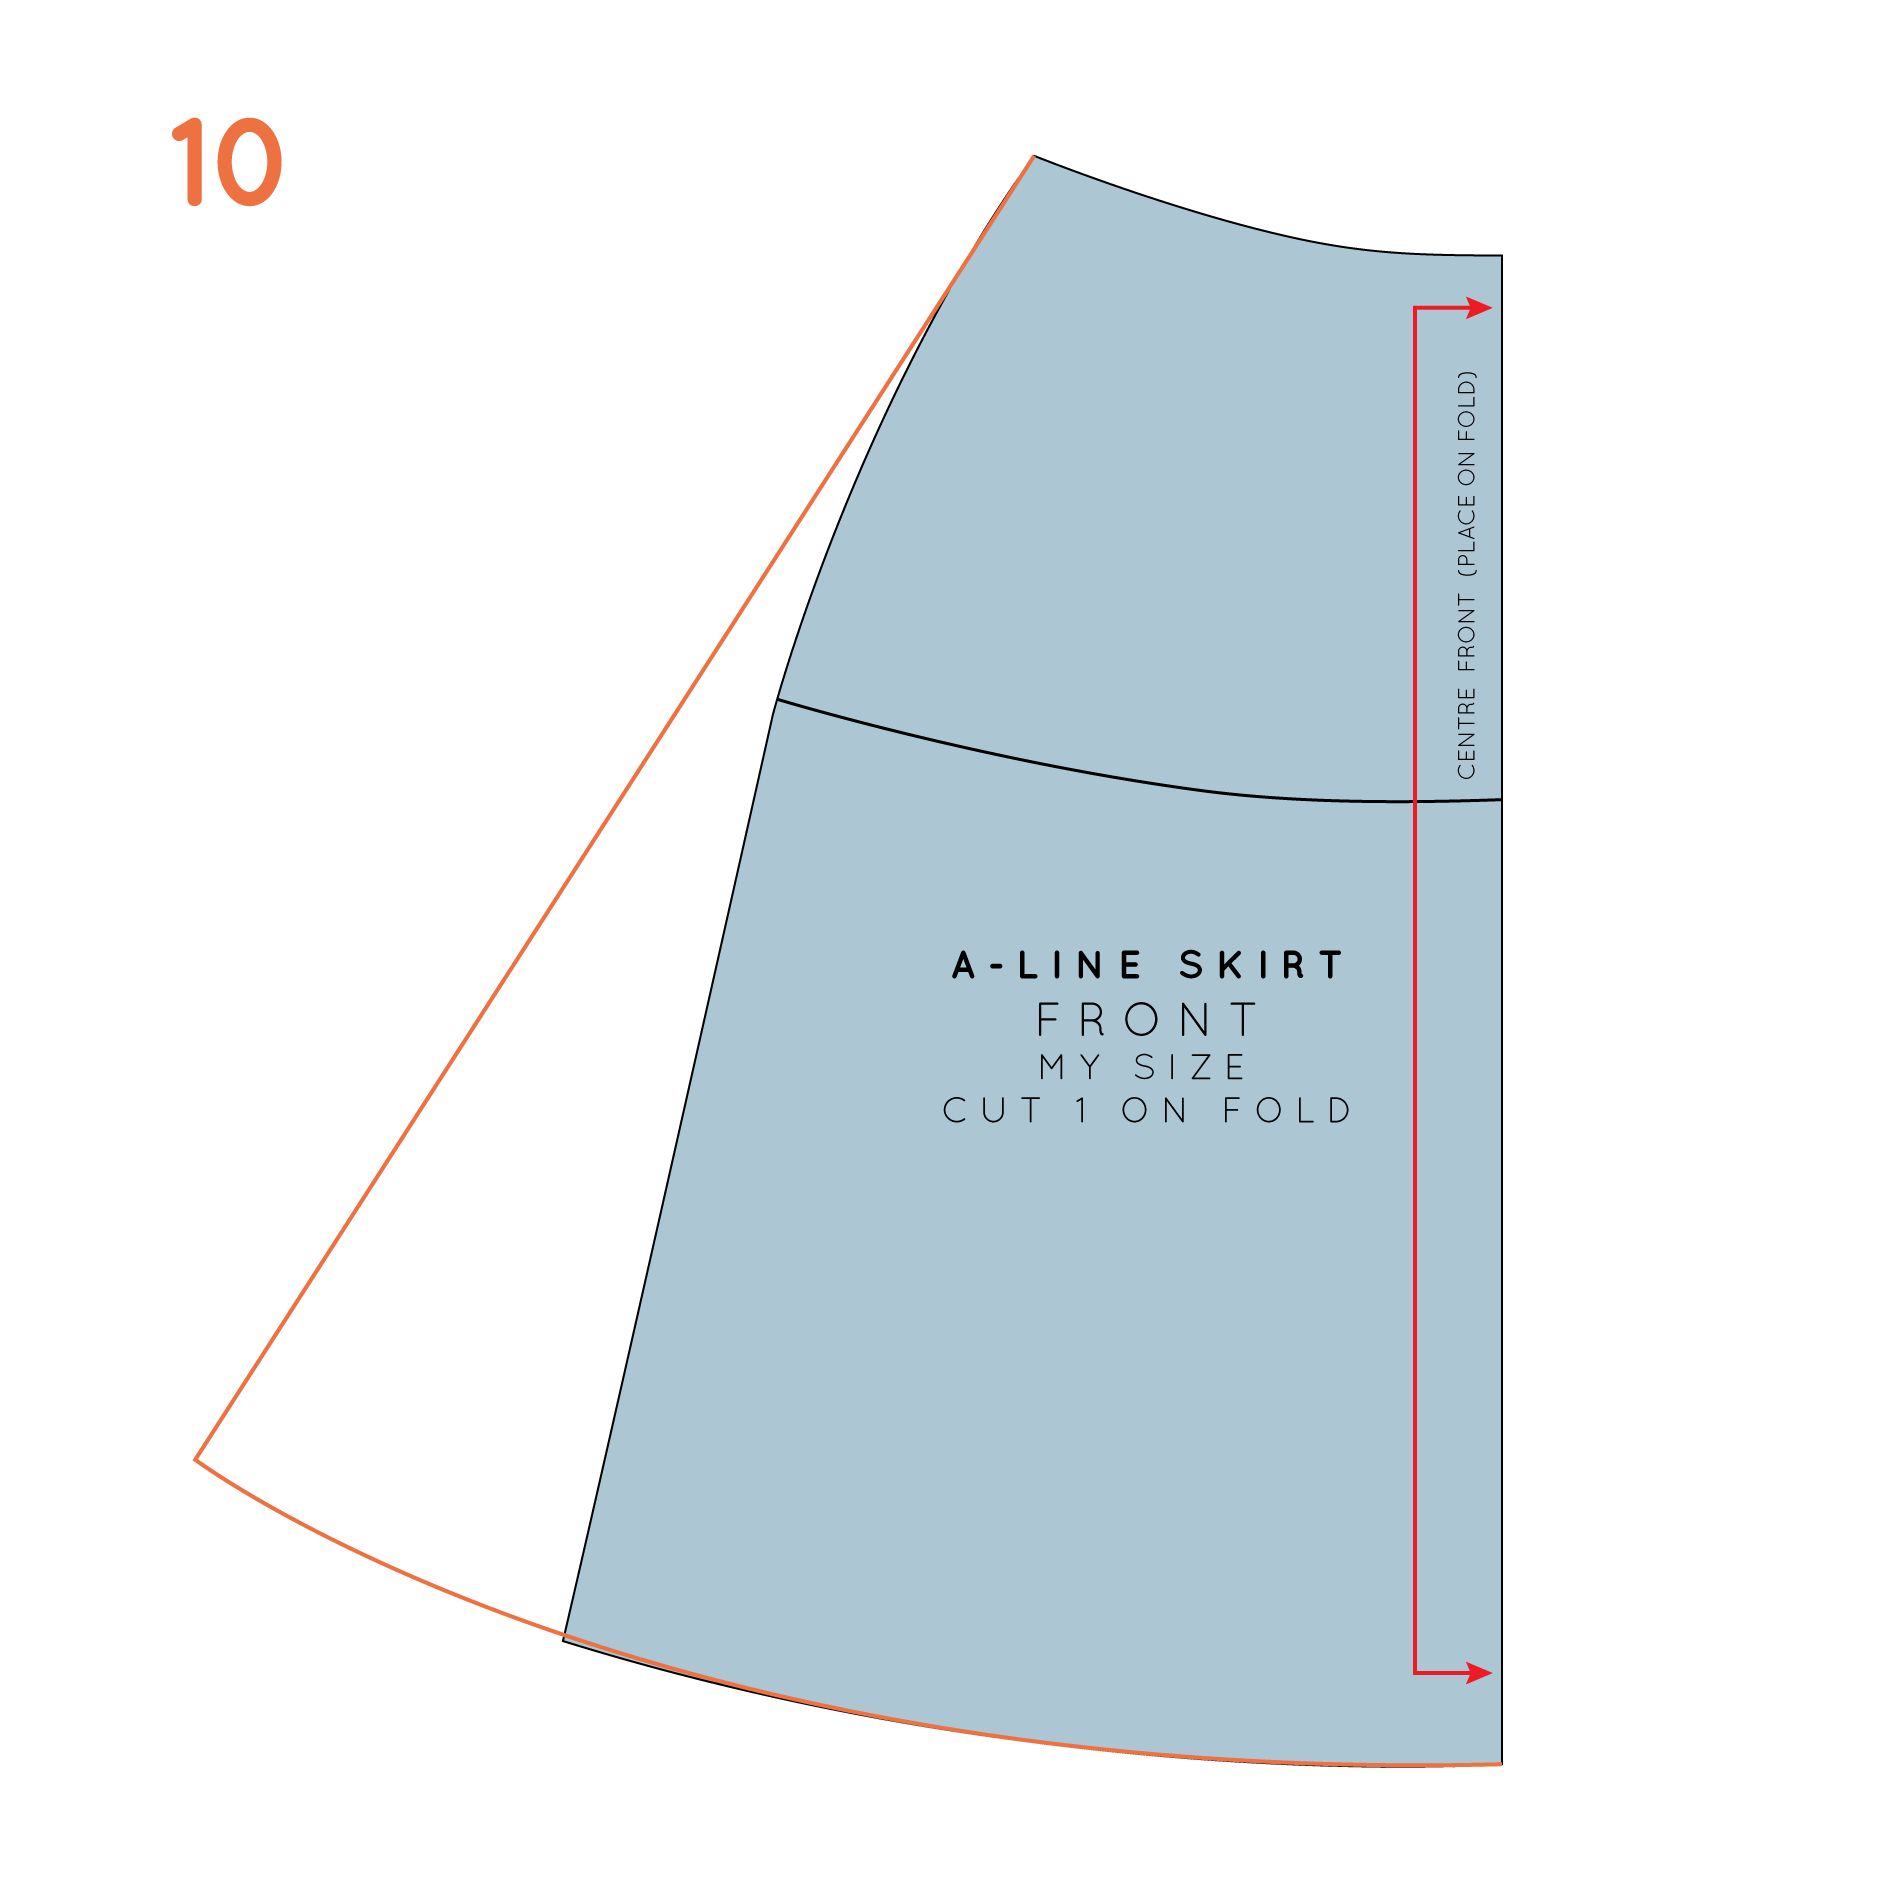
The hacks we've created have been placed in order of difficulty and there is a skill rating on each hack's introduction page so that you can determine which hack you would like to try. Are you new to pattern hacking? Start with the Straight neckline jumpsuit or the Elastic waist pants. Ready to level up? Try the Sleeveless boxy top. Ready to get a lot of pattern making skills under your belt? Check out the Jumpsuit with waist seam and darts.

We start with introduction pages of the Hack Kit pdf to learn about concepts, techniques and tools for pattern hacking. Then you can use the rest of the Hack Kit to get started on the pattern hacks with step-by-step instructions.

If you’d like to learn more about pattern making and join us with our monthly subscription, Curated by ITF, you can do so via the link below.

Tips for getting a good fit on a jumpsuit

Getting+a+good+fit+on+a+jumpsuit+BLOG+HEADER.jpeg

Tips for getting a good fit on a jumpsuit

We are very excited to let you know that our new Neale jumpsuit pattern is here! This is the jumpsuit we've been dreaming about for a long time. It's the perfect piece to wear to work, to wear out, to relax on the weekend. It will make you feel put together, but incredibly comfortable and at ease to do the things you want to do in your handmade wardrobe.⁠⁠

Neale jumpsuit-Swetha 3.jpg

The Neale jumpsuit is a a real skill builder of a pattern! Which is why we chose it to be our first Curated by In the Folds pattern.⁠ Sewing a jumpsuit means working with both the top and bottom of the body, which allows for the opportunity to learn more fitting techniques. We created a jam-packed Neale Fit Kit to go along with our first Curated by ITF pattern, so you can jump straight into it.⁠⁠ In today’s post, we would like to shares some of these great tips for getting a good fit on a jumpsuit.

Sewing a jumpsuit can be tricky as you are fitting both the top and bottom part of a pattern. But often as they have a looser fit, they are a great intro introduction to pants fitting and with this post we hope to make the process a lot more fun!


1. Pick the right size for you

a. Take your measurements using a tape measure, check out our diagram to see exactly where you should measure! Make sure to measure at the fullest part of your hips. We suggest doing this in front of a full length mirror. 

b. Check the size chart and circle or note the corresponding size for each pattern. If your measurements are between sizes, you could blend between the two. Before doing this, look at the finished garment measurements to decide if you could select the smaller or larger size. 

TIP: Use a tape measure and place it around your body to get a feel for how it will fit. (Remember to place yourself in the centre of the tape measure rather than pulling it forward or back.) This allows you to see the amount of ease in the pattern - as this is something that changes between patterns. For example the Neale jumpsuit has more ease in the waist than it does in the bust and hip.

2. Make all the adjustments you can before sewing

Before we get started with making our toiles / muslins, it's worth thinking about which alterations you can do beforehand.  You can make some alterations before making a toile / muslin using your measurements, while others are made when you have done a fitting of a toile and have the toile to refer to.

Some of you will have a good idea of the alterations that are usual for you to make to a pattern before getting started. We encourage you to make these standard alterations to the pattern before you make a toile so that you can achieve a good fit at the fitting stage.

One example of an alteration you can do beforehand is checking the length. Especially in a jumpsuit you need to consider the length between each section e.g bust to waist, waist to hip, hip to crotch, then add in or take away length at the appropriate section.

Capture.PNG

Another alteration that you may be able to do before making a toile is a SBA (Small Bust Adjustment) or FBA (Full Bust Adjustment). To check this, work out the difference between your high bust measurement and bust measurement. If the difference between your high bust measurement and your full bust measurement is 2.5cm (1") your bust is an A cup, 5cm (2") it's a B cup, 7.5cm (3") is a C cup, 10cm (4in) is a D cup and so on. Record your bust cup size.

1629161752414.jpg

Often pattern companies draft for a B cup, sometimes they will offer a range of cup sizes. It's best to check before you start sewing. In the Folds currently offers a B cup.

• If you have a B cup bust cup size you will not need to make a bust adjustment to the pattern.

• If you have an A cup bust (or smaller) you may need to do a Small Bust Adjustment.

• If you have a C cup bust cup size or larger you may need to do a Full Bust Adjustment

3. Sew a toile

A toile is a test version of a garment, made from a similar, but often cheaper, fabric that assists with the fitting process. By making a toile, you can check the fit, and make any adjustments before cutting into your 'real' fabric.

You only need to cut the front and back pieces, you don’t need to sew the zip, facing pieces, pockets or finish the seams. On the toile - mark the bust, waist and hip line on the fabric. On the Neale jumpsuit we’ve added notches so you can easily find these on your pattern!

You can also mark in the bust apex point by drawing a line from the centre of the dart, through the dart point and beyond the tip of the dart by 2.5cm (1in). Lastly extend the pocket notches on the toile with a marker so that you can check you are happy with the pocket positioning.

Other tips for sewing a toile are:

  • Remove the seam allowance from the neckline and armholes and add staystitching to stop them stretching.

  • Sew the toile with a longer stitch length than usual, so that when fitting the toile it is easy to release the seams if you need to.

  • Do not sew the hem. It is good to have the hem allowance available if you would like to experiment with length options. 

  • Remember, it is still important to press the toile well as you sew. This will help you when assessing the fit of the toile.


4. Assess the fit

Now it's time to assess the fit. Yay!

Get yourself set-up in front of a full length mirror with a notebook, pen, pins, seam ripper / snips and marker. If you have a friend who can help you - get them too! Work through the checklist below and take note of any issues. It’s also a good idea to take pictures on the front, side and back (you can use the timer on your camera). Sometimes you notice things on the photos that you may not see in real life. 

InTheFold_Edit-Still_07.jpg

Jumpsuit fitting checklist:

  • Check that your side seams appear straight and are perpendicular to the floor. If your side seam is pulling towards the front or the back, this normally means that you need more width in the area where it's pulling.

  • Lift your arms and check that the armhole sits in a comfortable position under your arm. Check that the armhole is a nice shape on the front and back.

  • Check that your BUST LINE, WAIST LINE and HIP LINE are in the correct position for you and are all parallel to the floor. If any of these lines are in the incorrect position, you will need to either shorten or lengthen the pattern. For a jumpsuit it’s important to notice where to add/take length because you are fitting both a top and pants in one.

  • Check the front and back crotch are not too tight or too loose. If they are, you will need to adjust the crotch length.

  • Move around. Check that you can move and sit comfortably in the jumpsuit. If a seam feels tight, let out the seam with your seam ripper and re-pin the seam with a smaller seam allowance to see if this helps.

You can find more fitting tips, the full checklist and instructions on how to make these adjustments in our first issue of Curated by In the Folds. Our September project, the Neale jumpsuit, comes with a bonus Fit Kit that will walk you through a range of different pattern alterations in detail. 


5. Grab a cup of tea and take a break!

InTheFold_Edit-Still_06.jpg

Fitting patterns at times can be hard. It’s important to take a break! Remember not to ‘over fit’, it’s easy to start obsessing over every wrinkle but in reality, we move around and we aren’t just a static image! 

You don’t have to make all of the adjustments at once. You can choose which are more important to you and if you like, you can build on these as you go. With Curated by In the folds we aim to help you through the fitting process, one step at a time, providing you with all the information (always tested by us!) in one place and hopefully have some fun with it! As part of the subscription, we also have a great online platform in which you can ask any questions and see what other people are making and learn from their fitting process too.

If you’d like to learn more about fitting and join us with our monthly subscription, Curated by ITF you can do so via the link below.

The Collins Top Sew-along : Tester Round-up

Yay! It's time to start the Sew-along for the Collins Top! This has been a long time coming. I had high hopes for this sew-along being ready as soon as the pattern was released, but unfortunately it didn't work out that way. I decided to release the Collins Top the week before #makersforfashrev and two weeks before an overseas trip and so that is what caused the delay (sometimes my planning skills leave a bit to be desired!). 

If you have been following my blog for a little while, you'll proabbly know that a sew-along for me is a pretty big deal. I really like to jam pack in as many posts as possible, to ensure that if you are following along, all your questions get answered and I can help you make a garment that you really love and fits you well. You may remember that the Acton sew-along had a whopping 24 posts in it! It is a lot of work to do, but as a lot of the content can be applied to many other different patterns, I feel it is a worthy mission. I want to help makers be the best makers they can be and I feel this is a great way to help!

I'll be starting with the tester round-up, as I think it's always the best place to start. It gives you a chance to see how the pattern looks on a variety of body shapes, as well as in a range of different fabrics.

I'm not going to lie, testing this pattern was tough. I made a bit of a drafting blunder in the original pattern, which I somehow overlooked before sending it out for testing. I corrected the problem and overall am much happier with the final product, but this did mean that I had to test the pattern twice - which meant a huge testing group!! Thankfully I had so many amazing people put their hands up to get the job done (some of them even tested in both rounds of testing) and we made it in the end!

So without further adieu, here is a round-up of the tester versions of the Collins Top. I have included everyone who wanted their photos shared and have put them in alphabetical order for no reason except that it will help me know that I haven't forgotten anyone!


Adrienne

Alice

"This was a wonderful pattern and produced a lovely garment. This top has already become my favourite item of clothing, not just that I have made but in my whole wardrobe." 

Asheley

"I actually love the inside of my garment. I am a stay at home mom who runs around with my 2 year old and 5 year old, mostly wearing jeans and t-shirts. This top is one of the nicest finished garments in my wardrobe and I made it. Also, I love modern but timeless silhouette. I don't own anything else like this, but would like to make more garments like this."

Becky

"I can sense the work and love in this pattern, everything is so detailed and helpful."

Caz

"Oh my! I love how your patterns fit together! All those angles at the edges and seam allowances, so neat and tidy!"

Emma

"I have always enjoyed making In the Folds patterns. Comfort , thoughtful , generous ; sizing,instructions,sharing of knowledge, design ....artistic .... I learn new techniques every time and there is a simplicity to the design element I adore."

Erin

"I feel very fortunate to be a regular pattern tester for In the Folds. Her unique design style and thoughtful perspective always produce the most interesting and fun garments to maker and wear."

Genevieve

"I really like the amount of ease around the waist and hips to allow for flowy fabric and comfort. I also really like the fit around the bust and the shoulder so that I have a bit of shape without being tight. I like the way it hangs off the shoulder to the back. I think that's panelling. It's lovely and gives subtle help to bring the eye in at the wide points."

Jackie

"I liked that the diagrams in the instructions had the pieces numbered - I mostly just follow diagrams and skim the words so this made it super easy to follow."

Jennifer

"I love that it feels like I am not wearing anything. It is so light and breezy and doesn't hug anything!! I also like the hem design. It adds interest to my wardrobe. I also like the button detail. It adds a nicely tailored aspect to the shirt."

Jessica

"I'm so thankful for have been chosen to test this pattern! I didn't think garment sewing could be so fun! I'm so used to sewing straight seams on quilts that I thought this was going to be really hard to do, but it wasn't. It was really enjoyable. I looked forward to sewing on it each time I did and telling my husband about what I had learned while I was working on the pattern that day."
 

Jurgie

"It feels so comfortable! Easy to wear, easy to style with pants or a skirt. I love the construction of it and how smarty-pants I feel when looking at the panels that make up the top. The dropped hem flatters."

Kate

"A great pattern for woven fabric with loads of panels to mix and match fabric. This top looks great in a fabric that has structure but I decided to use a silk/poly mix which gives it a lovely drape."

Kate

"I love the panelling in this pattern. For me, as a slim flat chested girl, I find fitting a challenge and also that the majority of clothes and commercial patterns are aimed at women with fuller figures or have necklines that only flatter a bigger bust. The panels on the front of the Collins are great because they imitate the effect of princess seams but are much less daunting (for me!). Also the sleeve attachment was so easy - it's all about the raglan sleeves for me these days! I don't know why I didn't start off with patterns which featured raglan sleeves, they're so much easier!" 

Renee

"I especially love the top part (neckline and sleeves) of the Collins top in my chosen fabric. It fits perfectly and is flattering."

Vesna

"I thought that the look is really unique and interesting - I love panel lines of the pattern as well as both versions - with and without the sleeves. While loose and boxy this design is still very flattering, which is not an easy thing to achieve in my opinion. I loved that about Collins. Also, I'm certain that this design would work in pretty much all lengths - which is awesome! I see Collins as a starting point for lots of different looks: depending on the choice of fabric, sleeves or no sleeves and crop/blouse/tunic or dress length - you can end up with a number of cool looking silhouettes, each significantly different than the next one!"


That's it! What do you think? Has this inspired you to make a Collins Top for yourself?

See all the posts in the Collins Top Sew-along.


You may also like:

A round-up of the most popular posts from the past 12 months

As this week is a time to celebrate the first birthday of In the Folds, I am also seeing it as a good time to reflect on all that I have done this year. It's been a very busy year, with a range of different projects and collaborations and a fair number of blog posts. I dived into my blog analytics today so that I could share the 10 most popular posts of this last year. 


I'd love to know what you would like to see on this blog in the next 12 months! Let me know in the comments or send me an email!

Throwback Thursday : How to draft a hem facing

how_to_draft_a_hem_facing_1

It's Thursday (somehow another week is coming to an end), which means it's time for a Throwback Thursday post! As I am still solidly in skirt mode from the skirt series I've been sharing with you lately, I thought it would be a good time to talk hem facings.

What is a hem facing?

A hem facing is a seperate pattern piece that is used to finish the hem of a garment (rather than just turning up the hem as you often do when hemming).

When should I consider using a hem facing?

A hem facing is a good way to finish a hem if you have a curved or shaped hemline (in the case of an A-line skirt or circle skirt, for example). It can also be used to finish a straight hemline if you would like to add weight to the hem (can help with the fall and drape of a garment), or just prefer this finish.

how_to_draft_a_hem_facing_2

If you have sewn The Rushcutter, you will know that I included a hem facing in the pattern, to help you achieve a lovely clean finish.

Why can't I just do a normal hem?

how_to_draft_a_hem_facing_3

The reason you cannot simply add a hem allowance to a curved hemline (left hand image) by extending the pattern beyond the side seam and centre front, as you often would to create a hem, is that when you have a curved line, the circumference of the cut edge will become larger than the hemline. When you fold up the hem (right hand image), there will be too much fabric and the hem will be unable to sit flat.

To avoid this, you will need to create a separate pattern piece - a hem facing.

How to draft a hem facing

how_to_draft_a_hem_facing_4

1. To get started, take the pattern you will be making a facing for. I am using the basic skirt block, that has been adapted to an A-line shape. You can find how to do this, by looking at this tutorial

The process is the same for the front and back patterns, so I will just use the front pattern piece for this example.

2. Decide how wide you would like the hem facing to be. Anything from 3 - 15cm (1 1/4in - 6in) is okay (this is obviously a very broad spectrum, which will depend on your design and the fabric you are using). If you want anything less than 3cm (1 1/4in), I would suggest using bias binding instead. If you are not sure of what width to use, have a look at your ready to wear clothes, to get an idea. 

Mark the width you would like your facing to be on the centre front, measuring up from the hemline. Mark this distance on the side seam too. 

how_to_draft_a_hem_facing_4

3. You will then need to mark the width of the facing at regular intervals between the centre front and side seam (every 10-15cm or so). Be sure to draw these lines perpendicular to the hemline.

4. Join the endpoints of all these lines with a smooth, sweeping curve. You have now created the shape of your waist shaping.

how_to_draft_a_hem_facing_5

5. Take a seperate piece of pattern paper, and trace off the shape of the hem facing.

6. Before removing the tracing, mark a notch close to the centre of the hem curve (if you have a very wide hem, you may consider adding an extra notch or two), and transfer onto the skirt pattern with a tracing wheel. This will help when you are sewing the pieces together later (it is not crucial if you are making a narrow skirt, but if you are making a full circle skirt, then you will thank your past-self for being so diligent when notching the hemline!)

 Transfer the grainline onto the hem facing (which will be parallel to the centre front).

how_to_draft_a_hem_facing_6

7. Add seam allowance to the body of the pattern (if you have not done so already), as well as the facing. I suggest 1cm (3/8in) along the long edges (the hem edge and the top edge) and 1.5cm (1/2in) on the side seam. You will not need seam allowance at the centre front, as the piece will be cut on the fold. For the back pattern piece, you can also cut on the fold, which will minimise bulk at the centre back seam. 

8. Add cutting instructions

Depending on the fabric, you may want to add interfacing to the pattern when you get to the cutting stage of the project - just keep this in mind.


You may also like:

How to draft a shaped waistband

draft_a_shaped_waistband_1

Last week, I showed you how to draft a straight waistband for your skirt block (it will also work for other garments, such as trousers) as part of The Skirt Series I have been running for the last couple of weeks. Today, I will be showing you how to draft a shaped waistband. 

Before starting, though, I'd like to a little re-cap of a couple of things (which you may remember, if you read the previous waistband post).

two types of waistbands

Most waistbands on skirts or trousers are based on these two basic waistband shapes:

draft_a_shaped_waistband_2

A straight waistband - which is a long rectangle that generally does not have side seams. 

draft_a_shaped_waistband_3

A shaped waistband - which may, or may not, have side seams. 

SHOULD I DRAFT A STRAIGHT WAISTBAND OR A SHAPED WAISTBAND?

Either option can be drafted for the skirt block, and which is better for you comes down to individual preference and body shape. For me, I am a little too curvaceous in the lower half to feel comfortable in a straight waistband (as the top of a straight waistband tends to gape on me).

If you followed the tutorial to draft a straight waistband, you will see the first few steps are the same, so if you'd like to go back to the construction of your straight waistband, then you can! If you haven't already drafted the straight waistband, not to worry, just skip over the next two steps and start with 'Take measurements.'

Trace your pattern

draft_a_shaped_waistband_4

On a seperate piece of pattern paper, trace a copy of the straight waistband, without seam allowance.

Indicate the centre front and centre back.

draft_a_shaped_waistband_5

Using the notches to guide you, mark the points of interest (front dart, back dart, side seam) with vertical lines on the pattern.

TAKE MEASUREMENTS

If you haven't already drafted the straight waistband, you will need to start by taking some measurements from your skirt block. 

draft_a_shaped_waistband_6

Remember to measure along the stitch line, not the edge of the pattern.

Measuring along the waistline, on the front pattern piece:

1 - Centre front to first dart arm

2 - Second dart arm to side seam

On the back pattern piece:

3 - Side seam to first dart arm

4 - Second dart arm to centre back

WAISTBAND CONSTRUCTION

There are several ways to draft a shaped waistband, including using the waist section of the bodice block to construct, but as I have not yet shown you how to draft a bodice block (but definitely plan to in the future), I'll show you how to draft the waistband using the skirt block.

draft_a_shaped_waistband_7

Add the four measurements taken in the previous step together to find the length of the waistband. Remember this measurement gives you half the waistband, as the pattern piece can be cut on the fold. Draw a line as long as this measurement. 

draft_a_shaped_waistband_8

Decide how wide you would like your waistband to be - consider a measurement around 3 - 6cm (1 1/4 - 2 1/4in). Draw a perpendicular line from either end of your original line, the height of your waistband.

draft_a_shaped_waistband_9

Complete the rectangle by connecting the end points of the lines drawn in the previous step.

So now that you have the basic shape, it's time to get some markings onto your pattern piece.

draft_a_shaped_waistband_10

Going back to your original measurements (from your skirt block), measuring from the right hand side of your waistband, mark in each point of interest with a perpendicular line. You need to mark the location of your front dart, the side seam and back dart. You can also label each end as the centre front (right hand side) and centre back (left hand side).

And this is where the tutorial takes a turn away from the straight waistband tutorial...

Label your pattern

draft_a_shaped_waistband_11

Label each section of the waistband, with the following:

1 - Centre front

2 - Side front

3 - Side back

4 - Centre back

Measurements required

You will now need to find the difference between your waist measurement (where your skirt sits) and the top of your waistband.

draft_a_shaped_waistband_12

A good way of doing this, is by putting on your skirt toile (as you can see, my skirt is a digital one!) and working out where the top of your waistband will sit (this will depend on how wide you are making your waistband). Take a tape measure and measure around your waist at the point where your waistband will end. Take note of the measurement.

Compare measurements

Work out the difference between the measurement you just took and your actual waist measurement. Take note of this number.

You now need to divide this measurement by 2 (as you will be cutting your pattern on the fold) and then divide it by 3 (as you will be distributing the measurement evenly throughout the pattern piece).

For example, if the difference between your measurements is 6cm, you need to divide that by 2, which gives you a result of 3cm. You then divide the 3cm into 3, giving you 1cm. That number (in this case, 1cm) is the one you need in the next step.

Waistband construction

draft_a_shaped_waistband_13

Take that number and, on your waistband, mark a point to the right side of each vertical line (excluding the centre front and centre back), that distance away from the line. If you were to use the same numbers I used in the example above, for this step, you would need to mark a point 1cm from each vertical line. 

draft_a_shaped_waistband_14

Label these points as A, B and C.

Cut

draft_a_shaped_waistband_15

Cut down each vertical line, from the top of the waistband. Do not cut all the way through the pattern, leave a small "hinge" to keep the pattern pieces attached.

Close

draft_a_shaped_waistband_16

Being careful not to break the "hinge," rotate the centre back piece, until the slashed line overlaps point A. Tape or glue in place. 

draft_a_shaped_waistband_17

Repeat for the 'side back' piece (which is now attached to the centre back piece). Rotate until the slashed line overlaps point B and then stick in place. 

draft_a_shaped_waistband_18

Rotate the final slash line, aligning the cut line with point C.

As you can see, your waistband is no longer a rectangle! The top edge of your waistband is now narrower than the bottom edge. 

Trace the pattern

draft_a_shaped_waistband_19

Take a piece of pattern paper and place it on top of your waistband construction so that you can trace it. 

Start by tracing the centre front (and labelling it as the 'centre front'). From the centre front draw a perpendicular line at either end of the line.

draft_a_shaped_waistband_20

By doing this, you will ensure that you get a nice smooth waistband across the centre front and back (as you can see in the example above) - when the piece is cut on the fold.

Repeat for the centre back.

draft_a_shaped_waistband_21

Now, using a ruler, or a hip curve, join the perpendicular lines (drawn in the previous step) with smooth curves, creating the waistband shape.

Add notches

draft_a_shaped_waistband_21

Before removing the pattern from the construction underneath, mark each point of interest with a notch. These notches will make it much easy for you to sew the waistband to the skirt, without the worry of stretching the waistband. 

draft_a_shaped_waistband_22

It is also a good idea to add notches along the top edge of the waistband. I like to put them in a different spot to the notches on the bottom edge, to save any confusion. 

Add a side seam

draft_a_shaped_waistband_23

If you would prefer to have a side seam in your waistband (rather than all-in-one), at this point you should draw in your side seam.  Draw a straight line from the middle notch on the lower edge of the waistband up through the centre of the respective slash line (through the centre of the overlap).

Add seam allowance

draft_a_shaped_waistband_24

You should have now transferred all the necessary details from your pattern construction onto your pattern. You can now add seam allowance to the top and bottom edges, as well as the centre back. I would suggest 1-1.5cm (3/8 - 5/8in) on the curved edges and 1.5-2.5cm (5/8in - 1in) on the centre back. 

If you have added a side seam, I would suggest adding seam allowance of 1.2 - 1.5cm (1/2 - 5/8in) to this seam.

Add grainline and cutting instructions

draft_a_shaped_waistband_25


Mark the grainline (parallel to the centre front) and add cutting instructions (cut 1 on fold).

If you have added a side seam, the grainline on the back piece will run parallel to the centre back, and the cutting instructions will be 'cut 2 pairs'. 

You may consider fusing you waistband, but that will come down to your fabric choice and design. 


You may also like:

Throwback Thursday: Adding volume to a pattern

ADD-VOLUME_cut_and_spread_1.gif

Over the past weeks I have been showing you how to draft a skirt block, as part of The Skirt Series.

Now that it is complete, it is time to start making the pattern your own. 

ADD-VOLUME_cut_and_spread_2

Last week I showed you how to draft an A-line skirt, by relocating the fullness of the dart to the hemline, using the cut and spread technique.

Today I will show you how to add more volume to the skirt block, using this same technique. You can use this same method to add fullness to just about any pattern piece: sleeves, trousers, blouses and jackets, and many more. 

Mark the cut and spread lines

ADD-VOLUME_cut_and_spread_3

1. I am using my skirt block to demonstrate this tutorial. The darts have already been moved, as shown in this tutorial. As always, it is best to have a copy of your pattern, without seam allowance. It is much easier to make adjustments with seam allowance removed.

2. Draw three lines (this is only a suggestion, you could use more or less) down the length of your pattern, roughly parallel to the centre front. Space them out, with roughly even gaps between them.

ADD-VOLUME_cut_and_spread_4

3. You will be cutting these lines, to add volume to the pattern. Wherever there is a line, this is where more fabric will be added - that's why it is best that they are evenly spaced.

4. Take your scissors and cut along the first guideline, from the hemline up towards the waistline.

ADD-VOLUME_cut_and_spread_5

5. Do not cut all the way through the pattern. Stop a few millimeters (1/16 in) from the waistline, leaving a 1-2mm "hinge" to keep the two pieces together.


How much volume to add?

Think about how much volume you are wanting to add to the pattern overall. You may want to do this by eye (just cut along the line and then spread until it looks as though enough volume has been added), or by an exact amount. If you are just opening up a hemline, I would say that doing it by eye is fine. But if, for example, the hip-line of a pattern is too tight and you are spreading the pattern to accommodate this, then I would suggest finding an exact amount so that you don't get any surprises.

If you have found an exact amount, you will need to divide this figure by four, as the volume will need to be distributed between the four pieces that make up the skirt pattern (front right, front left, back left and back right). Then divide the number again, by the number of guidelines you have on your pattern piece.

For example, if you would like to add an overall 30cm to the hemline, you will be adding 7.5cm to each pattern piece. If I was to add this to my pattern used as an example, I would divide this 7.5cm by my three guidelines, meaning I would open up each guideline by 2.5cm.

Cut and spread 

ADD-VOLUME_cut_and_spread_6

6. Slide a separate piece of pattern paper under your pattern, so that you will have something to stick the pattern to once you make the adjustments. Spread the hemline by the amount worked out in the previous step. Use tape or glue to secure in place.

7. Repeat process for the other lines, spreading each opening by the same amount as the first.

Check pattern

ADD-VOLUME_cut_and_spread_7

8. Redraw the waistline with a smooth curve.

9. Redraw the hemline with a smooth curve.

ADD-VOLUME_cut_and_spread_8

10. Check the the hemline meets the side seam and the centre front with a right angle. This will help you get a nice smooth hemline between front and back pattern pieces.

Complete the pattern

The pattern is done and you can now add seam allowance. If the pattern is a bit of a mess, with all that tape and extra paper, then simply trace a copy onto a seperate piece of paper.


You may also like:

Throwback Thursday: How to use the cut + spread technique to draft an A-line skirt

cut_and_spread_inthefolds

After a few days of Rushcutter pattern alterations, it is time to get back to our skirt blocks, as it is, after all, Throwback Thursday! So Welcome back to The Skirt Series! Now that the pattern is pretty much complete (we just need to create a waistband pattern - which I will cover in tomorrow's post) I think we should have a play around with our new pattern blocks.

Once you have a skirt block that fits you well, there is just so much that can be done with it, and over the next few weeks I plan to show you some of the techniques you will need to know to transform your block into a skirt. 

One of the techniques I use the most when I am flat pattern-making, is relocating darts. So I think that is a good place for us to start! Once you know how to do it, you will be able to use this technique on any pattern that has darts.

Cut and spread

cut_and_spread_inthefolds_1

So today, I will show you how to relocate the waist darts in the skirt block, to create an A-line skirt. 

1. To start, you will need your skirt block. I will demonstrate by showing the front pattern piece, but the principle is exactly the same for the back pattern piece.

2. Trace a copy of your skirt block, without seam allowance. 

3. Draw a line, parallel to the centre front, from the tip of the dart, down to the hemline. 

cut_and_spread_inthefolds_2

4. Starting at the hemline, cut along this line, until you are 1-2mm from the dart point.

5. Now focusing on the outside dart arm (the dart closest to the side seam), cut down from the waistline towards the dart point, once again stopping 1-2mm from the dart point. This will create a small 'hinge,' so that the two parts of your pattern remain attached. But you will be able to open and close your dart with ease.

cut_and_spread_inthefolds_3

6. Close the waist dart by rotating the pattern, until the cut dart arm sits on top of the inner dart arm.

7. When in position, tape (or glue) in place. You will see that, by closing the dart, you have opened up the hemline, giving the skirt an A-line shape.

Trace the pattern

cut_and_spread_inthefolds_4

8. Take a separate piece of pattern paper and use a weight to hold it in place on top of the pattern. Trace around the pattern. You will see that the waistline has become quite angular since removing the dart, so you will need to redraw it with a soft curve. You will also need to redraw the hem with a smooth curve.

9. Add pattern details, notches and repeat for the back pattern piece.

cut_and_spread_inthefolds_5

10. If you would like a more drastic A-line you can redraw the side seam as a straight line (this will remove any shaping around the waist). To complete the pattern, add seam allowance.

Want to give it a go yourself?

I have created a small scale version of my skirt block that you can download (just click the image above) so that you can have a play around, if you are short of time, paper or space. It is also great to have a small scale version of techniques for your reference, so that you can easily store them for reference. And there will be many more new techniques to come, so print a few copies!


You may also like:

Throwback Thursday: How to add seam allowance to a sewing pattern

Last week, I showed you how to draft a skirt block from your own measurements, and then how to add shaping to the darts at the waistline, as part of The Skirt Series.

add_seam_allowance_to_a_pattern_inthefolds_2

Before going ahead and making a toile to see how it fits, you will need to add seam allowance and pattern markings (which will be in tomorrow's post). 

What is seam allowance?

add_seam_allowance_to_a_pattern_inthefolds_3

Seam allowance is the extra space you add around the edge of a pattern piece so that it can be sewn together.

If you do not plan to make up a toile of your pattern (in the case of pattern blocks), then there is no need to add seam allowance. When you are using a block to create a pattern it is much easier to use it without seam allowance and then add seam allowance once the pattern is complete. 

How do I add seam allowance?

I find that the easiest way to add seam allowance is with a long transparent ruler. Not to worry if you don’t have one though, you can just use and ordinary ruler and mark the seam allowance width at intervals along the seam and then draw the line through all the points.

I have two different rulers, which I find super helpful. One only shows centimetres, but also has lines to indicate the millimetres in between. This one is very handy for when I'm adding 6mm seam allowance to a neckline or 12mm to a seam.

add_seam_allowance_to_a_pattern_inthefolds-4

The other, which I have used for this tutorial, only show has a line for every 5mm. If I am using a 1cm / 1.5cm / 2cm seam allowance, then this is definitely the one I reach for, as there are a lot fewer lines to get confused by!

Before getting started

Before getting started, have a think about the seam allowances you plan to use. I know some commercial patterns use the same seam allowance on every seam, but I think you are much better off changing the allowance depending on the seam. This will help you get a much cleaner and more professional finish.

The seam allowance required will have a lot to do with the fabric you are using, and how you will be finishing the seams too. For example, if you are making a silk chiffon top, it is best to use a narrow seam allowance, so you are not left with bulky seams that show through. A silk chiffon top is a delicate piece of clothing, that is not worn everyday and is normally hand washed, so it can afford to have smaller seam allowances. But, if you are making a pair of trousers or a coat, you need seams that a stronger (particularly in places where tension is put on the seams - e.g. the crotch of trousers) and therefore need a seam allowance that is wider than what you would use for your chiffon top. 

Standard seam allowances

I have put together a table to help guide you with how much seam allowance to add, but as I said, it is up to you! If you click on it, you can download a printable version of the table. It may be handy to put up on the wall in your sewing room!

Adding seam allowance to your skirt block

This tutorial will show you the method I use for adding seam allowance to a pattern, using a skirt block as an example. This method can be used to add seam allowance to any pattern.

add_seam_allowance_to_a_pattern_inthefolds-6

Decide on how much seam allowance you will be adding (using the table above if needed) and find where the line is that indicates that width on your ruler. 

add_seam_allowance_to_a_pattern_inthefolds-7

Lay that particular line (the width of your seam allowance) along the side seam of your pattern.

add_seam_allowance_to_a_pattern_inthefolds-8

With a sharp pencil, or pacer, draw in your seam allowance, being careful to keep your ruler in place. Be sure to extend the line past the original line by a couple of centimetres (this helps when we add seam allowance to the other seams).

add_seam_allowance_to_a_pattern_inthefolds-9

After marking the side seam, it's now time to move on to the hip curve.

If the seam you are adding seam allowance to is curved (which it is in this case) you will need to mark the seam allowance with a broken line. Line up your seam with the ruler and draw a small line (in this case, two lines).

add_seam_allowance_to_a_pattern_inthefolds-10

Then pivot your ruler to you next point (I tend to do this every 1 – 1.5cm) and continue marking the seam allowance with a broken line.

For tight curves (such as the bodice neckline) mark your seam allowance guidelines closer together to ensure a smooth and accurate curve.

add_seam_allowance_to_a_pattern_inthefolds-11

Continue pivoting until you have gone around the whole curve.

add_seam_allowance_to_a_pattern_inthefolds-12

Next, on to the waistline. Before starting to add seam allowance, extend both dart arms, as well as the centre line, by a few centimetres. This will help when you are adding seam allowance to the top of the dart.

add_seam_allowance_to_a_pattern_inthefolds-13

Mark the seam allowance on the waistband, and then follow the angle of the dart, when you get to the first dart arm. Repeat for the other side.

add_seam_allowance_to_a_pattern_inthefolds-14

Continue along the waistline, towards the centre front, pivoting the ruler when necessary. 

add_seam_allowance_to_a_pattern_inthefolds-15

The centre front does not need seam allowance, as you will be cutting this piece on the fold. Just extend the centre front line a little beyond each edge, so that it can intersect with the seams on the other sides. 

add_seam_allowance_to_a_pattern_inthefolds-16

Mark the hem allowance by measuring down the centre front and side seam from the stitching line. 

add_seam_allowance_to_a_pattern_inthefolds-17

Join the points to create the hemline. 

add_seam_allowance_to_a_pattern_inthefolds-18

By this stage, you should have worked your way around the whole pattern.

add_seam_allowance_to_a_pattern_inthefolds-18

Now to do something about those broken lines. 

Draw in your curve by joining the broken lines to form a smooth curve. You can do this by carefully pivoting your ruler, using a French curve or something else round (like a large mug or plate depending on the shape of the curve). A good way to check if your curve is smooth is, with the pattern flat on a table, to crouch down and look at the curve at eye level. You will quickly see if there are any sharp points!

add_seam_allowance_to_a_pattern_inthefolds-19

Repeat for the back pattern piece. And you are done, your pattern now has seam allowance!


I would love to know if I have convinced any of you to try doing some pattern making yet?


You may also like:

A tutorial: How to add dart shaping

inthefolds_dartshaping_1

Welcome back to my latest addition to the blog: The Skirt Series. In yesterday's tutorial, I showed you how to draft a skirt block.

inthefolds_dartshaping_2

At this stage the pattern is drafted, but it is not yet complete. There are still two things to do before we can go ahead and make a toile - we need to add dart shaping and then add seam allowance. I will cover dart shaping in today's post and then next week I'll get to adding seam allowance.

What is a dart?

Essentially, pattern drafting is the act of making something two dimensional (the fabric) fit around something three dimensional (the body). Darts are a way of doing this and are most commonly used to create shape around areas of the body that are curved - the bust, shoulders, elbows and waist, but can be used pretty much anywhere - whether purely for fit, or also as a design detail.

What is dart shaping and why do I need to think about it?

inthefolds_dartshaping_3

You may have put a dart in something before and noticed that the dart has changed the shape of the seam that it lies on and is no longer the smooth line it once was. In the example, I have folded the dart, and it has caused the waistline to become very sharp and angular. This is because we have lost 3cm to the dart, which is what gave us our nice smooth curve.

inthefolds_dartshaping_4

To prevent this from happening, you need to add dart shaping. This will ensure that once your dart is sewn in your waistline (or which ever seam your dart is located) it will remain a smooth line.

Let's get drafting!

Take one piece of your skirt (I will be starting with the front), or any other pattern piece that you are working on, that has a dart. Your pattern should still be on a larger piece of paper (not yet cut out).

inthefolds_dartshaping_5

You will need to fold the dart, so you can predict what will happen when you sew the dart when you get to making it up in fabric. Think about which direction the fullness of your dart will be pressed once it is sewn, this will decide which dart arm you need to fold.

Generally vertical darts are pressed towards the centre front (in the case of front darts) and the centre back (in the case of back darts). It seems reviews can be mixed when it comes to more horizontal darts, but I tend to push mine up up.

Fold along Dart arm # 2, down to the dart point, being careful to fold right on the line, to make a crease.

inthefolds_dartshaping_6

Working with darts on a flat surface can be difficult so move over to the corner of your table (hopefully you have a square or rectangular table like me, otherwise a big book will do the trick), placing the point of your dart on top of the corner of the table.

inthefolds_dartshaping_7

Fold the dart, by placing Dart arm # 2 on top of Dart arm # 1 (this is when that crease comes in handy). You will quickly see that it is much easier to get the dart to sit flat when it is sitting on a corner.

You will see that your seam would look like if you were to sew it without adding dart shaping. Not great, right?

inthefolds_dartshaping_8

Use a weight to keep your pattern in place on the corner and then take a ruler and pencil and redraw the waistline with a nice smooth curve.

inthefolds_dartshaping_9

Take your tracing wheel and trace along your new seam line - particularly focusing on where the dart is folded (go over this area a couple of times to ensure the markings transfer through the fold).

inthefolds_dartshaping_10

Unfold the dart and you will see the markings transferred from the tracing wheel.

inthefolds_dartshaping_11

Take a ruler and join the dots to form a nice smooth line.

And there you have it, a dart with shaping!


I must say that this little tip is one of my favourites. Do you have a favourite pattern cutting technique?


You may also like:

Throwback Thursday : Drafting a skirt block

inthefolds_draftaskirtblock_tutorial

As I mentioned last week, I will be diving into the Em Makes Patterns archives every Thursday to bring you some juicy pattern making goodness. 

For this weeks Throwback Thursday post, I thought it was worth starting right at the very beginning. If you are thinking about learning to your own patterns, then the best place to start is by drafting a skirt block. 

The skirt series

This is the first post of the skirt series, and each week I will be adding more posts, so that by the end of it, you will have a skirt block made to your measurements, and also have some pattern making techniques under your belt, so that you can make the skirt of your dreams!

What is a pattern block?

A pattern block is a basic pattern drafted to specific (or custom) measurements.

It is the starting point for most patterns (when flat pattern cutting), and can be manipulated and adjusted to meet individual design preferences.

It is a good idea to transfer your blocks onto cardboard, to keep them strong, as once you have a set of these, you will be using them a lot!

The skirt block

A skirt block is a fitted skirt that sits on the waist. Generally skirt blocks have two darts in the front and two in the back, although it is common to see a variation on this (for example, four darts in the back). By drafting a skirt block, you will get to know some basic techniques, and also get a sense of flat pattern making.

Tools + supplies

To draft a skirt block, you will need:

  • a piece of pattern paper

  • a ruler

  • a pencil

  • a tape measure

  • You may also want a french curve (or plate) for drawing the hip curve. To be honest, I don't use a curved ruler very often, and would rather use a standard ruler to draw my curves. But I will leave that tutorial for another day!

Measurements required

For this tutorial, you will need the following measurements: 

This distance will depend on how long/short you would like to make your skirt block - I made mine to finish just above my knee. 

Let's get drafting!

Mark the centre back

inthefolds_draftaskirtblock_1

To start, draw a straight line down the left hand side of your pattern paper, the length of your WAIST TO HEM measurement.

Label the ends as A and B. 

This will become the CENTRE BACK seam in your skirt.

Mark the waistline

inthefolds_draftaskirtblock_2

You will need to add a small amount of ease to the pattern (which will allow you to walk/sit/dance in your skirt). It is up to you how much ease you add - but as it is a block it should be quite close fitting, I suggest adding about 5cm to the HIP measurement and 3cm to the WAIST measurement.

Take your HIP measurement and add ease to this measurement, then divide result by two. As for all symmetrical patterns, you will be making half the skirt pattern (as the front pattern will be cut on the fold, and a pair of backs will be cut, to create a full skirt).

Draw a line from A (perpendicular to the CENTRE BACK seam ie. AB) the length of the measurement you found above. Label the end point as C.

This line (AC) will become the waistline of the skirt.

Mark the hemline

inthefolds_draftaskirtblock_3

Move down to point B and draw a line, perpendicular to the CENTRE BACK, the same length as the waistline. Label the endpoint as D.

This line (BD) will become the HEMLINE of the skirt.

Mark the centre front

inthefolds_draftaskirtblock_4

Join points C and D. This will be the Centre Front of the skirt.

Mark the hip line

inthefolds_draftaskirtblock_5

Take your WAIST TO HIP measurement and mark a point this distance from A, down the CENTRE BACK line. Mark point as E.

inthefolds_draftaskirtblock_6

Draw a perpendicular line from E that intersects with the CENTRE FRONT (CD).

You can mark this line as the HIP LINE.

Mark the side seam

inthefolds_draftaskirtblock_7

It is now time to mark the side seam. 

Take your full HIP MEASUREMENT and divide by four (once agin because we will be cutting on the fold). Add 1.5cm to the result. This extra 1.5cm will move the side seam slightly beyond the halfway point - to allow room for your derriere in the back of the skirt.  

Mark this measurement on your HIP LINE, measuring from point E. 

Mark point as F.

inthefolds_draftaskirtblock_8

Draw a perpendicular line from F, that extends up to the WAISTLINE (mark intersection point as G) and down to the HEMLINE. 

inthefolds_draftaskirtblock_9

At this stage, your waistline is the same length as your hip line. This is not the case in most women's bodies, so you will need to remove some width from the waistline. This will be done by creating four darts (two in the front and two in the back) and curving the hip line at the side seam.

To do this, take you WAIST measurement and subtract it from your HIP measurement. 

With your result, subtract the width of your four darts (4 darts measuring 3cm each = 12cm). The result is how much you need to remove from the side seams. 

Take the result and divide by two (as we are making half the pattern) and distribute either side of point G, on the waistline (half the measurement on the front pattern and half on the back). Mark points as H and I.

inthefolds_draftaskirtblock_10

Join H to F with a smooth curve. 

If you have quite a big difference between your waist and hip measurements and are worried that the hip curve is too extreme, you may choose to increase the width of your darts to compensate. 

inthefolds_draftaskirtblock_11

Repeat for the front by joining I to F with a smooth curve. 

inthefolds_draftaskirtblock_12

You will need to extend your side seams slightly beyond the WAISTLINE to accommodate the curve of your hips. Extend lines from H and I by 1.5cm, at the same angle as the curved hip line so that each becomes one continuous line.

Waistline

inthefolds_draftaskirtblock_13

Join the new point (extension from H) to A with a smooth curved line. You have now created the back waistline of the skirt.

inthefolds_draftaskirtblock_14

Repeat for front pattern. Join the new point (extension from I) to C with a smooth curved line. This is now the front waistline.


DOWNLOAD THE LITTLE BOOK OF SEAM FINISHES

Would you like to make clothes that are as beautiful on the inside as they are on the outside?

Sign-up to the newsletter to stay in the loop to receive inspiring content that will help you become a more confident maker. And get started with a free e-book!


Darts

inthefolds_draftaskirtblock_15

Now it is time to draw in the darts.

Mark the midpoints of both front and back waistlines. Label the midpoint of the back waistline as J and front waistline as K.

inthefolds_draftaskirtblock_16

From point J, mark a point 1.5cm towards the CENTRE BACK. From this new point, mark another point 1.5cm towards the CENTRE BACK.

If you have decided to increase your dart width, then make sure you remember to add in this width now. For example, if you plan to make the darts 3.5cm wide, then mark your points 1.75cm apart. If your dart value goes beyond 4cm, I would suggest creating two smaller darts instead - you will get a more flattering shape that way.

inthefolds_draftaskirtblock_17

These points mark the centre of the back dart, and the dart arms 1.5cm either side (to create a dart that is 3cm wide).

Draw a line that is 14cm long (this will be the length of your back dart) from the middle point. The line should be perpendicular to the waistline.

inthefolds_draftaskirtblock_18

Join the points either side to the endpoint of the line you just drew. You have now created the two dart arms.

inthefolds_draftaskirtblock_20

Move to your front waistline.

From point K, mark a point 1.5cm towards the CENTRE FRONT. From this new point, mark another point 1.5cm towards the CENTRE FRONT. These points mark the centre of your front dart, and the dart arms 1.5cm either side (to create a dart that is 3cm wide).

inthefolds_draftaskirtblock_21

Draw a line that is 13cm long (this will be the length of your front dart) from the middle point. This line should be perpendicular to the waistline. This will be the centre line of your front dart.

inthefolds_draftaskirtblock_22

Join the points either side to the endpoint of the dart centre line. This will complete your front dart.

inthefolds_draftaskirtblock_23

By this point, it should really be starting to look like a skirt pattern!

Finishing up

inthefolds_draftaskirtblock_24

Take a seperate piece of pattern paper and trace a copy of the front pattern. Remember to include all markings (hip line, dart, centre front). 

inthefolds_draftaskirtblock_25

Leaving some space between the pattern pieces (you still haven't added seam allowance), trace around the back pattern piece - once again, marking all important points. 

inthefolds_draftaskirtblock_26

And now you have a front and back skirt pattern! Add grainlines (parallel to the centre front and centre back) and label each piece.

For labelling I always use the format:

  • pattern name

  • name of pattern piece

  • sizing information (if required)

  • cutting instructions

  • You can also add the date and whether or not there is seam allowance added

Some of these things may seem very obvious, but I'm telling you, it makes it much easier if you pick the pattern up in a few months time!

Before cutting out the pattern, you will need to add shaping to the dart at the waistline, and seam allowance. You can go right ahead and do this, or you can wait for me to show you on the blog (very soon)!


profile pic.jpg

DID YOU ENJOY THIS TUTORIAL?

It is our vision to empower you to make a wardrobe that you will wear, love and cherish - long into the future.

If this tutorial has helped you, it would be greatly appreciated if you could give thanks with a small donation. This will help us to continue to create content like this tutorial and continue offering it for free - so it can be accessed by all.

We greatly appreciate your support!


How did you go? Would love to know if you have any questions related to drafting a skirt block?


You may also like: