make a skirt

Throwback Thursday: Adding volume to a pattern

ADD-VOLUME_cut_and_spread_1.gif

Over the past weeks I have been showing you how to draft a skirt block, as part of The Skirt Series.

Now that it is complete, it is time to start making the pattern your own. 

ADD-VOLUME_cut_and_spread_2

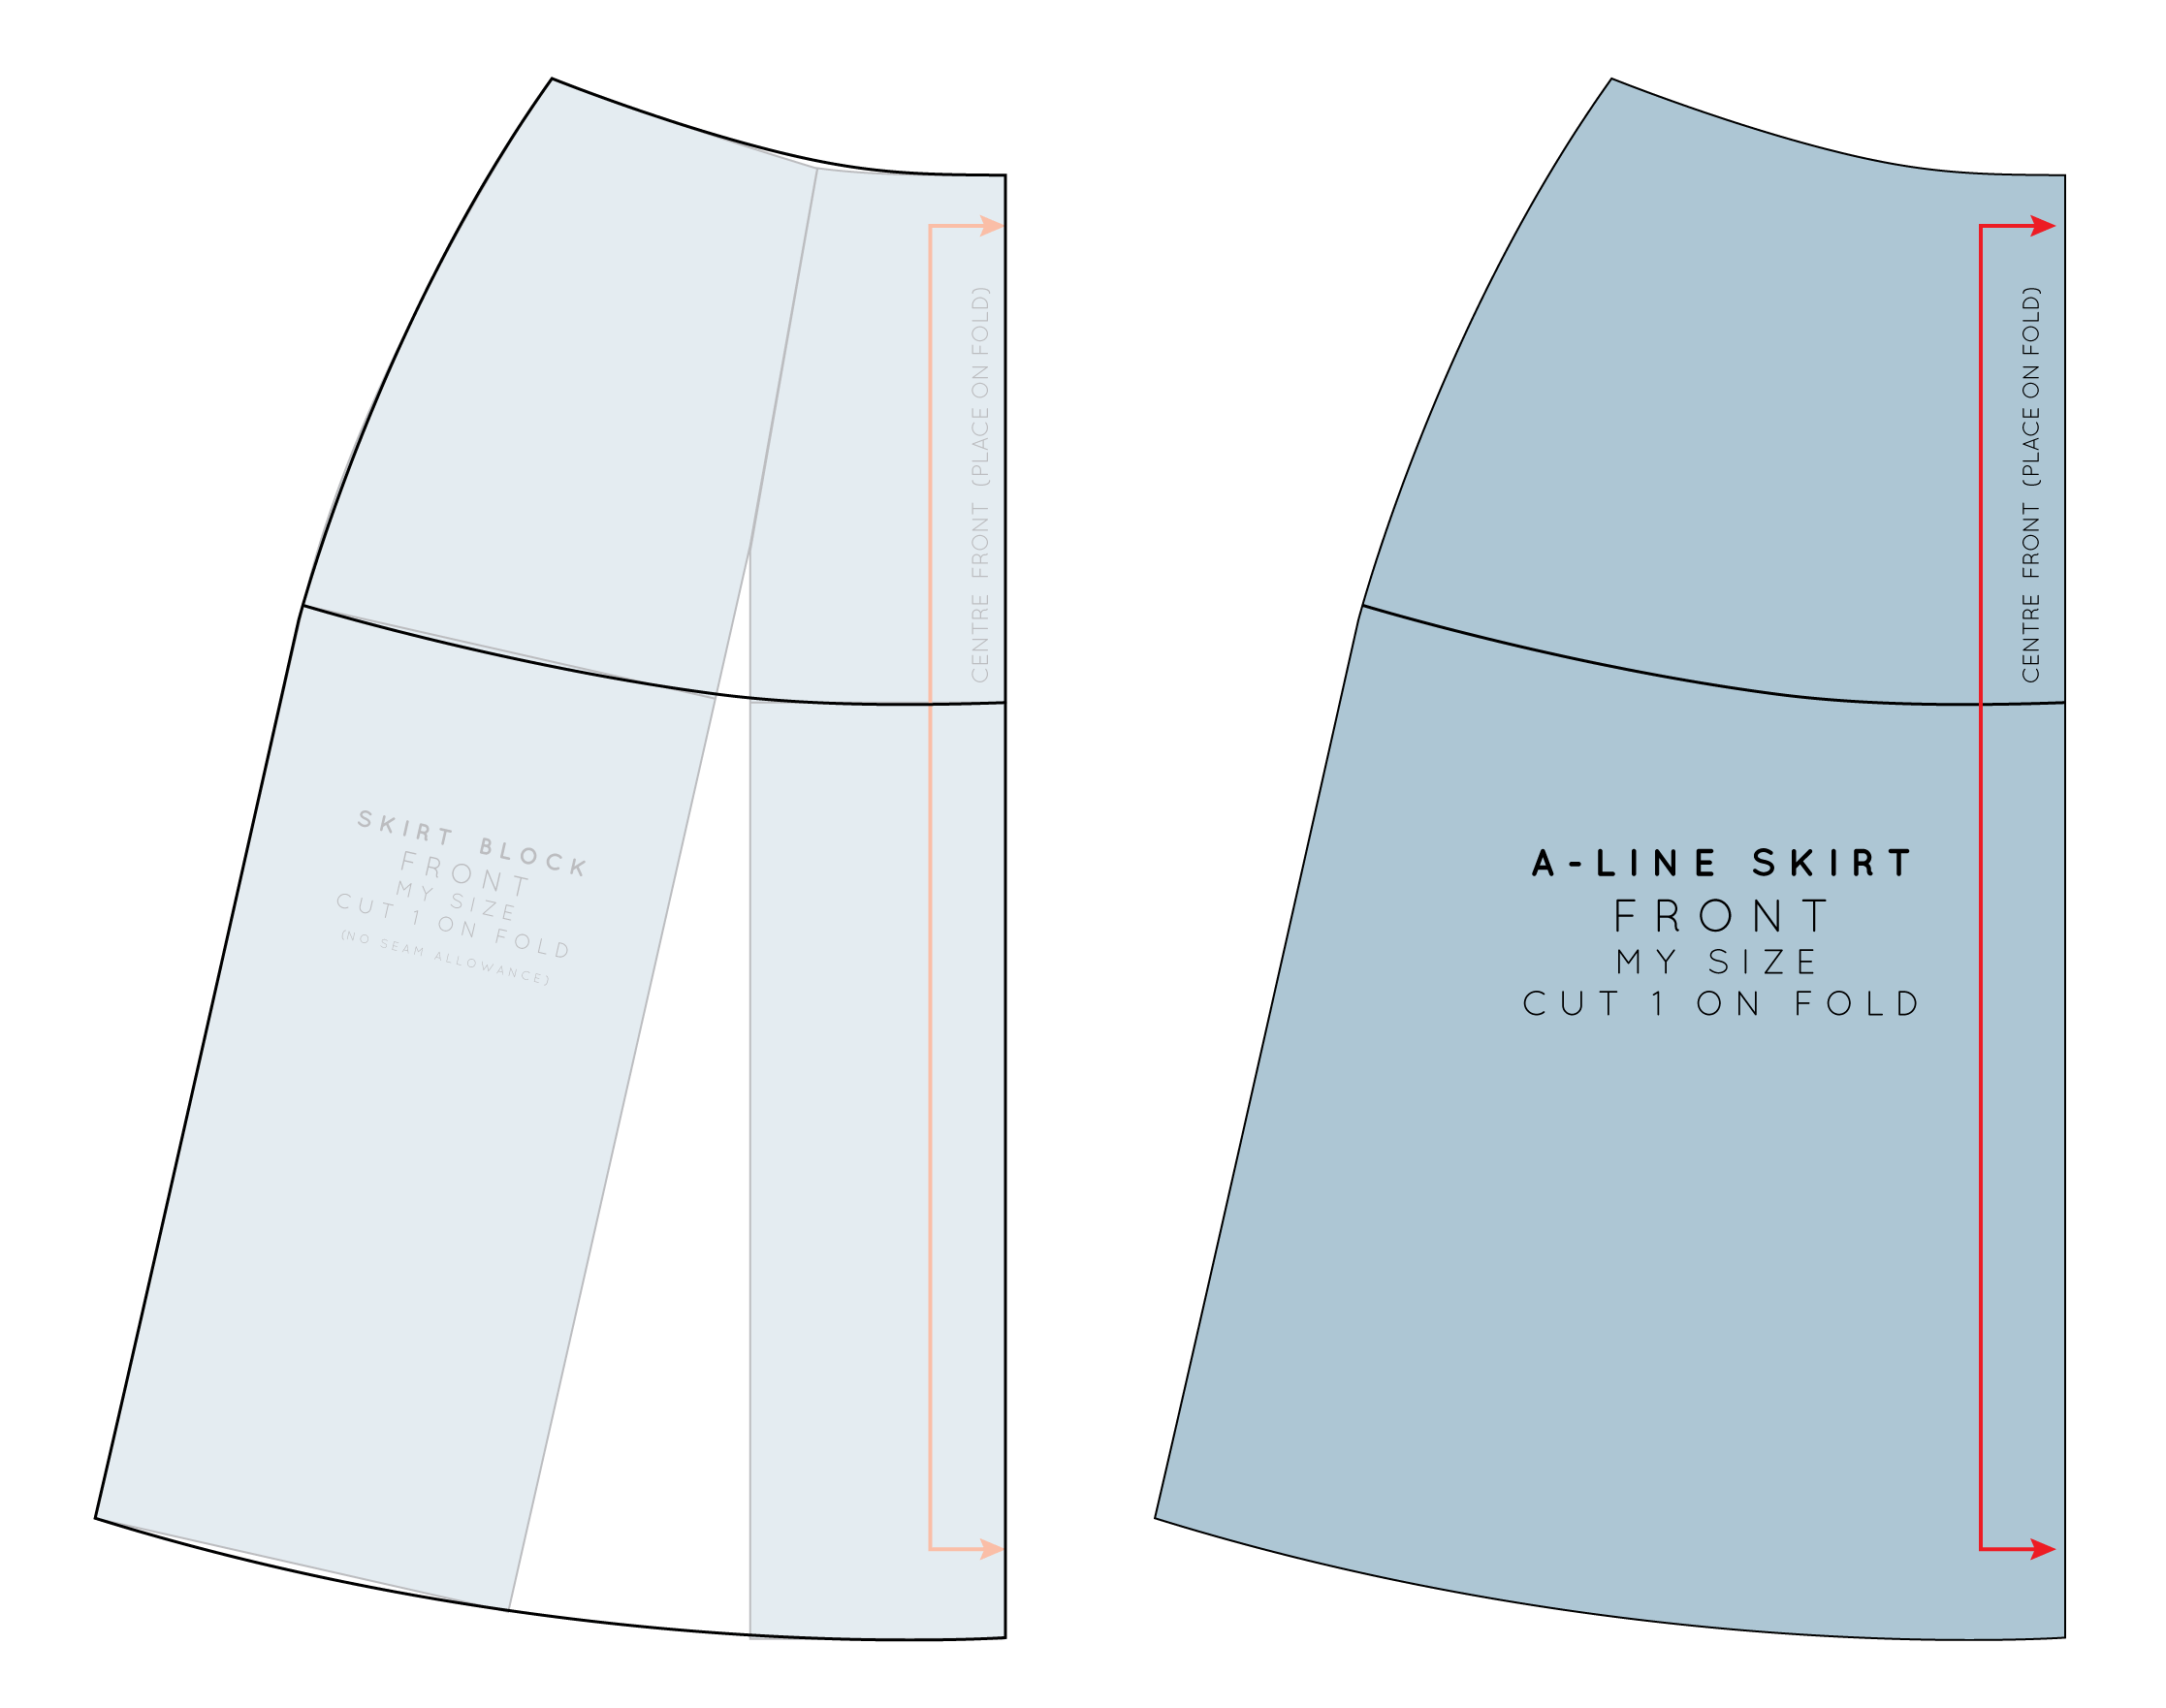
Last week I showed you how to draft an A-line skirt, by relocating the fullness of the dart to the hemline, using the cut and spread technique.

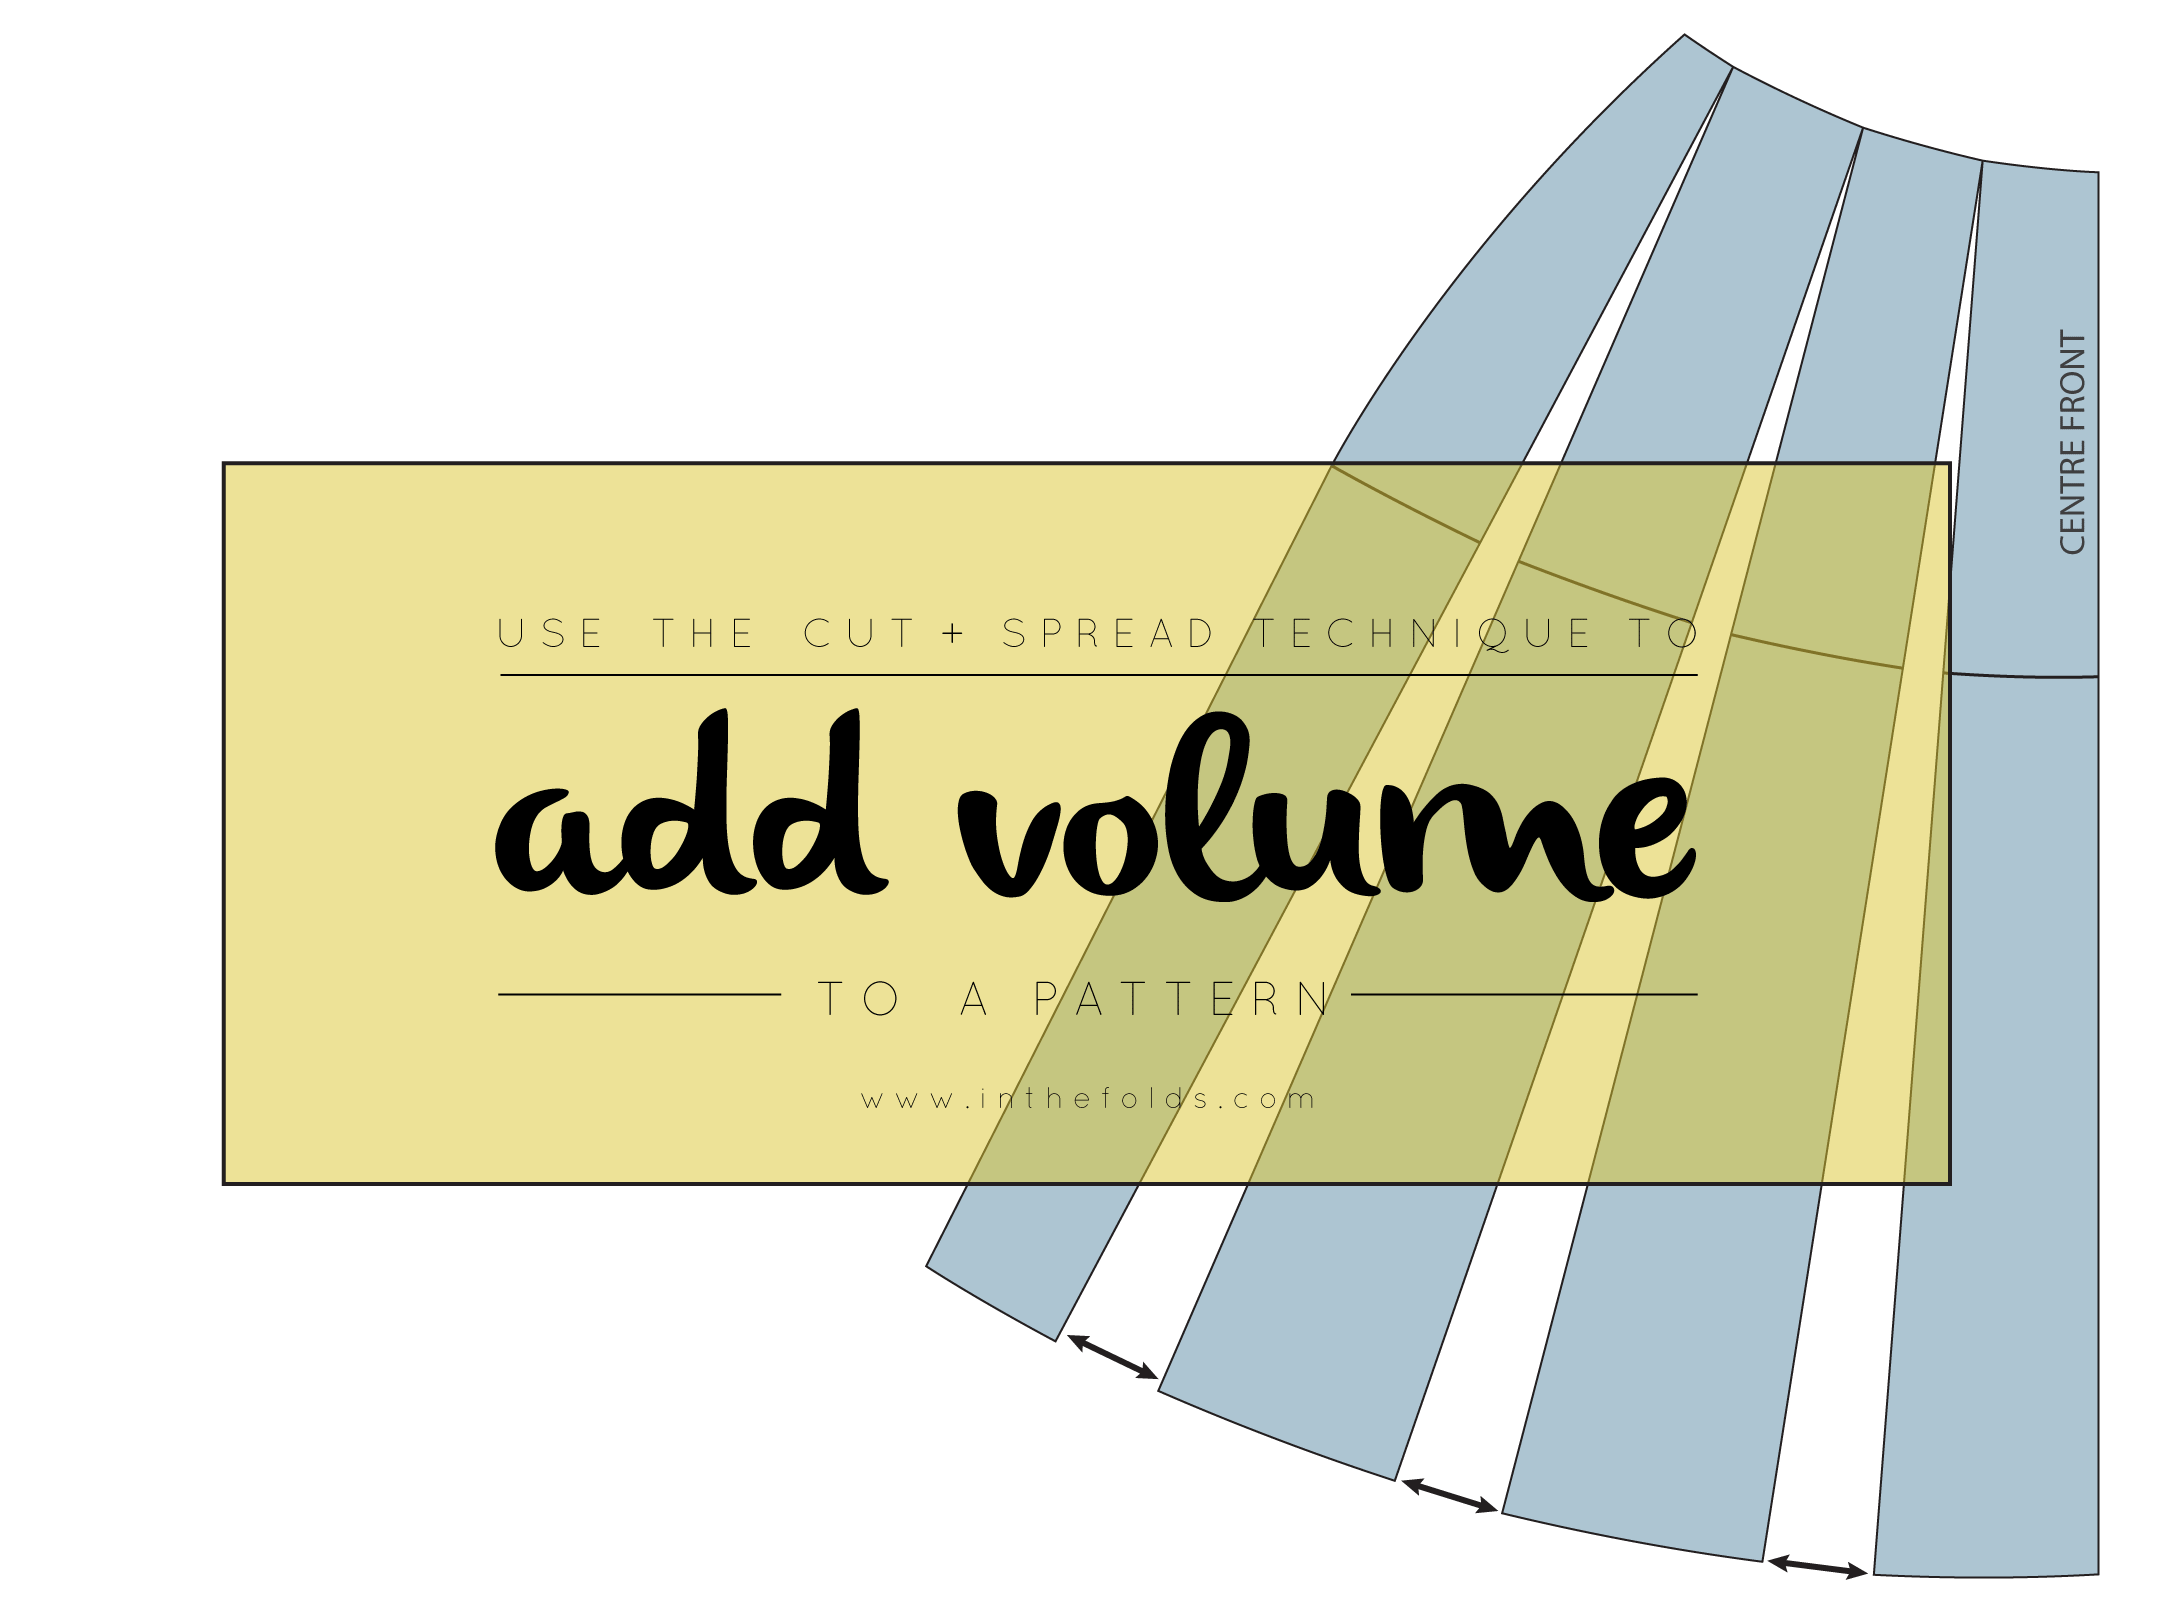
Today I will show you how to add more volume to the skirt block, using this same technique. You can use this same method to add fullness to just about any pattern piece: sleeves, trousers, blouses and jackets, and many more. 

Mark the cut and spread lines

ADD-VOLUME_cut_and_spread_3

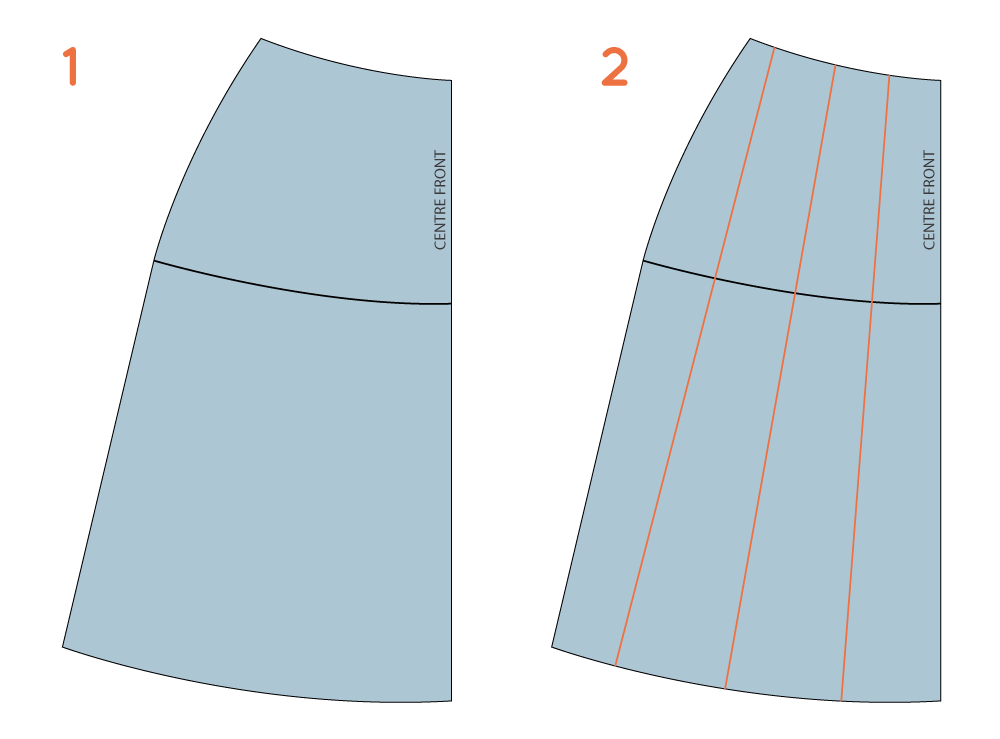
1. I am using my skirt block to demonstrate this tutorial. The darts have already been moved, as shown in this tutorial. As always, it is best to have a copy of your pattern, without seam allowance. It is much easier to make adjustments with seam allowance removed.

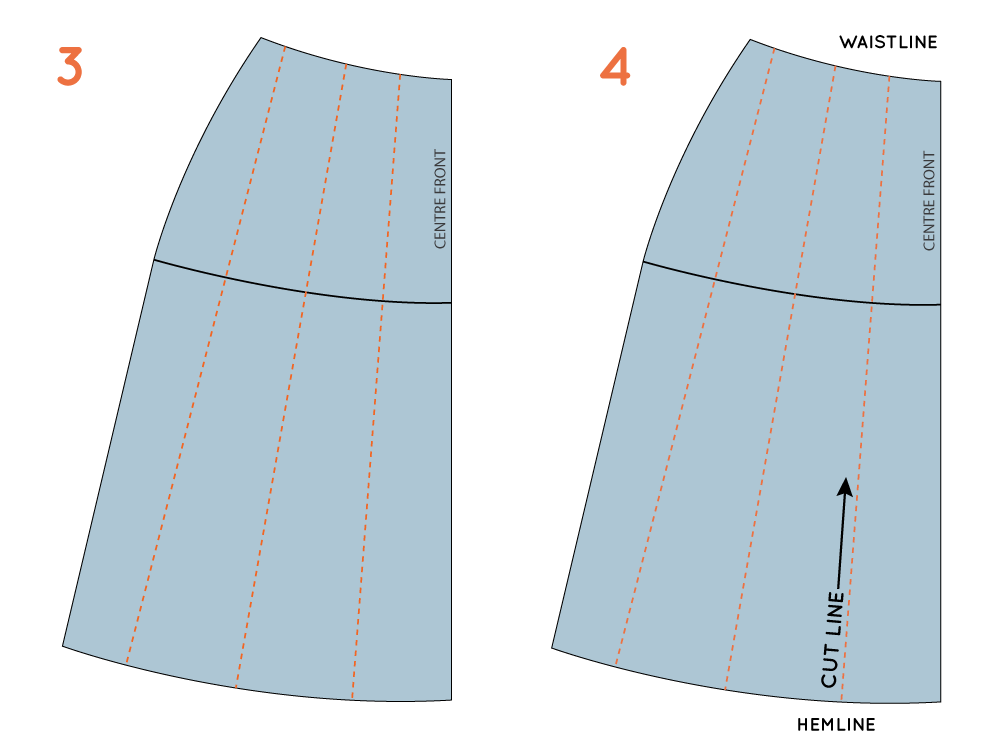
2. Draw three lines (this is only a suggestion, you could use more or less) down the length of your pattern, roughly parallel to the centre front. Space them out, with roughly even gaps between them.

ADD-VOLUME_cut_and_spread_4

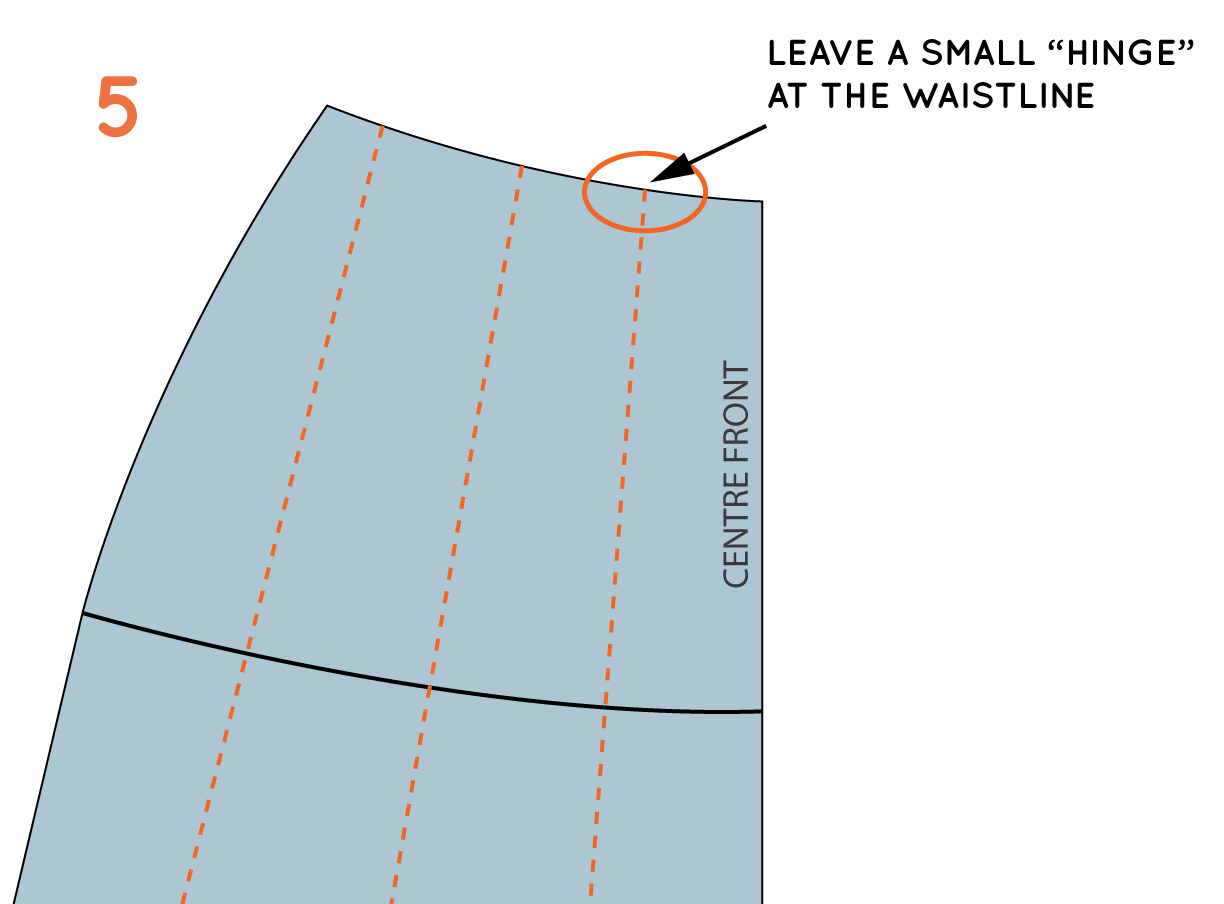
3. You will be cutting these lines, to add volume to the pattern. Wherever there is a line, this is where more fabric will be added - that's why it is best that they are evenly spaced.

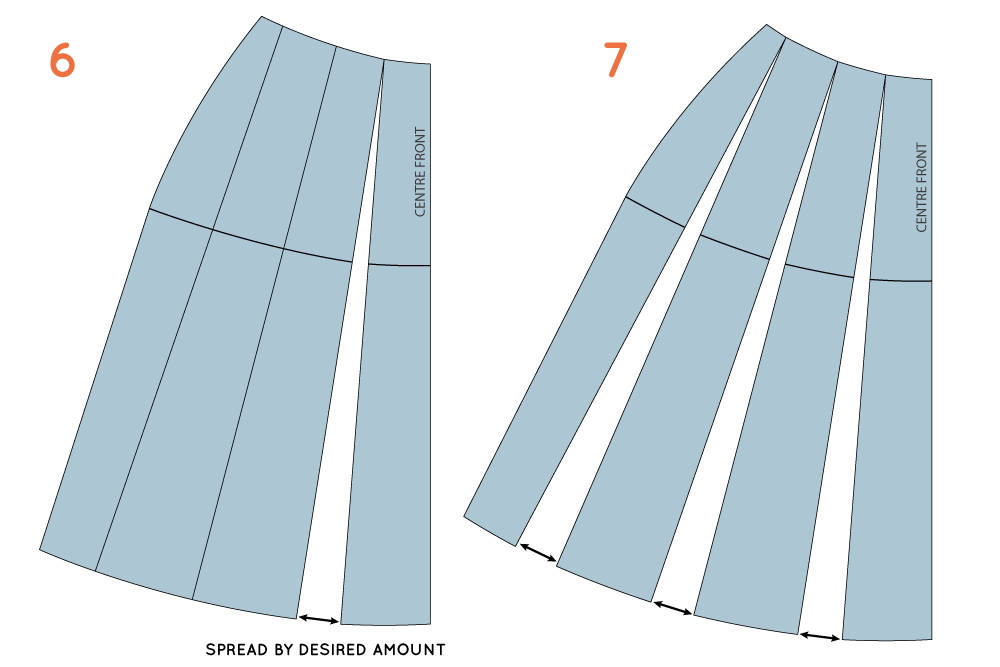
4. Take your scissors and cut along the first guideline, from the hemline up towards the waistline.

ADD-VOLUME_cut_and_spread_5

5. Do not cut all the way through the pattern. Stop a few millimeters (1/16 in) from the waistline, leaving a 1-2mm "hinge" to keep the two pieces together.


How much volume to add?

Think about how much volume you are wanting to add to the pattern overall. You may want to do this by eye (just cut along the line and then spread until it looks as though enough volume has been added), or by an exact amount. If you are just opening up a hemline, I would say that doing it by eye is fine. But if, for example, the hip-line of a pattern is too tight and you are spreading the pattern to accommodate this, then I would suggest finding an exact amount so that you don't get any surprises.

If you have found an exact amount, you will need to divide this figure by four, as the volume will need to be distributed between the four pieces that make up the skirt pattern (front right, front left, back left and back right). Then divide the number again, by the number of guidelines you have on your pattern piece.

For example, if you would like to add an overall 30cm to the hemline, you will be adding 7.5cm to each pattern piece. If I was to add this to my pattern used as an example, I would divide this 7.5cm by my three guidelines, meaning I would open up each guideline by 2.5cm.

Cut and spread 

ADD-VOLUME_cut_and_spread_6

6. Slide a separate piece of pattern paper under your pattern, so that you will have something to stick the pattern to once you make the adjustments. Spread the hemline by the amount worked out in the previous step. Use tape or glue to secure in place.

7. Repeat process for the other lines, spreading each opening by the same amount as the first.

Check pattern

ADD-VOLUME_cut_and_spread_7

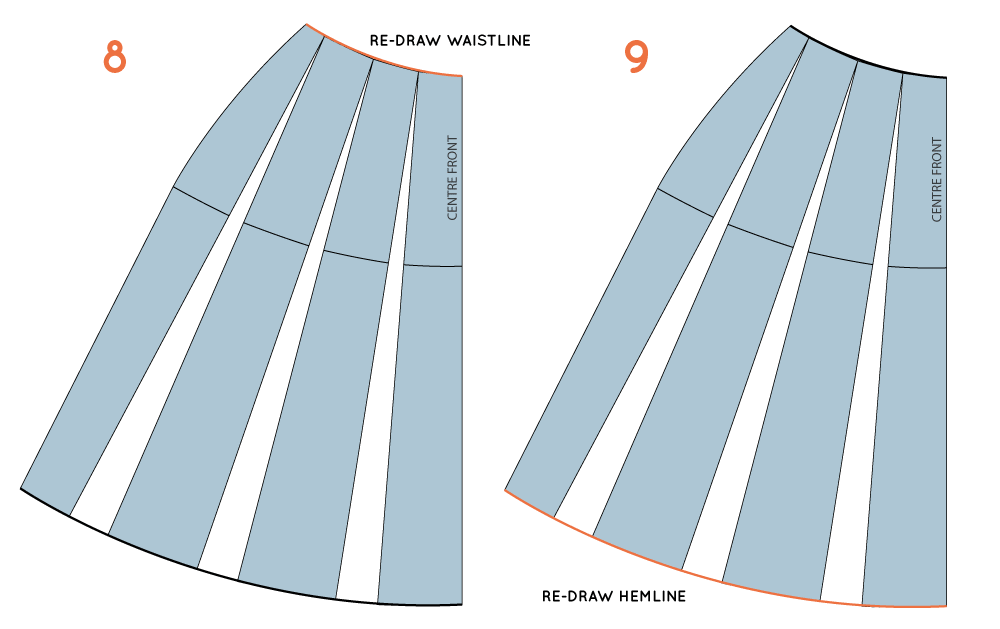
8. Redraw the waistline with a smooth curve.

9. Redraw the hemline with a smooth curve.

ADD-VOLUME_cut_and_spread_8

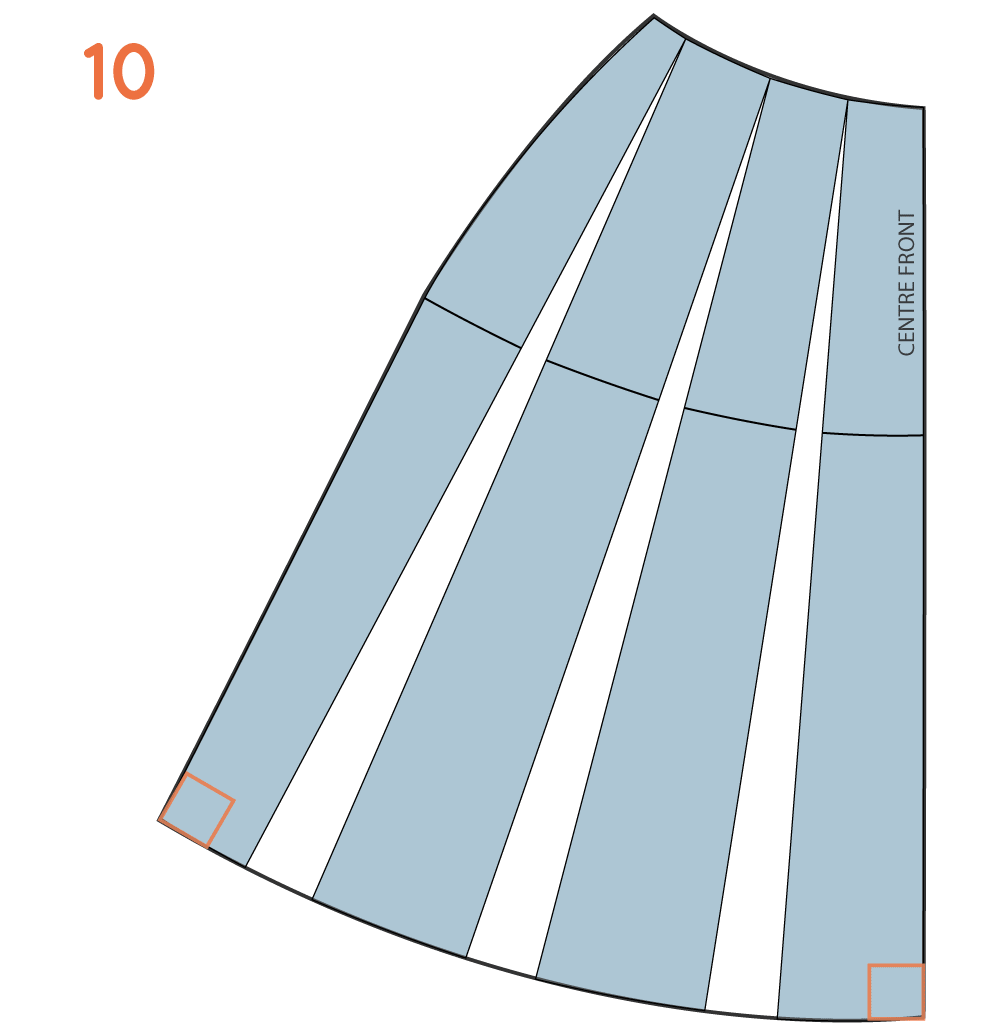
10. Check the the hemline meets the side seam and the centre front with a right angle. This will help you get a nice smooth hemline between front and back pattern pieces.

Complete the pattern

The pattern is done and you can now add seam allowance. If the pattern is a bit of a mess, with all that tape and extra paper, then simply trace a copy onto a seperate piece of paper.

You may also like:

A tutorial: How to add dart shaping

inthefolds_dartshaping_1

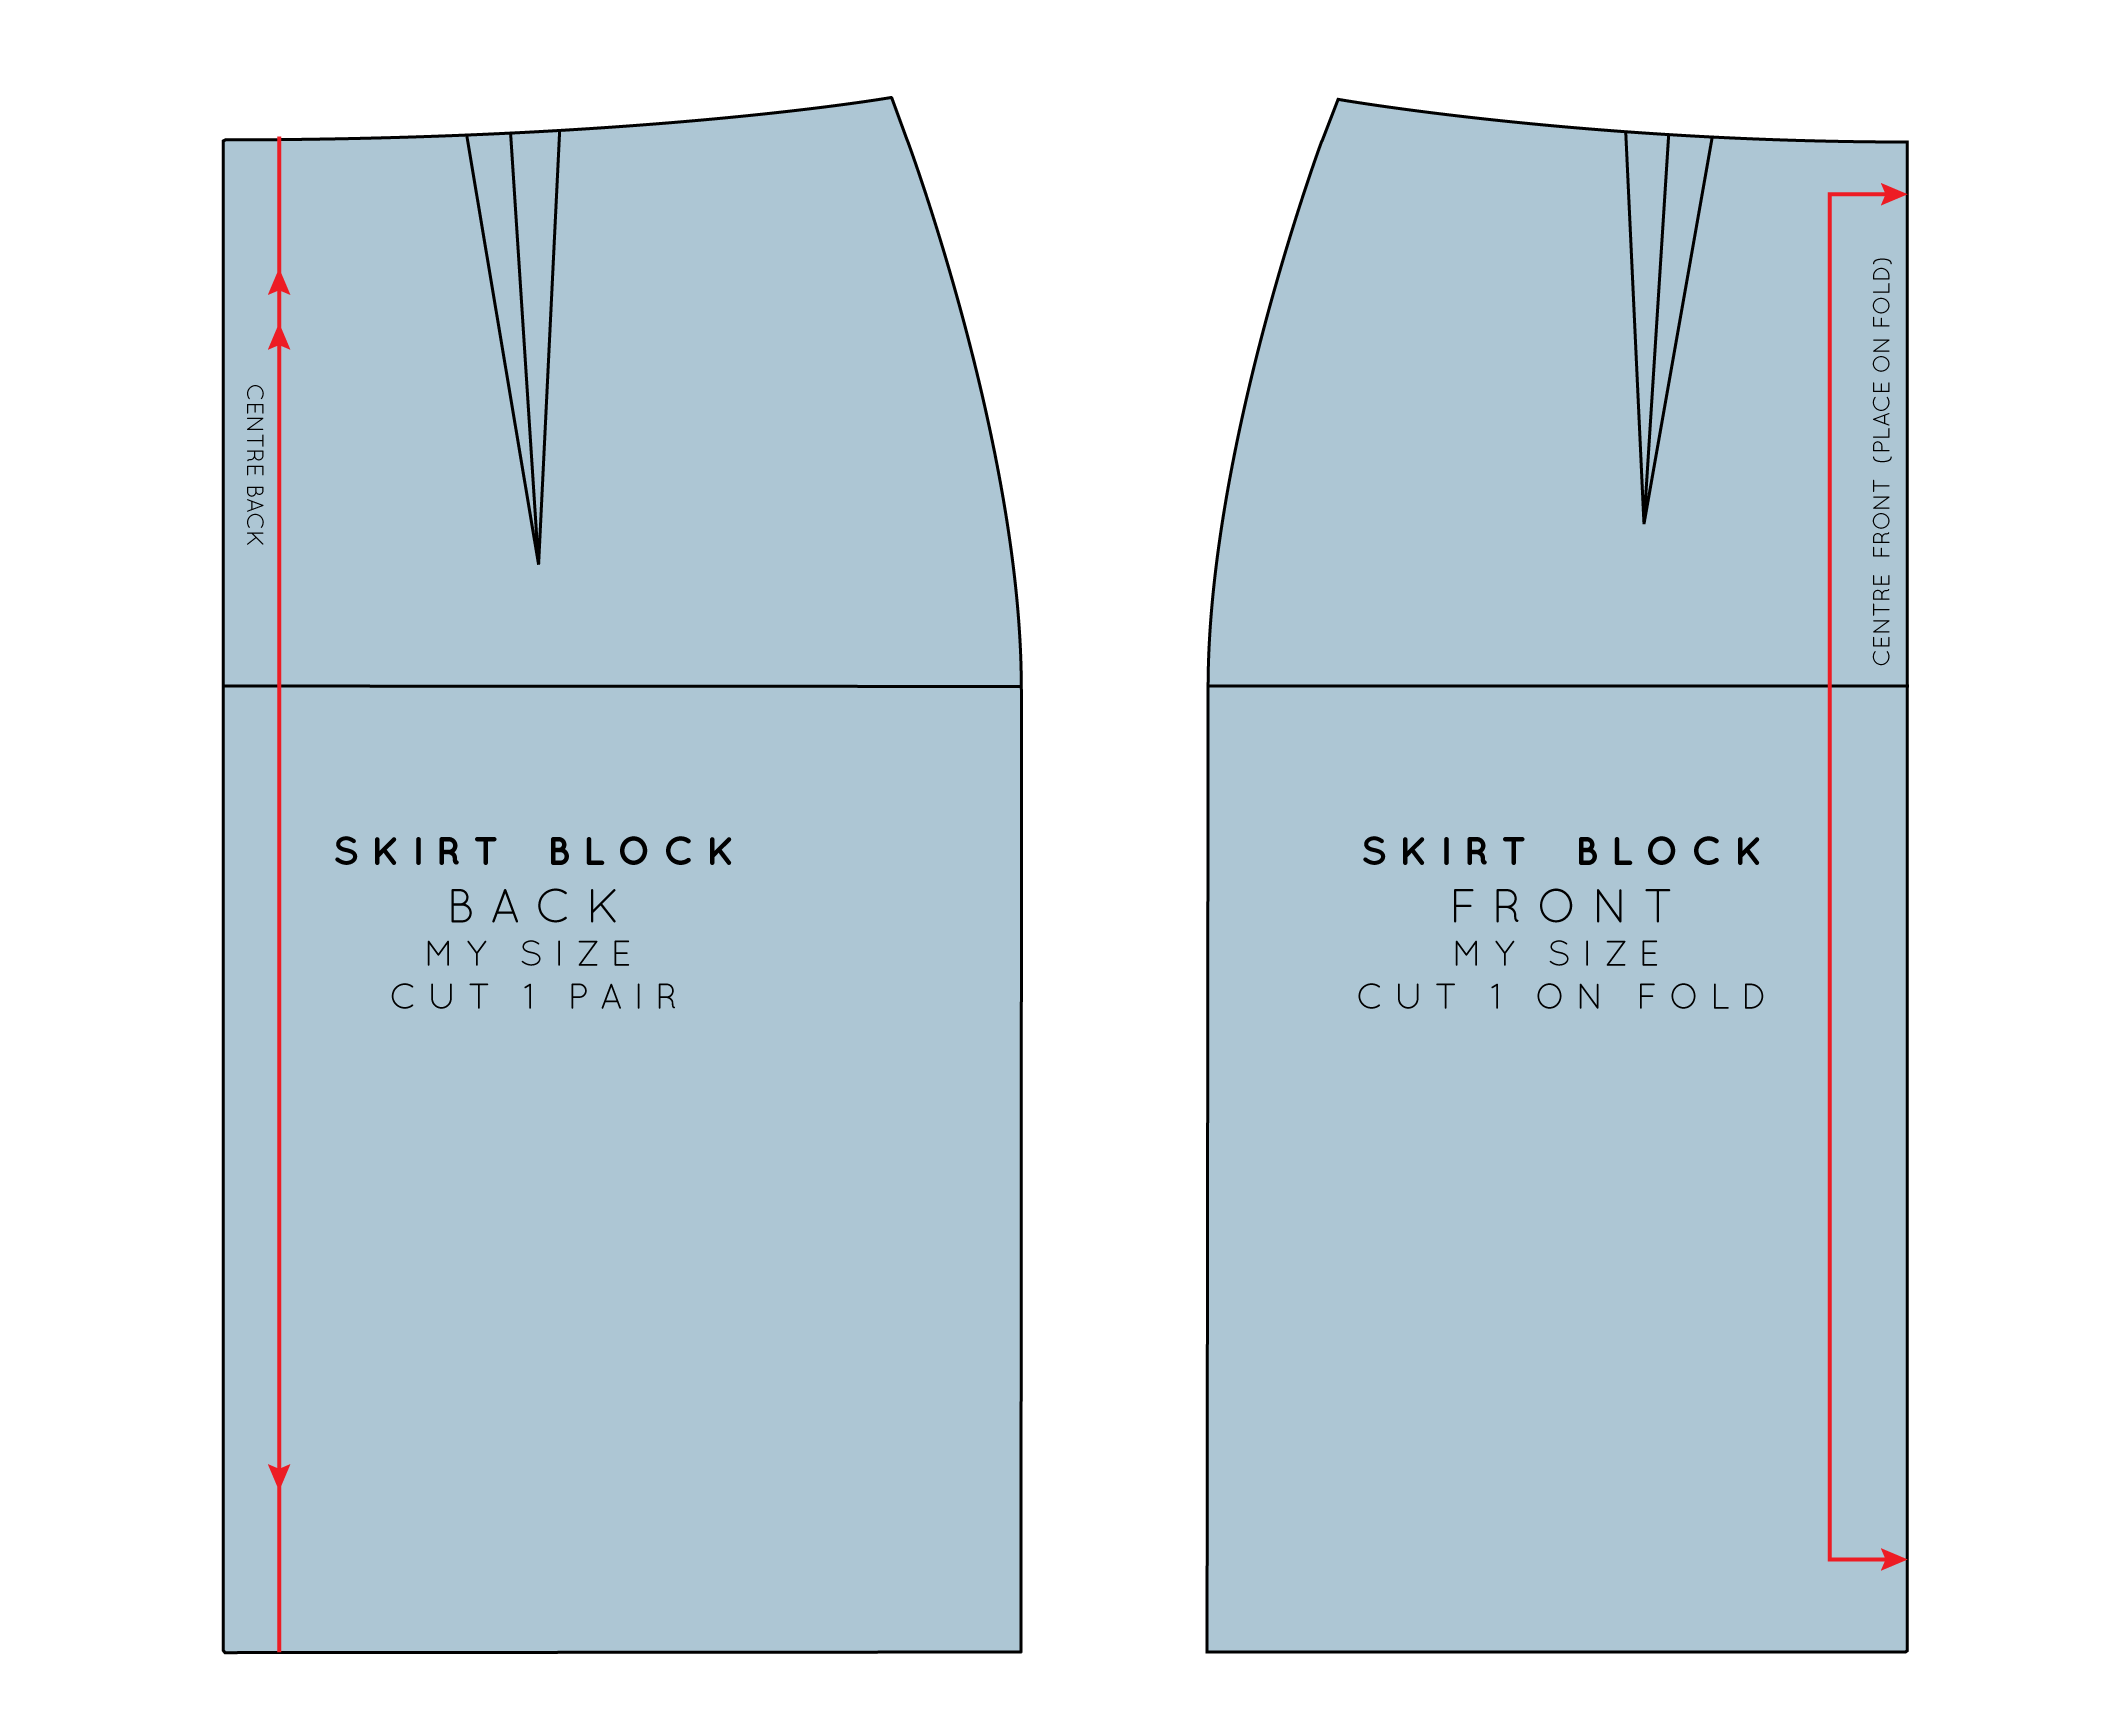
Welcome back to my latest addition to the blog: The Skirt Series. In yesterday's tutorial, I showed you how to draft a skirt block.

inthefolds_dartshaping_2

At this stage the pattern is drafted, but it is not yet complete. There are still two things to do before we can go ahead and make a toile - we need to add dart shaping and then add seam allowance. I will cover dart shaping in today's post and then next week I'll get to adding seam allowance.

What is a dart?

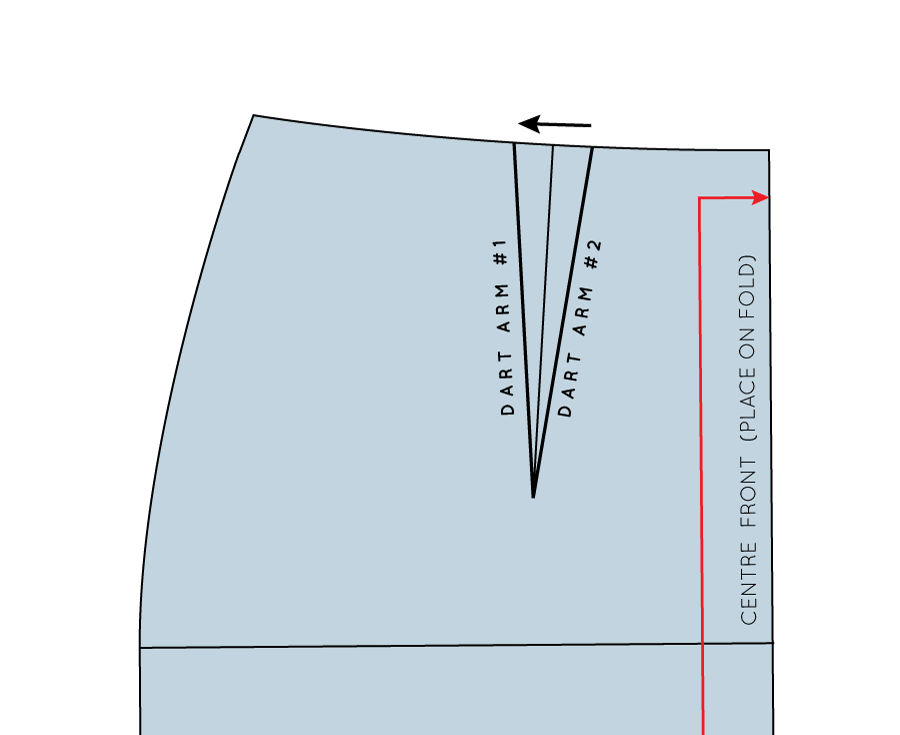
Essentially, pattern drafting is the act of making something two dimensional (the fabric) fit around something three dimensional (the body). Darts are a way of doing this and are most commonly used to create shape around areas of the body that are curved - the bust, shoulders, elbows and waist, but can be used pretty much anywhere - whether purely for fit, or also as a design detail.

What is dart shaping and why do I need to think about it?

inthefolds_dartshaping_3

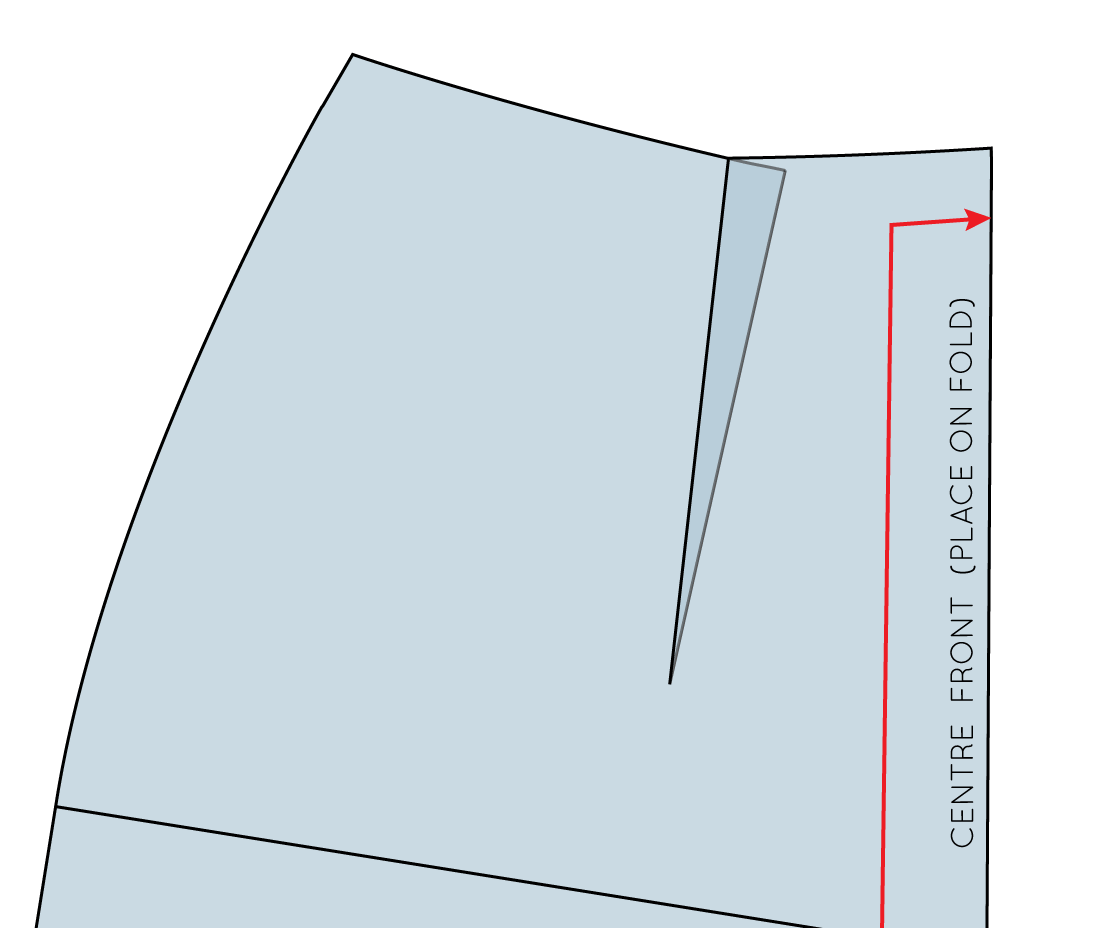
You may have put a dart in something before and noticed that the dart has changed the shape of the seam that it lies on and is no longer the smooth line it once was. In the example, I have folded the dart, and it has caused the waistline to become very sharp and angular. This is because we have lost 3cm to the dart, which is what gave us our nice smooth curve.

inthefolds_dartshaping_4

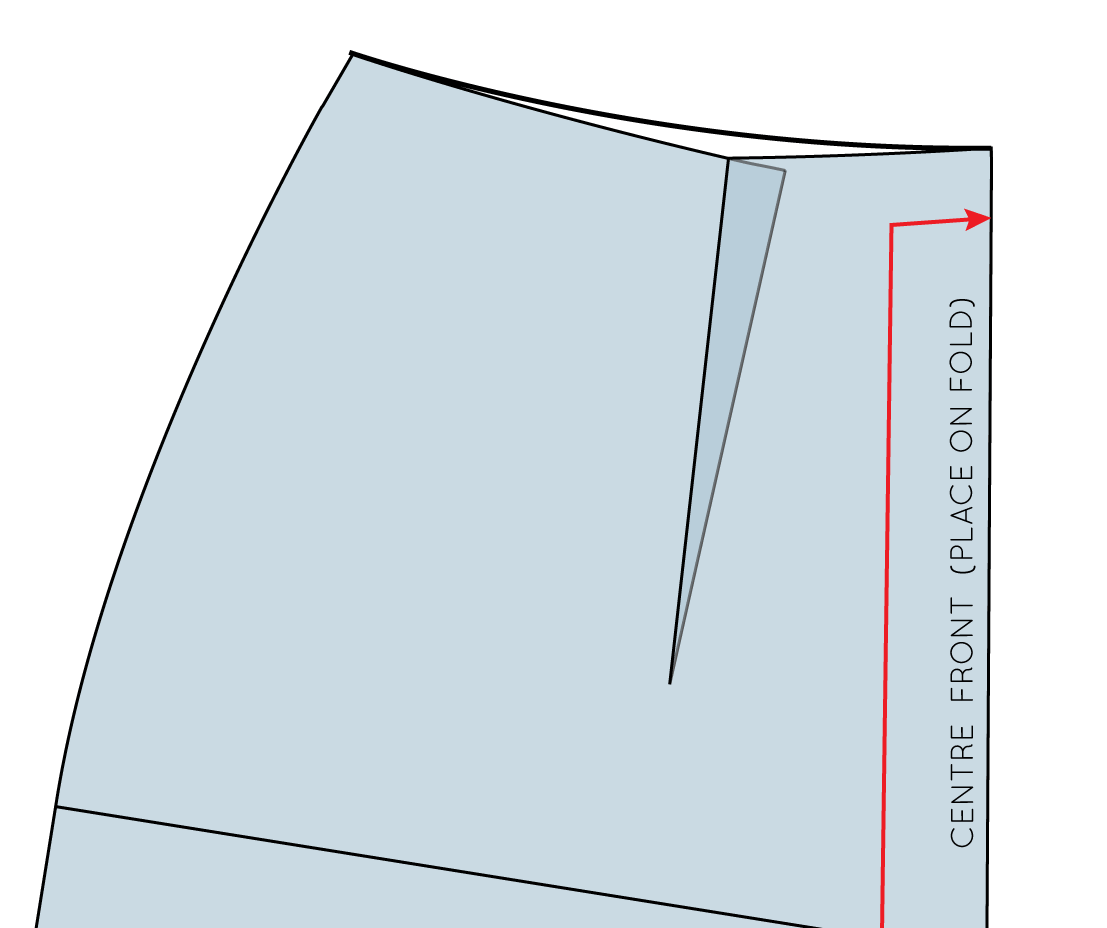
To prevent this from happening, you need to add dart shaping. This will ensure that once your dart is sewn in your waistline (or which ever seam your dart is located) it will remain a smooth line.

Let's get drafting!

Take one piece of your skirt (I will be starting with the front), or any other pattern piece that you are working on, that has a dart. Your pattern should still be on a larger piece of paper (not yet cut out).

inthefolds_dartshaping_5

You will need to fold the dart, so you can predict what will happen when you sew the dart when you get to making it up in fabric. Think about which direction the fullness of your dart will be pressed once it is sewn, this will decide which dart arm you need to fold.

Generally vertical darts are pressed towards the centre front (in the case of front darts) and the centre back (in the case of back darts). It seems reviews can be mixed when it comes to more horizontal darts, but I tend to push mine up up.

Fold along Dart arm # 2, down to the dart point, being careful to fold right on the line, to make a crease.

inthefolds_dartshaping_6

Working with darts on a flat surface can be difficult so move over to the corner of your table (hopefully you have a square or rectangular table like me, otherwise a big book will do the trick), placing the point of your dart on top of the corner of the table.

inthefolds_dartshaping_7

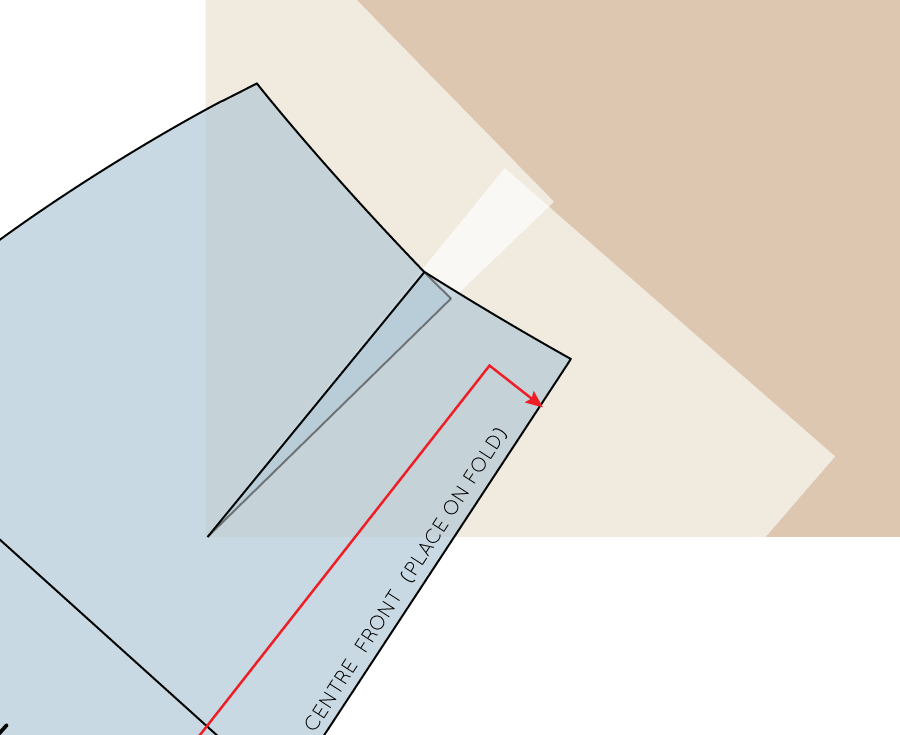
Fold the dart, by placing Dart arm # 2 on top of Dart arm # 1 (this is when that crease comes in handy). You will quickly see that it is much easier to get the dart to sit flat when it is sitting on a corner.

You will see that your seam would look like if you were to sew it without adding dart shaping. Not great, right?

inthefolds_dartshaping_8

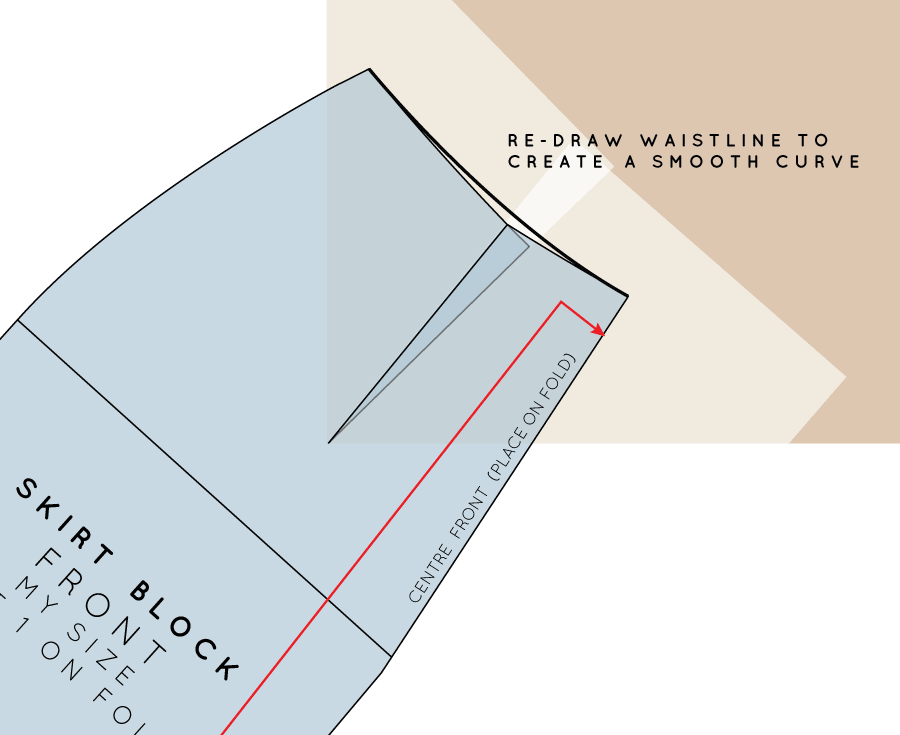
Use a weight to keep your pattern in place on the corner and then take a ruler and pencil and redraw the waistline with a nice smooth curve.

inthefolds_dartshaping_9

Take your tracing wheel and trace along your new seam line - particularly focusing on where the dart is folded (go over this area a couple of times to ensure the markings transfer through the fold).

inthefolds_dartshaping_10

Unfold the dart and you will see the markings transferred from the tracing wheel.

inthefolds_dartshaping_11

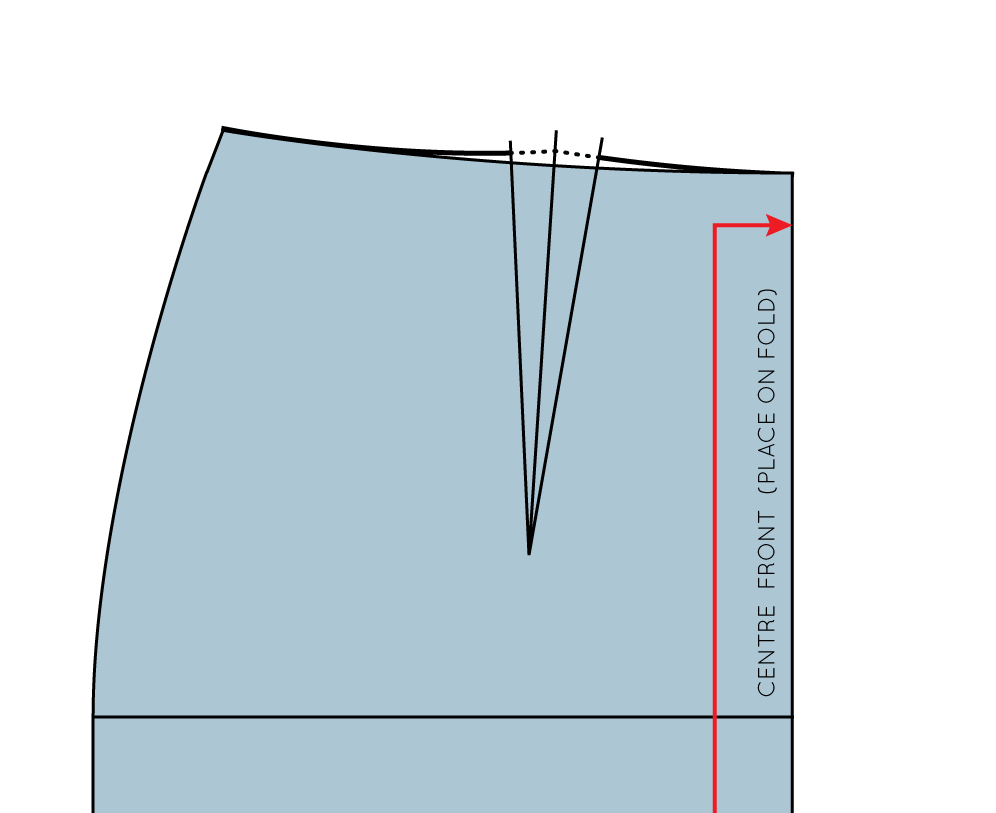
Take a ruler and join the dots to form a nice smooth line.

And there you have it, a dart with shaping!


I must say that this little tip is one of my favourites. Do you have a favourite pattern cutting technique?


You may also like: