darts

How to : Move a dart (using the 'Pivot' technique)

inthefolds_move_a_dart_1

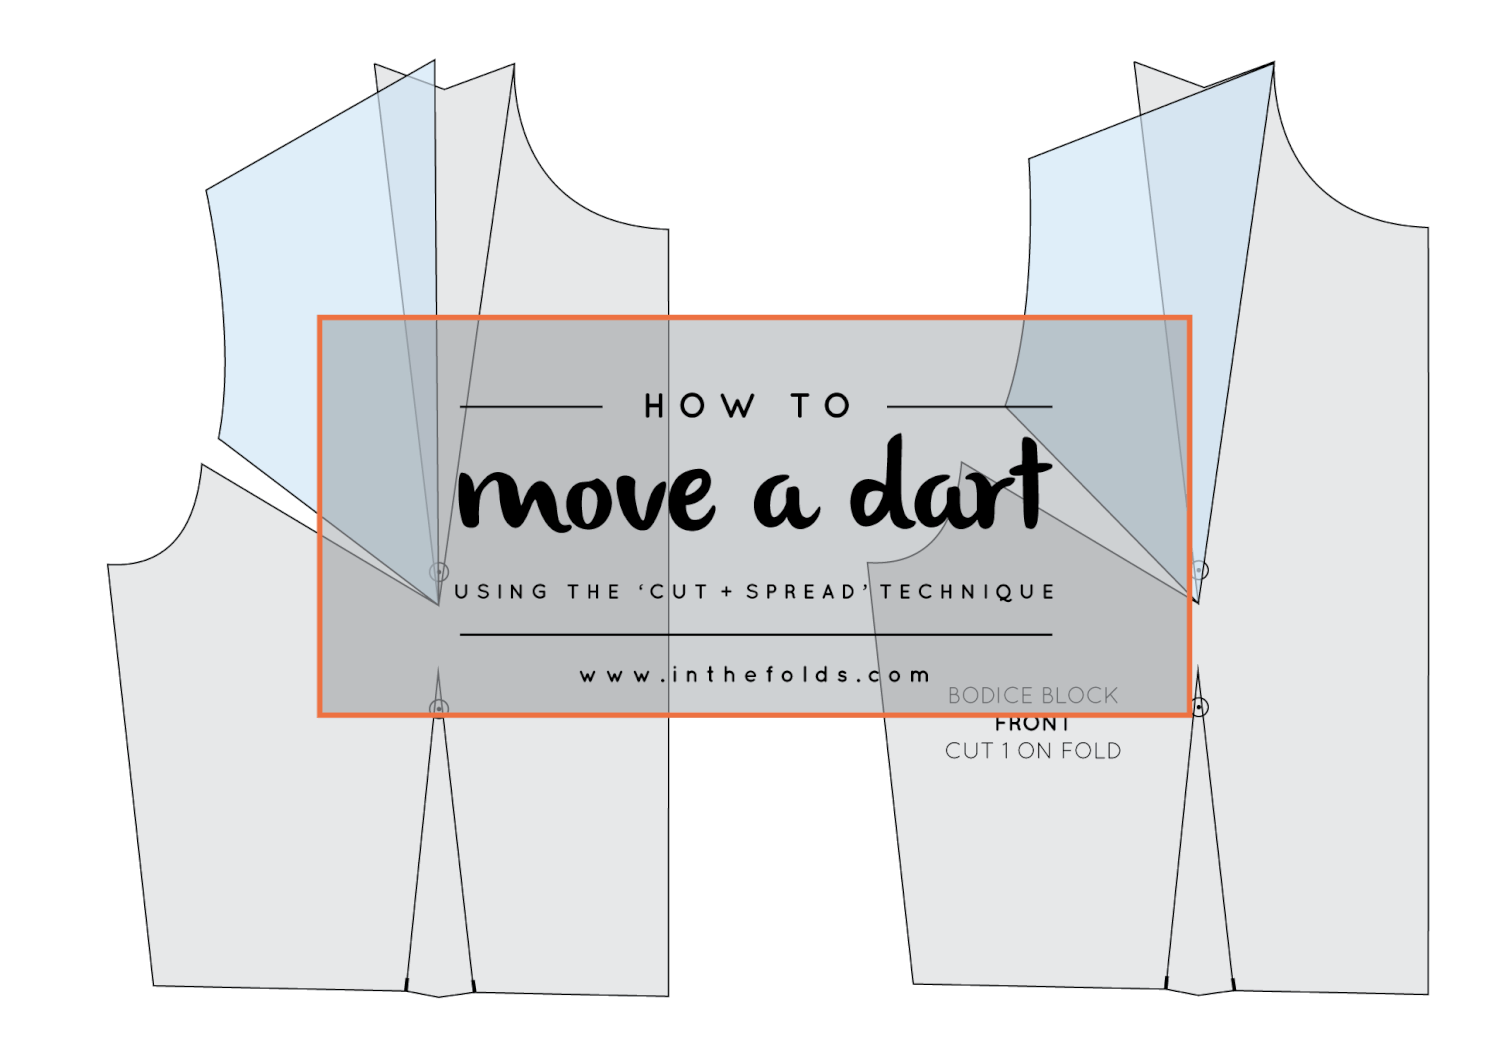
Last week I showed you how to relocate a dart using the 'Cut and Spread Technique.' As the title suggests, this technique involves cutting your pattern piece to move the dart (and can also be used to add fullness to a pattern).

If you would prefer not to cut into your pattern (because it is a master copy, or you want to just experiment before finalising anything) it is a good idea to use the 'pivot' technique to move a dart. The outcome is exactly the same, it's just a different way of achieving it. I use both techniques in practice and it totally depends on what I am doing as to which one I choose to use. 

Tools

To perform this techniques you will need your original pattern (the basic bodice, for example), a seperate piece of pattern paper, a stiletto (also known as an awl) and a pencil.

Choose the new dart position

inthefolds_move_a_dart_2

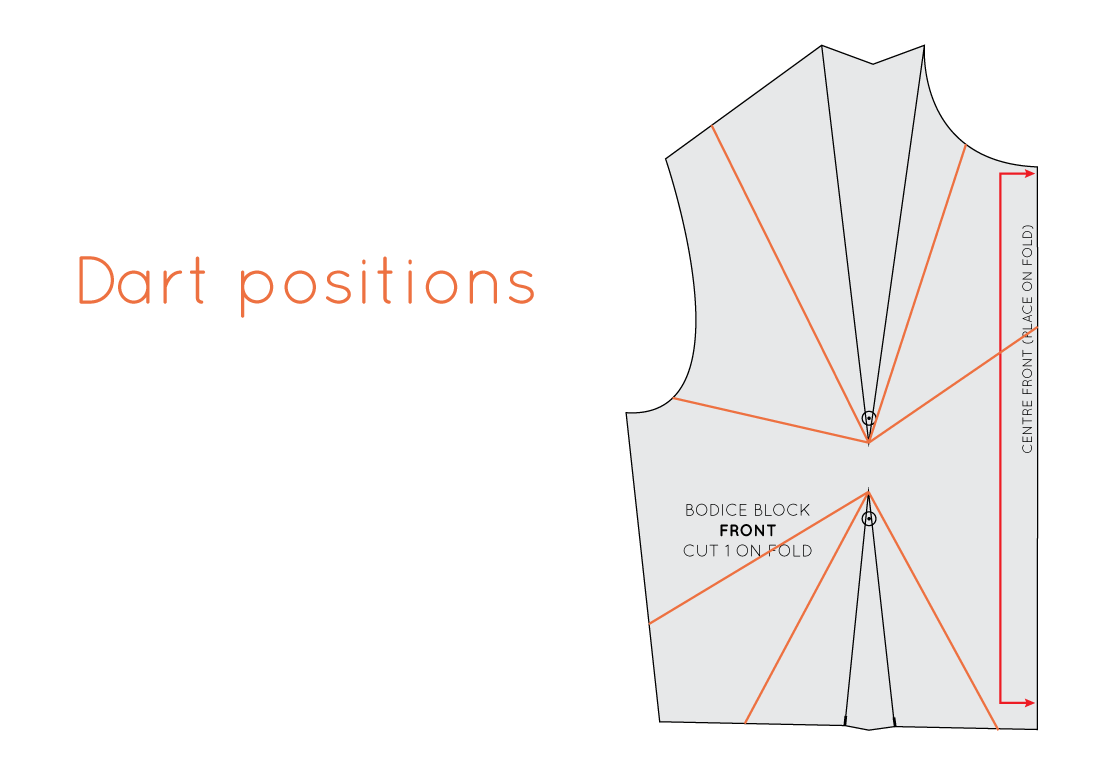
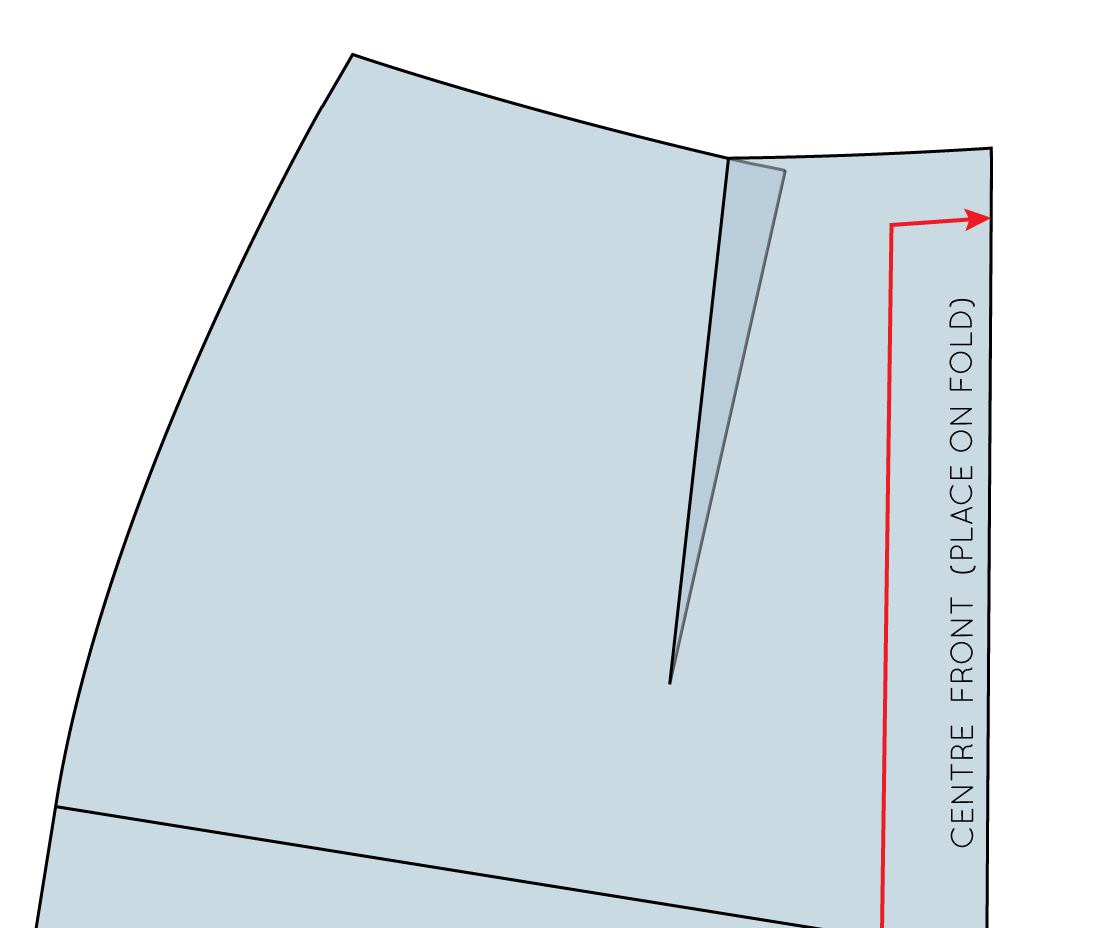
Have a think about where you would like to move your dart/s to. In the image above you can see some suggestions about where you could move the darts to on the front basic bodice. 

For the point of the exercise I have chosen to move the shoulder dart to the armhole but you can use this process to move either dart anywhere. 

Mark the new dart position

inthefolds_move_a_dart_3

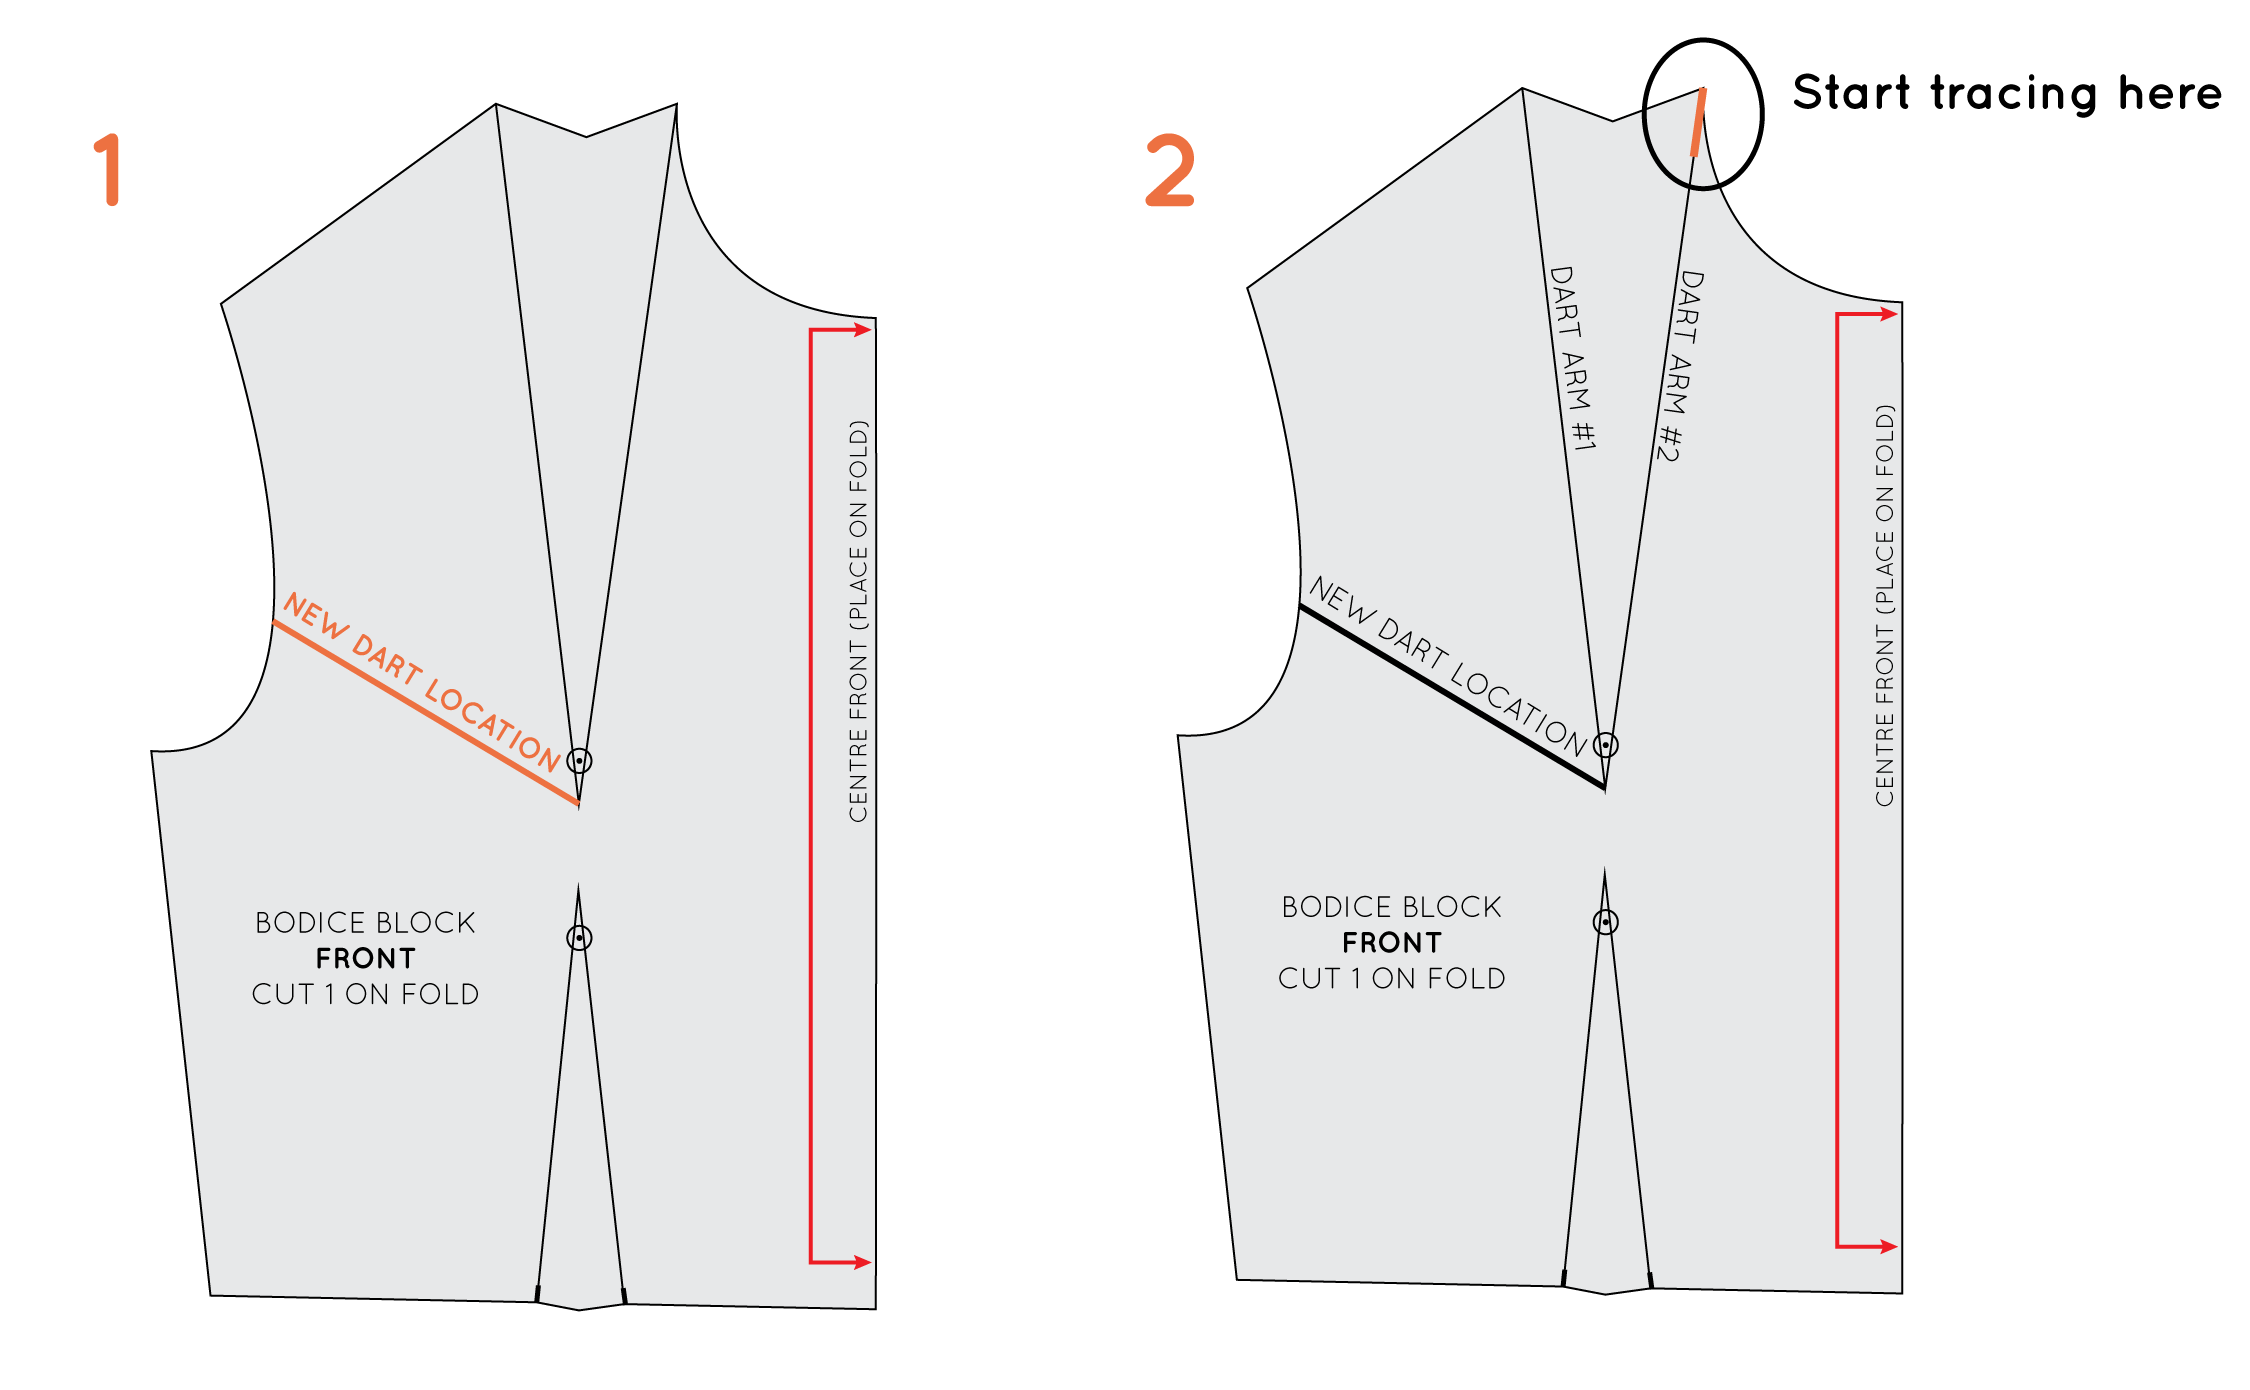
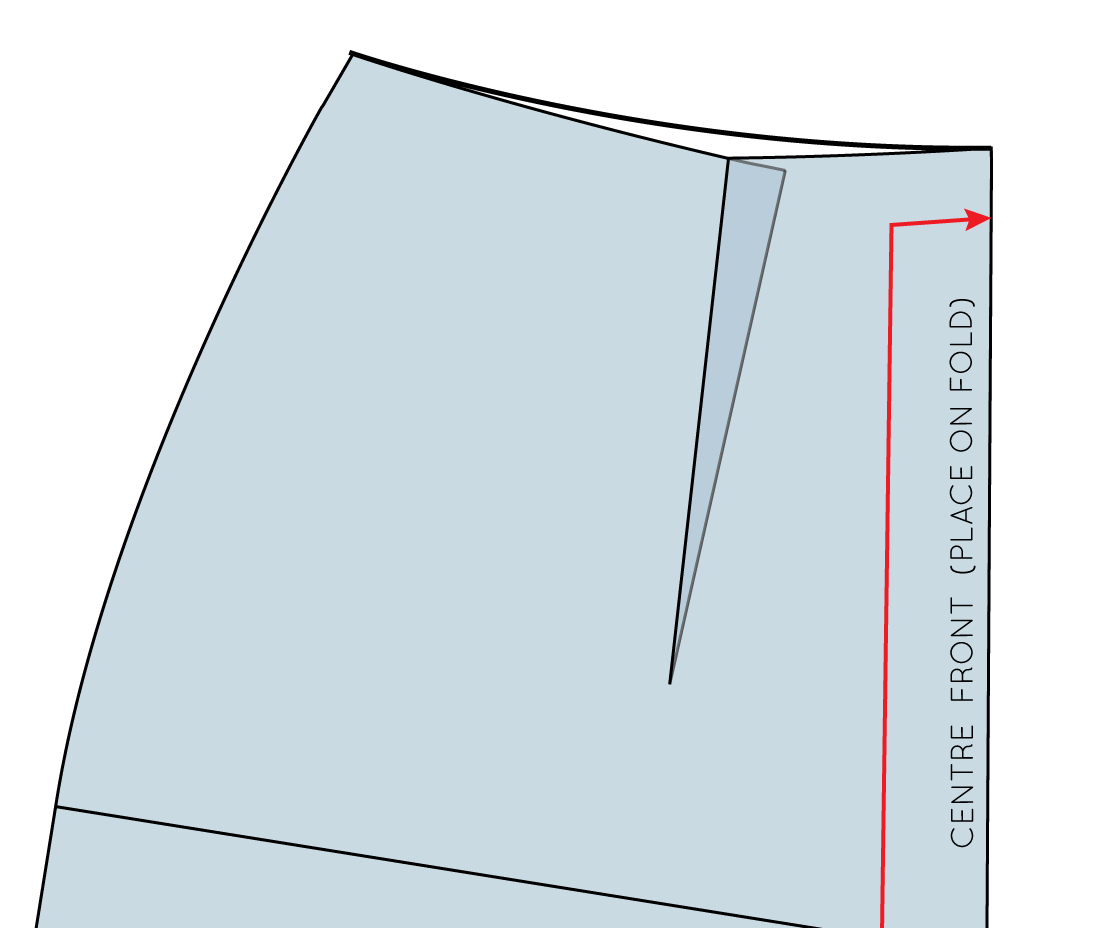
1. Draw a line where you would like your new dart to be placed. The dart point will need to be at the same point as the original dart.

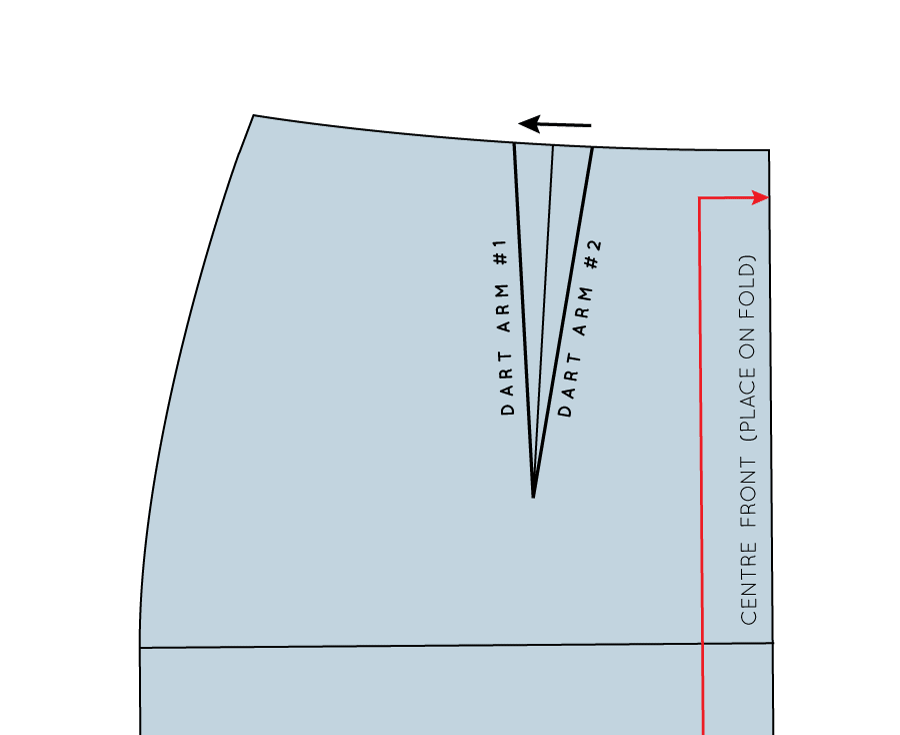
2. Place the pattern onto a piece of pattern paper and hold in place with a pattern weight. Focus on the dart you are moving (which in this case is the shoulder dart) and the dart arm closest to the centre front - this is the point where you will start tracing around the pattern. I have labeled the dart arms 'Dart Arm #1' and 'Dart Arm #2' to help with the explanation. 

Trace the original pattern

inthefolds_move_a_dart_4

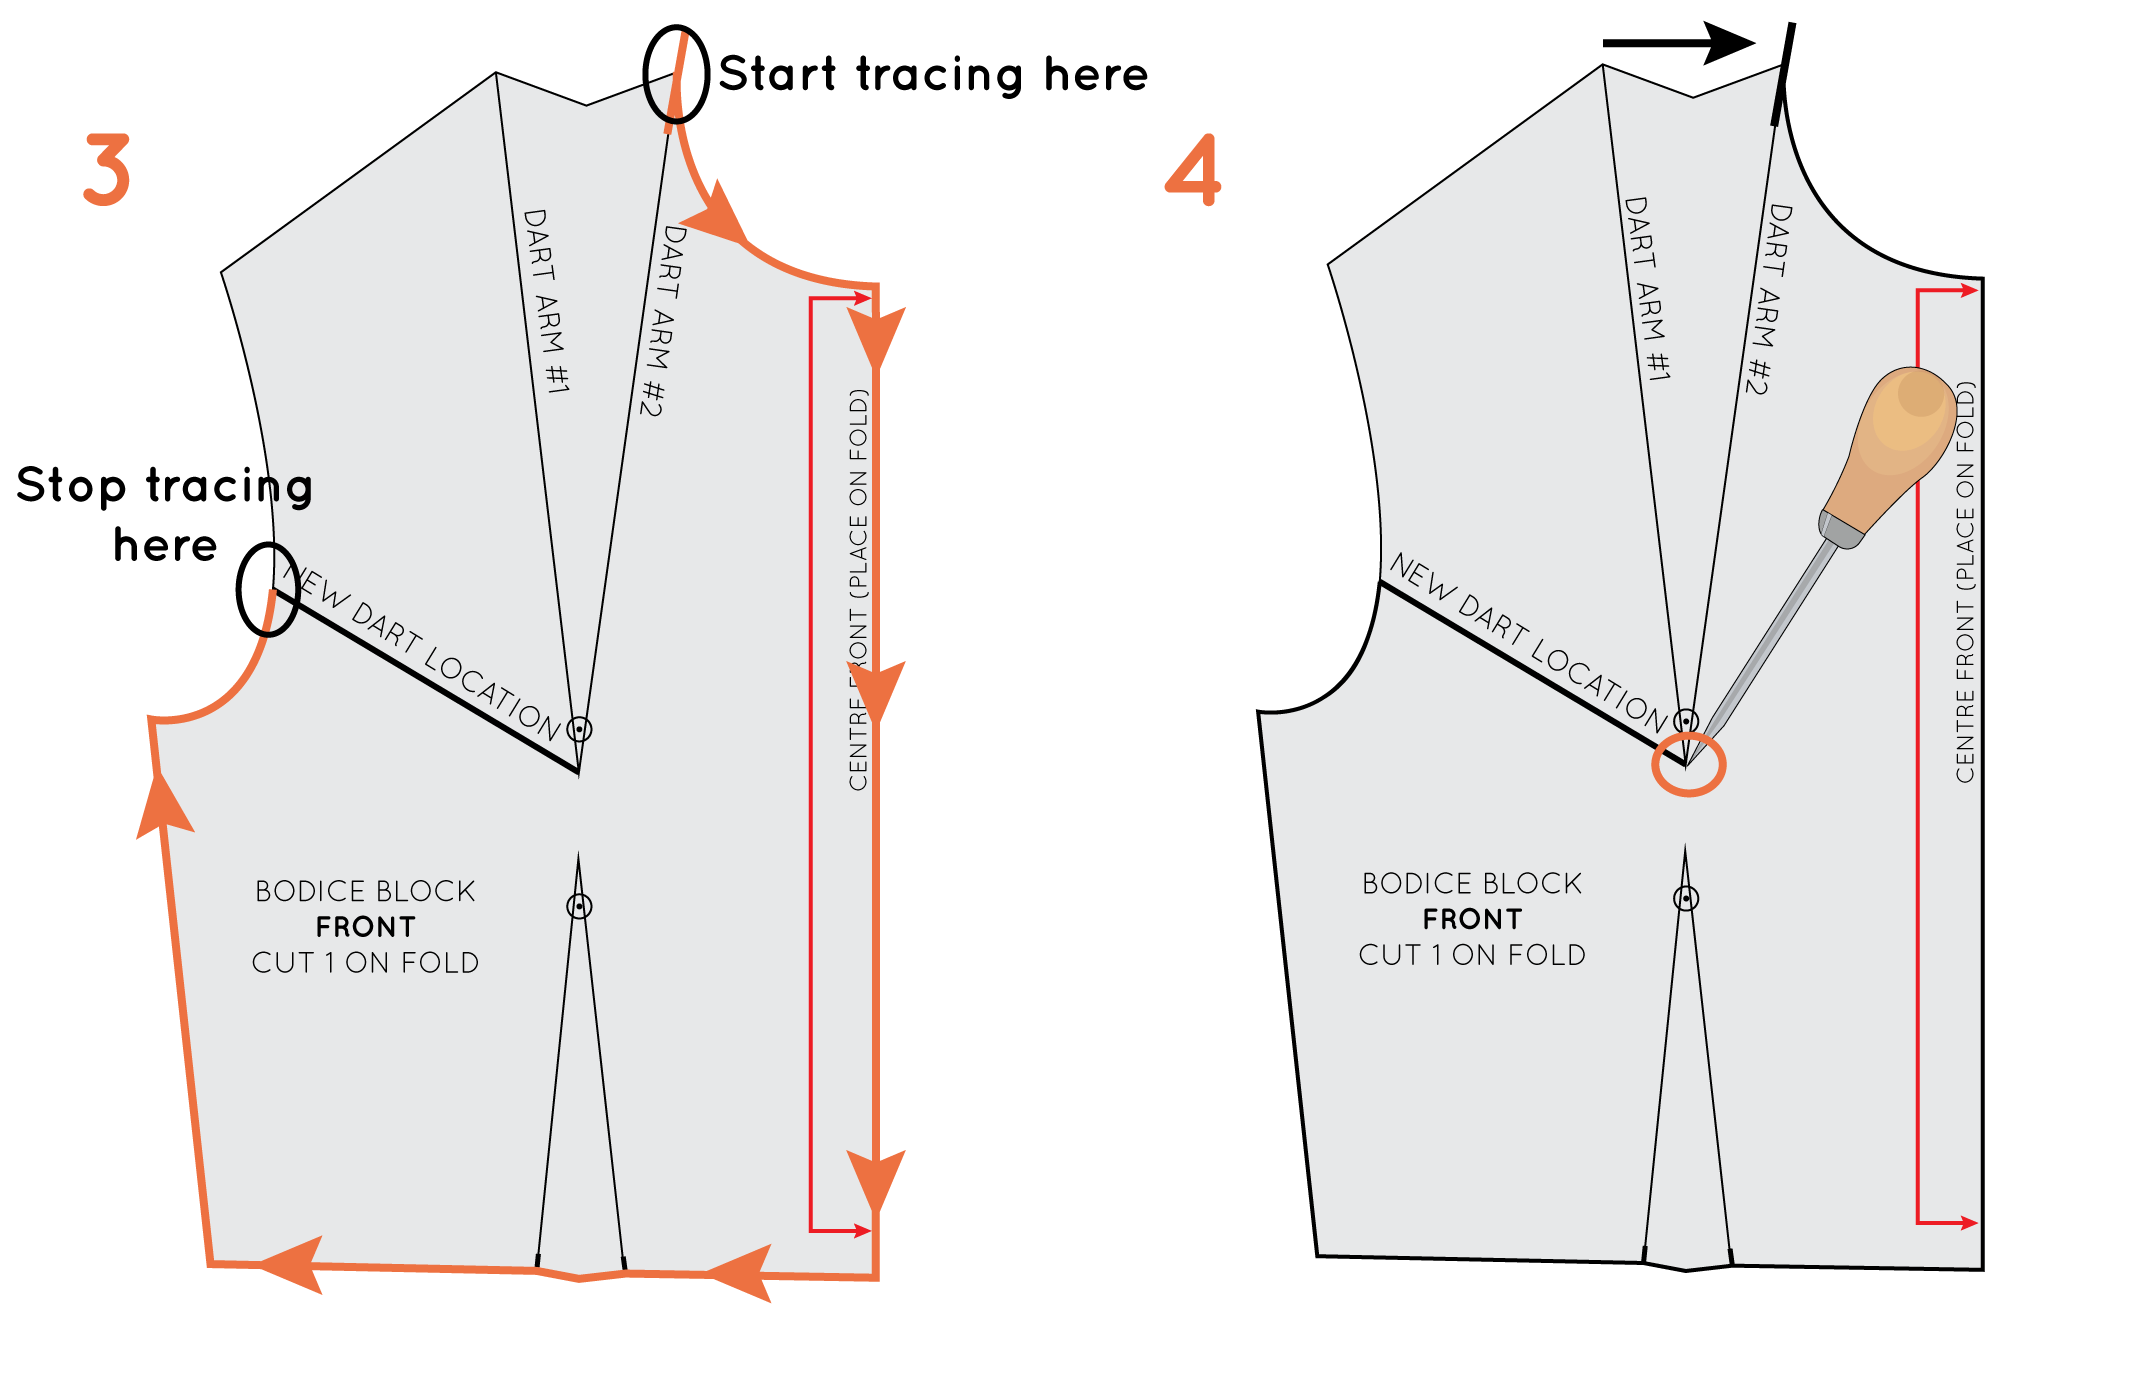
3. Start tracing around the pattern piece from 'Dart Arm # 2' - going down the neckline, centre front, along the waistline, up the side seam and then around the armhole until you reach the new dart location. Stop tracing here. 

As the waist dart is staying where it is, remember to mark the dart point and notches so that when you remove the pattern you are tracing, you can redraw the waist dart in its original position.

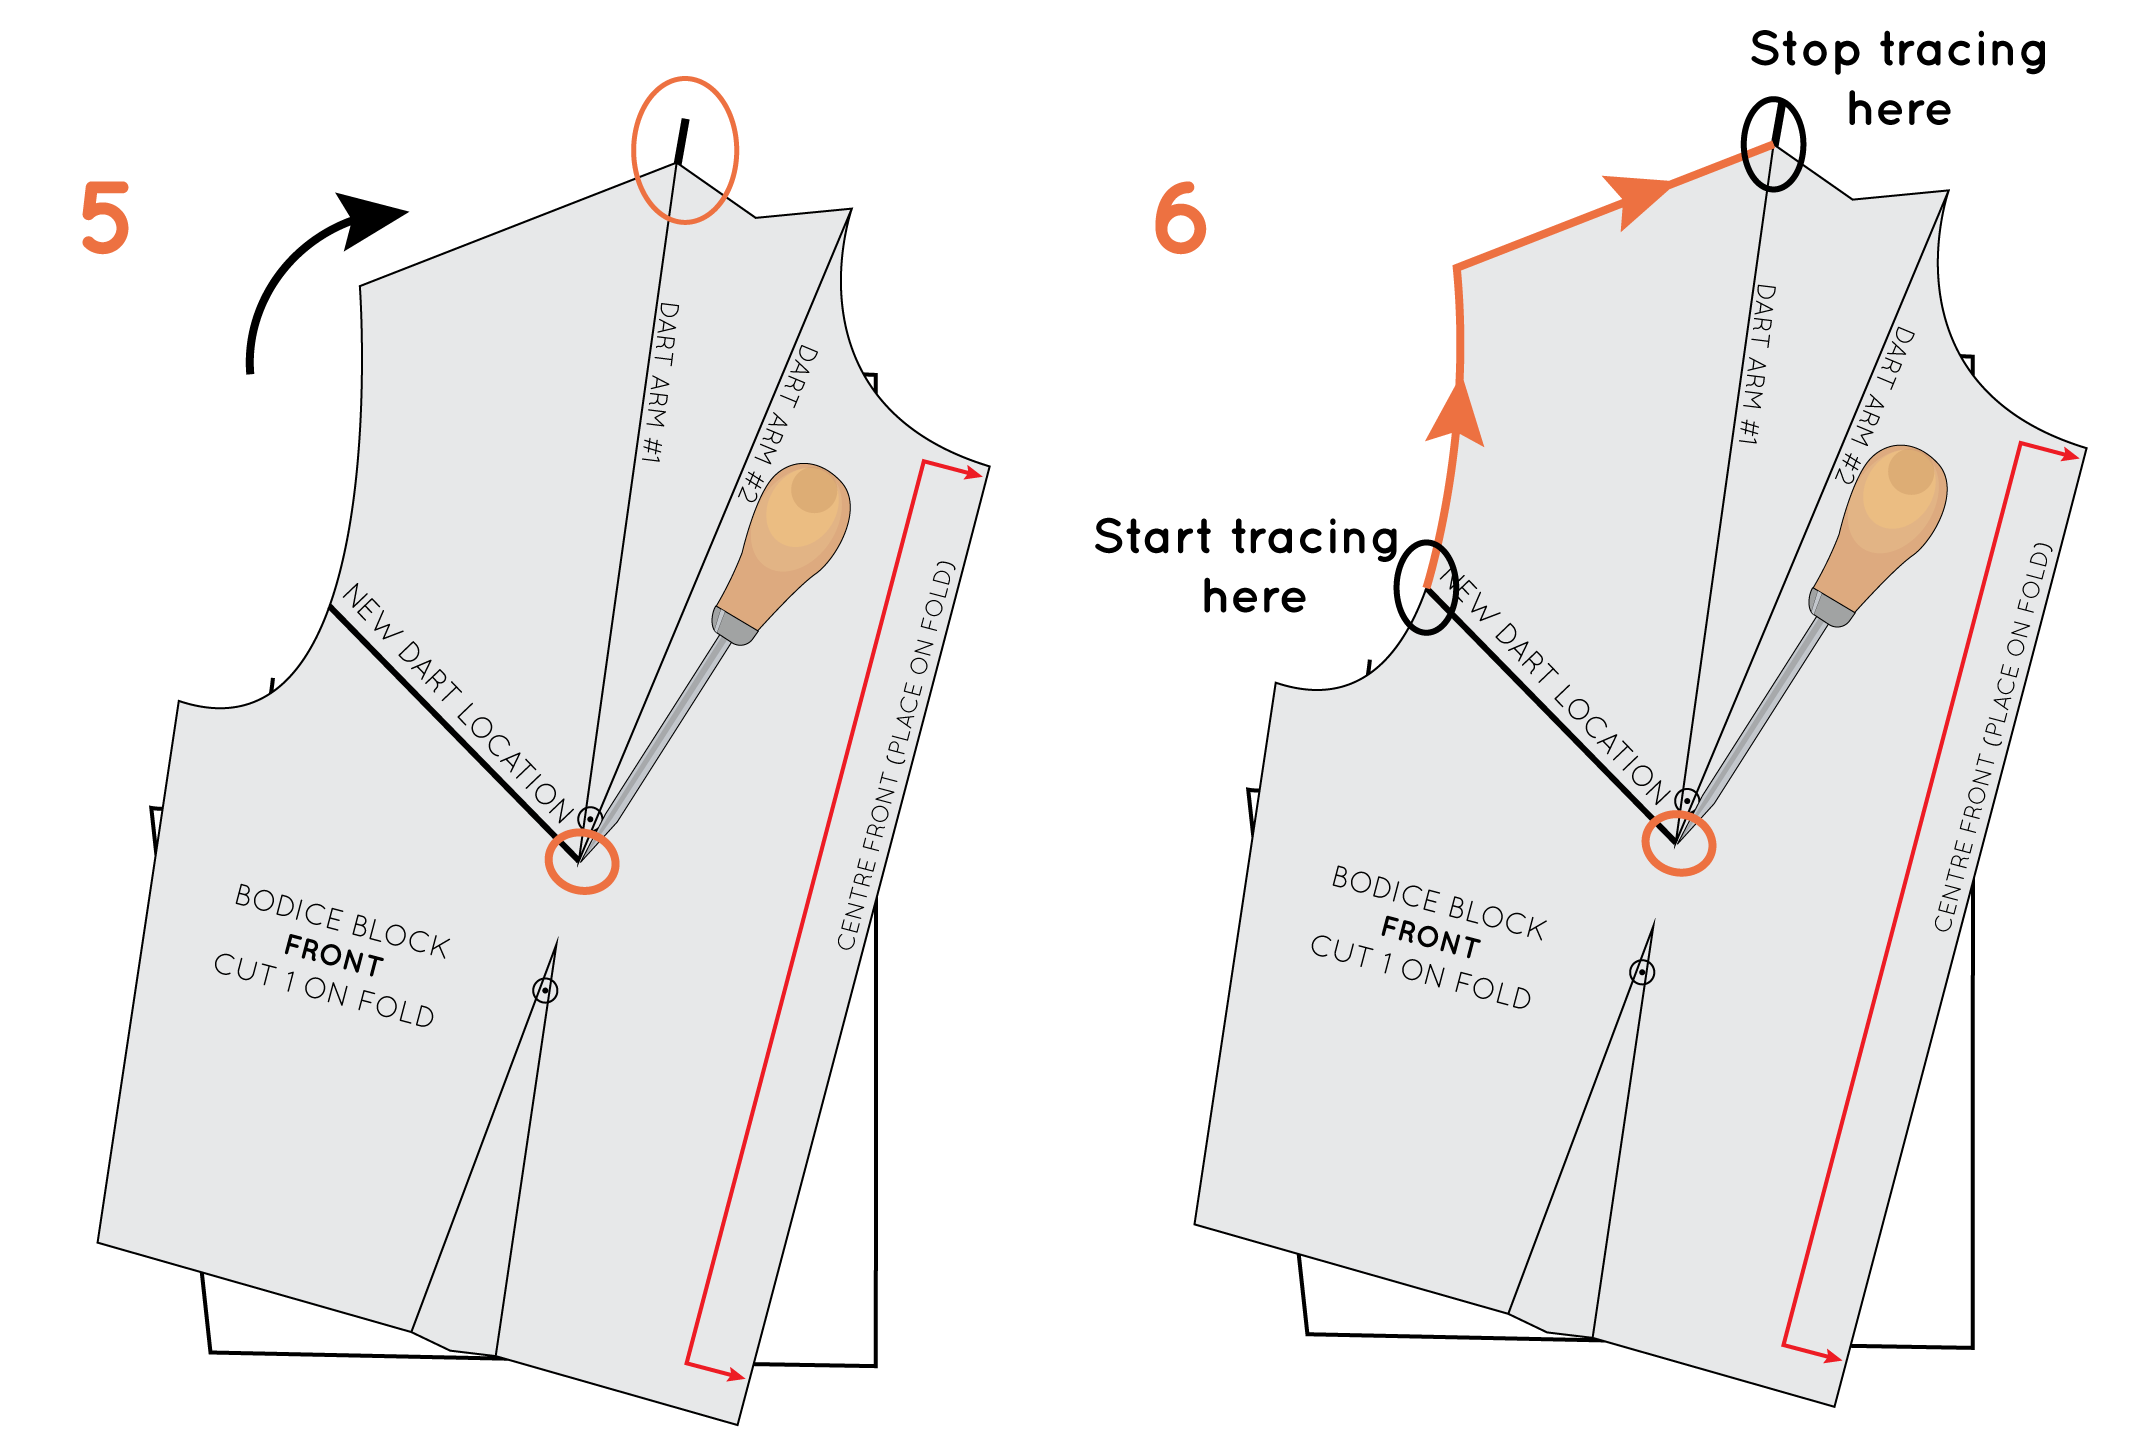
4. Now it is time to pivot the pattern to remove the shoulder dart and create a dart at the armhole. Take your stiletto (or a pin or sharp pencil if you don't have one) and insert the point into the point of the shoulder dart. Remember this is not the drill hole (as the drill hole is marked 1-1.5cm from the dart point), but the point itself. In the next step you will be closing out the shoulder dart by rotating 'Dart Arm #1' towards 'Dart Arm #2.' 

Pivot the pattern

inthefolds_move_a_dart_5

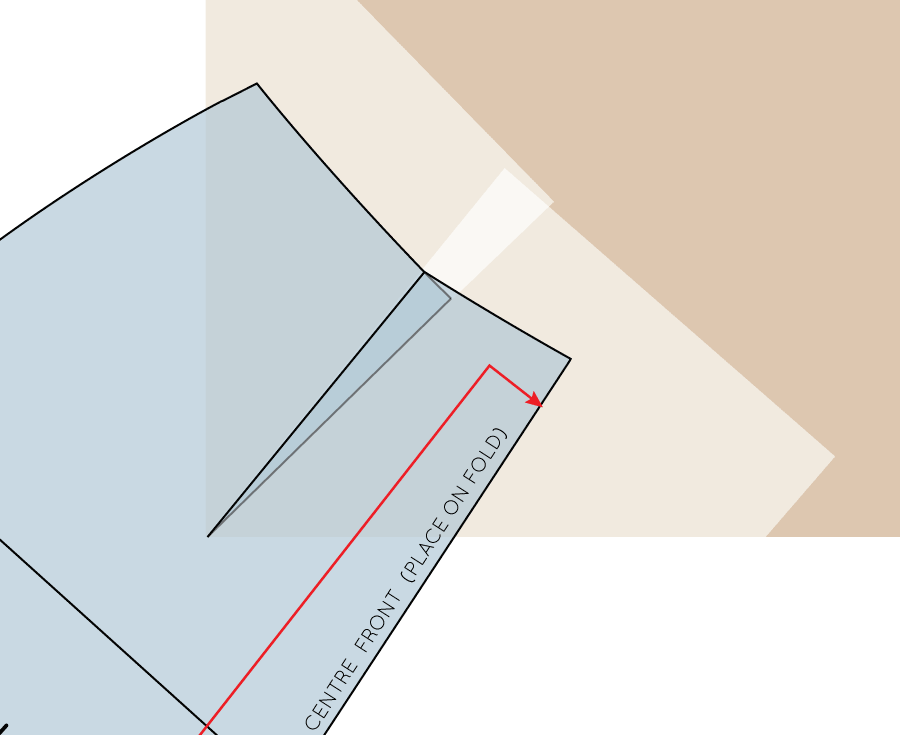
5. Remove the weight from the pattern. With the point of the stiletto securely in the drill hole, rotate (or pivot) the pattern so that 'Dart Arm #1' now lines up with the point where you started tracing the pattern in Step 3 (where 'Dart Arm #2' was originally), being careful to hold the piece of pattern paper that you are tracing onto securely in place. 

6. Place the weight back on the pattern and trace the remainder of the pattern, starting at the point where your new dart is marked and continuing to 'Dart Arm #1.'

Complete your new dart

inthefolds_move_a_dart_6

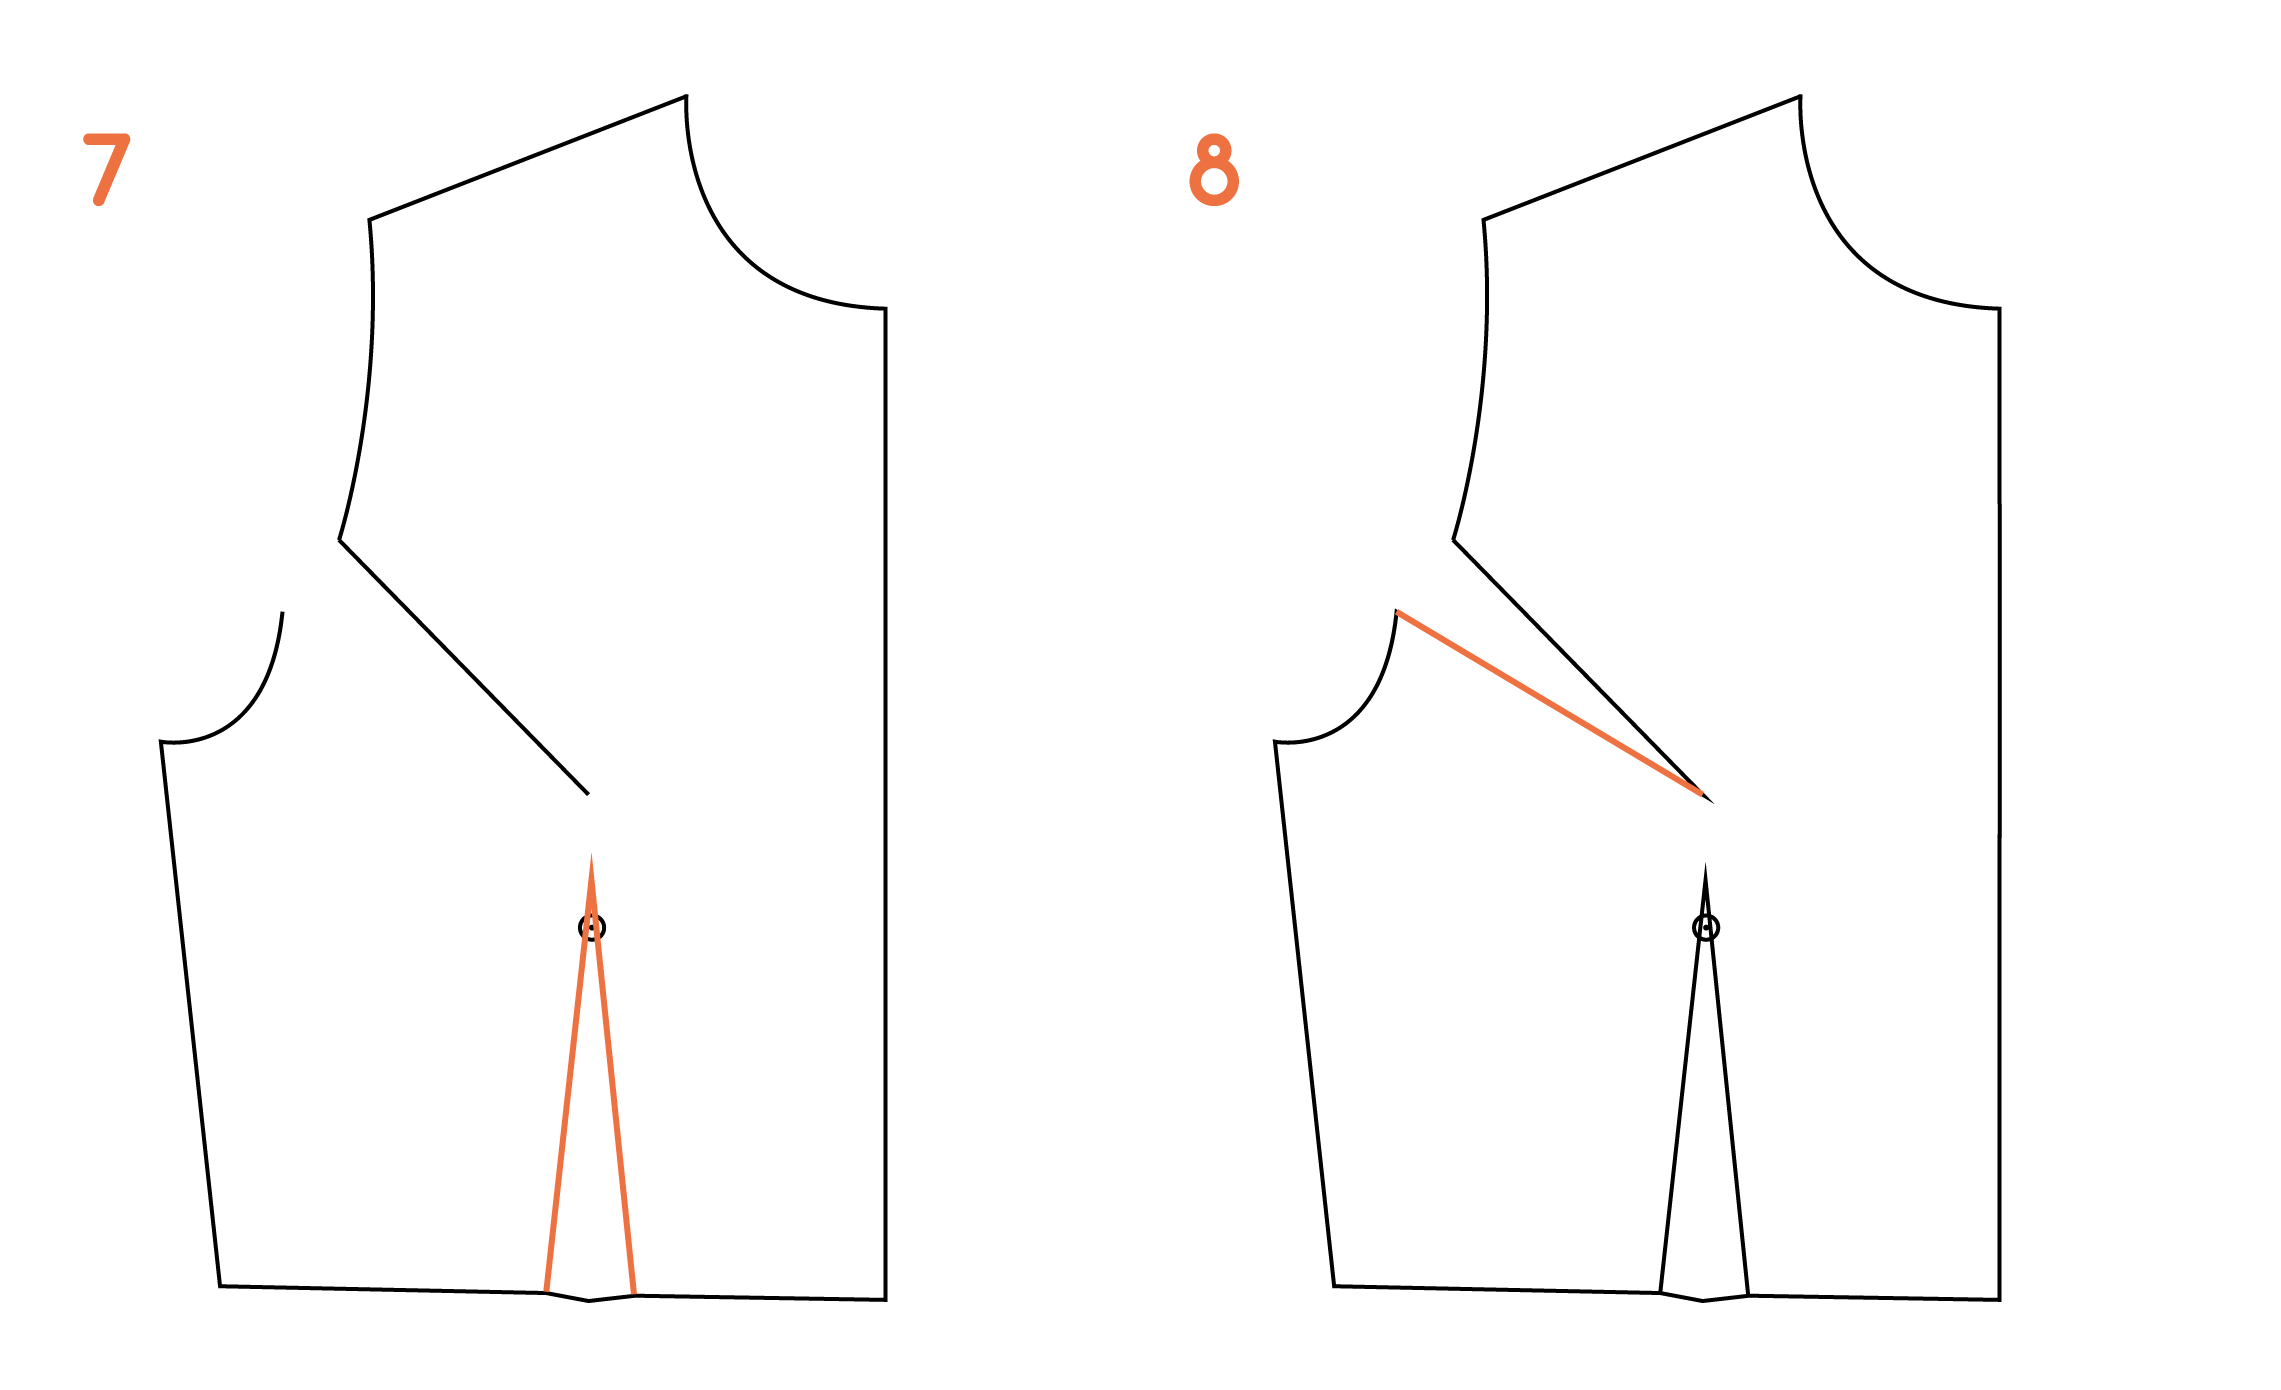
7. Remove the pattern piece you were tracing and re-draw the waist dart (or any design features that you have transferred from the original pattern).

8. Complete the new dart by joining the opening in the armhole to the dart point with a straight line. 

Add markings + cutting instructions

inthefolds_move_a_dart_7

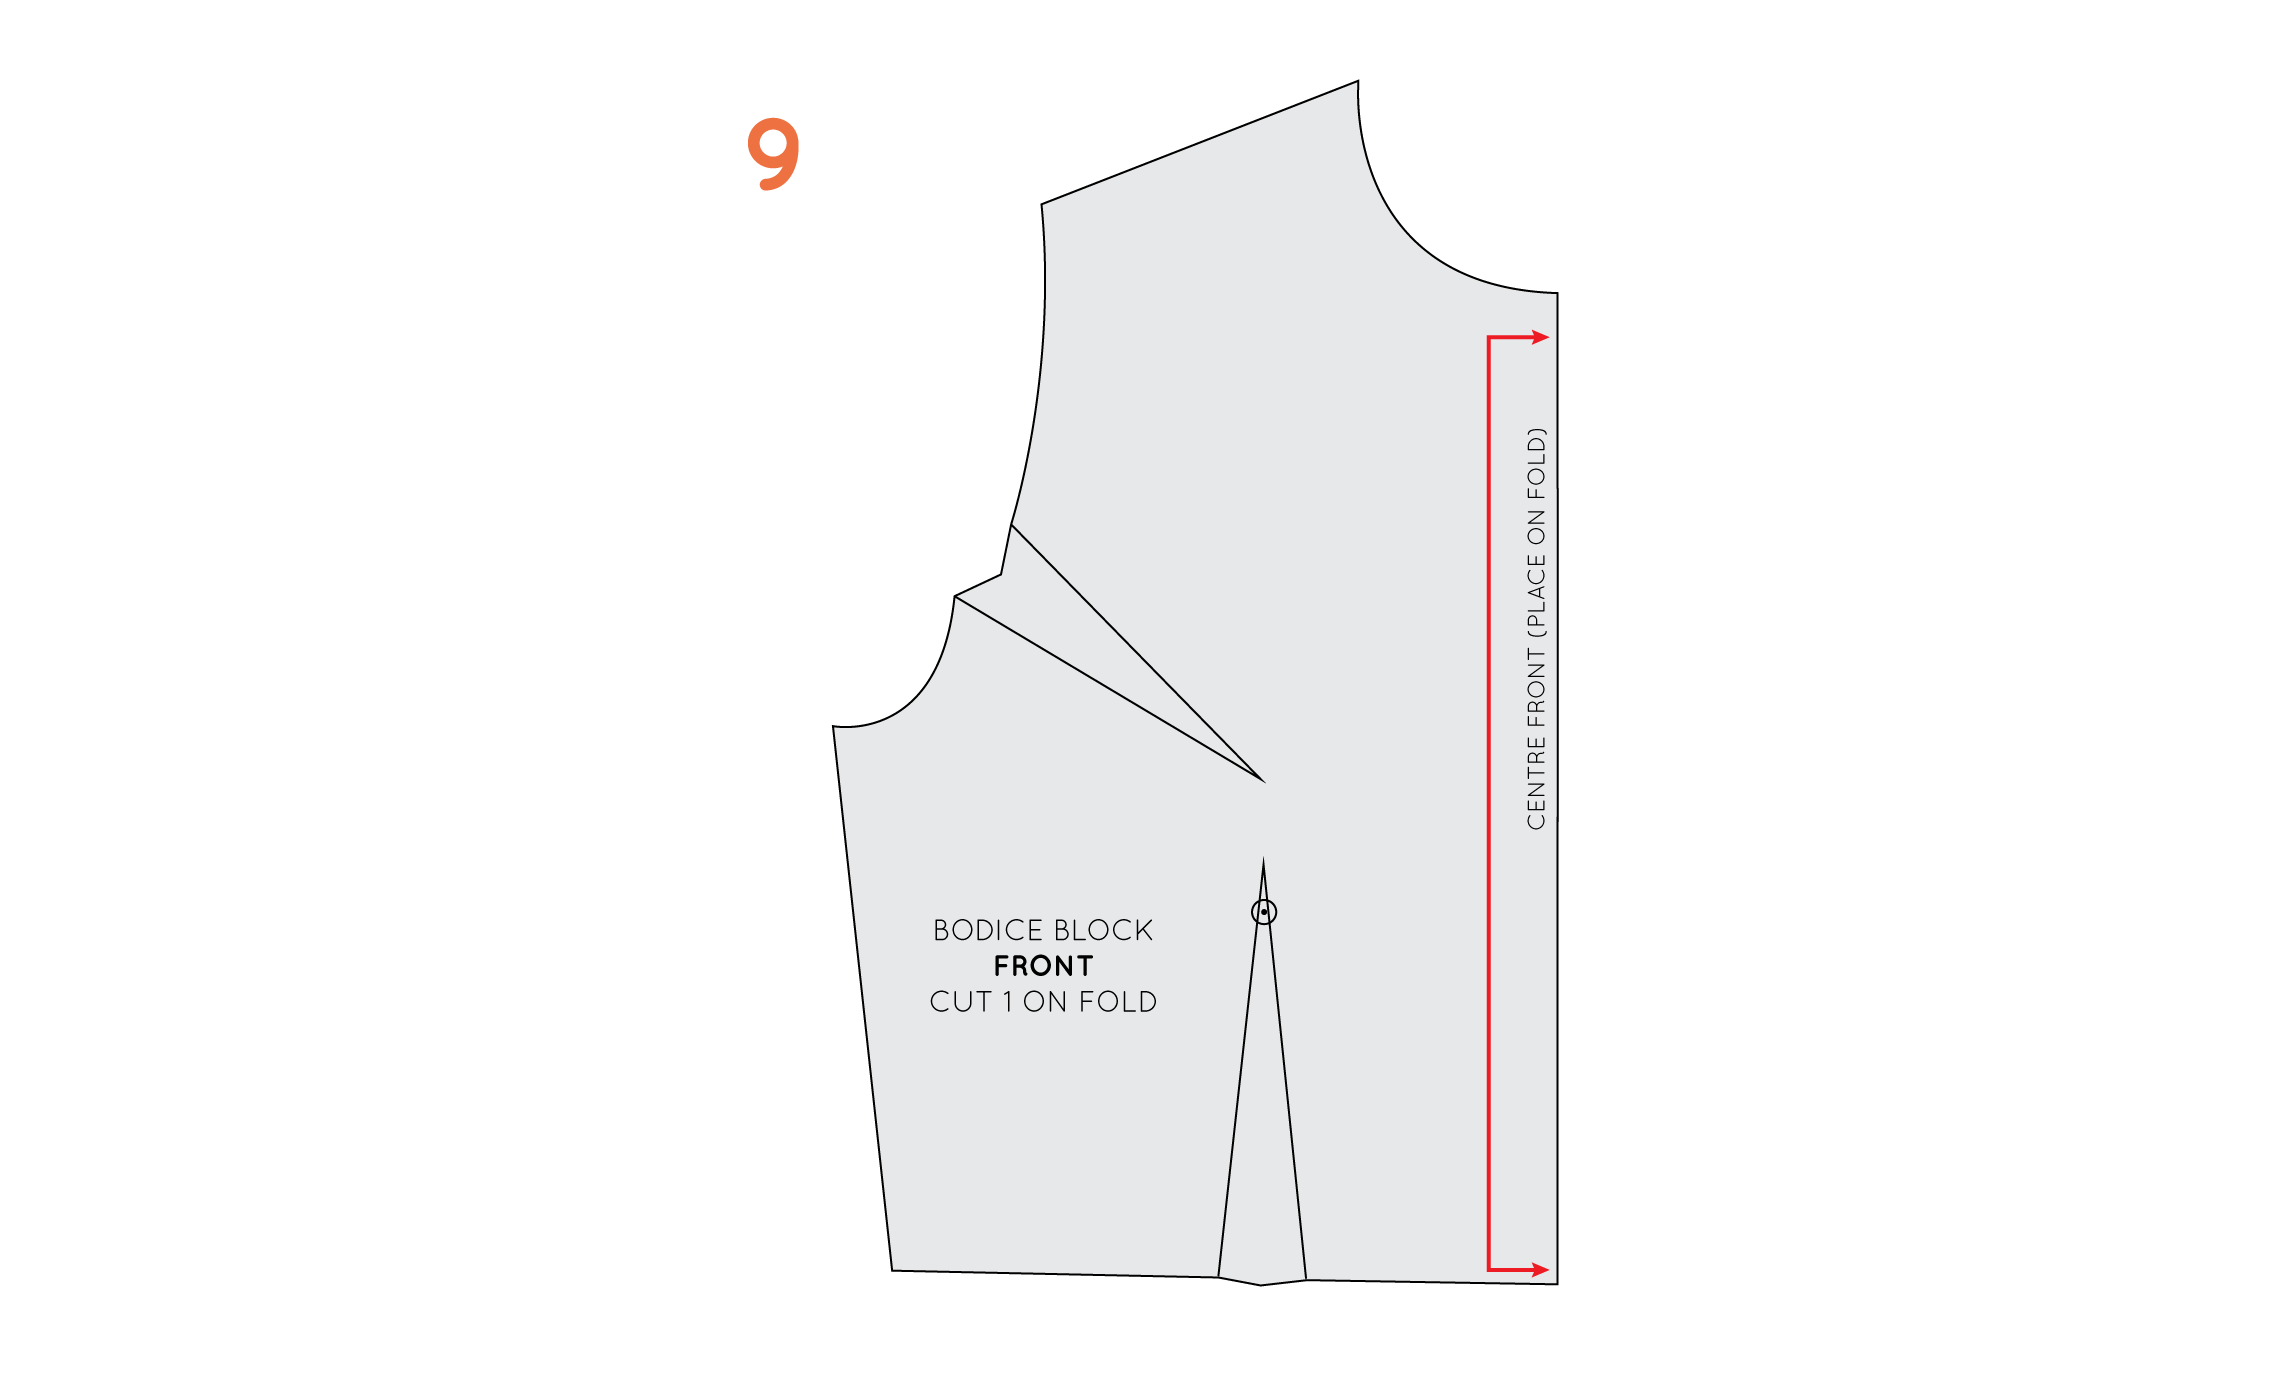
9. Complete the pattern by adding shaping to the new dart, adding pattern markings (in this case notches and the grainline) and cutting instructions as well as seam allowance.

And that's it. Now you have two techniques for moving darts in your repertoire!


You may also like:

Adding pattern markings to your patterns

adding_pattern_markings_to_you_patterns_inthefolds

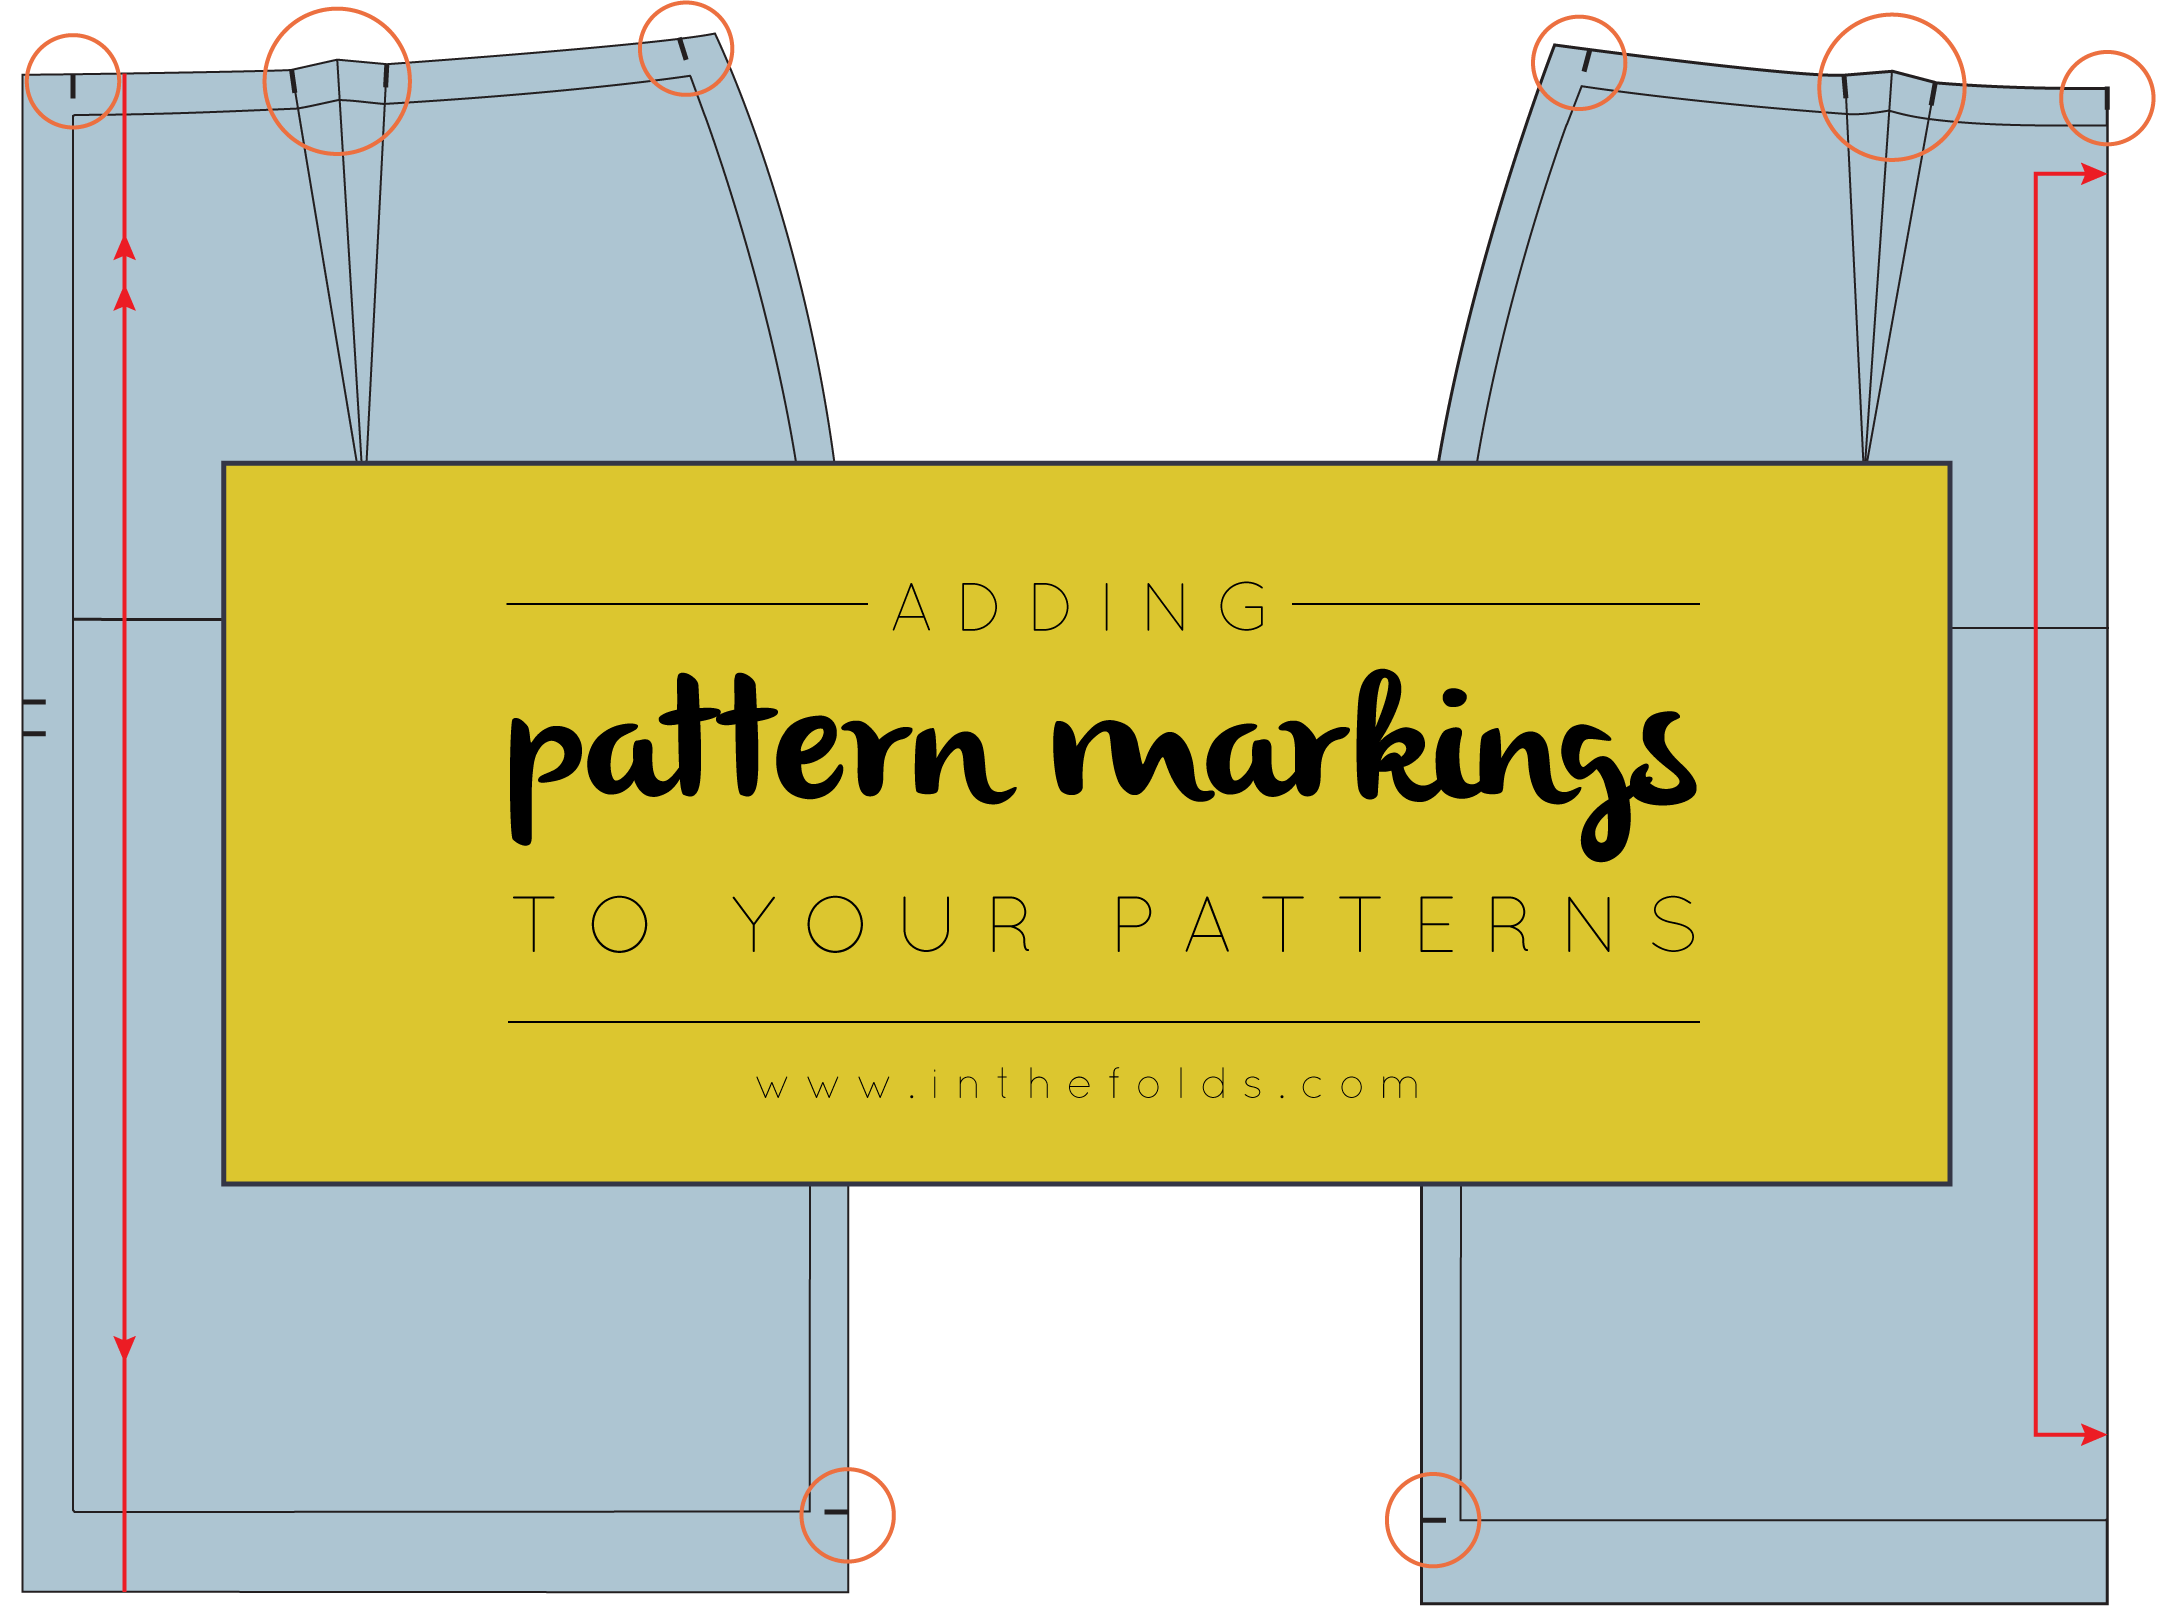
For those of you have been following along with The Skirt Series, we have almost finished our blocks! We have drafted the pattern, added shaping to the darts, added seam allowance, and today we are going to finish it all off by adding pattern markings.

Pattern markings

There are a number of markings you should always add to your pattern pieces. They help you with laying patterns on the fabric correctly when cutting your fabric, and also help when sewing your garment together. 

The grainline

The grainline ensures that the pattern is placed on the fabric the right way. If the grain is not straight (and it is intended to be), you may end up with a badly fitted garment.

The grainline usually runs vertically through a pattern, although in some cases it will run horizontally or even diagonally (bias cut patterns). I like to use arrows to indicate the top and bottom of the pattern - this can help when you have a directional print or a pattern piece that is an unconventional shape. The double arrow points towards the top, and the single arrow points towards the bottom. I also like to draw grainlines so they run from one edge of the pattern to the other, this is really hand when using a striped fabric, to ensure your placement is exactly right. 

Notches

Notches are small cuts in the fabric that guide you while you are sewing (they are also commonly indicated with small triangles). If you have sewn The Rushcutter, you will know how much I love a good notch! 

Notches are used to indicate:

  • seam allowance
  • dart arms
  •  the location of design details such as: pleats, gathers or pockets
  • the centre front
  • the centre back
  • balance points

Balance points are pointers on your pattern that help you put pieces together correctly, as well as help you when you are sewing a very long, or curved seam.

For example, I tend to add a balance point (or even two or three - depending on the length of the seam) part way down a side seam to ensure that the pieces are sewn together correctly and I am not left with excess fabric on one side of the seam at the end. Balance points also help to prevent stretching the seam when sewing. In the skirt block, for example, the notch at the hip line acts as a balance point.

A notching no-no

Try to avoid notching both sides of a corner as this can weaken the fabric (as well as the pattern itself). 

Double notches

Double notches are normally used to indicate the direction a piece should be sewn in (and generally indicate the back of the pattern piece). For example, a double notch is used on a sleeve cap to indicate where the sleeve cap meets the back armhole. In a side panel, a double notch is also often used to show where the piece meets with the back pattern piece.

I also like to use a double notch to indicate the end of a zip (if I am using a zip in the centre back).

Drill holes

Drill holes are used to indicate a dart point. I prefer to place drill holes 1cm - 1.5cm up from the actual dart point, so that when the dart is sewn, the marking is hidden inside the dart.

Drill holes can be used to indicate other design features, such as:

  • placement of patch pockets
  • placement of belt loops
  • or any other design feature that is in an area where you are unable to mark a notch on a seam

Pattern instructions

Pattern instructions are your way of keeping track of, and identifying, pattern pieces.

On each pattern piece, you should include:

  • the name of the pattern
  • the name of the pattern piece
  • size
  • cutting instructions
  • number of pieces
  • date

Some of these things may seem quite obvious, but the clearer your markings are, the easier your pattern will be to use. Particularly if you decide to use the pattern in a month, or even a year! If the instructions are clear, you won't waste any time trying to remember the details of your pattern. 

And that's it! You can go ahead and make a toile of your skirt block and see how it fits!


In the coming weeks I am planning on showing you some different ways to hack the skirt block into a different design. Do you have anything you would like to see in particular?


You may also like:

A tutorial: How to add dart shaping

inthefolds_dartshaping_1

Welcome back to my latest addition to the blog: The Skirt Series. In yesterday's tutorial, I showed you how to draft a skirt block.

inthefolds_dartshaping_2

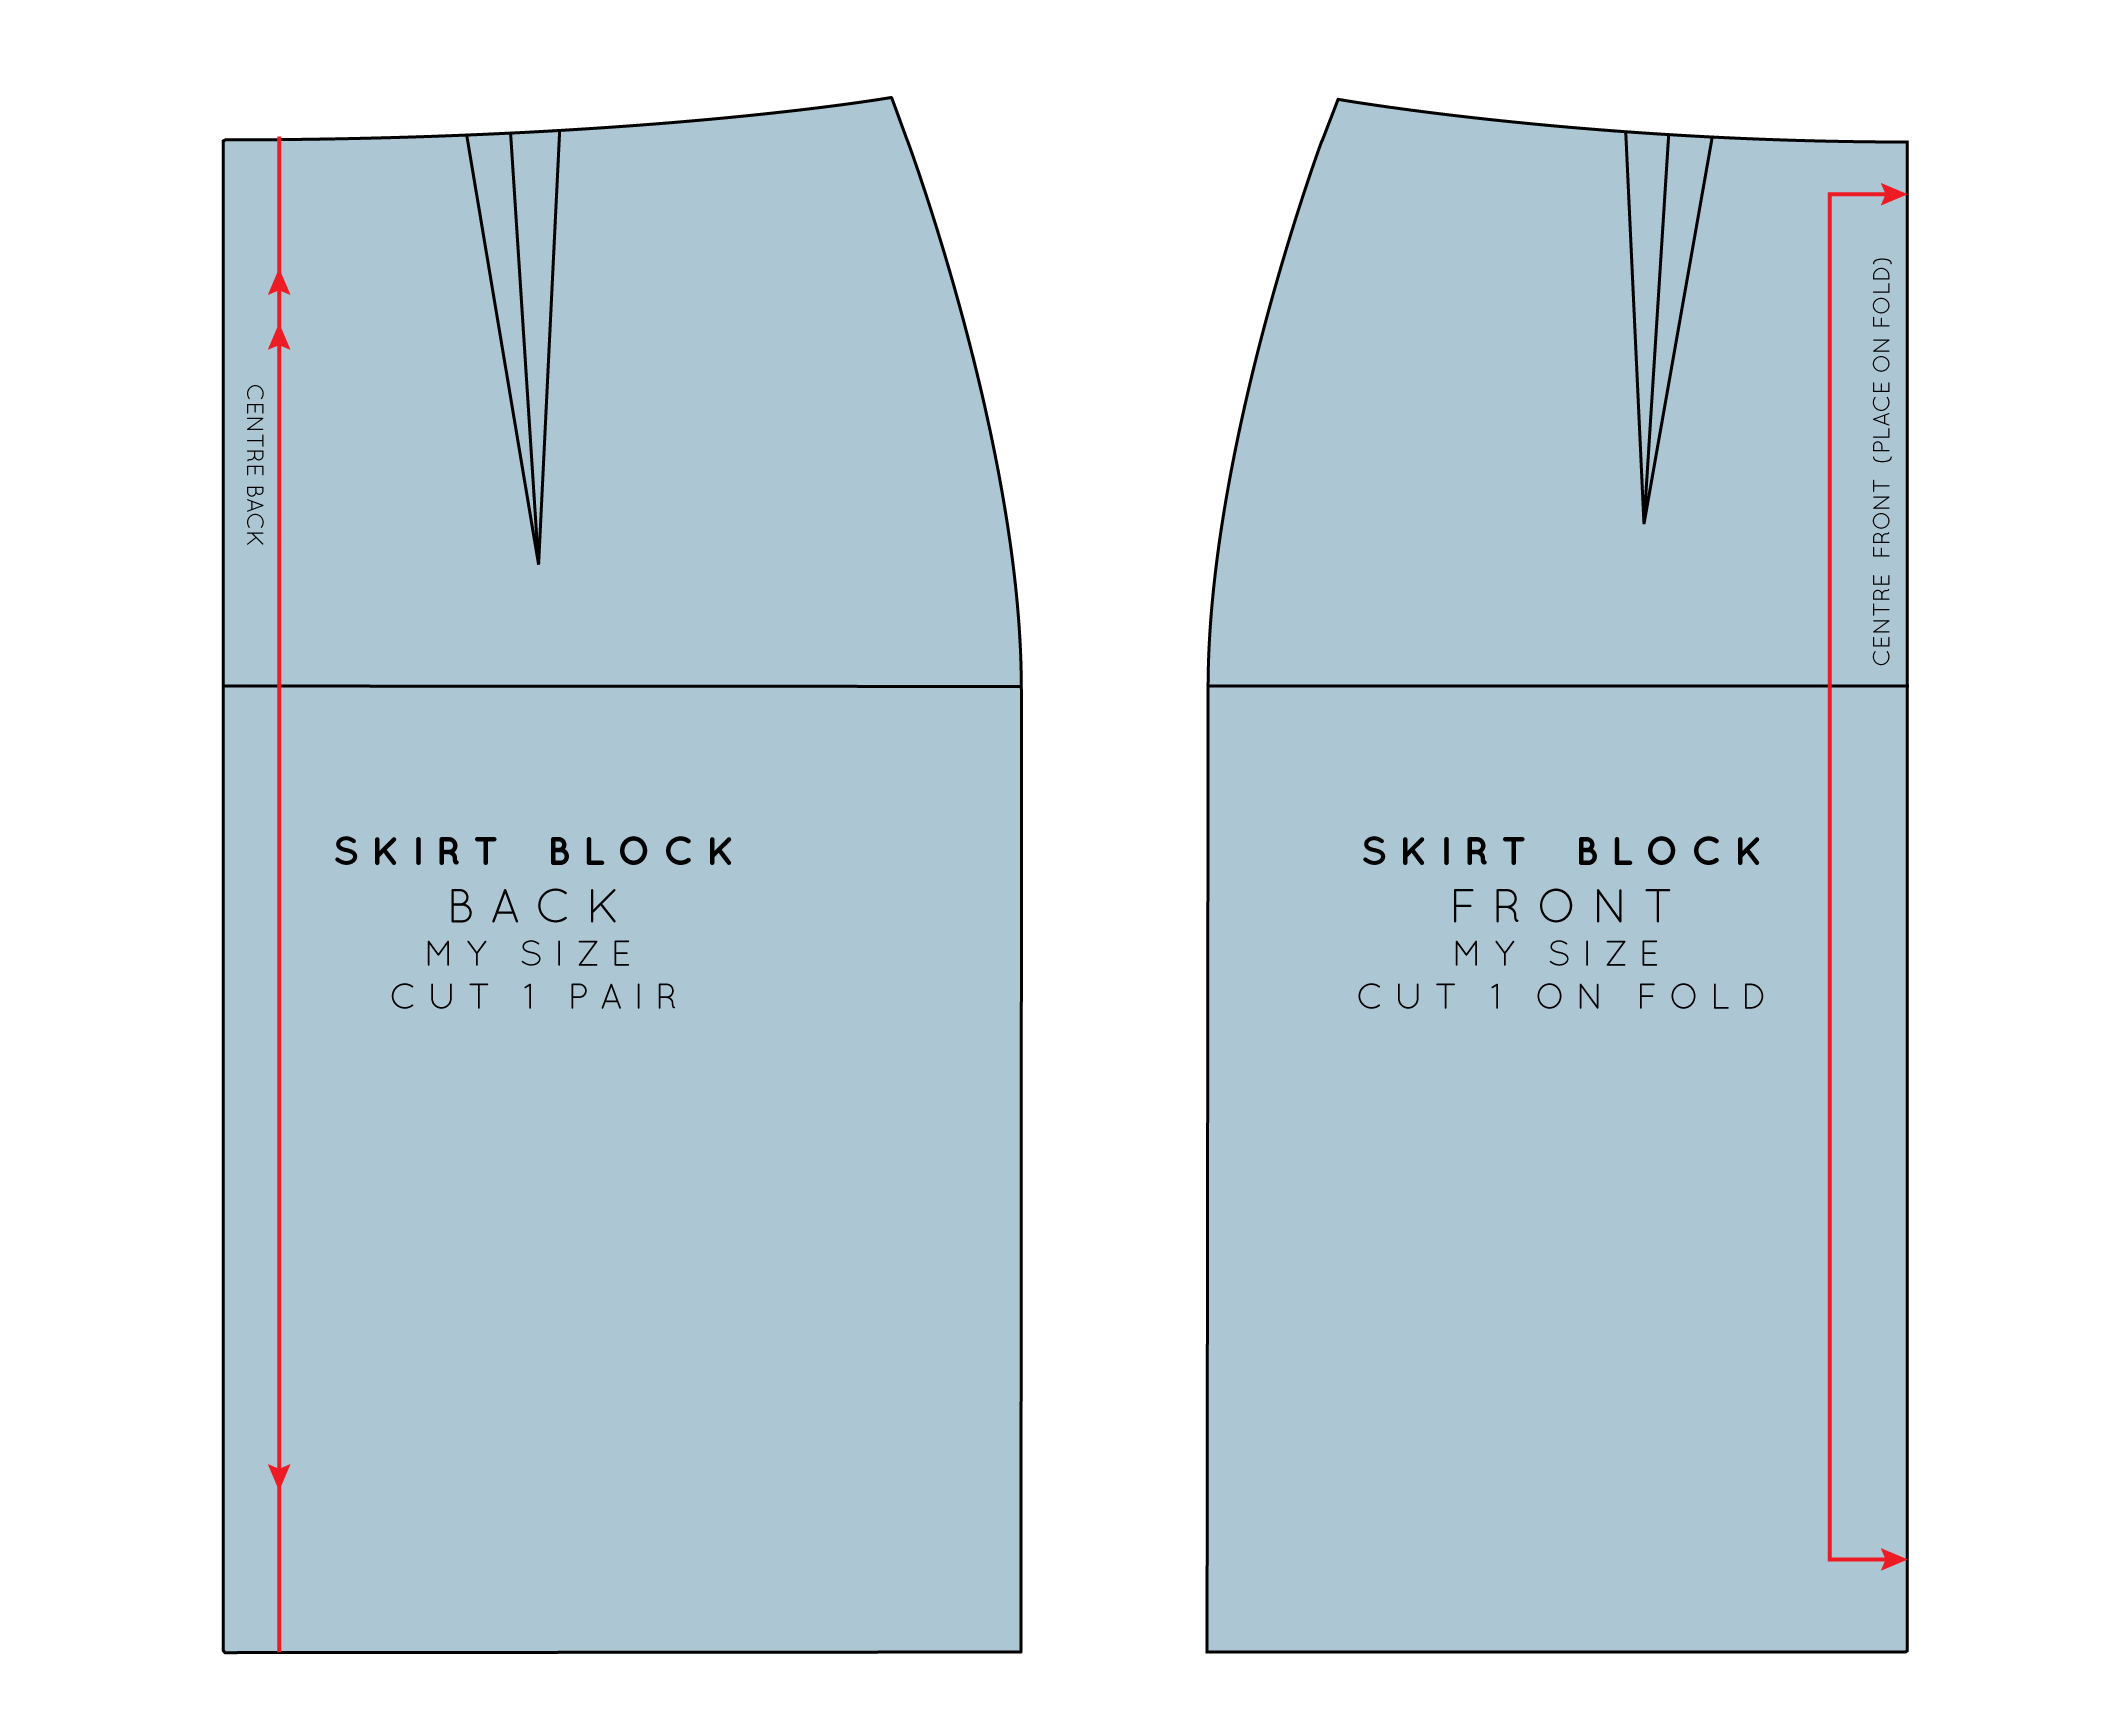
At this stage the pattern is drafted, but it is not yet complete. There are still two things to do before we can go ahead and make a toile - we need to add dart shaping and then add seam allowance. I will cover dart shaping in today's post and then next week I'll get to adding seam allowance.

What is a dart?

Essentially, pattern drafting is the act of making something two dimensional (the fabric) fit around something three dimensional (the body). Darts are a way of doing this and are most commonly used to create shape around areas of the body that are curved - the bust, shoulders, elbows and waist, but can be used pretty much anywhere - whether purely for fit, or also as a design detail.

What is dart shaping and why do I need to think about it?

inthefolds_dartshaping_3

You may have put a dart in something before and noticed that the dart has changed the shape of the seam that it lies on and is no longer the smooth line it once was. In the example, I have folded the dart, and it has caused the waistline to become very sharp and angular. This is because we have lost 3cm to the dart, which is what gave us our nice smooth curve.

inthefolds_dartshaping_4

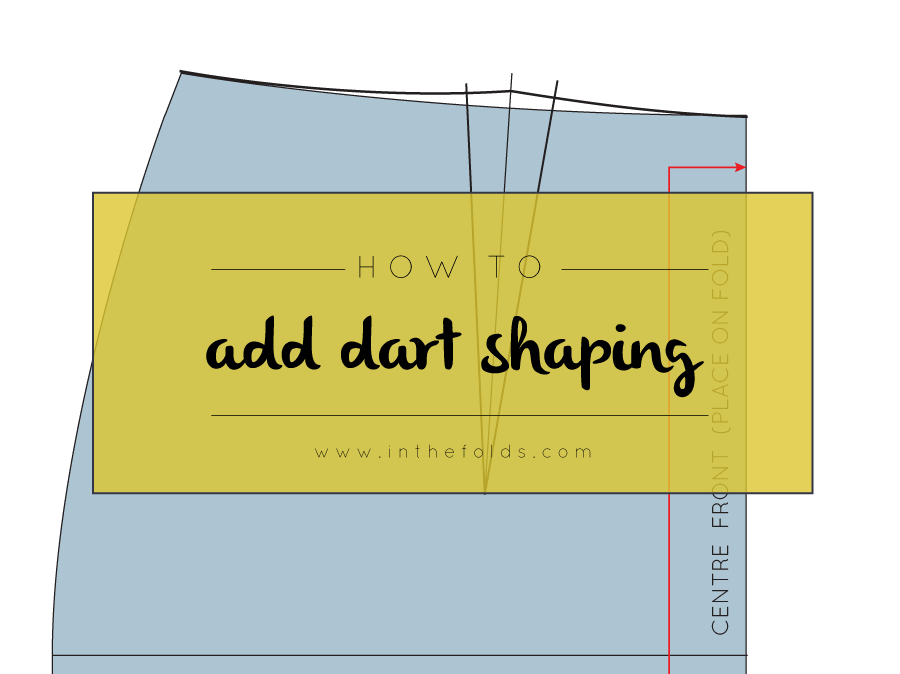
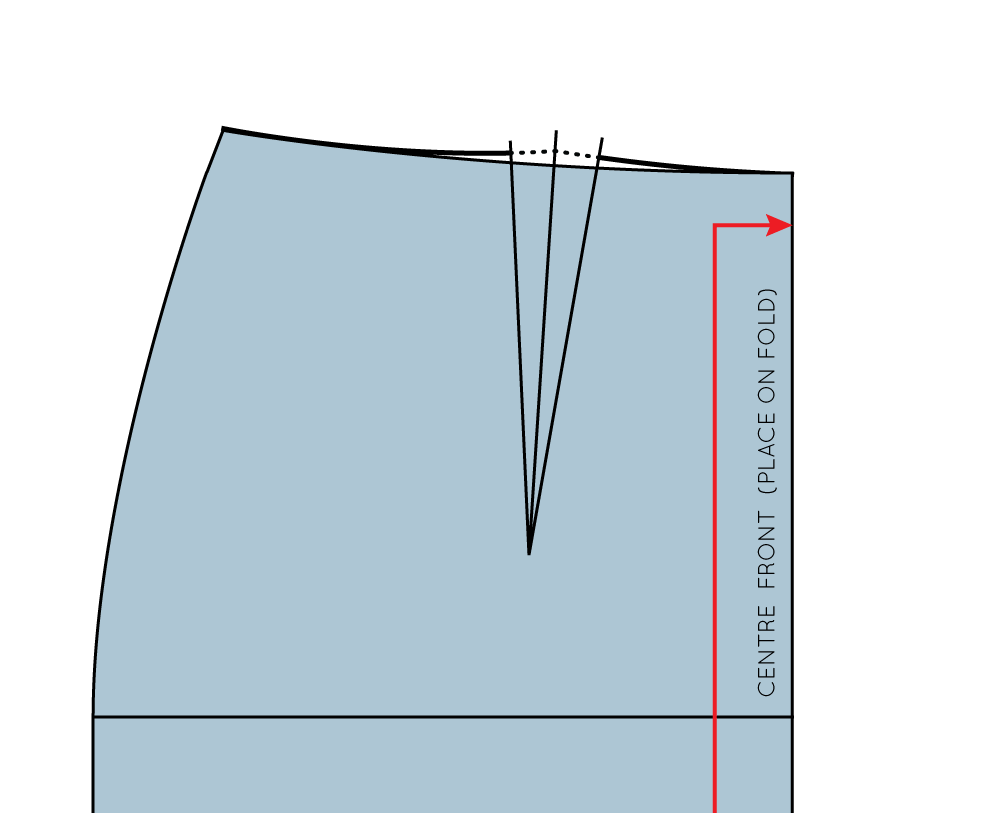
To prevent this from happening, you need to add dart shaping. This will ensure that once your dart is sewn in your waistline (or which ever seam your dart is located) it will remain a smooth line.

Let's get drafting!

Take one piece of your skirt (I will be starting with the front), or any other pattern piece that you are working on, that has a dart. Your pattern should still be on a larger piece of paper (not yet cut out).

inthefolds_dartshaping_5

You will need to fold the dart, so you can predict what will happen when you sew the dart when you get to making it up in fabric. Think about which direction the fullness of your dart will be pressed once it is sewn, this will decide which dart arm you need to fold.

Generally vertical darts are pressed towards the centre front (in the case of front darts) and the centre back (in the case of back darts). It seems reviews can be mixed when it comes to more horizontal darts, but I tend to push mine up up.

Fold along Dart arm # 2, down to the dart point, being careful to fold right on the line, to make a crease.

inthefolds_dartshaping_6

Working with darts on a flat surface can be difficult so move over to the corner of your table (hopefully you have a square or rectangular table like me, otherwise a big book will do the trick), placing the point of your dart on top of the corner of the table.

inthefolds_dartshaping_7

Fold the dart, by placing Dart arm # 2 on top of Dart arm # 1 (this is when that crease comes in handy). You will quickly see that it is much easier to get the dart to sit flat when it is sitting on a corner.

You will see that your seam would look like if you were to sew it without adding dart shaping. Not great, right?

inthefolds_dartshaping_8

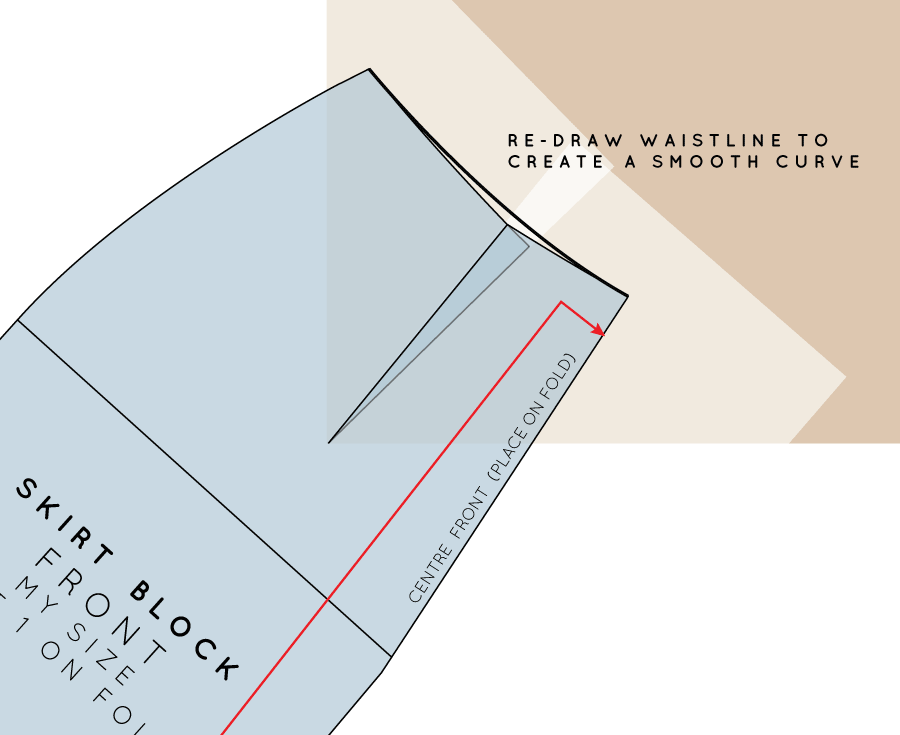
Use a weight to keep your pattern in place on the corner and then take a ruler and pencil and redraw the waistline with a nice smooth curve.

inthefolds_dartshaping_9

Take your tracing wheel and trace along your new seam line - particularly focusing on where the dart is folded (go over this area a couple of times to ensure the markings transfer through the fold).

inthefolds_dartshaping_10

Unfold the dart and you will see the markings transferred from the tracing wheel.

inthefolds_dartshaping_11

Take a ruler and join the dots to form a nice smooth line.

And there you have it, a dart with shaping!


I must say that this little tip is one of my favourites. Do you have a favourite pattern cutting technique?


You may also like: