Tips for getting a good fit on a jumpsuit
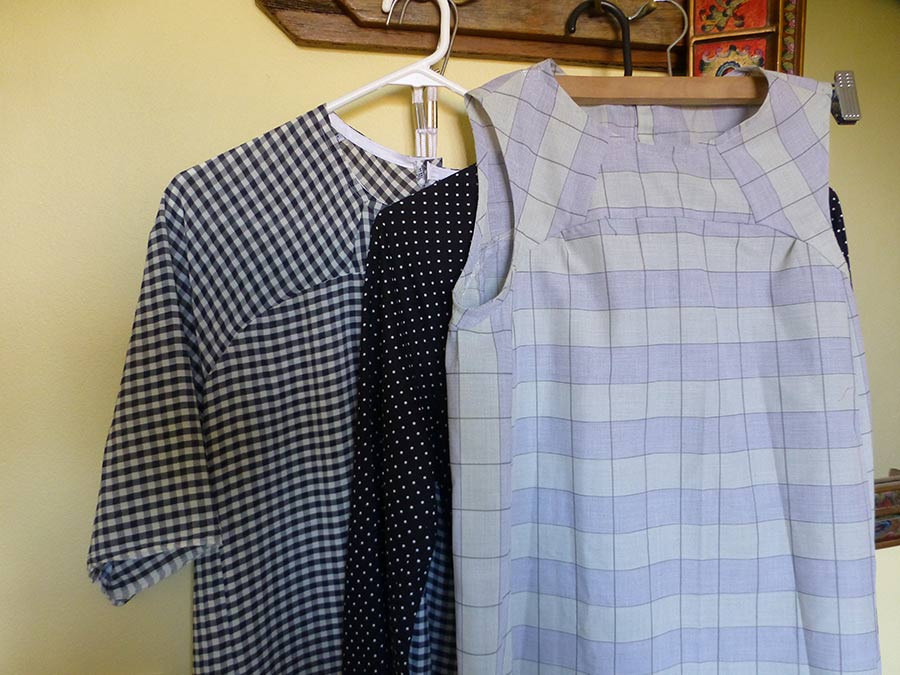
We are very excited to let you know that our new Neale jumpsuit pattern is here! This is the jumpsuit we've been dreaming about for a long time. It's the perfect piece to wear to work, to wear out, to relax on the weekend. It will make you feel put together, but incredibly comfortable and at ease to do the things you want to do in your handmade wardrobe.
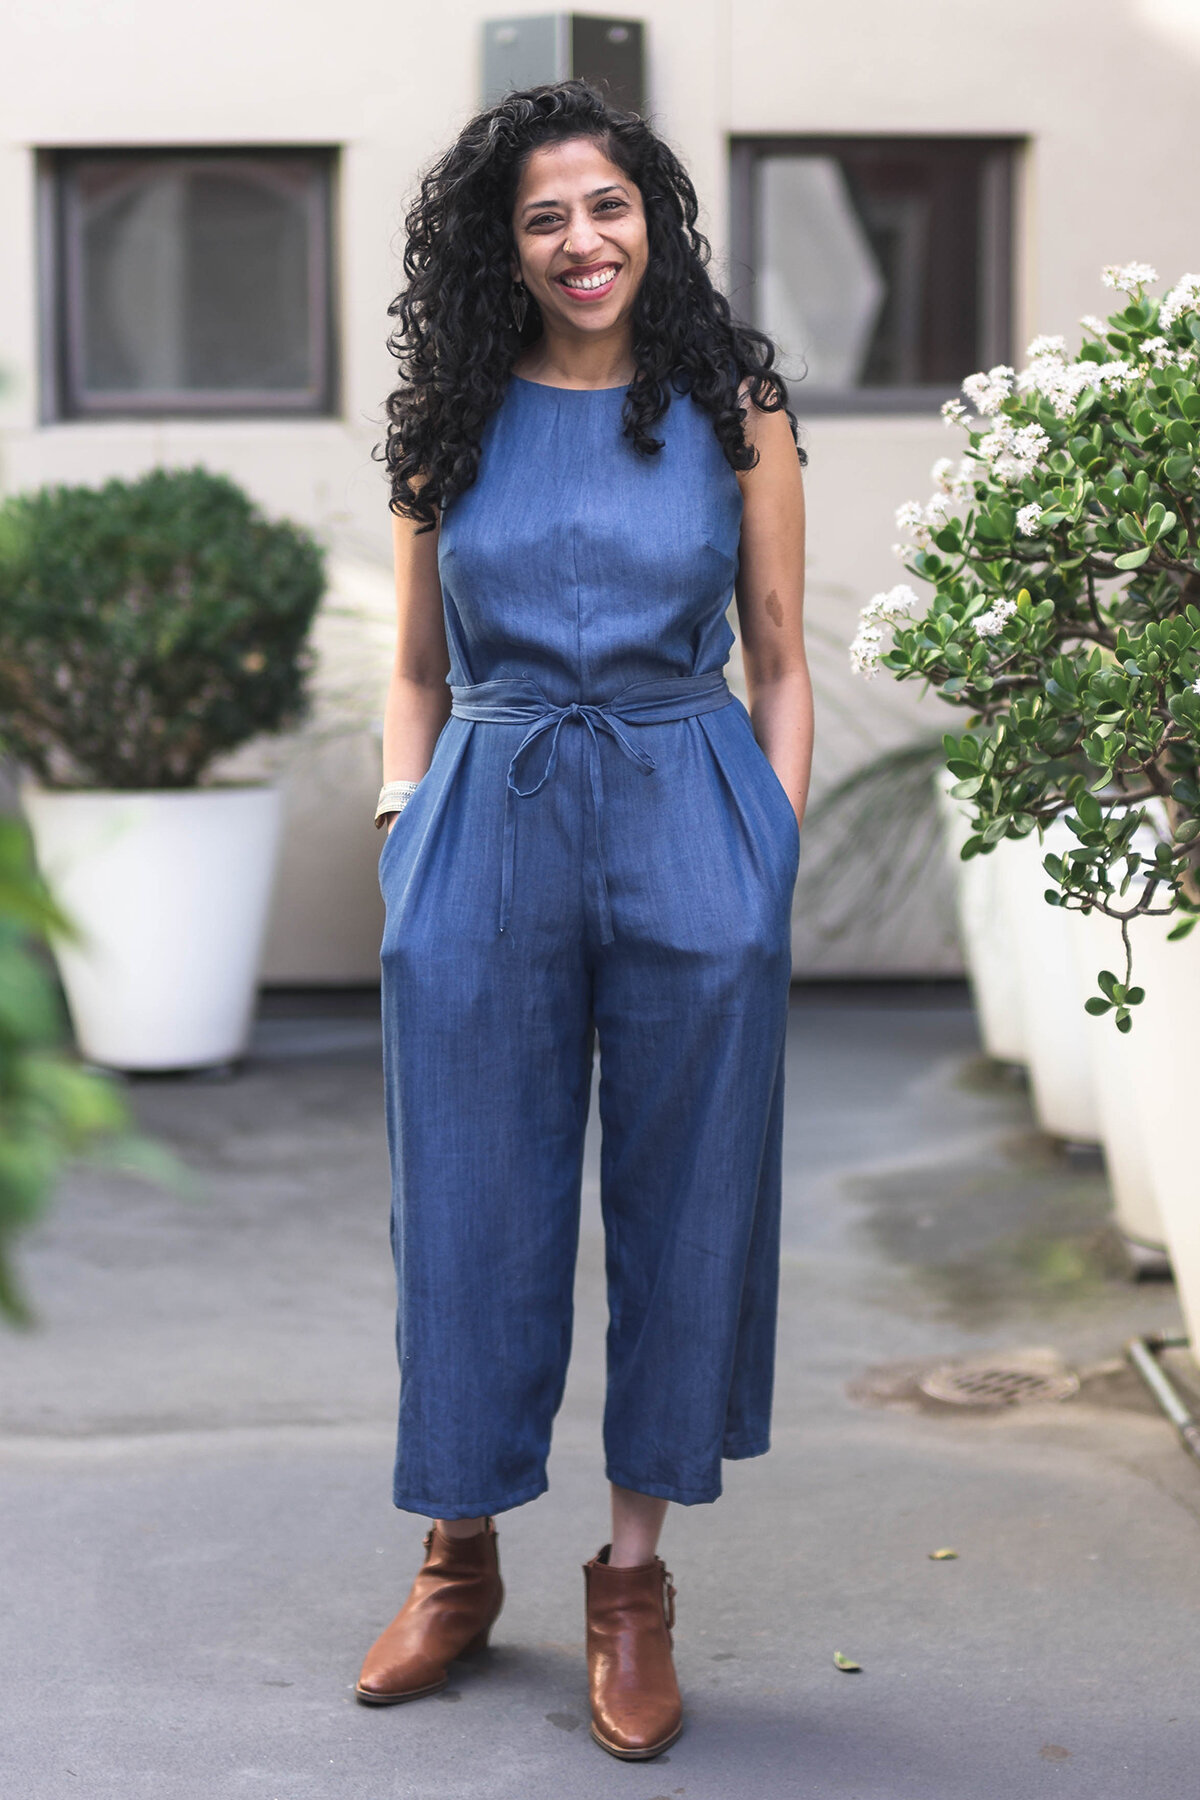
The Neale jumpsuit is a a real skill builder of a pattern! Which is why we chose it to be our first Curated by In the Folds pattern. Sewing a jumpsuit means working with both the top and bottom of the body, which allows for the opportunity to learn more fitting techniques. We created a jam-packed Neale Fit Kit to go along with our first Curated by ITF pattern, so you can jump straight into it. In today’s post, we would like to shares some of these great tips for getting a good fit on a jumpsuit.
Sewing a jumpsuit can be tricky as you are fitting both the top and bottom part of a pattern. But often as they have a looser fit, they are a great intro introduction to pants fitting and with this post we hope to make the process a lot more fun!
1. Pick the right size for you
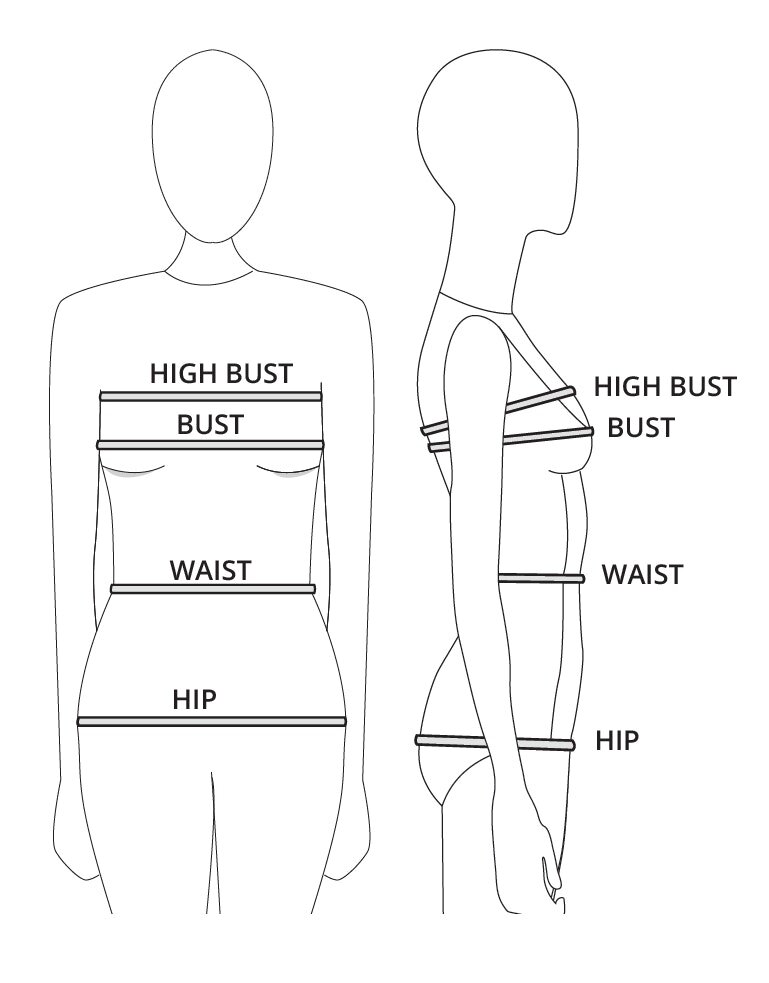
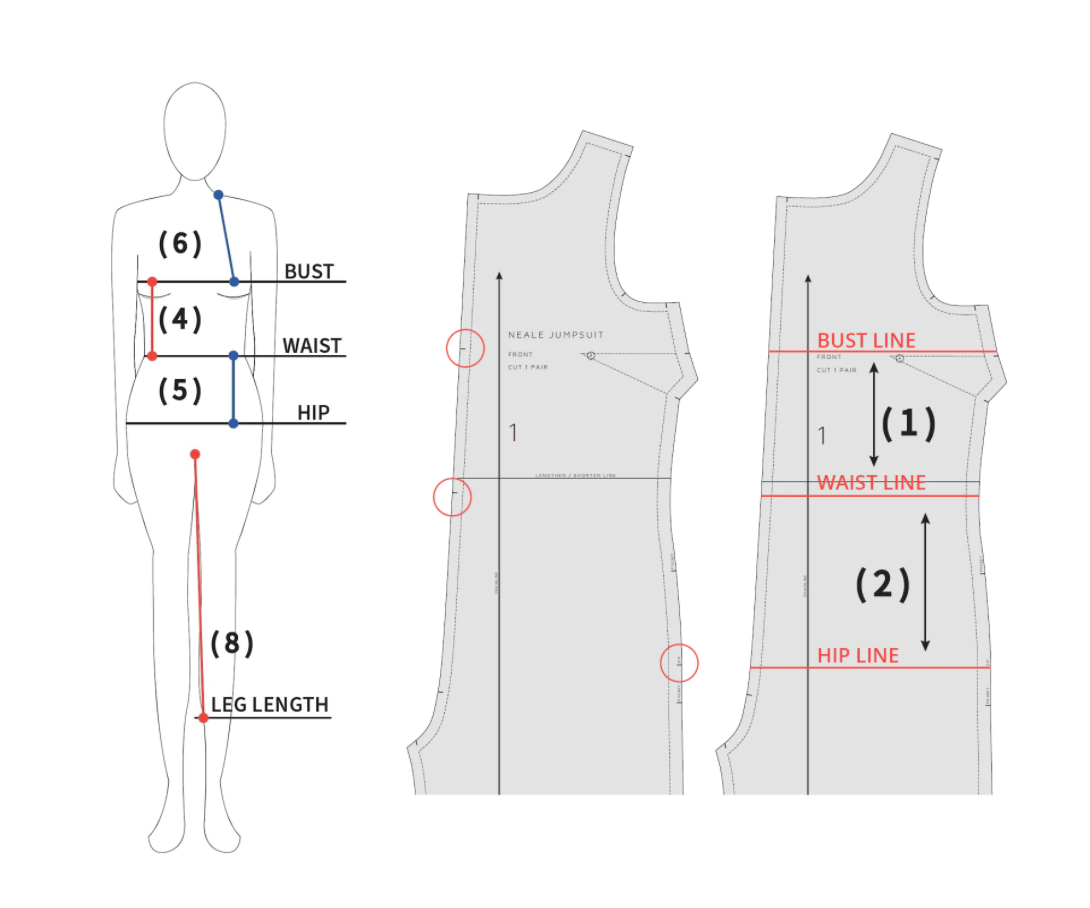
a. Take your measurements using a tape measure, check out our diagram to see exactly where you should measure! Make sure to measure at the fullest part of your hips. We suggest doing this in front of a full length mirror.
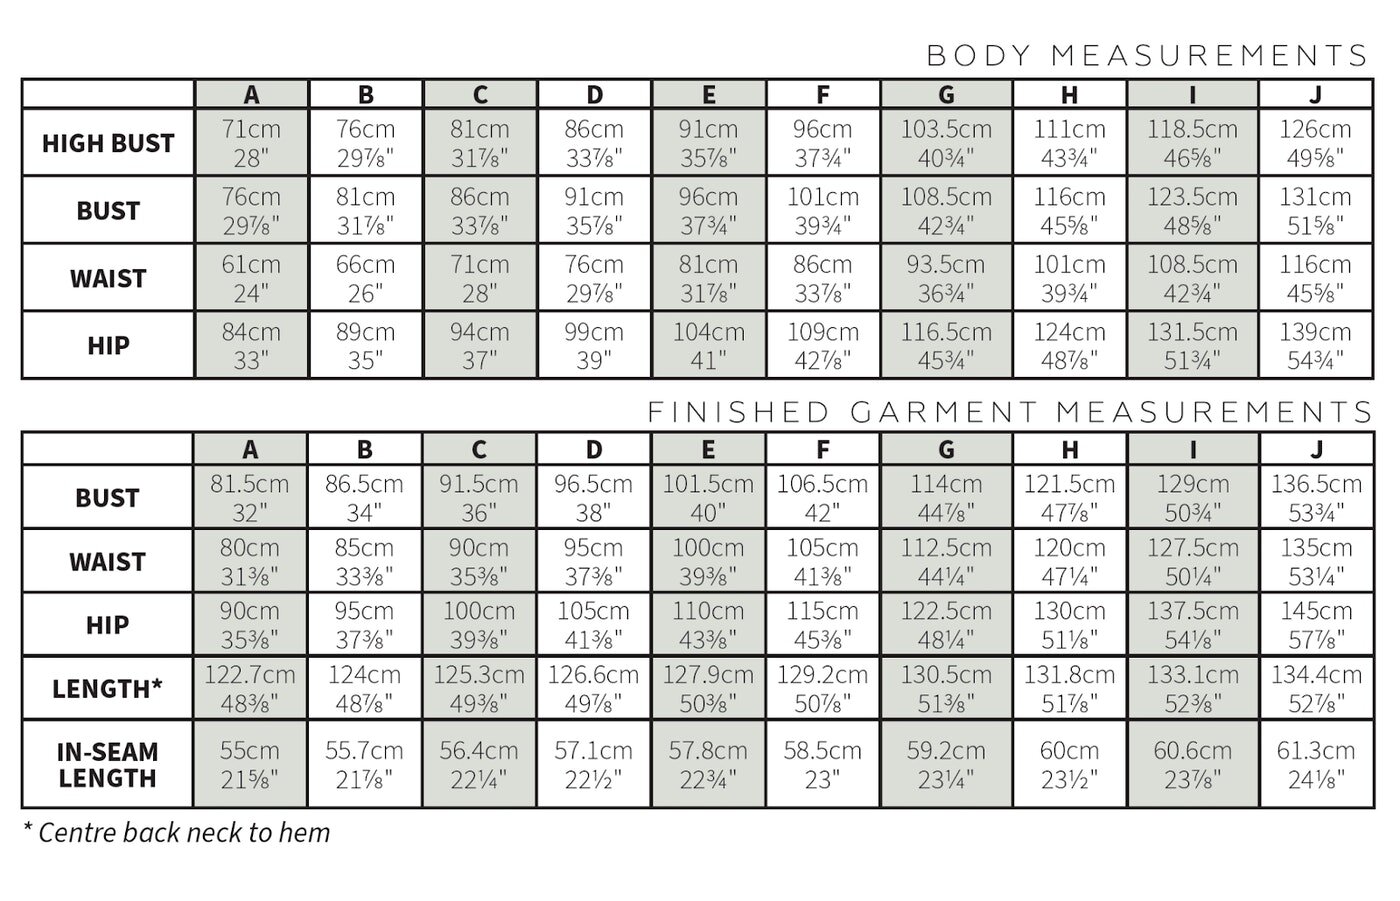
b. Check the size chart and circle or note the corresponding size for each pattern. If your measurements are between sizes, you could blend between the two. Before doing this, look at the finished garment measurements to decide if you could select the smaller or larger size.
TIP: Use a tape measure and place it around your body to get a feel for how it will fit. (Remember to place yourself in the centre of the tape measure rather than pulling it forward or back.) This allows you to see the amount of ease in the pattern - as this is something that changes between patterns. For example the Neale jumpsuit has more ease in the waist than it does in the bust and hip.
2. Make all the adjustments you can before sewing
Before we get started with making our toiles / muslins, it's worth thinking about which alterations you can do beforehand. You can make some alterations before making a toile / muslin using your measurements, while others are made when you have done a fitting of a toile and have the toile to refer to.
Some of you will have a good idea of the alterations that are usual for you to make to a pattern before getting started. We encourage you to make these standard alterations to the pattern before you make a toile so that you can achieve a good fit at the fitting stage.
One example of an alteration you can do beforehand is checking the length. Especially in a jumpsuit you need to consider the length between each section e.g bust to waist, waist to hip, hip to crotch, then add in or take away length at the appropriate section.
Another alteration that you may be able to do before making a toile is a SBA (Small Bust Adjustment) or FBA (Full Bust Adjustment). To check this, work out the difference between your high bust measurement and bust measurement. If the difference between your high bust measurement and your full bust measurement is 2.5cm (1") your bust is an A cup, 5cm (2") it's a B cup, 7.5cm (3") is a C cup, 10cm (4in) is a D cup and so on. Record your bust cup size.
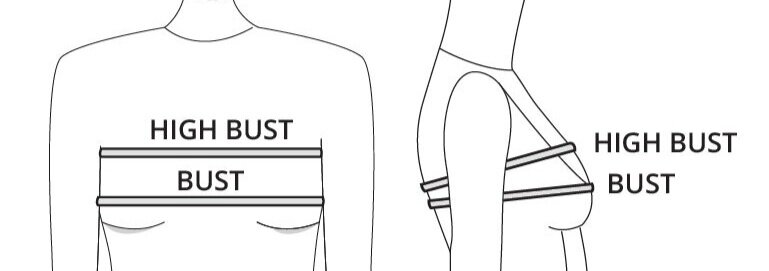
Often pattern companies draft for a B cup, sometimes they will offer a range of cup sizes. It's best to check before you start sewing. In the Folds currently offers a B cup.
• If you have a B cup bust cup size you will not need to make a bust adjustment to the pattern.
• If you have an A cup bust (or smaller) you may need to do a Small Bust Adjustment.
• If you have a C cup bust cup size or larger you may need to do a Full Bust Adjustment
3. Sew a toile
A toile is a test version of a garment, made from a similar, but often cheaper, fabric that assists with the fitting process. By making a toile, you can check the fit, and make any adjustments before cutting into your 'real' fabric.
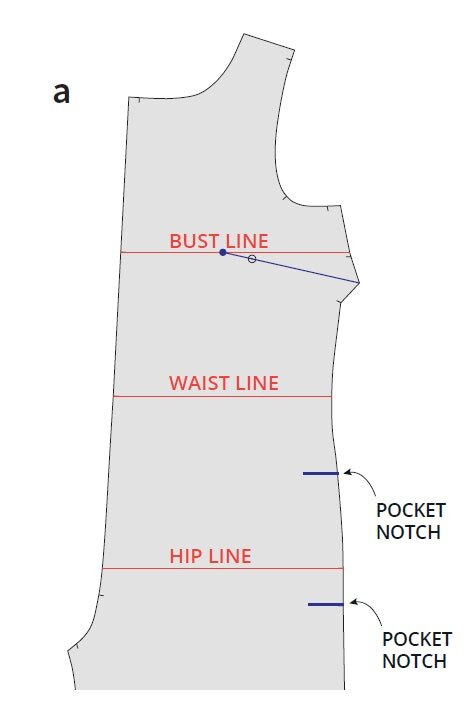
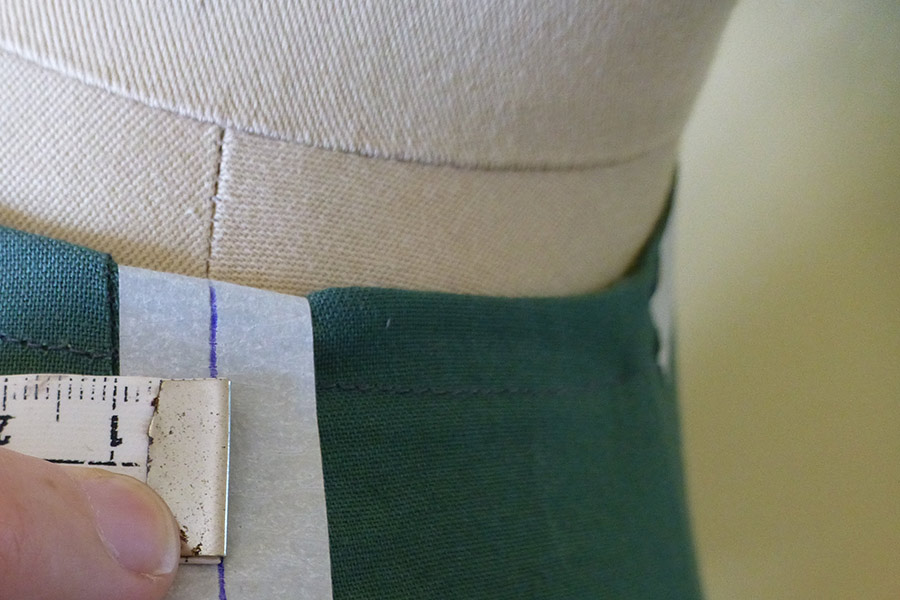
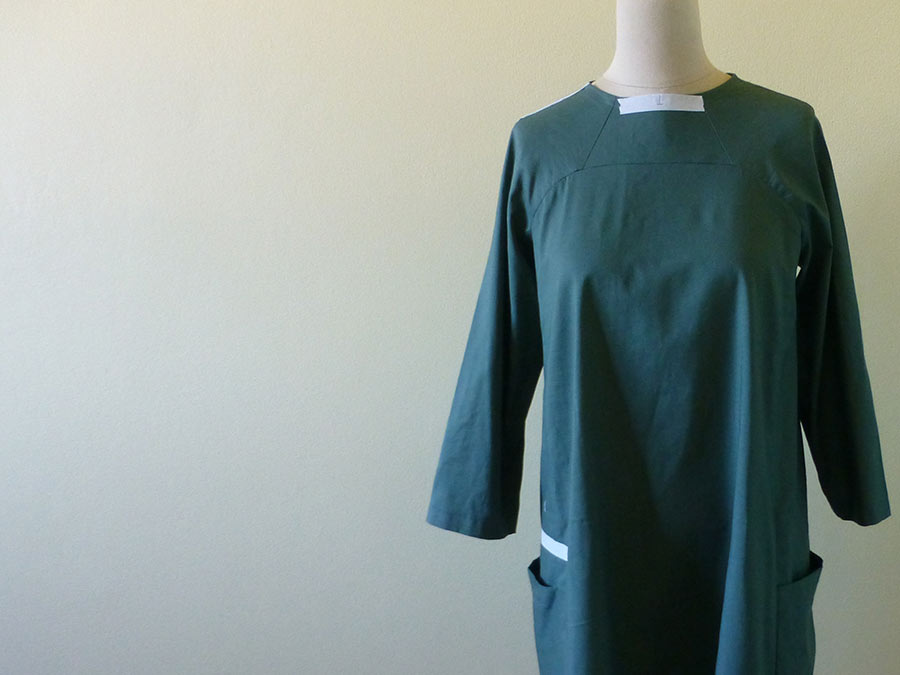
You only need to cut the front and back pieces, you don’t need to sew the zip, facing pieces, pockets or finish the seams. On the toile - mark the bust, waist and hip line on the fabric. On the Neale jumpsuit we’ve added notches so you can easily find these on your pattern!
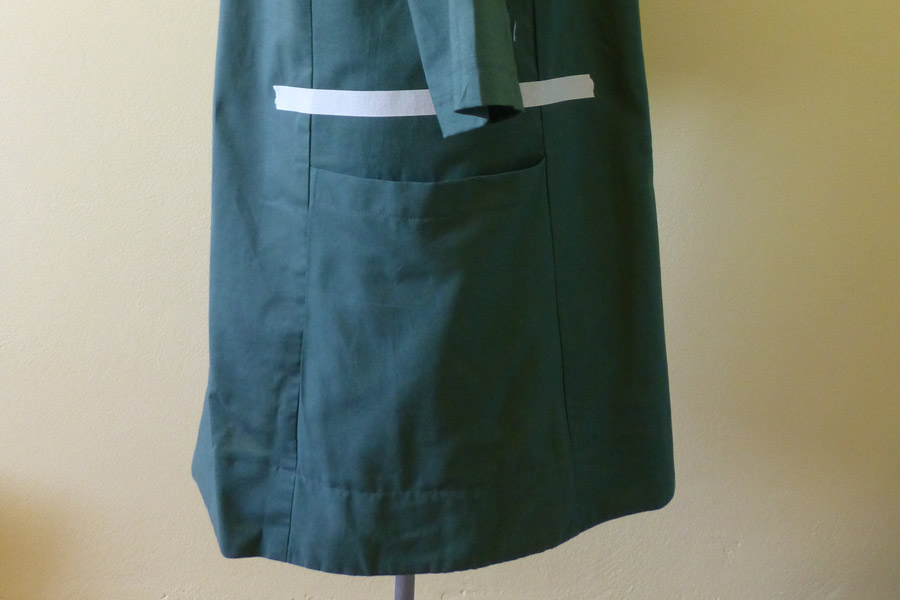
You can also mark in the bust apex point by drawing a line from the centre of the dart, through the dart point and beyond the tip of the dart by 2.5cm (1in). Lastly extend the pocket notches on the toile with a marker so that you can check you are happy with the pocket positioning.

Other tips for sewing a toile are:
Remove the seam allowance from the neckline and armholes and add staystitching to stop them stretching.
Sew the toile with a longer stitch length than usual, so that when fitting the toile it is easy to release the seams if you need to.
Do not sew the hem. It is good to have the hem allowance available if you would like to experiment with length options.
Remember, it is still important to press the toile well as you sew. This will help you when assessing the fit of the toile.
4. Assess the fit
Now it's time to assess the fit. Yay!
Get yourself set-up in front of a full length mirror with a notebook, pen, pins, seam ripper / snips and marker. If you have a friend who can help you - get them too! Work through the checklist below and take note of any issues. It’s also a good idea to take pictures on the front, side and back (you can use the timer on your camera). Sometimes you notice things on the photos that you may not see in real life.

Jumpsuit fitting checklist:
Check that your side seams appear straight and are perpendicular to the floor. If your side seam is pulling towards the front or the back, this normally means that you need more width in the area where it's pulling.
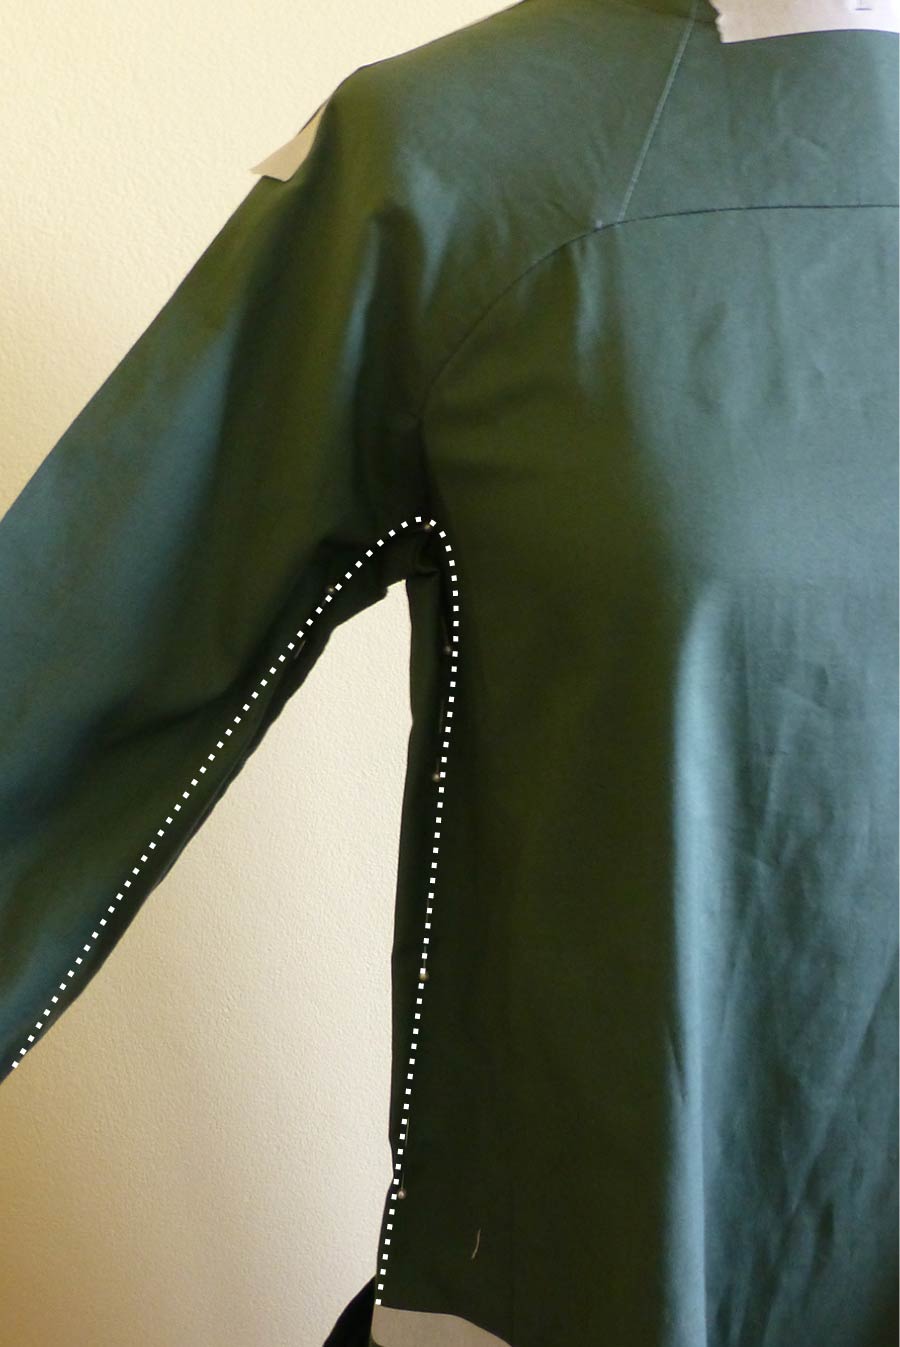
Lift your arms and check that the armhole sits in a comfortable position under your arm. Check that the armhole is a nice shape on the front and back.
Check that your BUST LINE, WAIST LINE and HIP LINE are in the correct position for you and are all parallel to the floor. If any of these lines are in the incorrect position, you will need to either shorten or lengthen the pattern. For a jumpsuit it’s important to notice where to add/take length because you are fitting both a top and pants in one.
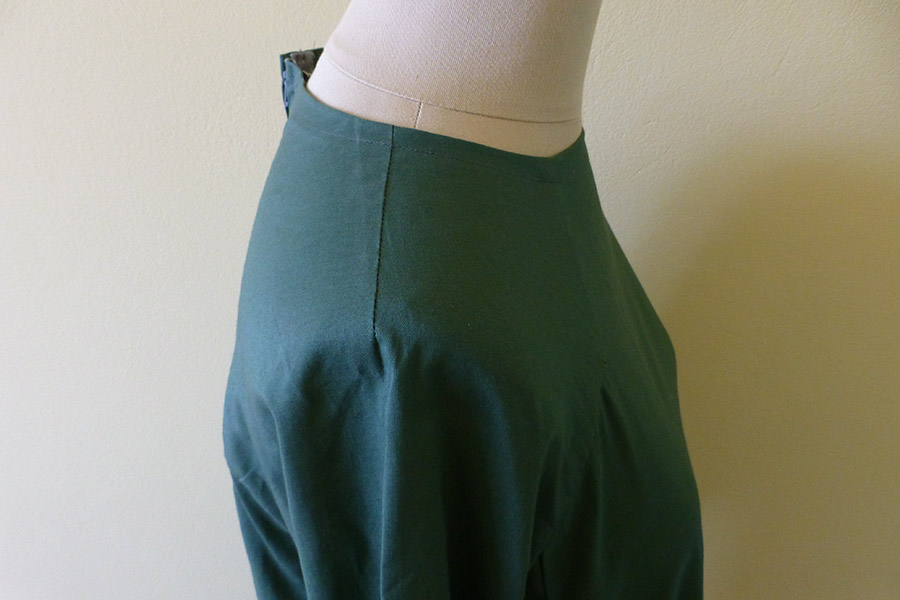
Check the front and back crotch are not too tight or too loose. If they are, you will need to adjust the crotch length.
Move around. Check that you can move and sit comfortably in the jumpsuit. If a seam feels tight, let out the seam with your seam ripper and re-pin the seam with a smaller seam allowance to see if this helps.
You can find more fitting tips, the full checklist and instructions on how to make these adjustments in our first issue of Curated by In the Folds. Our September project, the Neale jumpsuit, comes with a bonus Fit Kit that will walk you through a range of different pattern alterations in detail.
5. Grab a cup of tea and take a break!

Fitting patterns at times can be hard. It’s important to take a break! Remember not to ‘over fit’, it’s easy to start obsessing over every wrinkle but in reality, we move around and we aren’t just a static image!
You don’t have to make all of the adjustments at once. You can choose which are more important to you and if you like, you can build on these as you go. With Curated by In the folds we aim to help you through the fitting process, one step at a time, providing you with all the information (always tested by us!) in one place and hopefully have some fun with it! As part of the subscription, we also have a great online platform in which you can ask any questions and see what other people are making and learn from their fitting process too.
If you’d like to learn more about fitting and join us with our monthly subscription, Curated by ITF you can do so via the link below.