Over the past two days I have shown you how to prepare the bodice of your Rushcutter - View B. At this point we are up to putting in the in-seam pockets.
I just LOVE pockets, so I find a way to put them in pretty much every garment I make. Even a soft floaty dress like my Rushcutter.
If you're not as partial to a pocket as I am, you can simply attach the FRONT to the SIDE PANELS, ignoring the pocket all together. But if you are a fan of the pocket, well continue on with me today and I'll show you how to get a lovely finish with a french seam. And this method will work for other garments, not just The Rushcutter!
Place your pockets
Take 1 pair of pockets and, with wrong sides together, match the pockets to the notches on the FRONT. The notch in the centre of the pocket should be matched with the middle notch on the FRONT of the dress.
Pin pocket in place. Now, before sewing, I would suggest holding the panel up to your body, and checking how the pockets sit on your body. The top of the panel should sit just above your bust. If the pocket feels too low or too high, remove the pins and place the pocket in a more suitable location (this is when a toile really comes in handy). Measure the distance between the notch on the pocket and the notch on the dress, so that you will be able to place the other pocket pieces in the correct spot.
Stitch one side of the pocket to the front
When you are happy with the pocket placement, stitch from the top of the pocket to the bottom, using a 6mm (1/4in) seam allowance.
Repeat on the other side.
Trim back pocket seam allowance
Trim back the seam allowance by 2-3mm (1/16in), from the top of the pocket to the bottom, leaving the rest of the seam untrimmed, on both sides.
Open the seam, and press the seam allowance towards the pocket.
Create a french seam
Fold the pocket back towards the dress, now with right sides together, enclosing the raw edge and the original row of stitching inside the fold. Once again, stitch from the top of the pocket to the bottom with a 6mm (1/4in) seam allowance. Repeat for the other side.
Stitch pocket to side panel
Now take the remaining pair of pockets and match them to the SIDE PANEL pieces with wrong sides together, once again matching up the centre notches. If you changed the placement of your pockets on the front, make sure you do the same for the pockets being attached to the side panels. Pin in place and attach using the same method we used for the first side.
Join the front to the side panel
Press all 4 pocket bags away from the panel they are attached to.
With wrong sides together, pin the SIDE PANEL to the FRONT on both sides. Pin up the seam, around the pocket, and then continue pinning the remainder of the seam.
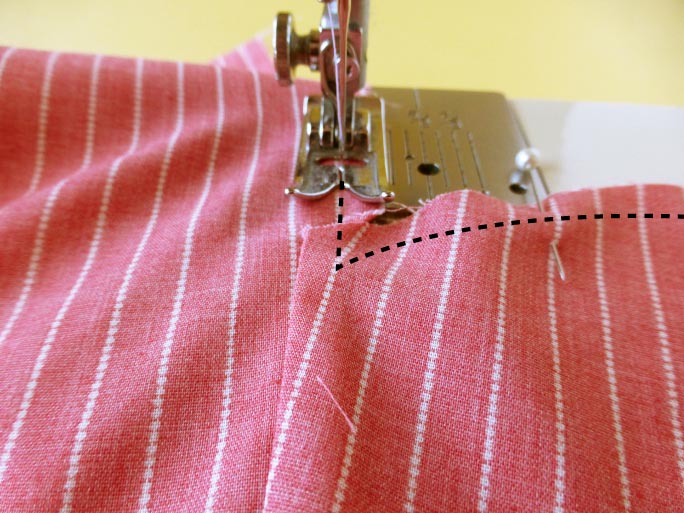
Stitch the pieces together with a 6mm (1/4in) seam allowance. You will notice that, when you approach the pocket, your stitching line does not meet up with the seam between the body of the dress and the pocket. This is how it is supposed to look, they will match up when you sew your second row of stitching.
Clip into corners
Clip into the corners between the pocket bag and the body of the dress, getting nice and close to the row of stitching, but being careful not to cut through.
Trim back the whole seam by 2-3mm (1/16in).
Press seam
Turn the pieces inside out, and press the seam flat. Pin and then and stitch along the seam, with a 6mm (1/4in) seam allowance enclosing the raw edge inside the seam.
Attach the back
Attach the BACK to the side panels with a french seam. Use the notches to help you position the pieces correctly. Press the finished seams towards the front of the dress.
So that brings us to the end of this post! Tomorrow, the Rushcutter will really start looking like a dress as we will be joing to the bodice to the body of the dress. Yay!


