Including panel lines in a design is a good way to eliminate darts, without losing the fitted shape of the garment. They are also a great way to add interest to a design. There are countless variations, and it is also a great way to include more than one fabric in your design if you would like (if you fancy a splash of contrast fabric like me).
What are princess panels?
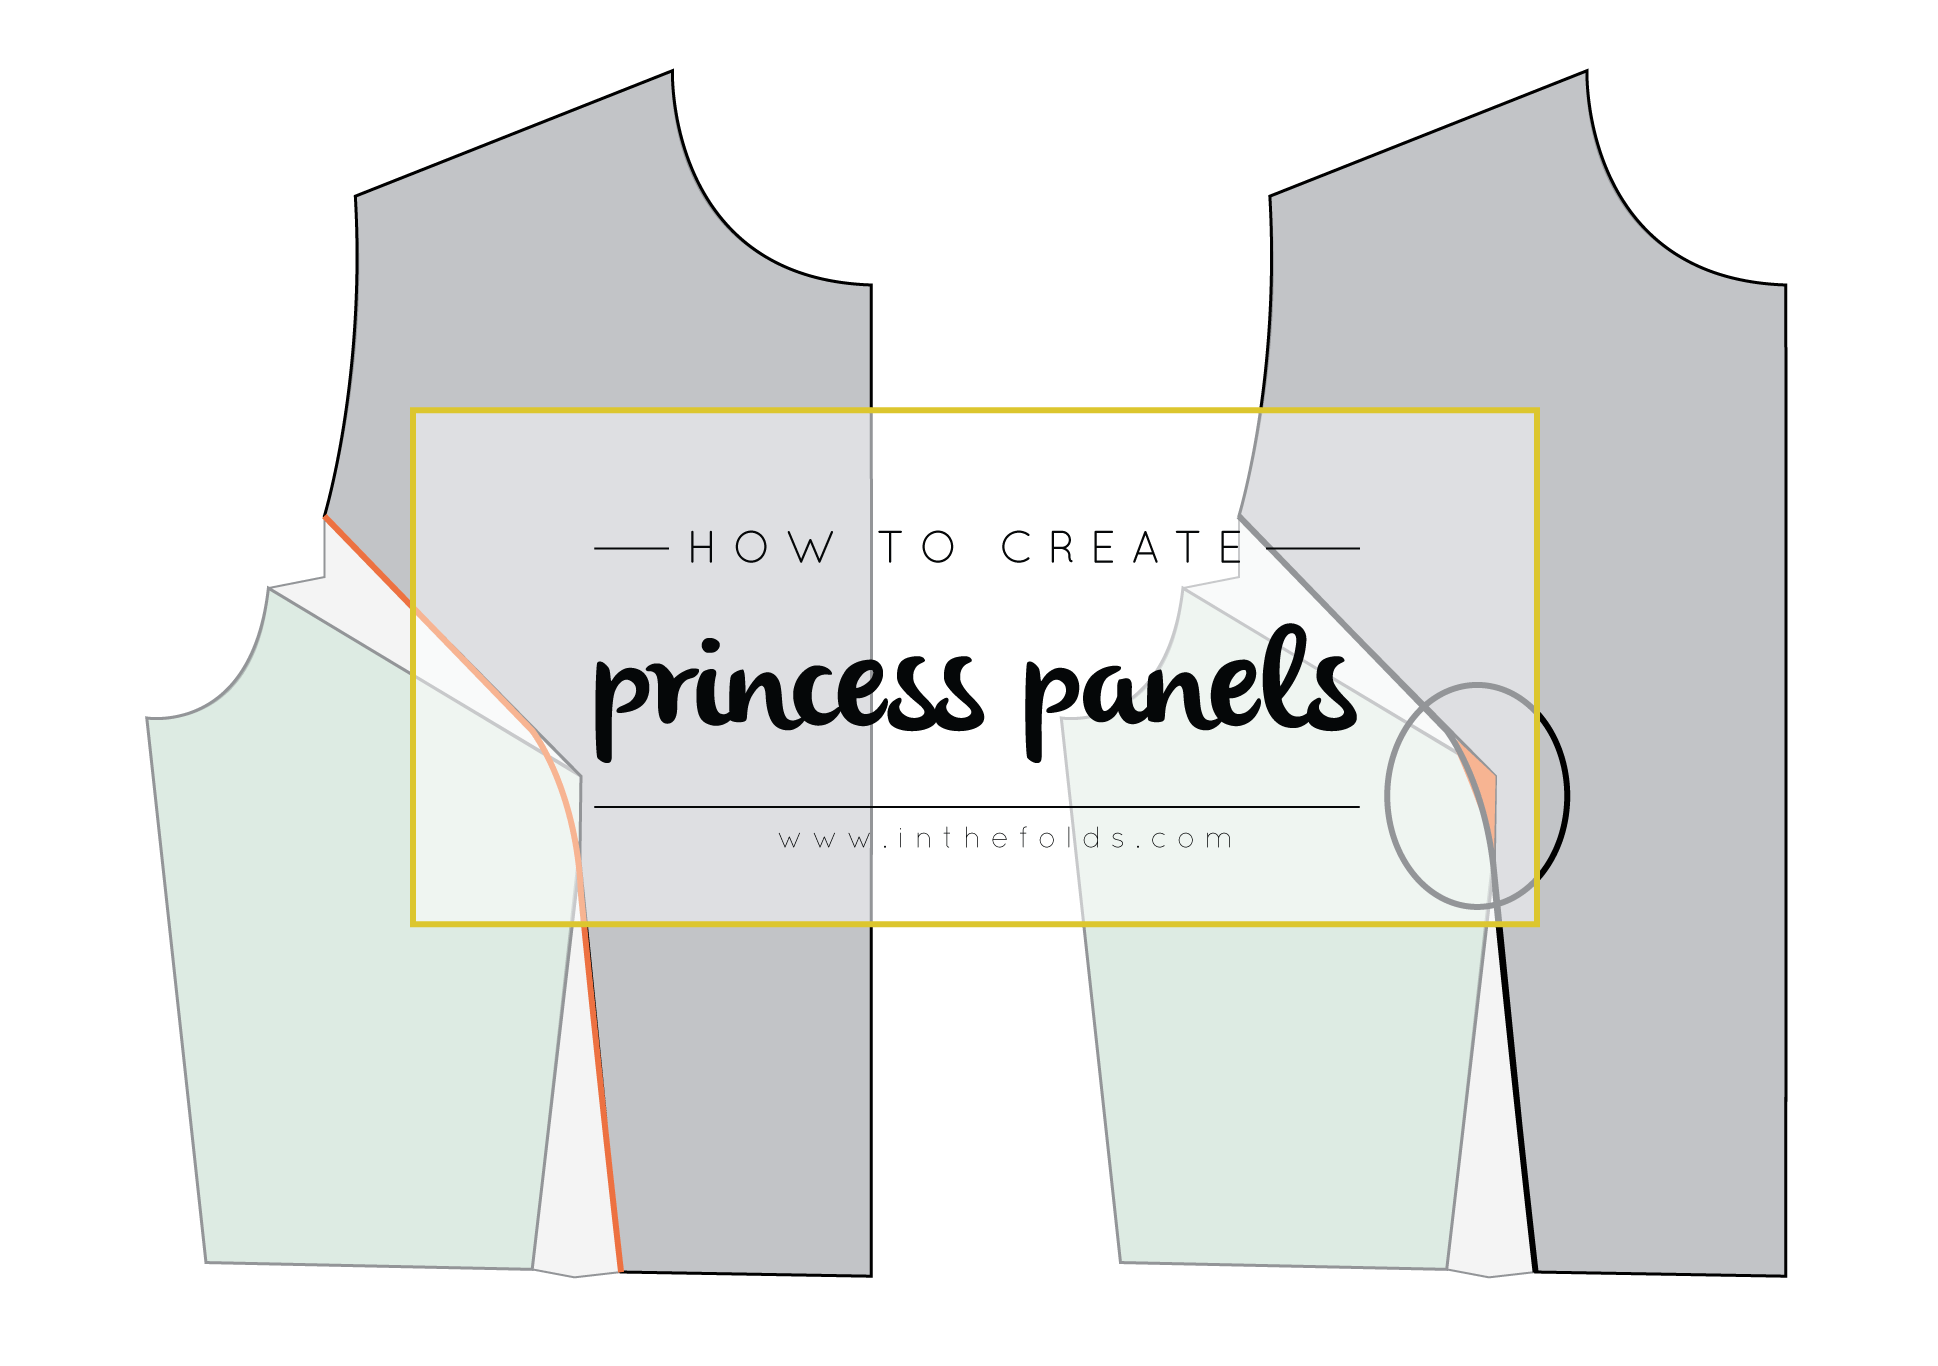
'Princess panels' are panels that are shaped around the bust, to create a nice fit (without the need for darts), but can also be an interesting design detail.
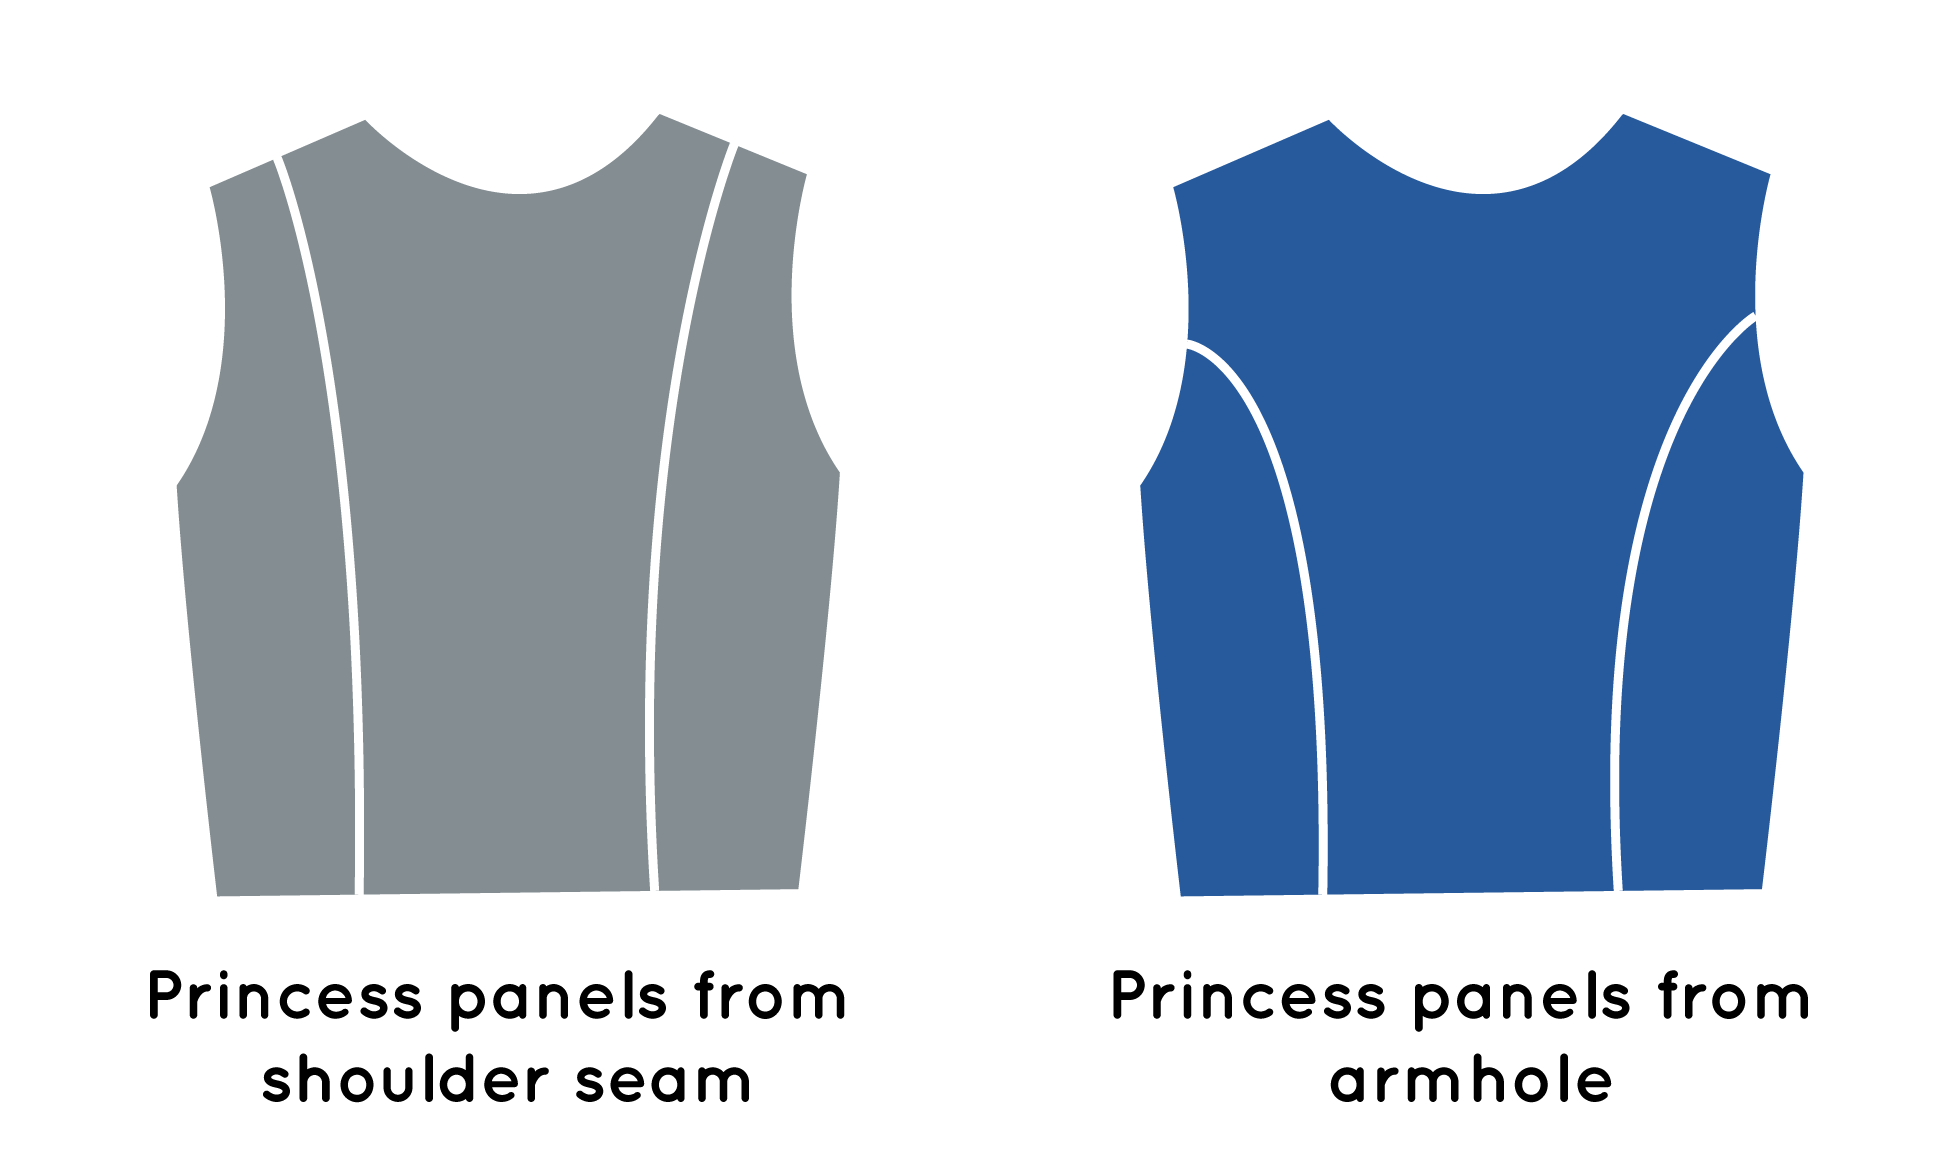
Princess panels can cut through the pattern from the shoulder line to the waist, or they can cut through the pattern starting at the armhole and running down to the waist. I'll show you how to create both options, although they use basically the same method - and it's really up to you which you would prefer. If you are a beginner, I'd suggest drafting the version from the shoulder seams, as it can be easier to sew. The curve required to have princess panels coming from the armhole can be a little trickier to sew (but totally manageable if you've got some pins and patience).
I will be using the basic bodice in the example, but you can create princess panels on any fitted top pattern with waist darts.
Option #1 : Drafting princess panels from shoulder seam
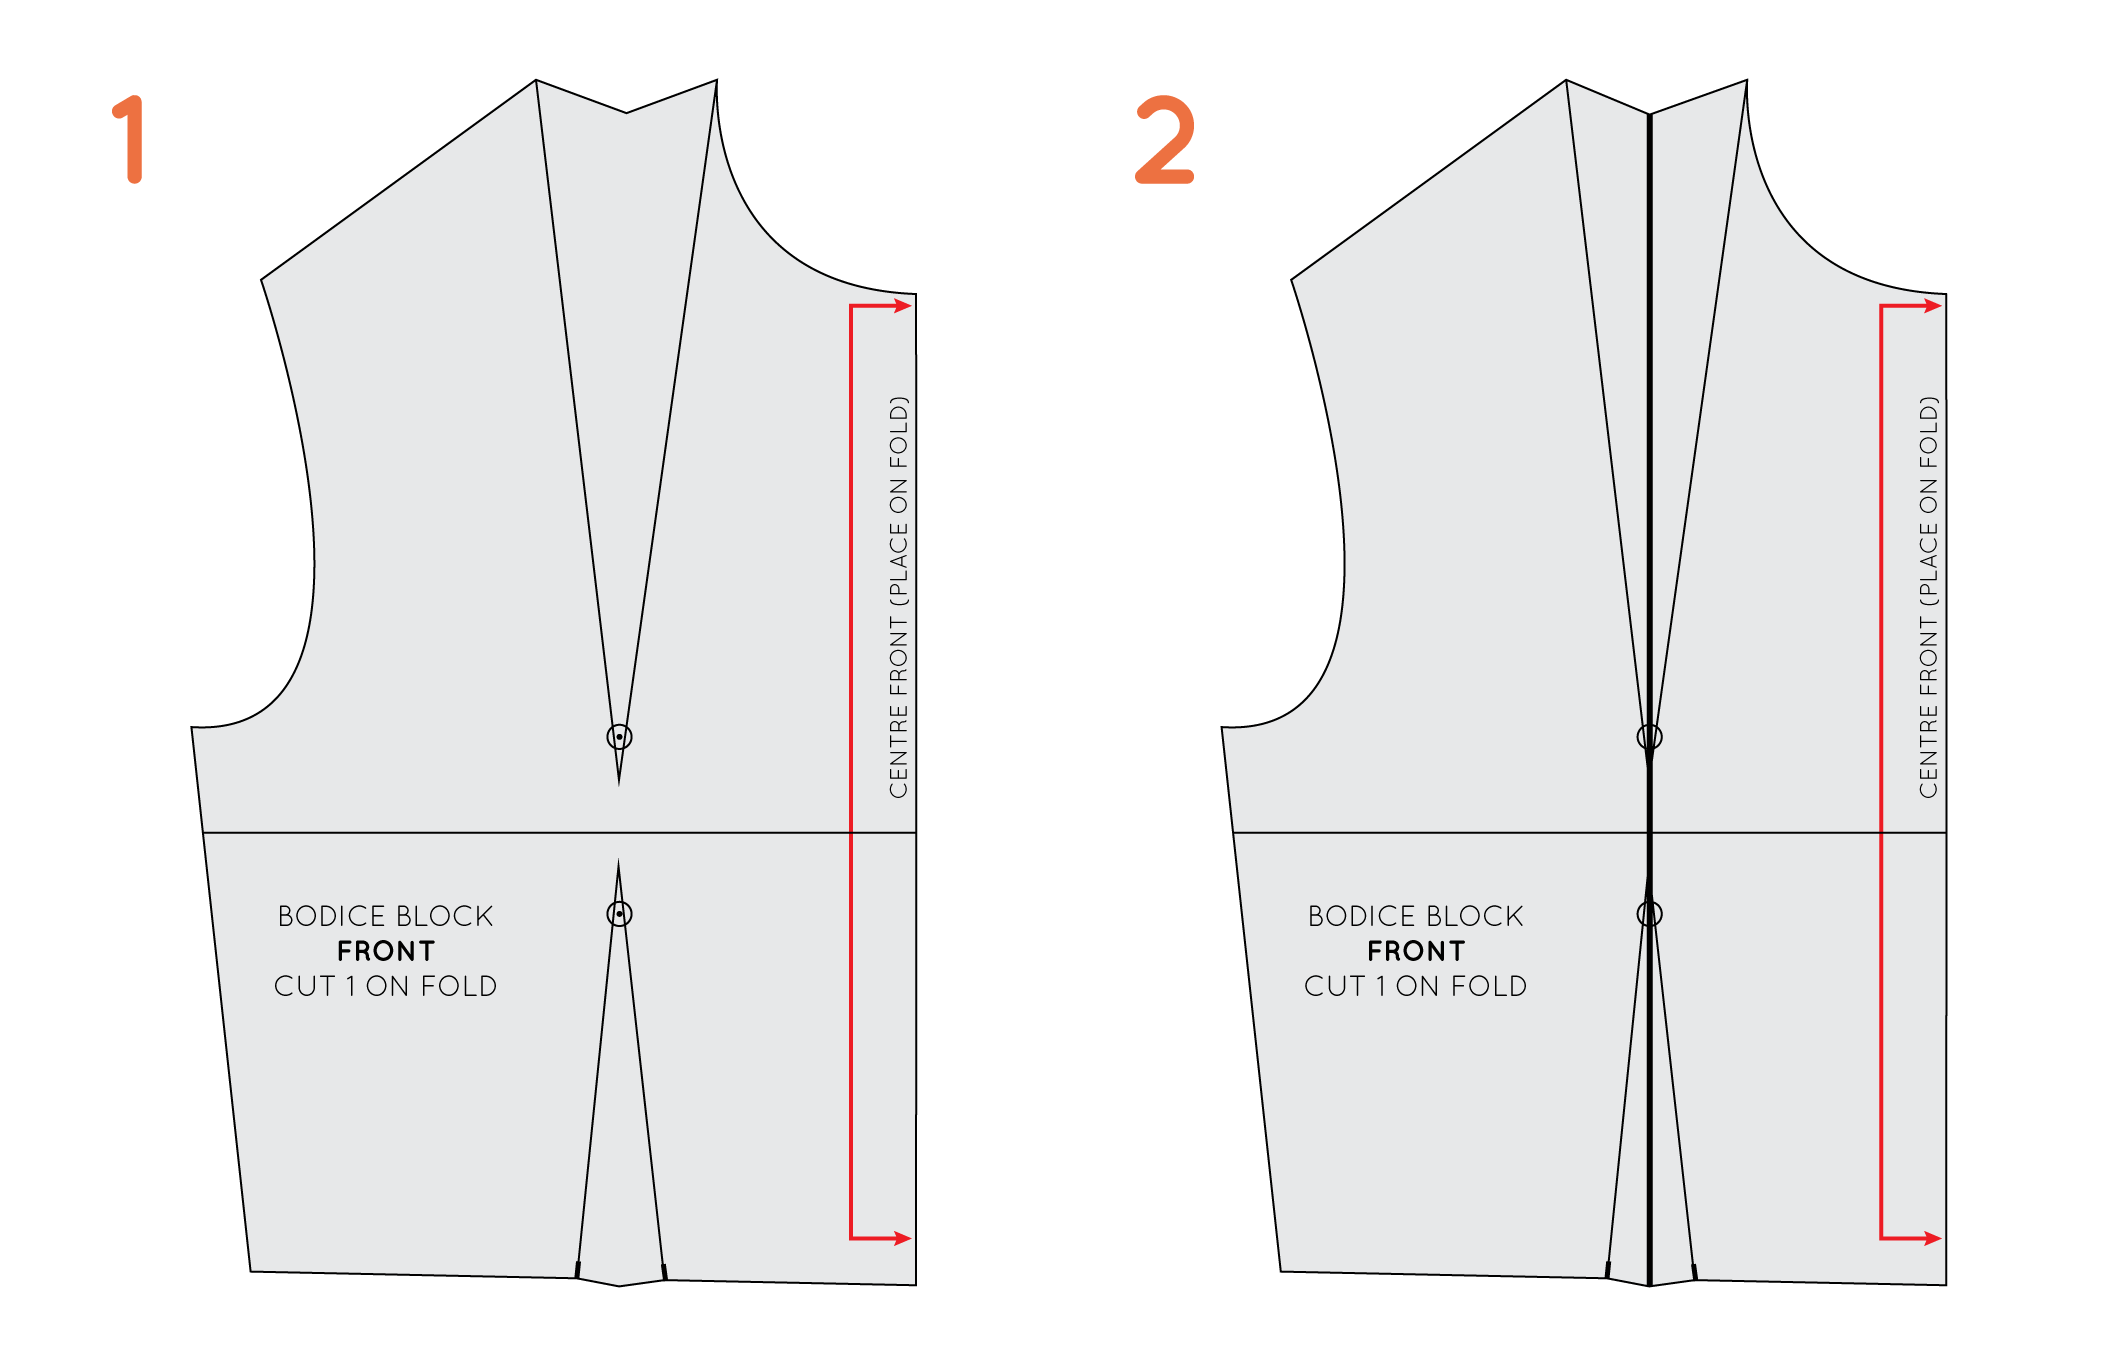
1. Trace a copy of the pattern you will be adjusting.
2. Draw a straight line through the centre of both darts.
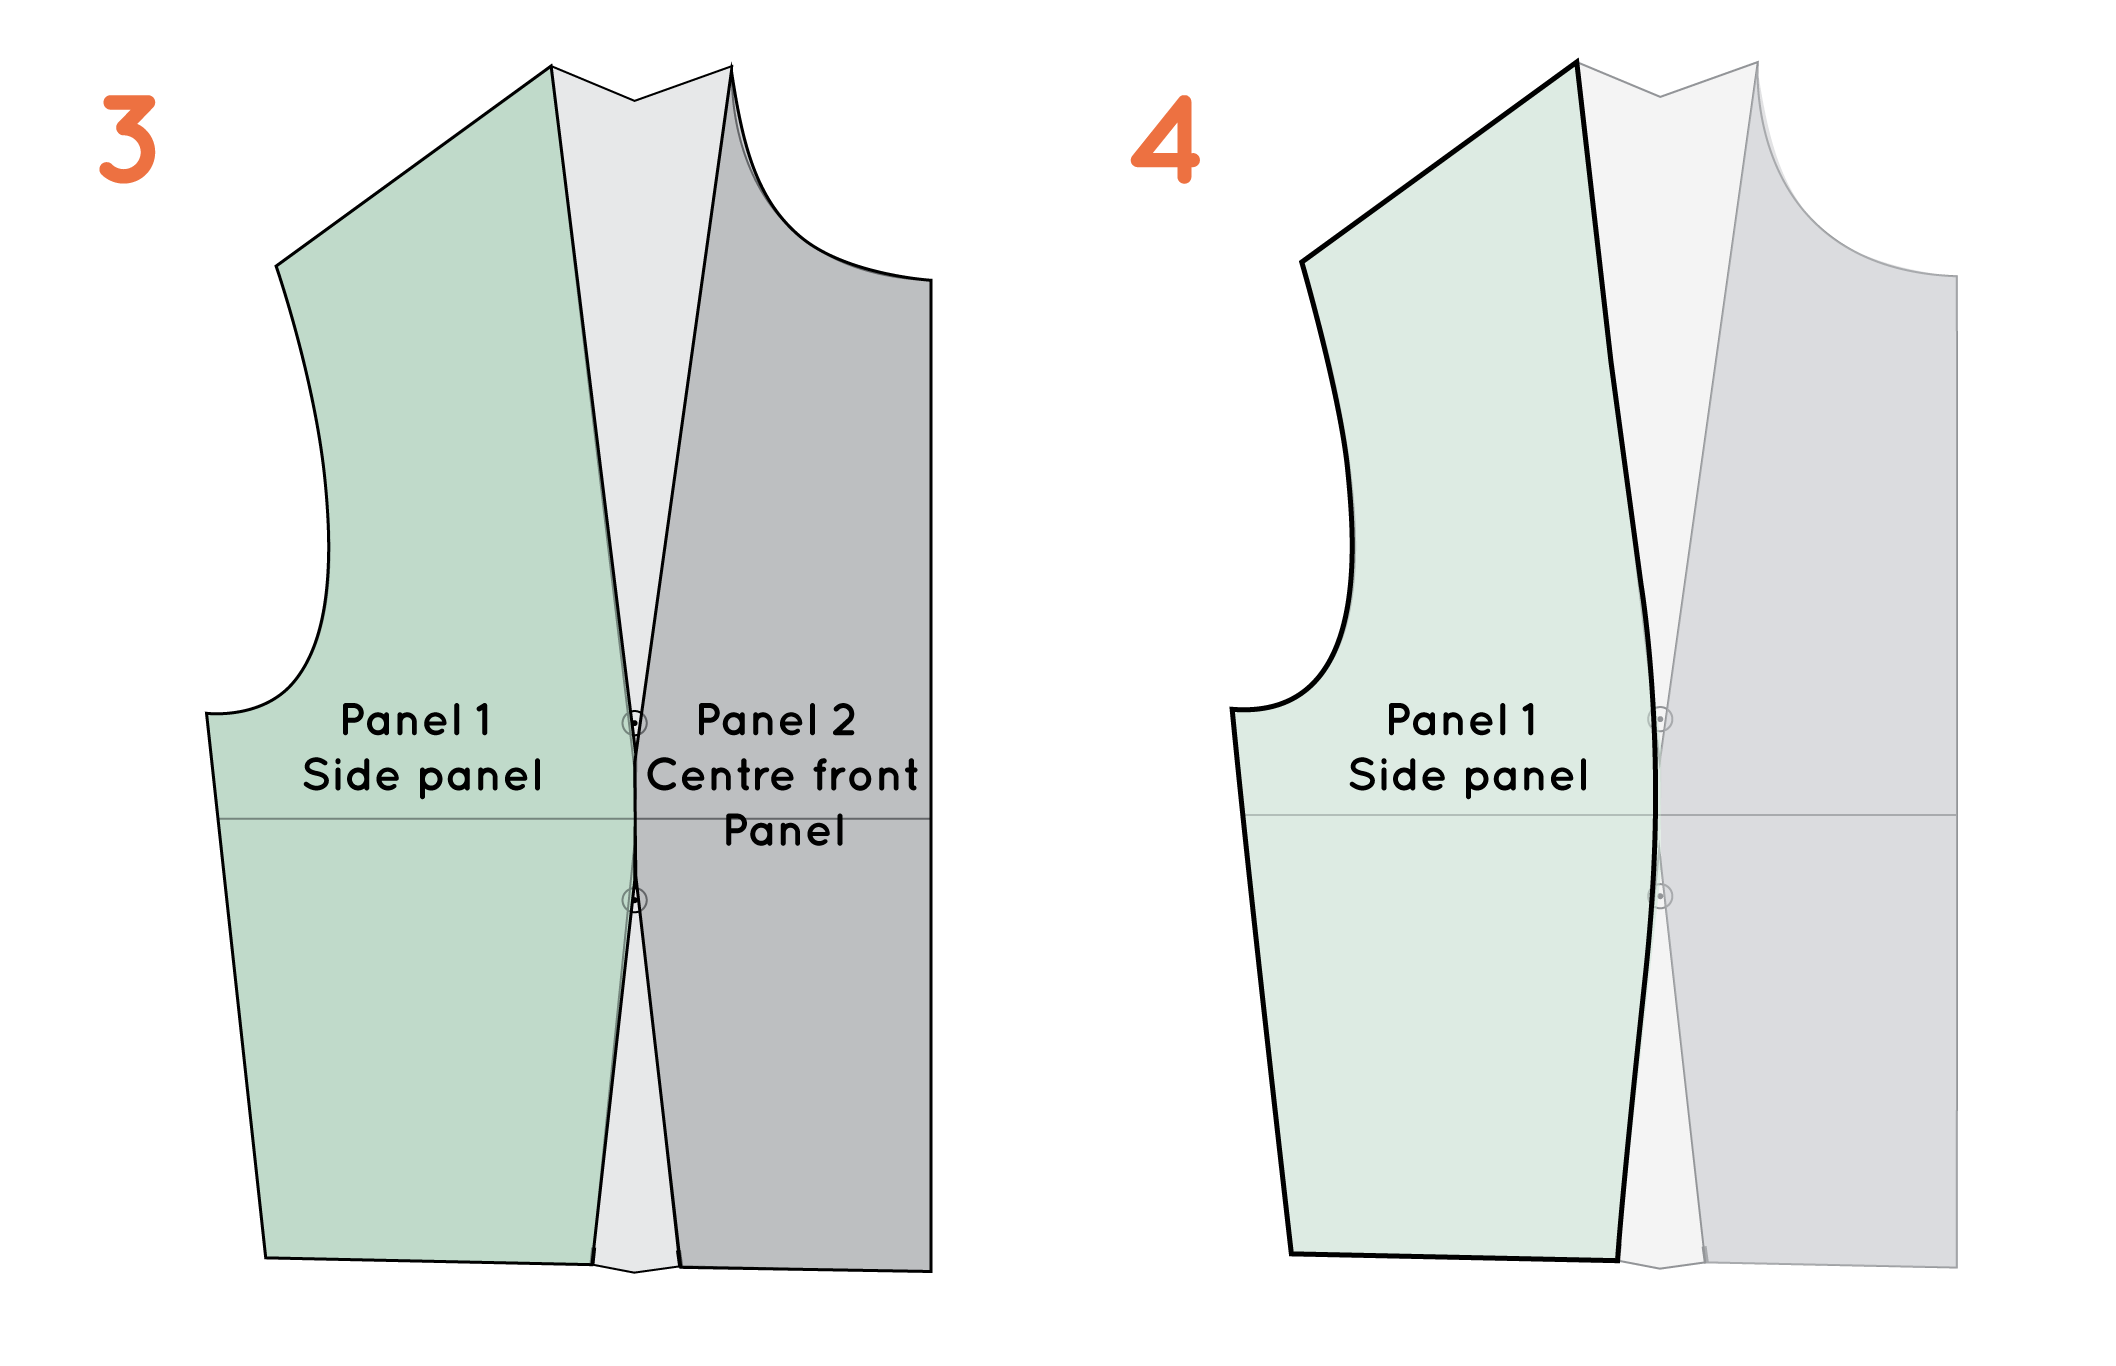
3. You will be separating the pattern into two pieces, and eliminating the darts all together - creating a 'side panel' and 'centre front panel' that are sewn together to create the shaping over the bust.
4. Take a piece of pattern paper and trace the side panel piece. To avoid pointy breasts (and to make it easier to sew), you will need to change the rigid angles of the dart arms into a smooth curve along the panel line.
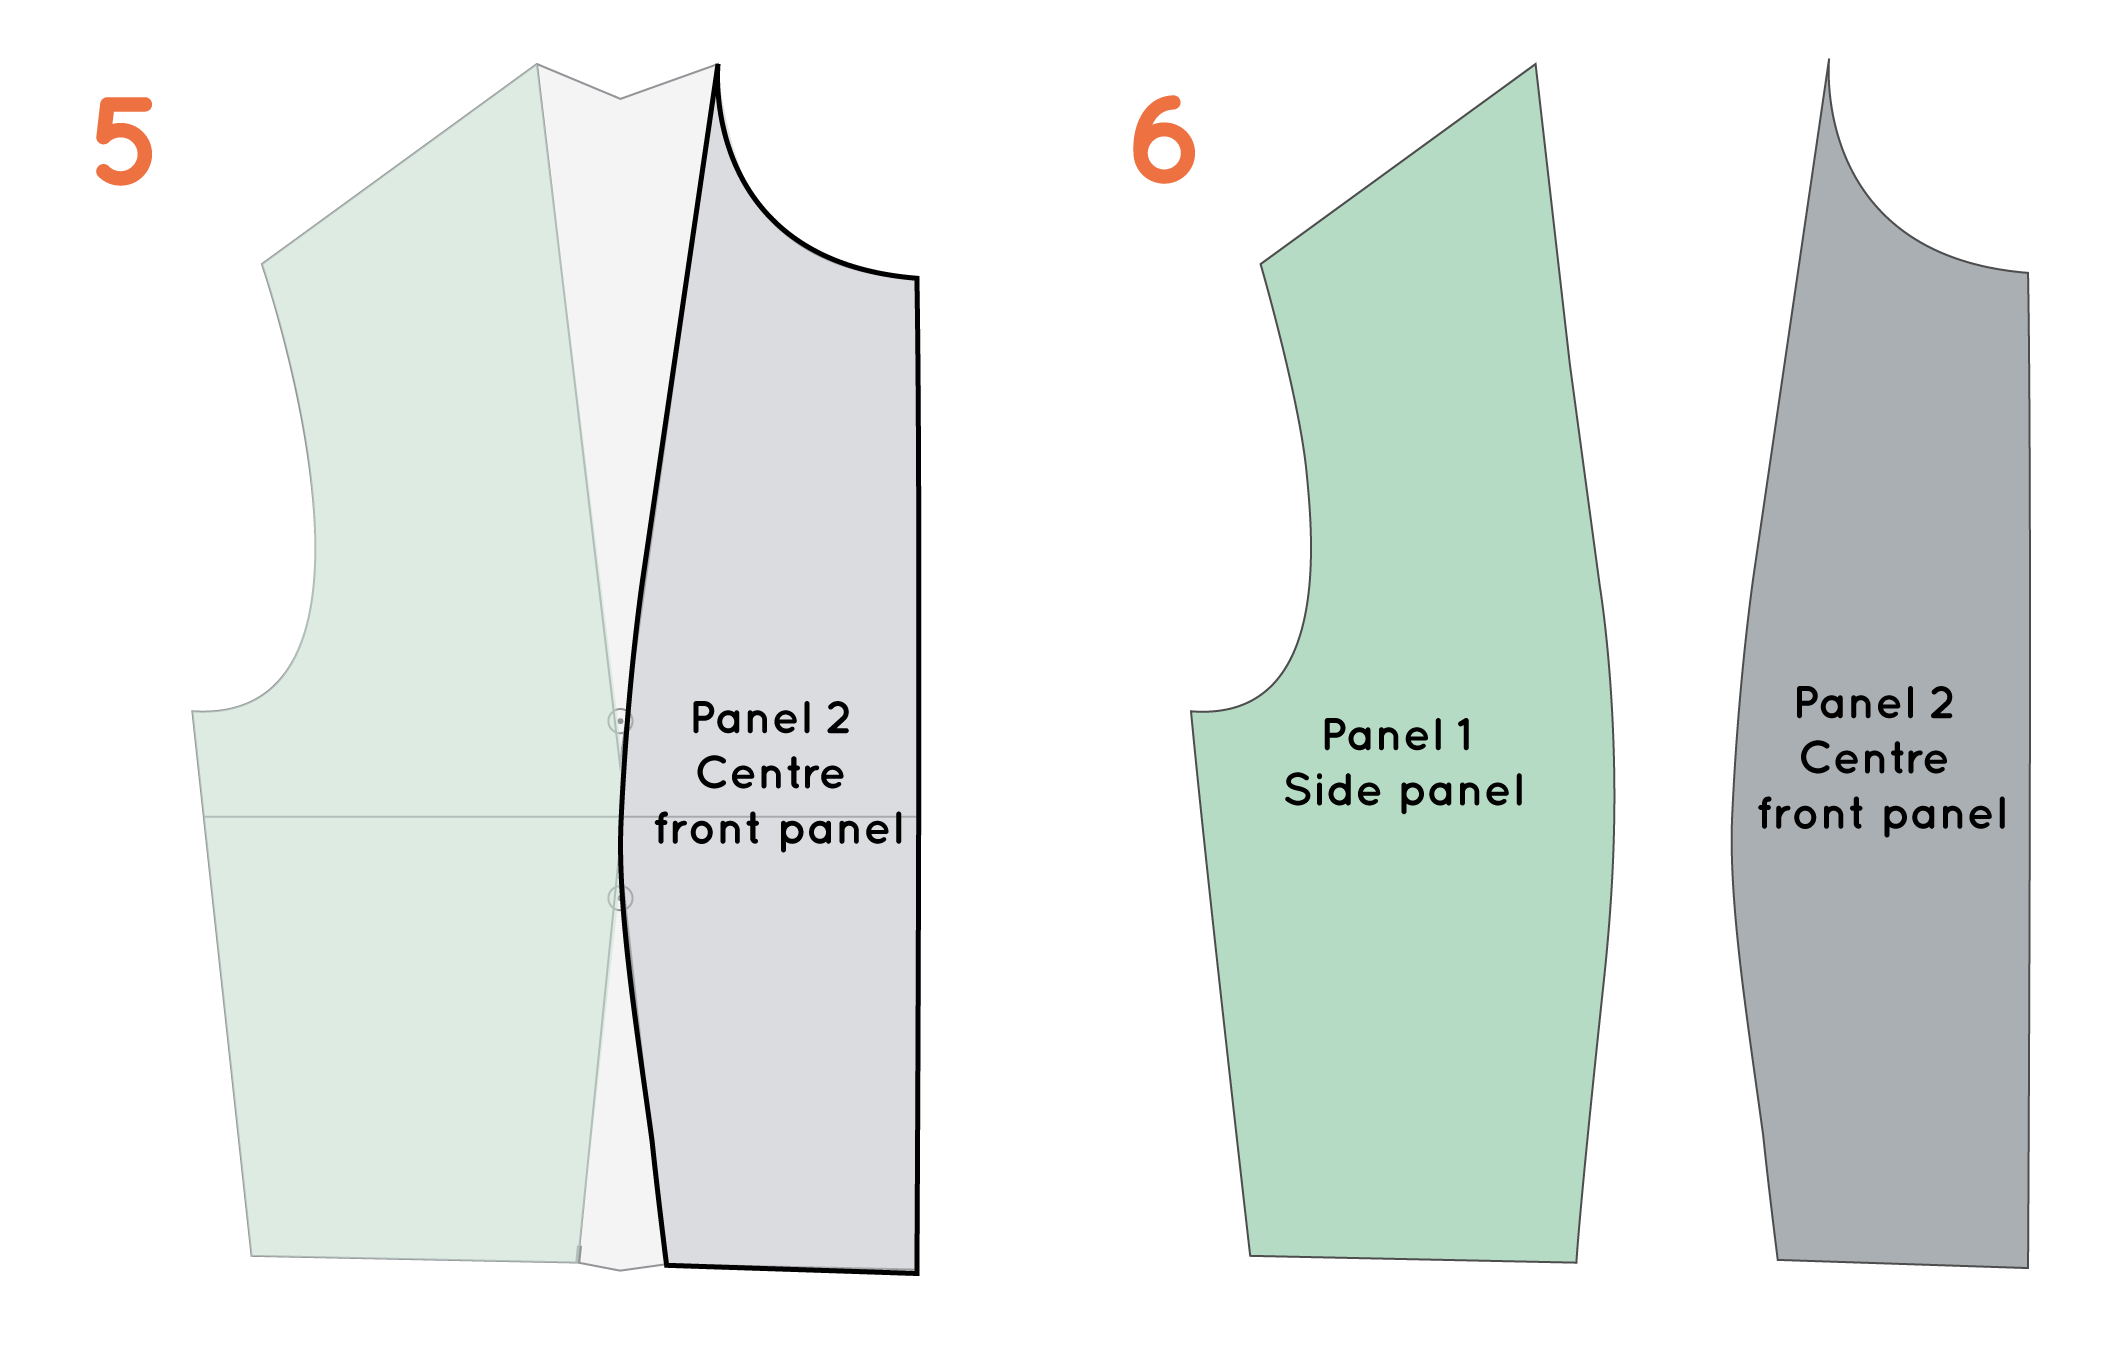
5. On another piece of paper, trace the second panel (centre front panel) once again smoothing out the angles of the dart arms to create a smooth curve.
6. You now have two separate pattern pieces and no darts!
The next steps are to check that the curves on each piece are the same length (I'll do a post about how to do this next week), add seam allowance and pattern markings (you will need a grainline, cutting instructions, and notches along the curve).
OPTION #2 : DRAFTING PRINCESS PANELS FROM armhole
If you would prefer to have the panel lines coming from the armhole of the bodice, you will need to start with a dart in the armhole. If your dart is located elsewhere (for example, in the shoulder like it was in the previous example) you will need to start by moving the dart to the armhole.

1. Trace a copy of the pattern you will be adjusting. I will be using the basic bodice in the example (with darts transferred to armhole), but you can create princess panels on any fitted top pattern with waist darts.
2. Draw straight lines through the centre of each dart. These lines will intersect at the bust point.
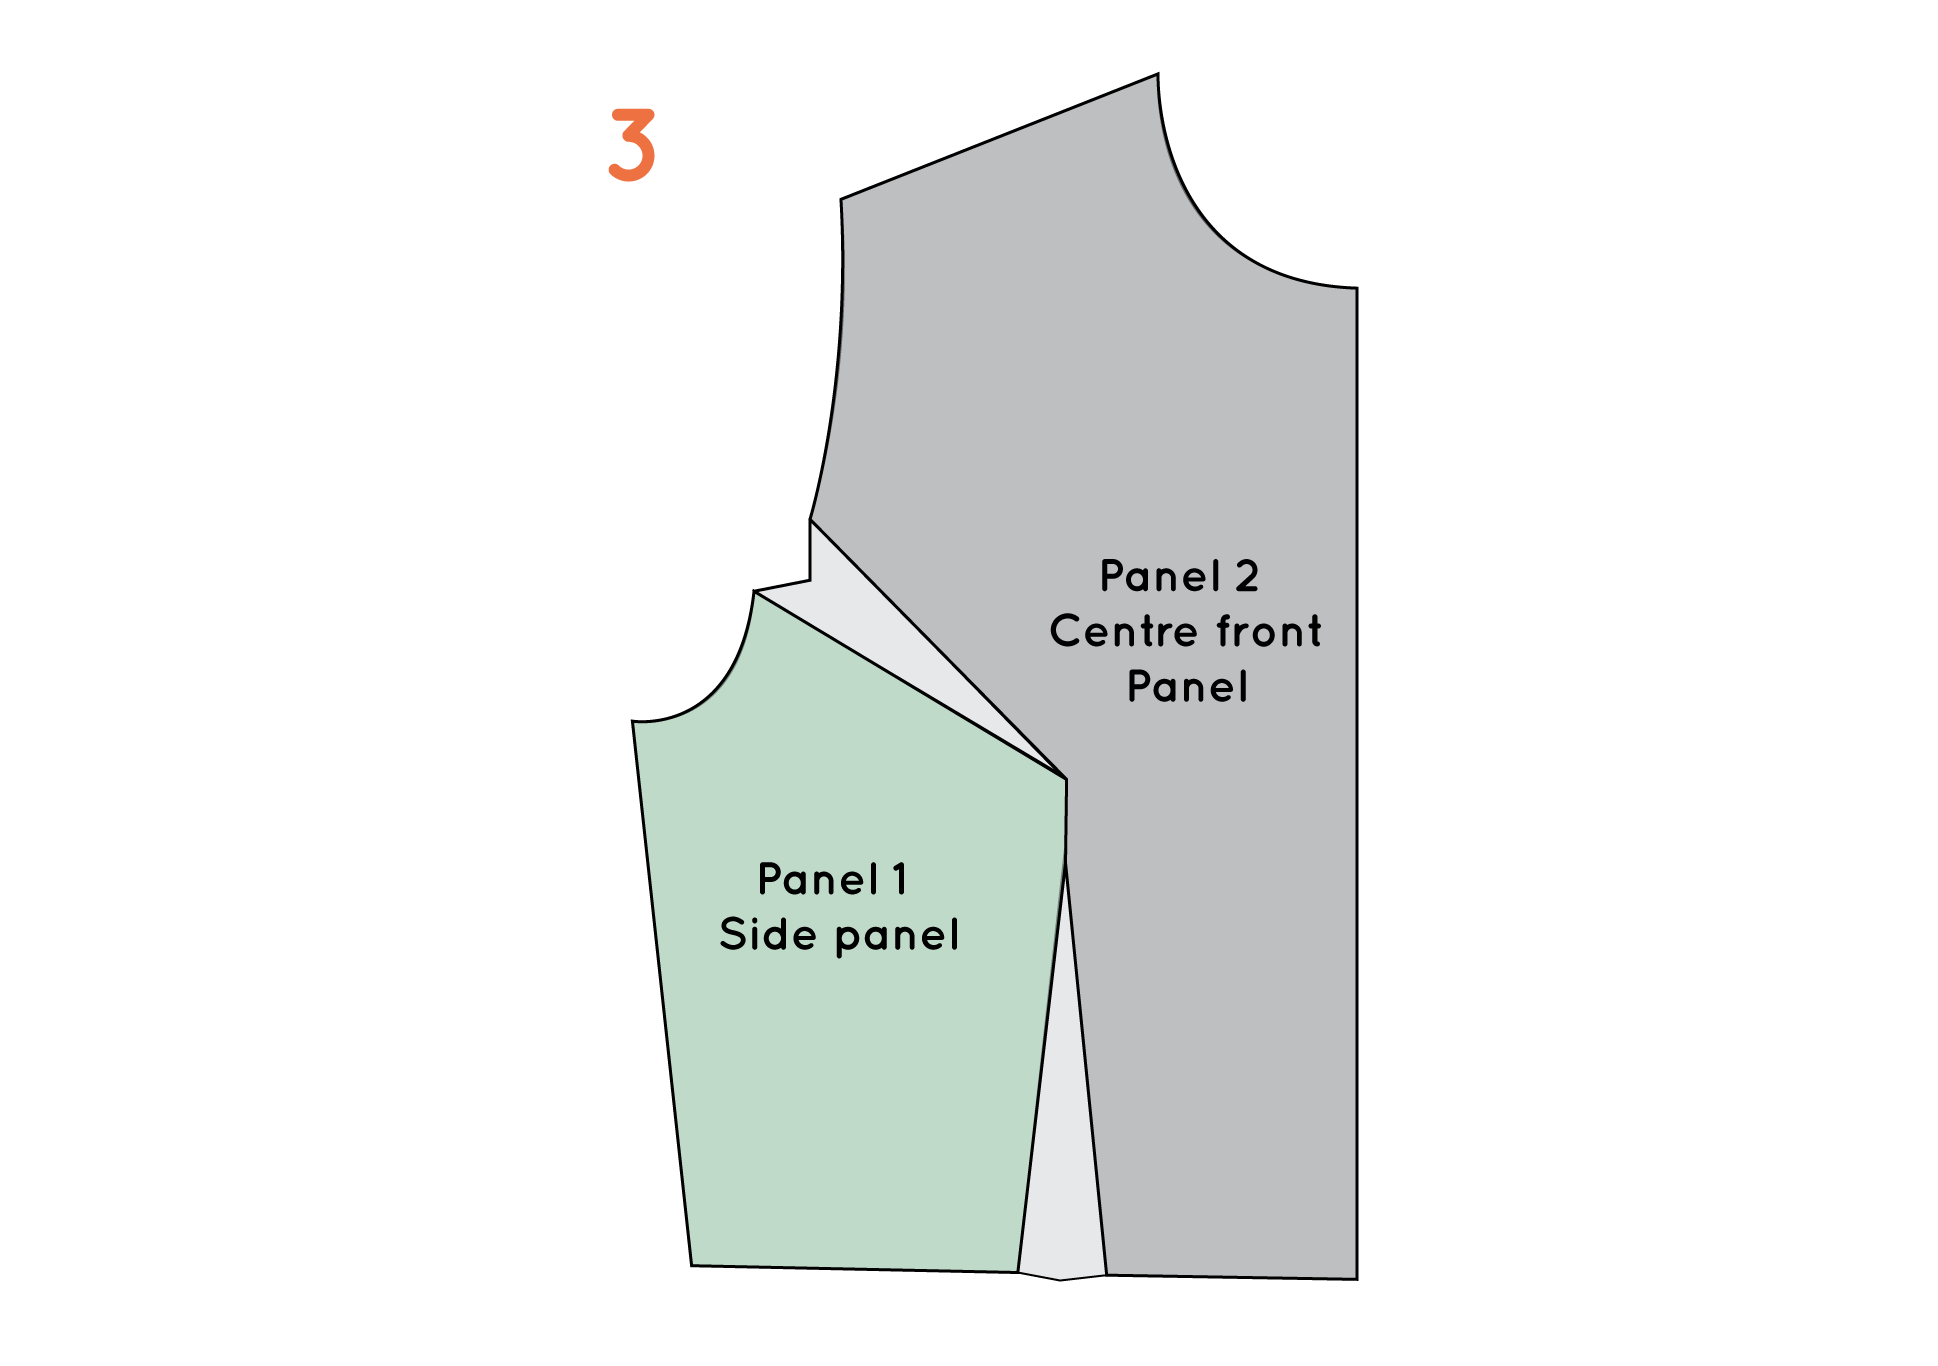
3. Just like in the previous example, you will be separating the pattern into two pieces, and eliminating the darts all together - creating a 'side panel' and 'centre front panel.'
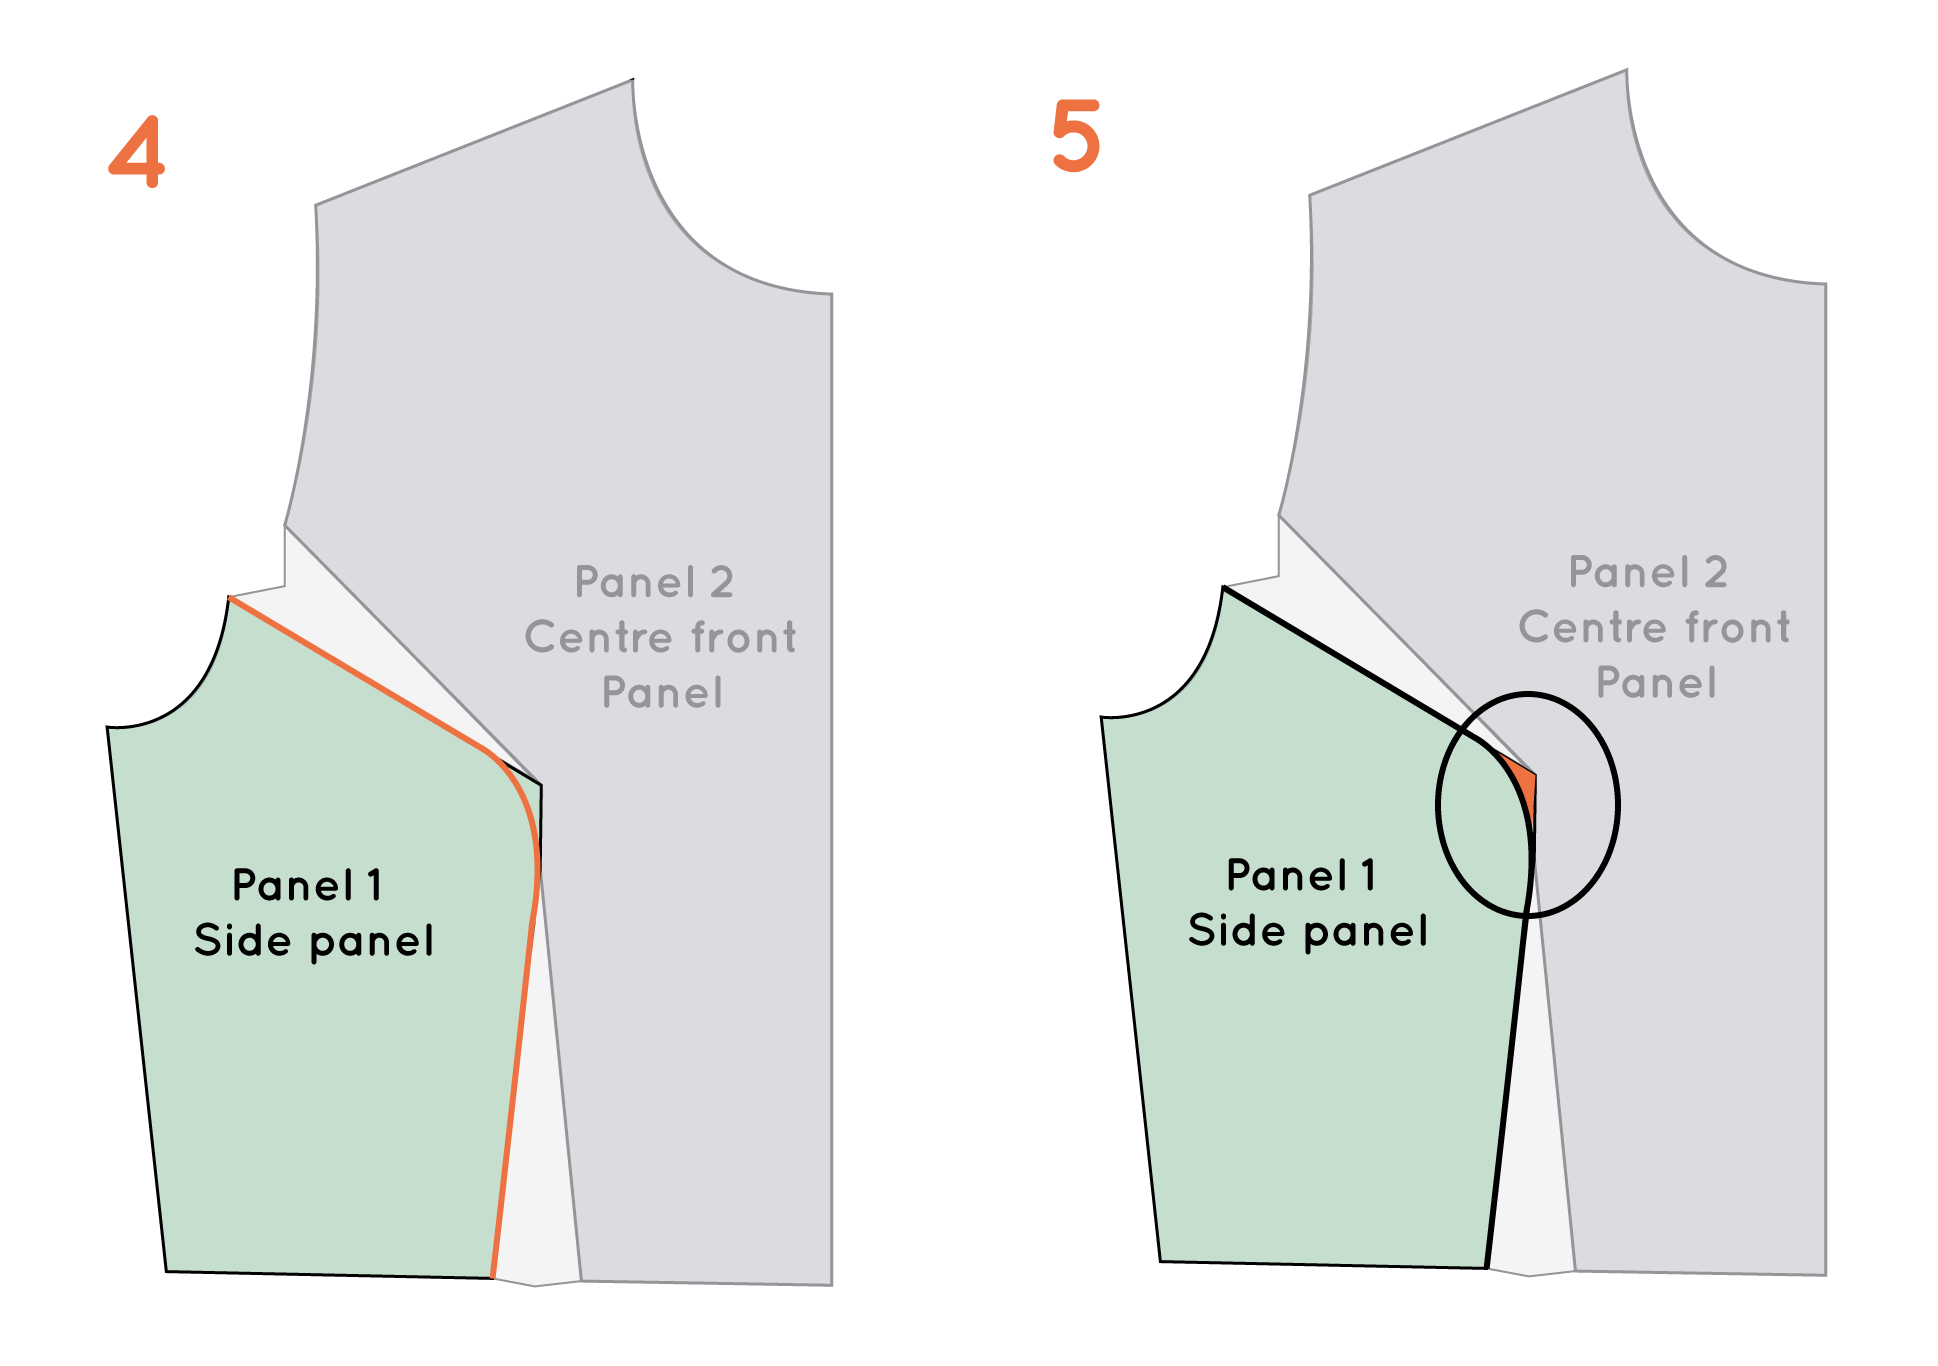
4. Take a piece of pattern paper and trace the side panel piece. Draw a line that follows the lower dart arm at the armhole, and gradually curves as it approaches the dart point (start curving the line a couple of centimetres back from the dart point). Continue the curved line so that it meets the outside arm of the waist dart and continue tracing along dart arm to the waist.
5. You will see that this new line has removed the sharp corner at the bust point.

6. Take another piece of pattern paper and trace the centre front panel, once again creating a smooth curve to replace the dart arms. This time the curve will be concave, rather than the convex curve of the side front panel.
7. As you can see, to make this curve, a small amount will need to be added at the point of the curve. This will even out the amount that was removed from the side front panel (this small triangle has been relocated from one side to the other).

8. To complete the patterns, you will need to check that the curved seams fit together. You will also need to add notches to the curve (which you can find in the same tutorial) to help guide you when sewing the curved seams together (as curves like this can be very tricky to sew and notches can be your saviour!) and add seam allowance (I'd suggest 1cm or 12mm).
And that's it, you have princess panels!