The Acton : Tester round-up

As you have probably seen by now, last week I released The Acton dress pattern. This pattern was a long time in the works, as I really wanted to fine tune my process, so there was  a lot of learning and experimenting to be done. I tested the pattern earlier this year, along with some incredible makers, and today is the day that I can finally share these pictures with you (I know they are all pumped to finally share their Actons too!) and a few of the comments that were made about the pattern.


Andreia - In a Manner of Sewing

acton_dress_inthefolds_1

"The pattern is perfectly designed and i really need to try it on a fabric that is more suited for my skills, because all the notches, pivots, seam allowances match so perfectly it´s just impossible not to enjoy sewing it."

Check out Andreia's blog (and Acton review) here


Henna - Stitch Study

"I like that you listed the pages I needed to print for my view and size. I just plugged it in and printed, and everything was there. I also like that the pattern is arranged in chunks. I have limited space for taping, so this helped tremendously."

Check out Henna's blog here


Erin - Brooklyn Pattern Co

 "What I liked about making the Acton was how well the pieces came together. It made it very satisfying to finish with all things lining up. I really nailed the CF point and that felt great."

Check out Erin's blog here


Megan - Pigeon Wishes

acton_dress_inthefolds_4

"I love the way this dress fits on a pear shape and I think the bodice is really flattering. The skirt hangs in a very elegant way and moves beautifully (I made my garment in Cupro so it feels very floaty too)."

Check out Megan's blog here


Sue - Sewin' Steady

"It's a unique bodice style for me, not falling across the natural waistline, and I think the result is flattering, helping the skirt skim across any lumps and bumps in ones midsection. I also appreciate the princess seams making it easy to adjust the fit."

Check out Sue's blog (and Acton review) here.


Shannon - Adventures in Ordinary

"Really like the shaped, paneled bodice and A-line skirt. I think it'll look good in various lengths, too (I have a maxi-length in mind next!)."

Check out Shannon's blog here.


Katina - I'm Not Tina Wheeze

"I like the option of having the sizes on different layers (although I didn't use it because I got my husband to print it for me this time and didn't want to complicate the request). I also really like the way the pieces were arranged so you could just tape together the pattern parts that you needed."

Check out Katina's blog here


Helen - Helen's Closet

"The Acton dress is very figure flattering and comfortable to wear. I can even wear it bra-less because I chose a heavier fabric! The length is very nice, not too short or too long. I love the princess seams and the tiny straps. The way the straps angle up towards the neck is beautiful."

Check out Helen's blog here


Kate - Sewing with Kate

"I enjoyed the second version much more. It came together very quickly. I have never sewn a princess seam bodice before. I thought it would be hard. It wasn't!"

Check out Kate's blog (and Acton review) here


Caz - Useful Box

"Emily - I love your patterns and how they fit together. Especially how the corners are prepared and then fit together nicely. It reminds me of all my pattern making classes at college. They appeal to my logical brain! ... I love the princess bust line - that fits me perfectly. I also love how the bodice to waist seam is so flattering. I also love there is lots of room in the skirt for hips and bumpy tummies. Also love the pockets - everything should have a pocket!"

Check out Caz's blog here


Åsa Maria - Made by A M Borg

"I especially like the a-line skirt and the narrow neckline and the shape of the bodice. I feel very comfortable in this "shape". Looking forward to summer here in Norway so I get to use it. It's way to cold here now."

Check out Åsa Maria's blog (and Acton review) here. 


Suzanne - Dressed in Pretty Little Things

"The Acton dress is exactly what I have come to expect from an indie sewing pattern, well executed with a whole lot of love and attention behind it... I really like the fit of this pattern, being bigger busted I normally avoid higher necklines and under bust seams as they normally sit on top of my bust. But this a beautifully drafted pattern."

Check out Suzanne's blog here


Sarah Walker 

acton_dress_inthefolds_12

"I love bodices that are shaped with seams rather than darts - somehow just more satisfying to sew. And the lined bodice meant sewing was quick as you didn't need to worry about finishing seams... I love the design - it's actually different, rather than another fit and flare dress, and the instructions strike a good balance between explaining the steps and understanding nobody wants to spend half of their sewing time reading!"


Marie-Fleurine - Sew Marie Fleur

"The fit is great, I love having the pattern both with and without seam allowances and the instructions are detailed. It's definitely one of the indie patterns with high quality fit and instructions."

Check out Marie-Fleurine's blog (and Acton review) here.


Cindy - Caliana Design

"It is super detailed and each notches line up perfectly. As I made my muslin and my final dress, I thought how quick and simple it seemed to be when I was sewing it together. After the initial fit issues, I was able to complete the dress in less than 2 hours, kids interruption included ;)."

Check out Cindy's blog here.


Lilith - Old Maiden Aunt

**Lilith added an extension to the bodice. This section is not part of the pattern.  

"I learned a couple of things about curved seams as it's my first time sewing a fitted bodice that joins a curved line to a straight line (joining the two front bodice pieces together) - it creates a really flattering fit!"

Check out Lilith's blog here

Think you'd like to make yourself an Acton? Take a look at the product listing


You may also like:

The Acton pattern is finally here!

I am so excited to let you know that the Acton pattern is finally here!

For those of you who have been following along with me for a while, you will know that this lady has been in the works for a long time! But I must say that after all the hours spent on it, I couldn't be happier. She is a real beauty and I am ecstatic to be sharing her with you today.

The pattern is available in 10 sizes, from bust 76cm (30in) - 131cm (51.5in). 

View A features a fitted bodice with a low back and thin shoulder straps. The skirt is A-line, and includes (optional) in-seam pockets in the side seams.

View B features a fitted bodice with racer-back and thin shoulder straps. The skirt is a wrap that can be tied in a number of ways to achieve different silhouettes.

By working through this pattern, you will gain confidence in: achieving a great fit, working with tricky fabrics, sewing princess seams, inserting an invisible zip and lining a garment. 

I also chose to do things a little differently this time, and decided to illustrate the instructions (after I learned that the general consensus is for illustrations instead of photos). 

Check out the pattern now.


You may also like: 

How to : Lengthen a pattern

inthefolds_lengthen_a_pattern_1

You may have seen that earlier this week I did a post on "How to Shorten a pattern," so today I thought I'd do a post on how to lengthen a pattern! The principle is exactly the same, you just need to add access length, instead of removing it. 

As I said in the previous post, sometimes you can simply add some length to the hem of a garment, I would use this method in the case of a straight skirt, sleeve or trousers. But there are times when you may want to add the excess length to the interior of a pattern piece, so that the piece still fits properly with the rest of the pattern. For example, if you wanted to lengthen a sleeve that had a cuff, you wouldn't want to just add the extra length to the bottom. You would be extending the length of the placket too, and maybe even changing the shape of the sleeve overall. This is also the case if you have a pattern with an interesting shape - such as an A-line dress. You would not want to just add the extra length to the bottom of an A-line dress, as you could end up with a shape far more extreme than you anticipated!

For the case of the example, I will use the simple summer top pattern I showed you how to draft a few weeks ago

Trace the original pattern

inthefolds_lengthen_a_pattern_2

Take a copy of the pattern, with seam allowance. Normally when making alterations to a pattern I suggest to remove the seam allowance, but with something as straight-forward as this, there's really no point removing it. Take note of any important details, such as pattern markings (notches etc.) and the grainline.

inthefolds_lengthen_a_pattern_3

Draw a horizontal line through the pattern, roughly half-way between the armhole and the hem, on the side seam. If you are using a ready-made pattern, it is likely that your pattern will have a "Lengthen and shorten line" already on it, so you can skip this step. 

inthefolds_lengthen_a_pattern_4

Cut through the horizontal line, splitting each piece in two. 

Add paper to compensate for excess length

inthefolds_lengthen_a_pattern_5

Work out how much length you would like to add to the pattern. This is when a toile can really come in handy!

For the sake of this example, I will be adding 5cm (2") to the length of the top.

Take two small pieces of pattern paper (this is a great way to use up those scraps of paper you have laying around) and stick  to the back of the top half of both your pattern pieces (ensuring you have enough room below the pattern piece to add the excess length).

inthefolds_lengthen_a_pattern_6

On the paper that you just attached, draw a horizontal line 5cm (or whatever length you are adding) down from the cut line (parallel to the bottom edge of the pattern). 

inthefolds_lengthen_a_pattern_7

At this stage you can also extend the centre front and centre back lines of both your pattern pieces onto the attached pieces of pattern paper (if your pattern doesn't include the centre front or centre back - for example, on a sleeve - you can just extend the grainline).

Add length

inthefolds_lengthen_a_pattern_8

Take the lower pieces of your pattern, and using the lines as guides, stick the pieces in place on the paper.

Re-trace pattern

inthefolds_lengthen_a_pattern_9

Take a separate piece of pattern paper and trace the new pattern pieces, creating a new side seam that runs smoothly between the underarm and the hem. 

Finalise the pattern

inthefolds_lengthen_a_pattern_10

Be sure to add all pattern markings, as well as the grainline. And you're done!


You may also like:

How to : Shorten a pattern

inthefolds_shorten_pattern_1

There are times you are going to want to shorten or lengthen a pattern, and I thought I'd show you how to do that today.

Sometimes, you can simply cut off some length from the hem of a garment, but there are times when you may want to remove (or add) the excess length to the interior of a pattern piece, so that the piece still fits properly with the rest of the pattern. For example, if you wanted to shorten a sleeve that had a cuff, you wouldn't want to just lop the excess off the bottom. The sleeve would no longer fit the cuff correctly, and you could also lose important details like the placket position. This is also the case if you have a pattern with an interesting shape - such as an A-line dress. You would not want to just cut the excess off the bottom of an A-line dress, as it is likely you would lose the shape of the A-line. 

For the case of the example, I will use the simple summer top pattern I showed you how to draft a few weeks ago

inthefolds_shorten_pattern_2

Take a copy of the pattern, with seam allowance. Normally when making alterations to a pattern I suggest to remove the seam allowance, but with something as straight-forward as this, there's really no point removing it. Take note of any important details, such as pattern markings (notches etc.) and the grainline.

inthefolds_shorten_pattern_3

Draw a horizontal line through the pattern, roughly half-way between the armhole and the hem, on the side seam. If you are using a ready-made pattern, it is likely that your pattern will have a "Lengthen and shorten line" already on it, so you can skip this step. 

inthefolds_shorten_pattern_4

Cut through the horizontal line, splitting each piece in two. 

inthefolds_shorten_pattern_5

Work out how much length you would like to remove from the pattern. This is when a toile can really come in handy!

For the sake of this example, I will be removing 5cm (2") from the length of the top. On one of the pieces, draw a horizontal line 5cm (or whatever length you are removing) from the cut line (parallel to the cut line). 

inthefolds_shorten_pattern_6

Now, simply move the lower half of the pattern up to the line drawn on the upper half of the pattern and tape (or glue) in place. 

inthefolds_shorten_pattern_7

Take a separate piece of pattern paper and trace the new pattern pieces, creating a new side seam that runs smoothly between the underarm and hem. 

inthefolds_shorten_pattern_8

Be sure to add all pattern markings, as well as the grainline. And you're done!


You may also like:

Pattern hack : Add sleeves to the peplum top (or any other sleeveless top pattern)

You may have seen (or even already made) the Peplum Top that I released a couple of months ago in collaboration with Peppermint Magazine.

When it was first released, a number of people asked whether sleeves could be added, and I thought it would be a great tutorial to do, as I'm sure for a lot of you there are sleeveless patterns you would love to add sleeves to. This tutorial will walk you through adding sleeves to this particular pattern, but could be used for almost  any sleeveless pattern.

Why can't you just add a sleeve to a sleeveless pattern?

It's not a difficult process, but unfortunately it's not as simple as just adding a sleeve to the sleeveless top and hoping for the best. Above I've drawn two very basic tops - one with sleeves and one without. You can see that the armhole on each pattern is not the same. 

When you place one pattern on top of the other, you can clearly see this difference (which is highlighted in red on the illustration on the right). If you were to put a sleeve on the sleeveless top, without making any changes to the armhole, the sleeve would have to reach across the difference (the red area), which would leave you with an awkward looking garment and an ill-fitting sleeve. 

To rectify this, you will first need to change the armhole on your front and back pattern pieces, and then you will be able to fit the sleeve.

For this tutorial you will need a sleeveless top pattern as well as another top (or dress) pattern that has sleeves that you like the fit / style of. 

Trace a copy of the pattern

Trace a copy of your sleeveless top pattern without seam allowance (it is much easier to make alterations to a pattern without seam allowance). Mark any design features and notches.

The Peplum Top pattern has a seperate shoulder panel. To make this alteration easier, you will need to reattach the shoulder panel to the front and back pieces (I will show you how to get it back later on in the tutorial). To do this, draw a line (or fold a line) through the middle of the shoulder piece and cut the piece in half. Label each piece so you don't get them mixed up - as they are very similar in shape. 

Attach the shoulder panel pieces to the front and back of the top, so that you have to complete pieces - the front and the back. 

Take the front and back pieces from your other pattern (the one with sleeves) and place on top of the sleeveless pattern pieces, lining up the centre front / centre back, shoulder seams and side seams (as close as you can). This is when transparent paper helps!

Use weights to hold pieces in place.

Trace the pattern

With a fresh piece of pattern paper, trace the lines from each pattern piece needed for the new pattern. Begin by marking the centre front and centre back - taking the lines from the original (sleeveless top) pattern.

Next, trace the front and back neckline - using the lines from the original pattern. 

Re-draw the shoulder seam - starting at the neckline end of the seam on the original pattern (sleeveless top) and joining with the end of the shoulder seam from the second pattern (top with sleeves). This will ensure that the neckline binding still fits the neck of the top, whilst the sleeve will fit in the armhole. 

Trace the armhole curve from the pattern with sleeves - being sure to also transfer the sleeve notches. 

Transfer the side seam - starting at the new armhole and joining to the side seam of the sleeveless pattern at the hemline. Trace the original hemline. 

Before removing the pattern, transfer the shoulder panel lines onto the new pattern. 

You now have the pattern with armholes ready for sleeves!

Re-create the shoulder panels

You will need to re-cut the panel lines to re-create the shoulder panel pieces. Before cutting through the lines, add notches to the panel lines on both the front and back (you can transfer notches from the original pattern if you like).

Seperate the shoulder panels from the main front and back pieces. 

Re-attach the front and back shoulder panel pieces at the centre line, before tracing a new copy of the piece onto a seperate piece of pattern paper. Use a smooth curve down either side to remove any sharp points.

Complete the pattern by adding seam allowance to each piece. You will be able to use the original pattern to transfer the seam allowance to the hem, side seams and neckline. You will need to add seam allowance on your own to the armhole, shoulder panel and sleeve - this tutorial will help with that!


You may also like:

Pattern release : The Peplum Top

You may have noticed that recently I have been releasing seasonal patterns in collaboration with Peppermint Magazine.  

The first one I made was a sweater dress (perfect for those of you in the northern hemisphere) and then just recently our Spring pattern was released - a nice little peplum top, perfect for warm summer days. 

The best bit about this collaboration, is that the patterns are free! You can just jump on their site, browse through their pattern archive and take your pick.

This pattern is a nice easy one - sewing up beautifully in light-weight summer fabrics like cotton, linen, silk or viscose/rayon.

Perhaps my favourite thing about this pattern is the v-neck back. The pattern includes a bias cut pieces to help you get a really nice finish on the 'v,' without too much fiddling.

Think this top is for you? Download it for free now!


You may also like:

Are you a photographer or illustrator who loves sewing?

As a lot of you would know, I recently hit my one year in business milestone. I'm one of those people who, when I hit some kind of big milestone - whether it be a birthday, ten years since finishing high school (this year.... ahhhhhhh!!), even just new years eve, I can't help but look back and reflect on the time that has passed. Which means that this last few weeks has included a lot of reflection time as I think about how far this little business has come, as well as what hurdles I need to overcome to keep this little gal going. 

The main thing that keeps coming to mind is that I just can't do it all. No matter how much I think I can, no matter how diligent I am, no matter how many hours I work, I just cannot do it all, and I think that (maybe) I have finally accepted that. If I want this business to grow, it can't be up to me to do every little task involved in the process. There is truly not enough hours in the day, and to be honest. I started 2016 thinking I could release 6 patterns in the year. You may have noticed that I have not even released one (except for a couple of patterns in collaboration with Peppermint Magazine)! Obviously something is not working how it should.

As some of you may have read on social media, I recently held a photo shoot for my upcoming pattern (which is coming in two weeks! Yay!) The photos look great and I am really pleased with how it went, but all the photos need a little retouching. Nothing major... a bit of overall brightening up, removing a bra strap here, some stray hairs there etc. My first thought was 'I am sure I could work out how to do it myself.' Although I can use Photoshop, I am by no means an expert, but generally if I apply myself (and watch a tonne of YouTube videos and read a few blogs) I can work most things out. And then I really thought about it. I could spend days learning how to do it and days actually retouching the photos, and at the end, they probably wouldn't even be that good. Because, as I said, I'm not a pro. And that's when I realised I really had to change my mindset about these things get serious about finding someone to help me do the job. I jumped online, scoured the internet for possibilities and found a company I was happy with. Then they edited the photos (for not too much money at all) and I saved myself hours of frustration and heartache. Job done!

This little transaction made me realise that with the growth of online freelancing sites like Air Tasker, Freelancer, Upwork etc. there just has to be people out there in the world that have the skills to help me with some of the tasks that make up my business. And that is why I am coming to you!

I have been thinking about all the jobs I do in a day, and have been trying to think about the things that are really important that I do myself (blogging, social media posts, designing, pattern making, writing pattern instructions) and those that just aren't (illustrating pattern instructions, photographing sew-alongs, cutting samples, sewing samples) and trying to work out how to get help with the steps I need so that I can focus on other things. I have put a couple of positions on a freelancing website, and then it occurred to me that I should also ask here. I know a lot of you are great sewers, but I don't know what your other talents, hobbies or jobs are, and maybe it's illustrating or photograhy! (Which are the two things I am looking for help with first) 


So if this sounds like something that may interest you, read on ...

Illustrator - technical illustrations needed for sewing patterns

I am currently looking for someone to help with the technical drawings that accompany the instructions for my patterns. The illustrations need to be created in Adobe Illustrator as I would want access to the original files so that I could tweak them if necessary. 

Each pattern requires around 40 - 60 illustrations - depending on the complexity of the pattern. I have previously done the illustrations myself so will hand over my illustrations for reference (as they need to be in the same style for the sake of consistency) as well as a document with all the strokes etc. that I want used. I really need to them to be at the same level as they are currently (or to a higher standard).

The complexity ranges, depending on the step - some being quite simple and only taking a few minutes, while others take a bit longer. I will provide digital copies of the pattern pieces, which I find are handy to start the illustrations with, as well as photographs of each step of the process for reference. I will also provide written instructions to make it very clear what each illustration needs to include.

I am really hoping to find someone who I can work with on an ongoing basis. I would like to get started straight away with 1-2 patterns that are ready to go, but I plan to release patterns regularly in the new year and having someone reliable, who I can count on to do this work to a high standard is my ultimate goal.

Is this something you might be interested in?
- Great sewing and construction knowledge is required
- You will need to have strong Illustrator skills
- Job will be done remotely through email communication, so I really need someone trustworthy and reliable
- You need to have a great eye for detail and the ability to understand a brief
- I want the illustrations to be drawn in the same style that I have done so far so that things remain consistent for my brand - so you must be able to do this

If you want more examples of the kind of illustrations I am talking about, please check out the free pattern I released with Peppermint Magazine a few months ago. 

I would love to work with someone who loves sewing as much as I do, is friendly, organised and willing to go the extra mile to do a great job. If this sounds like you and you have all the skills previously mentioned, please get in touch (email hello@inthefolds.com) telling me a little about yourself, why you think you´d be a great fit for this project and some examples of your work.


The second thing I am looking for is a little trickier. I am not sure if I will find the right person for this one, but I did want to put it out there to see! 

Photographs required for sew-alongs

I am looking for someone to take step-by-step photos for tutorials on my blog (as well as an aid to the illustrations that are created for pattern instructions).

I am currently taking the photos myself, but don´t have a great set-up, so would love to find someone who has the set-up, skills and creativity to take some really great photos for the blog.

I would provide the freelancer with the pattern and fabric (or we could discuss you purchasing the fabric at my expense), as well as written instructions and you would need to make the garment, taking clear and beautiful photos of each step in the process. Some of my patterns can be quite tricky, so you will need to be a great sewer. 

I am really hoping to find someone who I can work with on an ongoing basis. I would like to get started straight away with one pattern that is ready to go, but I plan to release patterns regularly in the new year and having someone reliable, who I can count on to do this work to a high standard is my ultimate goal.

Is this something you might be interested in?
- Great sewing and construction knowledge is required
- You will need to have strong sewing and photography skills
- Job will be done remotely through email communication, so I really need someone trustworthy and reliable
- You need to have a great eye for detail and the ability to understand a brief

Photos would need to be up to the same standard (or preferably of a higher standard) that I currently have on my blog. I don't really mind where you are based as it could all be done online through email and the occasional Skype call. 

If it sounds like you tick all the boxes, please send me an email (hello@inthefolds.com) telling me a little about yourself, why you think you´d be a great fit for this project and some examples of your work / link to your blog.


YOU MAY ALSO LIKE:

A round-up of the most popular posts from the past 12 months

As this week is a time to celebrate the first birthday of In the Folds, I am also seeing it as a good time to reflect on all that I have done this year. It's been a very busy year, with a range of different projects and collaborations and a fair number of blog posts. I dived into my blog analytics today so that I could share the 10 most popular posts of this last year. 


I'd love to know what you would like to see on this blog in the next 12 months! Let me know in the comments or send me an email!

The Ruschutter - 20% off Birthday special

As I mentioned yesterday, In the Folds turns one this week!

The day I launched my business is also the day I launched The Ruschutter sewing pattern. Which means this beauty is also turning one this week!

To celebrate, I have decided to offer a 20% discount on the pattern. All you need to do is head to my Etsy shop and enter the coupon code 'BIRTHDAY20' at checkout.

The sale will last for a week (ending Friday October 14), so get in quick! 

Talking About: 1 year in business

I cannot believe today marks the day that exactly one year ago I launched In the Folds as well as The Rushcutter dress pattern. Part of me feels like no time has passed at all, while the other part feels like I have been steering this ship for ten years! I cannot believe how naively I took the plunge into starting my own business - and how much learning I have had to do this past year just to survive. I thought that a good way to wrap up the year would be a little reflective post about all that I have learned this first year, as a reminder to myself about how far I have come, and hopefully some tips for you if you are about to start this crazy journey too. 

1. Sometimes not having a clue is a great thing

Thank goodness for the blind faith of a beginner. It's so easy to jump blindly into something when you have absolutely no idea of what is involved. And this truly is a blessing. If I knew when I started what I know now about running a business (which is still not a great deal), I don't know if I would have been brave enough to do it at all. I see this trait in so many parts of life, sewing in particular. New sewers often jump right into projects far beyond their skills, because they have no way of judging what's involved and have no fear, or knowledge, of what could go wrong. I think this is fantastic, and something to really aspire to. I wish this was something we could control and bring into our lives more often, because fear really does stifle our potential. So see it as a bonus when you don't have a clue about something - it often will work in your favour. Step naively into the face of it, and take the challenges one by one as they come.

2. You can learn a lot from the internet

When I did start to lose my naivety and started realising the beast I was creating, I also learned that worrying about what you don't know is just pointless. Because basically there is going to be A LOT you don't know, and there's just no point dwelling on it or getting worked up about it. Soldier on and face each obstacle as it comes. It is incredible what you can teach yourself with the help of a good Google search (I learned how to draft patterns digitally by trawling the internet for blog posts and tutorials) or a podcast. If you break whatever is daunting you down into small steps, suddenly it looks much more manageable and achievable and then you can face each challenge one by one. 

3. Sometimes you're just not ready for the information

This leads me to the point that sometimes it's best not to know something. There's only so much brain real estate we have, and there's no point filling it with useless things that you may not need until a year down the track. For example, before I started In the Folds I did a small business course. The teacher harped on and on about marketing. I listened, but I just couldn't wrap my head around it. Of course I knew it was important, but it all just seemed too big and too daunting for me to think about. So I didn't. I chose to focus on more pressing issues. At the beginning the most important thing I had to do was learn how to make a great digital product (I have always been a pattern maker, but only knew how to draft patterns manually). There would have been no point spending hours working on marketing when I didn't even have a product to marker. Twelve months on, and now that I have mastered creating a PDF pattern, it's time to take the next step. I am finally realising what a huge impact marketing has on your business's success and I am ready to learn. I am ready to take it all in. I have been reading marketing books, and listening to marketing-related podcasts, and actually understanding them, and even enjoying them. Because I am ready for the information now. 

4. Having your own business can be very lonely, but that doesn't mean you have to do it alone

Photo care of Louisa Eagleton Photography

Photo care of Louisa Eagleton Photography

While I was still at university I did work experience with a local fashion designer. I went to her studio one or two days a week to help out with anything and everything she needed help with. Early on I was struck by what a lonely working life this designer led. She spent her days in the studio with no-one around but her dog, and me when I was there. At that moment I vowed I would never have my own business - it would be far too lonely for me. I need to be around people all the time. Or so I thought. Fast-forward seven years and here I am sitting at my desk writing this post. Totally alone. And extremely happy to be doing it. What I have learned is that although you may get lonely running your own business, it doesn't mean you have to do it alone. I choose to work in a shared studio space, so that I am surrounded by others. I choose to collaborate with businesses that believe in the same things that I believe in so I can bounce ideas around with other creatives. In the past twelve months, I have met more like-minded individuals than I had met in my entire life pre-business. I may not get to see these people every day, but when I do see them, they re-fuel my energy and inspiration in a way that sustains me in the lonely times. And then of course I have my friends and family, who have been absolute troopers throughout the journey so far. 

5. People generally want to help you

And this leads me to another major lesson I have learned. People generally want to help you. There is something about "the little guy" (or gal) who has said 'Stuff you normal job / normal lifestyle' that excites and inspires people. They may not want to take the leap themselves, but they will often want to be part of the journey. I find it really difficult asking for help, but what I am slowly learning to accept is that I cannot do it alone and people do actually want to help. There are always going to be times when I'm going to need to call in a favour. And that's okay. 

6. Starting a business forces you to look internally

The biggest surprise to me this year is how much having my own business has made me look internally. If you mentioned the term 'self-help' to me a year ago, I would have actually laughed in your face. I didn't understand it, I didn't get it, and didn't believe there was any need for it in my life. Then I started a business and realised that when you pour your heart and soul into something, it becomes part of you, and any cracks or strains in the business are often reflections of some part of you that needs to be looked at a little closer. Blocks in my business often relate to personal blocks I have. For example, when I started In the Folds I wasn't too worried about how many patterns sold. Money wasn't driving me. I thought this was a good thing, it meant I could be creative and free without thinking about money. Then I realised that it wasn't liberating to work like that. Having no money doesn't give you freedom, it limits you and your potential. I wasn't worrying about money, not because I had risen above to some higher plane where money wasn't an issue, but because I felt I didn't deserve it. This was a huge revelation to me and something I must continually think about and work on. I now work on different things internally, as I realise how these things manifest externally. It is a never ended process, but a very rewarding one. 

7. Creating a routine is really important

Photo care of Louisa Eagleton Photography

Photo care of Louisa Eagleton Photography

When I tell people I have my own business, they often remark about how great it must be 'being able to work whenever you like.' Any business owner will know that it's not like that at all. Having your own business encourages you to work ALL THE TIME - whether you like it or not. There is always a million things on the to-do list and only you to do it, so you just work and work and work and work. I definitely have work-aholic tendencies. I love to work. I have always enjoyed working, and working for myself has made me love work even more. I truly love what I do and it makes me feel incredibly happy and fulfilled. But that doesn't mean it is good for me to work all the time.

I do not want to be defined by what I do for a living. I want to be defined by my relationships with others, by what I give to the world, the stories I share, the places I go. This article from Womankind that I read recently resonated so much with me - and was a great reminder that I cannot let work absorb me, nor should anyone. This means trying to find some work-life balance.

I am definitely not going to pretend I have worked it out. I haven't. But I am getting better. And the main thing that has helped is the routine I have created for myself and my work. I try to work normal working hours. I get to work between 9am and 10am. I have lunch around 1pm, just like I would do if I worked in an office. I leave work around 6pm so that I can spend time with my partner or friends in the evenings. I work weekends when I have a deadline, but I try to refrain from  working so that I can spend time with my friends and family, and just relax and re-group. This work takes a huge mental toll on me, and I like to have the weekends to reflect and gear-up for the week ahead. I went to a great talk earlier this year and the speaker discussed the idea of our "Golden Hours." By this she meant the hours in the day where you do your best work. Realising that my "golden hours" are first thing in the morning and later in the afternoon / evening has been a great lesson. I now plan my days around these peak times. First thing in the morning I do my most important work, the things that have to be done, while I am full of energy and ready to go. After lunch, when I am feeling like crawling under my desk for a siesta, I try to do my favourite work. The work that I don't find challenging and I love to do no matter how exhausted I am - sewing and pattern making fall into this category. And then in the evening (if I have a deadline and need to work) I get back to the important stuff. 

8. Put everything into it - it's so much easier than only going halfway

I worked in London for two and a half years or so a couple of years ago. I moved there with the grand dreams of interning in the fashion industry and working out what I wanted to do with my life. I got there and realised that although it would be easy to find an internship, a paid one was almost impossible to come by, and if I wanted to eat I was going to have to find another job. After calling my parents and having a mini melt-down on the floor of a 12 bed dorm in a backpacker hostel I remembered that I had been tutoring kids for years back home, and maybe I could find some part-time nannying work. Fast forward a couple of weeks and there I was at the park with three gorgeous young children who were now my responsibility four afternoons a week. It was not ideal, but it would pay the bills and let me do what I wanted each morning (i.e. interning). A year or so later I started working on my first pattern making blog and although I loved my job as a nanny, I quickly realised how hard I was finding it to focus on the job at hand. All I could think about was working on my blog. Pushing a child on a swing, I would be thinking about the next tutorial I would write. Walking through the park with the stroller, I would be thinking about what I would sew next. Then I would finally have time to do all that I had been dreaming about and I was just too exhausted to do the work. Now that I work in my business full-time, I finally feel focussed. No longer do I catch myself (as often) day dreaming of the work I want to be doing, while eating dinner with my partner or while talking to my Mum on the phone. By being 100% in in my business it is no longer a chore to do the work. It has become a non-negotiable. I work every day. And then I rest on the weekends and evenings, and actually give my attention to the people around me that deserve it. Here is a great article that illustrates it really well. 

9. You just can't do it all

When I started In the Folds I just knew I had to do everything myself. I didn't have the budget to pay anyone for help, so I didn't even think about it. I learned how to do the things I didn't know how to do and just got on with it. Until I hit a road block. I wanted to change something on my website and I just couldn't. I trawled forum pages and blogs, trying to find the solution, wasting hours and hours and not coming up with an answer. I finally bit the bullet and decided to call an expert for help. His rates seemed astronomical at the time, but I knew I didn't have a choice. Then he did the job in no time at all and it was perfect. And suddenly I had no problem handing over my credit card details. I have learned that my time has value and can often be spent doing something far more useful than trawling the internet for a solution that may not exist. I am now learning that it is a good investment to outsource some of the work, even when my budget is very tight. I sent my last pattern for Peppermint Magazine to a pattern digitser and grader. I couldn't believe how much time and frustration that saved me. For future pattern releases I plan to hire someone to illustrate the instructions. I know that I can do all these tasks myself. But I also know that I could find someone that could do it better than I can, and I can carry on doing the things I couldn't outsource to anyone. 

10. Having a plan is great, but you've got to be flexible

When I did the small business course I mentioned earlier, we had to write a business plan. It was a tough exercise, but I found it so useful in getting my head around what I was setting out to do. I handed it in and then haven't looked at it since. How come? Things changed. I realised that I couldn't pump out the ten patterns in the first year like I had planned. Things took far longer than I thought they would. Things cost far moe than I had planned and I needed to take on an occasional freelance job just to get by. And that's okay. It is really difficult to make a plan when you have no idea of what processes you will use and how long they will take. There is no point sticking to a plan just because it's there. To me, business is about constantly pivoting and adapting to what's going on around you. I do plan to write that business plan again though. With a year's worth of experience under my belt, and finally a clue about who my "ideal customer" is, I think I am in a much better place to put pen to paper. But I will be flexible with that plan too.

11. Enjoy the process and celebrate the successes along the way

And the final lesson, and perhaps the most important. Celebrate the victories along the way - however small they are. Our definition of success is constantly changing, as we move the goal posts back each time we achieve something. So I am learning to celebrate the moments along the way. Like today when I'll be having a glass of champagne and giving myself a pat on the back and saying "Girl, you did it. You survived your first year in business."


YOU MAY ALSO LIKE:

How to: Draft an all-in-facing

dradt_facing_1

In the last couple of weeks I have been showing you how to draft a simple summer tank top. Today I thought it would be a good time to show you how to finish the armholes and neckline. 

There are generally two methods used to finish the armholes and neckline of a sleeveless top - you could finish them with bias binding (shown in the image above), or draft a facing. I use both variations and make my choice depending on the fabric I am using and the style of the top (or dress) I am making. 

Where to start

dradt_facing_2

Drafting a facing is really easy, and only takes a couple of minutes. Take the pattern you would like to make a facing for - in this case I am using the sleeveless top pattern that I showed you how to draft in this tutorial

dradt_facing_3

Consider how deep you would like your facing to be. When it comes to facings, I don't think there's anything worse than a really shallow facing that pops out of the neck or armhole at any opportunity it gets. For this reason, I always draft a nice wide facing.

On your front pattern piece, measure down the side seam the depth of your facing. I would suggest anywhere between 7-10cm (3-4in), but have a look at your ready-to-wear garments with facings, and get an idea of what you like (or don't like). Also mark a point on the centre front (this doesn't have to be exactly the same as the measurement on the side seam, just have a think about how far down you would like the facing to run at the centre front).

dradt_facing_4

Draw the shape of the facing onto the pattern. You will want it to be a smooth curve so that the edge is easy to finish (with bias binding or overlocking). 

dradt_facing_5

The section above the curved line is the facing piece.

dradt_facing_6

Take a separate piece of pattern paper and trace off the facing piece.

dradt_facing_7

Before removing the facing piece, mark a notch on the armhole (this will come in handy when you are sewing the facing to the body of the top). Using a tracing wheel, transfer the notch onto the top front. 

dradt_facing_8

Mark a notch on the shoulder seam and side seam too. 

dradt_facing_9

To complete the pattern piece, add the grainline and cutting instructions (cut 1 on fold). Repeat process to create the back facing, and you're done! 

When attaching the facing, make sure you understitch it to get a really nice clean and professional finish. 


You may also like:

How to : Draft a top with yoke

draft_top_yoke_1

Recently I have been well and truly in summer sewing mode, as I have been working on another pattern for Peppermint magazine (see my first pattern for Peppermint here). As it's a quarterly publication, the next release will be in Spring, which makes me feel as though spring is just around the corner. And makes me very excited! I am not a winter person at all, so I have been very much enjoying pretending it's spring and using luscious linen to make the sample. 

So, to keep the dream alive, that it is actually spring (I know I shouldn't whinge as winter in Sydney is very mild) I thought I'd post a follow up post to the post I did a couple of weeks ago on drafting a summer top.

I thought a good place to start would be with a few simple adjustments you can make to your simple top pattern (or even an existing top pattern you have) to add a bit more interest, starting with adding a yoke. 

What is a yoke?

A yoke is a panel that is inserted in the top of a garment to add interest. For example, yokes are often used on the back shoulders of shirts, but can also be found on blouses, tops, skirts and trousers. 

Trace the pattern

draft_top_yoke_2

To start, trace a copy of the pattern you would like to add a yoke too. I am using the simple sleeveless top pattern that I drafted from my basic bodice block

Style lines

draft_top_yoke_3

Think about the shape of the yoke you would like to create, and draw the style line on the pattern. I have included a few examples, but there are countless options of what you could do. Be sure to bring the style line to a right angle at the centre front (more details about this can be found here). 

draft_top_yoke_4

For the sake of the example, I decided to go with a simple straight yoke through the armhole.  Before going any further, put a notch on the style line. This will help match the two pieces back together once they become two separate pattern pieces. 

draft_top_yoke_5

Cut along the style line (or trace each piece onto paper) to create two independent pattern pieces.

What next?

draft_top_yoke_6

There are a number of things you could choose to do now. You could leave the pattern as is (just add seam allowance and pattern markings) for a simple tank with a yoke panel line (which you could choose to also repeat on the back pattern piece).

draft_top_yoke_7

You could consider adding volume to the lower panel to create more of a trapeze silhouette. You can do this by cutting and spreading the pattern until you achieve the desired silhouette (look at this tutorial for more details about how to do this).

draft_top_yoke_8

Or even consider adding a box pleat at the centre front (this is a personal favourite of mine).

Finish the pattern by adding seam allowance and cutting instructions.


You may also like:


Notes on adding seam allowance

One of the first tutorials I created for this site was about how to add seam allowance to a pattern. If you are going to draft your own patterns, this is really something you are going to need to know how to do (and it's also a greta place to start if you want to learn some basic pattern making principles). In today's tutorial, I'd like to expand on the basics a little. I'd suggest checking out the previous tutorial first if you are unsure how to add seam allowance, and then come back to this tutorial. 

I did work experience with a local fashion designer while I was at university. One day a week I would go to her studio and help out with whatever tasks she needed help with. I learned a lot about things like how to cut fabric, how to trace patterns etc. (which have all really come in handy), but I'd say the best lesson I learned was about marking seam allowances. I remember being asked to add seam allowance to a particularly strange shaped pattern and realising I didn't know what to do when the pattern came to a point at one side. The designer I was working for told me to think about how the piece needs to sit once the seam is sewn and pressed and that should help me work it out. This now seems very obvious, but at the time it was a real 'wow' moment. From that moment on I never struggled, and it is a way of doing seam allowances that I have brought into my patterns. Over time, I have learned this is not always the way it is done and users of my pattern always get really excited about it and see it as a nice little detail in the process, that helps you achieve a really beautiful and professional finish in your hand-made wares. So I thought I'd share it with you today!

An example

Here is an example of what I am talking about from the Rushcutter sewing pattern (as the old saying goes, a picture really is worth a thousand words). This is the pattern piece for the raglan sleeve, and you will notice that at the seam where the sleeve joins to the centre front panel the seam allowance comes to a strange looking point. 

The reason for this is that, after this seam is stitched and then pressed open, with the seam allowance cut like this, it will be able to sit flush with the edge of the sleeve. This will help you get a lovely clean finish when you attach the sleeve to the armhole of the dress. 

How to do it

Take the pattern you are adding seam allowance to. For the sake of the example, I have just used the front pattern piece from a sleeveless top pattern. (which I showed you how to make last week).

Start by adding seam allowance to the straight seams. I'd suggest between 1.2cm (1/2in) and 1.5cm (5/8in).

Add seam allowance to the curves. Curved seams require a slightly smaller than standard seam allowance (as this helps when you are sewing them) so I'd suggest 6mm - 1cm (1/8in - 3/8in). If you're not sure how to add seam allowance to curves, there is information about it in my previous tutorial on adding seam allowances

4.gif

What I didn't go into in the last tutorial was what to do at intersection points. It's not a problem if your pattern piece is made up of straight seams on all sides, but if, like in the example, your pattern has a mixture of straight and curved seams, you will have to add one extra step to the process.

Focus on one particular area to start. I will start with the shoulder seam. Fold along the shoulder line. This is the original shoulder line, not the seam allowance line. By folding along the shoulder line you are able to see what will happen when the seam is stitched and pressed open (which is normally the case with shoulder seams).

Take a tracing wheel (or awl) and trace over the lines that indicate the seam allowance on either side of the shoulder seam (the armhole and the neckline) for approximately 2-3cm (1in).

Unfold the pattern and you will see that you have transferred the shaping to the shoulder seam. 

Use a ruler and pencil to join the dots created by the tracing wheel. 

You will see that when you fold back the seam allowance on the shoulder seam, it now sits flush with the armhole and neckline.

Next, we'll move onto the side seam.

Again, fold along the stitch line. 

Use a tracing wheel to trace along the armhole and hem line (the seam allowance line, not the stitch line) for approximately 2-3cm (1in). 

Unfold to see the lines that have been transferred to the side seam and mark with a ruler and pencil.

Repeat process form all pattern pieces, and that's it, you're done! 


You may also like:

How to : Draft a simple summer top

Summer is here for all of you lucky people in the northern hemisphere, and I thought it would be a great time to show you how to draft a quick and easy sleeveless summer top! You may wonder what I'm thinking, as most of you know I am based in Sydney, where it is currently quite chilly (well at least as chilly as it gets here), but I really wanted to start showing you how to turn your bodice block into a functional garment (as who really wants to wear a bodice block?) and I haven't shown you how to draft a sleeve yet, so sleeveless top it is!

This is a really simple tutorial and a great place to start if you are trying your hand at pattern drafting.

Where to start

1.gif

Trace a copy of your front and back bodice blocks without seam allowance. Be sure to also mark both darts on each piece.

Relocate shoulder darts to the waist

Relocate the shoulder darts on the front and back bodices to the waist, using this method or this method

You won't actually be needing the darts in the waist, so you can redraw the hem with a smooth curve, removing the darts altogether. 

Trace the pattern

Trace the pattern pieces onto a separate piece of pattern paper, leaving enough space in between the pieces for alterations. 

LOWER THE ARMHOLE

It is likely that you will want to lower the armhole of your top for a more comfortable fit. The bodice block is designed to sit right under your arms, and I'd say for a summer top you will want a bit more breathing room. 

Decide how much you would like to lower the armhole by. Mark this distance on the side seam, measuring down from the armhole. Mark this point on both front and back patterns (this is your new underarm point). This is when it's great to have a toile (muslin) to refer to, so you can see exactly how low you want your armhole to be.

It is a good idea to reduce the length of the shoulder seam too. As it stands, it is a decent sized shoulder seam and for a summer top it is likely that you will want something a little slimmer. Remove some of the length from each side (the end close to the armhole and the end close to the neckline) to keep it balanced.

Work out how much you would like to remove from the shoulder and mark this distance on the shoulder seam, measuring in from the armhole. 

Create the new armholes by joining the points marked on the side seam and shoulder seam with a smooth curve. 

Cut along the new armhole line to remove excess from both front and back armholes (or trace off separate to create a new pattern).

LOWER THE NECKLINE

For the same reason I suggested lowering the armholes, I suggest also lowering the neckline. Use the same method used for the armholes. On the front shoulder seam, measure in from the neckline and mark the point where you want your new neckline to be. Mark the same distance on the back pattern piece. Also work out how much you would like to lower the neckline by and mark this point on the centre front and centre back. This doesn't need to be the same distance - you may want a low front (or even a low back).

Re-draw the front and back necklines by joining the points marked on the shoulder line and centre front/back with a smooth curve.

Cut along the new necklines to remove the excess from both front and back pattern pieces (or trace off separate pattern, with lower armhole).

Lengthen the pattern

At this stage, the pattern is still only waist length. If you'd like a cropped tank then you're done, but if you'd prefer some extra length then keep working your way through the tutorial.

The best way to lengthen a pattern is normally to slash the pattern horizontally and then add length through the middle of the pattern, so that the hemline stays intact and the silhouette of the garment doesn't change too drastically. In this case though, I'd suggest just adding length to the bottom of the pattern, as it is likely that you will need a bit of extra width around the hips. 

10.gif

Work out how much you would like to add to the pattern, and extend the centre front, centre back and both side seams by this length. 

Join the lines with smooth curves to create the new front and back hemlines.

Remember to meet each side with right angles so that you get smooth lines when you sew the pattern together. For more on this, check out this tutorial on checking patterns

To complete the pattern, add seam allowance and pattern markings and you're done! 

You may also like:

Finished project : Winslow Culottes

COVER.jpg

A month or so ago, Helen from Helen's Closet put out a call for pattern testers for her upcoming pattern. I jumped at the chance as she had recently pattern tested for me and I wanted to return the favour, and (more selfishly) I wanted to force myself to sew something new for myself. These days I get very little free time to sew, as most of my sewing time is consumed by pattern development and sampling for upcoming releases. I do know though that I work very well under pressure, and a deadline is a great way for me to make time to do some (semi)selfish sewing.

We were given two weeks to test the pattern, and of course about three days before the deadline, I decided to start sewing my Winslows. Thankfully the pattern isn't made up of too many pages (and does include a copy shop version), so doesn't take to long to assemble, and it's a quick and straightforward sew. 

The details

'The Winslow Culottes are wide-legged pants designed for ultimate comfort and style.  This pattern is intended to be made at any length, from shorts to full length palazzo pants. The design features inseam pockets, an invisible zipper, a waistband, and inverted box pleats.  Make above-the-knee or midi-length culottes in tencel for a chic, professional look, shorts in cotton lawn for active adventures, or full pants in viscose poplin for comfortable weekend wear.' (Helen's Closet)

I decided to make view B (the knee-length version) as I wasn't too sure about the whole culottes thing and I thought this style was the least drastic, and therefore probably the most wearable for me and my lifestyle. Since it started getting cold in Sydney, I have been living in jeans, so I had been on the hunt for some different bottoms I could make, for days when I need something a little more formal (but still comfortable).

The Fabric

I used a mysterious fabric that I bought second hand form The Fabric Cave. It has lovely loose weave that gives it a beautiful texture, although I am not at all sure what the fibre content is. It definitely has a polyester component as it didn't want to press well (but is also good because it doesn't hold creases, which is a real plus when we're talking culottes). 

Techniques used

I used a couple of different techniques in my Winslows to make them more winter appropriate (the pattern is designed for lighter fabrics) finish. I added 5cm to the length and turned this up for the hem - this extra weight in the hem helps them sit nicely and also makes them less likely to blow around too much in the wind. 

I also bound the inside edge of the waistband and sewed it flat (rather than tucking it under) to minimise on bulk in the waist area. (Sorry about the shoddy photos. It is really hard to photograph black garments!)

The verdict

When I finished my culottes, I wasn't totally convinced that I'd wear them much, as they're quite different to my usual style. But I must say I've worn them five or six times since I made them! 

If I made them again I would think about changing the straight waistband to a shaped one (using this tutorial), but apart from that the fit is great. I know this is totally a matter of preference, but straight waistbands just never sit very well on my curves.  

This is a really straightforward sew, with fantastic instructions that guide you through the process. I really enjoyed testing for Helen, she was so supportive and positive throughout the whole process and was very open to feedback, which I thought was fantastic. She somehow managed to coordinate testing with over 40 testers, and then released the pattern in no time (I wish I could take a leaf out of her book!)

All in all, a great pattern. Head over to Helen's blog for more details and inspiration (she has made so many pairs!)

What are your thoughts on culottes? Are you still sitting on the fence, or have you been converted like me?


You may also like:

How to : Check and true sewing patterns

check_and_true_patterns_1

I got to the studio today, ready to write a blog post about checking curved seams as a follow up to last week's blog post on creating princess seams, when I realised that I'd actually done it a few months ago (high-five to past self for that one)! Thankfully I realised before I started. So I thought that instead, I'd take this opportunity to talk about checking and truing patterns

It is really important that you ALWAYS check that your patterns fit together correctly before going on ahead and cutting your fabric. It may seem a bit tedious checking each seam, but taking a few minutes to check your patterns at this stage can save you cutting out incorrect patterns and wasting precious time and fabric later on.

Checking patterns

Method one : Measure each seam

check_and_true_patterns_2

To check that your patterns fit together correctly, you need to check that each seam is the same length as the seam it will be sewn to. For example, in the case of the bodice block, we need to check that the side seams and shoulder seams are the same length. To do this, you can simply take a ruler or tape measure and measure each seam. 

Method two : Match pattern pieces and check seam length

check_and_true_patterns_3

The other way you can do this (which is the method I tend to use) is to match up the seams as if you were sewing them and check that they are the same length. This is very easy to do if your patterns don’t have seam allowance (in the case of a block), but if your pattern does have seam allowance, be sure to overlap the seam allowance so that ‘stitching line’ lays on top of ‘stitching line’ – rather than matching up seam allowances (this is when using slightly transparent pattern paper can be very handy!)

If seams are different lengths

check_and_true_patterns_4

If your seams happen to be different lengths, you will need to do a small alteration to get them the same length. You will need to add a little to one side of the pattern and remove a little from the other.

check_and_true_patterns_5

Measure the difference in length, by lining the two pieces up as if they were sewn, and then seeing how much excess there is at the end of the seam.

Take note of this measurement. 

check_and_true_patterns_6

Halve the measurement taken in the previous step and mark this point on the longer side, measuring from the end of the seam. For example, if the difference is 1cm, mark a point 5mm down from the end of the seam. You will need to reduce the length of the back side seam by 5mm and extend the front seam by 5mm - making them the same length. 

check_and_true_patterns_7

Tape some pattern paper to the side you will be adding to (in this case, the front armhole) and re-draw the armhole, passing through the point you marked in the previous step. You have now removed some length from the back side seam and added some to the front - making them the same length. 

If your seams are significantly different

Sometimes the excess is too much to use the previous method (I’d say if your seam is any more than 2cm out then use the following method). When this is the case, you need to distribute the excess either side of the seam – half on each end.

check_and_true_patterns_8

Place the seams together and find out the difference between the lengths of the two seams and rather than adding to/removing on just one side of the seam, distribute excess on both ends of the seam (in this case, for example, remove excess at both the armhole and hemline). 

check_and_true_patterns_9

Mark the midpoint of your excess on either side (in this example, at the 5mm point on either side) and redraw the neckline and armhole passing through these points, ensuring the line is smooth and eases nicely back into your original lines.

"Truing" PATTERNS

As well as checking that your seams are the same length, when checking patterns, you also need to "true" each seam. What this means is that you need to check that the lines meet smoothly and there are no sharp points or dips in the lines (unless that is the intention of the design).

True the side seams

check_and_true_patterns_10

For example, in the image above, you can see that the front and back side seams are the same length, but they do not meet as smoothly as they should at the armhole and hem. The armhole dips forward on the front pattern, creating an unbalanced shape, while the hem line lifts at the side seam, instead of remaining flat and smooth.

check_and_true_patterns_11

To correct this, attach some pattern paper to the area you will be adjusting and redraw the line.  You will see in the example above, a little extra was needed on the back armhole, as well as the front to get a nice smooth armhole curve. 

check_and_true_patterns_12

Use the same method to smooth out the hem line - adding enough to each side to get a smooth line. 

True the shoulder seam

check_and_true_patterns_13

To check the shoulder seam, lay your patterns flat and match up the seams as if you had just sewn them together and were now opening the seam to press it flat. Again, check that they are the same length and then check there is a smooth transition from the front to the back pattern piece. You will see in the example that the neckline is nice and smooth, but the armhole comes to a bit of a point at the shoulder seam.

check_and_true_patterns_14

To fix this, attach a little extra pattern paper to each pattern piece and redraw the curve, smoothly transitioning back into the original armhole curve.

Check that patterns are square

When a pattern is symmetrical always check both ends of the centre line (or "PLACE ON FOLD" line) meet the other seam at a right angle. This will prevent any strange lumps, bumps or points in your pattern piece. 

check_and_true_patterns_15

In the example shown, the neckline and hemline were not square to the centre front and when the pattern was cut on the fold, a peak was created in the neckline and a point in the hemline. 


check_and_true_patterns_16

To prevent this from happening, and to ensure a nice smooth neckline and hemline, before cutting the pattern on the fold, check that the curves meet the fold line at a right angle, using a set square. 

check_and_true_patterns_17

This way, when you cut the pattern on the fold, the neckline and hemline will remain nice and smooth.

I'd love to hear if you found this post useful!


You may also like:

New pattern : The Jersey Dress - in collaboration with Peppermint Magazine

I made a pattern for Peppermint Magazine! I am very excited about this as it is such a great magazine. I was planning to tell you what it's all about, but then I realised they probably do it much better themselves!

"Peppermint is an Australian eco fashion and lifestyle quarterly focused on style, sustainability and substance. Covering food, fashion, natural living, health and beauty, DIY, diversity, social entrepreneurs and more, it was created for the rapidly growing number of consumers who appreciate good design and creativity, but also care about social and environmental issues, positive media and things that matter."

They have a section on their website called 'Sewing School' where you can access a whole lot of great patterns, and now I have a pattern amongst them!

The pattern is a lovely snugly raglan sleeve jumper dress, with in-seam pockets, which is a really quick sew. It can be sewn with an overlocker or standard sewing machine (and the instructions include both methods) and could be tackled by a confident beginner. Best of all, it's free! You can download it directly from the Peppermint Magazine website. While you're there, you should also check out all the other great patterns that are available. 

Download the pattern now

How to: Create princess panels

how_to_draft_princess_panels_1

Including panel lines in a design is a good way to eliminate darts, without losing the fitted shape of the garment. They are also a great way to add interest to a design. There are countless variations, and it is also a great way to include more than one fabric in your design if you would like (if you fancy a splash of contrast fabric like me). 

What are princess panels?

'Princess panels' are panels that are shaped around the bust, to create a nice fit (without the need for darts), but can also be an interesting design detail. 

how_to_draft_princess_panels_2

Princess panels can cut through the pattern from the shoulder line to the waist, or they can cut through the pattern starting at the armhole and running down to the waist. I'll show you how to create both options, although they use basically the same method - and it's really up to you which you would prefer. If you are a beginner, I'd suggest drafting the version from the shoulder seams, as it can be easier to sew. The curve required to have princess panels coming from the armhole can be a little trickier to sew (but totally manageable if you've got some pins and patience). 

I will be using the basic bodice in the example, but you can create princess panels on any fitted top pattern with waist darts. 

Option #1 : Drafting princess panels from shoulder seam

how_to_draft_princess_panels_3

1. Trace a copy of the pattern you will be adjusting.

2. Draw a straight line through the centre of both darts. 

how_to_draft_princess_panels_4

3. You will be separating the pattern into two pieces, and eliminating the darts all together - creating a 'side panel' and 'centre front panel' that are sewn together to create the shaping over the bust.

4. Take a piece of pattern paper and trace the side panel piece. To avoid pointy breasts (and to make it easier to sew), you will need to change the rigid angles of the dart arms into a smooth curve along the panel line.

how_to_draft_princess_panels_5

5. On another piece of paper, trace the second panel (centre front panel) once again smoothing out the angles of the dart arms to create a smooth curve. 

6. You now have two separate pattern pieces and no darts!

The next steps are to check that the curves on each piece are the same length (I'll do a post about how to do this next week), add seam allowance and pattern markings (you will need a grainline, cutting instructions, and notches along the curve). 

OPTION #2 : DRAFTING PRINCESS PANELS FROM armhole

If you would prefer to have the panel lines coming from the armhole of the bodice, you will need to start with a dart in the armhole. If your dart is located elsewhere (for example, in the shoulder like it was in the previous example) you will need to start by moving the dart to the armhole. 

how_to_draft_princess_panels_6

1. Trace a copy of the pattern you will be adjusting. I will be using the basic bodice in the example (with darts transferred to armhole), but you can create princess panels on any fitted top pattern with waist darts. 

2. Draw straight lines through the centre of each dart. These lines will intersect at the bust point. 

how_to_draft_princess_panels_7

3. Just like in the previous example, you will be separating the pattern into two pieces, and eliminating the darts all together - creating a 'side panel' and 'centre front panel.'


how_to_draft_princess_panels_8

4. Take a piece of pattern paper and trace the side panel piece. Draw a line that follows the lower dart arm at the armhole, and gradually curves as it approaches the dart point (start curving the line a couple of centimetres back from the dart point). Continue the curved line so that it meets the outside arm of the waist dart and continue tracing along dart arm to the waist.

5. You will see that this new line has removed the sharp corner at the bust point.

how_to_draft_princess_panels_9

6. Take another piece of pattern paper and trace the centre front panel, once again creating a smooth curve to replace the dart arms. This time the curve will be concave, rather than the convex curve of the side front panel. 

7. As you can see, to make this curve, a small amount will need to be added at the point of the curve. This will even out the amount that was removed from the side front panel (this small triangle has been relocated from one side to the other).

how_to_draft_princess_panels_10

8. To complete the patterns, you will need to check that the curved seams fit together. You will also need to add notches to the curve (which you can find in the same tutorial) to help guide you when sewing the curved seams together (as curves like this can be very tricky to sew and notches can be your saviour!) and add seam allowance (I'd suggest 1cm or 12mm).

And that's it, you have princess panels!


You may also like:

Talking about : Pattern Testing

During the last couple of years there has been a lot of conversation, criticism and debate about the nature of pattern testing within the blogosphere. And I understand why. 

After reading this great piece by Sue (who happens to have recently tested a pattern for me) over at Sewin' Steady (as well as the comments that follow), I decided I wanted to get involved in the conversation in the hope that I can also encourage it to be discussed (and even questioned) in a positive and constructive way.

Pattern testing really is a difficult thing to talk about (I have drafted this blog post at least three times and I’m still not sure it conveys exactly how I feel about it.) as it is a murky area. 

What is pattern testing?

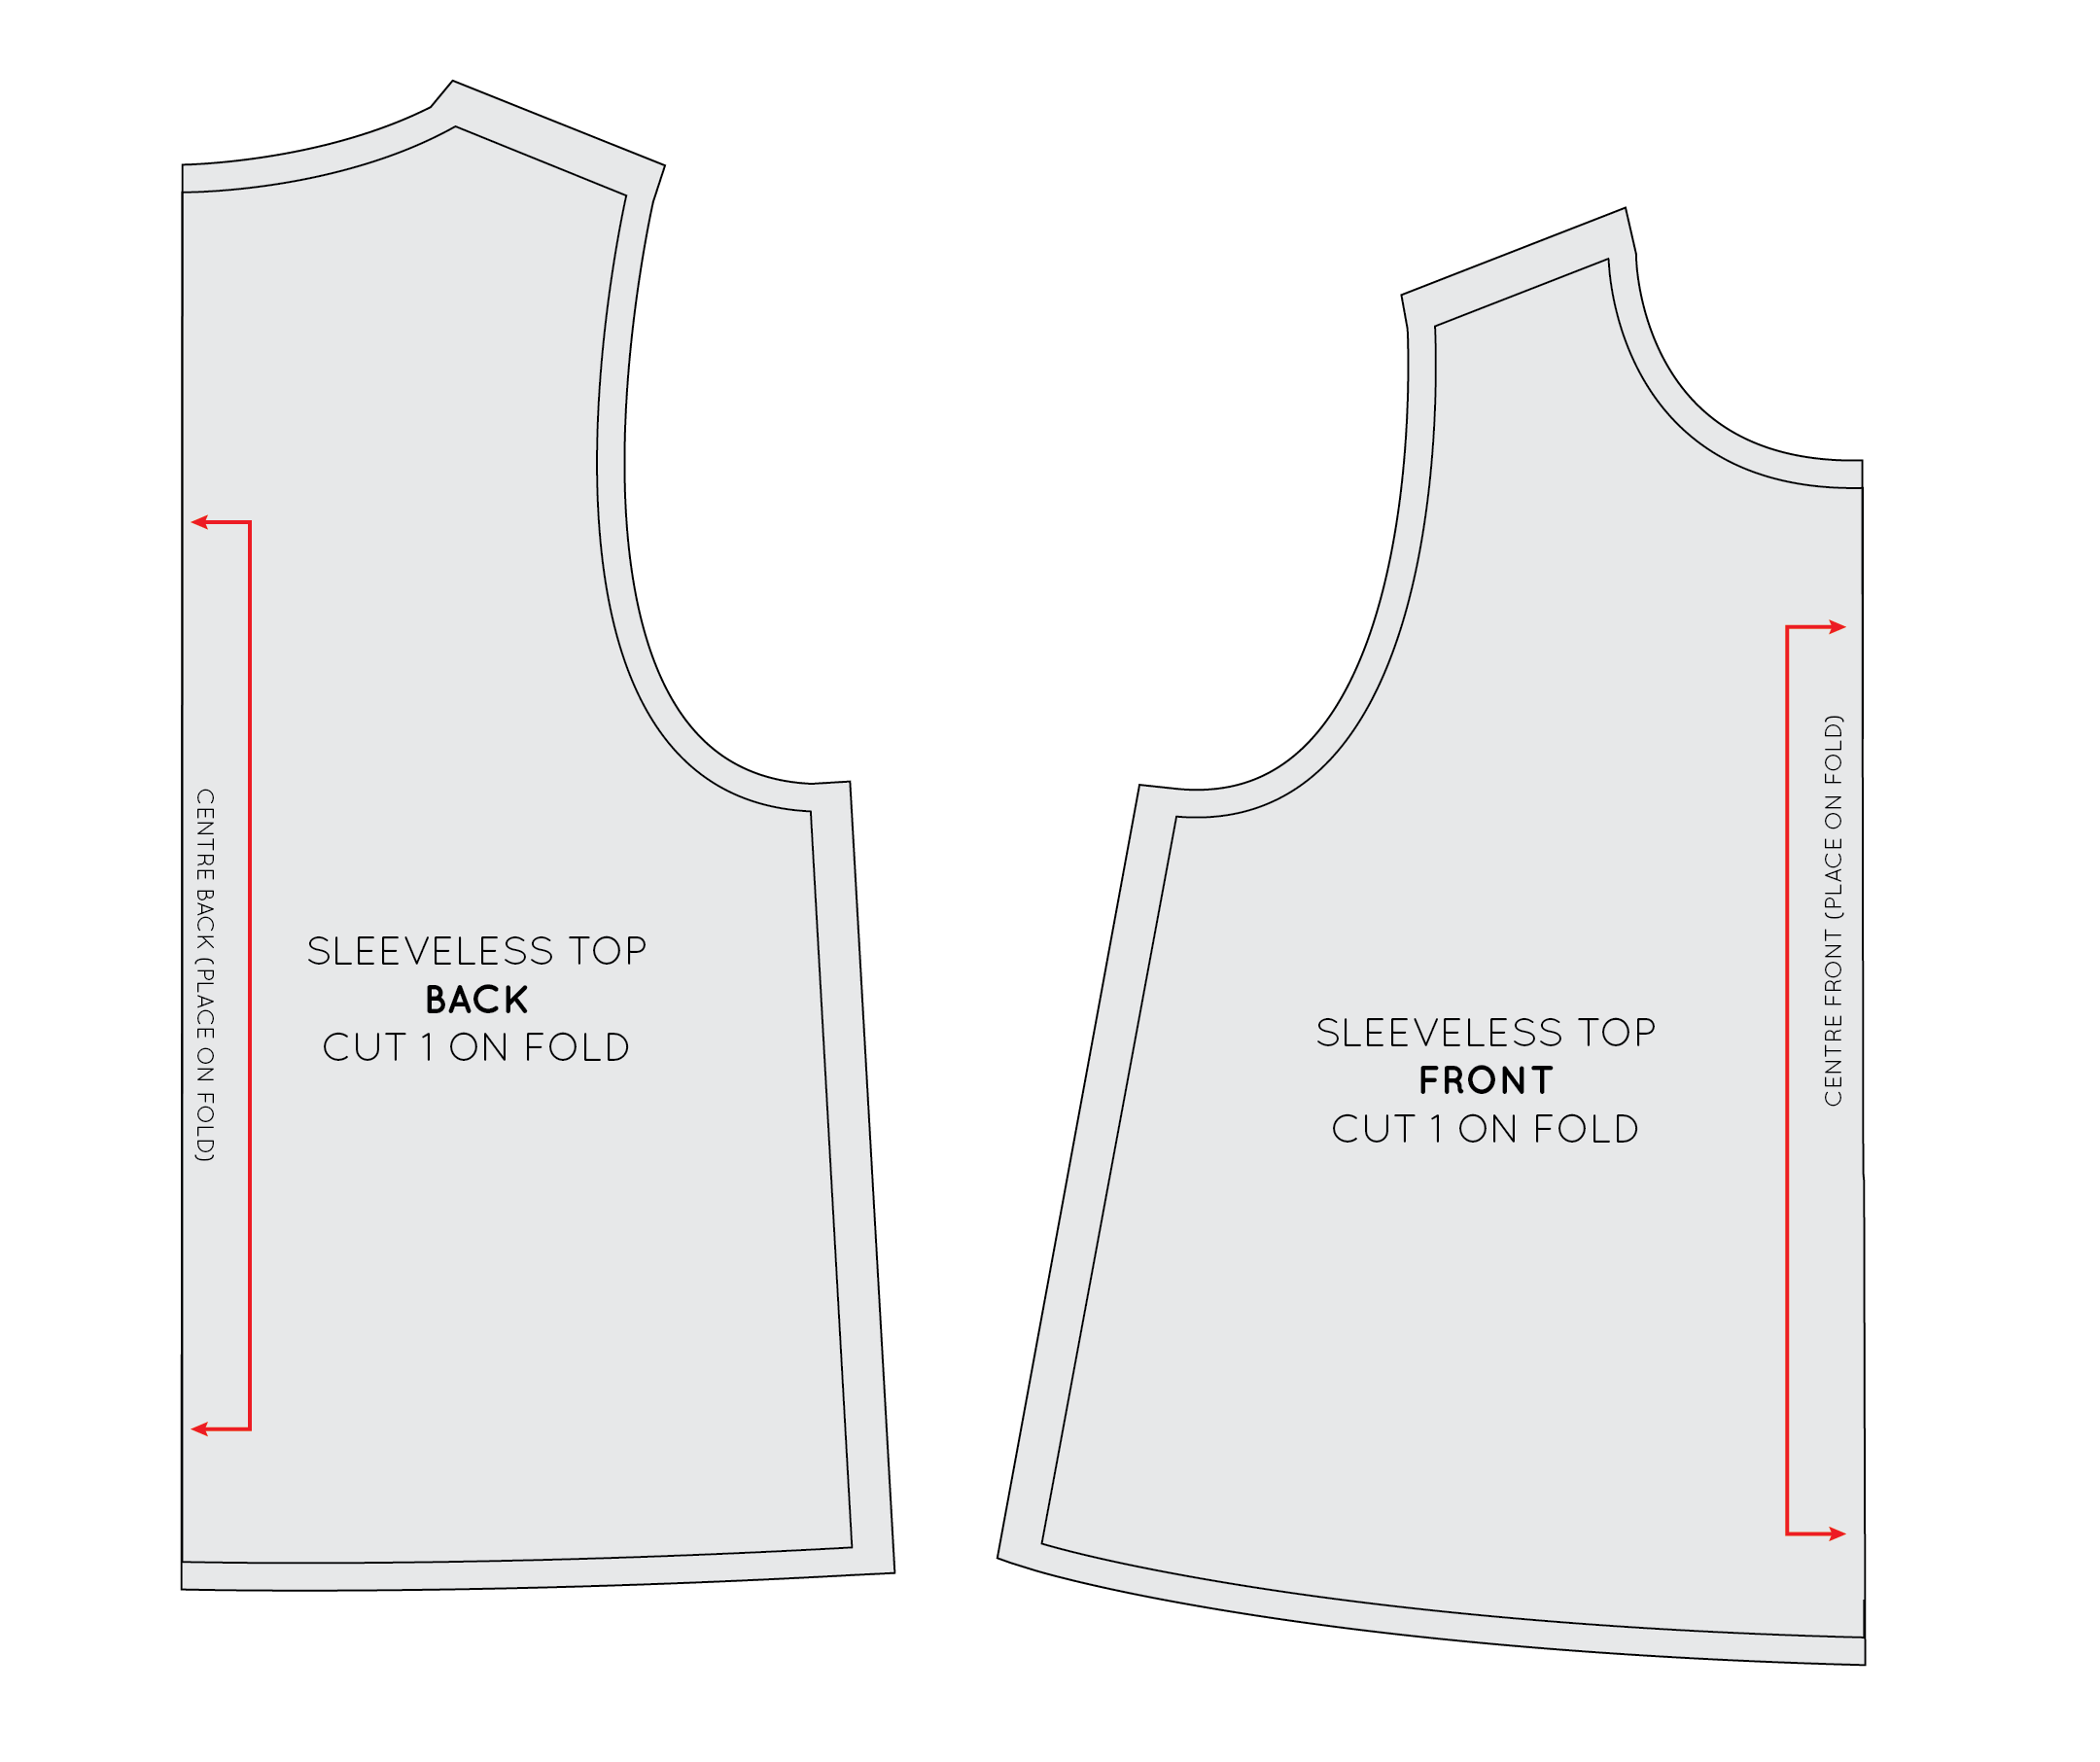
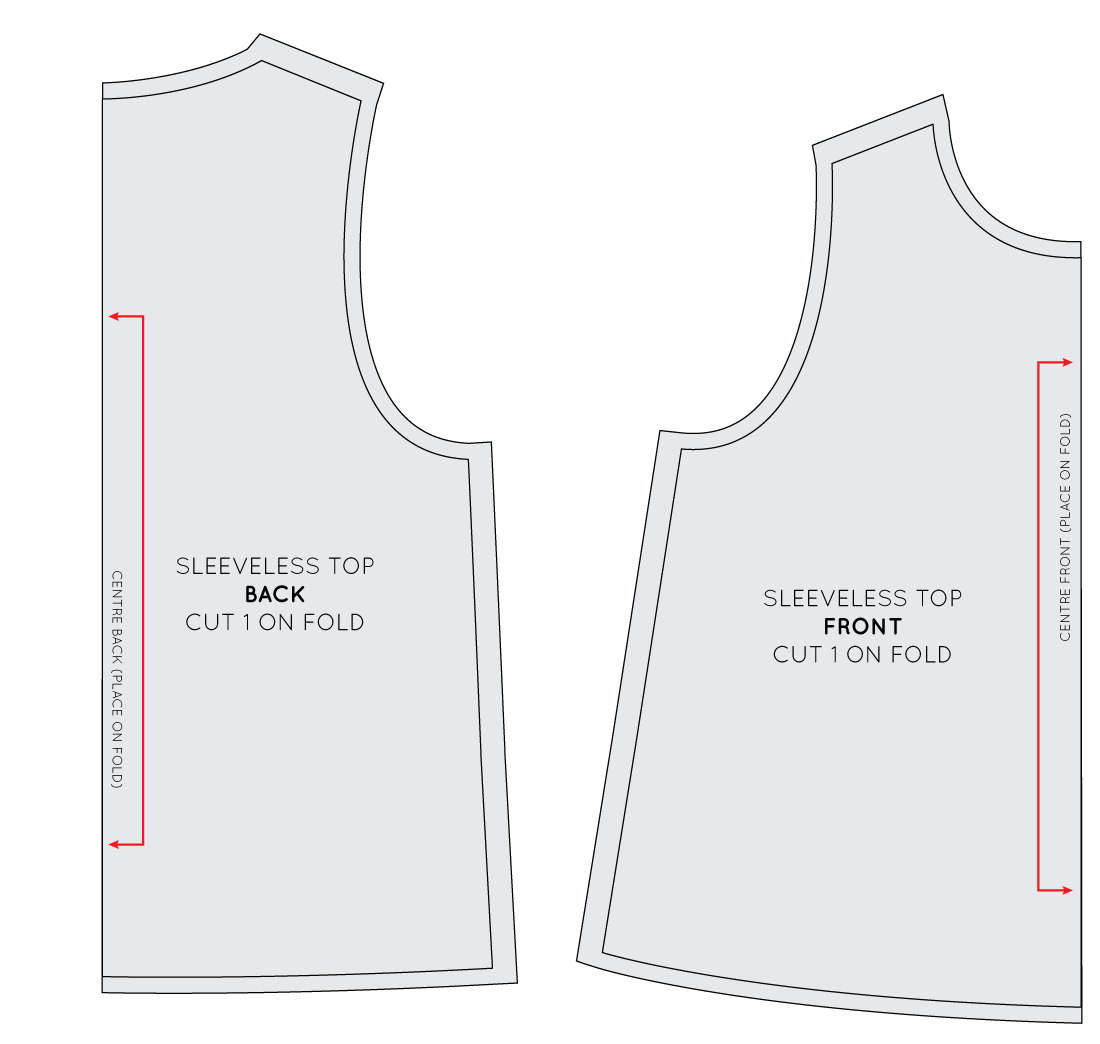
For those of you who are unfamiliar with pattern testing, this is how it works. The transaction normally goes something like this. Designer creates pattern. Designer puts a call out on blog and or social media asking for people to apply to test said pattern. Designer selects a group of testers. Designer sends pattern to pattern tester. Tester makes garment using pattern. Tester is paid in “kind" (usually a free pattern) for volunteering their time. Tester (generally) then reviews garment on their blog. Designer uses tester images to promote pattern. 

The main issues I have seen discussed surrounding pattern testing and the things I would like to talk about are:

1.  How are pattern testers selected?

2. Is pattern testing a means of actually testing a pattern, or is it a promotional tool?  

3. How do we encourage "real" feedback?

5. Is it unethical that testers are not compensated financially for their time / work?

1.  How are pattern testers selected?

I have seen this question come up a lot as there are many people out there who are applying to test over and over and never getting selected. I find this question quite difficult to answer as I don’t really have a proper strategy for selecting testers. Well at least, not yet. 

When it was time to test my first pattern, the Rushcutter, I didn’t have a website for In the Folds (only my old site Em Makes Patterns) or and Instagram account, so I decided to put a call out for testers in my previous site as well as a few Facebook groups. I was blown away by the response. I received around 120 applications in the first day. I was most surprised by this response because I was essentially a nobody. I had not released a pattern before, and had no online presence, yet so many people were willing to test a pattern for me when there was no guarantee that the pieces would even fit together. I was so touched by the generosity of all these women that I wrote an email to every single one of them thanking them for applying.

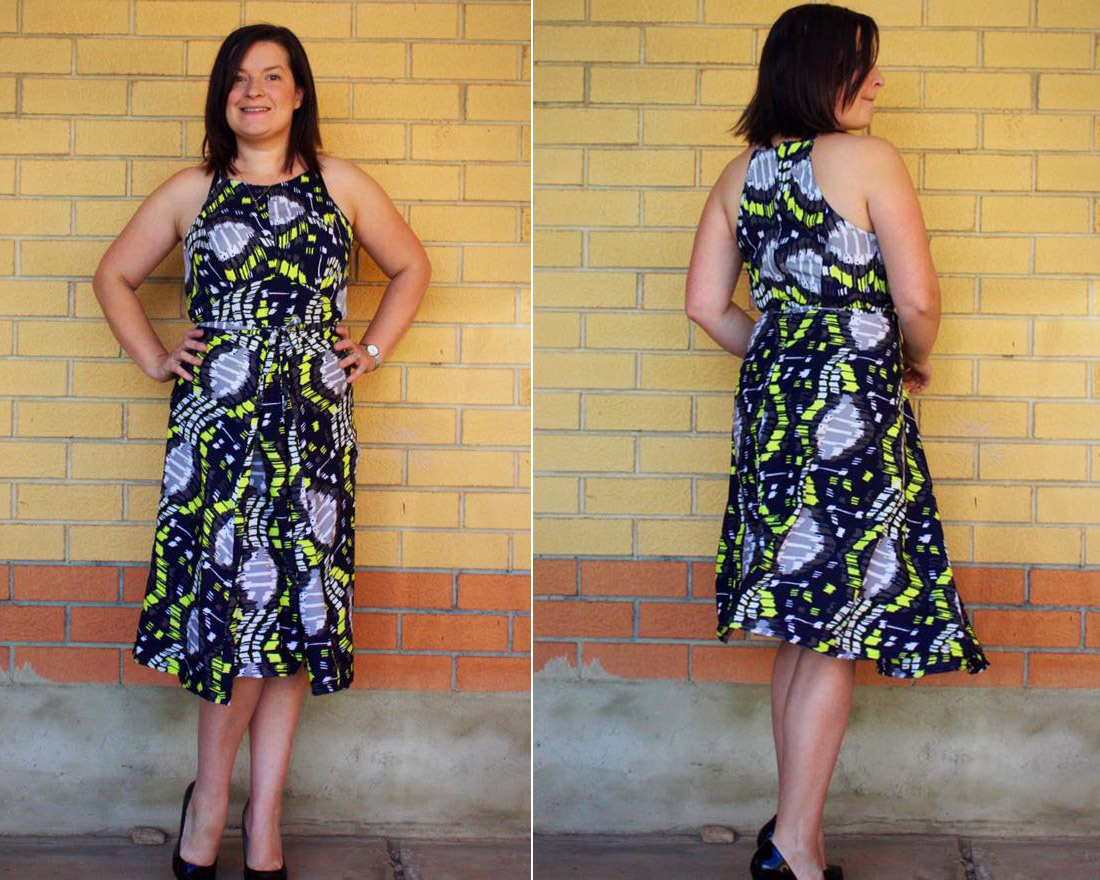
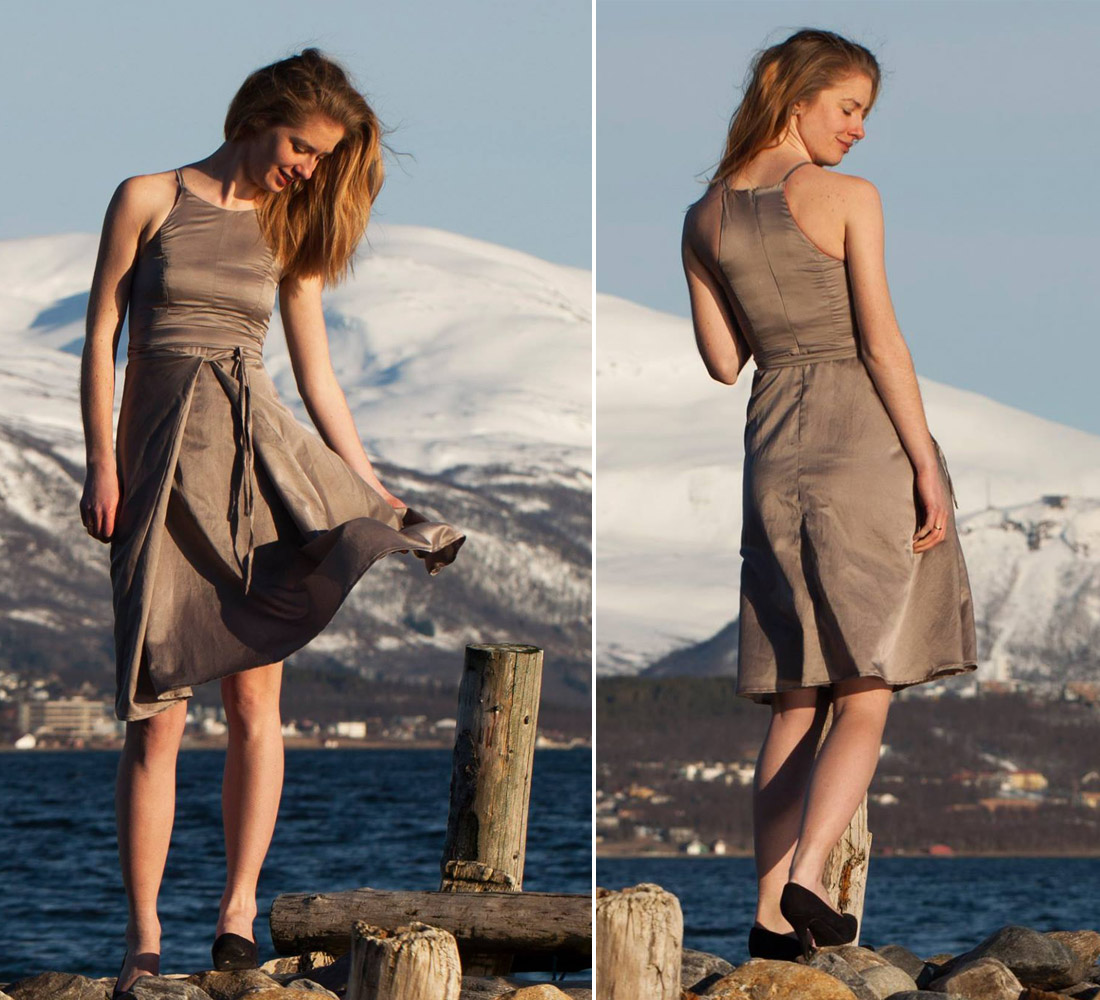
I was then stumped by the question of how to choose who I would ask to test the pattern. I started by putting all the applications into a spreadsheet and then going through and making sure I had at least two testers to select from for for each size. The dress can be made in two different styles and I had asked for preferences in the application, so I used this as a way to select testers. If only one person who wore a size C wanted to make view B, then that is who I selected. I then removed the testers who identified as beginners. I did this because  the Ruschutter is not designed for beginners and I did not want anyone to feel out of their depth. Testing is supposed to be fun, and I didn't want to leave people feeling upset or frustrated because it was too challenging. I also didn’t want to select all the advanced makers who applied as I really wanted to know how a diverse group of makers would feel about the pattern. 

I knew that I would not be doing a shoot for the Rushcutter at the time, so I also aimed to choose people who I knew would take a clear photo of the front and back so that I could include it in the product listing (I worked this out by looking at people's blogs or the photos they sent through Flickr, dropbox or on Facebok pages). I wasn't looking for over the top shots, just photos that clearly highlighted the garment details. 

I felt much calmer when it was time to test my second pattern. For one, I’d done it all before and had a good idea of what to expect. I also had a number of women who I had established a relationship with the first time around that I knew would jump on board again. This is something I have seen / read criticism about on a few blogs. I know many people have mentioned a bit of a “clique” when it comes to testing - feeling as though often the same people are chosen over and over to test patterns. I do understand that, but speaking from experience, I also know I felt much more comfortable asking people who had by this point become friends to help me out by volunteering their time, rather than asking a whole lot of new people to donate their time to my project. By establishing and then building an ongoing relationship I feel it is much easier to return the favour eventually, which I hope I can find a way to do with as many of my testers as possible. In saying this though, I did ask if people had tested before in the application so I could ensure I introduced some new testers into the pool and could also give them a chance. Roughly one third of the women who tested my latest pattern had not tested before and about half who tested the Ruschutter.

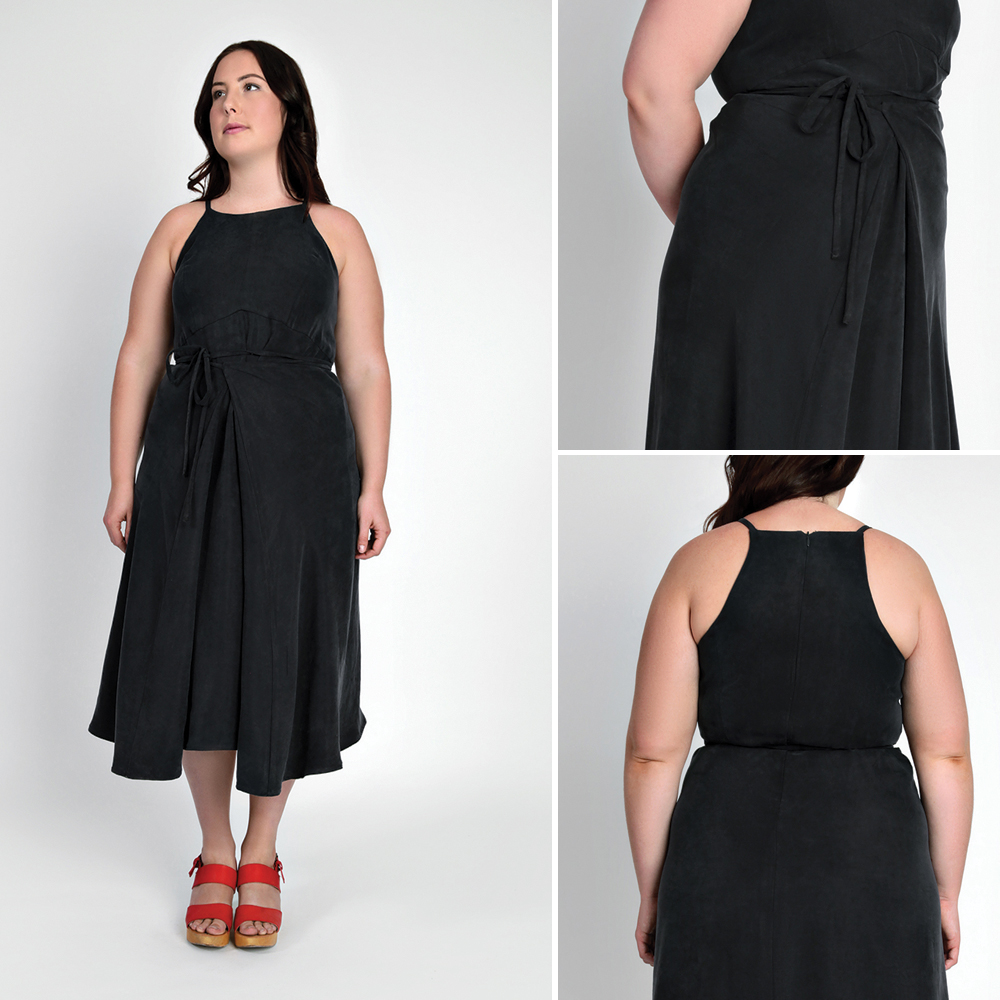
This time my selection method was slightly different. I decided to choose people, when possible, that had purchased the Rushcutter. I want testers who are going to enjoy making my patterns, who are actually going to wear the dress they make with the pattern. I don’t want the dress to end up in a wardrobe and never looked at again. By selecting women who had purchased the Ruchcutter, I felt that they already identified with my design aesthetic, my brand resonated with them and they were likely to enjoy making and wearing the Acton too. I also saw it as a way to thank them for supporting me and my little but growing brand.

I am still not sure of the best way to select testers and will be working on this each time I test a pattern, but for the moment I am learning as I go. 

2. Is pattern testing a means of actually testing a pattern, or is it a promotional tool?

This is a difficult question and I am obviously not in a position to answer this for everyone. But I am in a position to answer for myself and I think it is important that I do so. 

The reason I test patterns, with help of volunteers from the sewing community, is most definitely to see that the pattern works in its entirety. Marketing does not come into the equation. I don’t insist on testers having blogs to apply to test, nor are they expected to write a review of the pattern after its released. The decision whether or not to review the pattern is totally up to them. 

The reason I test a pattern is because I want to be sure that my pattern is an excellent product. When I send out a pattern for testing I ensure it is a darn good product before it even arrives in a testers inbox.

When I send it out I am sure of many things - I am sure the pieces fit together (because I check each piece from each size), I am sure it prints well (because I print the pattern at home and make sure that it does), I am sure that the techniques used are the best choices (because I make around ten toiles of a given design before I even start the grading process), I am sure it is graded correctly and I am sure that the instructions are clear and written well (because I spend a huge amount of time making sure that they are). It is really important for me to be sure of these things because I do not want to send out a pattern that is a flop, whether it is in a ‘testing period’ or not. I do not want people to waste their precious time, paper, ink and fabric to create a garment that just cannot be worn because of an error on my end.

Although I am sure of a lot when I send a pattern out, I still want to see a group of very different people approach the same pattern and see if it sheds light on anything that can be improved. Testing provides me with an opportunity to see a dress made in every size I offer (although I could go and make a dress in every single size, I would struggle to find ft models of all the sizes in my range) by women who have varied levels of skills. I am an advanced level sewist and can often underestimate how difficult a process is. Having testers of all different skills helps me with this immensely. No matter how much I scrutinise a pattern, there are simply things that I do not see. Beginners notice things that the more advanced sewers don’t see and vice-versa.

As well using testers of different size, shape and sewing skill, I also use testers from all over the world. This helps greatly and ensures that people can access the things they need to make the pattern in their area. For example, when I tested the Rushcutter I simply converted the button measurements from centimetres to inches, as I assumed this was how it was done. One of my testers highlighted that buttons of the size I specified could only be purchased in specialty shops in the US. I knew it was important that I changed it so it would be no trouble for those sewing the pattern. It is also important to check that all the testers also understand the terminology used in the pattern. For example, I used the word “drill hole” a number of times in my most recent pattern and one of my testers (thank you Erin) pointed out that this was not a term she knew. I then decided to put it in the glossary of terms. These are the type of things I would not be able to work out myself and what I am very thankful for my testers for. These things ensure that users of my product have a great experience using the pattern when it gets released. There is no frustrating moment when they realise they cannot find the button they need or have to scour the internet to fond the meaning of a term I use. 

So in short, for me the point of testing a pattern by asking people from the community is to confirm that I have created a good product, to iron out any creases and to see how a wide range of women approach the pattern. I do not rely on my testers for reviews. After the Rushcutter was released, I contacted people directly and asked if they would like a free pattern in exchange for a review. In this case it is important that the reviewer highlight that they have not paid for the pattern.

3. How do you encourage "real" feedback?

I ask testers to be as open and honest with their feedback as possible, specifically asking what they didn’t like about the pattern in the feedback form. I believe this is the best way to extract constructive feedback from people (because generally people are nice and don’t want to say ‘nasty’ things). I would definitely prefer to hear what’s wrong with the pattern before it’s released, when I am still in position to fix it, rather than afterwards what it would be very difficult (as well as awkward and embarrassing) to call it back. I occasionally see designers releasing “new and revised” editions of patterns. I really don’t want to go down this road. Updating and refreshing instructions or format is one thing, but changing the actual pattern pieces? All the creases should really be ironed out before the first pattern is sold.

4. When a pattern is reviewed after testing, is it expected that it has to be positive?

I think its fantastic when testers choose to review a pattern after it’s release. When testing for me, testers are under no obligation to write about the pattern, nor are they under any obligation to give it a positive review. I think honest reviews are what keep things interesting and are often what sell patterns.

I do appreciate that it is often very difficult to say anything negative about a pattern that you know the designer has spent a huge amount of time working on it. Indie pattern companies are not faceless. In most cases we know exactly who is behind the design, how hard they worked on it (and even sometimes what they had for dinner! Thank you Instagram.) This is a harder one to tackle as no matter how many times you encourage people to be open and honest with their review, it is a difficult thing to do. In a sea of generally positive reviews, it is always difficult to be the one to point out the flaws. It is also difficult to feel as though you may upset the designer. 

I did not do a blog tour when I released the Rushcutter, but have been toying with the idea for my next release. But thinking about the nature of reviews and how it sits with testing, has made me think that it may not be the right things to do. Would by encouraging people to take part in a blog tour make them feel as though they had no choice but to give the pattern a good review? Or is it a good way to say thank you to the testers, as surely a few people in the testing pool are hoping to get more traffic to their site by testing. And here I am going around in circles. What do you think about this?

And onto the last question in this piece. 

5. Is it unethical that testers are not compensated financially for their time / work?

I have read a few posts about this that pretty much accuse designers of exploiting people to get their patterns tested. I hate reading stuff like this as it really is so far from the truth (well at least it is for me and the way I do things) and it makes me feel very sad. It gives no credit to the incredible relationships that are formed during the testing process, the fun that people have and all that is learned (by both designer and tester) during the testing period. I guess what I am saying is that it gives no credit to the sisterhood that exists in our incredible community.

Choosing to test a pattern is a choice. Women (and maybe in some cases men) nominate themselves and volunteer their time and their skills to get involved in the process for a million and one reasons. They may want to see how it works, "meet" other makers, contribute to the community, learn something new, have a deadline, restore their "sew-jo" and the list goes on… I have tested a pattern before. Do you know why? Because I knew I wanted to start an independent pattern company at some stage and I knew I could learn from the testing process. And I did. I learned lots! And receiving a free pattern was just a bonus at the end. 

This does not mean that I think it's good that testers are generally not paid. I, as much as any other designer out there, would love to be able to pay people to test my patterns. But at the moment I am not in a position to do so. I am pretty sure that most pattern designers are not rolling in cash. I know I’m definitely not! I work one part-time and two casual jobs just to support myself while I run this little business. I would love to be in a position to pay each and every one of my testers. They have incredible skills that I truly value. But at this stage in the game it would be physically impossible. Does that mean I will never pay my testers? Definitely not. As my business expands (hopefully) and generates more income (hopefully), I would love to be sharing the pie around with the people who have helped me get established in the first place. But at this stage the only way I can compensate my testers is with a free pattern and a whole lot of kindness.

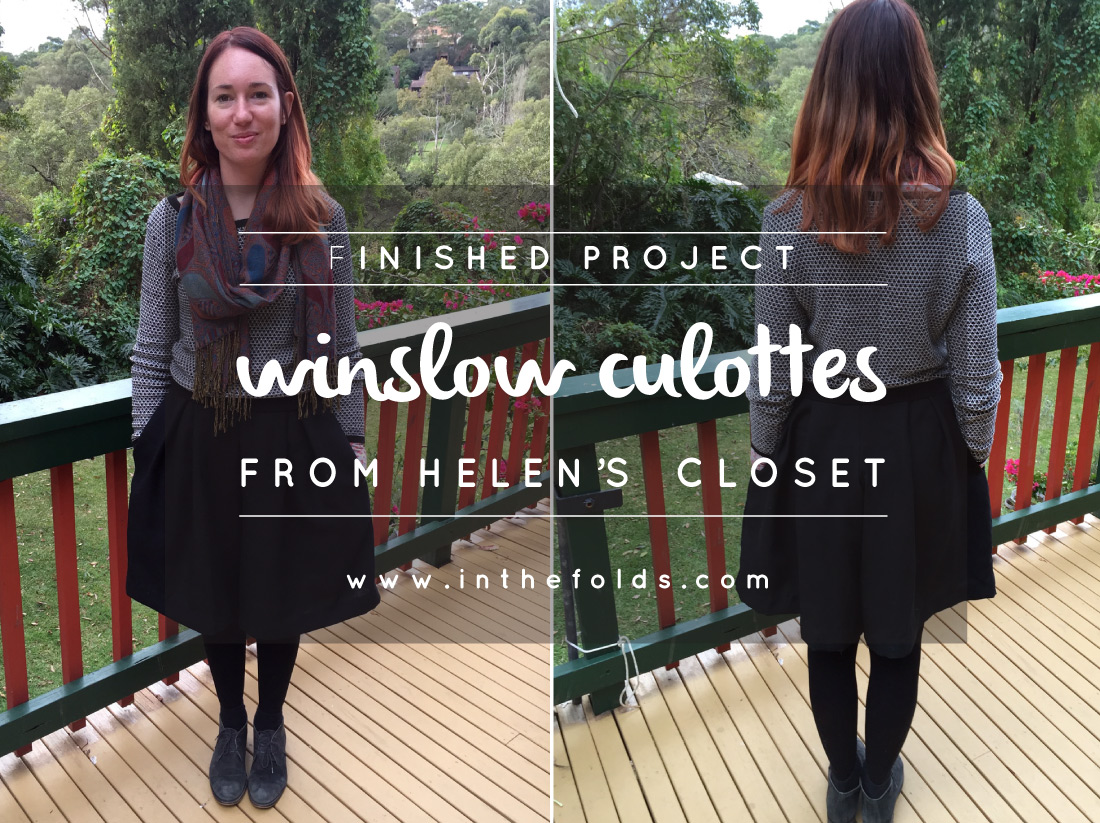
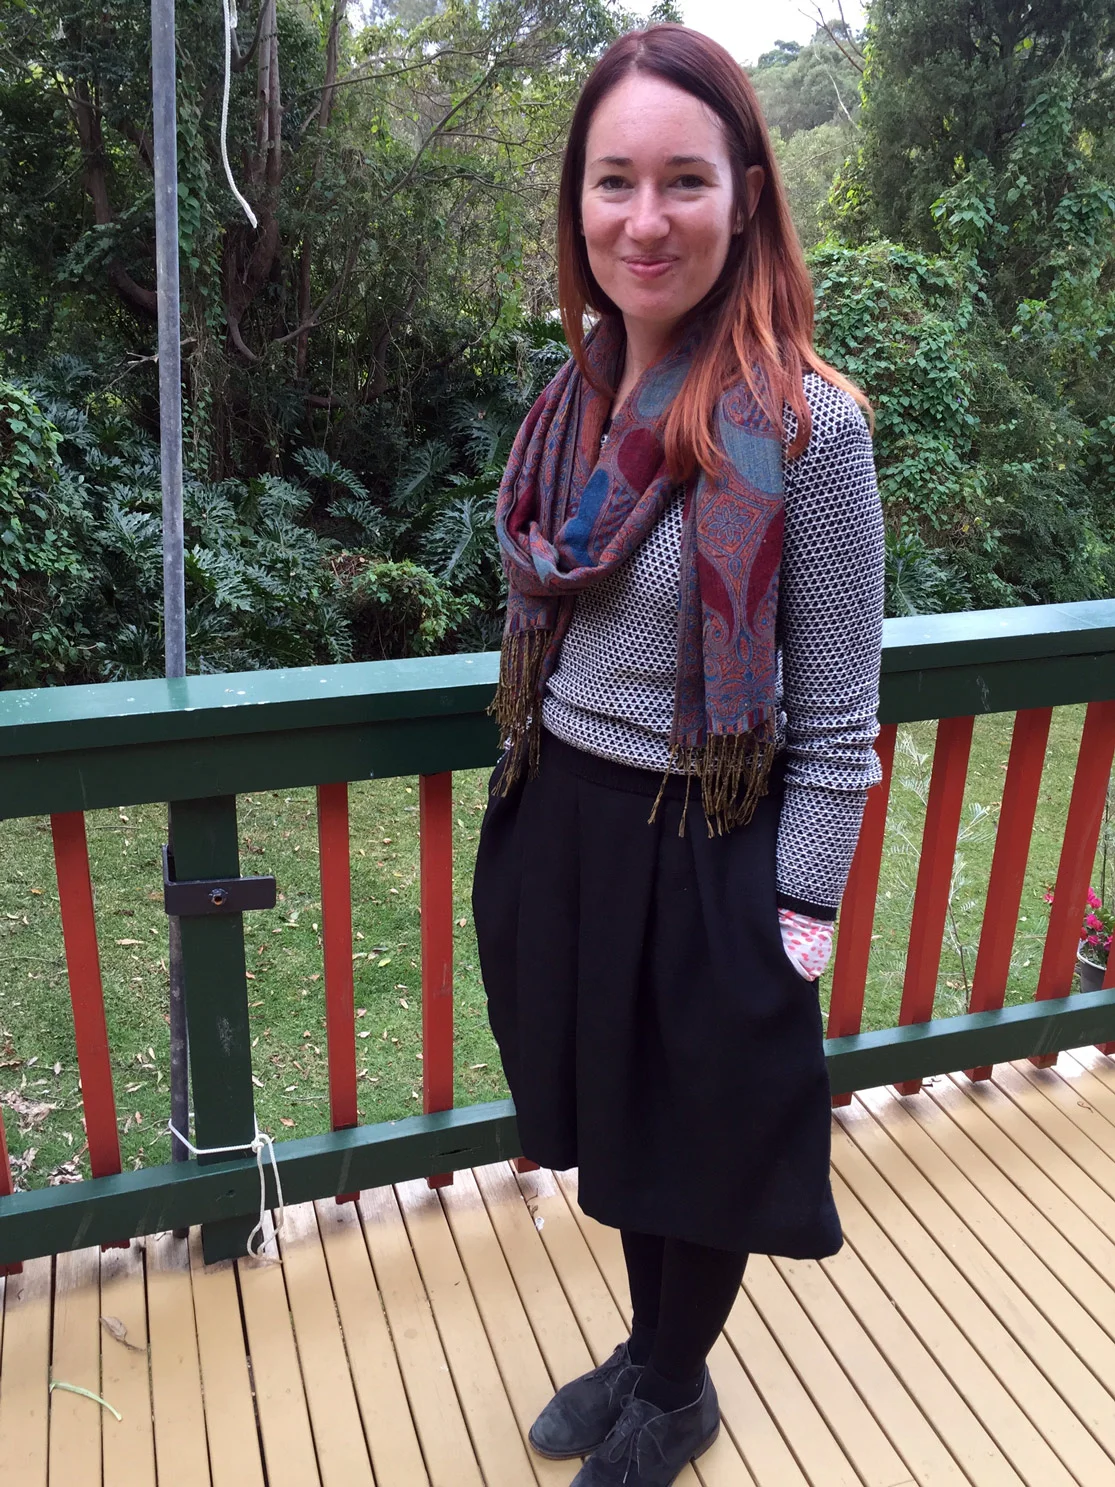
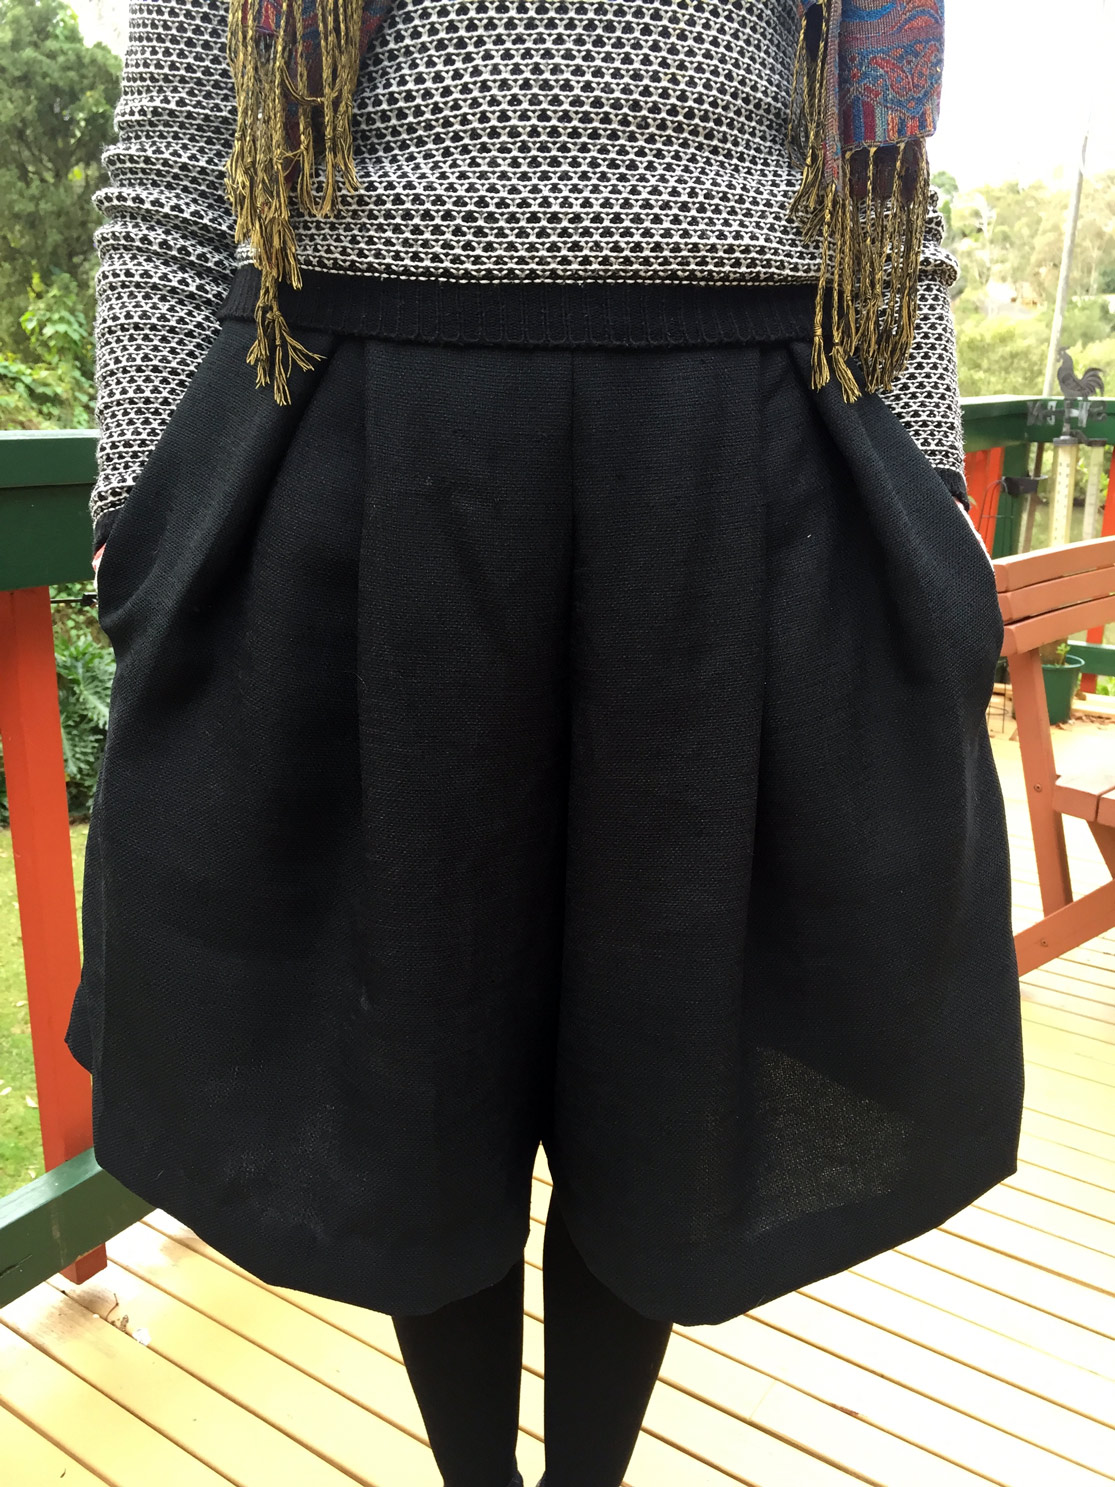
There are many ways we can make someone feel appreciated and respected without a financial transaction taking place. And of course, when there is a way I can return the favour, I jump at it with open arms. I am currently testing the Winslow Culottes for Helen from Helen’s Closet. I was so excited when she put a call out for testers. I realised it was a chance to return the favour after she had tested a pattern for me recently. When Andreia contacted me and asked if I would be a sponsor for this years London Sew Social I was happy to donate free patterns for all the attendees, as a way to say thank you to her. My lovely friend Kate, who I share a studio space with, tested for me and I am currently trying to pay her back with tea and treats! That is obviously not all the people who have tested for me, but I will try and repay the favour whenever there is an opportunity to do so. I hope that by building an ongoing relationship with the generous people who have tested for me, I will one day be able to find a way.

Going forward, and having had these issues swirling around my head all week, I have started thinking that maybe I need to work on being more outward about my desire to return the favour and rather than waiting for an opportunity to repay I should be actually asking my testers what I can do in return, what they like in exchange for their time and feedback? So that's some food for thought. 

I think that it is very important, that as a designer going into the testing process, we remember that testers are doing us a huge favour, and it is not the other way around. I know that without the collective community that are willing to put their hands up to test a pattern, so many patterns just would not exist. The incredible and diverse range of patterns that we are now lucky enough to have choice of would just not exist without this system. As a designer, I feel completely indebted to all the women who have been involved in testing for me so far, and who test for the independent pattern community in general. If you are a designer and are going into the testing period, go in with this mindset.


Your thoughts

I’d love to know your thoughts about pattern testing. Why do you do it and what do you thinkcould make it better? OR maybe you're a designer who has worked out a better system than me?


You may also like:

How to : Move a dart (using the 'Pivot' technique)

inthefolds_move_a_dart_1

Last week I showed you how to relocate a dart using the 'Cut and Spread Technique.' As the title suggests, this technique involves cutting your pattern piece to move the dart (and can also be used to add fullness to a pattern).

If you would prefer not to cut into your pattern (because it is a master copy, or you want to just experiment before finalising anything) it is a good idea to use the 'pivot' technique to move a dart. The outcome is exactly the same, it's just a different way of achieving it. I use both techniques in practice and it totally depends on what I am doing as to which one I choose to use. 

Tools

To perform this techniques you will need your original pattern (the basic bodice, for example), a seperate piece of pattern paper, a stiletto (also known as an awl) and a pencil.

Choose the new dart position

inthefolds_move_a_dart_2

Have a think about where you would like to move your dart/s to. In the image above you can see some suggestions about where you could move the darts to on the front basic bodice. 

For the point of the exercise I have chosen to move the shoulder dart to the armhole but you can use this process to move either dart anywhere. 

Mark the new dart position

inthefolds_move_a_dart_3

1. Draw a line where you would like your new dart to be placed. The dart point will need to be at the same point as the original dart.

2. Place the pattern onto a piece of pattern paper and hold in place with a pattern weight. Focus on the dart you are moving (which in this case is the shoulder dart) and the dart arm closest to the centre front - this is the point where you will start tracing around the pattern. I have labeled the dart arms 'Dart Arm #1' and 'Dart Arm #2' to help with the explanation. 

Trace the original pattern

inthefolds_move_a_dart_4

3. Start tracing around the pattern piece from 'Dart Arm # 2' - going down the neckline, centre front, along the waistline, up the side seam and then around the armhole until you reach the new dart location. Stop tracing here. 

As the waist dart is staying where it is, remember to mark the dart point and notches so that when you remove the pattern you are tracing, you can redraw the waist dart in its original position.

4. Now it is time to pivot the pattern to remove the shoulder dart and create a dart at the armhole. Take your stiletto (or a pin or sharp pencil if you don't have one) and insert the point into the point of the shoulder dart. Remember this is not the drill hole (as the drill hole is marked 1-1.5cm from the dart point), but the point itself. In the next step you will be closing out the shoulder dart by rotating 'Dart Arm #1' towards 'Dart Arm #2.' 

Pivot the pattern

inthefolds_move_a_dart_5

5. Remove the weight from the pattern. With the point of the stiletto securely in the drill hole, rotate (or pivot) the pattern so that 'Dart Arm #1' now lines up with the point where you started tracing the pattern in Step 3 (where 'Dart Arm #2' was originally), being careful to hold the piece of pattern paper that you are tracing onto securely in place. 

6. Place the weight back on the pattern and trace the remainder of the pattern, starting at the point where your new dart is marked and continuing to 'Dart Arm #1.'

Complete your new dart

inthefolds_move_a_dart_6

7. Remove the pattern piece you were tracing and re-draw the waist dart (or any design features that you have transferred from the original pattern).

8. Complete the new dart by joining the opening in the armhole to the dart point with a straight line. 

Add markings + cutting instructions

inthefolds_move_a_dart_7

9. Complete the pattern by adding shaping to the new dart, adding pattern markings (in this case notches and the grainline) and cutting instructions as well as seam allowance.

And that's it. Now you have two techniques for moving darts in your repertoire!


You may also like: