How to : Move a dart (using the 'Cut + Spread' technique)

Hello, hello! This poor little blog has been very quiet lately, with me being very busy testing my new pattern and working on a couple of freelance jobs. But today is the day that I finally get back into the blogging routine (well that's the plan, at least). As I have so many tutorials to share with you and it's about time that I get going again!

In my last post, I showed you how to draft a bodice block to your own measurements, and today I'd like to show you how to relocate the darts, using the 'Cut and Spread technique.'


in_the_folds_move_dart_2

I would suggest making a toile of your bodice block before making any adjustments to your pattern. You can use this guide to making a toile, if you are not sure where to start. It's important that you get the fit right before you start making adjustments to your pattern. 

Choose the new dart position

in_the_folds_move_dart_3

Have a think about where you would like to move your dart/s to. In the image above you can see some suggestions about where you could move them to on the front bodice. 

Move the dart

Trace a copy of your bodice block pattern (it is always good to leave your original pattern as a master copy) without seam allowance. 

in_the_folds_move_dart_4

1. Draw a line where you would like your new dart to be placed. The dart point will need to be at the same point as the original dart.

2. Cut along the new dart line and one of the dart arms (the one closest to the new dart) from the edge of the pattern towards the dart point. Don't cut all the way to the dart point - leave a small 1-2mm "hinge" to keep the two pieces together. 

in_the_folds_move_dart_5

3. You will now be able to move the shoulder section of the pattern, using the small hinge you created in Step 2. 

4. Close out the original dart by aligning the cut dart arm with the other dart arm from the original dart arm. In the example, you will see that by closing the shoulder dart you have opened a new dart in the armhole. Use tape to close the dart permanently. 

To complete the pattern you will need to add shaping to the dart, add a drill hole 1.2cm - 1.5cm from the tip of the dart and then add seam allowance. And voila. You moved a dart!

There is another way of moving darts - which is called the 'pivot technique,' that I will show you next time.

Until then, happy drafting (and sewing)!


You may also like: 

Talking about : Fashion revolution and how to get involved

Talking about : Fashion revolution and how to get involved

Have you heard of Fashion Revolution? It's a brilliant organisation that has been established to get us to work together to transform the fashion industry, encouraging each one of us to ask the question 'Who made my clothes?' 

This cause is a very important one to me, and something I believe we all really need to be thinking and talking about - whether we make all our clothes ourselves or choose to buy ready to wear.

Would you like to pattern test for In the Folds?

pattern_testing_in_the_folds

I am FINALLY ready to test my next pattern! Are you interested in testing the pattern for me?  

What is the pattern?

I don't want to say too much about the pattern, but I can say it is a dress, with two variations. It's aimed at advanced beginners and beyond - so you'll need to have a few solid projects under your belt.

When will testing take place?

If you are selected to test the pattern I will send you the pattern by Friday April 15th, and I will need feedback (including photos of the finished garment) by Friday April 29.

If you applied to test The Rushcutter (through my previous website (Em Makes Patterns), I still have your details on file, so there is no need to apply again.

Want to know more?

If you would like to know more about pattern testing, or would like to apply, click here

Talking about: Getting Started

Lately I have been thinking a lot about how to get a business started. I have a couple of friends who are just starting out on their small business journeys, or are just in the pondering phase, and it has got me thinking about the kind of advice I can offer them. 

I am obviously no business guru. This is all very very new to me, as I myself, have only been officially in business for about six months (I also had a little warm up period three months before I officially launched my business). But I know, there are a few things I am very grateful that I thought to do (or was told to do) at the very beginning, and there are also many things that I have learned in the last six months, which I wish I had thought about in the beginning!

So I thought I'd share a few things with you, just in case you are thinking about taking the plunge too!

 1. Research is key

When I started researching for my business, I didn’t even know that’s what I was doing. Long before starting In the Folds, I had  stumbled upon the online sewing community (which I somehow had remained oblivious to until about three years ago) and was just completely blown away by how many people were sewing. 

I became a blog addict, following every blog I could (thanks to Bloglovin’) and soaking up all the amazing sewing goodness I could find. I hadn’t bought a sewing pattern for years (as I had learned how to draft patterns at university, and didn’t really feel the need to buy patterns), but suddenly indie patterns became very appealing. I wanted to know what all the hype was about. I bought a few patterns and gave them a whirl. I saw the incredible detail that was put into the instructions, the beauty of the packaging and the online support that was available. I suddenly understood the excitement.

And at this point, a seed was planted in my mind. What was stopping me jumping on board and producing patterns too?

This is when I realised how much research I had already done. I had been looking at sewing blogs daily by this point, so I already had a really good understanding of who was making patterns and the types of garments that were already on offer. I started taking note of what designers seemed to be the most popular, and what people liked about their patterns. I read countless blog posts about indie patterns and reviews of garments sewn with particular patterns, getting a good idea of what people expected from their pattern and what they did and didn't like.

I put my hand up to test a pattern, knowing that it would be a good way to learn how to go about testing a pattern, when I eventually got to that point. At this point I had no idea how the process worked, but by getting involved and doing it, I quickly learned the things I liked about pattern testing, as well as the things I didn’t like - and how I could iron out these creases when I was the one getting people to test my pattern. 

When I finally launched my business in October last year, I knew the world I was going into. Oh boy, there was still a tonne to learn, but my research had put me in good stead to know what to expect and to envisage (some of) the obstacles that were likely to come my way. There is an amazing group of women who made the indie pattern scene what it is today, and I think it would be crazy not to listen to them and learn from them. 

When my business started, my research did not stop. I am still constantly researching ways I could do things better, how to be more productive, more efficient and how to create a better product. I set time aside regularly to just sit down and absorb what I can. I continue to read blogs (although a wider range of blogs appeal to me now), search for interesting articles online, and listen to tonnes of podcasts (which is a great way to keep learning while you work on something else), as I think it is just so important to keep my finger on the pulse and always be questioning how things are done, and how things could improve. Once upon a time (albeit very recently) you needed to get a business degree to learn the ins and outs of starting a business, now you can find everything you need online. It is incredible. 

2. Just do it already

This is a piece of advice I have come across a lot (thank you Nike), but it does ring very true to me. After stumbling upon the online sewing community, I was busting to start a blog, but it took me months to finally do it. I didn’t know where to start, what people would think and if there were already too many blogs out there. I questioned whether there was anything new I could contribute to the conversation. I am so thankful that I pushed myself to just get the ball rolling and hit publish on that very first blog post. 

The only way to find out what's going to happen, is to go for it. The cliche of ‘you’ll never know until you try’ is just so true. Just starting a blog gave me a chance to work out how to put a tutorial together and work on my writing style. It gave me a chance to find and develop my voice. It gave me the confidence to realise that I was adding something new to the conversation, and that people were interested. Although I look back on some of my first tutorials and cringe, I know it was so important in the development of my style, and I had to work through that awkward stage, to get to where I am now (which is still continually growing and improving).

I think this quote from Ira Glass really sums this stage up very well:

Ira_Glass_quote.gif

In short, your work may (is likely to be) a little bit crap at first. But you won’t know that till you try, and you won’t be able to get it looking better if you don’t just put it out there and start ironing out the creases, developing your style, working on your process, and getting feedback from those around you. It can be scary at first, you wonder what people will say, what people will think, but all you can do is be brave and put it out there. Just do it. 

I recently watched this TED talk by Reshma Saujani about the importance of women being brave instead of being perfect, and it really struck a chord with me. And this blog post by Heather Lou form Closet Case Files, is also another great read about just biting the bullet and doing it (just in case you need a little more of a shove).

3. Practice makes perfect

No-one goes into business knowing how to do everything. No matter what they tell you. I went into my business with a lot of knowledge and skills related to my business - I have a degree in Fashion and Textiles, I knew how to create a website, I knew how to put a tutorial together, I knew I could write well. 

But that was far from the skills and knowledge I needed - I didn’t have a clue about marketing and advertising (and still don’t know much), I had no idea about book keeping for a business, and I also didn’t know all the ins and outs of drafting and grading a pattern digitally. But I didn’t let these things turn me off.

There is always going to be things we don’t know how to do (I still hit these obstacles daily), but the internet is an insane resource. We are so lucky to live at a time when finding the answer to a question is as simple as typing it into a Google search, or reaching out to a friend on Facebook or Instagram. 

One thing I found really liberating was to accept that there were things I did not know how to do, but I also knew I didn't need them right away. So I decided to file them away in a corner of my brain, labelled as 'work it out later.' By compartmentalising the tasks at hand, I could focus on what needed to be done, and learned, in the present, with the understanding that I could cope with the other things in the future. For example, when I decided to start my business, I had no idea how to grade a pattern digitally. Although I knew it was an important thing for me to learn how to do (and was crucial to me being able to launch my first product), I also knew I didn’t need that skill on the first day I started my business. There was still A LOT I had to do before I got to the point that I would need to digitise my pattern (I had to design the pattern, make up countless samples until it was just right, scan in the paper patter and build a website to house said pattern) and there was no point wasting mental real estate on it. 

When it was finally time to grade the pattern, that’s when I faced it. I started experimenting. I read everything I possibly could get my hands on on the topic. I knew how to use Adobe Illustrator, but had never tried to draft a pattern with it. I was learning from scratch. I practiced, I tried out different techniques, and I made mistakes. Lots of them. I trawled the internet for information and took snippets from many different sources, until I found a process that worked for me. My process wasn’t perfect, but nor did it need to be. It did the trick, and I knew that the next time I did it, I would be faster and more efficient.

3. Find your people

Finding your people is so important to the success of your business. I did a short small business course before I started In the Folds, and there was a lot of talk about our ‘ideal customer.’ At the time it seemed like a very abstract concept to me. I didn’t know what my ideal customer liked, didn’t like, what she did for work, what she did in her spare time (apart from sew, obviously!). None of it. I didn’t even know how I could find this information. 

Then I found Instagram. [This is not to say that Instagram will work for everyone. Your ideal customer may hangout elsewhere, they may not even be present online (although I think that is doubtful if you are taking the time to read this post), but this is just an example of working out where your ideal customers spends their time.]

Unfortunately, this was a lesson that took me a while to work out. And this is one of those lessons I wish I learned before starting my business. 

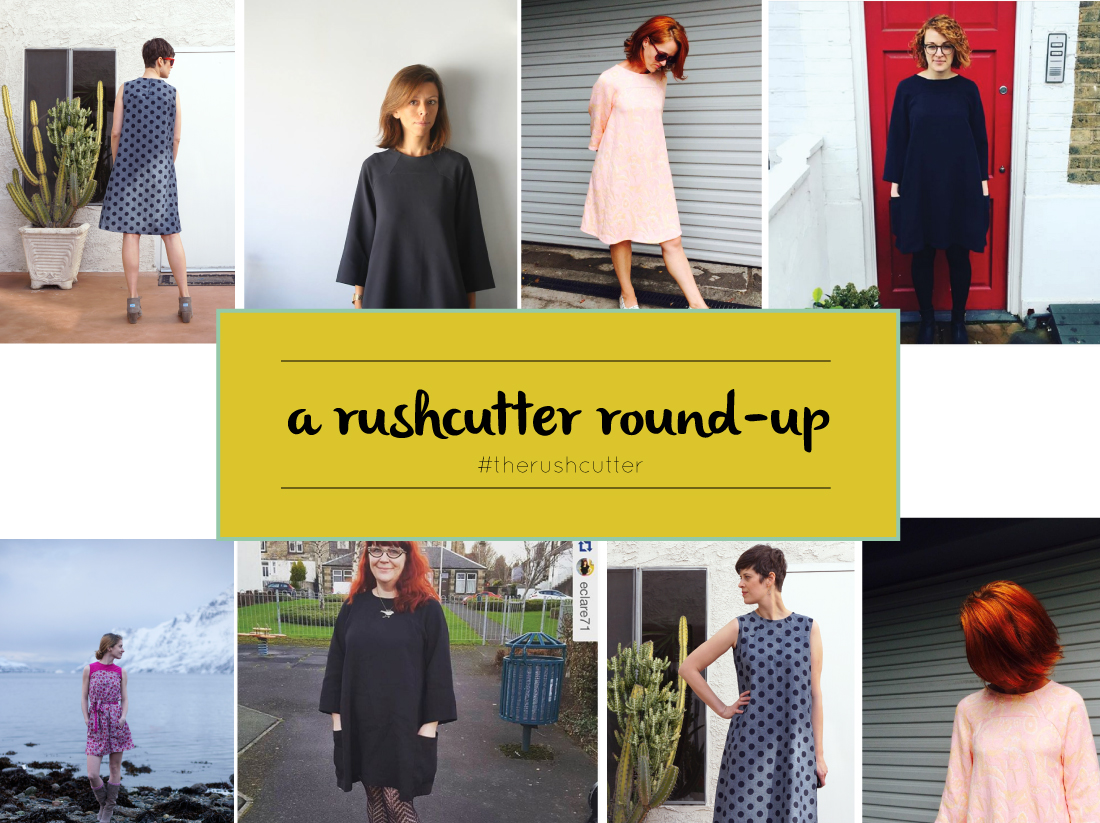
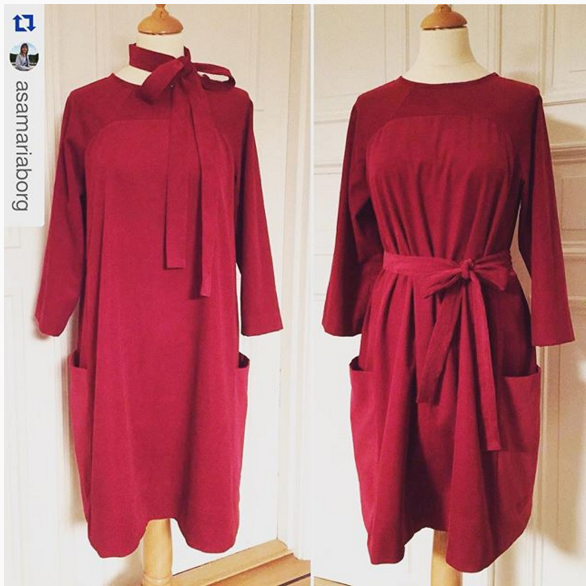
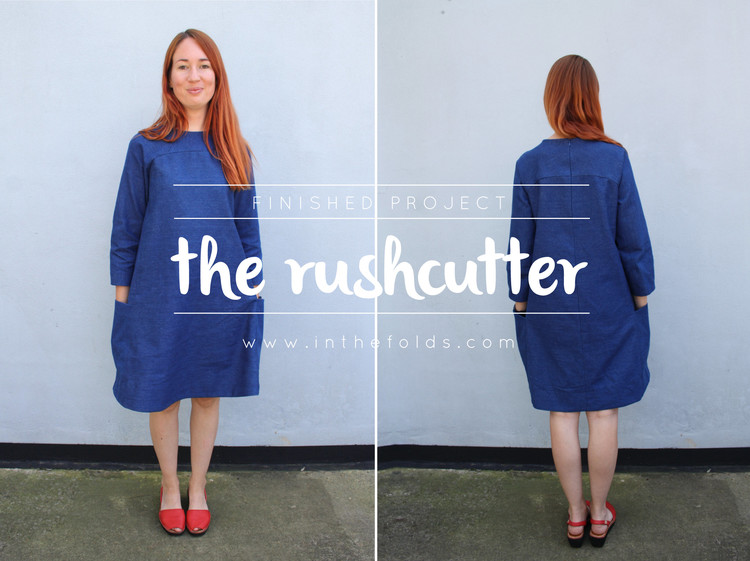
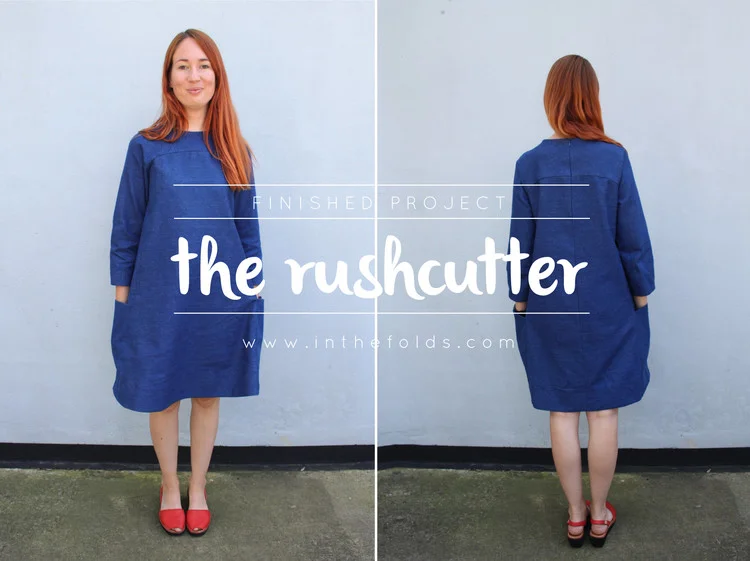
There was a three month period between my official first day of business and the day I launched my website and my first pattern (the Rushcutter). I had my head down designing my first pattern, putting it through testing, and getting my website up and running, and I had very little contact with the outside world (particularly with the outside online world). A girlfriend kindly offered to help me get some social media up and running (see point number 5 for the importance of calling on favours), as it was something I had been neglecting, and for some reason just couldn’t seem to face. She suggested I get on Instagram, as it would be a great place for me to be in touch with people who may be interested in my website or even my products. I told her it was fine, I already had an Instagram account from my previous blog (with a whole 34 posts and 226 followers) and I could just carry on with that. 

Thankfully, my dear friend knew far more than I did about the power of social media. She created an account and said she’d just have a play around with the kinds of posts she thought would work for my brand. I quickly realised the power of Instagram, as well as what all that fuss was about… Apparently sewists love Instagram (myself included). Due to the generosity of my friend, I quickly learned the kinds of posts I should be publishing, how hashtags worked, and how to use Instagram to chat to like-minded people. I quickly connected with hundreds of amazing women (and maybe a few men) who loved sewing as much as me, and wanted to see photos of all the things I was working on. Suddenly I felt part of a community. A community that is incredibly supportive and inspiring - which is worth its weight in gold, when you are knee deep in a business that you run on your own. 

Although I have now found my people, I do think it would have made launching my business and my first product much easier if I already had an online presence back then. Not only because I think I would have had customers from the get go, but also because of the huge amount of support and encouragement I get from my online friends (and some have even become offline friends now too). So, if I was going to go back and do it all over again (which I obviously can’t do, but I am writing this in the hope that it helps someone like you), I would have opened an Instagram account the moment I knew I was starting a business, and built some hype (and some friendships) in the months before my launch.

4. Plans are much better than lists

This is another one that took me a little while to learn. If you asked me a year ago which camp I was in - To-do lists or plans - I would have proudly said that I was a to-do list addict. Fortunately, in time, I learned that to-do lists just don’t cut it. I find a to-do list a really good place to start, if my mind is overflowing with information, but it really is just the first step.

I use a to-do list as a way to just clear my mind and get everything down on paper, but then I use a schedule to allocate time for each thing on that to do list. It has made me become much more realistic about what I should get (and can get) done in a day, and also allowed me to overcome that disappointing feeling at the end of the day when I haven't managed to cross off the 332 (and possibly 82 hours of work) off my To-do list, because now I don't have those crazy lists that were setting me up for disaster before I even began. If you’d like to know more about how I manage my time, take a look at this post where I go into a bit more detail.

5. Ask for help

I am notoriously bad at asking for help. I always worry that people are too busy doing their own things, and asking for help will be too big of an ask.

What I learned when I started In the Folds, was that people really do want to help. People are inspired by those who are going out on their own, and even if they don’t want to, or can’t do it themselves, often they will still want to be part of that journey.

When I told my friends and family that I was starting a business, I was surprised and heartened by the number of people who came forward to offer their time and expertise. One beautiful friend offered to get started on my branding, while another (who I mentioned earlier) got on with my social media. Help in these two areas (which were two areas I had very little confidence in my ability to do well) was just what I needed. I quickly learned that with a bit of a push and some encouragement, I did know what I wanted, and I also did have the skill to handle it, once they had got the ball rolling for me. 

So this is the moment when I say, TAKE THE HELP! Be gracious, be humble, be very very thankful, but just take the help. Who knows when you will be able to return the favour, but you can always find a way. And don’t be surprised by the people who come forward to say they’d like to help. You can find wisdom in weird and wonderful places. A friend of mine who is a computer coder offered to look over my pattern digitisation process, to see if he could streamline it at all. He showed me a shortcut that literally saved me hours! 

6. Start book keeping from the very beginning

This one is a boring one, but a very important one! Book keeping is something I neglected until about six weeks ago. Yep, seriously. It was something I just kept putting off. And putting off. And putting off. There always seemed to be something more important to be doing. But when I finally decided to bite the bullet, after a friend told me about the success she was having getting her taxes sorted on Freshbooks. I quickly realised it was nowhere near as bad as I thought it would be. Yes, I have spent far more money than I have made, but at least now I know exactly how much. And I also know where my money is going. And now I have a process.

I would suggest working out a book keeping system as soon as you can - particularly when you are right at the beginning. As this is something that can grow with you if its done right, and you will spend less time rummaging through your handbag looking for receipts!

7. Be authentically you 

Being authentically me is something I find so important in my business journey, and something I am always thinking about and continuously working on. In my offline life, I am outgoing and positive (well at least I try to be) and this is something that I wanted to shine through in my business. I know some people have their online persona, which is intentionally quite different from their offline self - and I think this can work very well. But for me, I wanted to be as much myself online as I am offline. Starting my first blog gave me a chance to develop my voice and see how it was received. The chatty way I write online, is just the way I speak offline, and people seem to respond very well to it. 

As well as being genuine and authentic, I think being as open and honest as possible is a really good thing in business. When I think about the blogs I love reading the most, they are definitely the ones where I get a realisitic idea of the life the blogger or maker lives. I love when people acknowledge that their business journey has been hard, and that their lives are not always as shiny as their Instagram feeds. It makes me feel normal, and that I may too be on the right track. 

I am not here to say it is easy being open on the internet. It is definitely not. And this is also an area I have not explored as much as I would like, but I know it is the way forward for me and my business. I have learned so much from others who have opened their lives and their businesses for me to see, and I want to be a part of the movement for more transparency in business (if you would like to know more about why I think it is important to be transparent then have a look here). 

8. Reach out

Reaching out is possibly the thing I have found the most difficult in these first months in business. I find it very hard to compose an email to a complete stranger, but I am learning that it is so crucial to success. I am also learning that people are generally nice, and will reply to you. As I said earlier, just like friends and family wanting to get involved in the amazing journey of going off on your own, even strangers get inspired to come along for the ride too!

Inspired by someone in your industry? Write them an email and tell them! They just might get back to you and say that they love what you are doing too.

I studied fashion design in an environment that I felt was was very cliquey. People kept their ideas to themselves. What I love most about the online sewing community is that it is the complete opposite to that. Designers are not competing with each other. We are working together to make our community better and greater. Because in the end, this is the most beneficial to all of us right? 

For example, I contacted Beth from Sew DIY late last year, asking if she’d be interested in reviewing the Rushcutter for me. She suggested a pattern swap. We sewed each others patterns and then blogged about it. Not only was it fun, but we both broadened our audiences, and sold some patterns too! And I made a new friend through the process. 

9. Save some money

Exactly one year ago, I moved back to my home in Sydney after spending almost three years in the UK. While I was living in London, I had really started thinking about the possibility of starting my own business in Australia, but it always seemed like quite a far fetched idea. When I moved back to Australia though, I realised it was the perfect time to do it. I didn’t have a job, and no strong desire to go and work in the mainstream fashion industry.

I was lucky enough to be in a position that I didn't need to pay rent, and I had the opportunity to apply for a government funded program to help get new enterprises get off the ground. I also had a bit of money in the bank. Not a lot, by any stretch, but enough that I could invest in a few things I needed to get me going.

Although I knew I was going to have to do all the work required to get my business off the ground, as I didn’t have the money to employ anyone, I was relieved to have enough money in the bank to get some professional help when I needed it. After days of playing with my Squarespace theme, I just could not get it to do what I wanted it to. Having some money in the bank meant that I could contact a freelancer who could do it for me. Although it was pricey, it did save me from days and days searching through Squarespace forums, for an answer that may have not even been there.

This is the moment where I say that if you are thinking about starting a business, save some money! Having the ability to get professional help when you need it, is priceless. Although I have learned so much by trying to do everything on my own, it would have really relieved some of the stress, if I could have outsourced more of the work. If you are thinking about quitting that job to get started on your own business, try and hold on and save some money first. It will really make your life easier in the long run if you have some money behind you. I listened to a great podcast recently, which happened to be an interview with a very good friend of mine, where she says exactly the same thing. If you are thinking of taking the journey, have a listen, Caitlin has some great tips!

10. Diversify

If like me, you are not really in a position to hold onto a job and save some money before taking the plunge, there are still lots of options. Diversify. Accept (and even celebrate) that you can make many from many different places. Get a part-time job - I work one day a week as a nanny, so that I know I will be able to afford to at least eat each week. It also forces me to get out of the studio every Friday and get some fresh air and to focus on something that isn't my business (try thinking about work when you are chasing a three year old around the park). I am always surprised by how many great ideas I come up with when I finally leave my desk and focus on something totally different.

You could also consider getting some freelance work.  As you know, I am a pattern maker. Although I love most to make patterns for myself, and all of you lovely people, sometimes I take on a freelance pattern making job. It is a great way to bring in some bucks, as well as develop my skills. Win win I say!

There is probably another million things I could have included in this post, but these are the things that I have found to be the most important at this early stage of starting a business.

Other resources

There are tonnes of resources out there, to get you started on your small business journey, but here are a few of my favourites:


Are you on a similar journey to me? Is there a piece of advice you have about going into business?

A round-up of Rushcutters

When I decided to start a business creating sewing patterns, I never in a million years could have imagined what it would feel like to see people actually using the pattern I made to make a garment. Back then it was a very distant concept, one that I had no way of visualising. Even when I put the pattern through testing, I couldn't imagine what it was going to be like to see women of all different shapes and sizes, styles and tastes, sew up one of my dresses. I sat around nervously waiting for the feedback. I had spent so much time perfecting the pattern, and I was so nervous there would be something I had somehow not thought of or missed. 

Image credit: Sweet Red Poppy

When the first image arrived in my inbox (image care of Sweet Red Poppy), I squealed in delight. Someone had actually used my pattern to make a dress that fit them!  

the_rushcutter_roundup_1

(Images : In a Manner of Sewing / Right : Pigeon Wishes)

I couldn't believe how different each dress looked, and how each tester had really made the dress their own. 

Now, six months on, more photos have been popping up and I thought I'd share them with you, as an ode to all the incredible women who have sewn my pattern!

The Indie Sew Spring Collection

As you may have seen, the Rushcutter was included in the Indie Sew Spring Collection, which meant some amazing bloggers made the Rushcutter as part of the release.

the_rushcutter_roundup_2

(Image: Indiesew)

Allie, from Indiesew, made the most beautiful Rushcutter for the collection lookbook. I just love how she used the reverse of the fabric as a contrast feature on the pockets and centre front panel. 

Fleurine from Sew Marie Fleur

(Image: Sew Marie Fluer)

Fleurine was one of the bloggers who chose to sew the Rushcutter as part of the blog tour. She made the sleeveless version (View B) and made the yoke in a contrasting fabric, which really is a beautiful touch. 

(Image: Sew Marie Fluer)

I was just so blown away by her photographs. She bravely went out in the cold to get these incredible shots (she lives in northern Norway). That's true dedication to sewing, right?

Beth from Sew DIY

(Images: Sew DIY)

Although Beth was part of the Indiesew blog tour (because her lovely Lou Box Top was also part of the collection), she didn't make the Ruscutter, as she had already made it a few weeks earlier. Late last year, Beth and I decided it would be fun to do a little pattern swap. I made her Lou Box top (which I'm wearing right now as I type), and she made this beautiful Rushcutter

Kate from Sewing with Kate

the_rushcutter_roundup_6

(Images: Sewing with Kate)

I am lucky enough to call the lovely Kate, from Sewing with Kate, a close friend. We met on Instagram, and then realised we were lucky enough to live very close to one another! She made this beautiful long sleeved Rushcutter from a second hand fabric find, which I just love. 

Instagram

(Image: @asamariaborg)

(Image: @eclare71)

Do you follow me on Instagram? If you do, you may have seen a few of these Rushcutters. But I thought I'd share them again, because they are just so lovely!

Screen Shot 2016-03-15 at 2.20.06 PM.png

(Image: @fruitvore)

(Image: @thefoldline)


Over to you

Have you made a Rushcutter? I would just love to see it! You can tag your photos on Instagram with the hashtag #therushcutter or send me an email if you're not Instagram. 

How to : Draft a bodice block

After weeks and weeks (or was it months?) it is time to move on from the Skirt Series, and up to our upper halves! And also for me to get back to blogging. It has been at the top of my To-do list for weeks and weeks, but somehow I've managed to ignore it and find other things to occupy my time (for further reading on why to-do lists don't work, check out this post).

So, without any more rambling from me, it is time to draft a bodice block! 

The bodice block

A basic bodice block is a great starting point for most patterns involving your top half – it can be used to make tops and dresses, and paired with a sleeve block can be used to make shirts, blazers, jackets and coats. Many patterns evolve from this block. So if you are ready to start making your own patterns, then a bodice block to your specific measurements is a great place to start (although, if you want something a little easier, I would suggest starting with the skirt block).

This tutorial has been adapted from this great "how to" on BurdaStyle.com, which was taken from Winifred Aldrich's Metric Pattern Cutting for Women's Wear (5th ed. Blackwell Publishing: Oxford, 2008, pp 215). I changed the order in places and added more measurements, to hopefully create a better fitting bodice and an easier to follow tutorial.

So, even if you are an absolute beginner, with the right measurements, the right tools and a little patience, you will have a great fitting bodice block in no time!

A little note

I originally posted this tutorial a couple of years ago, on my previous blog, Em Makes Patterns. If you saw it there, do not fret. This tutorial is the same. I've just updated the aesthetics of the tutorial. So there is no need to do it all over again!

One thing I did realise though, after posting this, is that this tutorial will only work for you if you have a smallish bust cup size. It hadn't occurred to me that this would be an issue (as I am very small busted), until a woman contacted me to say that her bodice toile had turned out much too short, and we worked out that it was due to her large bust size. So, if you have a bust size any bigger than a C or D cup, I would suggest using this tutorial to draft the basic shape of your block and then doing a full bust adjustment to get the right cup size.


Update September 2021

Thank you so much for all the enthusiasm for this blog post. It has been my most popular blog post of all time! After 5 years of answering questions, I no longer have capacity to answer individual questions regarding bodice drafting. The comments have now been switched off and I will no longer be able to get back to emails regarding this blog post. I’d suggest reading through the comments if you have a question, as it is likely I have answered a question similar to yours over the years. You can also See the post : Drafting the bodice block - Questions + Answers.

Update 2020

When I created this blog post in 2016, I had no idea that was going to become the most popular blog post on my website!

I have received a number of questions lately about the tutorial and I thought it could be a good idea to publish some of these questions and answers as an opportunity to help you on your own learning journey.

I will update the post as I receive more questions, so that hopefully, if you have a question, you will find a relevant answer here and can keep on going with your draft!

See the post : Drafting the bodice block - Questions + Answers


Measurements

The measurements you will need for this project are:

Waist measurement

Your waist is the bit in between your rib cage and your hips. It is often the most narrow point of your torso.

This measurement is one you will need all the time. To find it, simply wrap the tape measure around your waist, ensuring that the tape measure remains level all the way around (horizontal to the floor at both front and back).

Do not suck in your tummy like I accidentally did in this photo! You want to be as natural as possible, so that your clothes fit well. Make sure the tape isn't too loose, or isn't pulling you in either!

You could also tie a piece of elastic around your waist to get the right position and then measure.

Bust measurement

For your bust measurement, find the fullest point of your breasts and take a horizontal measurement from there.

Ensure the tape measure remains horizontal as it wraps around your back, for an accurate measurement (this is when measuring yourself in front of a mirror helps). 

Please note: if your bust cup size is more than a C or D cup (for more info on working out your bust cup size look here), you will likely be better of making the draft as if you have a B cup bust and then doing a Full bust Adjustment.

Armscye depth

The armscye depth is the measurement I initially found the most tricky to get my head around. For one, I am quite certain I had never heard this term until I started reading sewing blogs (I don't think it was mentioned once in the four years I studied fashion design), but since then, it seems to pop up all the time (always the way, right?) It also seems that there are many different ways people suggest to find it. 

When I first drafted my bodice block, I placed three fingers under my arm and then measured down from my last finger to my waist. I don't really know what the direct correlation is between this measurement and the armscye depth, but apparently, due to the ratio of the body, these two measurements are the same.

The more obvious way of finding this distance is to measure down from the nape of the neck to the (imaginary) horizontal line that runs across your back, between the bottom of your armholes.

Nape of the neck to waist

This measurement is a little tricky to take on your own. Start at the nape of your neck and measure vertically down to your waist. 

The easiest way to do this is to toe a piece of elastic around your waist and have someone measure down from the nape of your neck to the elastic on your waist.

Nape of the neck to Bust line

neck-to-bust.jpg

Again, the easiest way to take this measurement will be to tie a piece of elastic around your bust and have someone measure down from the nape of your neck to the elastic.

Neck circumference

To take your neck measurement, wrap the tape measure around the base of your neck, making sure it is not too tight.

Shoulder length

To measure the length of your shoulder, first find the peak of your shoulder (this is the bony bit before your shoulder becomes your upper arm). Now measure between the base of your neck and the peak of your shoulder.

Back width

Your back width is the horizontal measurement of your back, from the bottom of a standard armhole, across to the other armhole.

Shoulder to bust measurement

For the shoulder to bust measurement, hold the tape measure in the middle of your shoulder (approximately where your bra strap sits) and measure down to bust point, following the curve of your breast.

Bust point to point

Knowing the distance between bust points (I like to call this measurement "the nip to nip") can help when adding bust darts or drawing panels that you would like to cut through the bust (princess panels, for example).

Simply take the horizontal distance between your breasts.

Tools

You will need a large sheet of paper (approximately 1m x 0.5m), a sharp pencil or pacer, a long ruler, and french curve or Patternmaster (or a plate if you don't have a french curve). An eraser will also come in handy!

Okay... Let's go!

Drafting the block


CONSTRUCT THE CENTRE BACK

draft_bodice_block_2

With a large piece of pattern paper mark a point A close to the top left corner (always leave some space around the starting point when drafting patterns). From this point, draw a vertical line down the left hand side of the paper that is the length of the nape of neck to waist measurement. Mark the end point as B. This line will become the CENTRE BACK seam of the block and the grainline of your back pattern piece.

draft_bodice_block_2

Extend line AB by 1.5cm (1/2") from A, and label new endpoint as C. This extra 1.5cm (1/2") allows for back neck shaping. Label AB as CENTRE BACK (CB).

CONSTRUCT the bustline

Next, we will indicate our BUST LINE (the horizontal line that runs through both the front and back of the pattern at bust level). Take the nape of neck to bustline measurement. Then, measuring from point A, mark this length as point D on line AB. 

draft_bodice_block_4

Square out from point D with a line that is half of your bust measurement (only half bust is required as we are making the pattern on the half – i.e. the front will be cut on the fold, and a pair of the back will be cut) plus ease. For the example I decided to add 5cm (2") ease to the bust. Remember to halve the amount of ease, before adding it to your half bust measurement,

draft_bodice_block_6

Label end point of this line as E. Mark this line as BUST LINE.

CONSTRUCT THE WASITLINE

draft_bodice_block_7

Square out from point B,  drawing a line the same length as your bust line. Mark endpoint as F. Label this line WAIST LINE.

CONSTRUCT THE CENTRE FRONT

draft_bodice_block_8

Square up from F (passing through E), the length of the CENTRE BACK (including the extension), and mark the end end point as G. Label FG as the CENTRE FRONT (CF). This will also be the grainline of your front pattern piece.

draft_bodice_block_9

Join G to C with a straight line. 

Mark the armscye

draft_bodice_block_10

Take the armscye depth measurement and add 0.5cm (1/4"). Measuring from point A down towards point B, mark this distance on CENTRE BACK. Label this point as H

draft_bodice_block_11

Square out from H and extend the line until it intersects the CENTRE FRONT line. Mark the intersection point as I.

Construct the back neckline

draft_bodice_block_12

Take your neck measurement and divide it by 5. Measuring from point C, mark this measurement on line CJ. Label this point as point J

Join points A and J with a shallow curve  – this curve is the back neckline.


*Tip

draft_bodice_block_13

When working with curved lines, always check that they come to a right angle when they meet a straight seam (for example, the centre front, centre back or side seam). By doing this, you ensure that you will get a nice smooth curve when you cut a pair of a particular piece, or cut it on the fold. 


Construct the front neckline

draft_bodice_block_14

Take your neck measurement, divide it by 5 and then subtract 0.5cm (1/4"). Mark this measurement on line GC (measuring from point G) as point K.

draft_bodice_block_15

On the CENTRE FRONT (GF) mark a point the same length as CJ down from point G (neck circumference divided by 5). Mark the point as L.
 

draft_bodice_block_16

Join K to L with a deep curve – this is the front neckline. As we did with the back neckline, check that the curve of the neckline meets the centre front at a right angle (so that you will get a nice smooth neckline when you cut the piece on the fold).

Drafting the BACK SHOULDER SEAM

draft_bodice_block_17

Take your armscye depth measurement and divide it by 5 and then subtract 0.5cm (1/4"). Mark this distance, measuring down from A on the CENTRE BACK as point N.

Square out from point N. This is just a guideline, so does not have to be a specific length.

draft_bodice_block_18

Take your shoulder length measurement and add 1.5cm (1/2") (this is the allowance for the shoulder dart). With this length in mind (or written down if you have a bad memory like me), use a ruler to pivot from point J until your measurement passes through the perpendicular line drawn from N. Draw a straight line to create your shoulder line. Label the endpoint as O.

Drafting the back shoulder dart

draft_bodice_block_19

Mark the  midpoint of the back shoulder seam (line JO) (i.e. the distance halfway between J and O) as point P.

draft_bodice_block_20

Mark a point 15cm (6") down from point A, on the CENTRE BACK line, and square out from this point. Once again, this is only a guideline, so does not need to be a specific length.

draft_bodice_block_21

From point P, draw a guideline parallel to CENTRE BACK, extending down until it passes through the perpendicular line that you marked in the previous step.

draft_bodice_block_22

From where these lines intersect, mark a point 3cm (1 1/4") towards the CENTRE BACK and label as point Q. Q will become the point of the back shoulder dart.

draft_bodice_block_23

Mark a point 1.5cm (1/2") from P on the back shoulder seam (line JO), towards O. Label this point as point R

draft_bodice_block_24

Join P to Q to create the first dart arm, and point R to Q to create the second dart arm. 


Download The Little Book of Seam Finishes

Would you like to make clothes that are as beautiful on the inside as they are on the outside?

Sign-up to the newsletter to stay in the loop to receive inspiring content that will help you become a more confident maker. And get started with a free e-book!


Mark the bust point

draft_bodice_block_25

Move your attention to you BUST LINE (line ED). Take your bust point to point measurement and divide it by 2 (as we are working on the half) and add 0.5cm (1/4") (allocated ease). Take note of this measurement. From point E, on the bustline, mark a point, the distance you just found from point E. Mark this point as your BUST POINT.

draft_bodice_block_27

Draw a vertical line, parallel to the centre front and centre back, passing through the bust point, intersecting all your horizontal guidelines. This line is the VERTICAL BUST LINE. Where it intersects CG label as point R and point S where it intersects the WAISTLINE (BF). 

Draft the front shoulder dart

draft_bodice_block_28

Mark a point 0.5cm (1/4") up from L on the CENTRE FRONT (line GF) and square out from this point. Again, this is just a guideline, so it doesn't have to be a specific length. 

draft_bodice_block_29

This is one of the equations taken from the BurdaStyle tutorial that is very handy (I am not sure if I would have been able to work this out without this guidance!)

Add or subtract 0.6 cm (1/4") to 7cm (2 3/4") for each 4cm (1 1/2") bust increment above or below 88cm (34 1/2"). For bigger busts you will need a larger dart (add to 7cm), and for a smaller bust you will need a small dart (therefore subtract from 7cm). 

For example, my bust measurement is 84cm (33"), which is 4cm (1 1/2") below 88cm (34 1/2"), therefore I need to subtract 0.6cm (1/4") from 7cm (2 3/4"), leaving a dart width of 6.4cm (2 1/2"). 

Take dart width measurement and mark this distance from K as point T.

draft_bodice_block_30

Move down to the BUST POINT and mark a point 1cm (3/8") above it on line RS (vertical bust line) as point U. This will be the point of your dart. The reason why we lift the dart point a little above the bust point is that if the dart point was right at bust point you would be left with Madonna style pointed breasts! 

Join K and T to U with straight lines to create the front shoulder dart.

Drafting front shoulder seam

draft_bodice_block_31

Take your shoulder length measurement and, with this length in mind, and using your ruler, pivot from point T until your measurement passes through the perpendicular line drawn from above point L. Draw a straight line - creating your front shoulder line. Mark the endpoint as point V.

Please note: it's not a problem if your shoulder lines overlap - just keep working through the tutorial. When you get to the end you will be tracing a copy so that you have separate front and back bodice pieces and can add seam allowance.

Drafting the armhole

draft_bodice_block_32

On line HI mark a point that is the length of half of your back measurement plus 0.5cm (1/4”) (allocated ease), from H. Label point as W.

draft_bodice_block_33

Square up from point W until the line intersects the perpendicular line drawn from N. Mark the intersection point as X.

draft_bodice_block_34

Find the midpoint of line XW. Mark as point Z.

draft_bodice_block_35

Take the distance from the CENTRE FRONT to BUST POINT (i.e length from E to BP or half bust apex to apex measurement plus 0.5cm) and mark this distance on line HI, measuring from the dart arm closest to CENTRE back. Mark point as A1.

draft_bodice_block_36

Square up from point A1 so that the line intersects the front shoulder seam (line VT).

draft_bodice_block_37

Take the armscye depth measurement and divide it by five. Mark this length on the line just drawn from A1, as point A2.

draft_bodice_block_38

Find the midpoint of the line between W and A1 and mark as A3. Square down from this point so that the line intersects waistline (line BF). Mark intersection point as A4

draft_bodice_block_39

Draw diagonal lines (lines drawn at a 45 degree angle) inwards from points W and A1. From W the line needs to be 2.5cm long (1") (mark endpoint as B1), and from A1 1.5cm long (1/2") (mark endpoint as B2). These diagonal lines will help in the next step, when we are at the stage of drawing in the curve of the armhole.

Join O to Z to B1 to A3 to B2 to A2 to T with straight lines.

draft_bodice_block_40

creating darts

At this point, the waist measurement is the same as the bust measurement. For a lot of us, our bust measurement is larger than our waist measurement. To remove this excess width from the waist and to create a well fitting block you will add waist darts (one in the back waist and one in the front waist – remember this is on the half so when you make your block there will be two in the back, and two in the front. We will also slightly taper the side seam, which we will also treat as a dart at this stage).

To work out how much width you will need to remove with your darts, take your waist measurement and add 2cm (7/8”) ease. Subtract this measurement from your bust measurement and divide your answer by 2.

Divide this number by three, so that it can be distributed evenly throughout back dart, front dart and side seam.

DRAFT THE BACK WAIST DART

draft_bodice_block_41

To mark the placement of the back waist dart, find the midpoint of line HV and label as C1. Square down from this point so that line intersects the WAIST LINE (BF). Mark the point of intersection as point C2. This will become the centre of your back dart.

draft_bodice_block_42

Distribute the dart width evenly either side of C2 and join endpoints to C1 to create dart arms. 

Draft the side seam

draft_bodice_block_43

For simplicity, at this stage, treat the side seam (line A3-A4) as a dart at this point. Distribute one third of the dart width to the back of the bodice and two-thirds to front of the bodice, either side of A2. Join the endpoints to A3 to create the front and back side seams. 

Draft the front waist dart

draft_bodice_block_44

Distribute dart width evenly either side of S and join the endpoints to a point 1cm (3/8") down from BP to create dart arms. 

Balance the waistline

draft_bodice_block_46

At this point the waistline of the pattern is straight. But as the front of our bodice must pass over the fullest part of our chest (our bust), we need to add a little extra length to our CENTRE FRONT, to prevent this part of the waistline from riding up when the bodice is made.  

Mark a point 0.5cm (1/4") to 1.5cm (1/2") down from point F as point C1.

(0.5cm (1/4") for small bust / 1cm (3/8") for medium bust / 1.5cm (1/2") for large bust)

 Join point B to point C1.

Trace the pattern

draft_bodice_block_47

With a second piece of pattern paper, trace off the back pattern piece – being sure to include all important details (i.e. bust line and darts). 

draft_bodice_block_48

Leaving a space between the pieces, trace the front pattern piece.

Add seam allowance to the pattern

draft_bodice_block_49

To finish, add shaping to the darts (following this tutorial) and then add seam allowance to the pattern. As it is a bodice block, I find that it is handy to have it available without seam allowance (as when you are making alterations or adjusting a pattern it is far easier to do so without seam allowance), but as you will need to make a toile to see how it fits, add seam allowance to the seams that will be sewn - the side seams, centre back and shoulder seams. The other seams - the neckline, armholes and waistline - can be left without seam allowance so that you can get a true indication of what it will look like without having to finish these seams or add a facing etc. I went for 1.5cm (1/2") seam allowance on the shoulders and side seams, and 2cm (7/8") on the centre back. For more details on adding seam allowance, you can take a look at this tutorial

Add pattern markings and cutting instructions

draft_bodice_block_50

Add pattern markings to the pattern – being sure to mark drill holes (I always mark my drill holes 1 - 1.5cm (3/8" - 1/2") above the dart point and notches.

And voila! There you have a basic bodice block to your very own measurements!

Sew it up (in calico or something similar you may have hiding in your sewing box), see how it fits and then you are ready to start getting creative making your own patterns!


Have a question about this tutorial?

Please check out these Frequently Asked Questions about the tutorial before getting in touch. I do love hearing from you, but you are likely to find your answer faster than we are able to get back to you.


profile pic.jpg

Did you enjoy this tutorial?

It is our vision to empower you to make a wardrobe that you will wear, love and cherish - long into the future.

If this tutorial has helped you, it would be greatly appreciated if you could give thanks with a small donation. This will help us to continue to create content like this tutorial and continue offering it for free - so it can be accessed by all.

We greatly appreciate your support!


You may also like:

The Indiesew Blog Tour

indiesew_spring_inthefolds_1

If you read my last post or are following me on Instagram, you will know that The Rushcutter is part of the Indiesew Spring Collection (yay!).  

As part of the fun and festivities, there's a blog tour going on, which is really exciting. When Allie first mentioned this, I was a little apprehensive. Free time for sewing has been scarce lately, and I wasn't sure if I would be biting off more than I could chew, if I put my hand up to be involved. But then I remembered that I work wonders with a deadline (hello very late nights, lots of stress, and not washing my hair for three days), and although it could end up being a little stressful, it would be a good excuse to make a couple of things that could fill some holes in my wardrobe. And the collection is beautiful right? So it would be crazy not to get involved!

Which brings me to the fact that today is the day that I get to share what I made from the collection. 

The Sanibel Dress and Romper from Hey June

sanibel_heyjune

Sanibel by Hey June

Description form Indiesew: When you're looking for a comfortable, yet flattering garment the Sanibel sewing pattern by Hey June fits the bill. This dress or romper features a cinched elastic waist with drawstring closure. The full button placket and two collar options make this a great project for the intermediate sewist. Sew your Sanibel in a lightweight denim and pair it with clogs and a floppy hat for a great spring look.

If you have been following along with me for a while (particularly in my early days of blogging, when I was still over at Em Makes Patterns), you may know that I find it very difficult to make a pattern straight out of the envelope. It is basically impossible. I have the best of intentions when I get the pattern, and then suddenly, like a tidal wave hitting me, I get the urge to hack the pattern into something I can call my own. So before going on, I want to apologise  to Adrianna from Hey June Handmade. Your pattern is absolutely beautiful and so very versatile, but my crazy urge to cut and spread and add and take away took over and now my Sanibel looks nothing like a Sanibel, (although I just love it all the same, and I hope you do too!). 

the pattern

Before I did hack up this pattern, I did take the time to have a proper look over it, in its original form, and also go through the instruction booklet pretty thoroughly, and I can definitely say this is a great pattern. It is well drafted, the instructions are clear and thorough, and it has loads of options to play with. I am even starting to think about making a shirt, by taking just the upper section of the romper and lengthening it.

Another thing that I loved about both patterns that I made from the Spring Collection collection, is that they came with copyshop versions, that I could take to a print shop and get printed on A0 sized sheets. Although it is adds a little extra cost, to me it's definitely worth the time saved. 

THE HACK

indiesew_spring_inthefolds_2

So here it is. Although, as you can see, my dress looks nothing like the original, it didn't actually that much effort to alter the original pattern to create the pattern I ended up using. 

What I did:

  • joined the skirt pattern to the shirt pattern leaving out the waist tie and casing
  • increased the width of the dress slightly, at the side seam
  • added a pleat to the centre back, using this method
  • removed some of the width from the capped sleeve at the shoulder
  • created my own placket, and added pleats to the centre front
  • left off the collar and instead bound the neckline with bias binding
  • and added in-seam pockets (of course)

Fabric

indiesew_spring_inthefolds_3

This fabric is a bit of a mystery, as I bought it from The Fabric Cave (a brilliant shop in Sydney where you can find the most incredible range of pre-loved fabric) but after a lot of fondling and a little bit of a burn test, I have come to the conclusion that I think it is a silk linen blend (not bad for an op shop, I must say). I really do get a lot of joy out of using second hand fabric, and the fact that sometimes, when ironed, I get a waft of that charity shop scent, is just part of it's charm (or at least that's what I keep telling myself).

Construction

indiesew_spring_inthefolds_4

As I altered the pattern so much, there was not much use for the instructions (although I did use them for sewing in the capped sleeves). I decided to go with french seams, because I just love them, and they really make me feel like my clothing is in another league of quality. I needed to overlock around the placket though.

indiesew_spring_inthefolds_5

I used the in-seam pocket pattern from The Rushcutter, that you can learn how to draft (or even just download) right here, and then I used this method to finish the pockets with french seams. 

I used a lightweight iron on interfacing on the placket to add some structure, before finishing the neckline and hem with bias binding, using this method and this method

Final thoughts

indiesew_spring_inthefolds_6

I just love this dress. It is exactly the kind of thing I love wearing at the moment - cool, breezy and very easy to wear. It can be dressed up or down, and goes just as well with my sneakers (which I spend 90% of my time in) as it does with dressier shoes. It is just the kind of thing my wardrobe has been begging for since I started working for myself (things I can just throw on and then run, yet still look somewhat put together) and I am very tempted to make myself another one quicksmart. 

Florence Kimono by Sew Caroline

florence-kimono-sew-caroline.jpg

Florence Kimono by Sew Caroline

The second pattern I decided to make was the Florence Kimono, by Sew Caroline.

Description from Indiesew: The perfect spring kimono has arrived! The Florence Kimono sewing pattern by Sew Caroline is a relaxed-fit kimono with 3/4 sleeves and three different hem lengths. Add lace trim to the sleeves and hem for a pop of visual interest. Sew your Florence Kimono in a flowing rayon challis and pair it with a knit tank top, skinny jeans, and heels for a night on the town.

The Pattern

indiesew_spring_inthefolds_7

The pattern is a nice easy one that you can smash out in a couple of hours. It consists of three pieces - the front, the back and the sleeve, so cutting was nice and speedy - so I was sat at my machine in now time. As I said earlier, the pattern includes an A0 version, which is much appreciated as the pattern pieces are quite big, due to the over-sized nature of this silhouette. 

Fabric

Like my 'Sanibel,' I used a pre-loved fabric I found at The Fabric Cave. Once again, I wasn't sure of the fibre content, but due to its handle and the way it presses, I would say it's a viscose rayon. I am in two minds about the print (which may or may not be because my boyfriend described it as a "grandma print") but I guess time can only tell.

The hack

indiesew_spring_inthefolds_8

I was much tamer with Florence than I was with poor Sanibel. The only change I made was to add a pleat in the centre back seam, which I made using this method (I am clearly going through a pleat stage).

Construction

The instructions ask for french seams, which was definitely the right choice for my fabric. For the opening, the pattern suggests using bias binding to finish the edge, and I decided not to bother, and just sewed a thin double folded hem, using this method (the same finish I used for the actual hem).

Final thoughts

This was a really quick project, which was a very satisfying sew!


The collection

As you can see, I didn't quite get through the whole Spring /collection (although I did make a Lou Box earlier this year), but I can definitely say it's a great little collection, and definitely a great place to start if you are thinking about sewing yourself a capsule wardrobe this spring. For more details or to purchase the collection, head over to Indiesew.

The blog tour

I really hope you are enjoying the Indiesew Spring Collection Blog Tour as much as I am. IF you've missed it, here are the previous posts in the series:

Feb 24: Sew Mariefleur

Feb 25: Dandelion Drift

Feb 26: Right Sides Together

Feb 29: Sewbon

March 1: Sew DIY

And here is what's still to come:

March 3: Sew Caroline

March 4: Baste + Gather

March 5: Ada Spragg


You may also like:

Introducing the Indiesew Spring Collection

I was very excited when, earlier this year, Allie from Indiesew got in touch to ask if I would be interested in being included in the Indiesew Spring Collection. Of course I said yes! It would be very exciting to see my pattern as part of a collection, and also see how Allie would go about styling the Rushcutter for the release.

She really didn't disappoint. I just love the Rushcutter she made in this Bluebell striped double cloth cotton, and it definitely got me inspired to make a couple more with more of a spring/summer vibe. 

It's a little bittersweet to know that as everyone in the northern hemisphere is gearing up for spring sewing, autumn is looming down here in Australia. But as it doesn't really get too cold down here, I think I should be able to squeeze in a few more summer makes (including another Rushcutter or two).

The collection

I was really excited to see my pattern alongside some other beautiful patterns from other independent pattern designers. 

Lou Box Top from Sew DIY

Lou Box Top from Sew DIY

Description from Sew DIY: The Lou Box Top is a versatile, loose fitting top with two neckline options and three hem options, for a total of six different silhouettes. Designed with beginners in mind, the steps are very easy to follow, using the most basic techniques and the loose fit of the design requires minimal fitting. It's a great project for beginners looking to get their feet wet and for more experienced sewists who want to add some quick-to-make basics to their wardrobe. 

As you may know, a month ago, Beth from Sew DIY and I did a little pattern swap. She made The Rushcutter and I made her lovely Lou Box top. I really love this pattern, and have been living in mine since I made it! 

Birkin Flares by Baste and Gather

Birkin Flares by Baste and Gather

Description from Baste + Gather: Inspired by the style of 1970s fashion icon Jane Birkin, the Birkin Flares feature a high waist, trim fit to the knees and a fashion-forward, flared leg. The Birkin Flares work wonders on all figures and make even the puniest of bottoms look fantastic (ask me how I know!).  Tall or short, thin or curvy, somewhere in the middle...I haven't seen anyone who doesn't look great in these jeans!

This pattern comes in waist sizes 24-35 and is suitable for the intermediate sewist. (Jeans are NOT hard to sew, and I'll help you through the tricky parts! Promise!)

Florence Kimono by Sew Caroline

Florence Kimono by Sew Caroline

Description from Indiesew: The perfect spring kimono has arrived! The Florence Kimono sewing pattern by Sew Caroline is a relaxed-fit kimono with 3/4 sleeves and three different hem lengths. Add lace trim to the sleeves and hem for a pop of visual interest. Sew your Florence Kimono in a flowing rayon challis and pair it with a knit tank top, skinny jeans, and heels for a night on the town.

Sanibel by Hey June

Sanibel by Hey June

Description form Indiesew: When you're looking for a comfortable, yet flattering garment the Sanibel sewing pattern by Hey June fits the bill. This dress or romper features a cinched elastic waist with drawstring closure. The full button placket and two collar options make this a great project for the intermediate sewist. Sew your Sanibel in a lightweight denim and pair it with clogs and a floppy hat for a great spring look.


Purchasing the collection

For the release, you will be able to purchase the Full Spring Collection, or the Mini Spring Collection as a PDF download. Or, if you're not into sticking PDF patterns together, you will able be able to buy a printed version of the collection (very exciting)! You can, of course, purchase the patterns independently from the Indiesew shop, if you are just drooling over one particular pattern. 

As well as this, you can also buy yardage of the fabrics featured in the Spring Collection Lookbook (great, right?)

Spring Full Collection

Get all 5 patterns for $45 US (about $63 AUD), which is a saving of almost 25%.

Spring Mini Collection

2016-mini-collection.jpg

Get 3 patterns (The Rushcutter, Florence Kimono & Lou Box Top) for $27 US (about $38 AUD), which saves you just over 20%.

Blog Tour

Just in case you weren't inspired enough by these beautiful samples made by the team at Indiesew, there will also be a blog tour, to get your creative juices flowing!

Feb 24: Sew Mariefleur

Feb 25: Dandelion Drift

Feb 26: Right Sides Together

Feb 29: Sewbon

March 1: Sew DIY

March 2: Me!

March 3: Sew Caroline

March 4: Baste + Gather

March 5: Ada Spragg


What do you think? Will you be purchasing the Spring Collection from Indiesew?


You may also like:

How to : Draft a waistband for a wrap skirt

waistband_wrap_skirt_1

As you may have seen, last week I showed you how to draft a wrap skirt. The post started to get a little long, so I decided that I would leave the waistband for a seperate tutorial - that I am writing today!

waistband_wrap_skirt_2

The waistband required for a wrap skirt, is one of the most basic to make of all. It is rectangular in shape (with no shaping or darts) and is secured by a waist tie. Depending how long the ties are, you can either secure it with a bow at the front or back of the skirt.

Measure the waistline

waistband_wrap_skirt_3

To work out the measurements for your waistband, first, measure the front and back waistline seams of your skirt.

If your pattern has seam allowance, be sure to measure the stitch line and not the edge of the pattern, for an accurate measurement.

You may notice that my pattern pieces have notches for an in-seam pocket. If you would like to know how to add a pocket to your pattern, head over to this tutorial (it's super easy and there is even a printable pocket pattern piece included at the end of the tutorial, if you don't feel like drafting your own!)

Construct the waistband

waistband_wrap_skirt_4

Take the total waist measurement and divide by two (we will be making half a pattern and marking it "Place on fold" - to create a full pattern piece).

waistband_wrap_skirt_5

Decide on the width of your waistband.

This is up to you, although be careful, do not make it too small, as it needs to be wide enough to place a button hole that the waist tie can loop through.

As a guide, my waistband was 4.5cm wide.

waistband_wrap_skirt_6

Complete the shape of the waistband by forming a rectangle, and label the centre back on your pattern piece.

Mark notches

waistband_wrap_skirt_7

Before you can complete the pattern, you need to add notches, to make it easier to sew the two pieces together. 

To do this, line up the centre back of the waistband with the centre back of the skirt, as if you were sewing the two pieces together.

Pivot

waistband_wrap_skirt_8

With a stiletto or pin, pivot the waistband pattern along the waist of the skirt - as if you were sewing the pieces together - until you reach the side seam. If you need more guidance with this technique, check out the tutorial on pivoting, that I posted earlier this week. 

Mark side seam

waistband_wrap_skirt_9

When at the side seam, transfer the seam location onto the waistband with a notch.

Move to the front pattern piece

waistband_wrap_skirt_10

Remove the waistband from the back pattern piece and move it onto the front.

Line up the side seam notch on the waistband with the side seam of the skirt, so that you can continue pivoting the waistband on the front waistband. 

Mark the centre front

waistband_wrap_skirt_11

Pivot the waistband along the skirt until you reach the centre front.

Transfer the centre front point onto the waistband with a notch.

waistband_wrap_skirt_12

Continue pivoting until the end, to confirm that the waistband and the skirt are the same length.

waistband_wrap_skirt_13

Extend the notches, cutting through the waistband pattern piece. You now have the centre back, centre front and side seam marked on your waistband pattern.

Add pattern markings

15.gifwaistband_wrap_skirt_14

You now need to add pattern markings / cutting instructions to the pattern. The centre back will need to be placed on fold, and a pair of these will need to be cut. Add notches at the centre front and side seam (and the centre back seam, when cutting).

Make the waist tie

Work out how long you would like your wait tie to be. 

A good place to start, I think, is your waist measurement plus 30cm.

waistband_wrap_skirt_16

Work out the width you would like your tie to be. Remember, it will need to be slightly thinner than your waistband, so that it can fit through the buttonhole when the skirt is "wrapped."

16.gifwaistband_wrap_skirt_16

Take the figure you have worked out for the length of your tie, and divide this measurement by two (as we will only need to make half the pattern piece). Draw a rectangle this long, and the width you have decided on. To complete the pattern, draw a horizontal line, through the centre of the pattern, and mark as a "fold line."

Add cutting instructions (cut 1 pair - on fold) and seam allowance.


Mark the buttonhole

15_2.gifwaistband_wrap_skirt_17

You will also need to mark the location of the button hole. The buttonhole is how the waist tie wraps around the skirt and only needs to be marked on the left hand side of the pattern.

And you're done! I really hope you have enjoyed this tutorial.


What do you think? Pretty easy, right? Would love to know if you are drafting yourself a wrap skirt!


You may also like:

The Maker's Glossary : How to pivot a pattern

patternmaking_glossary_1

Introducing 'The Maker's Glossary'

Today I am working on finishing up the wrap skirt tutorial that I posted last week, and I realised that it is about time to start some kind of glossary on this site. There are many techniques that I use in almost every pattern I cut, and would make much more sense if I could just link straight to the technique I'm talking about - rather than writing the same thing over and over (which will give me time to write more new tutorials!)

Recently, I was doing a freelance project for some lovely women that needed a pattern made. They came into my studio to discuss the project, and while they were here, they asked what my favourite pattern making tool is. I instantly picked up my tracing wheel and my stiletto, and said I couldn't choose between them. They are definitely the tools I reach for the most when I'm pattern making, and they really do make some of the processes and techniques used in pattern making much easier. So I thought I'd share one of those techniques today, which is pivoting a pattern piece. 

What is pivoting?

Pivoting is a technique used to check that seam lines match together. A ruler is normally sufficient when a seam is straight, but when it comes to curved seams, pivoting is a fast and easy way to check that the seams are exactly the same length.  It is also a good way to make sure you are placing your notches in the right place. 

What do I need?

stiletto.png

To pivot a pattern piece, I use a stiletto (also known as an awl), but if you don't have one of those, a sharp pencil or pin will do the trick.

How to pivot a pattern piece

patternmaking_glossary_2

For the example, I am using the back pattern piece and waistband from my wrap skirt. I want to check that the waistband is the right length for the waistband, as well as mark notches at any points of interest (for example, side seam and centre front), to make it easier to attach the waistband when it gets to sewing up the skirt.

patternmaking_glossary_3

Align your pattern pieces, like you were sewing the pieces together. For the example, the centre back line on the waistband needs to be lined up with the centre back on the skirt back. Remember that if your pattern pieces have seam allowance already added, you need to match the stitching lines and not the edge of the pattern. 

patternmaking_glossary_4

Take your stiletto (or pin) and place it through both pattern pieces, at the point where the two seams no longer fit together. 

patternmaking_glossary_5

Use your hand (or a weight) to hold the underneath pattern in place (in this case, the skirt), while you carefully pivot the top pattern, until the seams are aligned again.

patternmaking_glossary_6

Hold both pattern pieces in place, and once again, take your stiletto, and place it where the seams diverge, before pivoting the top pattern until the seams are aligned again. 

patternmaking_glossary_7

Continue pivoting until you get to the end of the seam (or to a point of interest). In the example, I have reached the side seam.

patternmaking_glossary_8

Before removing the waistband pattern, I need to mark the location of the side seam with a notch.

Now, to check the front, all I would need to do, is match the side seam notch on the waistband, with the side seam on the front pattern piece and continue pivoting. 


And that's it! You now know how to pivot! 

Please let me know if there are any techniques you'd like to learn and I'll do my best to get it up on the blog.


You may also like:

How to : Draft a Wrap Skirt

how_to_draft_wrap_skirt_1

Today I am continuing on with The Skirt Series by showing you (as the title suggests) how to draft a wrap skirt! It is a nice and easy pattern to draft, and an even easier pattern to sew, as it doesn't need a zip or buttons (just one button hole).

DRAFT THE SKIRT BLOCK

To draft a wrap-around skirt, start by drafting a basic skirt block (if you haven't already). This is the longest part of the process, but once you have your block made, you will have it ready for all skirt and dress patterns in the future!

CUT AND SPREAD TO CREATE AN A-LINE SKIRT

Once you have drafted the skirt, you can move to transforming the basic straight skirt into an A-line skirt.

ADD MORE VOLUME (IF YOU WISH)

If you would like more volume in the skirt, after making the standard A-line skirt, you can add more volume by following this tutorial


DRAFT A WRAP SKIRT

The back pattern requires no more adjustment, and can be marked 'Cut on Fold' as no zip is required.

The front pattern piece needs some adjustment though - taking it from an A-line skirt to a wrap skirt. 

Mark the grainline

how_to_draft_wrap_skirt_5

Take a large sheet of pattern paper, and draw a straight vertical line close to the centre. This will become the grainline of your pattern.

Trace the pattern

how_to_draft_wrap_skirt_6

This pattern needs to be cut as a full front (not "place on fold," as is often the case for skirt fronts) as the wrap extension extends beyond the centre front. You will need to create a full front pattern piece.

To do this, align the centre front of your A-line skirt pattern with the grainline you just marked, and trace the pattern.

how_to_draft_wrap_skirt_7

Flip the pattern over and trace the other side - ensuring the pattern is lined up with the centre front, waistline and hemline.

Create the wrap

how_to_draft_wrap_skirt_8

Have a think about how far you would like the skirt to extend beyond the centre front (the wrap). You will want it to extend enough that you get coverage when you walk / sit / dance / move.  As an indication of what works, I was making a size 10 and chose to extend by 12cm (which was just over halfway between the centre front and the right side seam of the pattern piece).

Draw a line, the length of the extension, on the right side of the pattern, perpendicular to the centre front.

how_to_draft_wrap_skirt_9


Now, draw a line that is square (meets the waistline at a ninety degree angle) with the waistline and passes through the endpoint of the line drawn in the previous step.

Continue the line until it intersects with the hemline.

how_to_draft_wrap_skirt_10

Cut along the line to remove the excess. You now have your front pattern piece.


Create the front facing

A facing is required to finish the front opening. The process is basically the same as drafting a pattern for a hem facing.

how_to_draft_wrap_skirt_11

Take the front of your wrap skirt pattern and work out the desired width of your front facing. As a guide, I chose to make mine 9cm wide. I like to have sturdy facing that provides stability to the garment and hides all unfinished seams, but the best option will depend on your fabric choice (If your fabric is lightweight, you may choose to finish the raw edges with a binding instead of a facing).

Mark the desired width close to the waistline and hem of the pattern (perpendicular to the line of the opening).

how_to_draft_wrap_skirt_12

Join the endpoints of these lines with a straight line that runs right through the pattern.

how_to_draft_wrap_skirt_13

This section will become the front facing.

Trace the facing piece

how_to_draft_wrap_skirt_14

Take a seperate piece of pattern paper and trace a copy of the front facing.

how_to_draft_wrap_skirt_15

You can have a facing that is separate to the main skirt (simply add seam allowance to both patterns). Although, I prefer to attach facings to the main garment, when possible (in this case, it is possible).

Attach the facing to the pattern

how_to_draft_wrap_skirt_16

To do this, cut out the facing piece, flip it face down and line it up with the front pattern, as if you were sewing them together.

Once in position, tape in place. 

how_to_draft_wrap_skirt_17

When the pattern is cut out in fabric, this line will become a fold.


Draft a hem facing

You will now need to draft a hem facing, by following this tutorial. Draft the facing from the centre front to the side seam only. 

how_to_draft_wrap_skirt_18

You will need to trace a copy of the hem facing piece and reflect it to create a complete hem facing (the easy way to do this is to trace it once, then fold it along the centre line and cut it out - use some pins / a staple to hold the pieces in place, if necessary).

Go back to your skirt pattern, and fold back the front facing piece. Now place your hem facing piece in position, and mark the point where the front facing piece ends. You do not want to create unnecessary bulk by facing the corner twice (at the hem and centre front), so by marking the position of the front facing, you will be able to cut down the hem facing to the right size. 

how_to_draft_wrap_skirt_19

Cut off the excess, before adding seam allowance to all pattern pieces. 


Although we still need to draft the waistband, I am going to leave it there for the moment, as I don't want to overwhelm you! Check back next week, to see how to finish off this pattern.


You may also like:

Pattern Hack : Rushcutter View A with Buttons

Rushcutter_hack_buttons_1

Original Technical Drawings

Recently, a customer got in touch and said that she wanted to make the Rushcutter View A (the version with sleeves), but would like to add buttons to the back, like View B, but wanted to check if it was an easy adjustment to make to the pattern. 

Rushcutter_hack_buttons_2

A Rushcutter with sleeves and buttons

Rushcutter_hack_buttons_3

It is a nice and easy adjustment to make, and it is a tutorial I have been meaning to create forever, so I thought this was a sign it was about time I got around to it, as I am sure she is not the only one who would like to make this adjustment!

A little bit about In the Folds patterns

If you have used the Rushcutter pattern, you will know that both stitching line and cutting lines are marked on the pattern.

Why is the stitching line marked?

When I first decided to start creating sewing patterns for home sewers, one of the first decisions I made, before I even started sketching, was that I wanted to create patterns that would help sewers develop their skills, in both sewing and pattern making.

By including the stitching lines on each pattern piece, it makes it much easier to understand how the pattern was originally made, but also allows for easy adjustments and 'hacking' to the pattern (as all pattern alterations should be done without seam allowance added to the pattern). 

Rushcutter_hack_buttons_4

In the image you can see that the stitching line is marked with a red line, while the cutting line (outside edge of the pattern) is marked with a thick black line. If you wanted to make changes to this particular pattern piece, you could simple cut along the stitch line to remove the seam allowance, and the piece would be ready to be altered.

Understand your pattern

Before making any adjustments to a pattern, I always suggest having a good idea of how the pattern works and fits in it's original design.

So, for this example, have a look at how the button placket works on View B, before adding it to View A.

The button placket

Rushcutter_hack_buttons_5

As you can see, the button placket is made up of three sections, that folded to create the button placket. The first (closest to the centre back) is 1cm from the centre back. This is the first fold line. The next line is 2cm from the first fold line and is the second fold line (the buttons and button holes will be placed between these two lines). And the third line is 1cm from the second fold line and is the edge of the pattern piece. 

Rushcutter_hack_buttons_6

When the piece is cut, the first fold line is folded and pressed towards the centre back.

Rushcutter_hack_buttons_7

The second fold line is folded and pressed, enclosing the raw edge inside, creating a button placket. 

Rushcutter_hack_buttons_8

To finish, the buttons and button holes are placed on the centre back line. To see how this looks in fabric, you can check out this step from the Rushcutter Sew-Along.

Make the adjustment

Rushcutter_hack_buttons_8

Take the 'UPPER BODICE' pattern piece from View B, and cut along the centre back line, removing the placket from the pattern. If you would like to keep the pattern intact, simply trace a copy of the placket section onto a seperate piece of paper. 

Rushcutter_hack_buttons_9

Now that you have removed the placket, you can get your sleeve pattern (from View A) ready.

Rushcutter_hack_buttons_10

You will be placing the right edge of the placket onto the centre back of the sleeve pattern (the stitch line).

Attach placket to sleeve

Rushcutter_hack_buttons_11

Line the placket up with the centre back of the sleeve pattern and tape or glue in place.

And that's it... Your Rushcutter is ready for buttons instead of a zip!

If you don't have the placket piece from View B

If you have already printed your pattern, and then decided to change from zip to buttons, and don't have the pattern pieces from View B, do not worry! It is super simple to create the placket piece, with the help of a pencil and a ruler.

Remove the seam allowance

Rushcutter_hack_buttons_12

Take your sleeve pattern and remove the seam allowance from the centre back seam (by cutting along the stitch line marked on the pattern).

Rushcutter_hack_buttons_13

Take a small piece of pattern paper, and tape it to the centre back of the pattern, creating space for your placket.

Rushcutter_hack_buttons_14

Create the placket by:

1. Drawing a line 1cm (3/8in) from the centre back, running parallel to the centre back. 

2. Drawing a second line, 2cm (3/4in) from the first

3. The final line will be drawn 1cm (3/8in) from the second line. 

Complete the placket shape

Rushcutter_hack_buttons_14

Extend the top and bottom edges of the sleeve pattern to complete the placket shape.

ADD PATTERN MARKINGS

Rushcutter_hack_buttons_15

Complete the placket by adding button / buttonhole placement markings.

And you are ready to sew!


Over to you

Do you have a pattern hack for the Rushcutter in mind? I'd love to hear about it!

If you use this tutorial, I'd love to know! Simply tag your photos on Instagram with the hashtag #draftingwithinthefolds.


You may also like:

Finished project : The Lou Box top by Sew Diy

inthefolds_louboxtop_1

Late last year, Beth from Sew DIY and I had the great idea of doing a little pattern swap. We had been swooning over each others patterns on Instagram, so thought it was about time we did something about it. 

Beth has a couple of patterns to choose from in her shop, but after a little deliberation, I decided to go with the Lou Box Top as I noticed there was a bit of a gap in my wardrobe for nice easy basics that I can wear to work, and thought that I could use the Lou Box to fill the gap. 

I love to use stash fabric, whenever possible, so decided to use some left over cotton linen that I had bought from The Fabric Store for a dress I had made for a friend at the beginning of the summer. 

What I liked straight away about the Lou Box, when I opened the pattern file, was all the options. There are two neckline options (a crew neck and a scoop neck) and three hem options (straight, dip or curved) and can be made in woven or knit (or a combination of the two).

I couldn't make up my mind between the straight hem and the dipped hem, but thought I could go ahead and make the dipped hem, and if I didn't like it, I could just cut the hem straight once the top was assembled. I ended up printing and cutting all the options available in the pattern, so that I have them ready to go  for next time (and there will definitely be a next time).

inthefolds_louboxtop_2

When I got to laying the pattern on the fabric, ready for cutting, I realised there wasn't going to be enough meterage. I already had my heart set on the fabric, so decided to add a horizontal panel line on both the front and back.

This was a super easy alteration to make as the pattern is actually made up of seperate panels, for each hemline option (the pattern pieces are just stuck together before the fabric is cut). So I just added seam allowance to the bottom of the body of the top and then seam allowance on the top of the hem panel.

inthefolds_louboxtop_3

I actually really like this detail, and am considering doing the same thing next time, but using contrasting fabrics. 

inthefolds_louboxtop_4

I also detoured from the instructions a little by turning the sleeve up to create a small cuff (rather than turning under, as the instructions suggested), to add another little detail. 

inthefolds_louboxtop_5
inthefolds_louboxtop_6

In terms of fabric, Beth suggests using 'Light-weight knit or woven fabric with lots of drape, such as crepe de chine, chiffon, georgette and jersey,' and I know my cotton linen choice is a little more on the structured side that these suggestions, so it's definitely a little boxier than some of the other versions I've seen. I was a little worried about my decision just to go with it, but now that its' finished, it's one of the things I like most about this top!

inthefolds_louboxtop_7

I feel really comfortable in it, and cannot believe how many times I've reached for it since I made it. It really has filled a gap in my wardrobe!

inthefolds_louboxtop_8

It was a super speedy make, which was a really nice change for me, because I have been working on samples for my next pattern, which generally take a while as I am really pedantic when I am sampling, so that nothing gets past without being resolved. Sewing someone else's pattern, gave me a chance to disconnect from work, and gave me a chance to really enjoy the process, without the stress that sits alongside working on one of my own patterns before it's released. It's also a good opportunity to see how other designers do things!

Well that's about all I can say about the Lou Box Top from Sew DIY. It's a perfect beginner pattern, but also a lovely speedy sew for the more experienced - providing lots of opportunity for variation. Thank you so much Beth for offering to trade patterns with me. I had a lot of fun!

Beth made a really beautiful Ruschutter, so you should definitely go check out her post.


You may also like:

Talking about: Planning and goal setting

talking_about_planning_goals_inthefolds

If you have been following along with me lately you may remember that I have been talking about my desire to be little more open about the struggles as well as the little victories of my day-to-day life as a very new small business owner. Since getting all your lovely responses on the topic, I have been busting to get started, as I feel there is a huge amount of value in this exercise. For me, it will provide an opportunity to consolidate my thoughts and ideas on a topic, keeping a record of it for the future (when I will most probably read over it and cringe), and hopefully for you it will provide inspiration and food for thought - or hopefully, some encouragement for your journey. 


Planning + goal setting for 2016

As it's the very beginning of a new year (okay, okay, three weeks in... where did the time go?), I have been thinking a lot about planning and setting goals for 2016 - as I am sure many of you have been doing too. I think it's only natural to see the end of one year and the looming of another as a time to reflect and make some changes - in the hope of being happier, healthier, more productive etc. in the new year. But what I have finally accepted is that these changes will not happen over night and all big changes are about commitment, dedication and making these changes into a habit or ritual.


On my way to burn out

A little back story. If you saw me on December 22nd last year, you would have seen a pretty haggard excuse for a person. I was most probably hunched over my sewing machine or computer (or maybe even both by that stage ... There was a moment when I'd become so overwhelmed by my to-do list that I had my sewing machine set up in front of my computer, and would jump between the two) and had given up on wearing make-up or anything apart from jersey sacks, or even washing my hair. Not good. Obviously. On this particular day I spoke to a friend about how exhausted I was, how little time I had to do anything for myself (including exercise, grocery shopping, seeing friends or even washing said hair) and how burned out I was feeling. I loved my little business, but it was literally taking over my life. Yet I was persistent that I was just going to work through the holiday period, convincing myself (and no one else) that I would feel better in the new year if I just kept soldiering on and knocking things of my ever growing to-do list.

After I said it out loud, I realised how stupid it sounded. Did I think some magical New Years Fairy was going to come and sprinkle fairy dust on my head and I was going to wake up, somehow recovered from one of the biggest, scariest, craziest, most challenging years of my life, and be ready to do it all over again?

The answer is no.

No matter how much I love doing what I do every day, I have learned that, there are times that it is more beneficial to my business (and probably yours too) to step back and take a rest. This probably seems very obvious to a lot of you, but this was quite a realisation to me. Coming to the end of year, and reflecting on the awful state I was in, emotionally and physically, I realised that I was going to have to make some huge changes in my life if I wanted to create a business and a lifestyle that would be sustainable, and wouldn't have me totally washed up before I turn 28. And before any of these changes could take place, I needed to take a good long rest. I took a week off work, in which I spent my time catching up on sleep, friends and TV series. Utter bliss. Suddenly it didn't seem so daunting to wash my hair or write that email that I had been avoiding replying to. If you follow me on Instagram, you may even know that I even found the capacity to iron every garment in my wardrobe (yep. Seriously. And I mean EVERYTHING, as I had not ironed in six months!)

So after a much needed break, I was finally in a fit enough state to start looking forward again. Just in time for New Years eve!


New years resolutions

I always have new years resolutions, although for the life of me, I cannot remember one I have ever set, and therefore no idea if I have ever accomplished one of my goals. I guess I just thought everyone had flakey goals and setting them was more about having something to talk about over the new year period - and then forgetting them by the end of January. I must admit, this year was no different. I set some really flakey goals.

Sitting on the beach with an esky full of picnic food and drinks, a friend asked me what my resolutions were for 2016. I answered, 'To have a happier and healthier year than 2015." When I asked him what his resolution was, he told me he wanted to do an Iron Man. Bang. The moment when I realised how tangible his goal was compared to mine. At the end of 2016 he will know whether or not he has achieved his goal, with a straightforward yes or no. Me? Even if I remembered my Flaky Goal, how would I measure it? Do a happiness pie chart? A health graph? I don't think so. This is the moment I remembered what I had learned on the small business short course I did in 2015 and it was time to actually use it.


Goals need to be S.M.A.R.T

SMARTgoals_inthefolds

Goals need to be smart as well as S.M.A.R.T : Specific, Measurable, Actionable, Relevant and Timely. This means that instead of my Flaky Goal, 'I want to have a happier and healthier year,' I would need to consider a goal such as, 'I will schedule in at least one weekly dinner with a friend which will help me feel happier and more connected to those around me,' or 'I will go swimming twice a week to work on my fitness.' 


Breaking goals down

Although the S.M.A.R.T method does really help when creating the right goals (I now have a list of goals for 2016 that I will be able to reflect on at the end of the year - and they are written down this time so that I don't forget them!) I do find big goals to be very daunting. Particularly when it is really difficult to predict what will happen in the future - which is definitely the case when you have your own business.

This is when breaking down a goal into smaller pieces makes the world of difference. When I say I want to release a pattern by x date, I instantly get butterflies in my stomach, thinking about the sheer amount of work that needs to be put in to create a pattern. Suddenly the goal no longer feels achievable and I begin to stress, rather than just getting started. 

By simply breaking the goal down into steps, I have realised that the Big Scary Goal becomes much more tangible, and also allows me to work out where to start.

For example, for this goal of releasing a pattern, what is involved? First, I need to come up with the design, make the initial pattern, make a sample and fit the pattern on a fit model. I then need to continue sampling and fitting until I am happy with the pattern. Once that is done I need to scan the paper pattern into the computer and digitise it using Illustrator. When I have done that, I next need to grade the pattern to my size range, take photographs for the instructions, write the instructions and test the pattern. I need to consolidate the testing feedback, create the listing and then finally release the pattern.

Although there is a lot to do, suddenly it doesn't seem so daunting. With this list, I have a much better chance of scheduling the right amount of time for the project and setting an achievable deadline, and knowing exactly where I need to start. It also allows me to plan things in advance. I should be fitting by 'Week X', do I have a fit model organised? I should be ready to take photographs of the process by 'Week Y', do I have fabric on hand, or will I need to purchase something? Having things pencilled in, means I can avoid stressful last minute runs to the shops, and wasting days not knowing what to work on. 

I really like the Goal Pyramid by Matthew Michaelwicz, which provides a simple, yet very visual way of breaking down goals into smaller milestones. 


Celebrate the victories

By having smaller goals, that lead to a larger goal, there are many more chances to sit back and reflect. Am I on track? What do I need to do this week, or even just today, to achieve this goal? As well as a chance for little celebrations along the way.  I don't want to have to wait until the end of the year to give myself a pat on the back for all the hard work I have done - and this means stepping back and celebrating the small achievements that will contribute to the success in the big goal. My celebrations aren't anything extravagant, but they are a time in which I allow myself a chance to say 'Well done! Go you!' A moment to sit back and feel very proud of what I have achieved. For example, a couple of weeks ago, I sold my fiftieth Rushcutter dress, and to celebrate I danced on my bed (the 50th pattern was sold while I was asleep). It is a lonely business, having a small business, so instead of seeking a high-five or a pat on the back from others, I have really had to learn to celebrate my own achievements in my own little ways. 


To-do lists vs scheduling

As I mentioned, this time of year is a very obvious time to be having thoughts about goal setting and planning, which means I have been running into great pieces of advice, suggestions and blogs everywhere I turn. While somewhere in BlogLand, I came across a link to this article about millionaire's not using to-do lists, and it really encouraged a light bulb moment for me.

I have not been able to function for the last six months without my to-do list, but then, when it gets to the end of the day and I have once again not managed to get everything crossed off the list, I feel like crap. Like really crap. What I had been overlooking is that a to-do list has no concept of time or priority. Basically, I just write down everything I can think of in the order I think of them, and then work my way through (normally leaving the most painful and time consuming tasks till last) until it is time to leave work (or was time to leave work three hours ago). This advice, to schedule things in a planner is very obvious, but has already really changed the way I work through the day, and the way I feel at the end of it. By scheduling tasks into a planner that is broken up into the hours of the day, I suddenly need to be realisitic about the time a task will take, and therefore don't end up with a list of things that could never be completed in a single day.

I still have my to-do list (as it's a really great way to get everything out of my head to make room for others - as apparently we can only hold 4 things in our head at any one time!) but once I have written my list, it doesn't stop there. I take the list and work through it - scheduling in each task and allowing a realistic amount of time to complete it. If, for some reason, something doesn't get done on a particular day, I reschedule it. Allowing nothing to be left behind - and preventing those moments when I wake up in the middle of the night, realising I have forgotten to do something. This is a great episode of the Note to Self podcast, about the science behind getting organised, if you would like to hear more. 

I am currently trying out the Passion Planner, and so far it seems to be doing the trick. I love that it has a section for 'Today's Focus' as well as a 'Weekly Focus,' which is a constant reminder that I need to accomplish the small milestones in the hope of one day achieving the Big Scary Goal. A great reminder to just keep putting one foot in front of the other, and to night get caught up in the end game. 


The importance of rituals

I find setting goals as a great way to give me the motivation and focus I need to get through the day-to-day grind of running a business. But this year, particularly after reading this article from Seamwork Magazine, and then binge reading Sarah Starr's amazing blog. I have been thinking a lot more about the importance of rituals and how I can bring some new rituals into my routine. I am not talking about massive changes, just small things that will add to the overall experience.

One of the first things I thought about was how much time I have been spending on my phone, and how unhappy that makes me. Particularly in the evenings, I want to get better at putting my phone down and focusing on something outside of my work (as my phone is becoming more and more associated with work as this journey goes on - when an email comes through I think I have to deal with it then and there, whether I'm still in my towel after taking a shower, or already in bed), which has lead me to going to the library to borrow books and reading before I go to bed, instead of scrolling endlessly through my Instagram feed. I find this much more relaxing, as the online space tends to stimulate me much more than a book, and I end up flooding my brain with more and more ideas, instead of focusing on winding down.

Although not as enjoyable, I have created a ritual out of grocery shopping. By scheduling it in my planner at the same time each week, I no longer see it as a chore, or something that can be sacrificed if I am too busy. It needs to be done as it is important that I have access to quality food at home, so that when I'm tired or busy I don't end up skipping a meal or eating junk.


Accountability meetings

One final ritual that has become a highlight of my week, is my accountability meeting. When I first agreed to meet with two of the women I met on my short small business course, it just seemed like an interesting thing to try out. The shock of going from working amongst other people to working on my own day in and day out, had not yet hit, so the need for human interaction was not there. A month or so in, I realised how important it was for me to meet with these women each week. It gave me a chance to get out of the studio, see people and also truly connect to women who were on a very similar journey to me, feeling accountable to someone apart from myself.

I am so early on in this journey, but still looking back, I can see how naive I was to what it would really be like. I hadn't realised how much a journey like this is also a journey into who you are as a person, what you really want and the kind of life you are trying to create (but I will save all that for another day), and that it really helps to have understanding and supportive people around you - who you can share your doubts, fears and little victories with. Someone who knows you and your business is only a phone call away, and there is something in that which is very reassuring. And with the deadline of a meeting, there is a sense of needing to get things done on time. My meetings are very relaxed, which has been great, but I have been doing a little research this week on how we could go about creating a structure for our meetings (after half an hour free time to catch up, of course) so that is something I will continue thinking about this year. 


What about you?

As I think I have now made clear, I am no expert on this topic. It is just something I have been thinking a lot about, and reading a lot about, in the hopes that I will find a process that works for me - allowing me to get more done, with less stress.

I'd love to know how you manage your days, and if you think there's anything else I should be trying to make sure that 2016 is happier, and more productive, than 2015 (the Flaky Goal strikes again!)


You may also like:

How to draft box pleats - Part 2

how_to_draft_box_pleats_1

If you are a regular to this blog you will know that earlier in the week I published a tutorial about box pleats - specifically, how to insert box pleats into the centre front (or centre back) of a garment. I was planning to also show you how to put box pleats in other parts of a garment, but the post got a little long, so I thought I'd save it for today's post.

For this example, I will show you how to add two more pleats to the front of the skirt (either side of the centre front pleat), but you can use the same method to add as many box pleats as you like. 

What is a box pleat?

how_to_draft_box_pleats_2

Just in case you missed the last post, here is a box pleat and an inverted box pleat. They are essentially the same, just the way the fabric is folded is opposite in each case, creating a different aesthetic (an inverted box pleat is a box pleat turned right side down). 

Getting started

To start, take the pattern you plan to add a box pleat (or inverted box pleat) to. I decided to use the pattern I drafted during the process of the previous tutorial (an A-line skirt with centre front box pleat). Trace a copy of the pattern without seam allowance.

how_to_draft_box_pleats_3

2. Consider where you would like to add a pleat. Make sure it is not too close to the side seam, otherwise there will not be room for the volume of the pleat when it is folded in place. In this case, I am only adding one additional pleat, but you may want to add more. Draw a line through the pattern, where you plan to place your pleat (or pleats). 

how_to_draft_box_pleats_4

2. Cut along the line - separating the pattern into two pieces (or more, if you plan to have multiple pleats). Label the pattern pieces if it is likely that you could get them mixed up.

Pleat width

how_to_draft_box_pleats_5

Now, you will need to have a think about the size of your pleat. This is totally up to you. If you are struggling to work out the width of your pleat, have a play around with some fabric (or even a piece of paper), folding different sized pleats to get an idea of how it will look. Make sure you check that there is room for a pleat this width, in relation to the centre front / back and side seams.

Create the pleat

how_to_draft_box_pleats_6

3. When you have decided on the finished width of your pleat, spread the two parts of the pattern piece apart, until the opening is double the width of the finished pleat. For example, if my finished pleat will be 5cm, I need to create a 10cm opening between the two parts of the pattern. Fill the gap with a piece of pattern paper and tape or glue in place.

how_to_draft_box_pleats_7

4. Mark a line that runs through the centre of the opening. This will become the centre of the pleat.

how_to_draft_box_pleats_8

5. Fold along both edges of the opening (bring the line towards you when folding).

how_to_draft_box_pleats_9

6. Fold in each section of the skirt pattern, lining up each fold line with the centre line of the pleat. 

Transfer waistline + hem shaping

how_to_draft_box_pleats_10

7. Just like with a dart, when you fold a pleat on a curved edge, you will need to adjust the edge of the pleat, so that when it is folded it will sit flush with the waistline.

With the pleat still folded (you may want to use a weight to hold the pleat in place), take a tracing wheel and trace along the waistline, transferring the shape of the waistline onto the folded paper underneath. Repeat for the hemline.

how_to_draft_box_pleats_11

8. Unfold the pleat, take a ruler and pencil, and join the dots created by the tracing wheel to create a smooth curve. 

Add notches

how_to_draft_box_pleats_12

9. Add notches to either side of the pleat, as well as the centre point of the pleat. 

Add markings to the pleat

how_to_draft_box_pleats_13

10. You now need to use arrows to indicate which direction the pleat needs to be folded. An arrow can be drawn from each outside notch towards the centre of the pleat. For an inverted pleat, when it comes to folding it in the fabric, the folds will need to come towards you, meeting at the centre point on the right side of the garment. For a box pleat, it will need to be the opposite - the folds come together at the centre on the wrong side of the garment.

Stitching the pleat

how_to_draft_box_pleats_14

Now have a think about whether you would like to stitch the pleats in place. This will depend on your fabric choice and the style of your skirt (or garment). You could consider leaving the pleats free, stitching down a few centimetres to give the pleat a little more structure, or stitch down 15cm (6 inches) or so, to really give some structure to your pleat. 

Mark a drill hole

If you would like to add some structure with some stitching, it is a good idea to mark a drill hole on your pattern, marking the end point of your line of stitching.

how_to_draft_box_pleats_15

11. Measuring down from the waistline, at the centre of the pleat, mark a drill hole the distance down you would like to stitch your pleat. 

12. To complete the pattern, add seam allowance and pattern markings


You may also like:

How to draft box pleats

drafting_box_pleats_1

My transition back into work mode, after a much needed break, has been a little slower than anticipated. I have been concentrating on many things already this year - filling in my calendar and working out a plan of attack for 2016, catching up on emails that came through over the holiday period, and madly sampling a couple of new patterns. But.. when it comes to my blog, I have been procrastinating! Today though, I had it in my diary that I would focus on getting back onto blog content, and although it is a little painful (as I seem to have forgotten a few things over the break... What's that font called again? What line weight do I normally do my illustrations in? So it is taking me afr longer than usual to even get started) here I am, getting the blog back on track, as I have a HUGE amount of content planned for you this year, so I better get on with it, before it suddenly becomes February! 

drafting_box_pleats_2

So, without further ado, I am going to get into the first pattern making tutorial of 2016! As you may know, if you have been following along, towards the end of year I was working on a blog series about drafting skirt patterns. I still have a few more tutorials related to skirts that I think you might like, so that's what I'll be focussing on for the moment. As I've said before, if you are new to pattern making and just wanting to dip your toe in, skirts are the place to start! They can be as simple as you choose to make them, and the fitting of a skirt is much easier than the bodice or trouser block, giving you a chance to learn some pattern making fundamentals before dealing with the ups and downs of fitting.  

Pleats

Adding pleats is a really simple adjustment that can be made to a pattern that can totally transform the look of a garment. There are many different types of pleats:- box pleats, knife pleats, accordion pleats (the fabric needs to be pleated with heat), top stitched pleats and kick pleats. Pleats can be inserted in tops, dresses, trousers and sleeve heads, but today I will be showing you how to add a box pleat to a skirt. 

Box pleats

drafting_box_pleats_3

In this tutorial, I will show you how to create a box pleat and an inverted box pleat. The drafting process is the same, the only difference is the direction the pleat is folded when you are sewing.

Getting started

drafting_box_pleats_4

1. To start, take the skirt pattern you would like to add a pleat to. I chose to use the basic A-line skirt block (that I have made a tutorial for here). You could choose a self drafted pattern, or even consider adding pleats to a pattern you have in your stash.

2. Take a seperate piece of pattern paper, and trace a copy of the skirt without seam allowance. Give yourself some extra space alongside the centre front as this is where you will be adding the pleat. 

drafting_box_pleats_5

Now, you will need to have a think about the size of your pleat. This is totally up to you. If you are struggling to work out the width of your pleat, have a play around with some fabric (or even a piece of paper), folding different sized pleats to get an idea of how it will look. 

Creating the pleat

drafting_box_pleats_6

3. When you have worked out the width you would like the pleat to be, divide that figure by two (as we are working only on half of the pattern - the piece will be cut on the fold, to create a full front piece). Now draw a rectangle half the width of the pleat (the figure you just found), and the length of the centre front. For example, if I would like to create a 12cm pleat, I will add a rectangle to the centre front that is 6cm wide.

4. Now draw a second rectangle the same length and width as the first. 

drafting_box_pleats_7

The centre front (fold 2) and the line between the two rectangles (fold 1) will become the fold lines for the pleat.

Fold the pleat

drafting_box_pleats_8

5. Fold along Fold 1, folding the first rectangle towards the body of the skirt.

6. Now fold along the centre front (Fold 2), folding the pleat so that it sits flat behind the body of the skirt. 

Transfer waistline shaping

drafting_box_pleats_9

Just like with a dart, when you fold a pleat on a curved edge, you will need to adjust the edge of the pleat, so that when it is folded it will sit flush with the waistline.

To do this:

7. With the pleat still folded, take a tracing wheel and trace along the waistline, transferring the shape of the waistline onto the folded paper underneath. Repeat for the hemline.

8. Unfold the pleat, take a ruler and pencil, and join the dots created by the tracing wheel into a smooth curve. 

Mark the pleat

drafting_box_pleats_10

9. You now need to use an arrow to indicate which direction the pleat needs to be folded. For an inverted box pleat, the centre front needs to be folded towards the centre of the pattern. Indicate the direction of the fold with an arrow. At this point you can also add the grainline and note to 'Place on fold.'

drafting_box_pleats_11

10. For a standard box pleat, the centre of the pattern needs to be folded towards the centre front. Indicate the direction of the fold with an arrow. At this point you can also add the grainline and note to 'Place on fold.'

Stitching the pleat

drafting_box_pleats_12

Now have a think about whether you would like to stitch the pleats in place. This will depend on your fabric choice and the style of your skirt (or garment). You could consider leaving the pleats free, stitching down a few centimetres to give the pleat a little more structure, or stitch down 15cm (6 inches) or so, to really give some structure to your pleat. 

Mark a drill hole

If you would like to add some structure with some stitching, it is a good idea to mark a drill hole on your pattern, marking the end point of your line of stitching.

drafting_box_pleats_13

11. Measuring down from the waistline on the centre front, mark a drill hole the distance down you would like to stitch your pleat. 

ADD PATTERN MARKINGS

8.gif

12. To complete the pattern, add seam allowance and pattern markings


You may also like:

Talking about : Transparency - The Response

Happy New Year! I hope you had a lovely holiday period and had a chance to relax. I had a lovely Christmas with my family, and then enjoyed some much needed down time. Lots of reading and movie watching! Now it's back to the studio to get the ball rolling for 2016, which I find very exciting, as I have a lot planned for this year. 

In one of my last posts of the year, I discussed my desire to be more transparent in my business - showing more of what goes on behind the scenes, in the hope of potentially enlightening or inspiring others who are interested in this journey. I asked what you thought, and was so pleased with the response! 

Here are some of the responses, which I thought I would include as they may help you too, if you are on a similar journey, or a thinking about similar things to me! 

quote_1.gif

I think these will become great go-to quotes if I am ever in doubt!

Wishing you a very Merry Christmas

This is just a very quick post to say Merry Christmas! I hope your day is filled with lots of love and laughs (and hopefully some tasty treats too).

To wish everyone a happy holiday, and to say thank you for your support this year, I am offering you 15% off The Rushcutter sewing pattern. All you need to do is enter the discount code 'HAPPYHOLIDAYS15' by Saturday January 2, 2016 to secure the discount. Enjoy!

The blog will be a little quiet for the next week or so, while I enjoy a little time off. There is plenty more coming next year, so please watch this space! Until then, there should be enough sewing and pattern making goodness to keep you busy over the holidays!


I would love to hear about the projects you've got planned for the holidays? I am hoping to get some selfish sewing done, but am not making any promises as I really do need to catch up on some sleep, after this very busy year!


You may also like:

Talking about : Transparency

My working pace has slowed down as the end of the year fast approaches, and the pace of my personal life has increased as I madly get prepared for Christmas (I left it to the last minute as usual). So there will be no new tutorials until the new year. I wanted to take this opportunity to post about something a little different today, giving you a little peak at what is going on behind the scenes at In the Folds (and chat about the potential of hearing a little bit more in the future).

I am spending a lot of time at the moment thinking about transparency, and it's place in business. Specifically, its place in my business. When I had the crazy (but great) idea to go into business, transparency was something I really wanted ingrained in my practice. Transparency about my thoughts, values and processes (and maybe even more).

Though, that is much easier said than done. Six months into my business venture, and I have revealed very little about what really goes on on a daily basis (okay, there was the time I told you I was eating rice cakes for dinner on instagram). There has been no sign of the struggles (and there have been many), the thought processes or even the small wins (and thankfully there have been a few of those too) that have come along the way. 

So that is what I'd like to talk about today - transparency, why I think it's important, why I haven't been very transparent (yet) and who inspires me in this particularly conversation. 

What do I mean by 'transparency'?

When I use the term 'transparency,' I am referring to a business model in which I would be open about what is going on at In the Folds HQ, in terms of processes, practices, thoughts (and maybe even finances), in the hope that my journey could help or inspire others who are on a similar journey (or those that would like to be on a similar journey, or are just interested in other peoples stories).

Why I haven't been transparent (yet)?

I guess there is a few reasons why I haven't been as open or transparent as I initially planned:

1. Number one has to be fear. When my business was an imaginary thing, the idea of opening it up to the world for judgement and scrutiny seemed totally fine. Now that it is a thing (albeit a very small thing), exposing myself on that level terrifies me a little (okay, okay, it terrifies me a lot).

2. Time is another huge reason why I have avoided a more transparent business model. I have not had the time to think about how I would like to do it, let alone actually do it. 

3. And the last thing that has been on my mind, when debating this concept internally, is concern that it will have a negative impact on my business. Will people judge me negatively if they know what my business looks like on the inside (as surprise surprise, my world doesn't really resemble the lovely shininess of my Instagram feed)? This is not to say that my business has any dirty little secrets! Just the reality that social media feeds are curated, and life is not! Which is something we all obviously know, but it is really easy to fall in love with the fantasy.

Why I would like to be more transparent

So now that I have highlighted the cons of introducing more transparency to my business, let's talk about the pros, and why it is on my mind at the moment. 

I just love businesses that are transparent about their processes. And I have learned so much from other entrepreneurs and small business owners opening their doors. I feel it is important to share some of that love and add something to the collective learning pool and conversation. 

I am constantly energised and inspired by other peoples stories, and it is often what keeps me going, particularly at the times when I am feeling low, or totally alone on this crazy journey. It is on my mind at the moment, as fantastic examples just keep on popping up around me.

Who inspires me?

Bjork + Lindsay Ostrom - Pinch of Yum / Food Blogger Pro

Although many businesses are now embracing transparency - which is absolutely fantastic, the first business that really stood out for me in this area is Pinch of Yum. If you know of this blog, you will know that it has absolutely nothing to do with sewing. It is a cooking blog. But the way they share (Lindsay and her husband, Bjork) the ins and outs of their business is truly inspiring. They publish a monthly income report, which details the ins and outgoings of the business, but it is not a way to show how successful they are (although they are very successful) but a tangible way to see where their income and traffic comes from, and how they have managed to grow these numbers, since the very early days. I was first introduced to the blog when I heard Bjork interviewed on the 'While She Naps' podcast by Abby Glassenberg, and was instantly mesmerised by his openness and frankness about growing a business. I was also very interested in his idea of '1% to infinity,' which has definitely become my business motto since hearing it mentioned. It was such a relief to hear someone say that the steps you take don't have to be massive, for you to see progress over time. Just keep moving forward each day, even if you are only improving by 1% each day, over time the improvement grows exponentially. That to me, makes perfect sense, and is something very tangible I can use to keep my business growing. Bjork also has his own podcast now, which although mainly focuses on guests from the realm of food, I find very interesting and relevant to my life as a small business owner in the online world.

Heather Lou - Closet Case Files - 'Make Boss' series

In the sewing world, there are some bloggers who show snippets of what goes on behind the scenes. I love the 'Make Boss' series by Heather Lou of Closet Case Files. These days I have very little time to read blogs, but I must say that I always take the time to read these posts when they pop up in my Bloglovin' feed. And I literally inhale them, and find so much of the information relevant to my journey. I loved this recent post, when Heather Lou discussed all the thought (and work, of course) that went into designing the cover art of her newly released paper patterns. This is true testament to how much thought goes into decisions like this. 

Start Up podcast by Gimlet Media

Over the last couple of weeks I have become totally addicted to the Start Up podcast. I have no idea how I didn't know of this podcasts existence (because I am an avid listener of the other Gimlet Media podcasts), but somehow I missed the memo. When it was mentioned twice in one day, by two different people, I knew it was time to play catch up. And boy, did I play catch up. I finished the first season in two days. And in another two, I was totally up-to-date. Which is sad, because I was absolutely loving binging on this incredible podcast.

Okay, back to the point (I am beginning to sound like a groupie), listening to a first hand account of starting a business, was absolutely fantastic. Hearing that many of the feelings I have had, were consistent with others, made me feel a little less alone in this venture. Obviously there are many differences between starting a huge podcasting company or an online dating company, and me, starting a business from my teeny tiny studio, but I was also surprised by how many similarities there are.

Reyna Lay Designs Podcast

I also stumbled upon the Reyna Lay Designs podcast recently (what can I say, I am a podcast addict) and was so heartened to hear her interview with Elisalex from By Hand London. She was so candid and honest, really laying out the struggles of what it is like to be an independent pattern designer. I had been following Elisalex on Intagram and on the By Hand London blog, but this interview just revealed much more of the story. There are many more great interviews in the archives, but this is the one that stood out for me.


These are a few things I have been following for a while, but transparency has once again come to the forefront of mind lately for a number of reasons.

Why now?

So why, after six months of business am I talking about this now? Firstly, 2015 is coming to an end, so with that I am consolidating my thoughts about the year. What worked? What didn't? What needs improvement? And also start thinking about 2016 and what my goals are for the new year.

I think 2015 was about me just getting this business started and releasing my first pattern. Hopefully 2016 is about building on that foundation, but also bringing much more into the mix, and creating the kind of business that I dream of.

Over to you lovely people!

So, what I am wondering dear readers, are you interested in knowing what goes on back here behind the sewing machine and the screen? Or are you thinking as you read this, 'No, no, no, I just want tutorials!' (which is totally fine) I am still not sure exactly how I would like it to look, but before I put pen to paper, I'd love to know if anyone is even interested in listening?


Checking patterns : Curved seams

checking_patterns_curved_seams_1

Hello there, I hope you are having a lovely lead up to the Christmas period, and life isn't too stressful getting organised for the silly season (my techniques is to totally ignore it, and seems to be doing the trick!).

 Image posted with permission from Yoshimi -http://yoshimitheflyingsquirrel.blogspot.com.au/2011/03/mermaid.html

Yesterday, I showed you how to draft a fit and flare skirt. Before going ahead and cutting out your skirt pattern though, there is one thing you must do... Check your patterns! For some reason this lesson took a little while to sink into my brain (although my pattern making teachers at university said it constantly) and I would just want to jump into the cutting and sewing. I paid for this mistake a number of times, so now I check my patterns religiously.

Why check patterns?

So here I am, now sounding like my nagging pattern making teachers! It is really important that you ALWAYS check that your patterns fit together correctly before going on ahead and cutting your fabric. It may seem a bit tedious checking each seam, but taking a few minutes to check your patterns at this stage can save you cutting out incorrect patterns and wasting precious time and fabric later on . It is really easy to do, and will only add a couple of minutes to your pattern making process (and could potentially save you loads of time in the long run).

When it comes to curves, the process for checking patterns is slightly different to when you check a straight seam.

To check straight seams, you simply have to place one stitch line on top of the other, and ensure they are the same length, and the transition between pieces is smooth (this is a very simple explanation, and I promise to give a more detailed explanation in the future).

checking_patterns_curved_seams_2

Today though, I want to talk about curved seams, as the fit and flare skirt that we drafted yesterday is made up of panels with curved seams. 

Identify the seams you are checking

checking_patterns_curved_seams_3

Take the patterns you are checking and focus on the curved seams, and how they fit together.

Measure or match?

I know that some people like to measure their curves (with a flexible ruler or tape measure), but I prefer to match the two pieces together as if they are being sewn. This way you can get a really good idea of how they fit together, and if any adjustments need to be made to the shape of the seam. 

Match the pattern pieces together

checking_patterns_curved_seams_4

1. Match the seams together, as if you were sewing them (one on top of the other). You may need to flip one upside-down (which is the case in the example) to line them up correctly.

If you are checking patterns that do not have seam allowance you can simply match the edges. If your patterns have seam allowance, make sure you are matching the stitching lines and not the edge of the patterns (this is when transparent pattern paper is very handy).

2. I like to notch my pattern at the same time that I check them. When the pieces are lined up correctly, mark a notch. Before moving on, transfer it onto the pattern underneath - a tracing wheel is a good way to do this. Curved seams can be difficult to sew - if you mark notches at regular intervals, you will make it easier for yourself later on.

checking_patterns_curved_seams_5

3. You will need to pivot the pattern, so that you can continue matching the seams. Take a stiletto/awl (or a sharp pencil or pin) and insert it at the point where the seams diverge. This will allow you to keep this point together, but also allow you the movement you need to match the remainder of the seam. When it is in place, you should be able to rotate the top pattern, without moving the pattern underneath. 

4. As you rotate, the seams will line up again.

checking_patterns_curved_seams_6

5. Once they are in line again, hold in place and mark another notch. Remember to transfer the notch onto the pattern underneath with a tracing wheel.

6. Move the point of the stiletto to the next pivot point (where the seam lines diverge again), and rotate the pattern until the seams align again. 

checking_patterns_curved_seams_7

7. Mark another notch. Once again, ensure the notch is transferred onto both pattern pieces.

8. Check that the seams are the same length.

If one of your seams is longer by a small amount (up to 1cm), simply trim off the excess. If the discrepancy is bigger, you will need to remove half the excess from the length of one pattern, and add the other half to the other pattern, so that they are the same length.

Check the hemline

checking_patterns_curved_seams_8

9. Now, flip the pattern over, and place the two pattern pieces together (as if they have been stitched together and then pressed open), to check the hemline. As you can see in the example, there is a small dip where the two patterns are joined. Redraw the hemline as a smooth curve, and adjust the pattern pieces to match. 

checking_patterns_curved_seams_9

10. At this point, you should also check that the angle between the centre front and hemline is a right angle. This means that when you cut the piece on the fold, you will get a nice smooth line. Check the side seam too - this should also come to a right angle. 

Check the waistline

checking_patterns_curved_seams_10

11. The same way that you checked the hemline, check that the waistline is also a nice smooth curved (and if it's not, make some adjustments). 

ADD SEAM ALLOWANCE

checking_patterns_curved_seams_11

12. To finish, add seam allowance. 


As I mentioned in the last post, if you have a style of skirt you would like to know how to draft, let me know (comment here or email me) and I'll see if I can develop a tutorial around it!


You may also like: