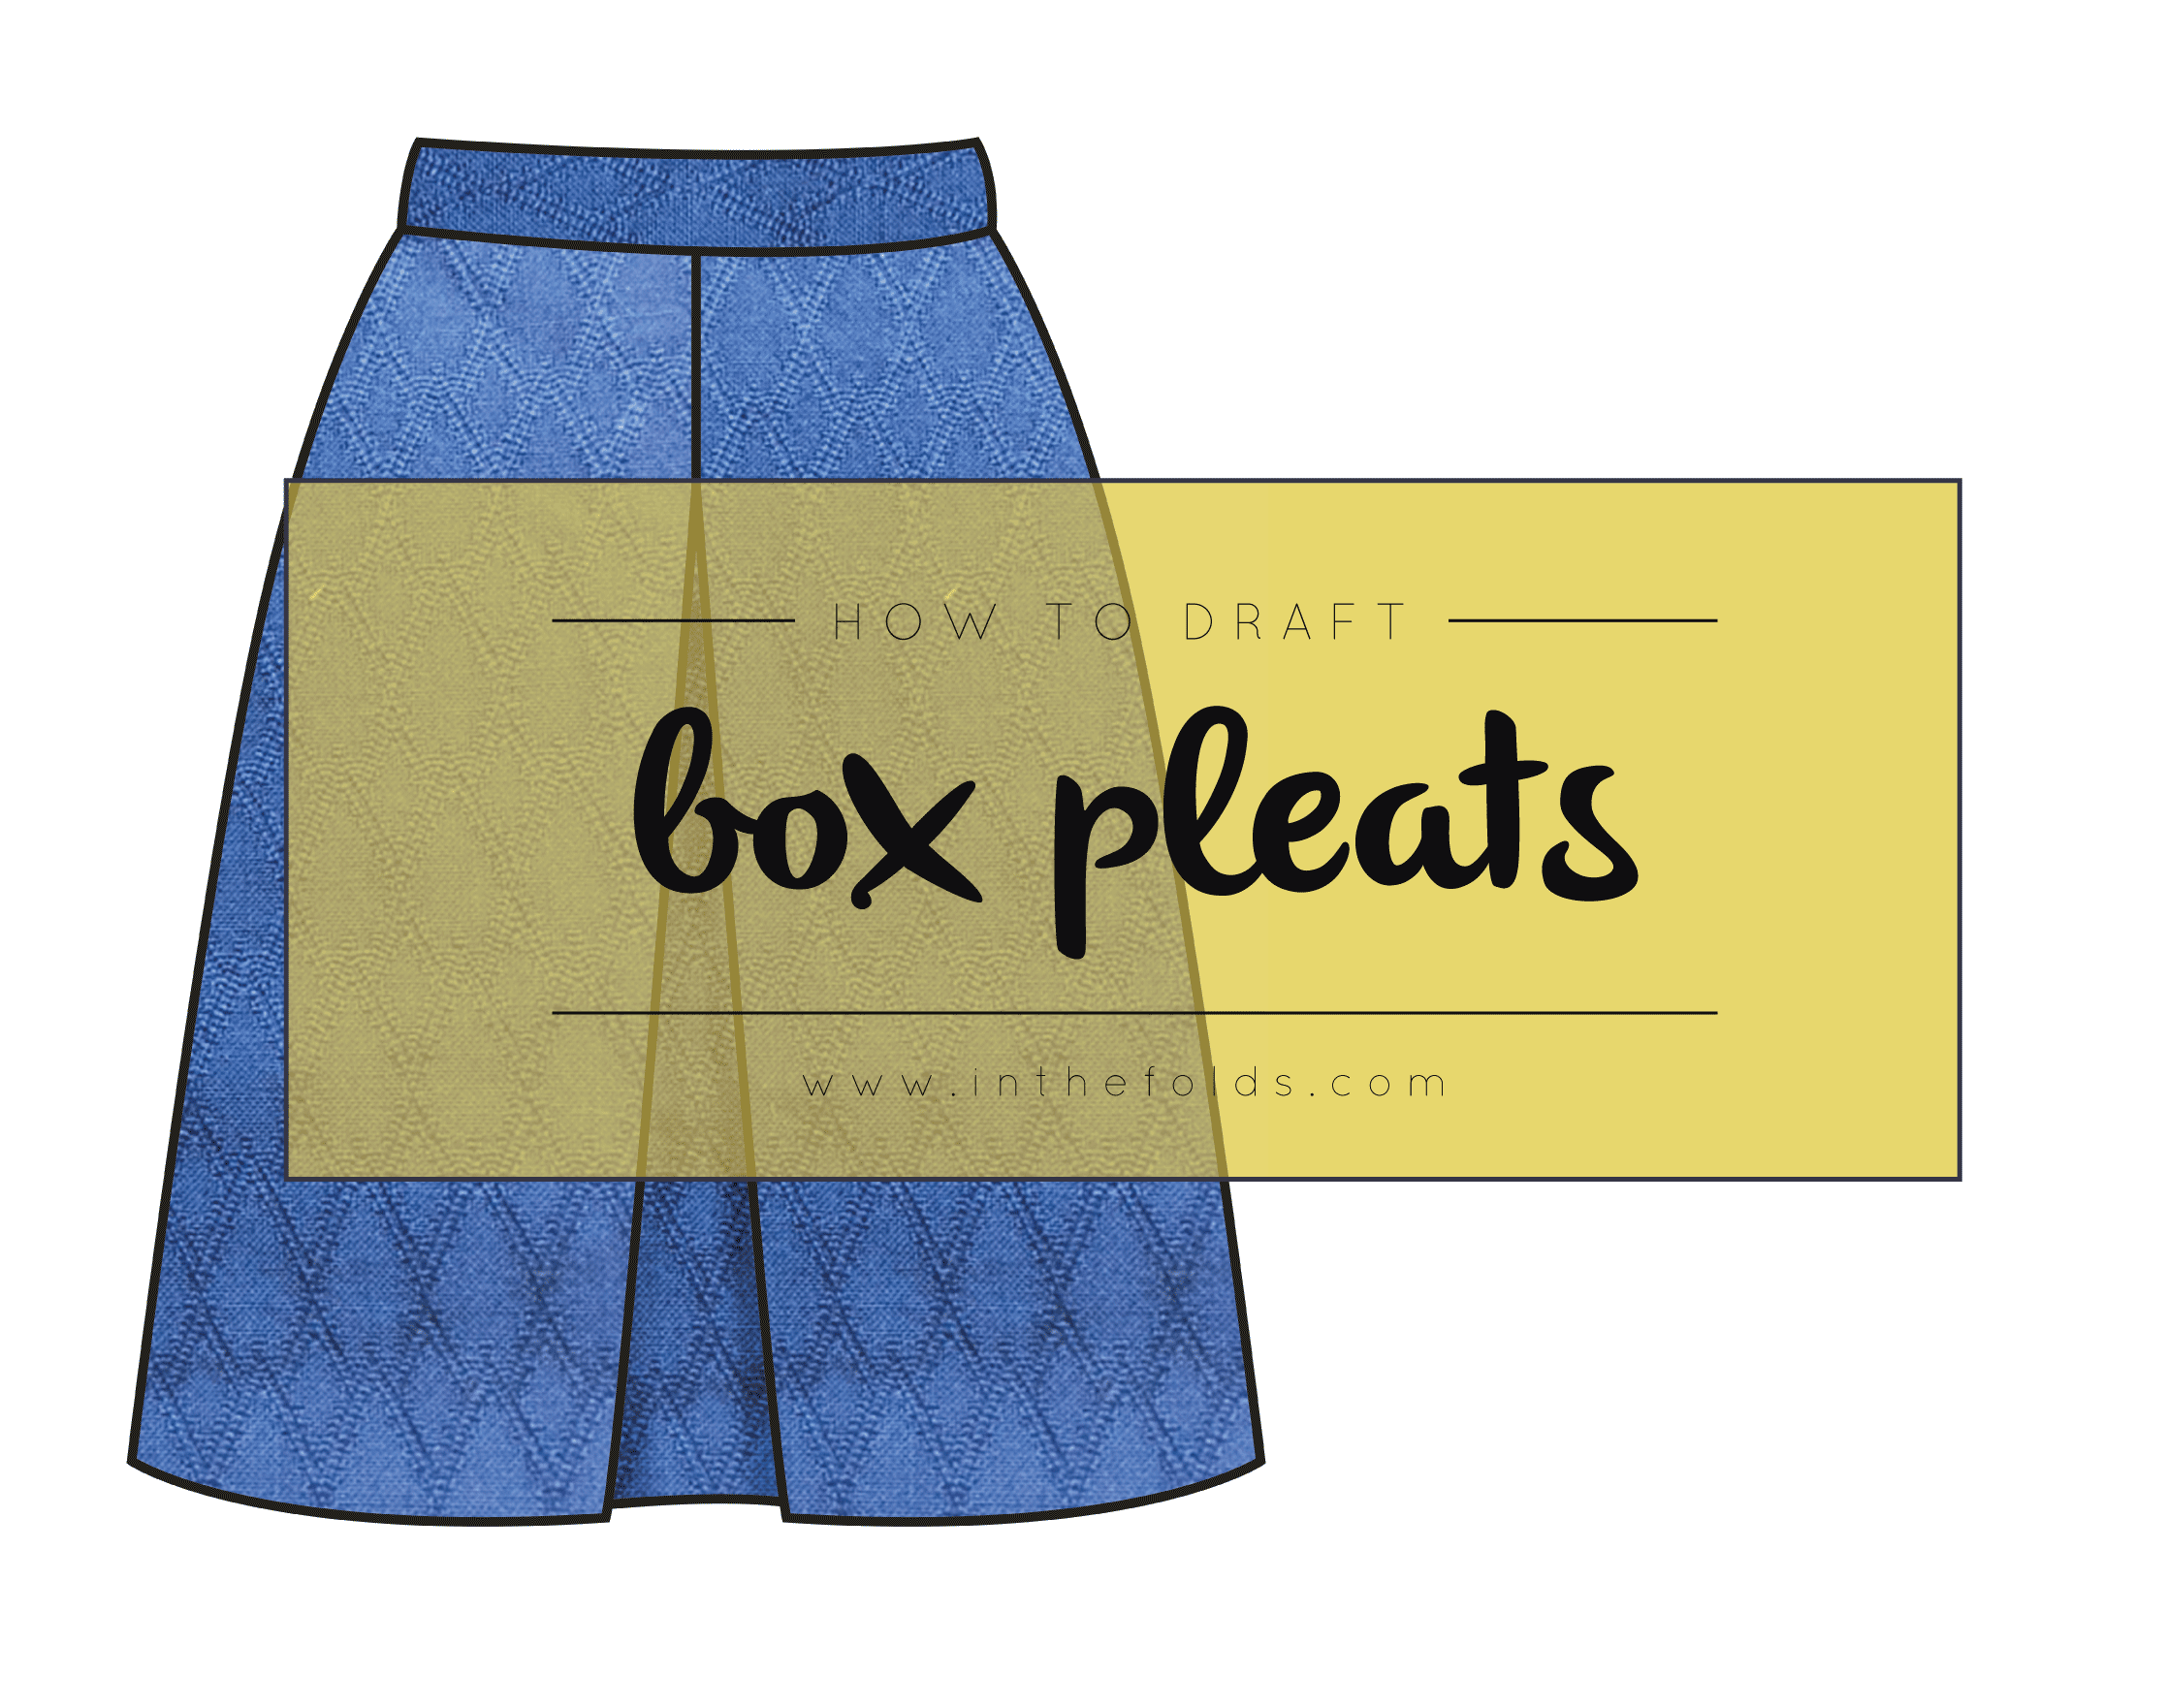
If you are a regular to this blog you will know that earlier in the week I published a tutorial about box pleats - specifically, how to insert box pleats into the centre front (or centre back) of a garment. I was planning to also show you how to put box pleats in other parts of a garment, but the post got a little long, so I thought I'd save it for today's post.

For this example, I will show you how to add two more pleats to the front of the skirt (either side of the centre front pleat), but you can use the same method to add as many box pleats as you like.
What is a box pleat?
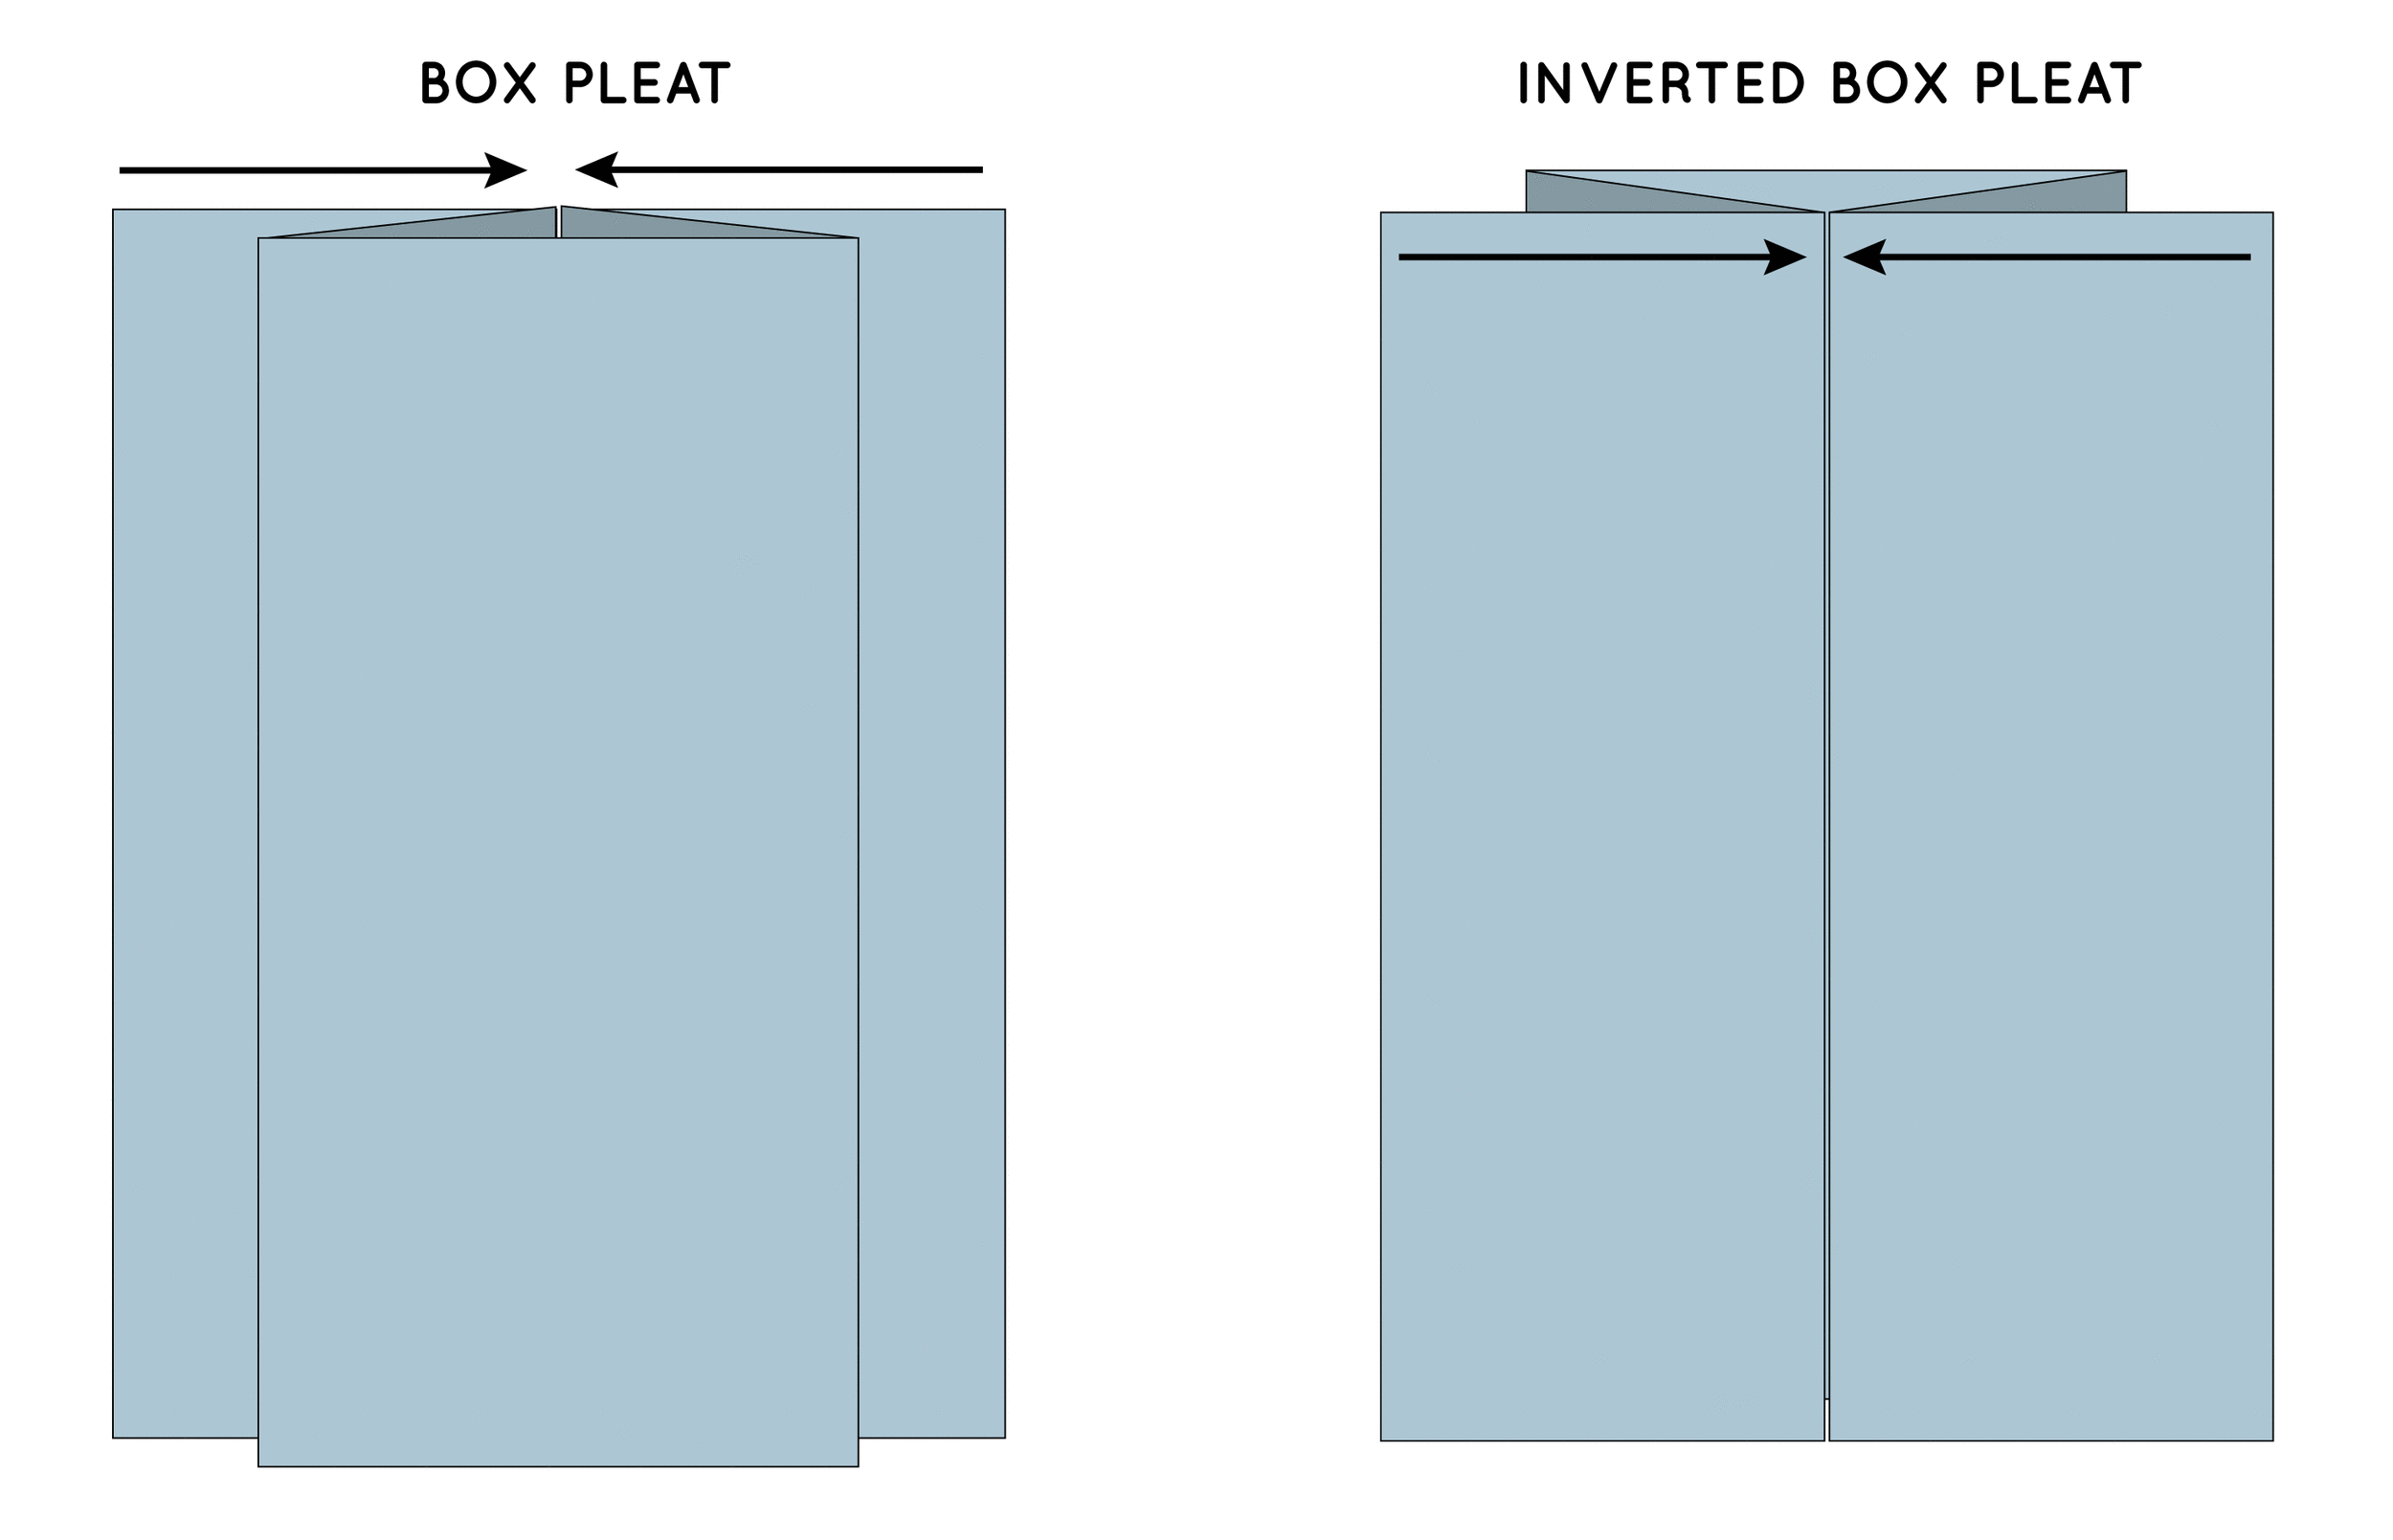
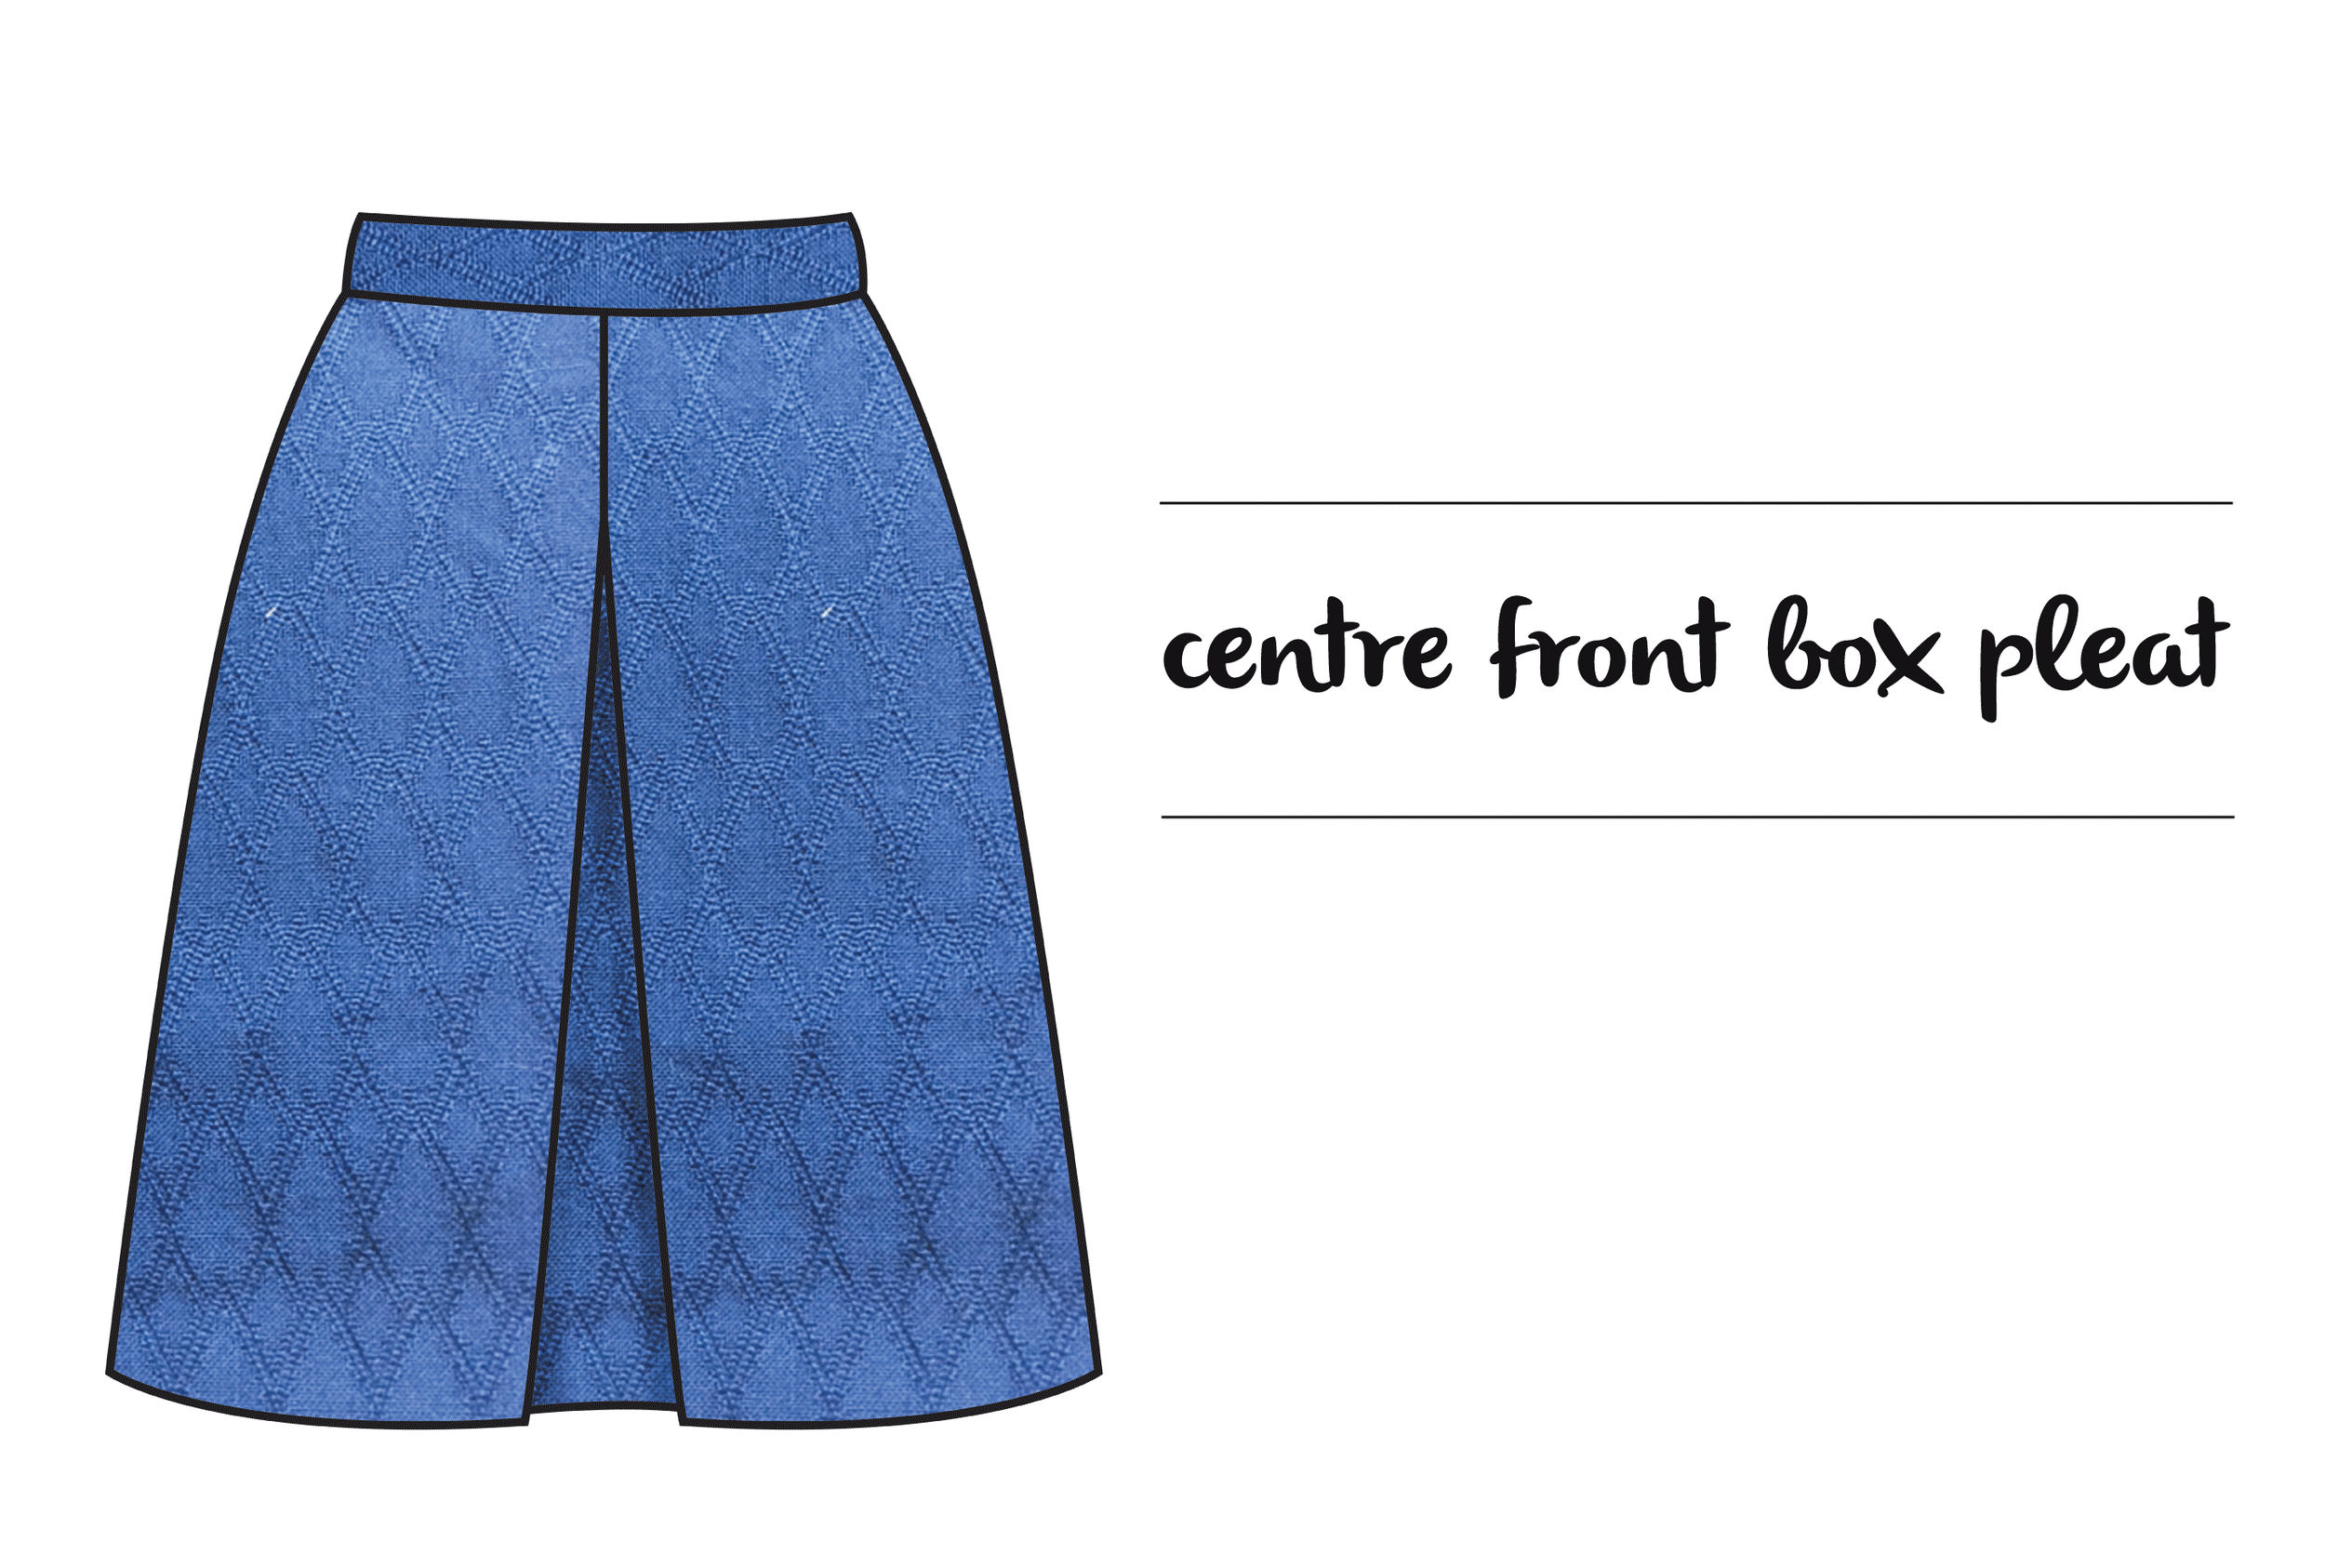
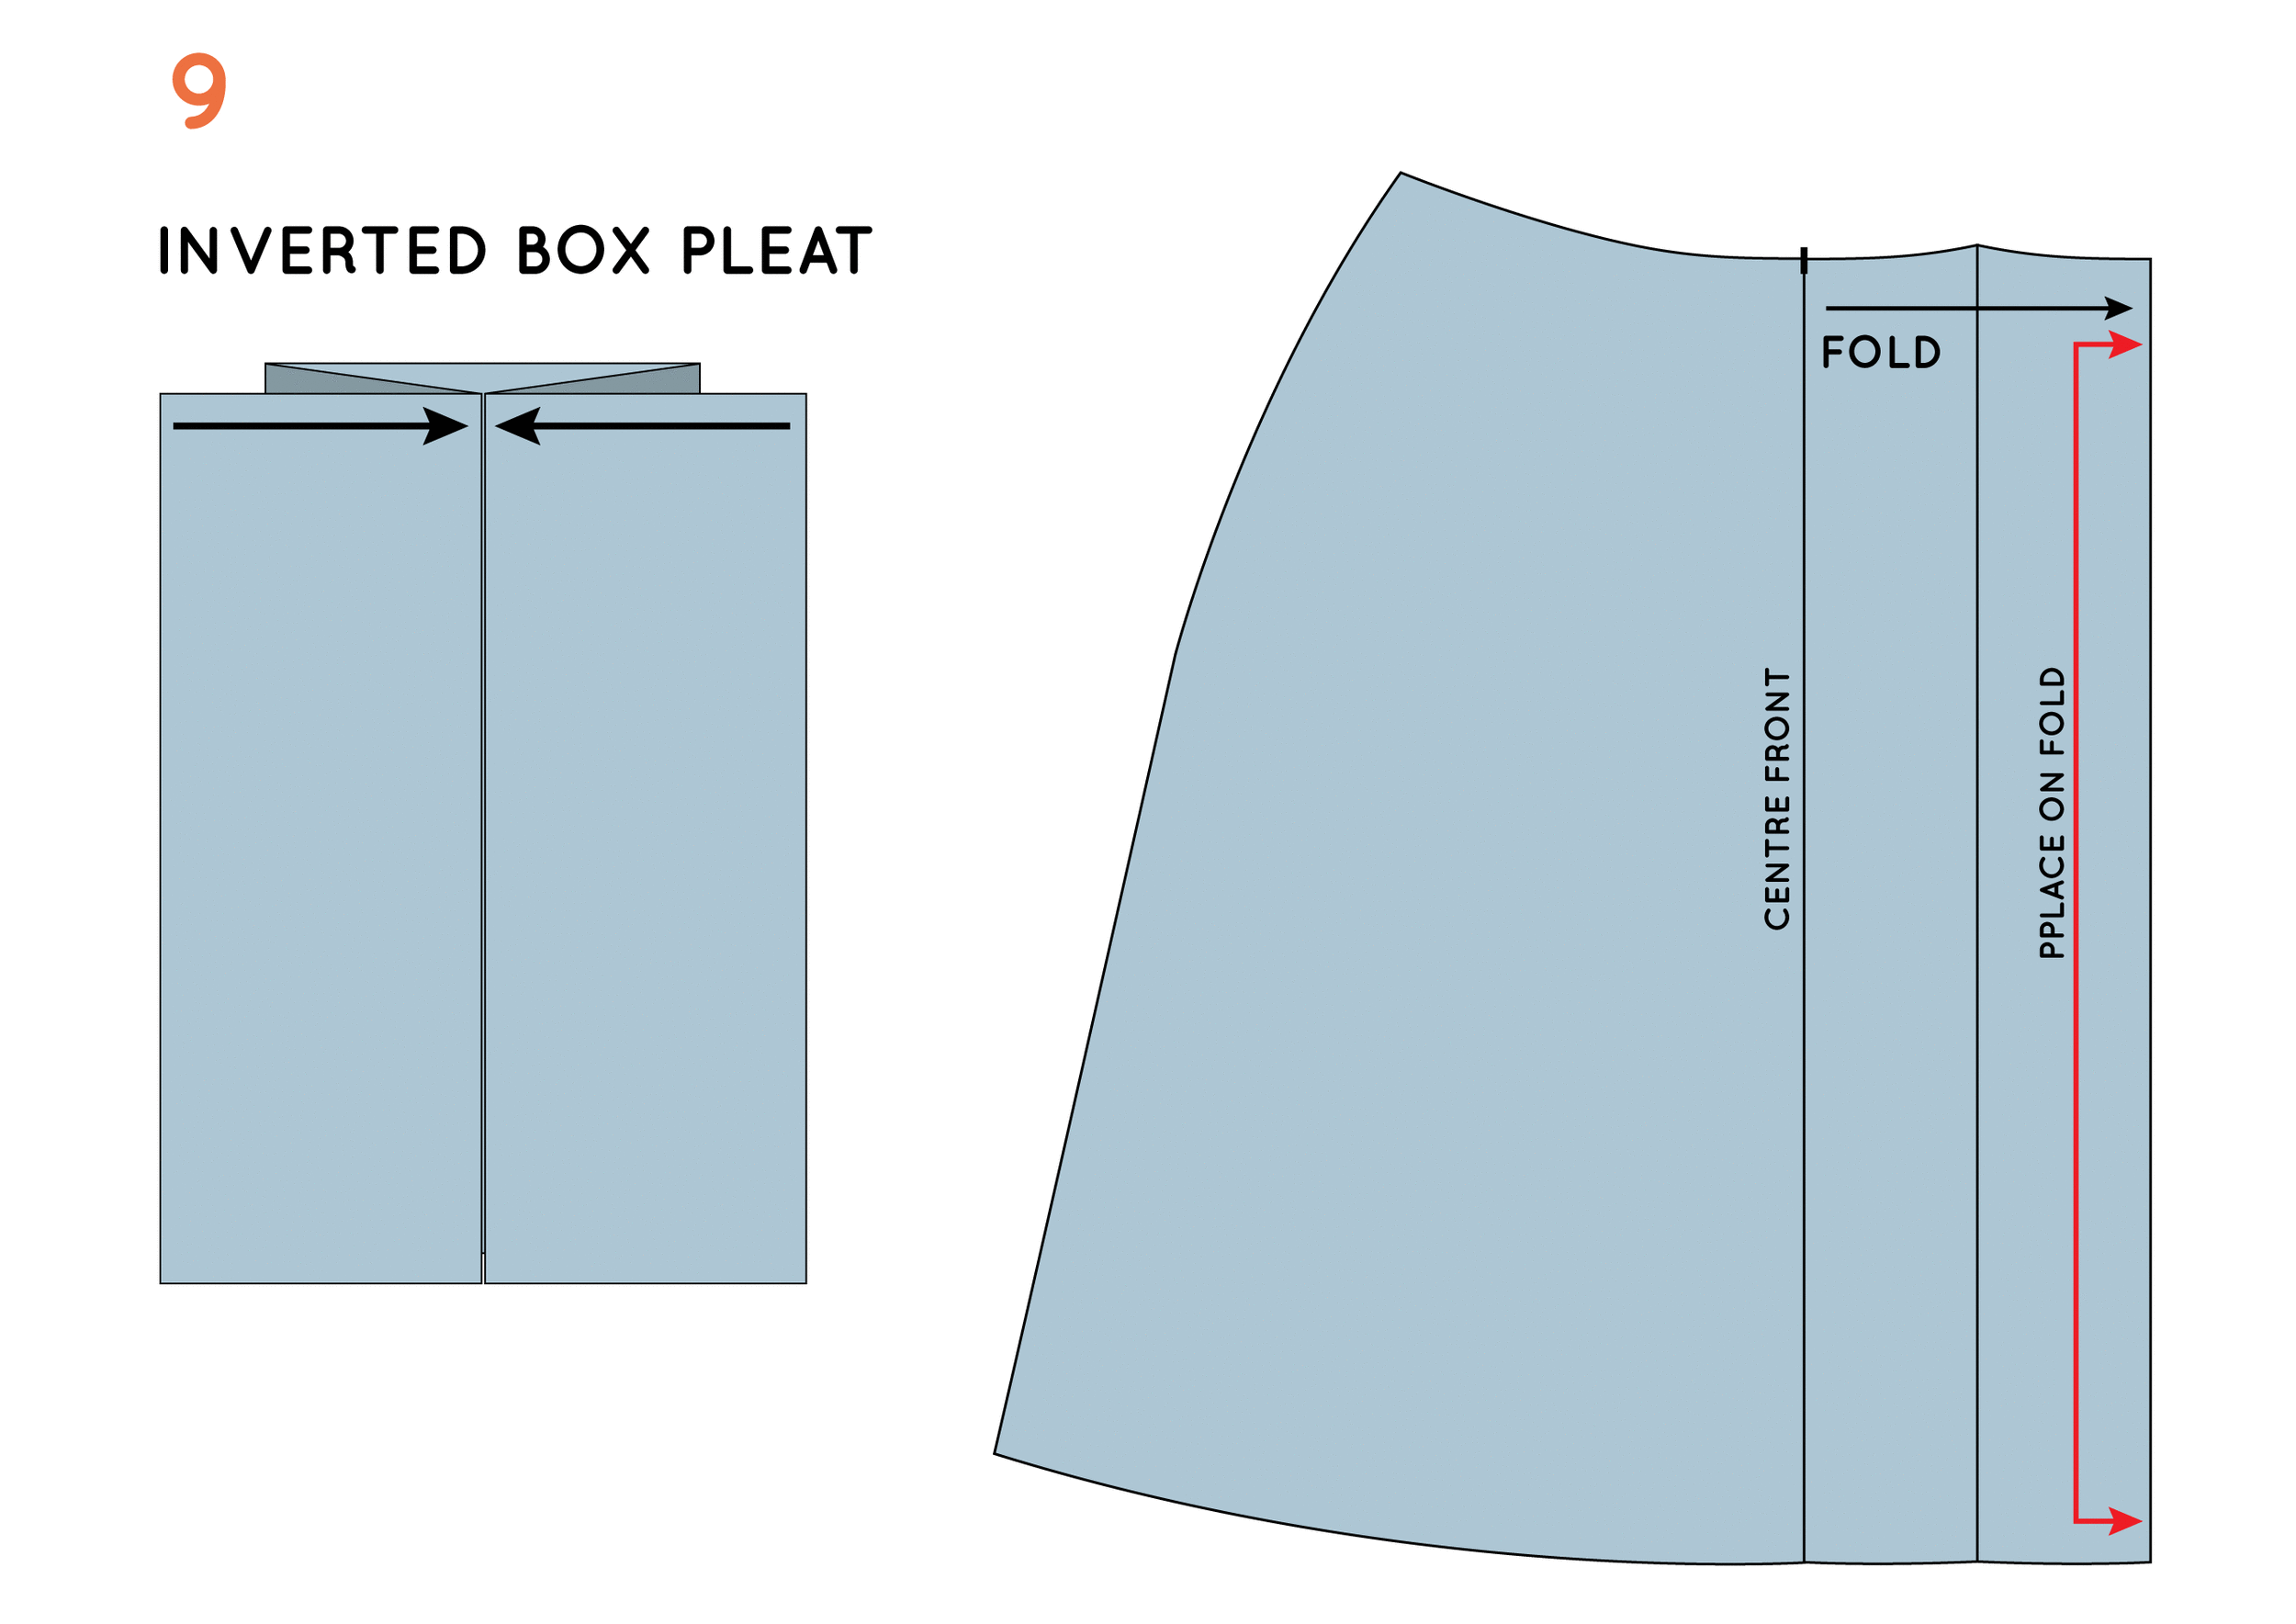
Just in case you missed the last post, here is a box pleat and an inverted box pleat. They are essentially the same, just the way the fabric is folded is opposite in each case, creating a different aesthetic (an inverted box pleat is a box pleat turned right side down).
Getting started
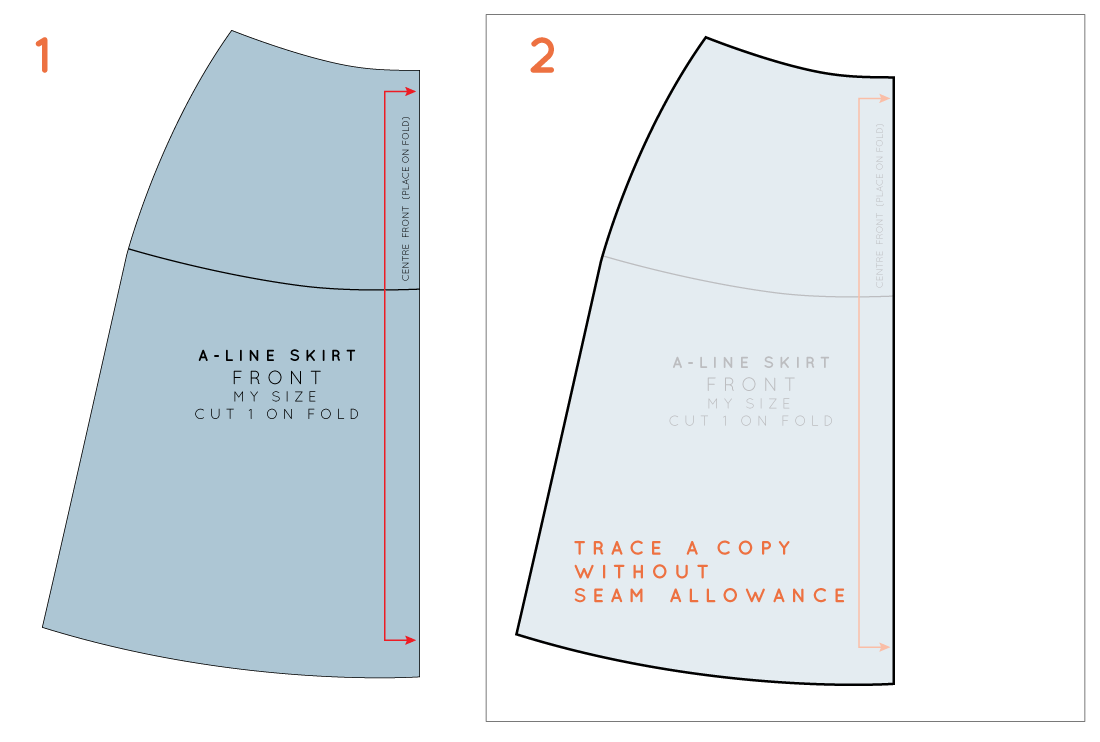
To start, take the pattern you plan to add a box pleat (or inverted box pleat) to. I decided to use the pattern I drafted during the process of the previous tutorial (an A-line skirt with centre front box pleat). Trace a copy of the pattern without seam allowance.
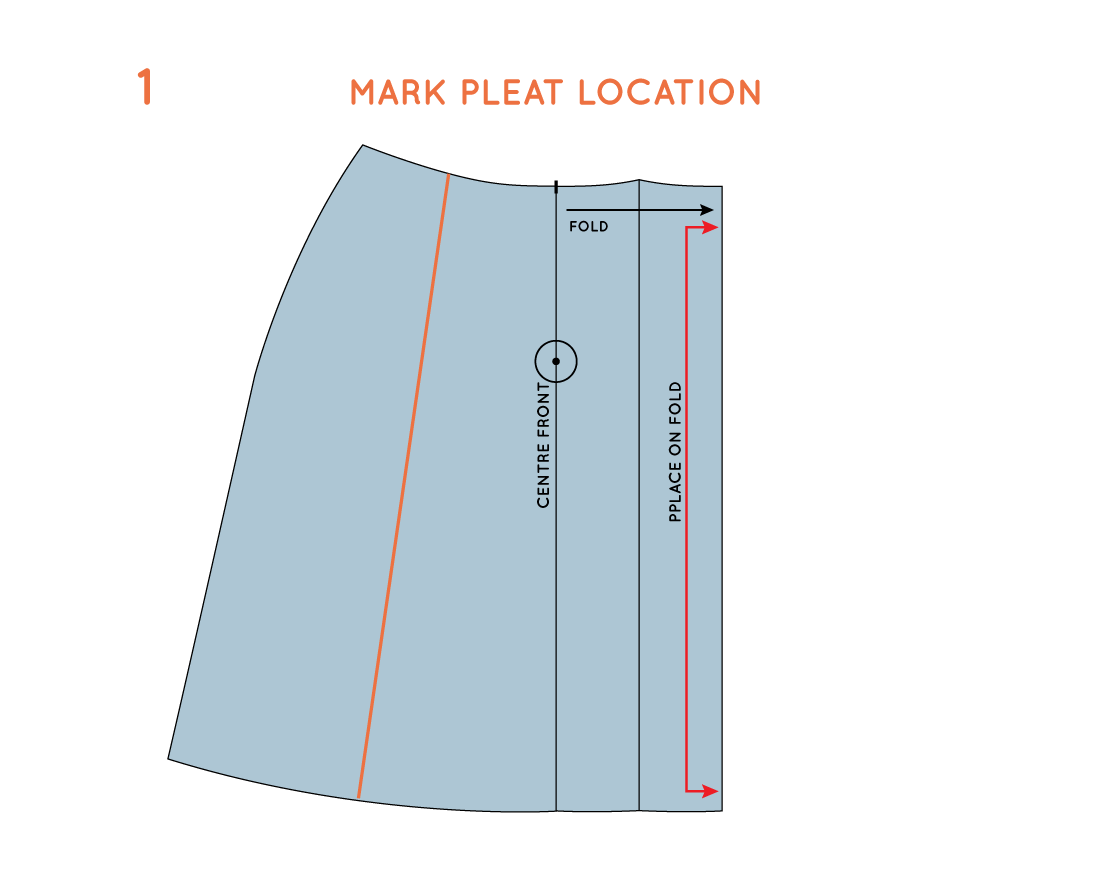
2. Consider where you would like to add a pleat. Make sure it is not too close to the side seam, otherwise there will not be room for the volume of the pleat when it is folded in place. In this case, I am only adding one additional pleat, but you may want to add more. Draw a line through the pattern, where you plan to place your pleat (or pleats).
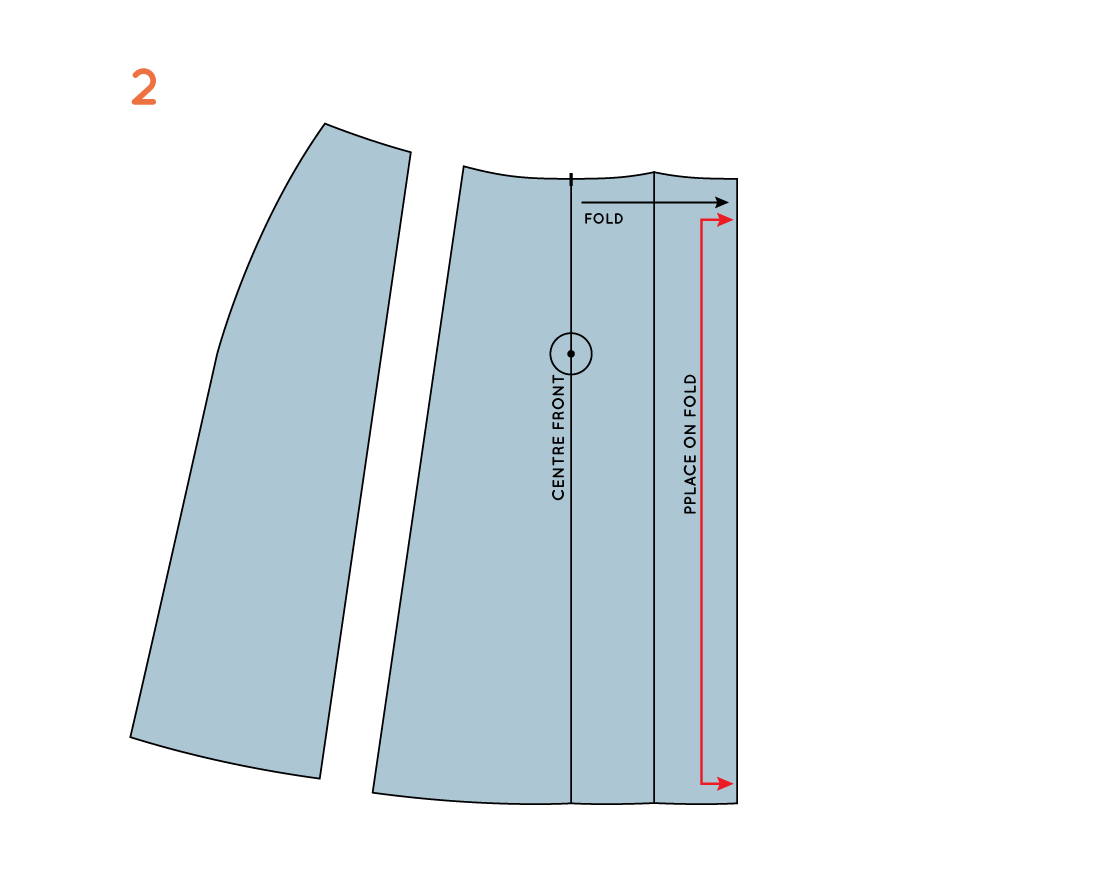
2. Cut along the line - separating the pattern into two pieces (or more, if you plan to have multiple pleats). Label the pattern pieces if it is likely that you could get them mixed up.
Pleat width

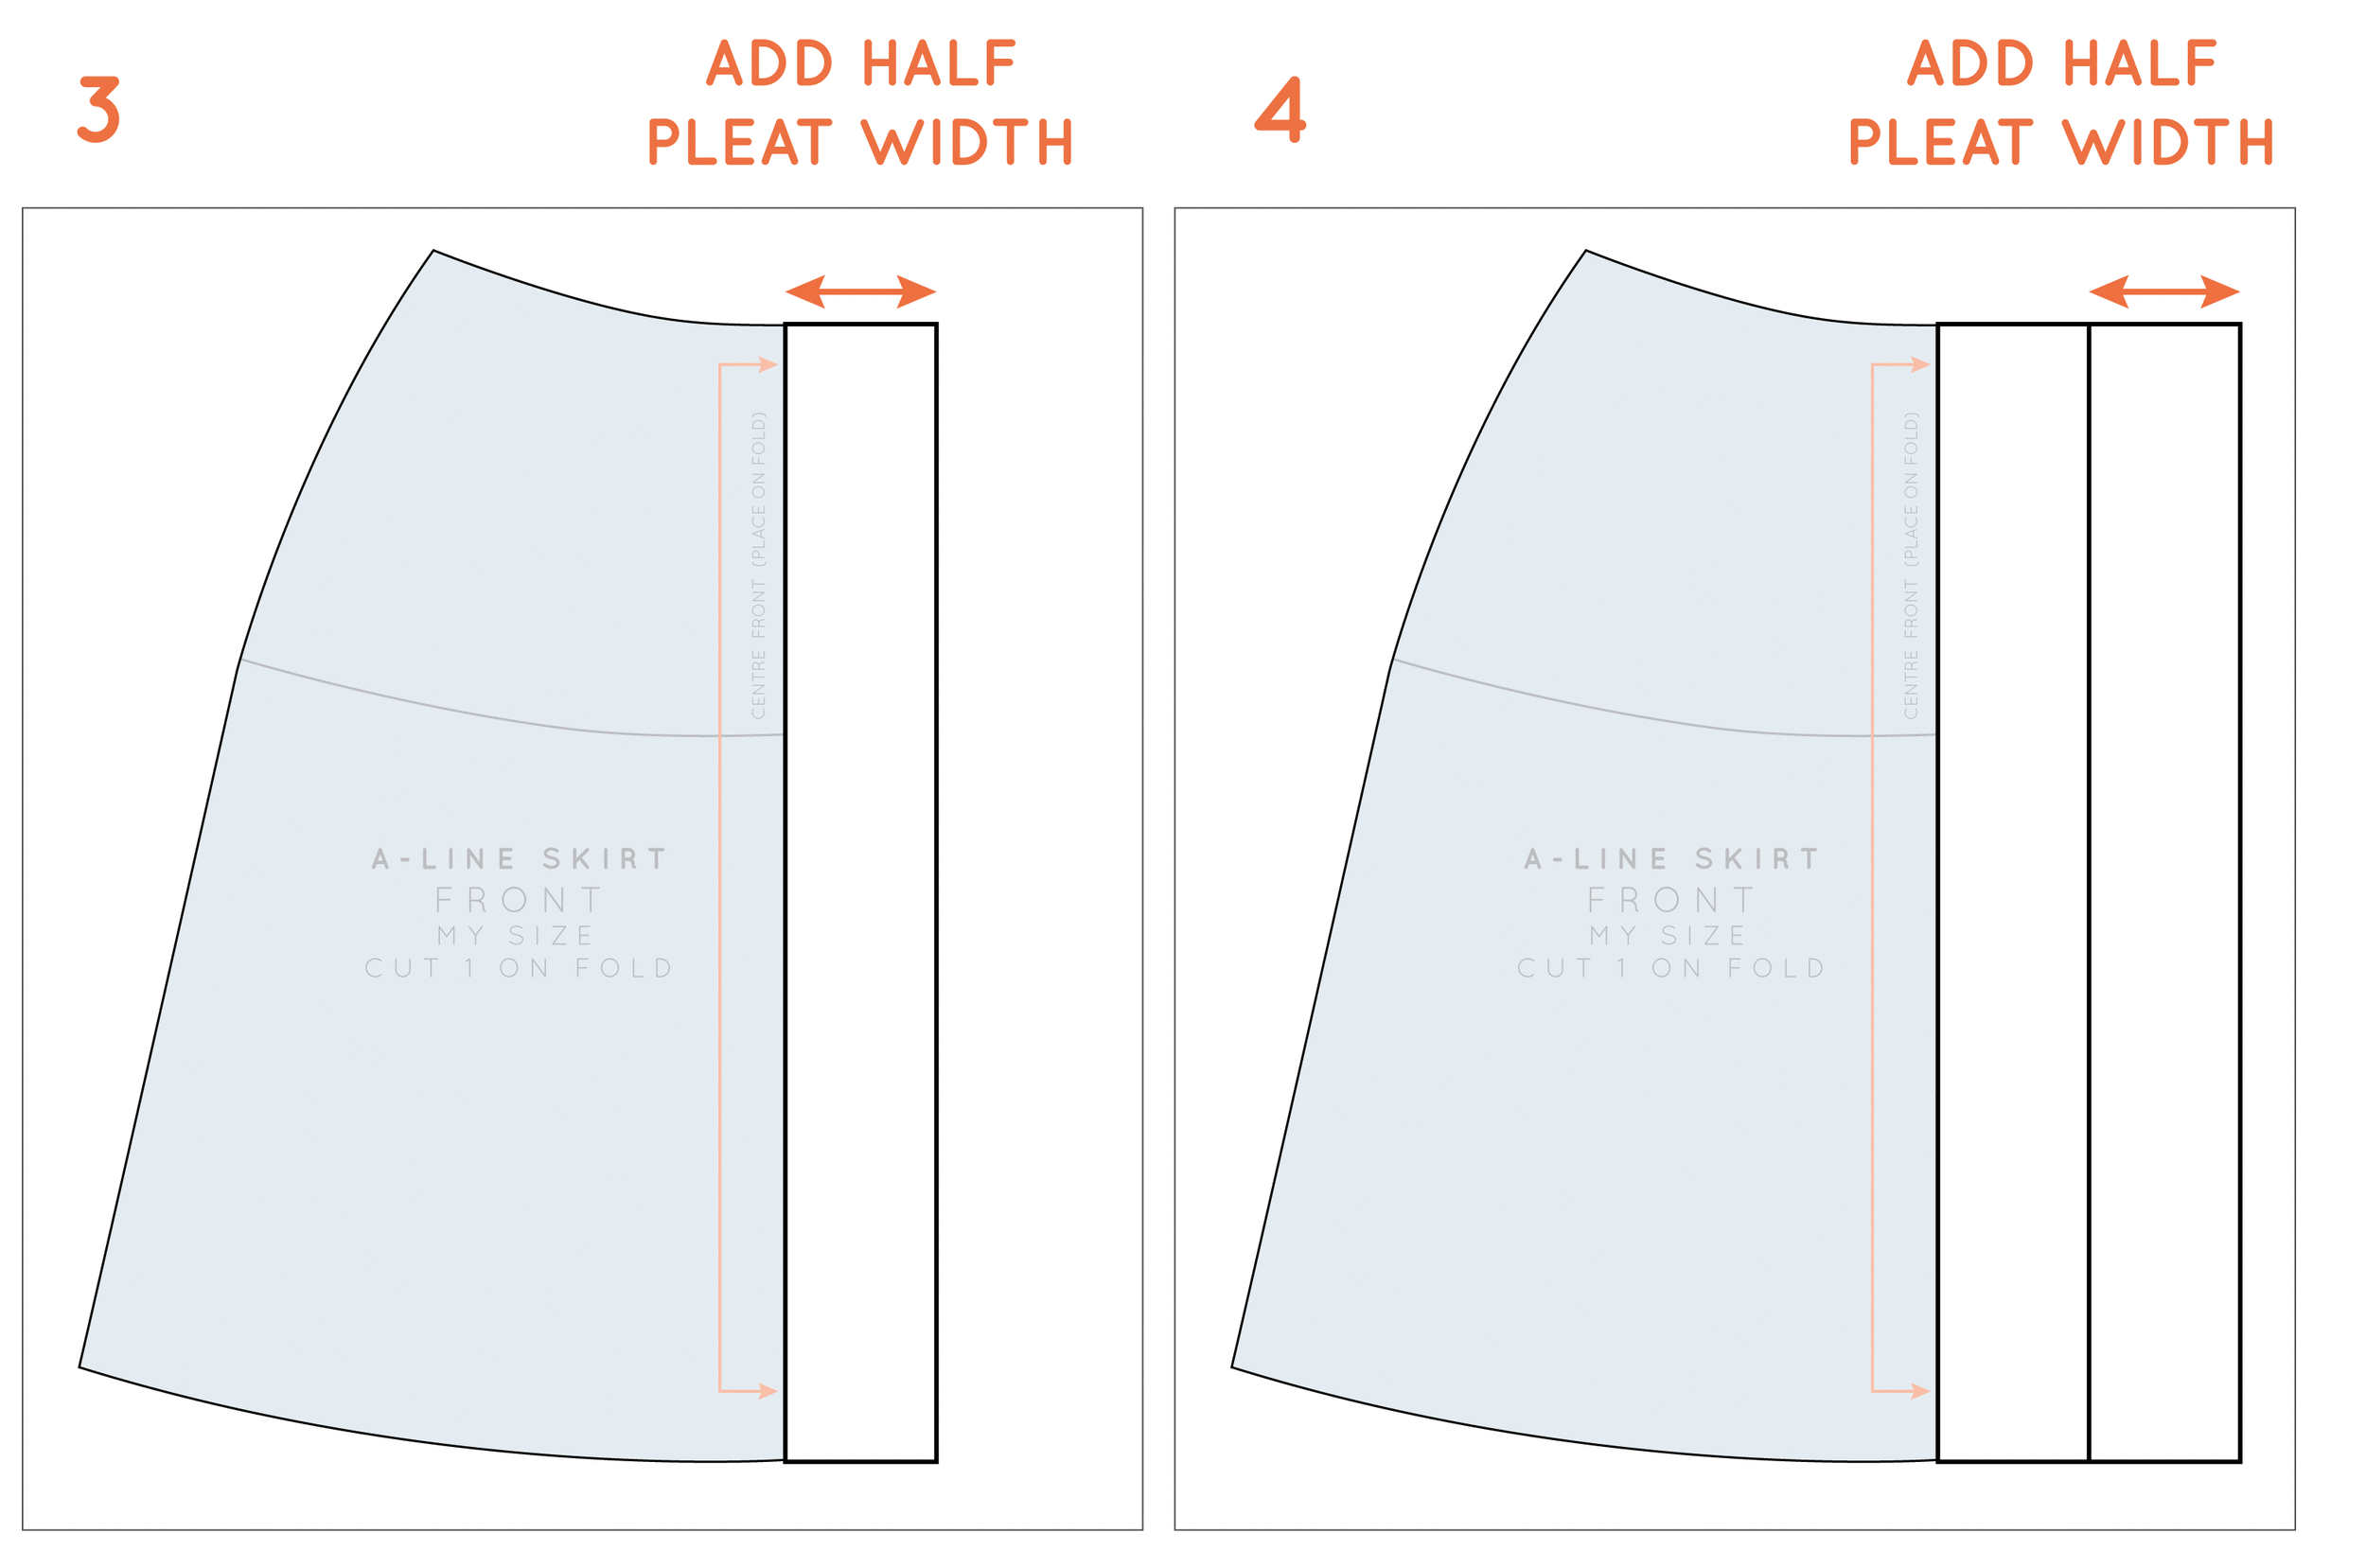
Now, you will need to have a think about the size of your pleat. This is totally up to you. If you are struggling to work out the width of your pleat, have a play around with some fabric (or even a piece of paper), folding different sized pleats to get an idea of how it will look. Make sure you check that there is room for a pleat this width, in relation to the centre front / back and side seams.
Create the pleat
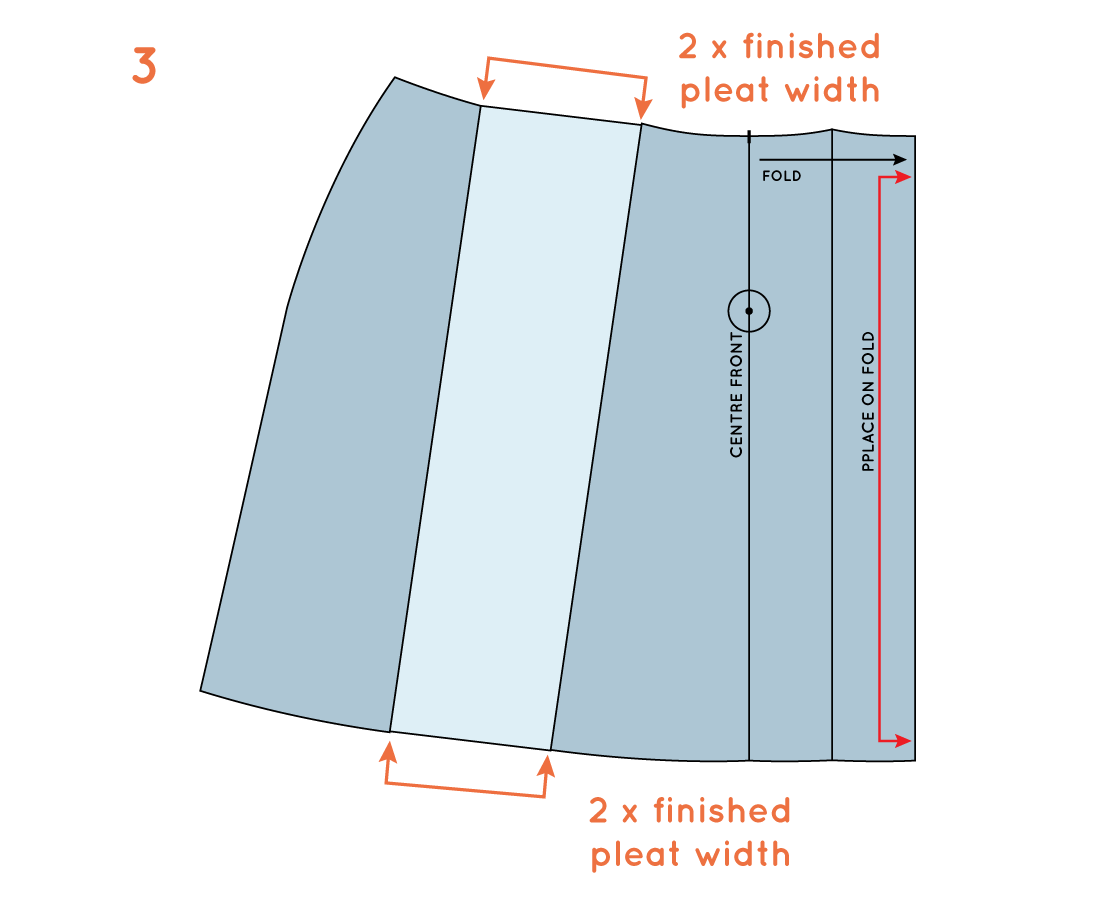
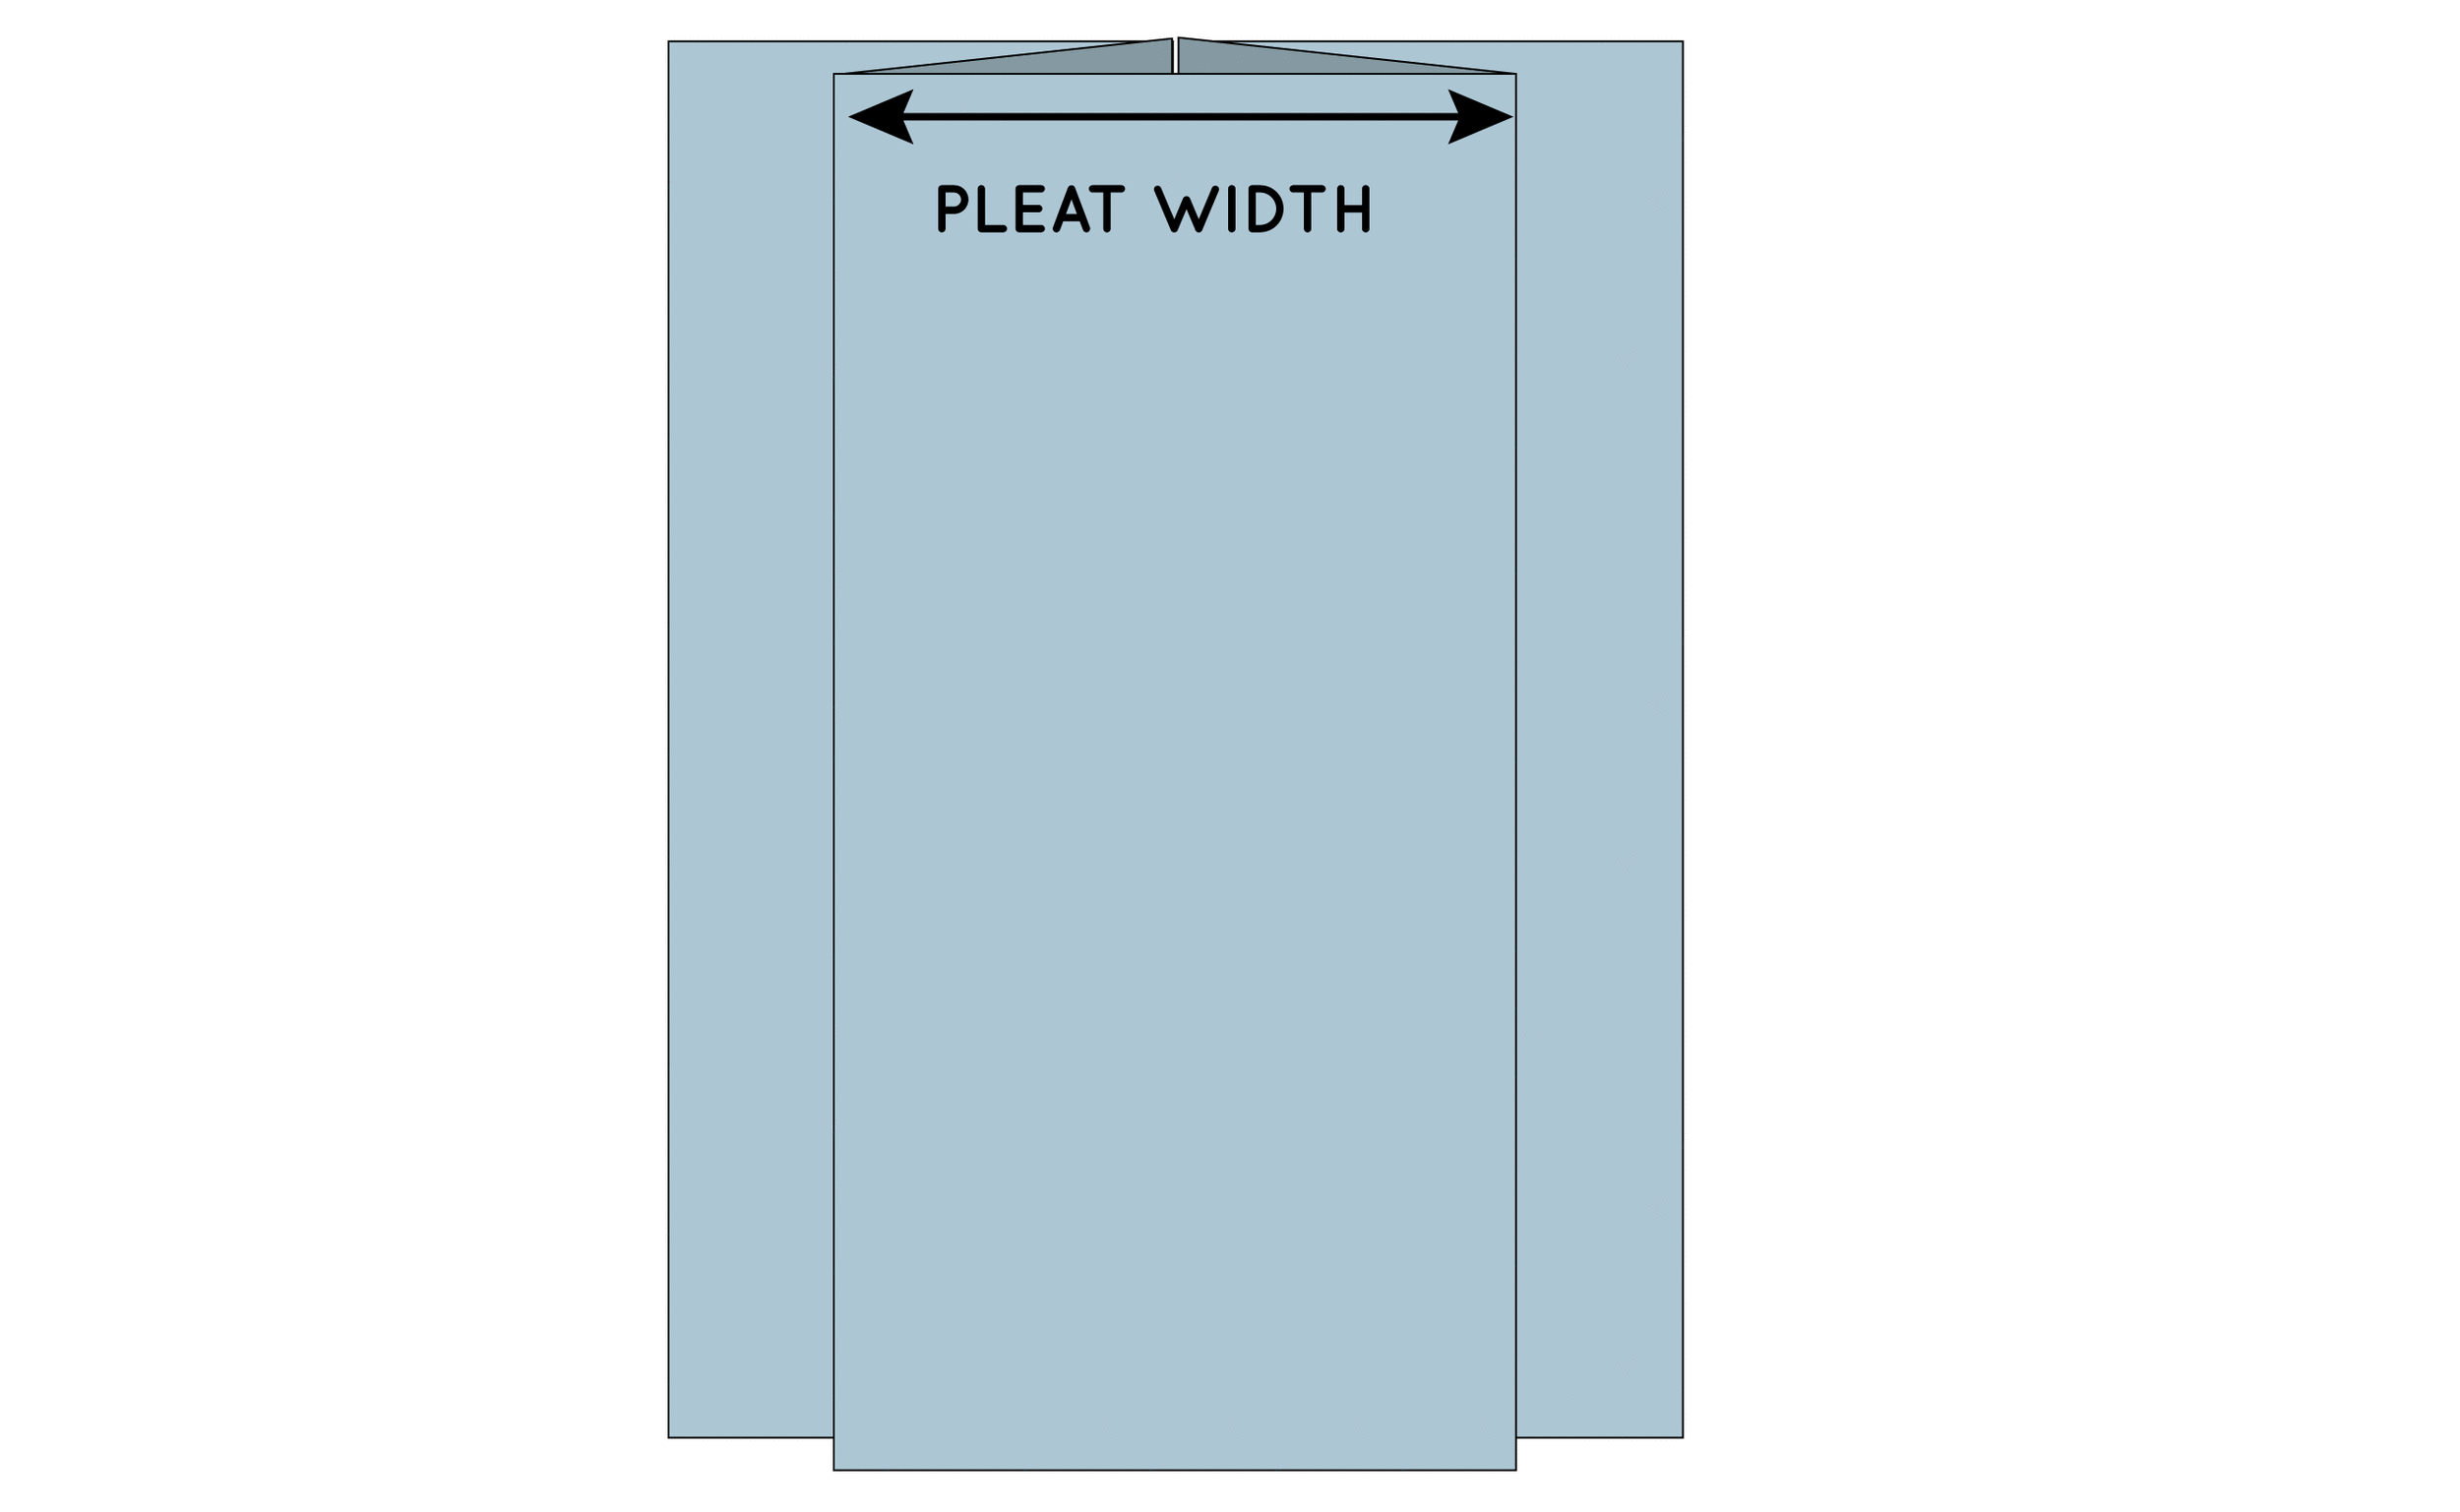
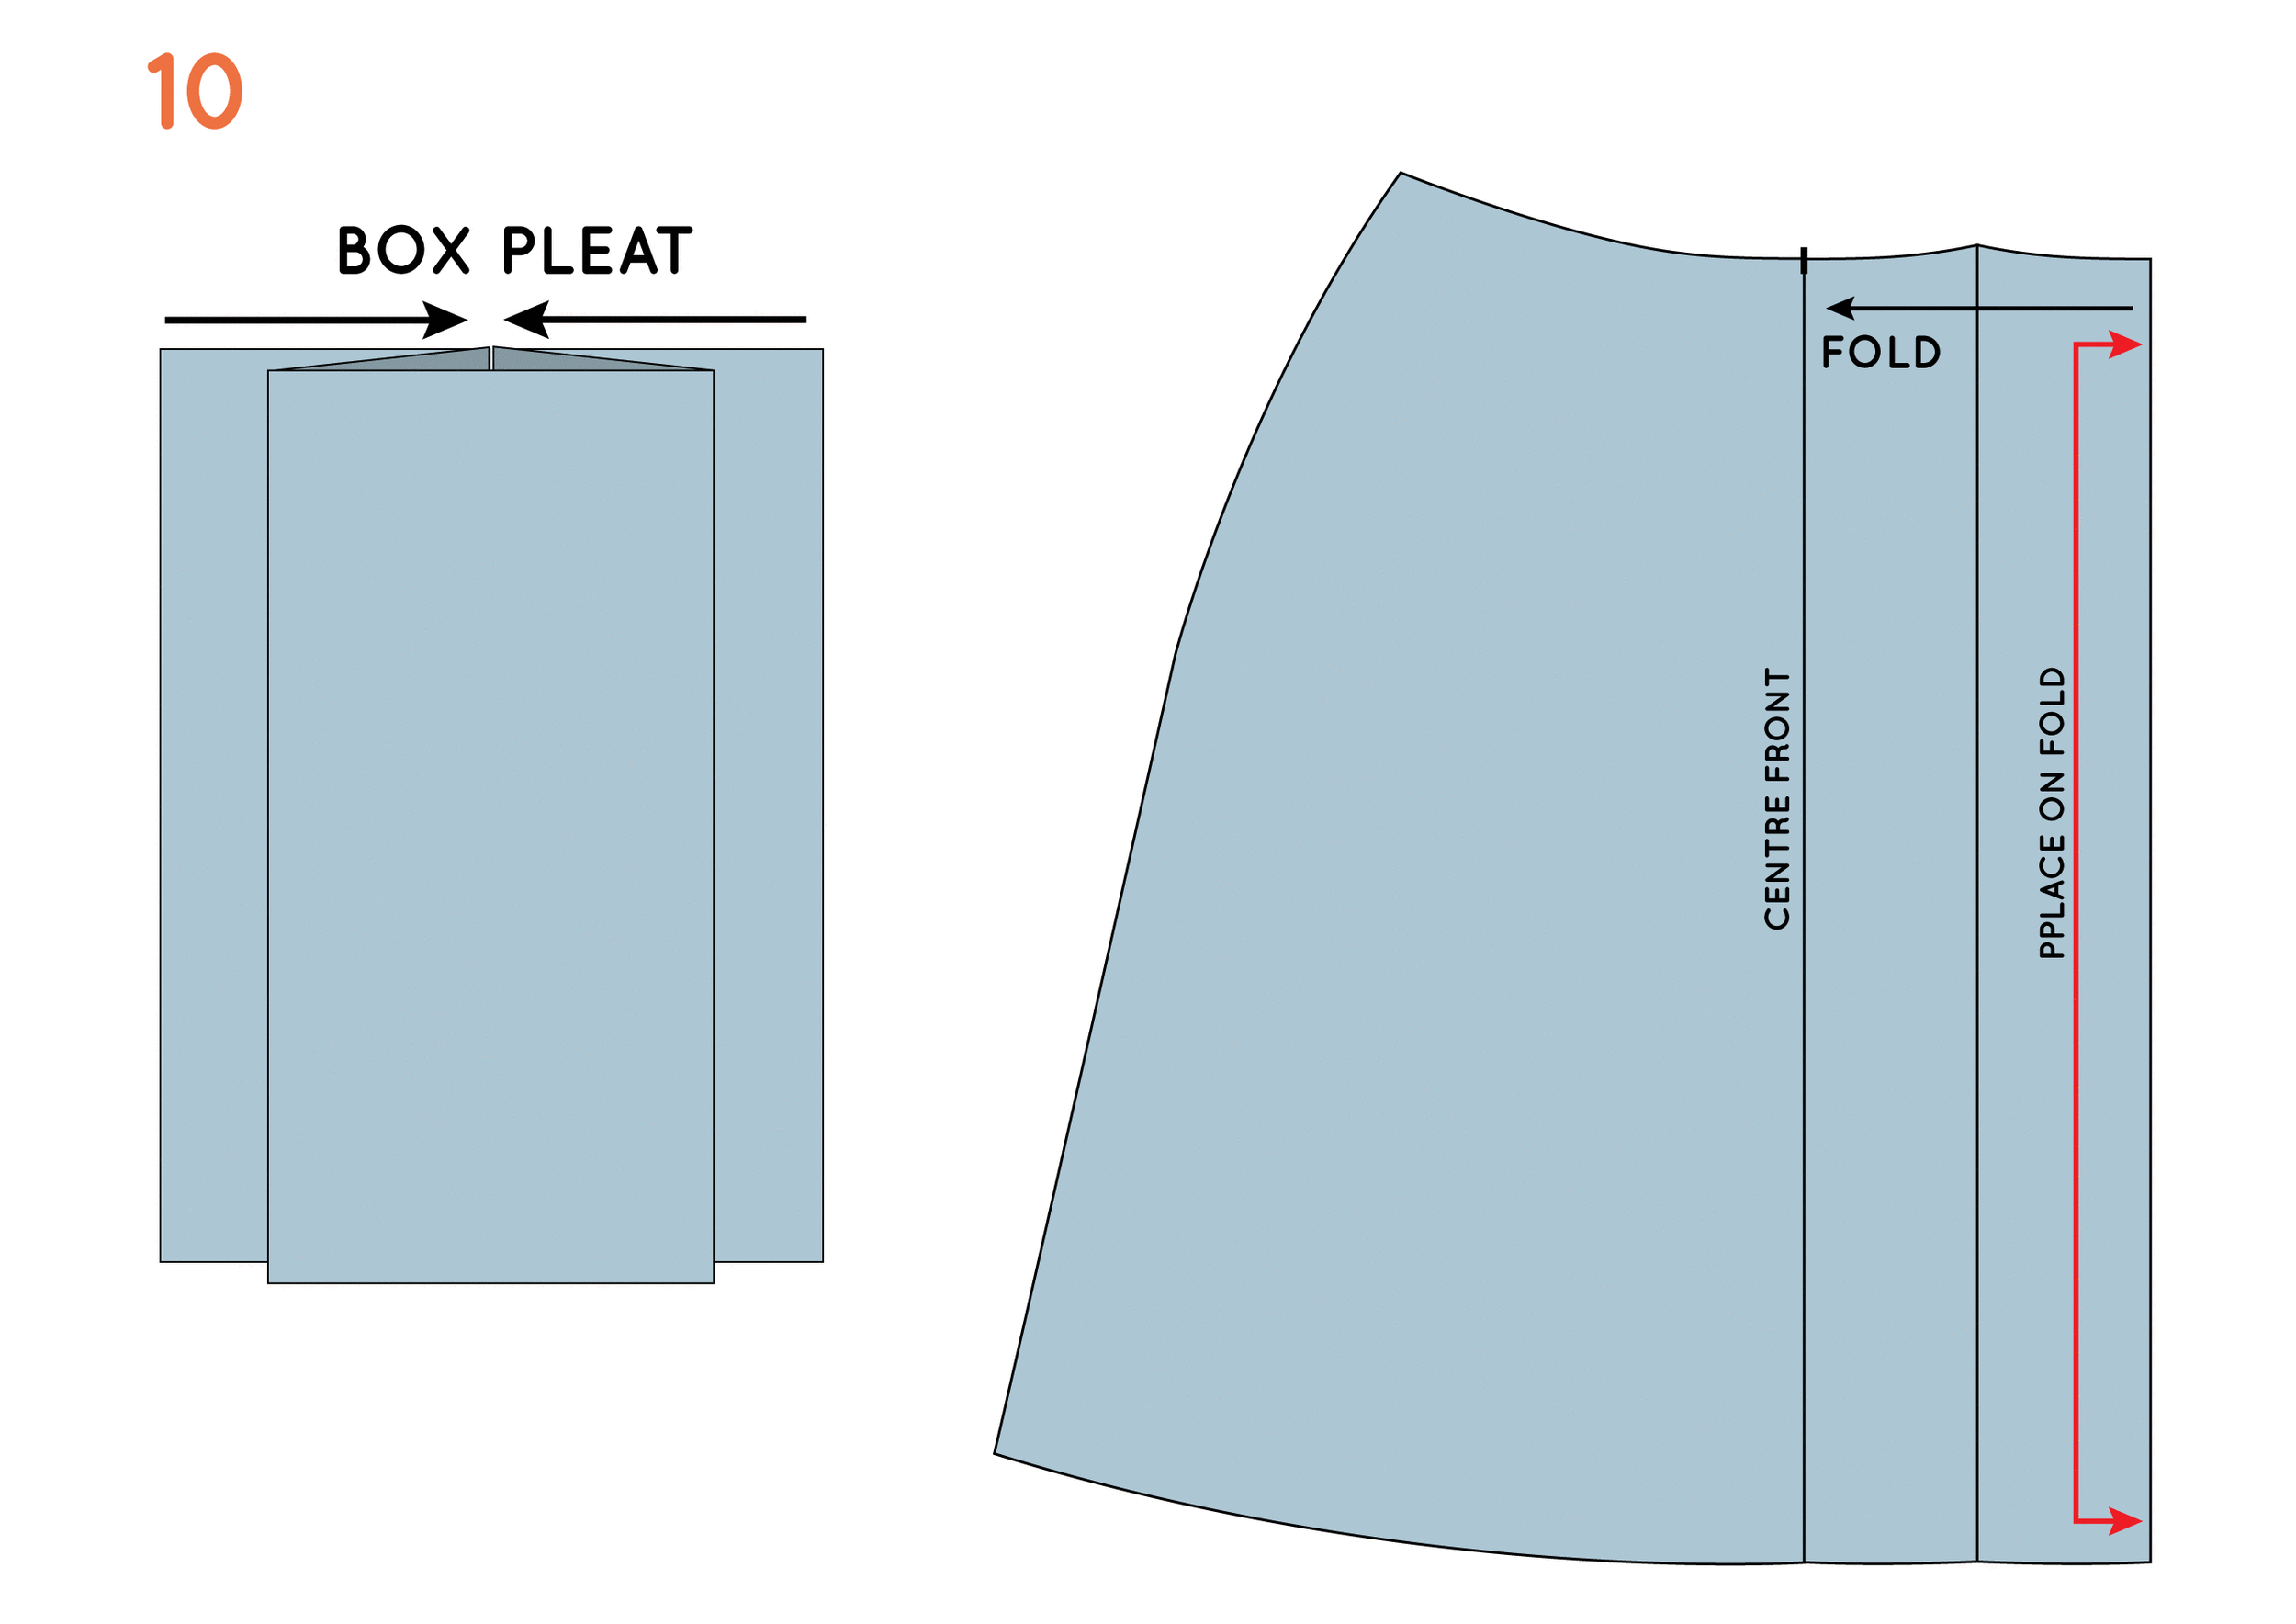
3. When you have decided on the finished width of your pleat, spread the two parts of the pattern piece apart, until the opening is double the width of the finished pleat. For example, if my finished pleat will be 5cm, I need to create a 10cm opening between the two parts of the pattern. Fill the gap with a piece of pattern paper and tape or glue in place.

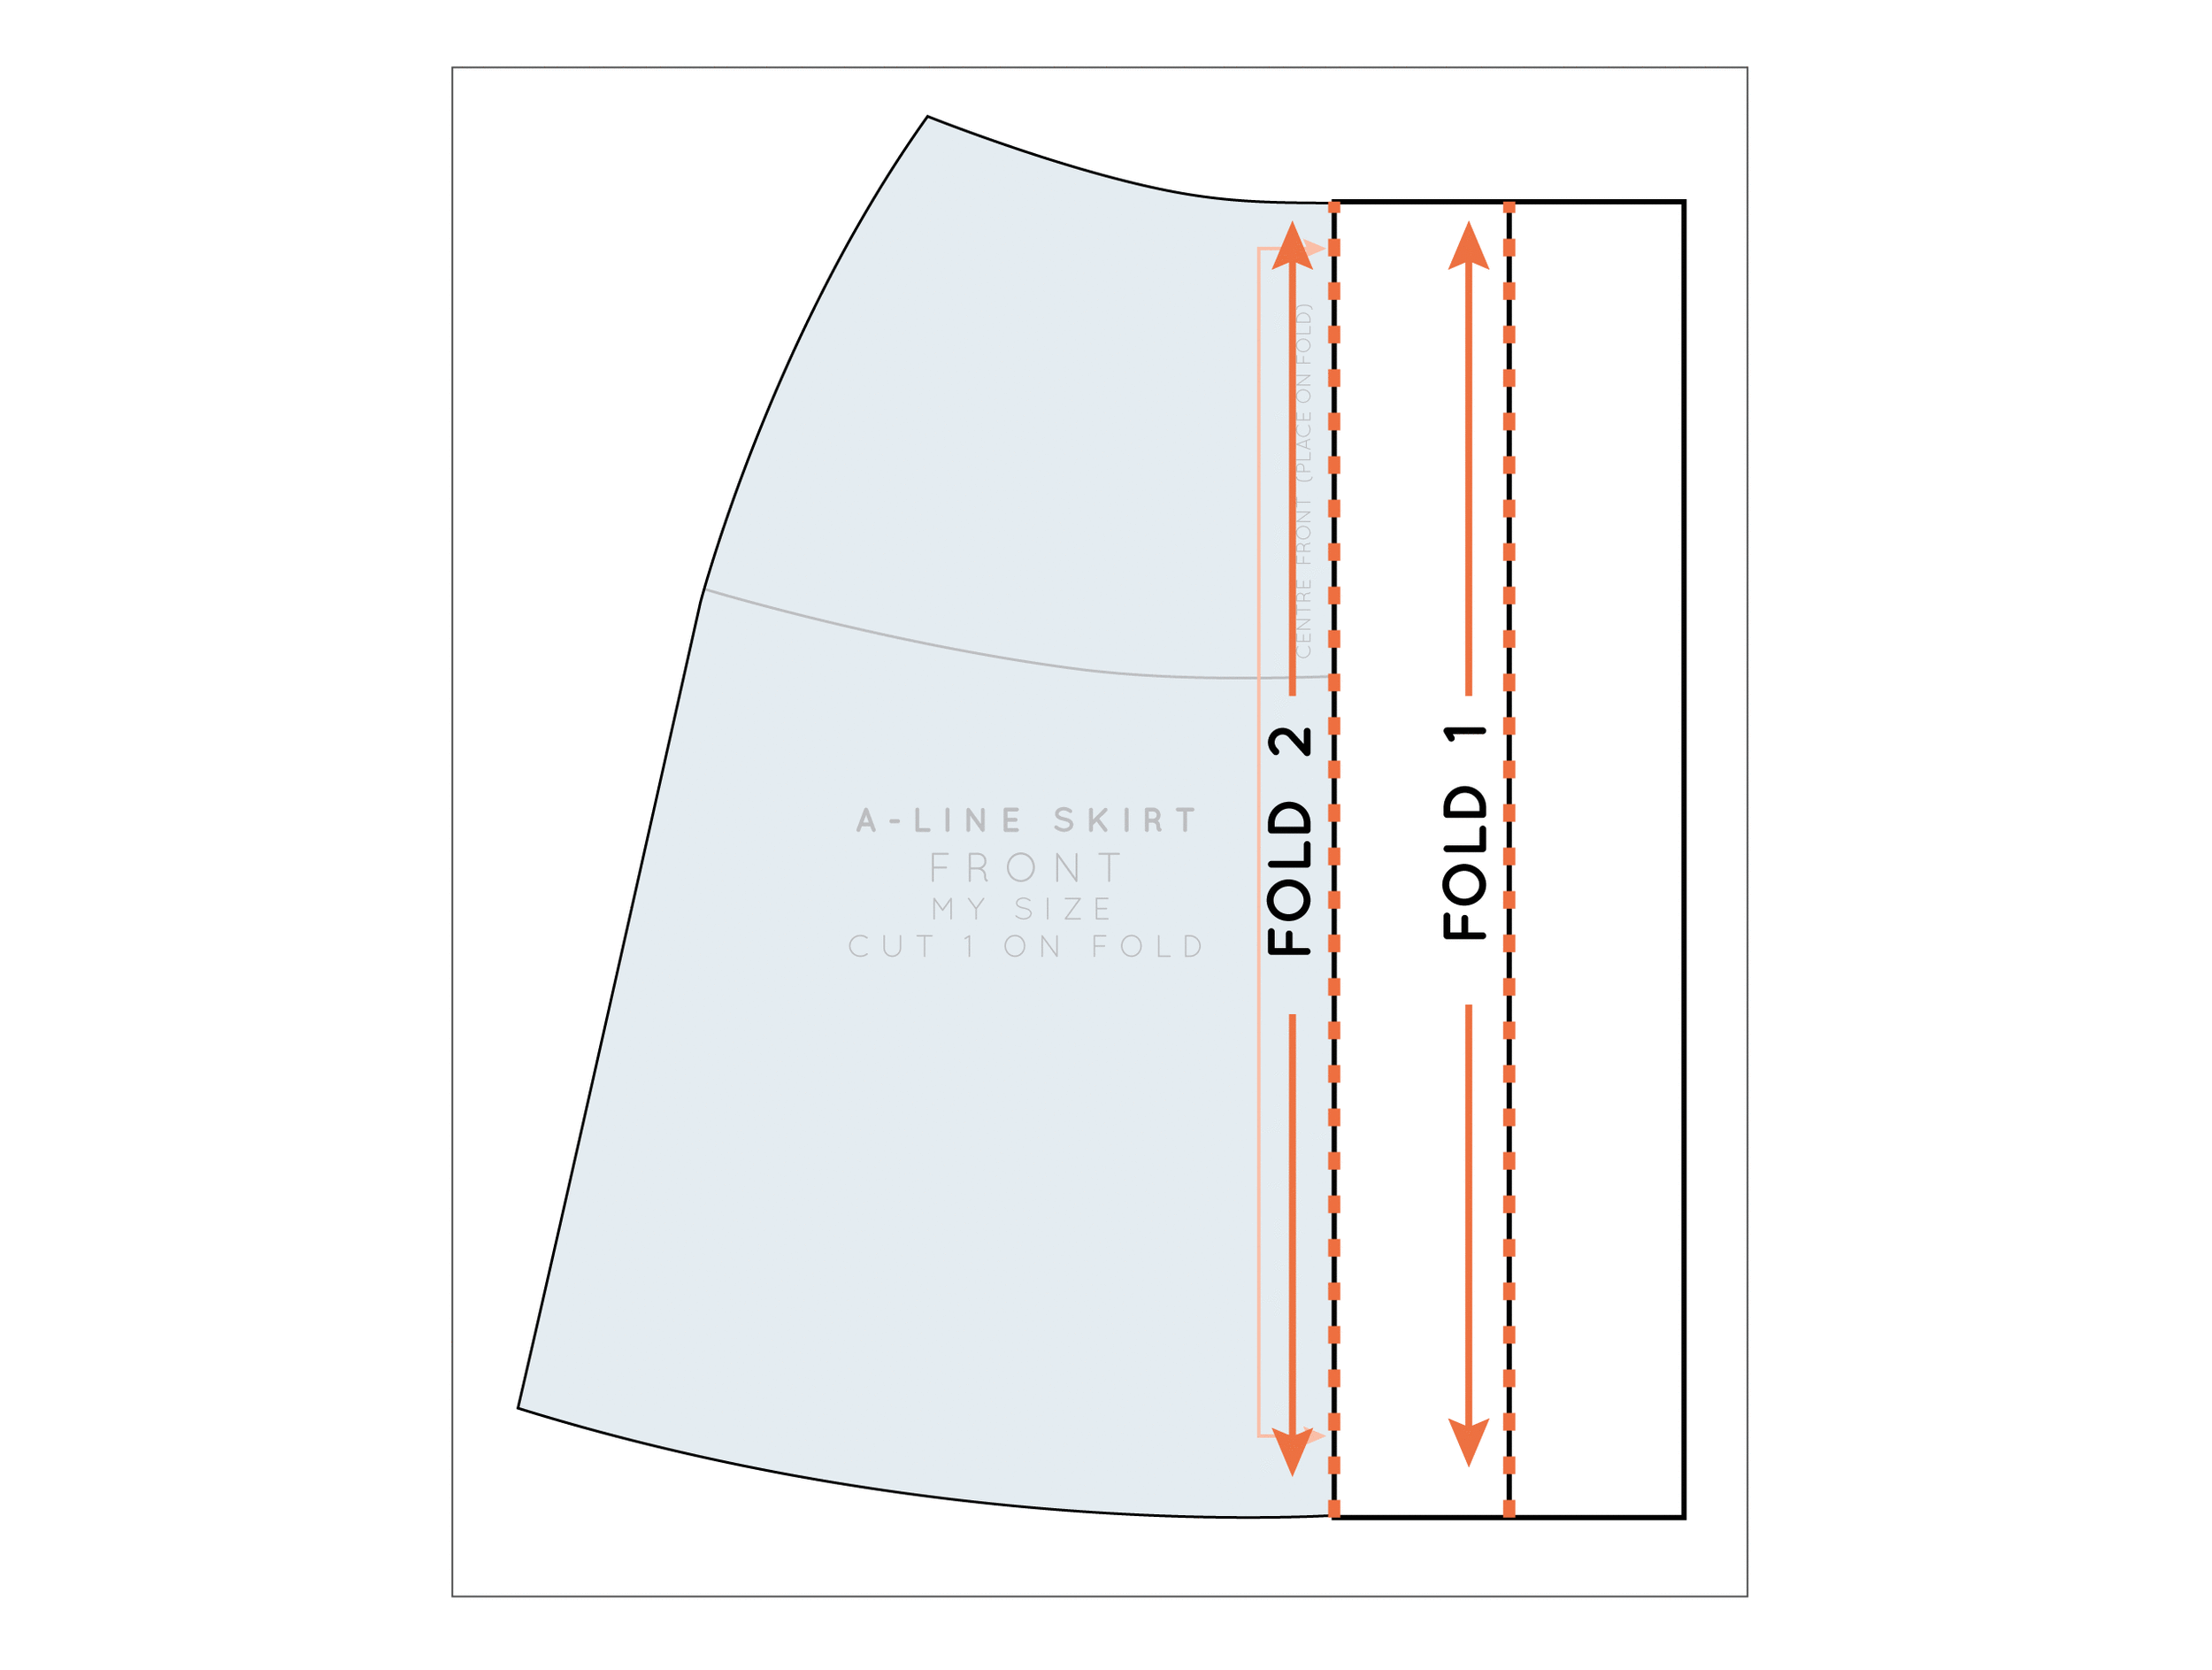
4. Mark a line that runs through the centre of the opening. This will become the centre of the pleat.
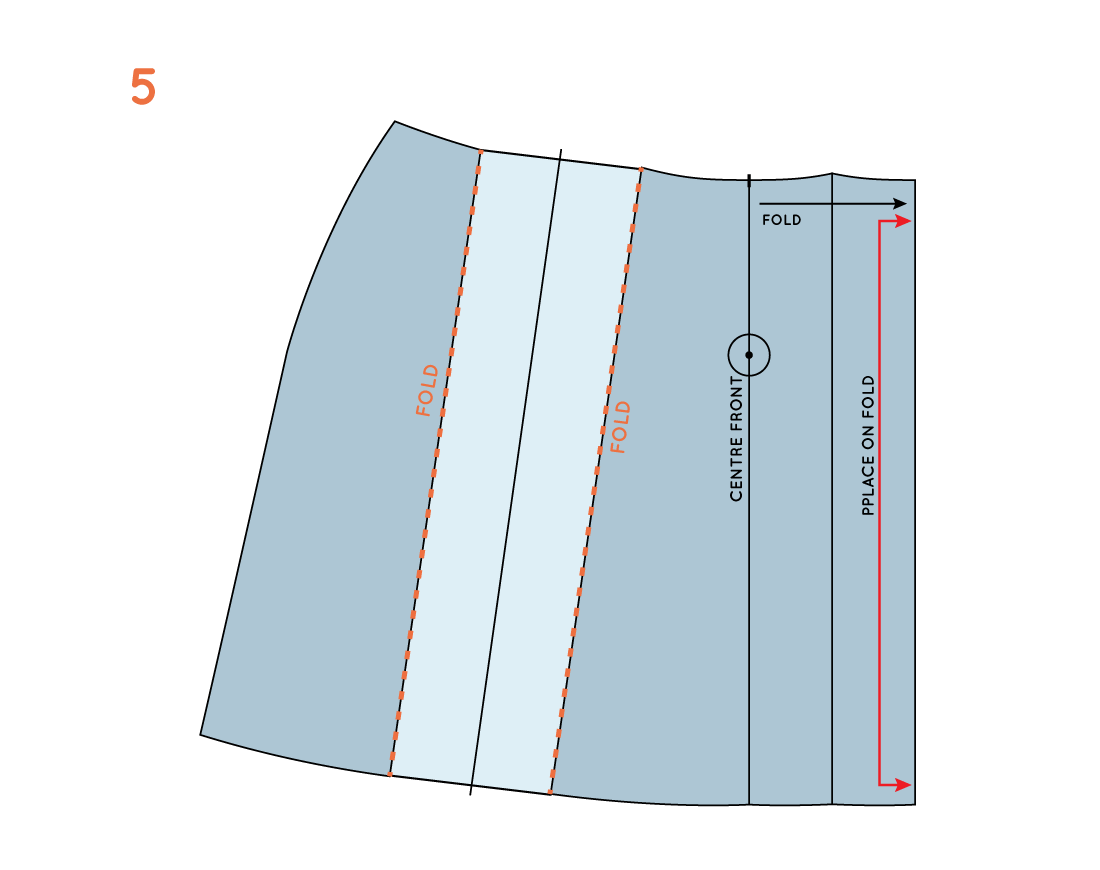
5. Fold along both edges of the opening (bring the line towards you when folding).
6. Fold in each section of the skirt pattern, lining up each fold line with the centre line of the pleat.
Transfer waistline + hem shaping

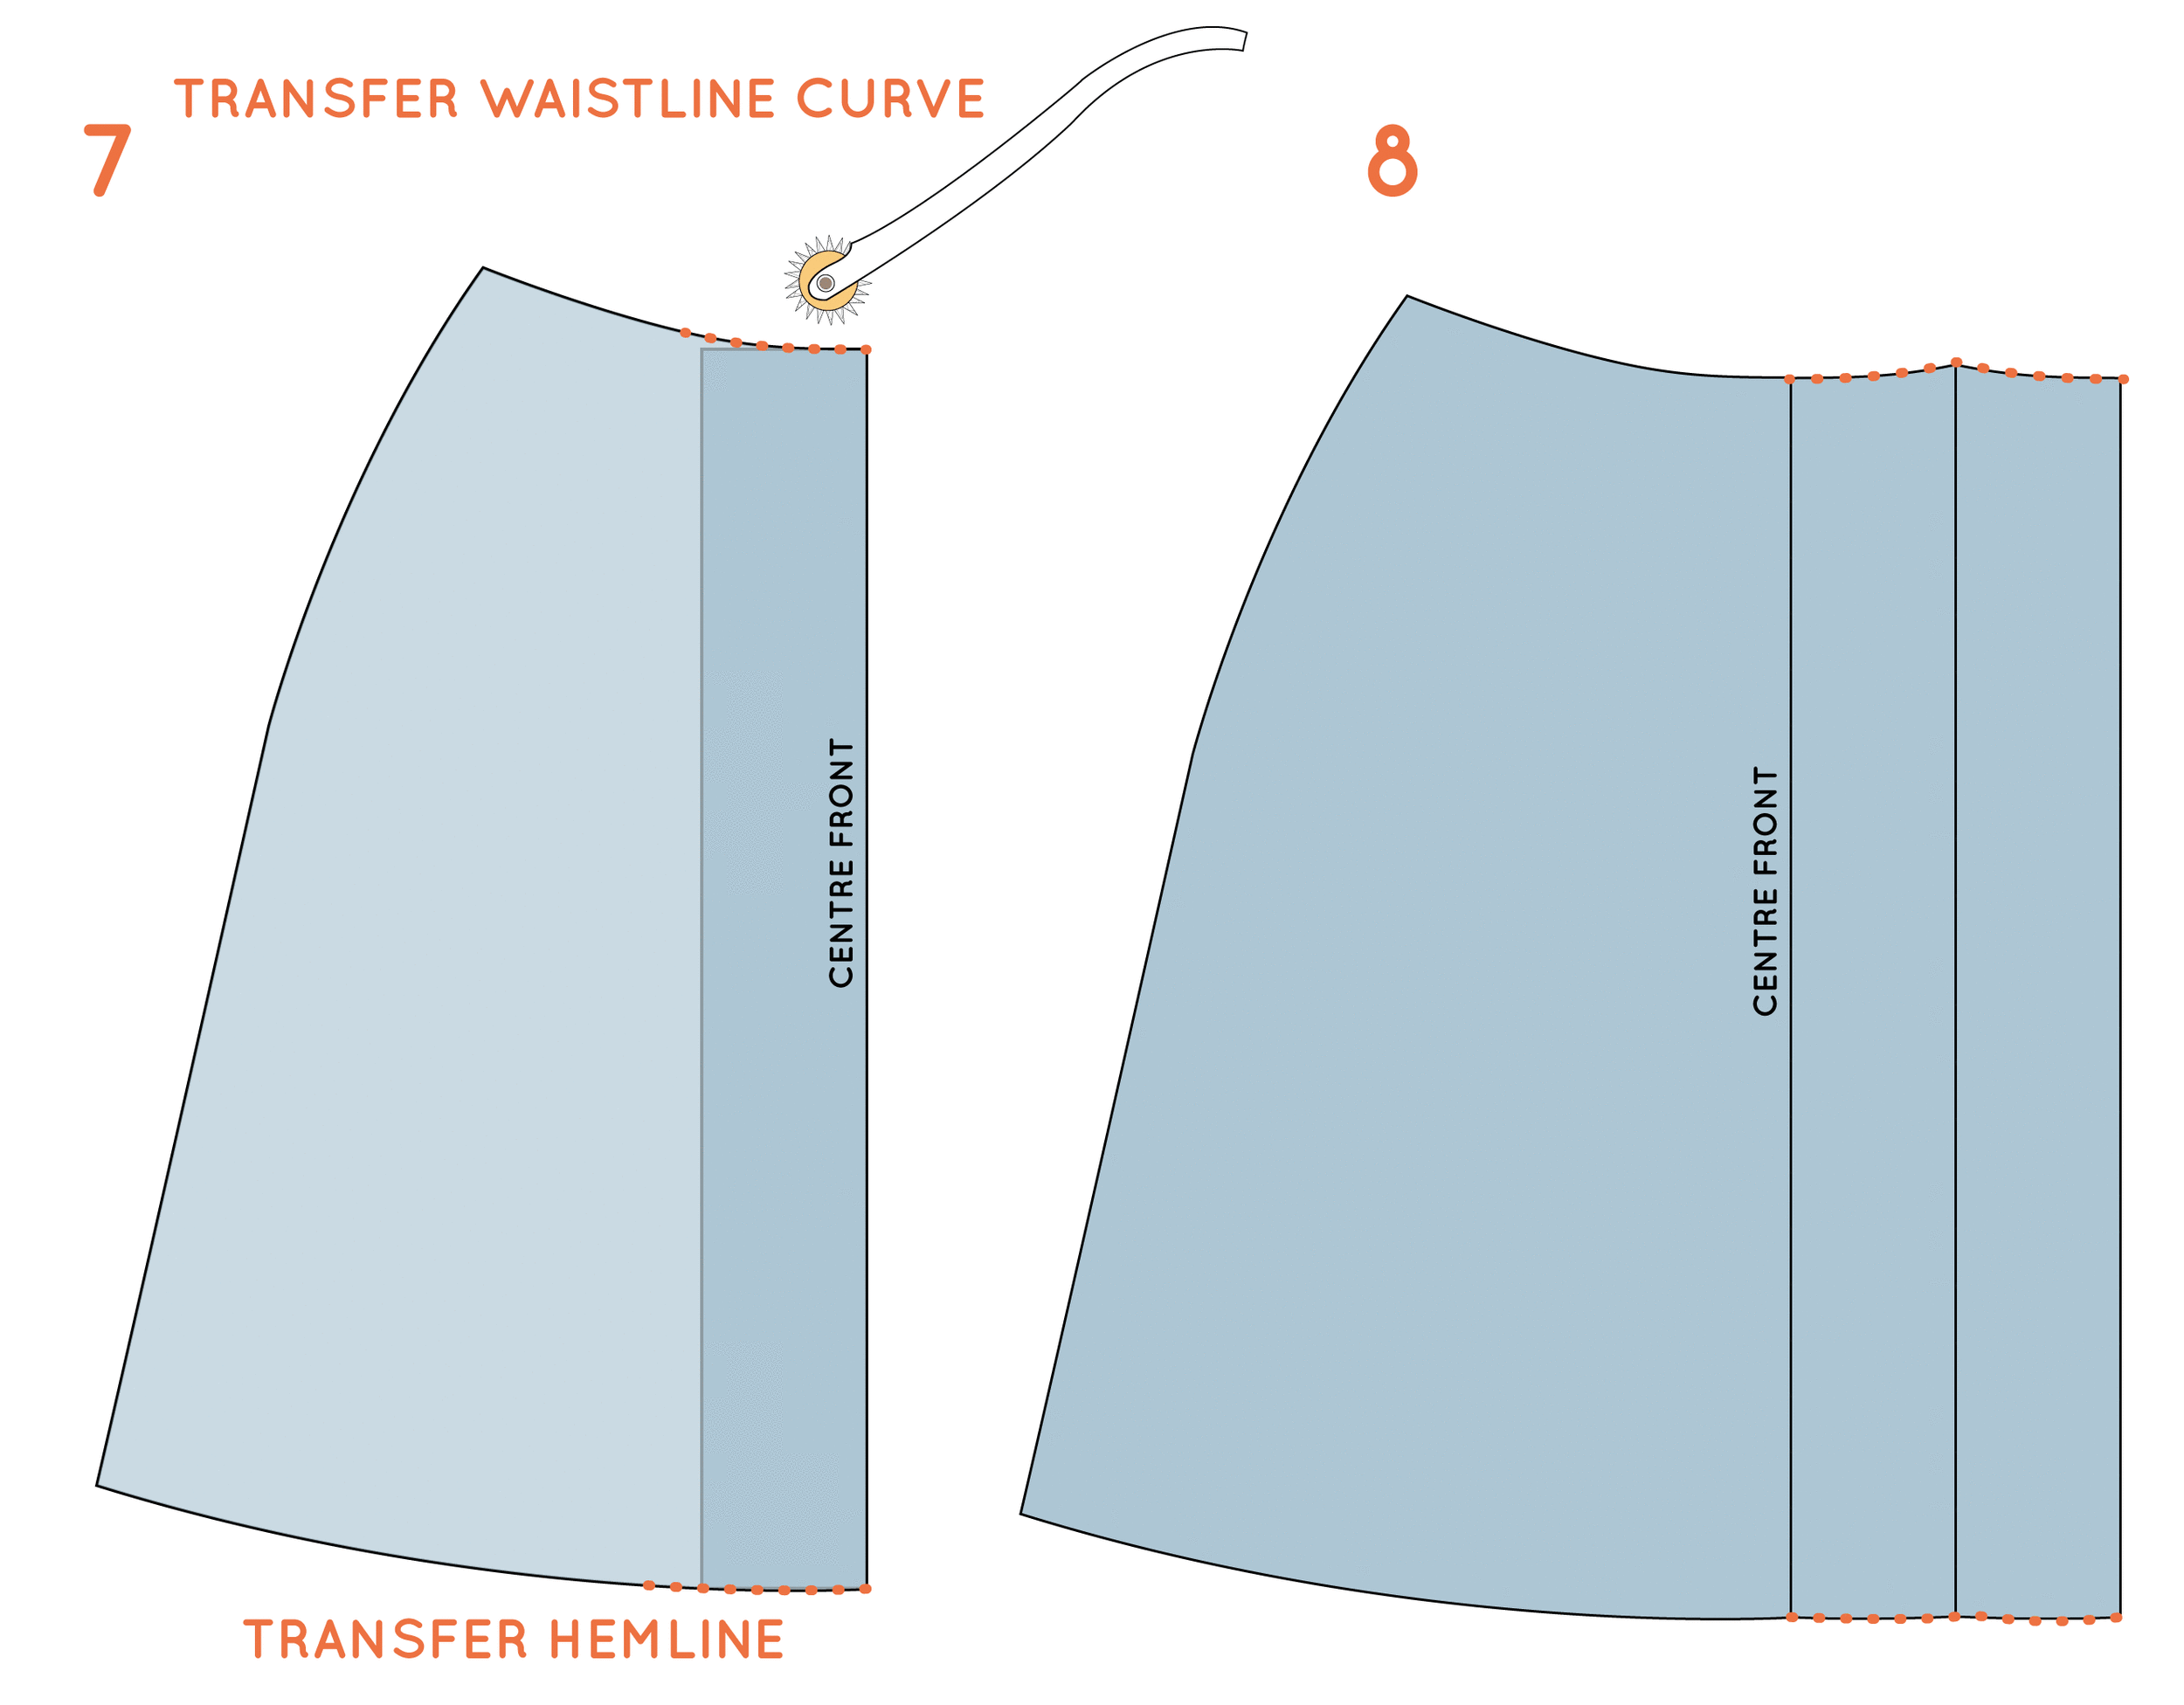
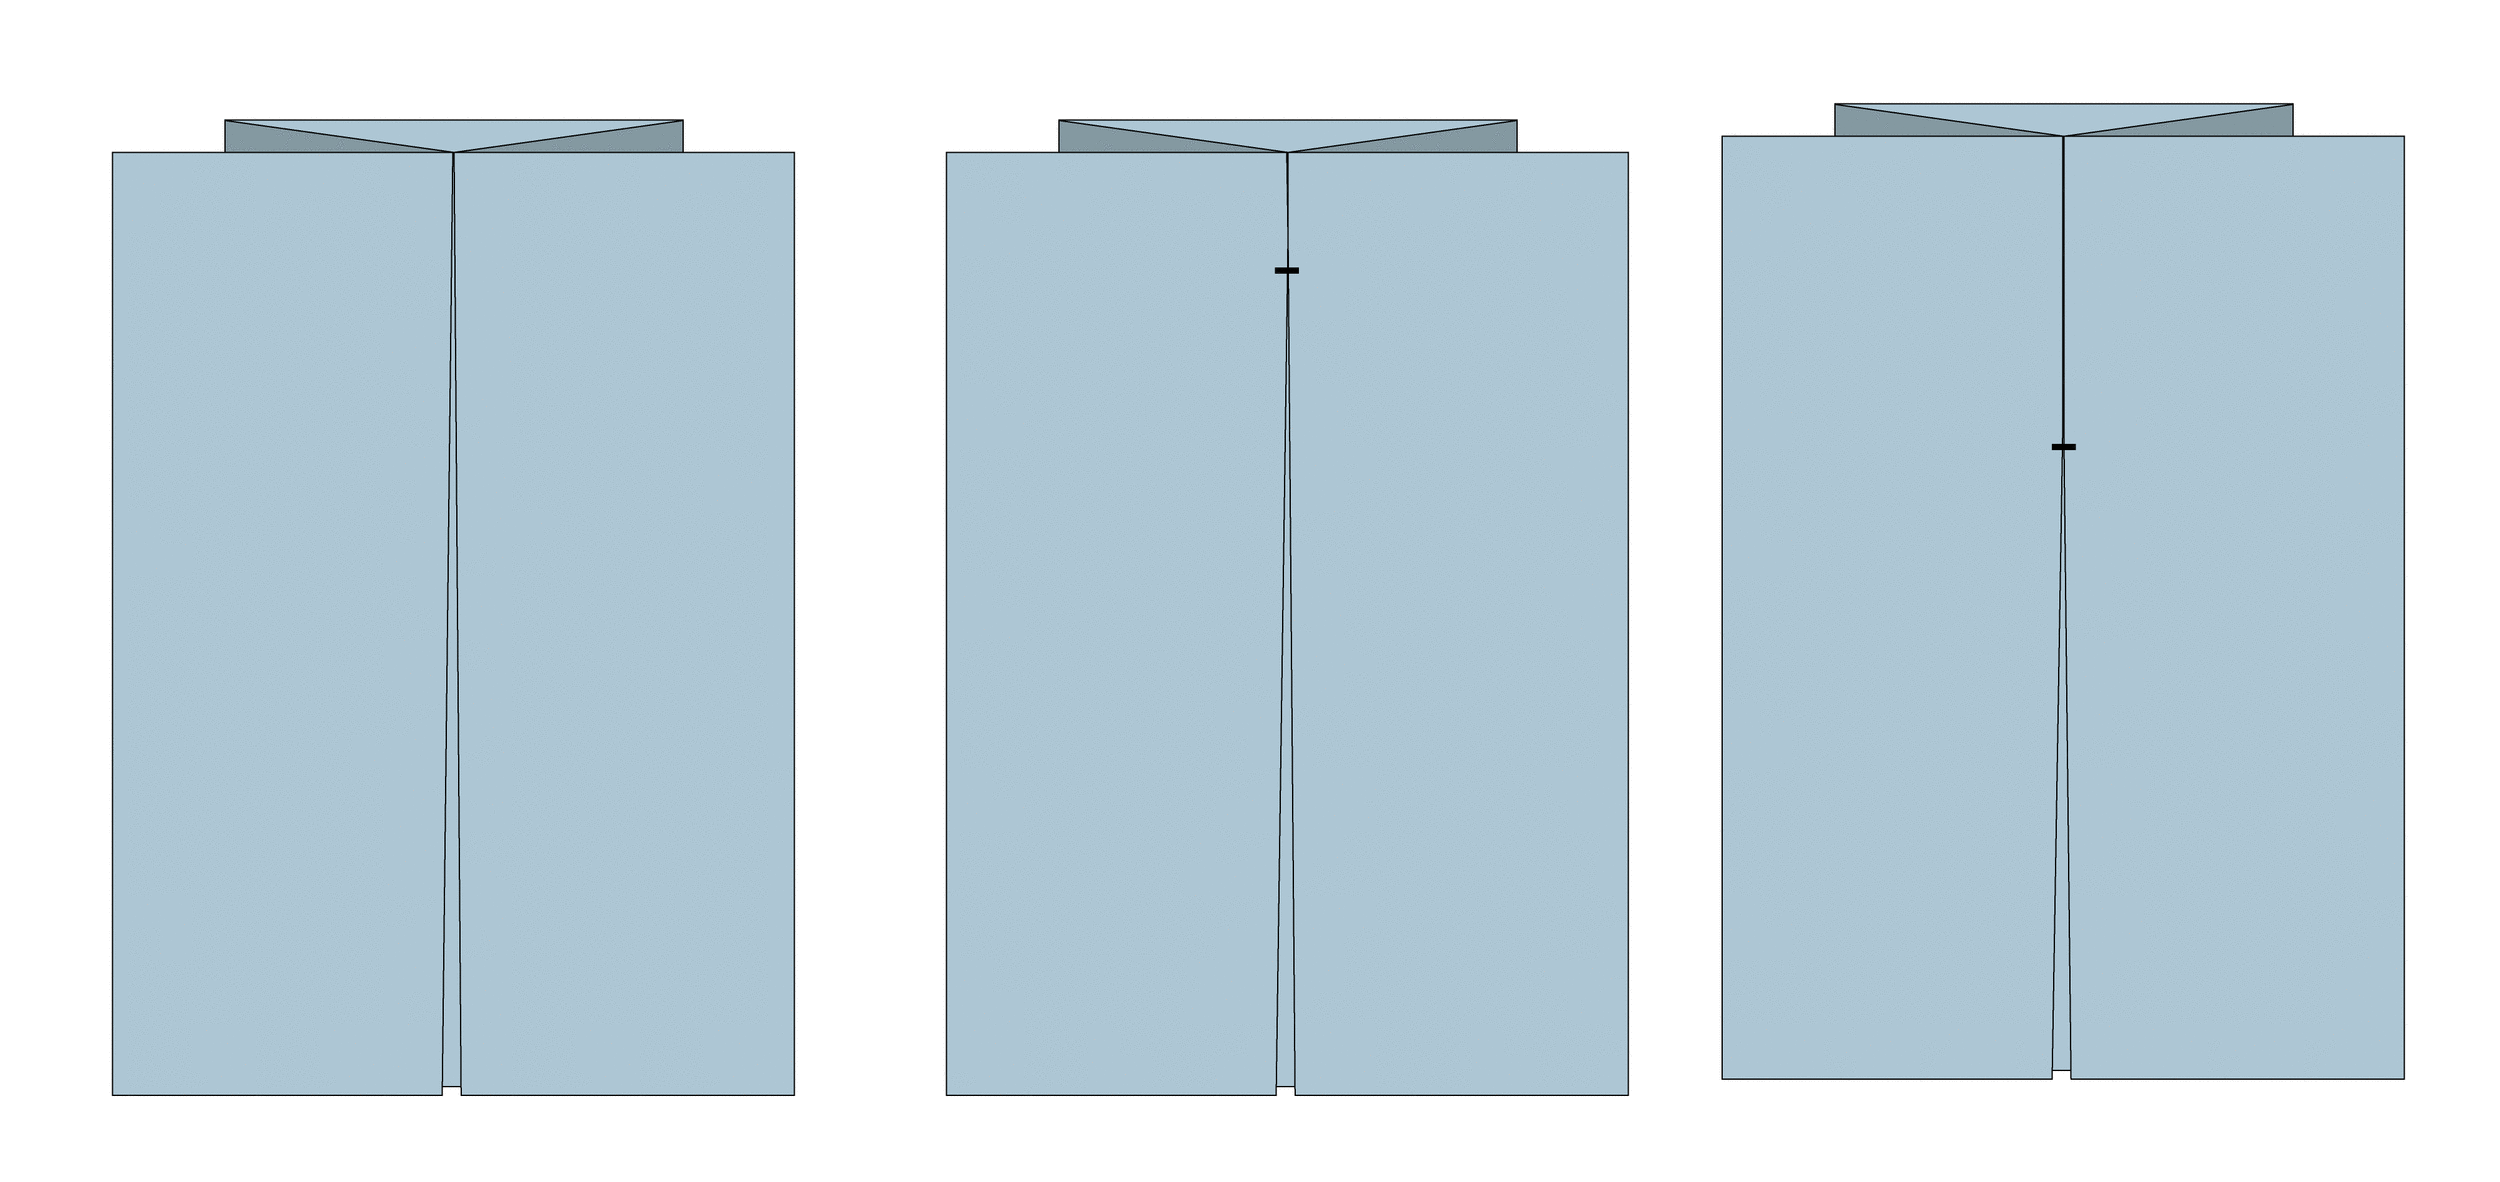
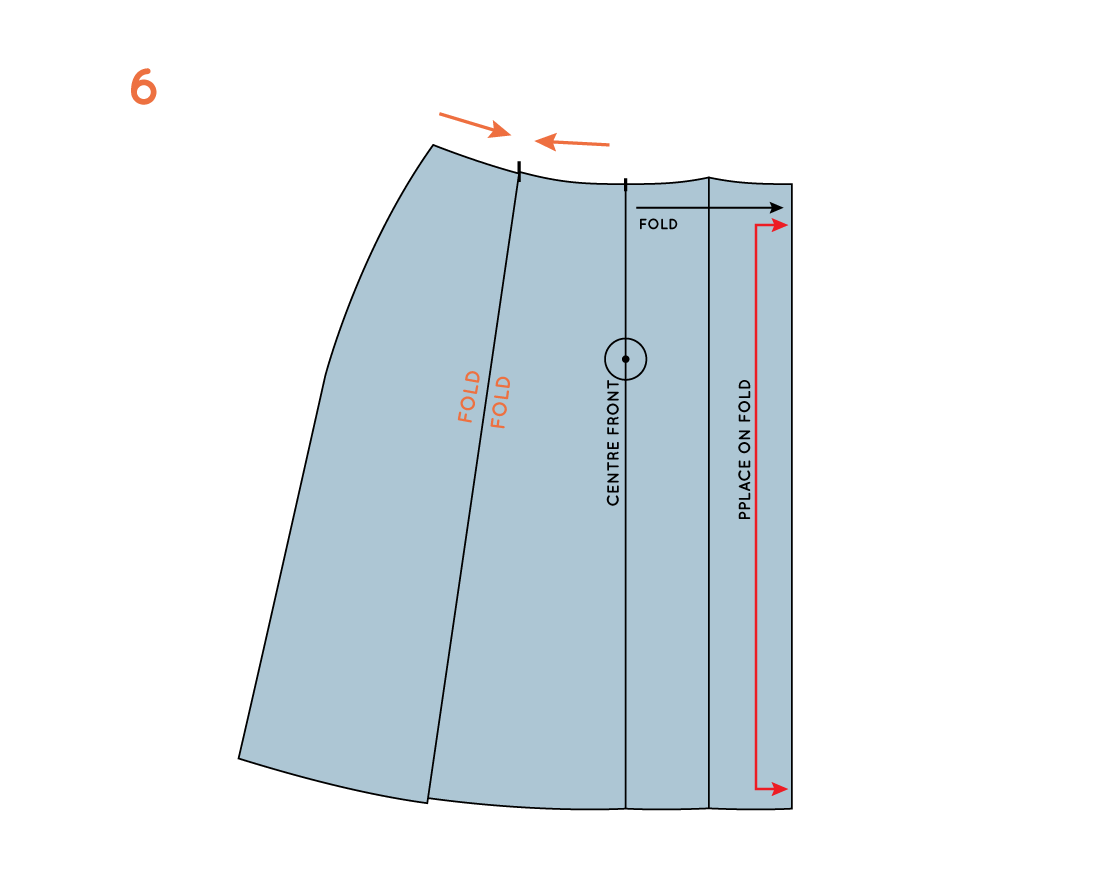
7. Just like with a dart, when you fold a pleat on a curved edge, you will need to adjust the edge of the pleat, so that when it is folded it will sit flush with the waistline.
With the pleat still folded (you may want to use a weight to hold the pleat in place), take a tracing wheel and trace along the waistline, transferring the shape of the waistline onto the folded paper underneath. Repeat for the hemline.
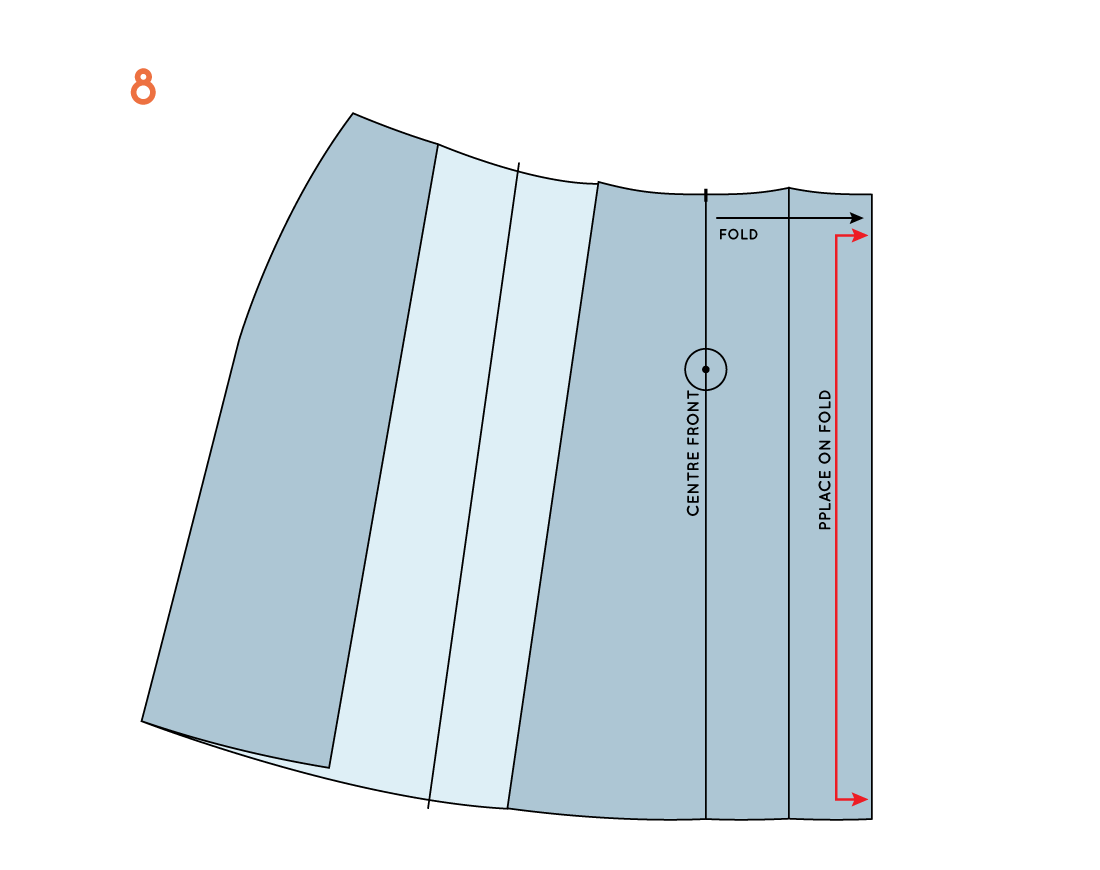
8. Unfold the pleat, take a ruler and pencil, and join the dots created by the tracing wheel to create a smooth curve.
Add notches
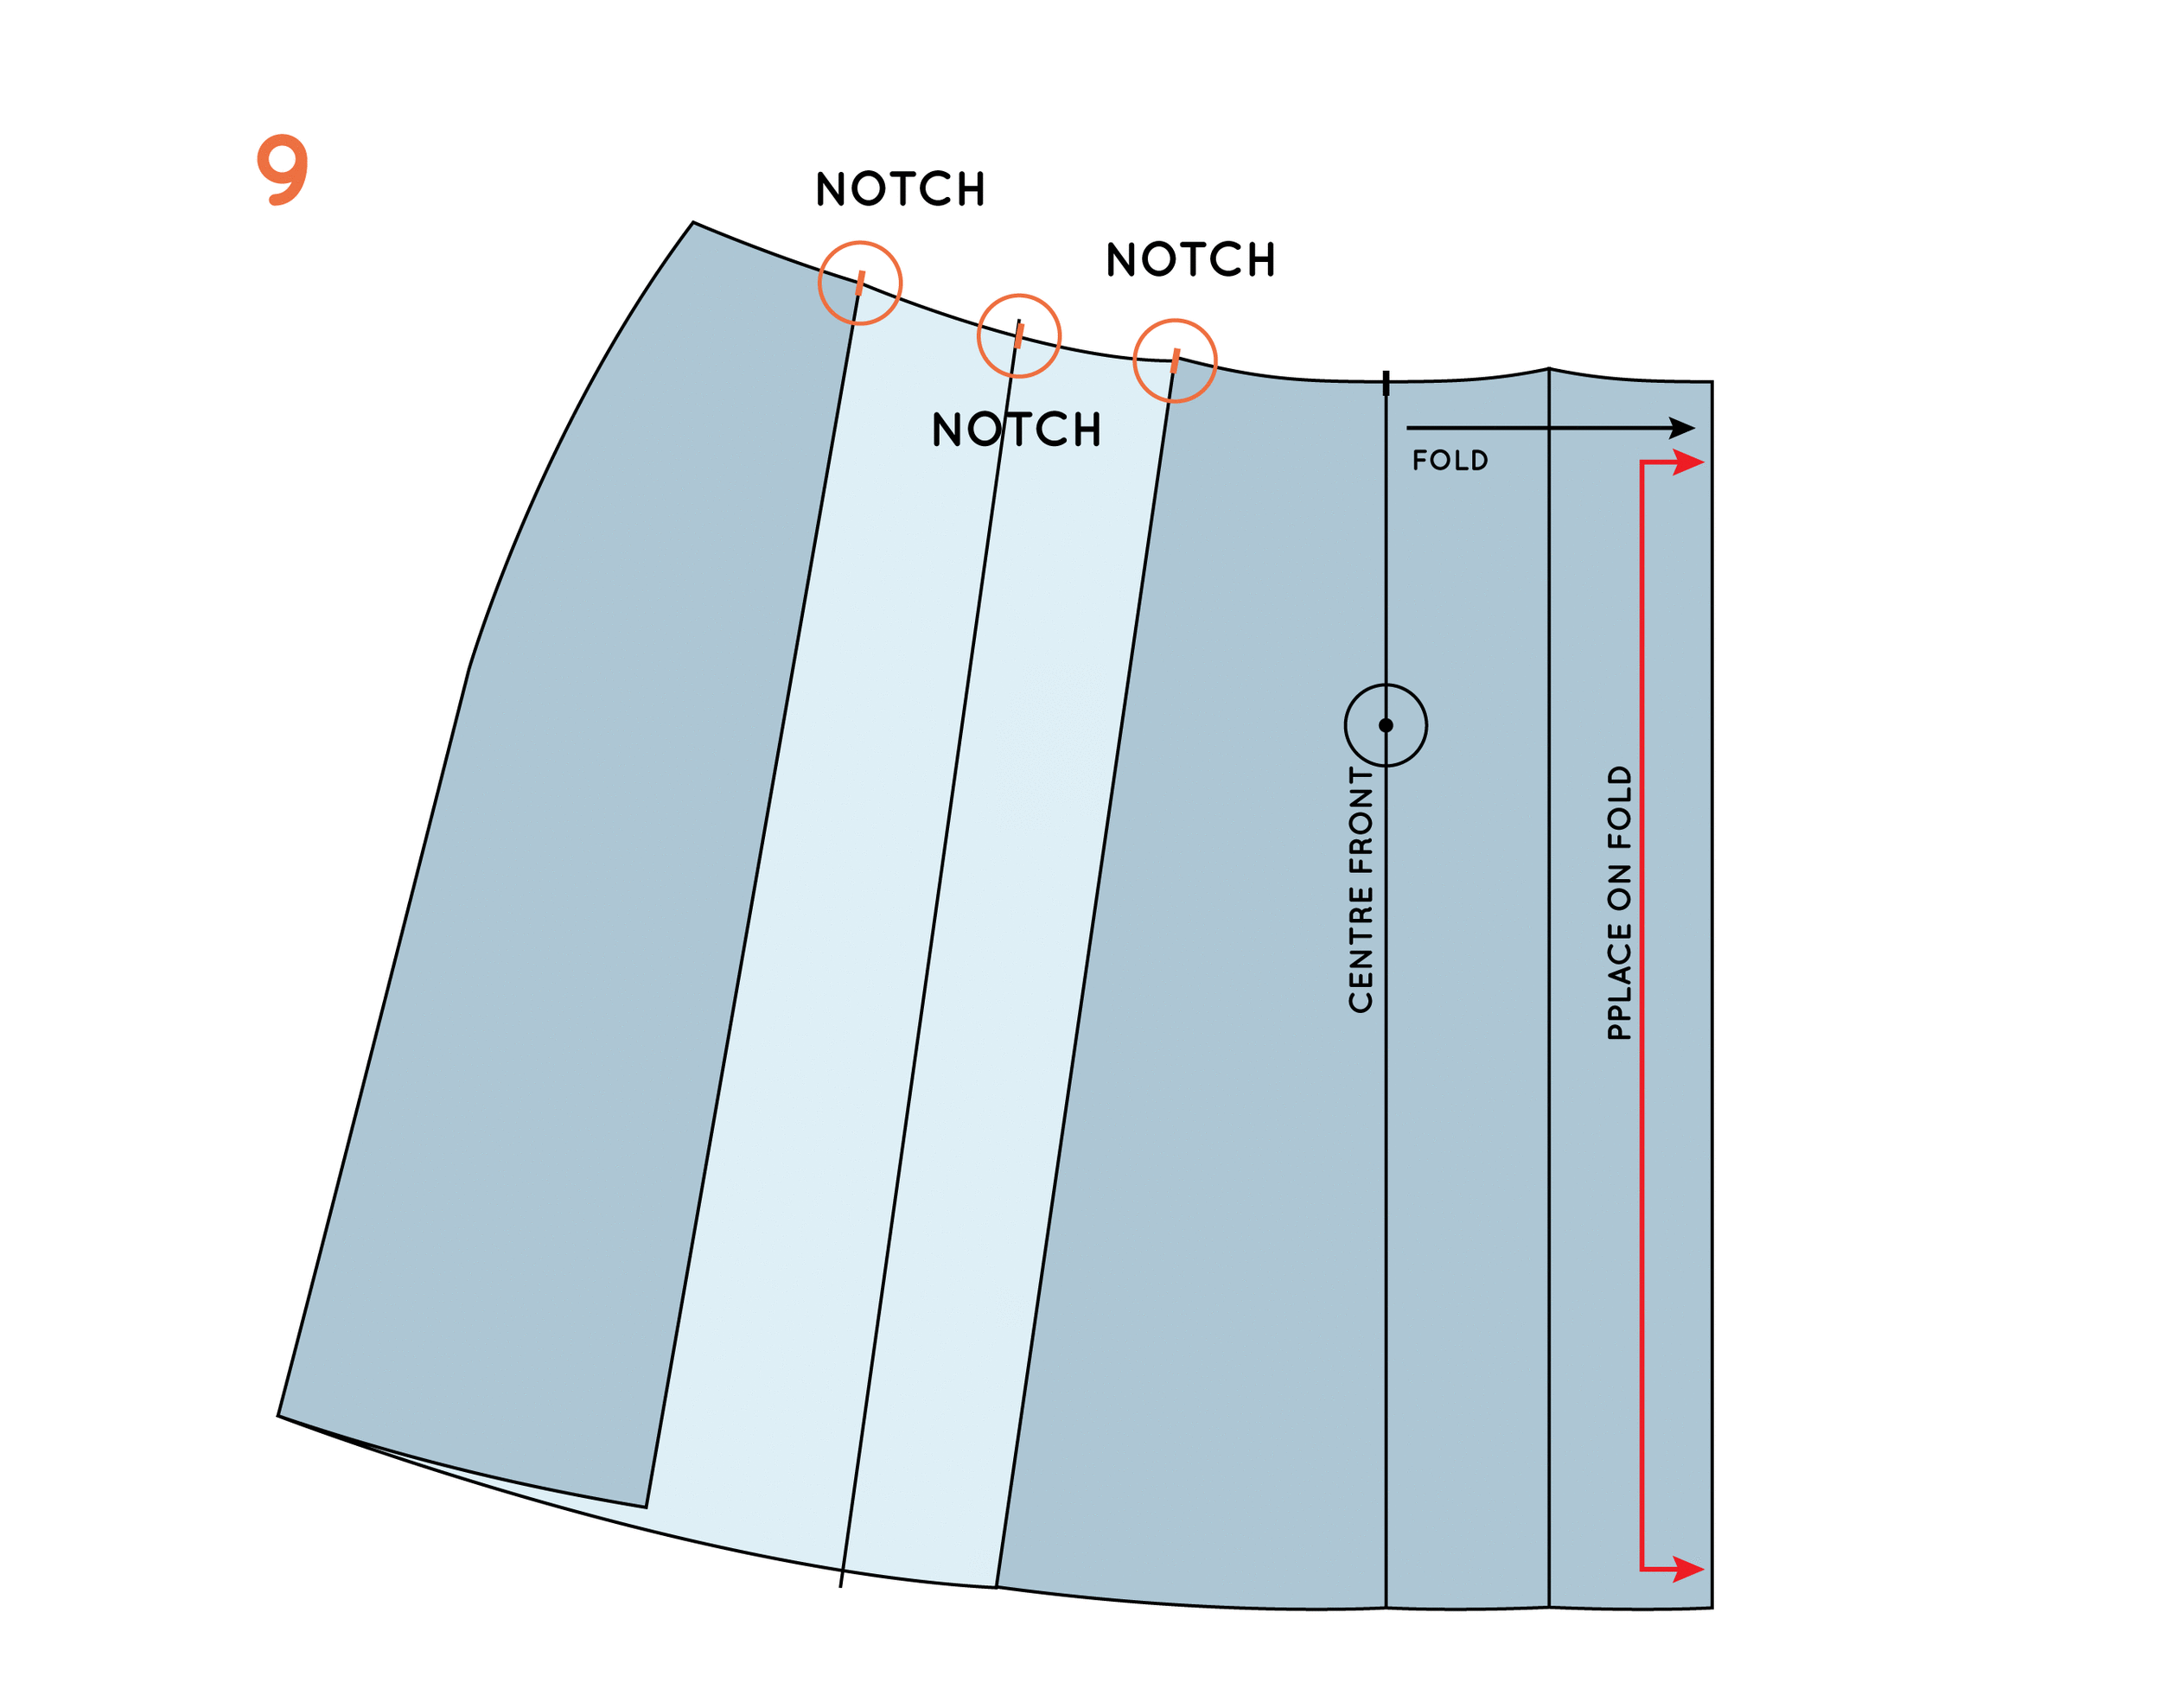
9. Add notches to either side of the pleat, as well as the centre point of the pleat.
Add markings to the pleat

10. You now need to use arrows to indicate which direction the pleat needs to be folded. An arrow can be drawn from each outside notch towards the centre of the pleat. For an inverted pleat, when it comes to folding it in the fabric, the folds will need to come towards you, meeting at the centre point on the right side of the garment. For a box pleat, it will need to be the opposite - the folds come together at the centre on the wrong side of the garment.
Stitching the pleat

Now have a think about whether you would like to stitch the pleats in place. This will depend on your fabric choice and the style of your skirt (or garment). You could consider leaving the pleats free, stitching down a few centimetres to give the pleat a little more structure, or stitch down 15cm (6 inches) or so, to really give some structure to your pleat.
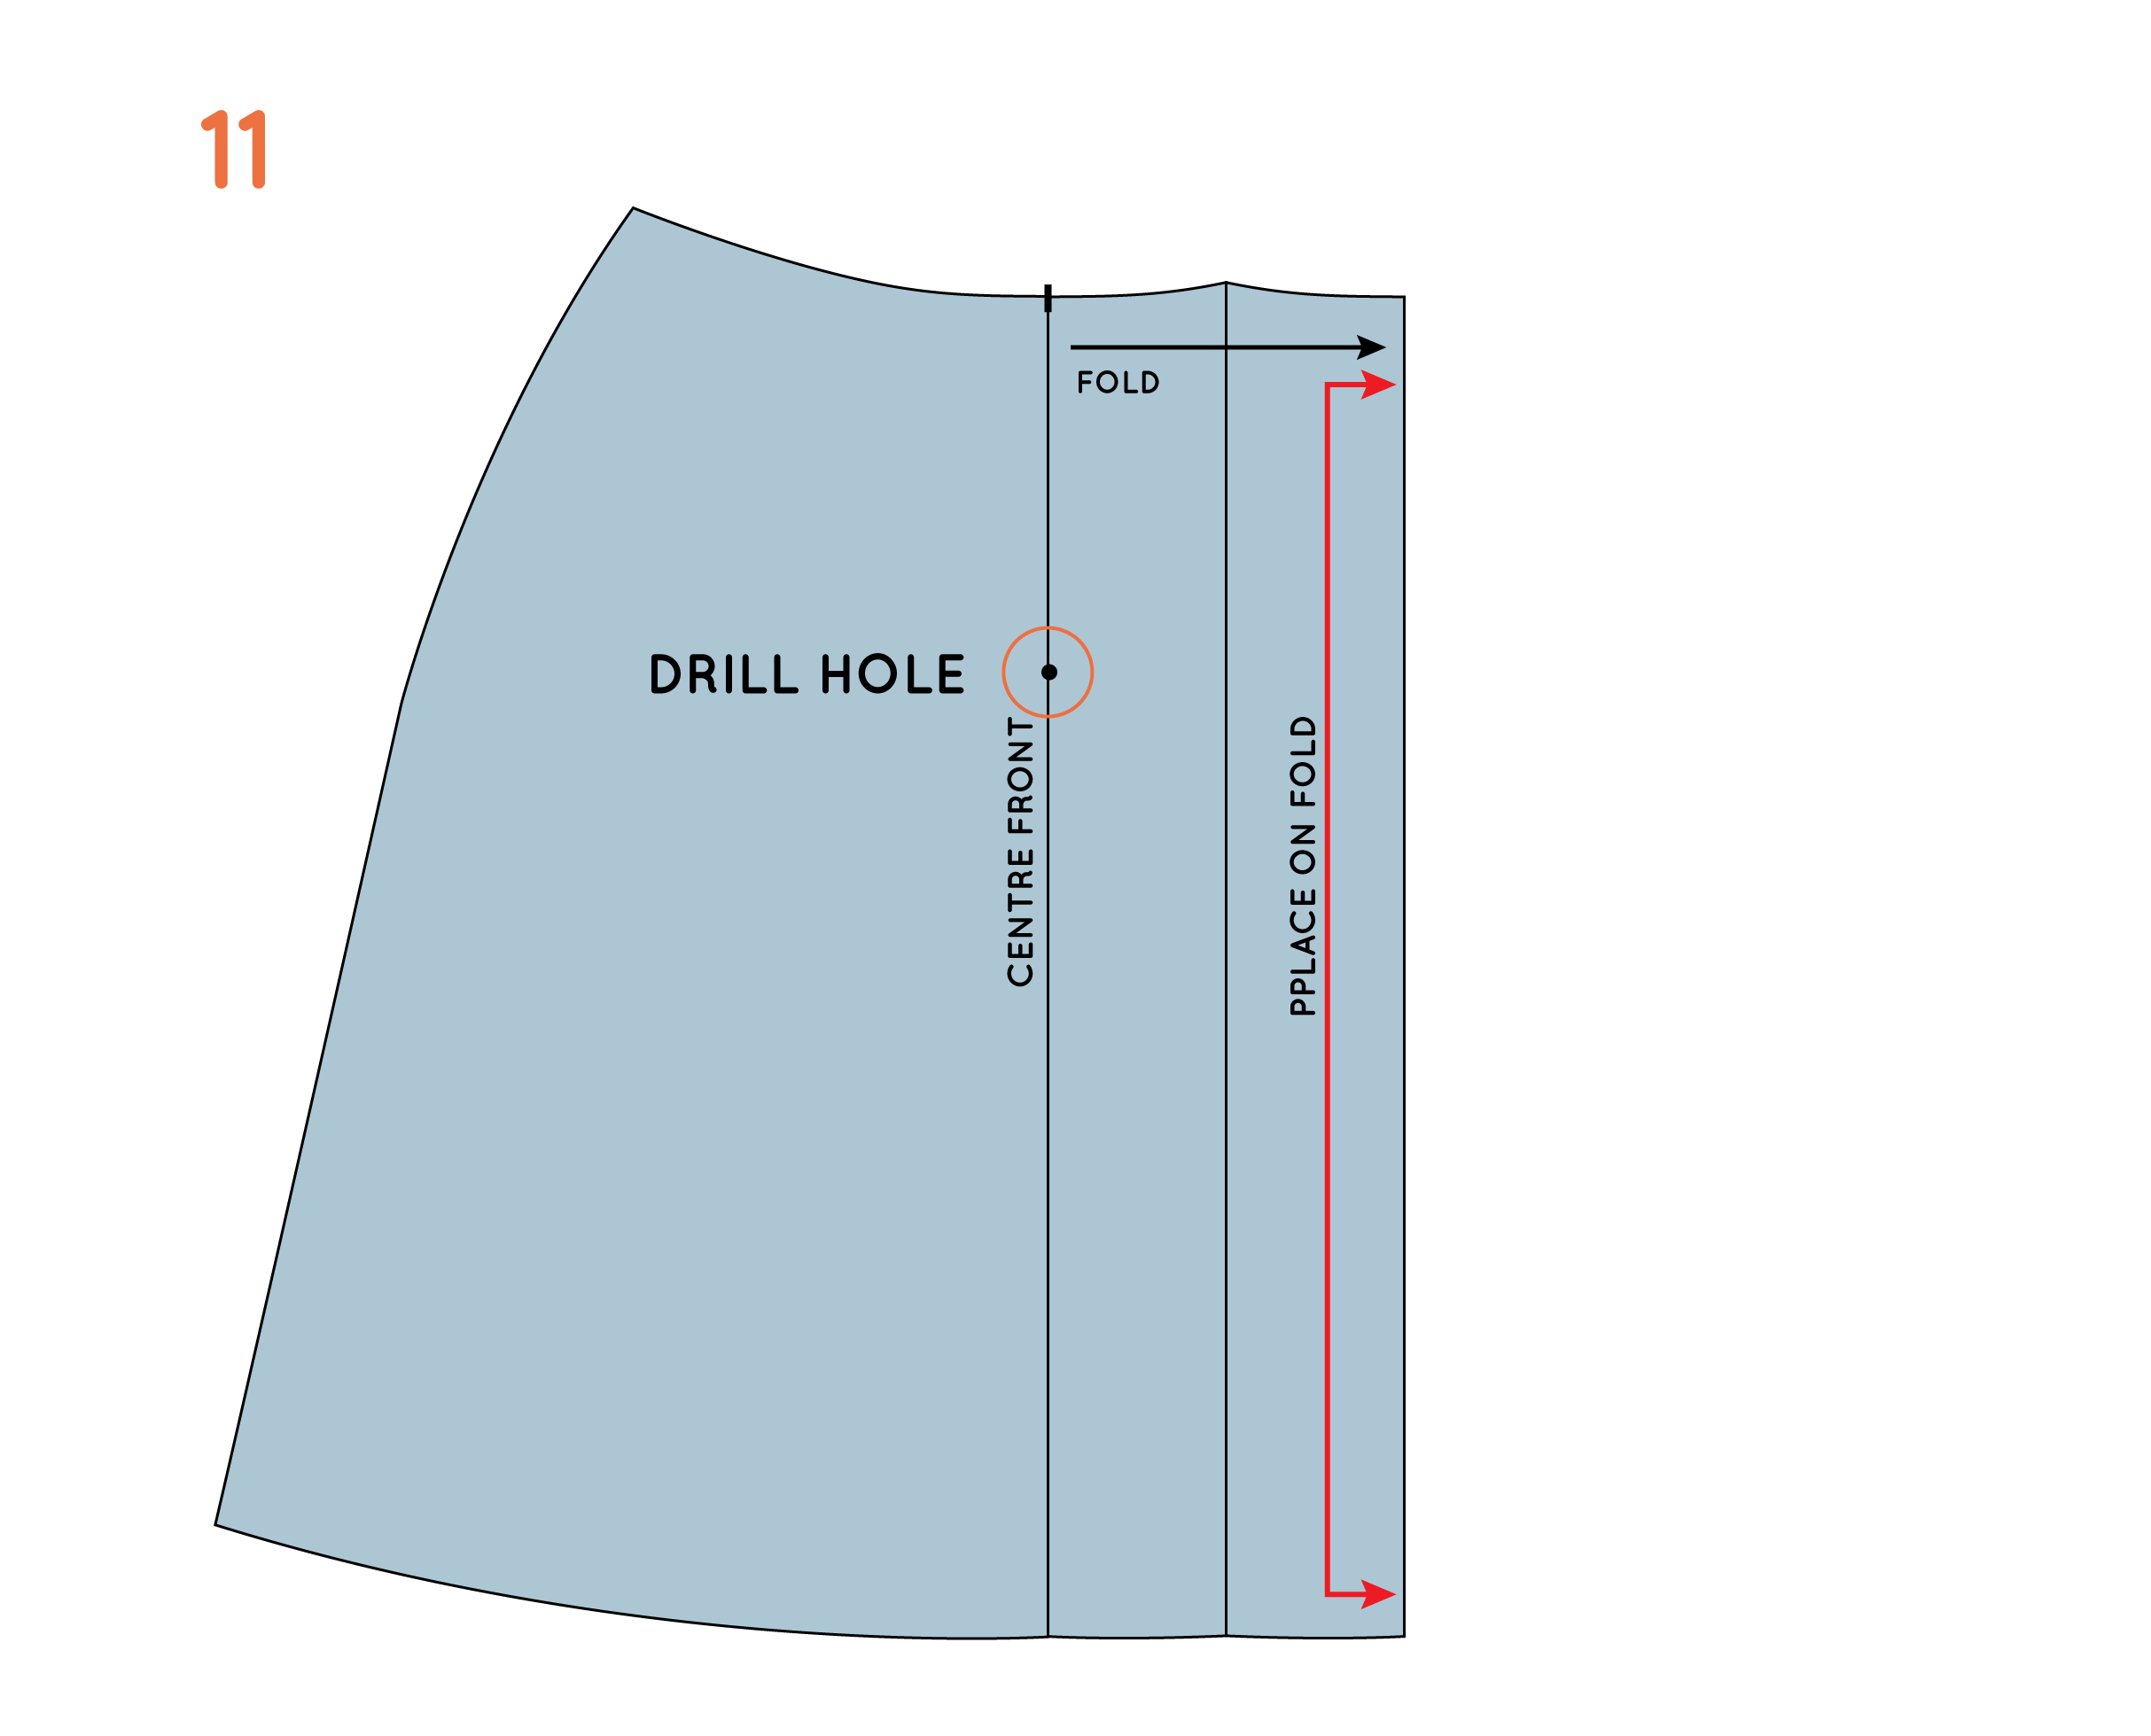
Mark a drill hole
If you would like to add some structure with some stitching, it is a good idea to mark a drill hole on your pattern, marking the end point of your line of stitching.
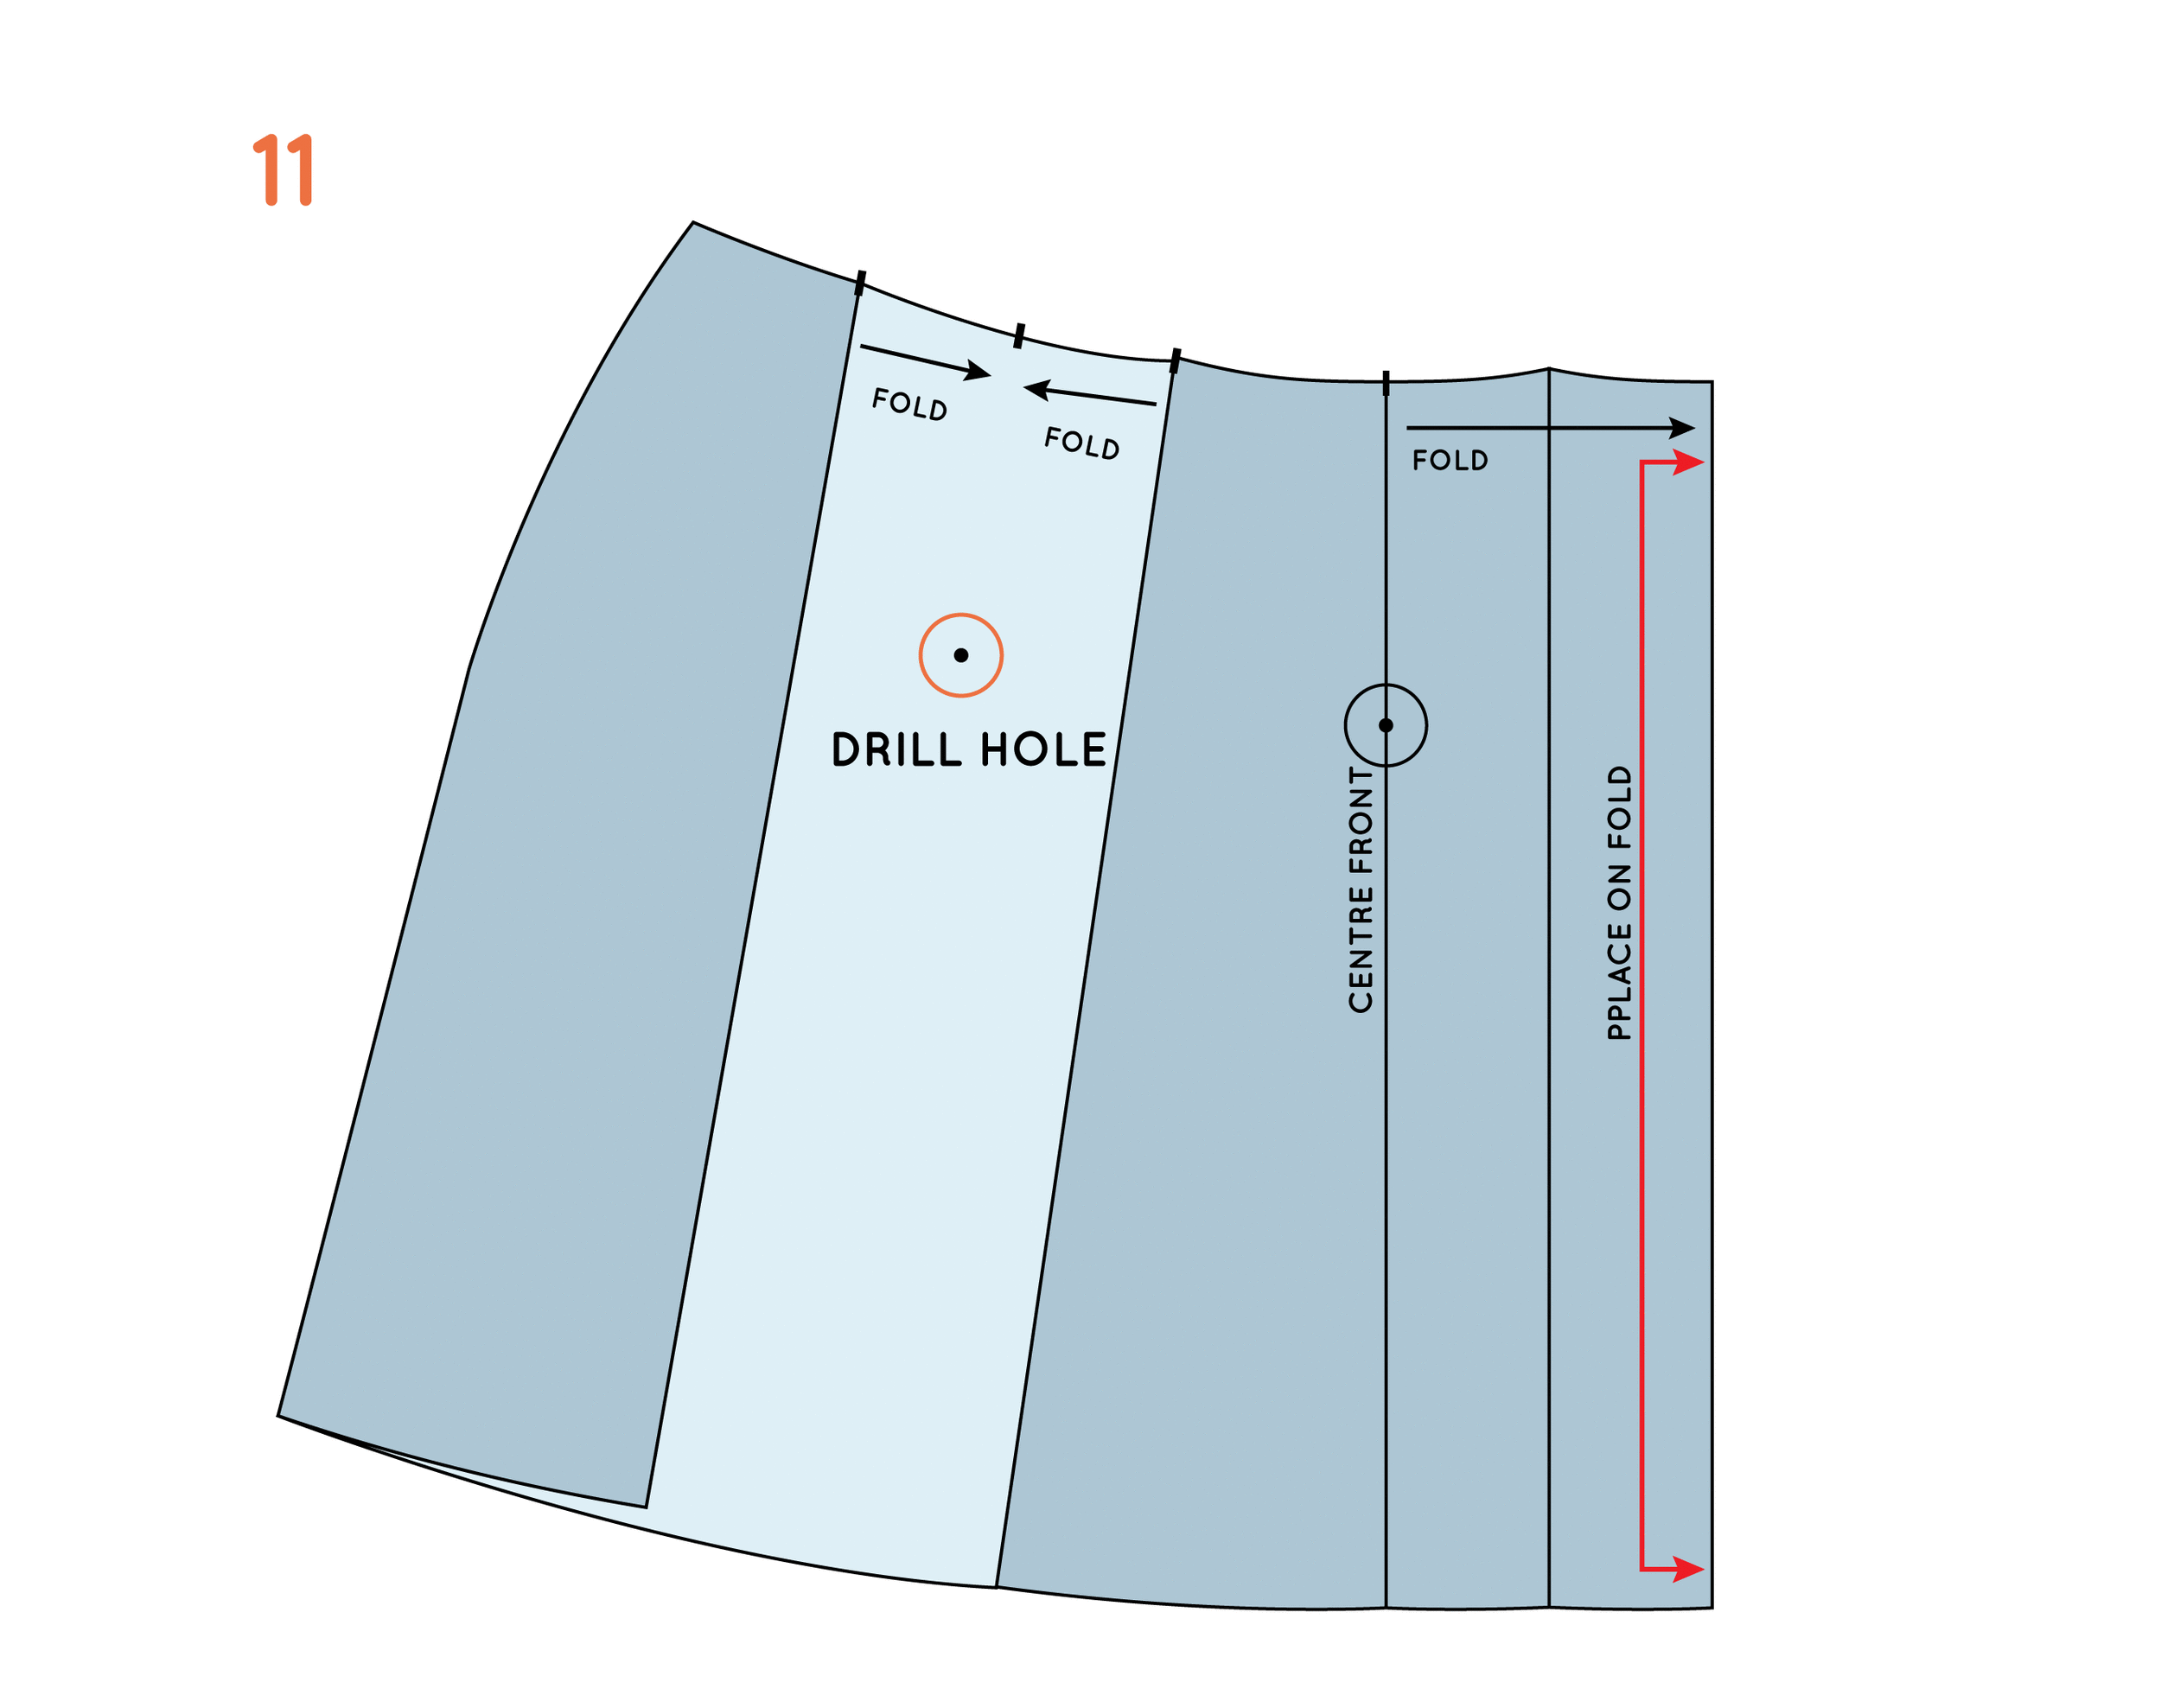
11. Measuring down from the waistline, at the centre of the pleat, mark a drill hole the distance down you would like to stitch your pleat.
12. To complete the pattern, add seam allowance and pattern markings.