finished project

Finished project : Winslow Culottes

COVER.jpg

A month or so ago, Helen from Helen's Closet put out a call for pattern testers for her upcoming pattern. I jumped at the chance as she had recently pattern tested for me and I wanted to return the favour, and (more selfishly) I wanted to force myself to sew something new for myself. These days I get very little free time to sew, as most of my sewing time is consumed by pattern development and sampling for upcoming releases. I do know though that I work very well under pressure, and a deadline is a great way for me to make time to do some (semi)selfish sewing.

We were given two weeks to test the pattern, and of course about three days before the deadline, I decided to start sewing my Winslows. Thankfully the pattern isn't made up of too many pages (and does include a copy shop version), so doesn't take to long to assemble, and it's a quick and straightforward sew. 
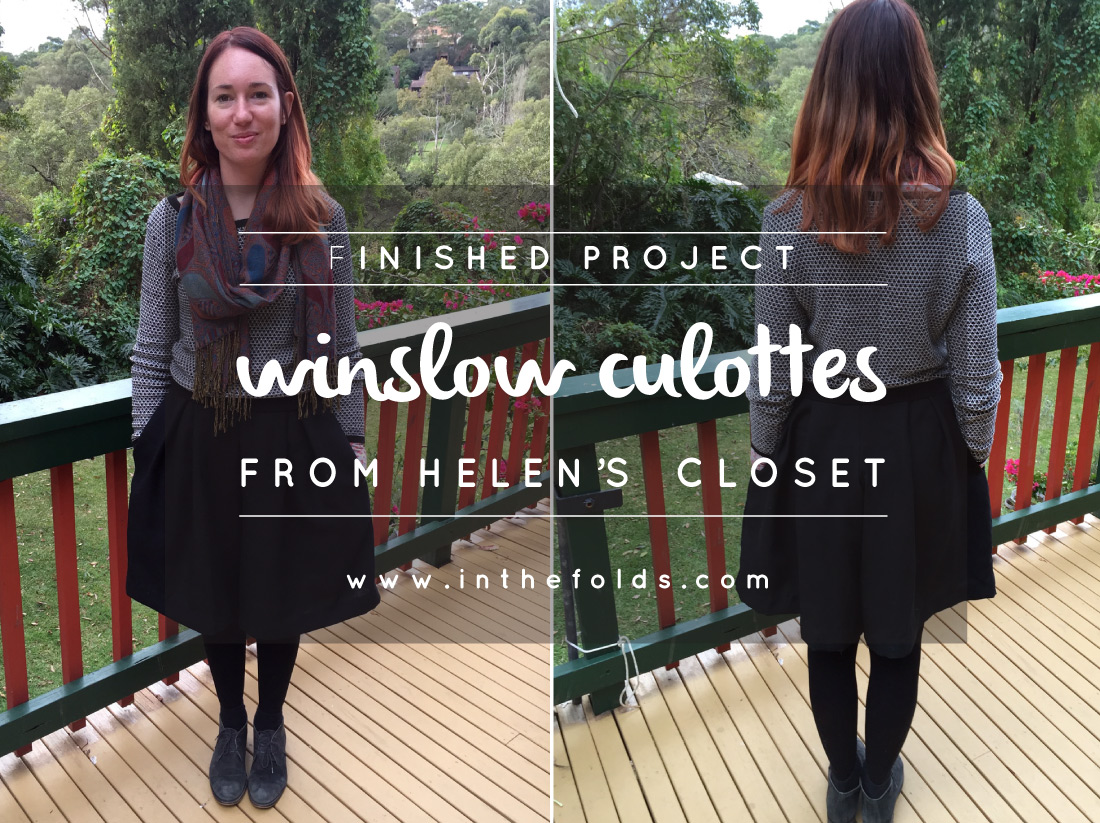
The details

'The Winslow Culottes are wide-legged pants designed for ultimate comfort and style.  This pattern is intended to be made at any length, from shorts to full length palazzo pants. The design features inseam pockets, an invisible zipper, a waistband, and inverted box pleats.  Make above-the-knee or midi-length culottes in tencel for a chic, professional look, shorts in cotton lawn for active adventures, or full pants in viscose poplin for comfortable weekend wear.' (Helen's Closet)

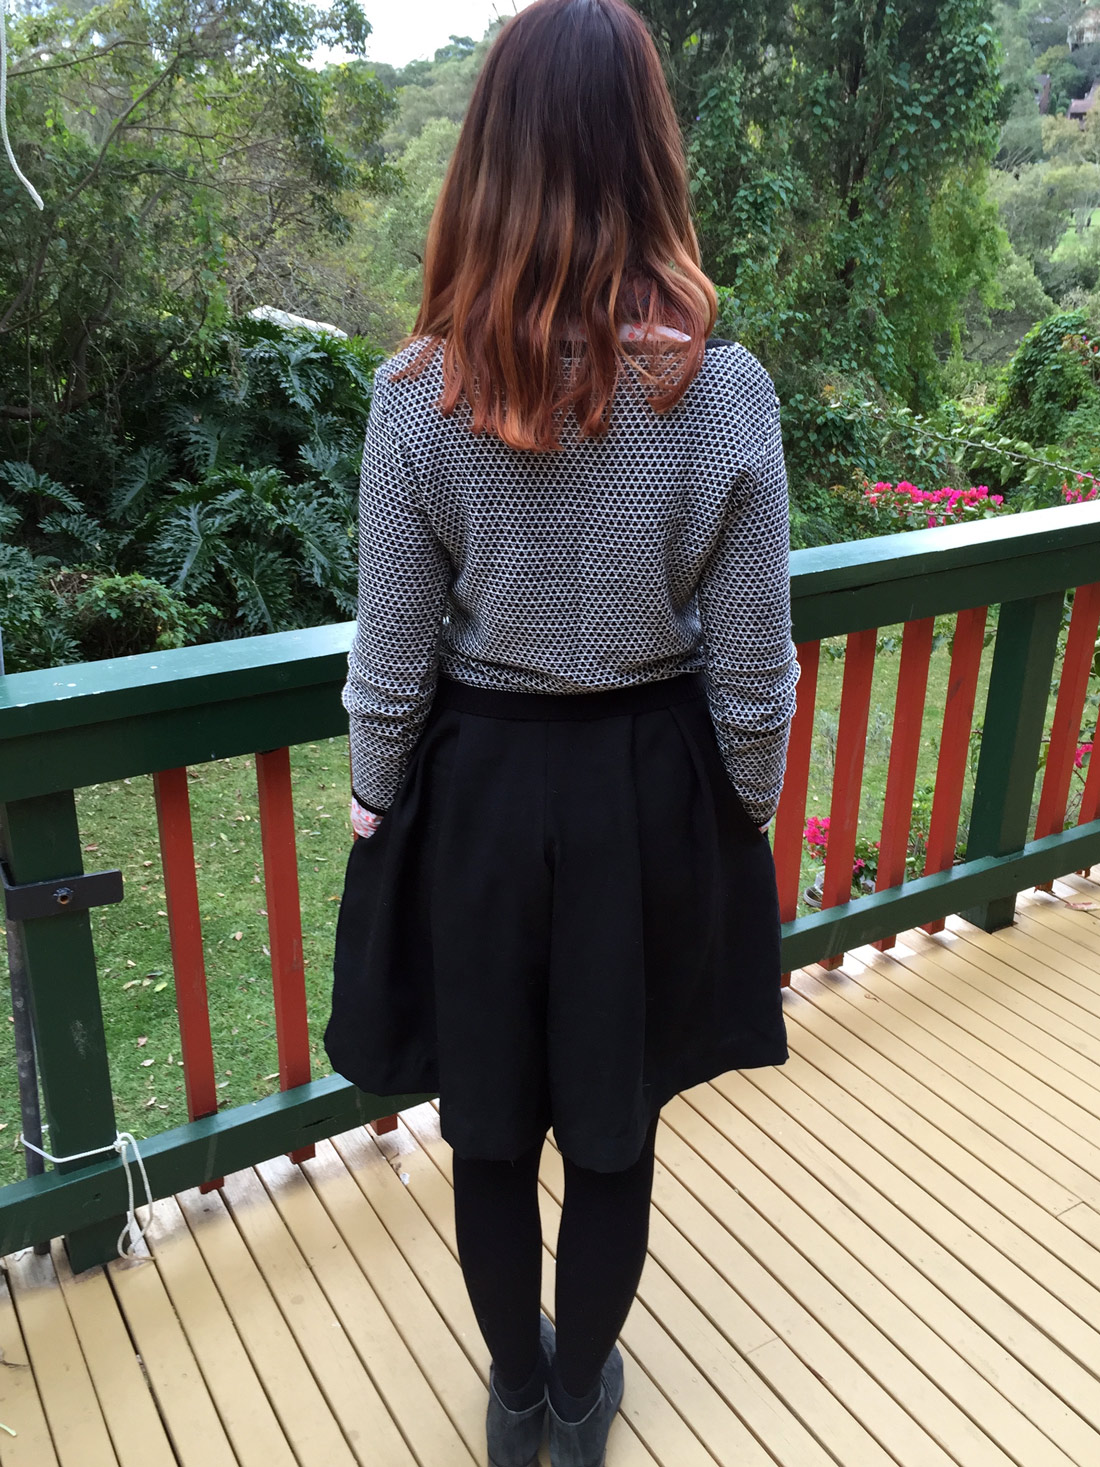
I decided to make view B (the knee-length version) as I wasn't too sure about the whole culottes thing and I thought this style was the least drastic, and therefore probably the most wearable for me and my lifestyle. Since it started getting cold in Sydney, I have been living in jeans, so I had been on the hunt for some different bottoms I could make, for days when I need something a little more formal (but still comfortable).

The Fabric

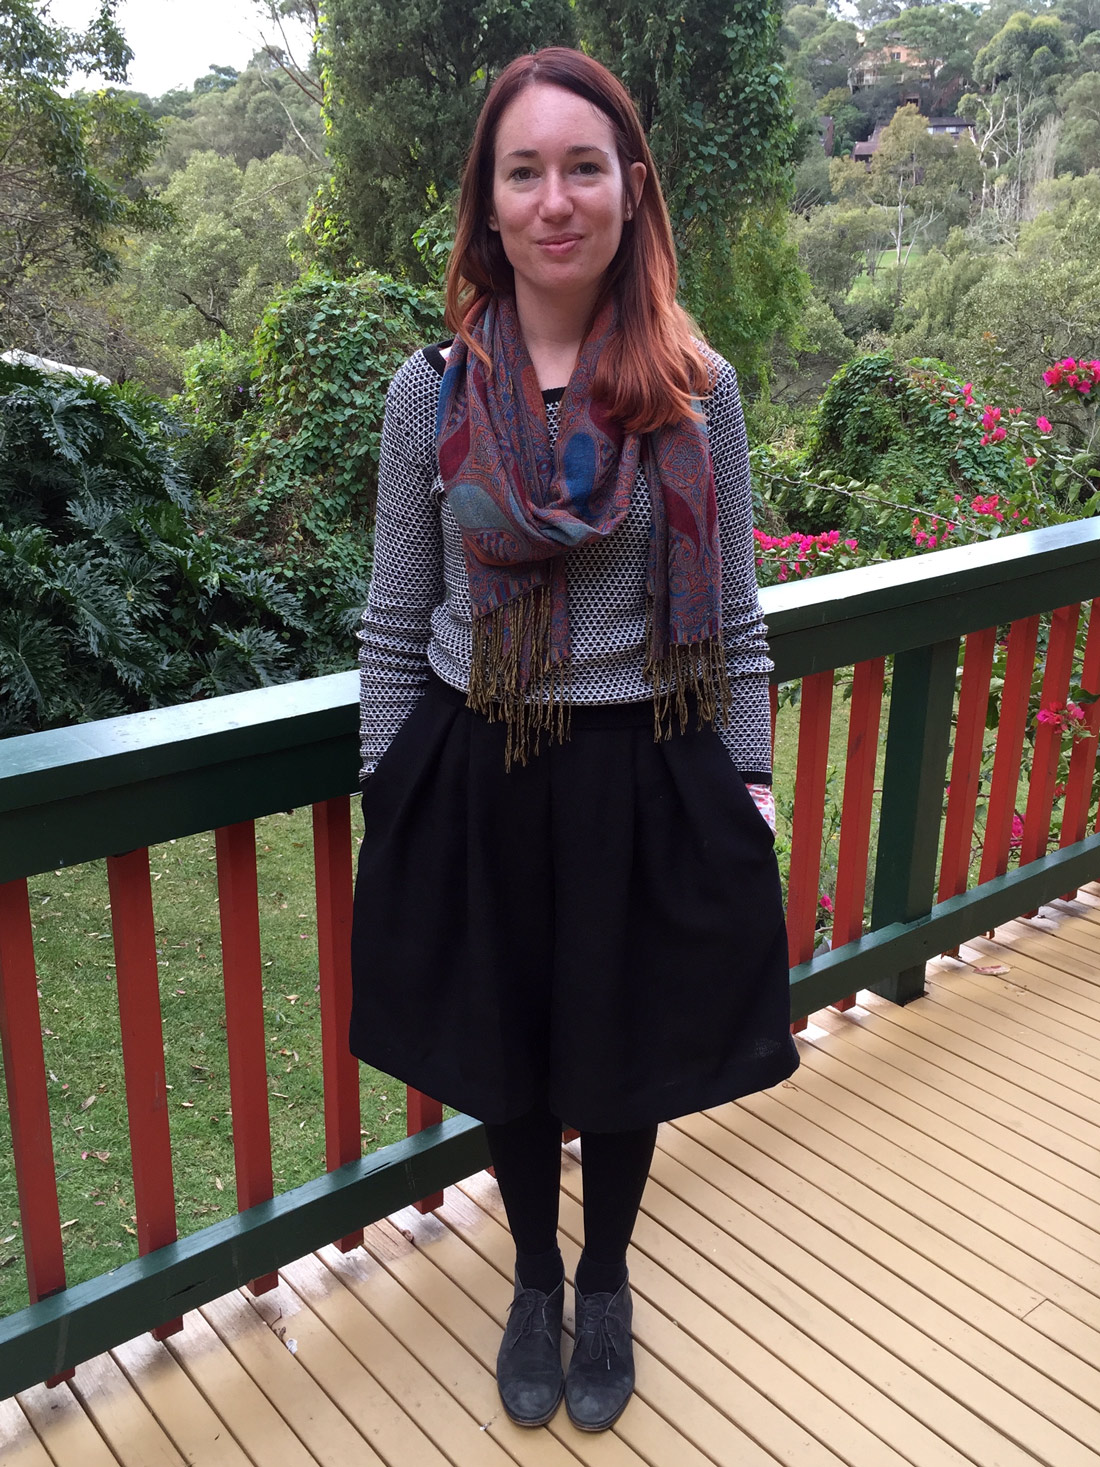
I used a mysterious fabric that I bought second hand form The Fabric Cave. It has lovely loose weave that gives it a beautiful texture, although I am not at all sure what the fibre content is. It definitely has a polyester component as it didn't want to press well (but is also good because it doesn't hold creases, which is a real plus when we're talking culottes). 

Techniques used

I used a couple of different techniques in my Winslows to make them more winter appropriate (the pattern is designed for lighter fabrics) finish. I added 5cm to the length and turned this up for the hem - this extra weight in the hem helps them sit nicely and also makes them less likely to blow around too much in the wind. 

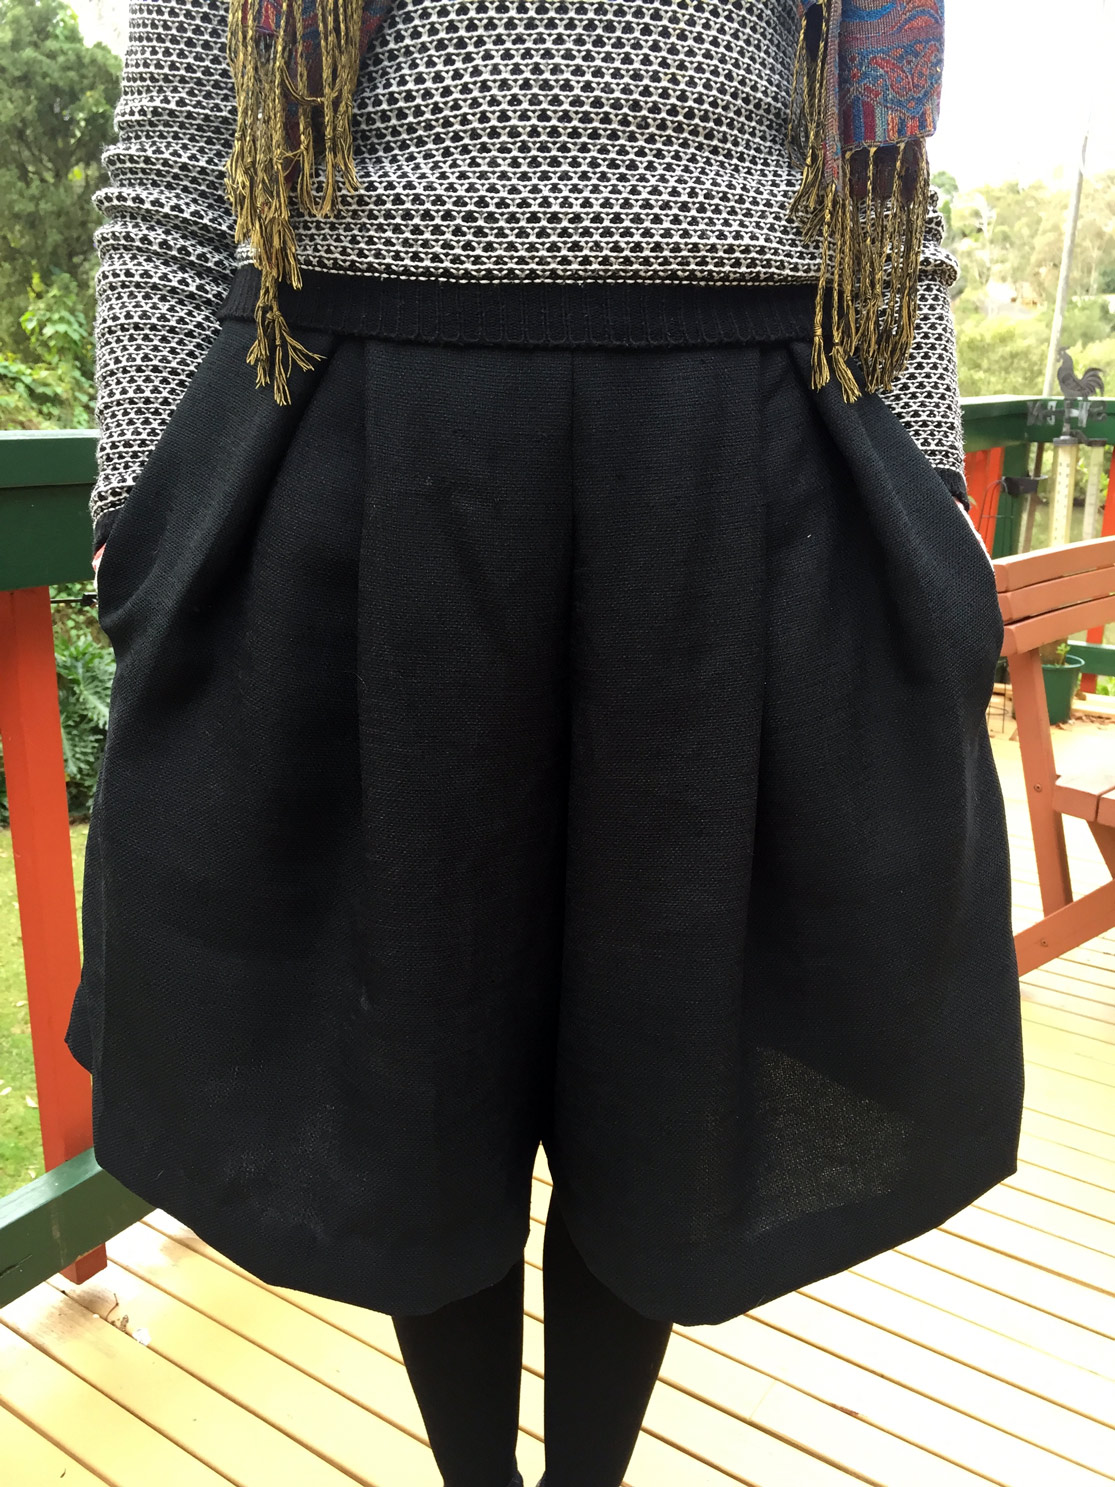
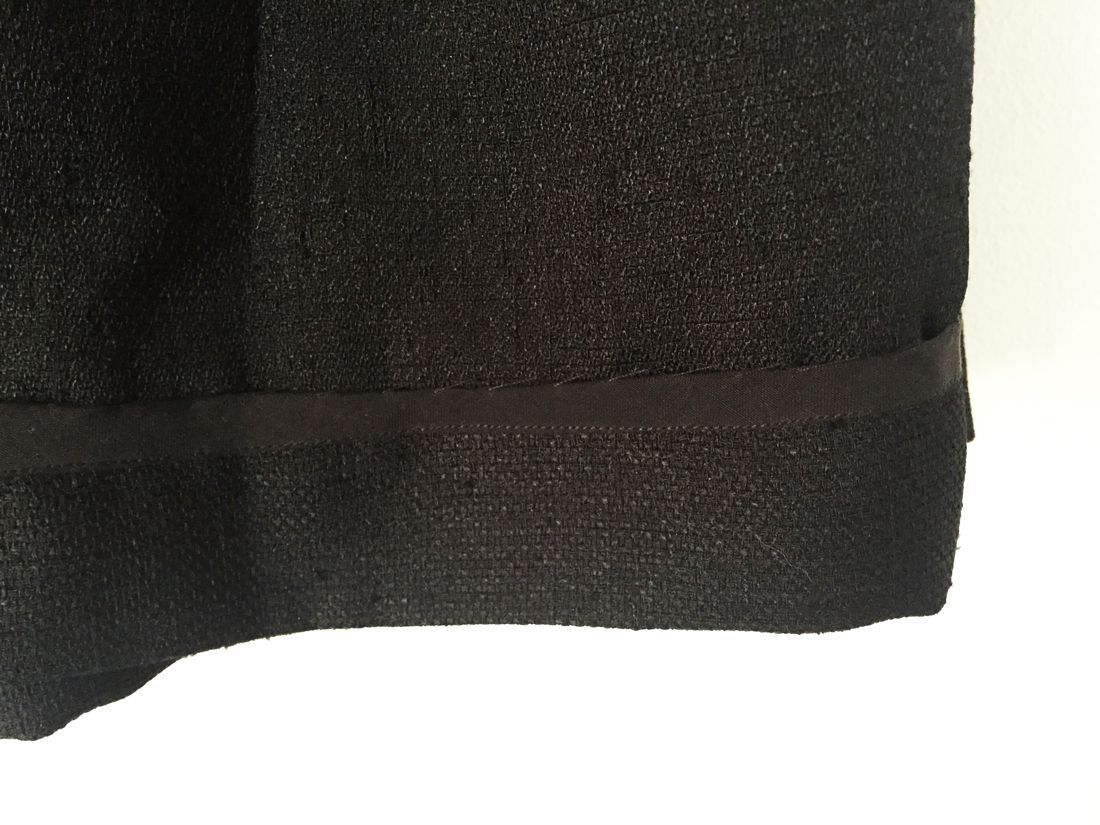
I also bound the inside edge of the waistband and sewed it flat (rather than tucking it under) to minimise on bulk in the waist area. (Sorry about the shoddy photos. It is really hard to photograph black garments!)

The verdict

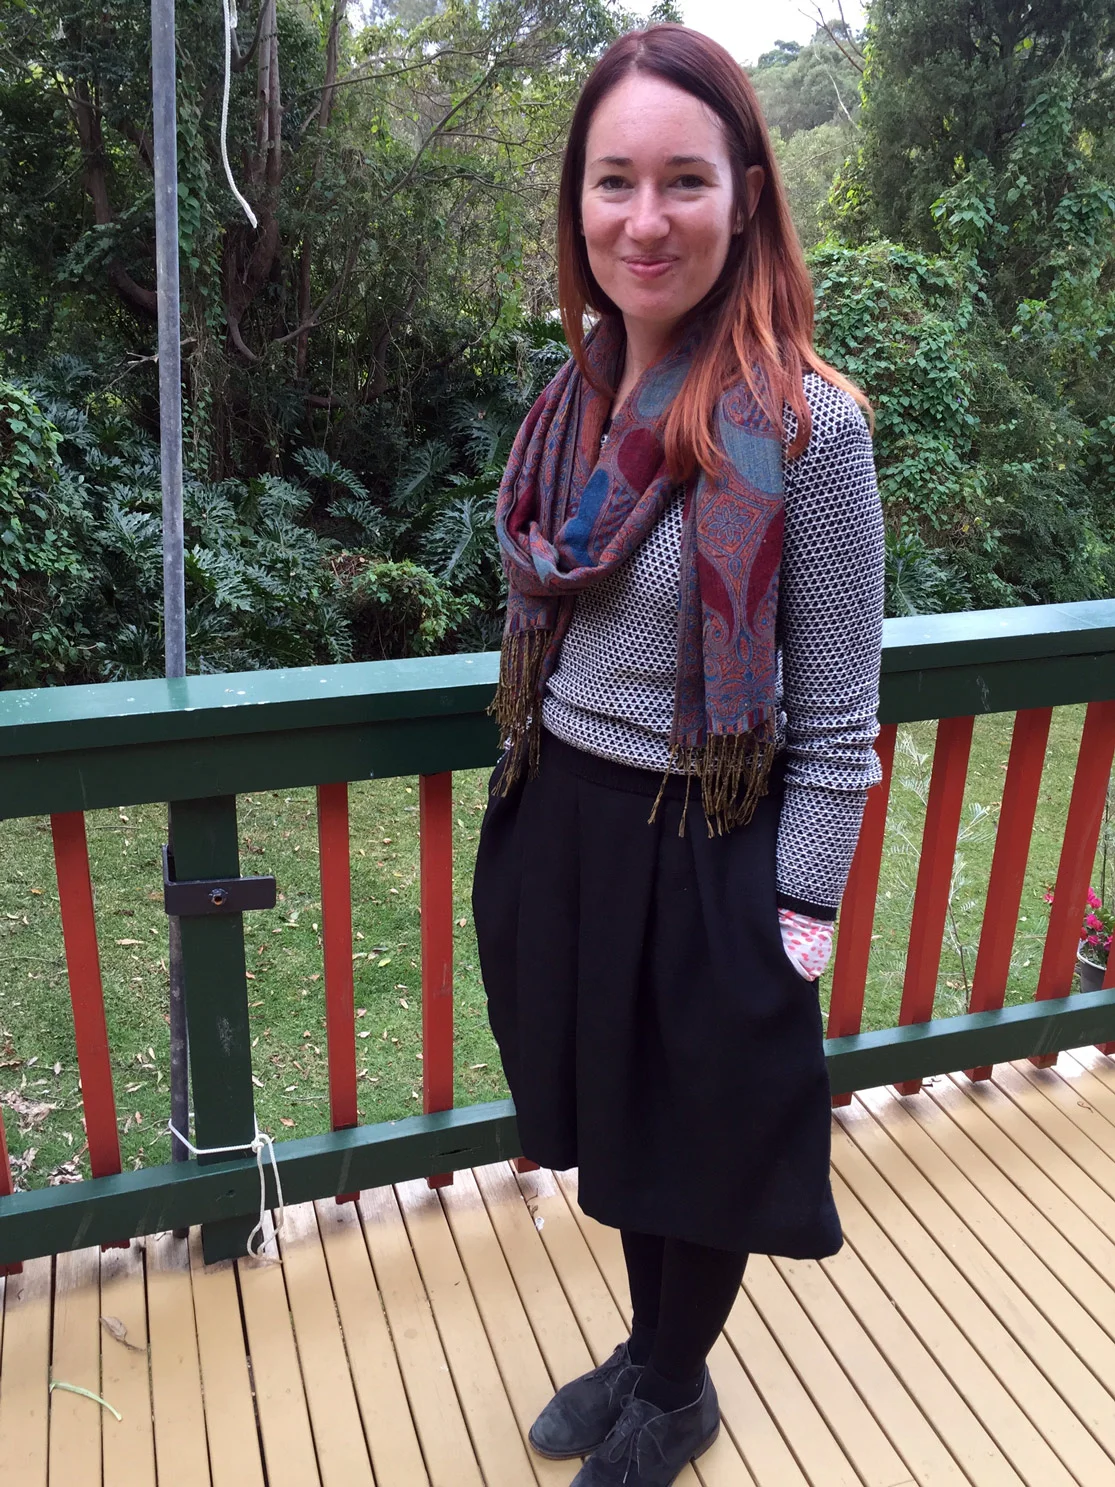
When I finished my culottes, I wasn't totally convinced that I'd wear them much, as they're quite different to my usual style. But I must say I've worn them five or six times since I made them! 

If I made them again I would think about changing the straight waistband to a shaped one (using this tutorial), but apart from that the fit is great. I know this is totally a matter of preference, but straight waistbands just never sit very well on my curves.  

This is a really straightforward sew, with fantastic instructions that guide you through the process. I really enjoyed testing for Helen, she was so supportive and positive throughout the whole process and was very open to feedback, which I thought was fantastic. She somehow managed to coordinate testing with over 40 testers, and then released the pattern in no time (I wish I could take a leaf out of her book!)

All in all, a great pattern. Head over to Helen's blog for more details and inspiration (she has made so many pairs!)

What are your thoughts on culottes? Are you still sitting on the fence, or have you been converted like me?


You may also like:

The Indiesew Blog Tour

indiesew_spring_inthefolds_1

If you read my last post or are following me on Instagram, you will know that The Rushcutter is part of the Indiesew Spring Collection (yay!).  

As part of the fun and festivities, there's a blog tour going on, which is really exciting. When Allie first mentioned this, I was a little apprehensive. Free time for sewing has been scarce lately, and I wasn't sure if I would be biting off more than I could chew, if I put my hand up to be involved. But then I remembered that I work wonders with a deadline (hello very late nights, lots of stress, and not washing my hair for three days), and although it could end up being a little stressful, it would be a good excuse to make a couple of things that could fill some holes in my wardrobe. And the collection is beautiful right? So it would be crazy not to get involved!

Which brings me to the fact that today is the day that I get to share what I made from the collection. 

The Sanibel Dress and Romper from Hey June

sanibel_heyjune

Sanibel by Hey June

Description form Indiesew: When you're looking for a comfortable, yet flattering garment the Sanibel sewing pattern by Hey June fits the bill. This dress or romper features a cinched elastic waist with drawstring closure. The full button placket and two collar options make this a great project for the intermediate sewist. Sew your Sanibel in a lightweight denim and pair it with clogs and a floppy hat for a great spring look.

If you have been following along with me for a while (particularly in my early days of blogging, when I was still over at Em Makes Patterns), you may know that I find it very difficult to make a pattern straight out of the envelope. It is basically impossible. I have the best of intentions when I get the pattern, and then suddenly, like a tidal wave hitting me, I get the urge to hack the pattern into something I can call my own. So before going on, I want to apologise  to Adrianna from Hey June Handmade. Your pattern is absolutely beautiful and so very versatile, but my crazy urge to cut and spread and add and take away took over and now my Sanibel looks nothing like a Sanibel, (although I just love it all the same, and I hope you do too!). 

the pattern

Before I did hack up this pattern, I did take the time to have a proper look over it, in its original form, and also go through the instruction booklet pretty thoroughly, and I can definitely say this is a great pattern. It is well drafted, the instructions are clear and thorough, and it has loads of options to play with. I am even starting to think about making a shirt, by taking just the upper section of the romper and lengthening it.

Another thing that I loved about both patterns that I made from the Spring Collection collection, is that they came with copyshop versions, that I could take to a print shop and get printed on A0 sized sheets. Although it is adds a little extra cost, to me it's definitely worth the time saved. 

THE HACK

indiesew_spring_inthefolds_2

So here it is. Although, as you can see, my dress looks nothing like the original, it didn't actually that much effort to alter the original pattern to create the pattern I ended up using. 

What I did:

  • joined the skirt pattern to the shirt pattern leaving out the waist tie and casing
  • increased the width of the dress slightly, at the side seam
  • added a pleat to the centre back, using this method
  • removed some of the width from the capped sleeve at the shoulder
  • created my own placket, and added pleats to the centre front
  • left off the collar and instead bound the neckline with bias binding
  • and added in-seam pockets (of course)

Fabric

indiesew_spring_inthefolds_3

This fabric is a bit of a mystery, as I bought it from The Fabric Cave (a brilliant shop in Sydney where you can find the most incredible range of pre-loved fabric) but after a lot of fondling and a little bit of a burn test, I have come to the conclusion that I think it is a silk linen blend (not bad for an op shop, I must say). I really do get a lot of joy out of using second hand fabric, and the fact that sometimes, when ironed, I get a waft of that charity shop scent, is just part of it's charm (or at least that's what I keep telling myself).

Construction

indiesew_spring_inthefolds_4

As I altered the pattern so much, there was not much use for the instructions (although I did use them for sewing in the capped sleeves). I decided to go with french seams, because I just love them, and they really make me feel like my clothing is in another league of quality. I needed to overlock around the placket though.

indiesew_spring_inthefolds_5

I used the in-seam pocket pattern from The Rushcutter, that you can learn how to draft (or even just download) right here, and then I used this method to finish the pockets with french seams. 

I used a lightweight iron on interfacing on the placket to add some structure, before finishing the neckline and hem with bias binding, using this method and this method

Final thoughts

indiesew_spring_inthefolds_6

I just love this dress. It is exactly the kind of thing I love wearing at the moment - cool, breezy and very easy to wear. It can be dressed up or down, and goes just as well with my sneakers (which I spend 90% of my time in) as it does with dressier shoes. It is just the kind of thing my wardrobe has been begging for since I started working for myself (things I can just throw on and then run, yet still look somewhat put together) and I am very tempted to make myself another one quicksmart. 

Florence Kimono by Sew Caroline

florence-kimono-sew-caroline.jpg

Florence Kimono by Sew Caroline

The second pattern I decided to make was the Florence Kimono, by Sew Caroline.

Description from Indiesew: The perfect spring kimono has arrived! The Florence Kimono sewing pattern by Sew Caroline is a relaxed-fit kimono with 3/4 sleeves and three different hem lengths. Add lace trim to the sleeves and hem for a pop of visual interest. Sew your Florence Kimono in a flowing rayon challis and pair it with a knit tank top, skinny jeans, and heels for a night on the town.

The Pattern

indiesew_spring_inthefolds_7

The pattern is a nice easy one that you can smash out in a couple of hours. It consists of three pieces - the front, the back and the sleeve, so cutting was nice and speedy - so I was sat at my machine in now time. As I said earlier, the pattern includes an A0 version, which is much appreciated as the pattern pieces are quite big, due to the over-sized nature of this silhouette. 

Fabric

Like my 'Sanibel,' I used a pre-loved fabric I found at The Fabric Cave. Once again, I wasn't sure of the fibre content, but due to its handle and the way it presses, I would say it's a viscose rayon. I am in two minds about the print (which may or may not be because my boyfriend described it as a "grandma print") but I guess time can only tell.

The hack

indiesew_spring_inthefolds_8

I was much tamer with Florence than I was with poor Sanibel. The only change I made was to add a pleat in the centre back seam, which I made using this method (I am clearly going through a pleat stage).

Construction

The instructions ask for french seams, which was definitely the right choice for my fabric. For the opening, the pattern suggests using bias binding to finish the edge, and I decided not to bother, and just sewed a thin double folded hem, using this method (the same finish I used for the actual hem).

Final thoughts

This was a really quick project, which was a very satisfying sew!


The collection

As you can see, I didn't quite get through the whole Spring /collection (although I did make a Lou Box earlier this year), but I can definitely say it's a great little collection, and definitely a great place to start if you are thinking about sewing yourself a capsule wardrobe this spring. For more details or to purchase the collection, head over to Indiesew.

The blog tour

I really hope you are enjoying the Indiesew Spring Collection Blog Tour as much as I am. IF you've missed it, here are the previous posts in the series:

Feb 24: Sew Mariefleur

Feb 25: Dandelion Drift

Feb 26: Right Sides Together

Feb 29: Sewbon

March 1: Sew DIY

And here is what's still to come:

March 3: Sew Caroline

March 4: Baste + Gather

March 5: Ada Spragg


You may also like:

Finished project : The Lou Box top by Sew Diy

inthefolds_louboxtop_1

Late last year, Beth from Sew DIY and I had the great idea of doing a little pattern swap. We had been swooning over each others patterns on Instagram, so thought it was about time we did something about it. 

Beth has a couple of patterns to choose from in her shop, but after a little deliberation, I decided to go with the Lou Box Top as I noticed there was a bit of a gap in my wardrobe for nice easy basics that I can wear to work, and thought that I could use the Lou Box to fill the gap. 

I love to use stash fabric, whenever possible, so decided to use some left over cotton linen that I had bought from The Fabric Store for a dress I had made for a friend at the beginning of the summer. 

What I liked straight away about the Lou Box, when I opened the pattern file, was all the options. There are two neckline options (a crew neck and a scoop neck) and three hem options (straight, dip or curved) and can be made in woven or knit (or a combination of the two).

I couldn't make up my mind between the straight hem and the dipped hem, but thought I could go ahead and make the dipped hem, and if I didn't like it, I could just cut the hem straight once the top was assembled. I ended up printing and cutting all the options available in the pattern, so that I have them ready to go  for next time (and there will definitely be a next time).

inthefolds_louboxtop_2

When I got to laying the pattern on the fabric, ready for cutting, I realised there wasn't going to be enough meterage. I already had my heart set on the fabric, so decided to add a horizontal panel line on both the front and back.

This was a super easy alteration to make as the pattern is actually made up of seperate panels, for each hemline option (the pattern pieces are just stuck together before the fabric is cut). So I just added seam allowance to the bottom of the body of the top and then seam allowance on the top of the hem panel.

inthefolds_louboxtop_3

I actually really like this detail, and am considering doing the same thing next time, but using contrasting fabrics. 

inthefolds_louboxtop_4

I also detoured from the instructions a little by turning the sleeve up to create a small cuff (rather than turning under, as the instructions suggested), to add another little detail. 

inthefolds_louboxtop_5
inthefolds_louboxtop_6

In terms of fabric, Beth suggests using 'Light-weight knit or woven fabric with lots of drape, such as crepe de chine, chiffon, georgette and jersey,' and I know my cotton linen choice is a little more on the structured side that these suggestions, so it's definitely a little boxier than some of the other versions I've seen. I was a little worried about my decision just to go with it, but now that its' finished, it's one of the things I like most about this top!

inthefolds_louboxtop_7

I feel really comfortable in it, and cannot believe how many times I've reached for it since I made it. It really has filled a gap in my wardrobe!

inthefolds_louboxtop_8

It was a super speedy make, which was a really nice change for me, because I have been working on samples for my next pattern, which generally take a while as I am really pedantic when I am sampling, so that nothing gets past without being resolved. Sewing someone else's pattern, gave me a chance to disconnect from work, and gave me a chance to really enjoy the process, without the stress that sits alongside working on one of my own patterns before it's released. It's also a good opportunity to see how other designers do things!

Well that's about all I can say about the Lou Box Top from Sew DIY. It's a perfect beginner pattern, but also a lovely speedy sew for the more experienced - providing lots of opportunity for variation. Thank you so much Beth for offering to trade patterns with me. I had a lot of fun!

Beth made a really beautiful Ruschutter, so you should definitely go check out her post.


You may also like: