Welcome back to the Acton sew-along! Today we will be finishing up the wrap version of the dress (view B).
Prepare the lining
You should have assembled the bodice lining at the same time as you assembled the bodice. If you haven't done it already, check out this post for how to do it (it's exactly the same as the bodice).

Take the bodice lining and with right side facing down, fold back the centre back seam allowance 2cm (¾in) and press flat on both sides.

With the lining still face down, turn up the bottom edge by 1.2cm (½in) and press.
ATTACH THE LINING TO THE BODICE
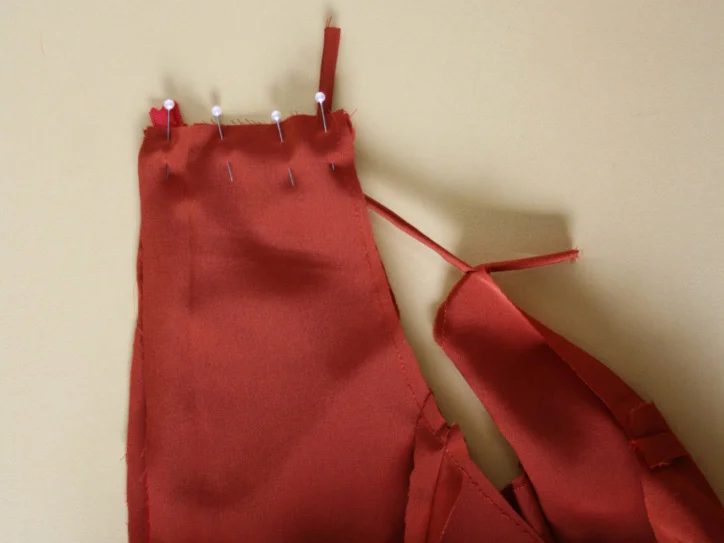
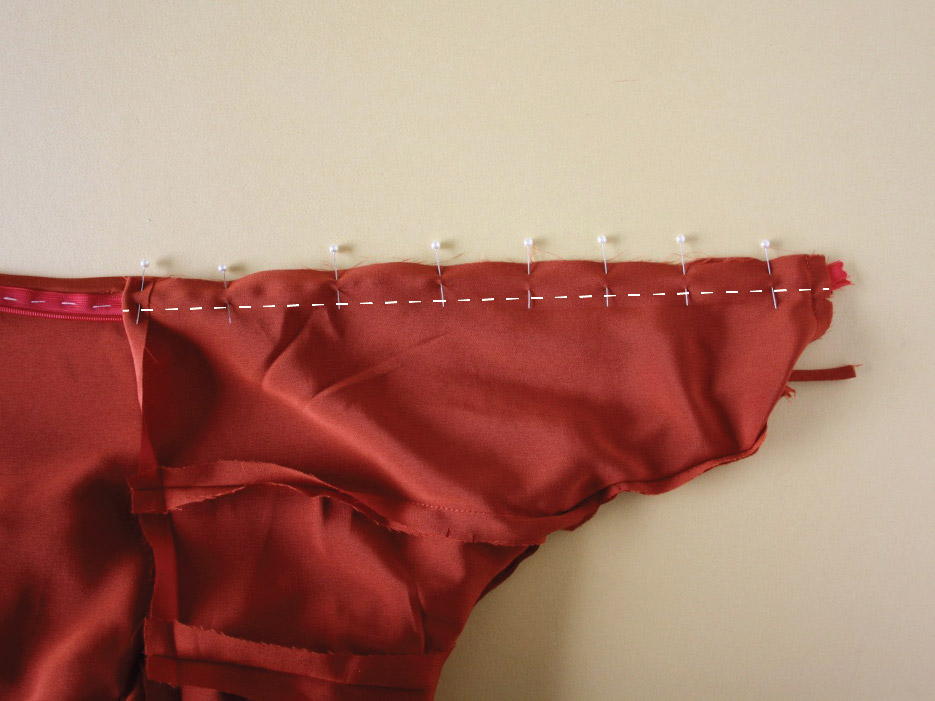
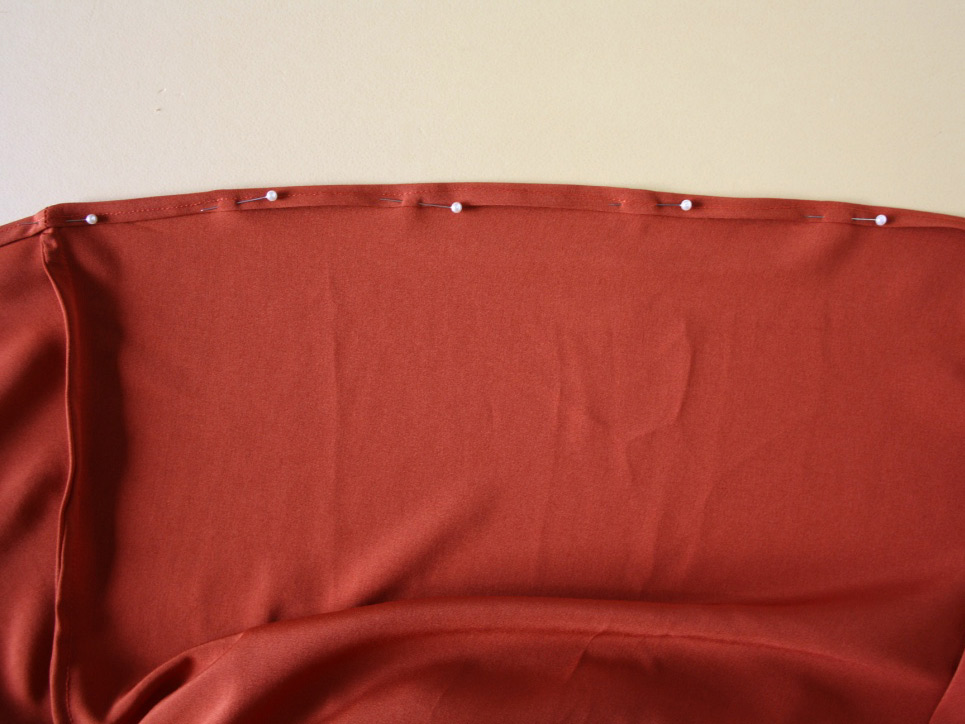
With the dress right side out, pin the lining to the bodice (with right sides together). Start at the centre back and work your way around the armhole, matching each set of seam lines. Be sure to have the zip open and the centre back seam allowances pressed flat and not folded back.

Continue pinning until you reach the centre back on the other side. This step can be a little awkward as the straps are quite short, so keep checking that the straps haven’t been caught up by the pins.

Stitch along the edge with a 1cm (⅜in) seam allowance.
Trim down the seam allowance by 5-6mm (¼in) and clip into the curves. Turn the dress to the right side.
UNDERSTITCH

Lay the seam flat, and with the seam allowances pushed towards the lining, understitch the seam
allowances to the lining. Start as close as you can get to the top of the back armhole and continue around the armhole.

Stitch as close as you can to the strap, before back stitching and then moving on to the neckline.
Backstitch again when you get as close as you can to the second strap, before moving on to the
second armhole.
Attach lining at centre back

With the bodice turned inside out, pin along the centre back seam - sandwiching the zip between
the bodice and the lining. Turn up the bottom edge by 1.2cm (½in) and pin in place (this is where the crease you made earlier comes in handy).
Using a regular zip foot, stitch the lining in place, by stitching next to the zip on the side closest to the raw edges. Repeat for the second side.
CLIP THE CORNERS

Trim back the seam allowances on either side of the corner to minimise bulk. On the lining, trim back the seam allowance from the bottom corner close to the zip, to minimise bulk in this area.

Turn the bodice right side out and use a corner turner (or pencil) to get a nice sharp corner, before giving the bodice a good press.

Before pinning the lining in place, use the cuts in the seam allowance at either side, to overlap the
seam allowances. Pin seams flat to the bodice.
ATTACH LINING AT THE WAIST
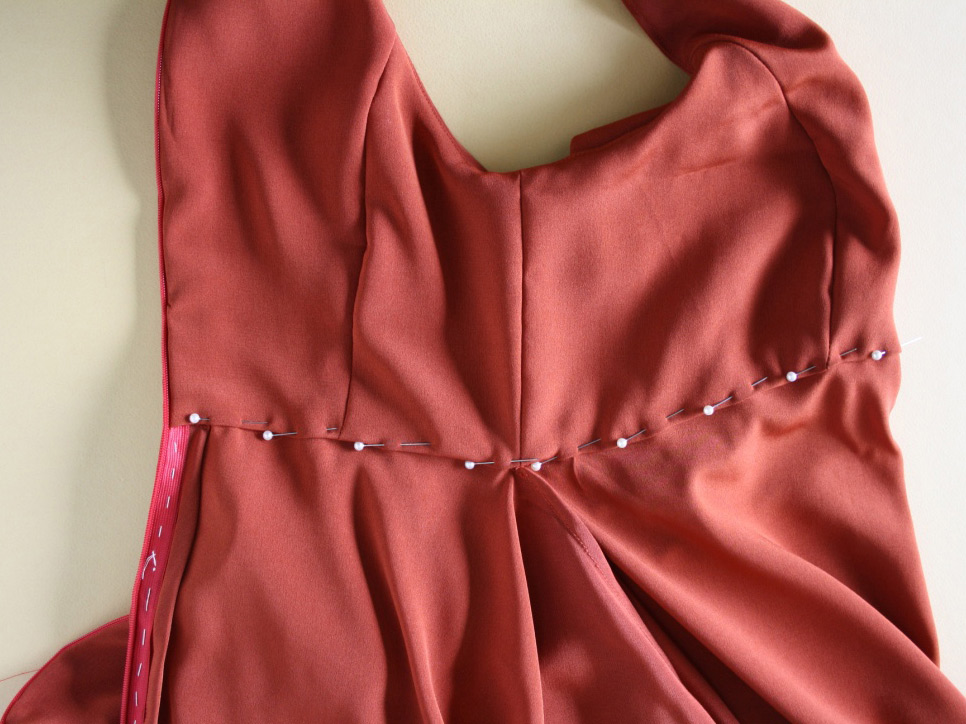
With the seam allowance on the lining still folded under, pin the lining to the bodice, along the waistline.
If you would like to stitch the lining in place by machine, turn the bodice to the right side, insert pins through the wasitline (ensuring that you catch the lining) and then stitch in the ditch (look here for more details).

To sew by hand (for a really clean finish on the inside and outside) take a sharp fine needle and pick up a few threads at the waistline seam, before feeding the needle through the fold line on the bodice lining and then going back through the waistline.
Hemming
Before hemming your dress it is a good idea to let it hang overnight to let the hem drop (particularly if you are using silk or similar). Trim down the hem if necessary after hanging.

With the dress inside out, turn up the hem by 6mm (¼in) and stitch. You can simply do this with your finger rather than pressing and pinning. Turn the hem by another 6mm (¼in) and press. Pin hem in place and stitch along the original stitch line to complete the hem.
Turn the hem by another 6mm (¼in) and press. Pin hem in place and stitch along the original stitch line to complete the hem.
And that's it! Both our Actons are all done. For a review of all the posts we've covered, have a look here.
I hope you have enjoyed the sew-along, and learned a thing or two!