
THE Q & A SERIES
How to raise an armscye on a pattern
Hi there!
I enjoyed seeing your answer to last week's question and I have a follow-up question. Rather than how to lower the armscye on a pattern, how do I go about raising the armscye?
Thanks,
Jenna
WHAT IS AN ARMSCYE ADJUSTMENT?
We’re happy to hear you found last week’s tutorial interesting!
As we explained in last week's email, an armscye (or armhole) adjustment is where you redraw a sewing pattern to make it fit your body. In this case, we need to raise the armscye to accommodate the unique shape of the body.
How do I know if I need to raise an armscye?
You'll know you need to raise the armscye of a garment if:
The armhole sits lower than you would like. In this case you might see the garment sitting lower than the top of your bra.
The armhole feels too long - it feels as though there is too much fabric in the armscye.
How to raise the armscye on a pattern

The first question to ask yourself is - how much would you like to raise the armscye by?
The easiest way to work this out is by trying on the garment. Stand side-on in front of a mirror and lift your arm. Take a ruler and hold the top of it where you would like the bottom of the armscye to sit. Record the distance between the top of the ruler and the original armscye position. You could use a tape measure to do this, but we find it easier to use a ruler as it remains straight - if you have a friend to help you then a tape measure is fine.

It’s also a good idea to visualise how this will change the shape of the armhole, as when you raise the armscye it will also make it smaller. In the illustration above we have marked the new armscye on the garment so you can visualise the alteration before making it.
Make the adjustment on the pattern
Step 1
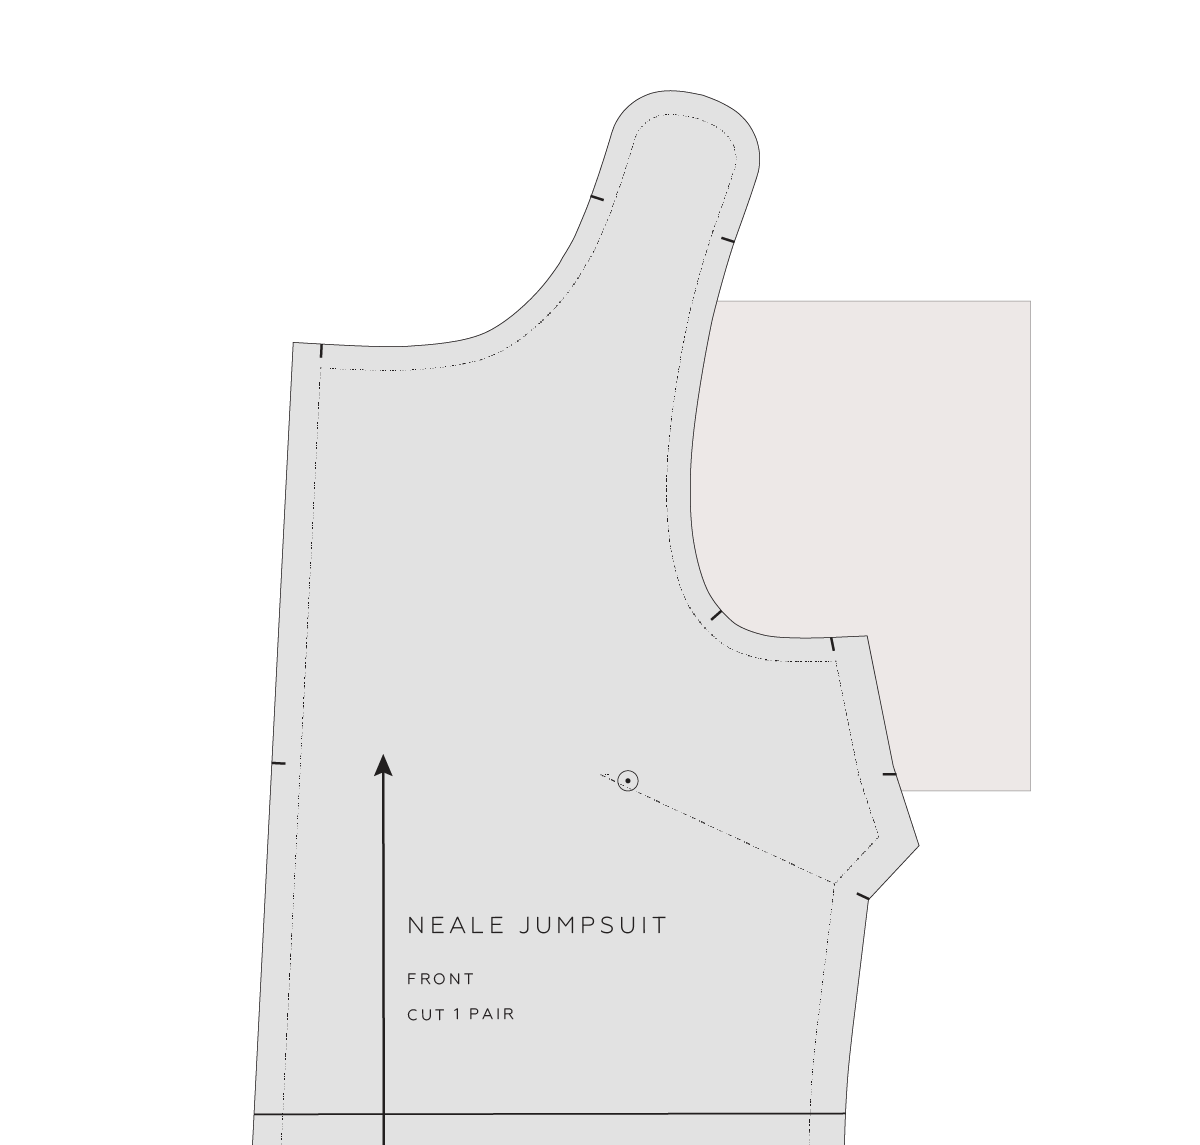
Take some pattern paper and tape / glue to the front armhole. This is the area we will be raising up and filling in with more paper (which means more fabric when we cut the pattern).

Step 2
Take a ruler and pencil. Extend the side seam stitch line up onto the attached paper. Be sure to follow the angle of the original side seam.
On In the Folds patterns the stitch line is marked on the pattern (the stitch line is the pattern without seam allowance), but if your pattern doesn’t have the stitch line marked, you will need to mark it first.
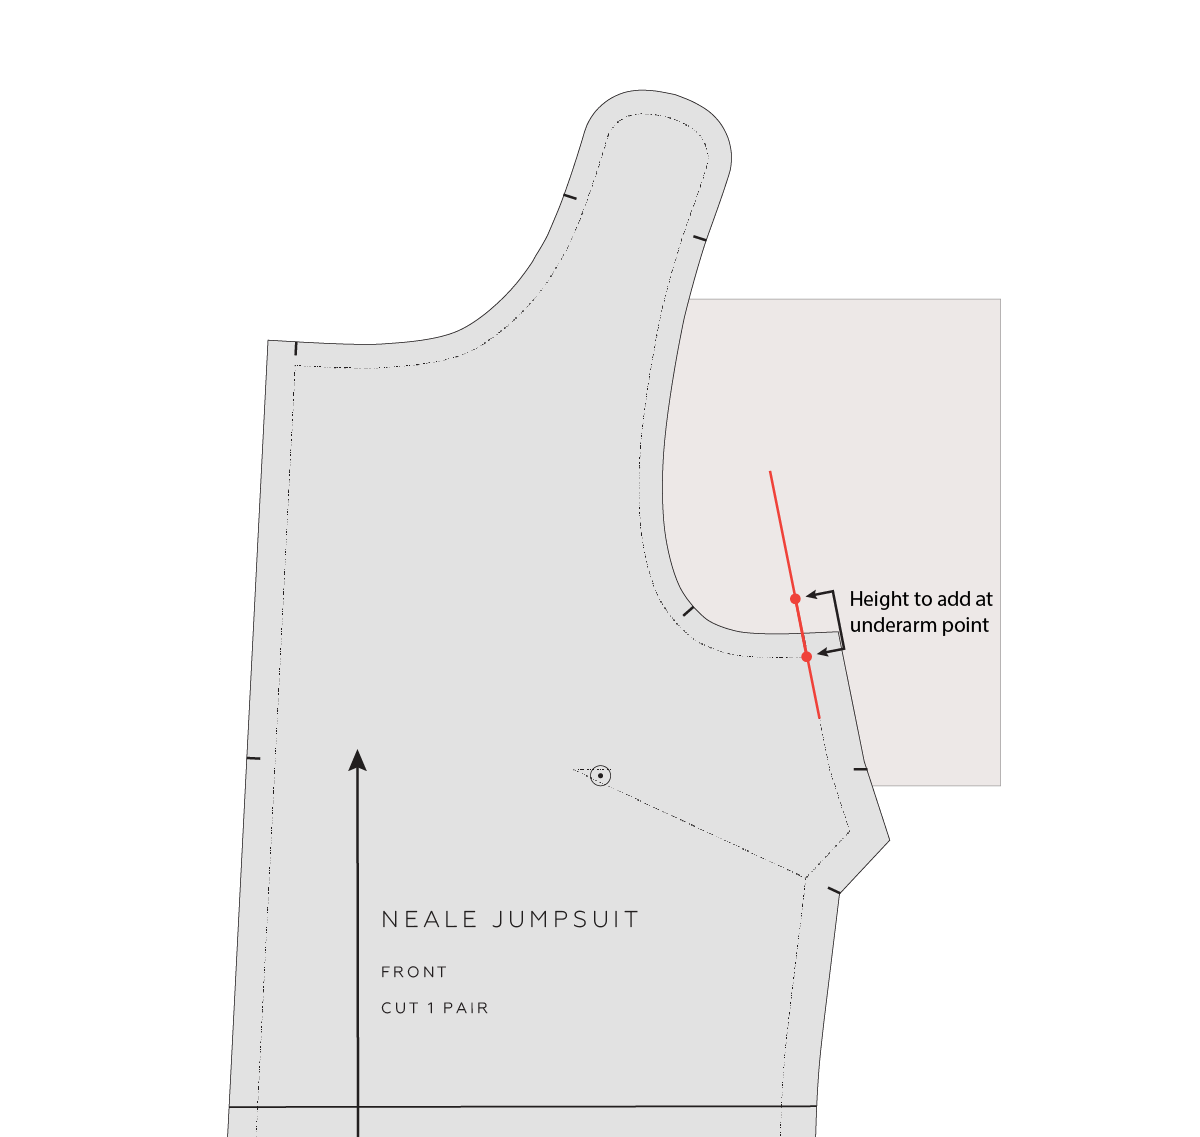
Step 3
On the line marked in the previous step, measure up from the point where the side seam stitch line meets the armhole stitch line, mark the amount you would like to raise the armhole by (this is the measurement you found when you took the measurement from your toile).

Step 4
Redraw the armscye curve - joining the point marked in STEP 3 to the original armscye stitch line. We suggest joining the armscye about one-third of the way around the curve when measuring from the bottom, although this will depend on how much you are raising the armscye by. If you are only raising the armhole by more than 1.5cm (5/8in), you may need to join the new line higher up the armscye to ensure the transition remains nice and smooth.
This will take a bit of trial and error to get a line you are happy with. Take it easy and use a pencil. A French curve or Patternmaster will come in handy for this.
The line that meets the side seam should be fairly flat by the time it meets the side seam stitch line. This will ensure the armscye doesn’t come to a point under the arm. Get it as smooth as you can, but we will check this again in a moment, so the line does not have to be finalised yet.

Step 5
Repeat STEPS 1-2 on the BACK pattern piece. You need to raise the armscye on the FRONT and BACK by the same amount.
Step 6
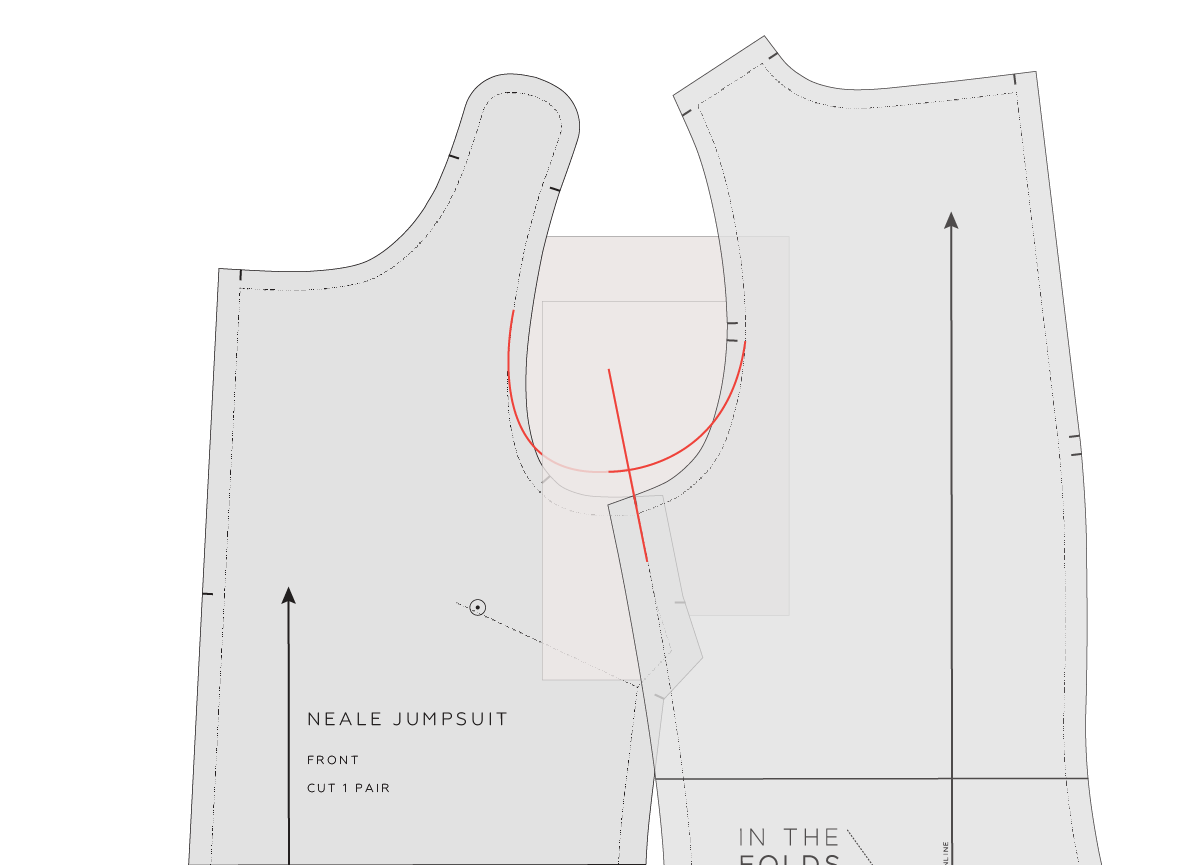
Place the FRONT and BACK pieces together at the side seam, stitch line on stitch line, as if the pieces have been joined.
Check that the curve from the front armscye runs smoothly through the side seam to the back and there are no dips or bumps.
Smooth out the armscye if it needs it and use a tracing wheel to transfer the markings to the overlapped section of the pieces.

Step 7
Add seam allowance onto the new armscye stitch lines on the FRONT and BACK. The seam allowance needs to be the same amount that was on the original armscye line. More information on how to add seam allowance to a pattern can be found here.
Cut along the new armscye seam allowance line to remove the excess paper.

Step 8
Move any notches to the new pattern edge. In this case, it’s the seam allowance notches on the side seam and the FRONT armscye notch.
Step 9
To finalise the pattern, make the same adjustment to the armhole facing pieces (if the pattern has facings).
Happy sewing,
Emily
For more issues of the Q & A series, you can check out the archive here.
WHAT YOU’VE BEEN MAKING

Peppermint Pleated skirt made by @adymadie

Hove jacket made by @sewing_kat


