
THE Q & A SERIES
HOW TO DO A FORWARD SHOULDER ADJUSTMENT ON a CURVED SHOULDER SEAM
Hey Emily,
How do I do a forward shoulder adjustment with the sloped shoulder on the Marden shirt???
Suthi, Curated by ITF member
One of the features we love about the Marden shirt is that smooth, shaped shoulder.
And even though some members of our Curated by ITF community weren’t sure about it at first, we were quietly confident that once they made the shirt and put it on, they’d fall in love with it.
And we were right! (See Exhibit A below, a conversation thread from our private Curated by ITF online community.)


Sue’s Liberty Marden shirt in View B.

Lynn’s linen Marden shirt in View A.
But if, like some of our Curated community members, one of your go-to fitting alterations is a forward shoulder adjustment (FSA), the curved shoulder line may leave you scratching your head. So we’ve come to your rescue with the answer you’re seeking!
Not sure what a forward shoulder adjustment is? Read this tutorial.
how to do a forward shoulder adjustment on a curved shoulder seam
As a quick overview, what we’re going to do is remove the shoulder shaping, make the FSA as we normally would and then add the shoulder shaping back on.
Let’s go!

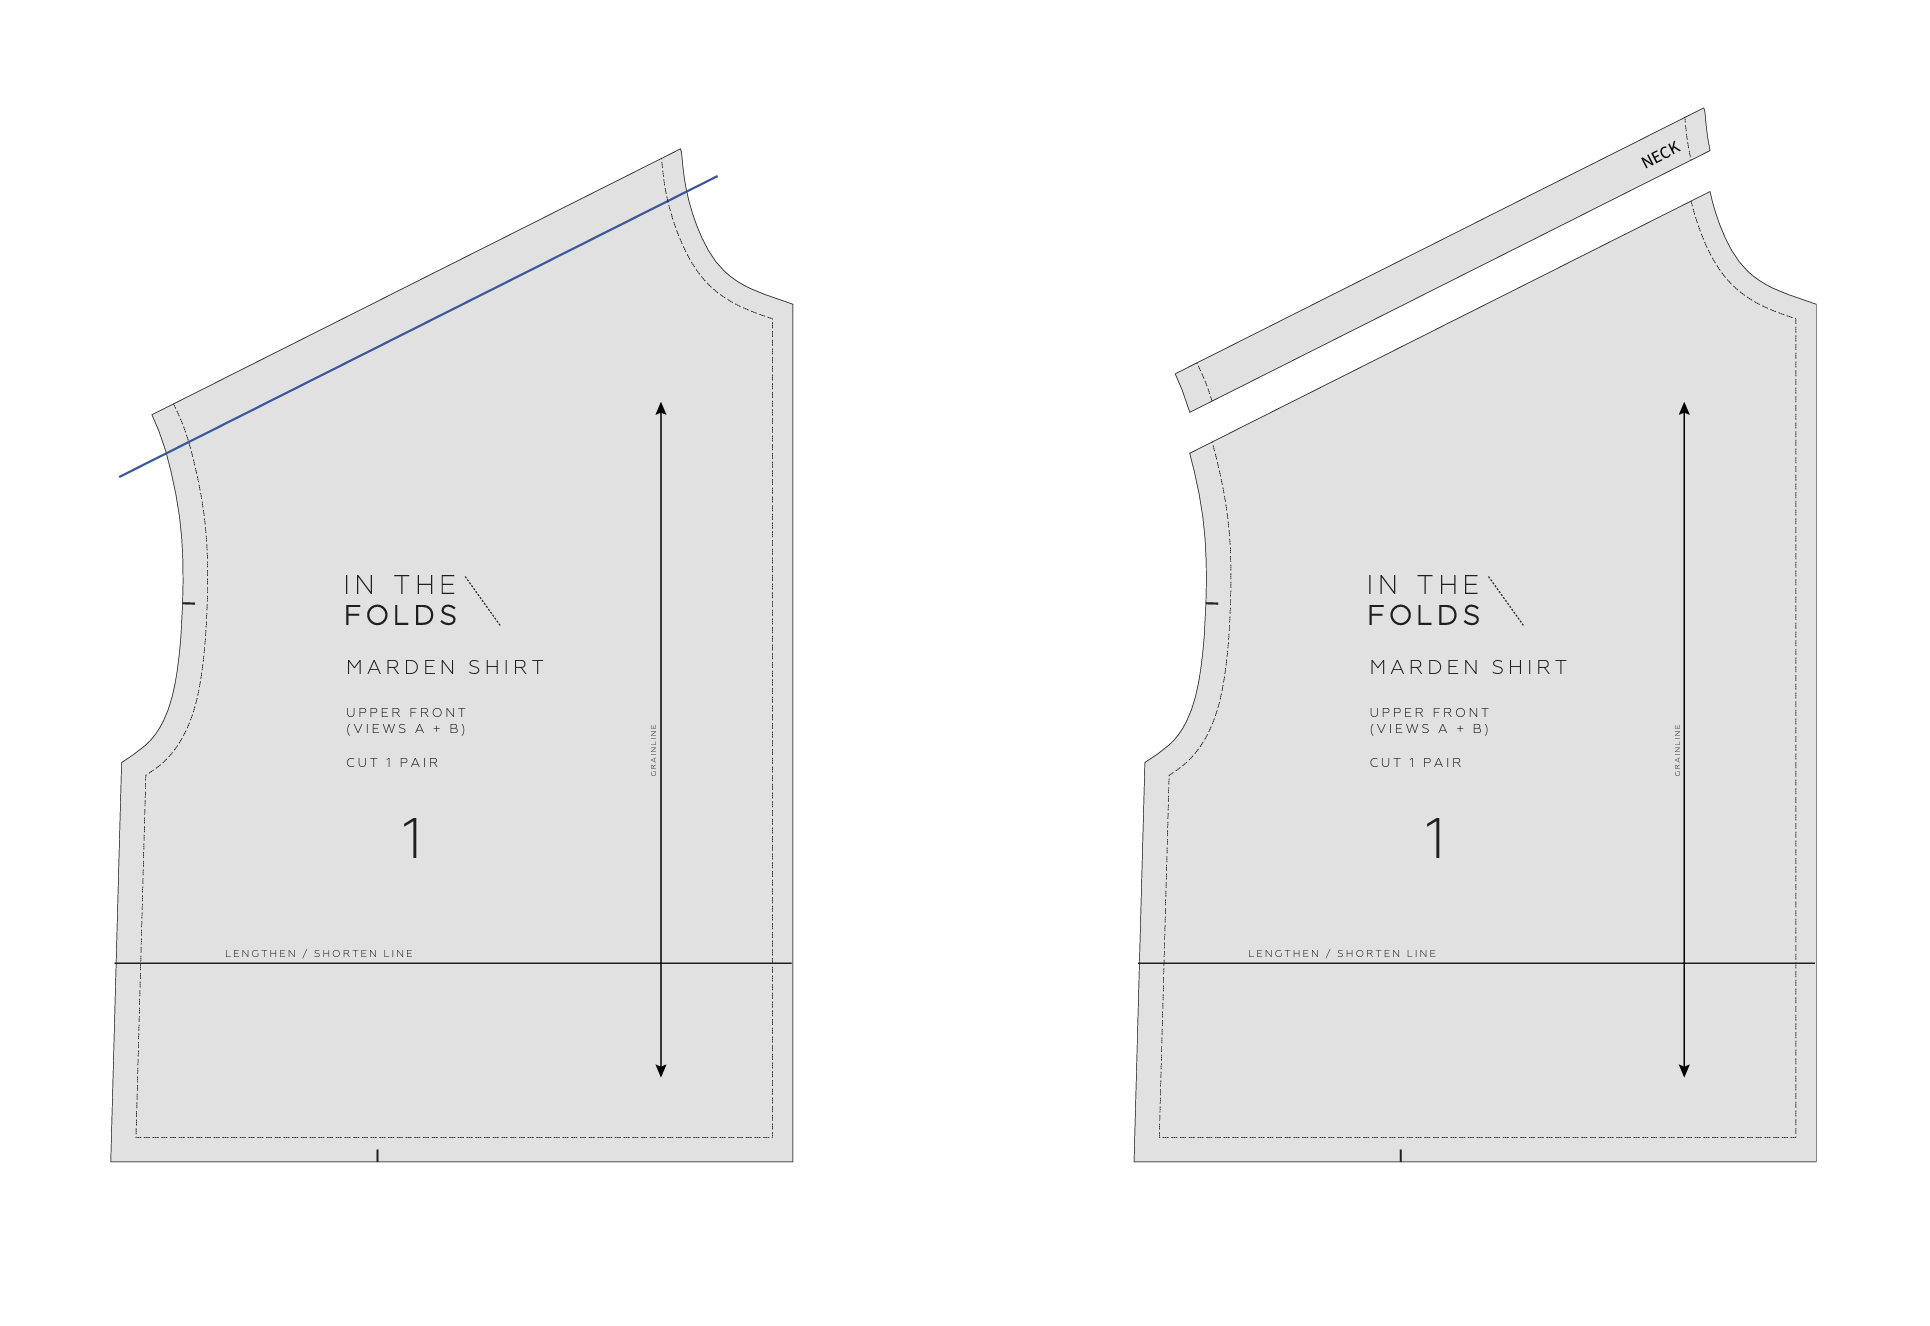
STEP 1
Draw a straight line through the shoulder STITCH LINE, intersecting with the armhole and neckline at each side on the FRONT and BACK.

STEP 2
Cut along the lines marked in STEP 1 and label as ‘FRONT SHOULDER’ and ‘BACK SHOULDER.’
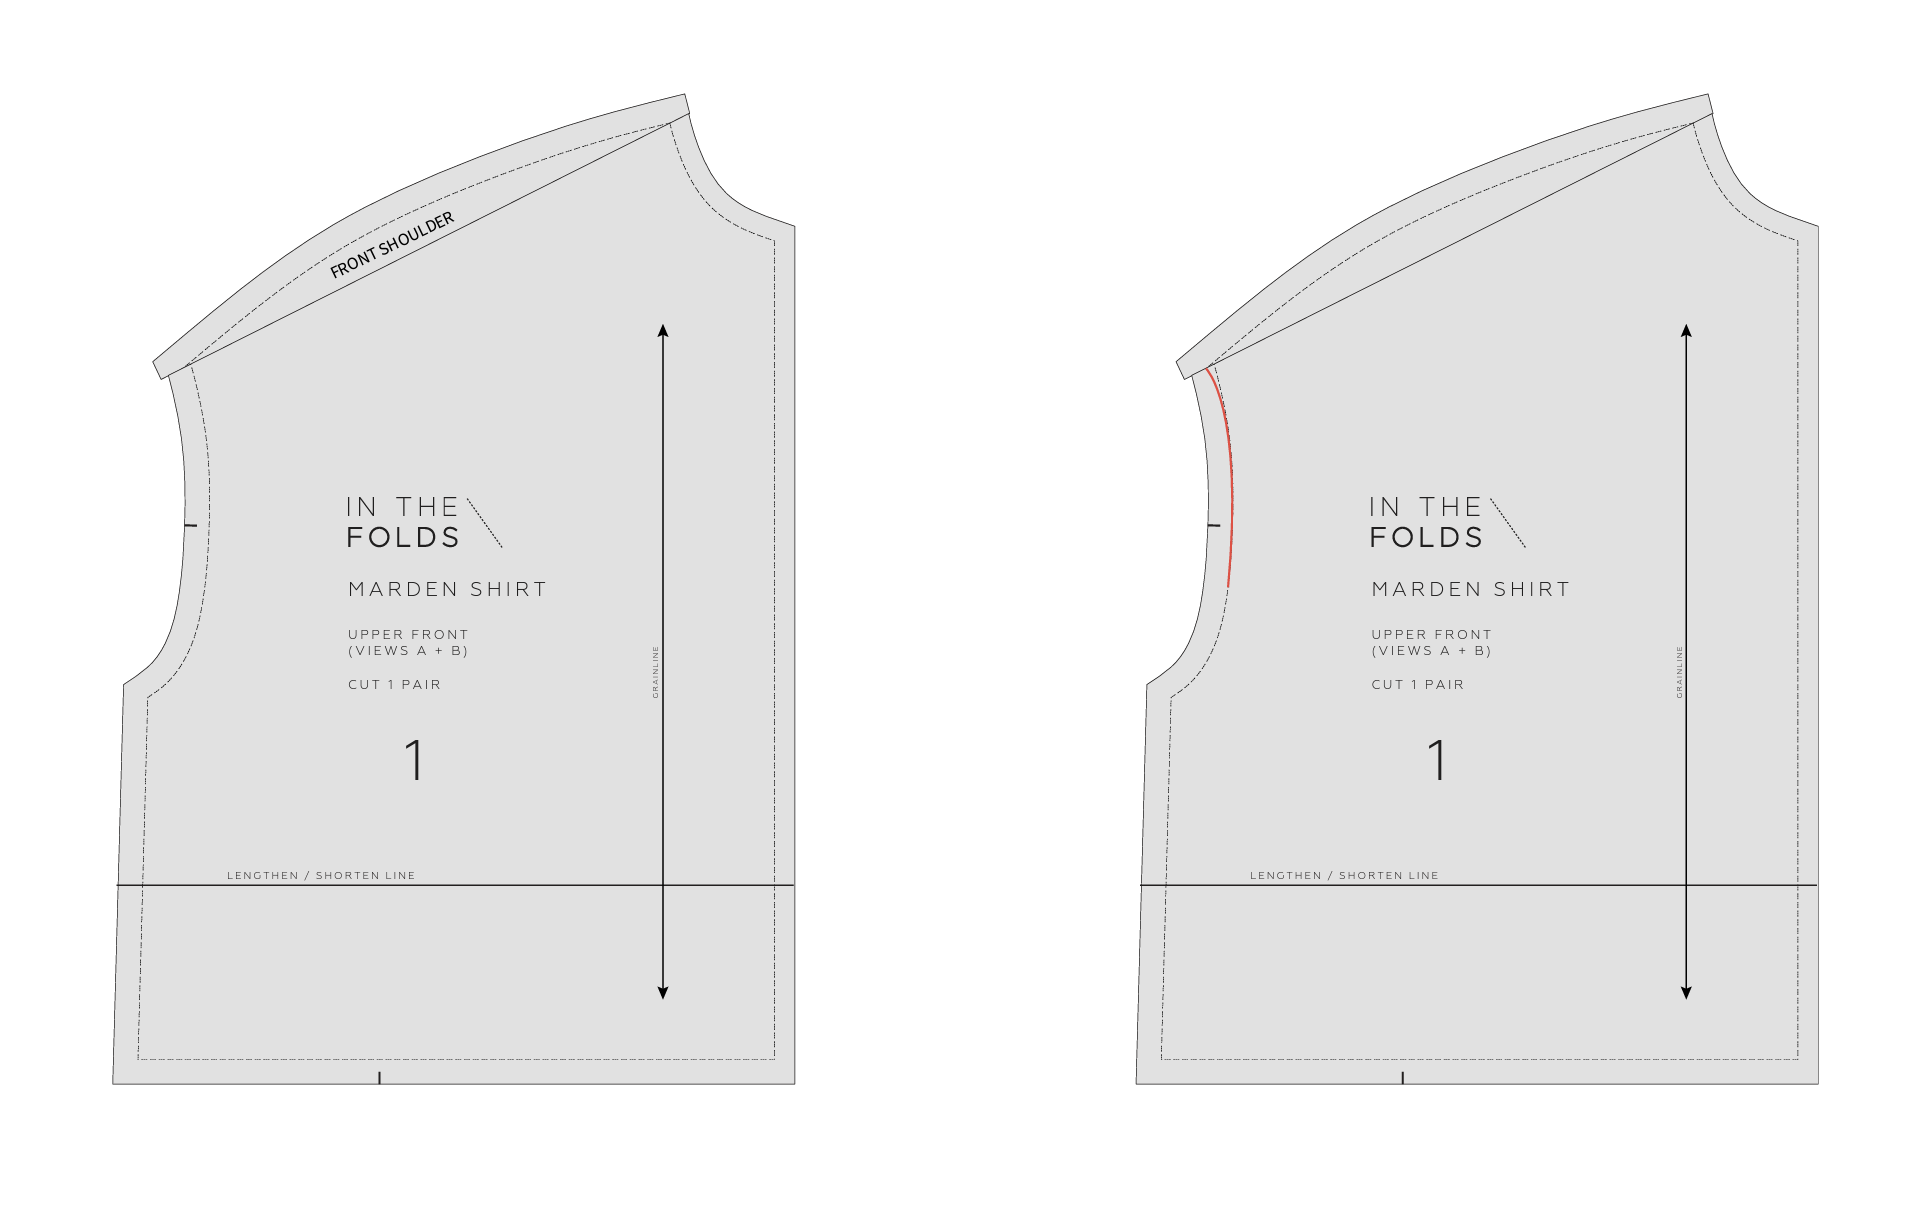
STEP 3
On the FRONT, mark the amount you would like to move the shoulder seam forward by. For example, if you need to move the seam 2cm (¾in) forward, draw a line 2cm from the cut line. (Not sure how much you need to move the shoulder seam by? Read this post.)
Cut along the line and label the side that’s close to the NECK so you get the piece around the right way when you join it to the BACK.

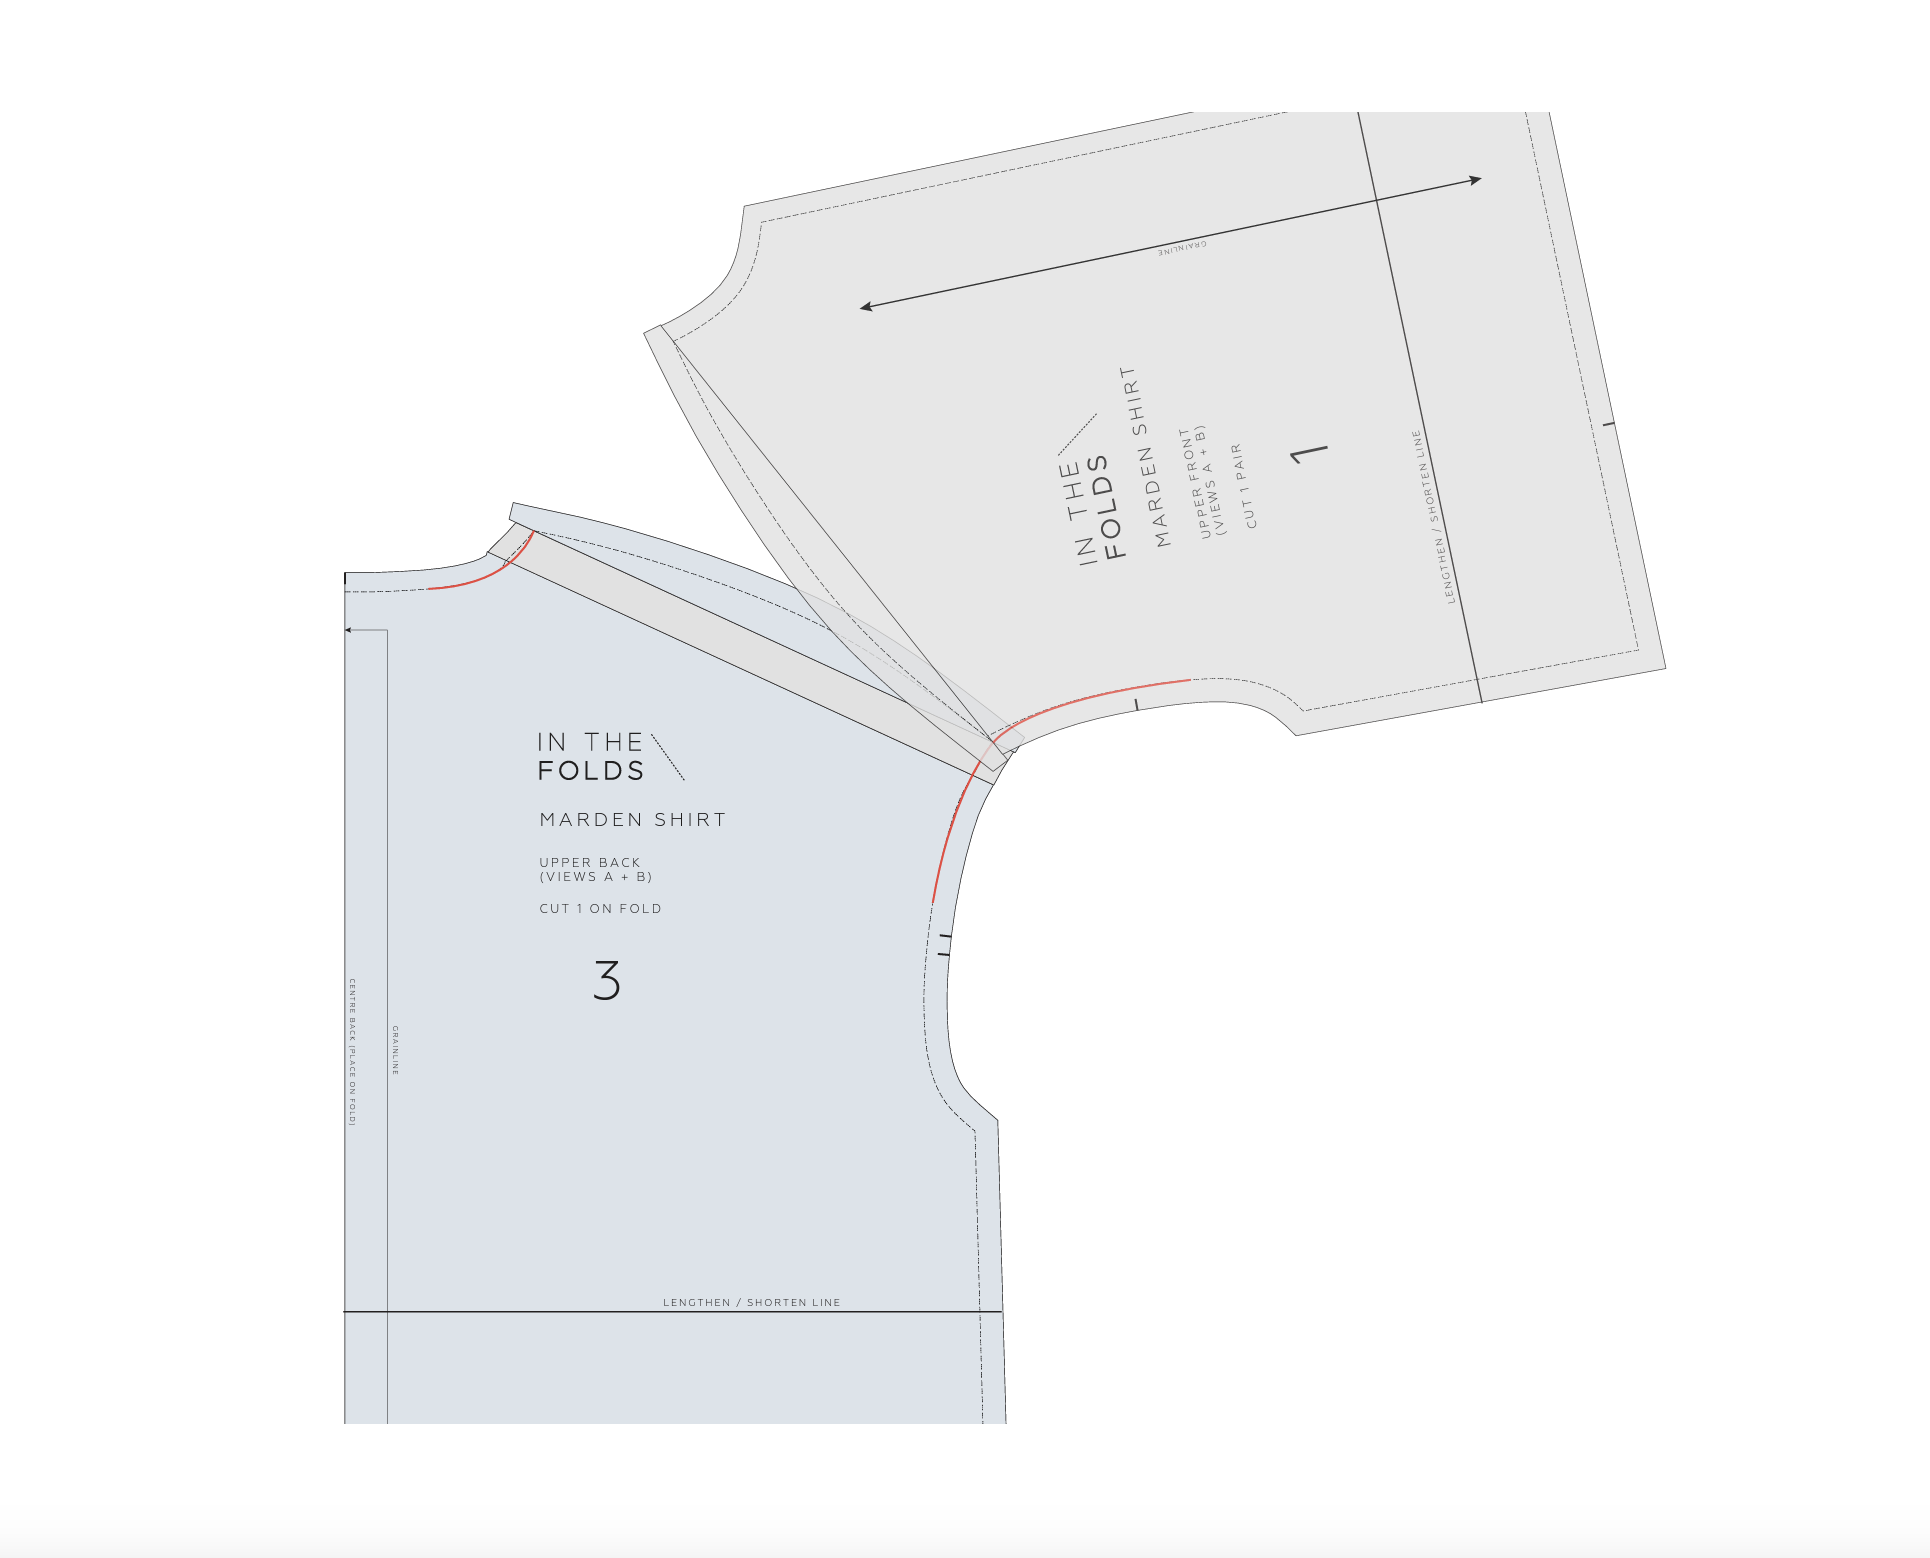
STEP 4
Stick the piece cut from the FRONT onto the BACK. You may need to add some paper behind the piece to make it easier to attach it accurately. Attach the BACK shoulder shaping back on.

STEP 5
Smooth out the stitchlines around the armhole and neckline where the adjustments have been made.
STEP 6
Attach the FRONT shoulder shaping back onto the FRONT. Smooth out the armhole and neckline (if required).

STEP 7
Line up the FRONT and BACK neckline at the shoulder to check the flow through, and adjust if necessary. Read this post about checking and truing adjustments when patternmaking.
STEP 8
Line up the FRONT and BACK neckline at the armhole to check the flow through, and adjust if necessary.
And that’s it! It’s not as scary as it seems. I hope this helps you get your Marden shirts to fit perfectly.
Happy sewing,
Emily
RESOURCES MENTIONED IN THIS ISSUE
The Sewing Shirts Skills Kit and the Marden shirt pattern are the first and second parts of our Sewing Shirts Series, which is available through our Curated by ITF subscription. Past issues are now available for purchase by current subscribers.
How to do a forward shoulder adjustment - blog post here.
How to check and true sewing patterns - blog post here.
For more issues of the Q & A series, you can check out the archive here.
WHAT YOU’VE BEEN MAKING

Sawtell dress made by @catford_quilters

Rushcutter dress tunic top made by @mamasuesews

