I hope you have been enjoying the Collins Top Sew-along over the past couple of weeks. So far, we've covered pattern alterations and sewing View A (sleeve version). Now, it's time to get started on View B (the sleeveless version).
Assemble front + back body
If you are making View B of the Collins Top (the sleeveless version), you need to assemble the main body pieces in the same way as you would if you were making View A (sleeve version). For a tutorial on how to do this, check out this tutorial.
Once you have assembled the front and back of the top, you will need to attach the shoulder panels.
Attach shoulder panels

We will be attaching the BACK SHOULDER PANELS to the back of the top. When you line up the pieces, you will notice that the curve of the panel differs slightly to the centre back panel piece (this allows for a nice fit in the finished garment). This means that to pin (and later stitch) the pieces together, it will require a little bit of easing.

Pin the BACK SHOULDER PANEL pieces to the back of the top, with right sides together. Use the notches to guide you.
Stitch seams with a 1.2cm (½in) seam allowance. These seams will be enclosed inside the facing so do not need to be finished (unless your fabric is prone to fraying).

Press seam allowances up towards the shoulder panels. Finish the side seams using your chosen method.
Staystitch

Carefully staystitch around the neckline (stitch from shoulder to centre back on each side of the opening) with the seam allowance open (not folded back).
At this point you can also staystitch the armholes (from top to bottom). This will prevent the curves from stretching out as you make the garment.
Staystitching should be inside the permanent stitch line (so it remains hidden inside the seam allowance), so in this case approximately 6mm (¼in) from the raw edge will suffice. Staystitch armholes on the front of the top.

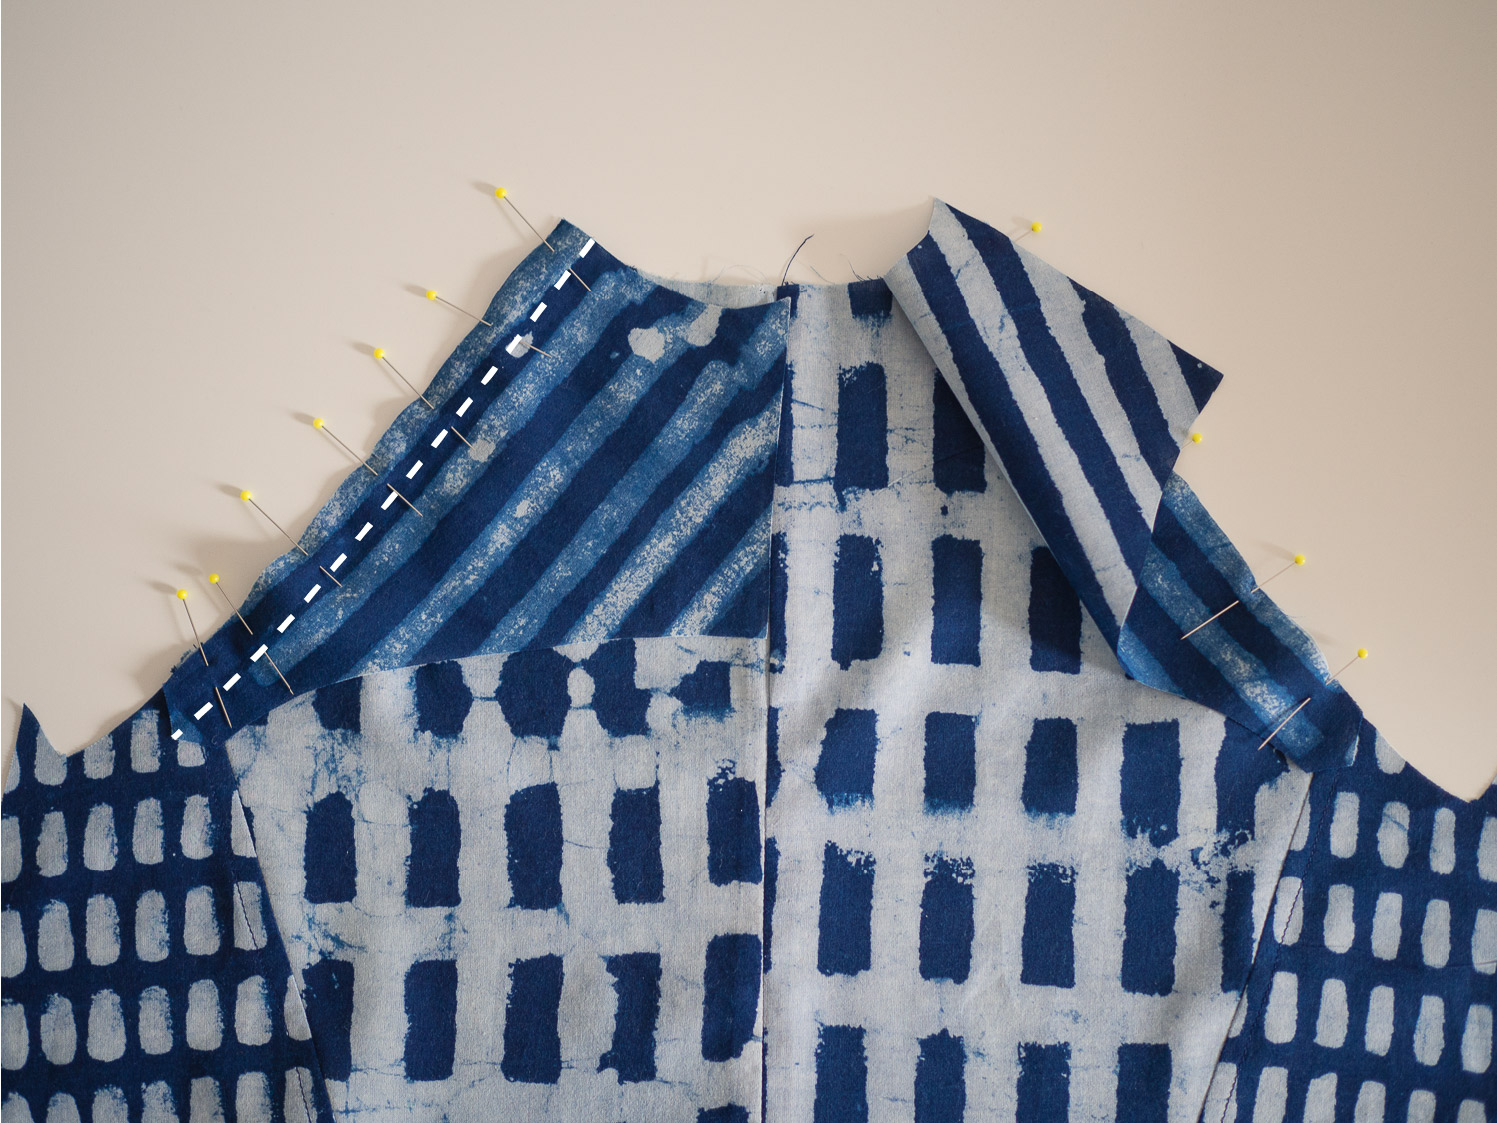
Repeat process for the FRONT SHOULDER PANELS. Pin the FRONT SHOULDER PANEL pieces to the front of the top, with right sides together. Use the notches to guide you. Like the back, this will require a little bit of easing. Stitch seams with a 1.2cm (½in) seam allowance. Press seam allowances up towards the shoulder panels.
You will notice in this photograph that Saki (the sew-along photographer) has chosen to add top-stitching to the panel line. This is not part of the instructions, but if you would like to add a nice little detail, go right ahead!
Staystitch neckline and armholes.
Join shoulder seams

With right sides together, pin the front and back shoulder seams together. Stitch with a 1.5cm (⅝in) seam allowance

Press seam allowance open. Again, these seam allowances do not need to be finished, unless your fabric is prone to fraying.
And we can leave it there for the time being. In the next post we will be attaching the facing. If you would prefer to bind the neckline with bias binding, check out this tutorial.