During the Acton sew-along, I showed you a range of different alterations you may need to make to your Acton dress pattern.
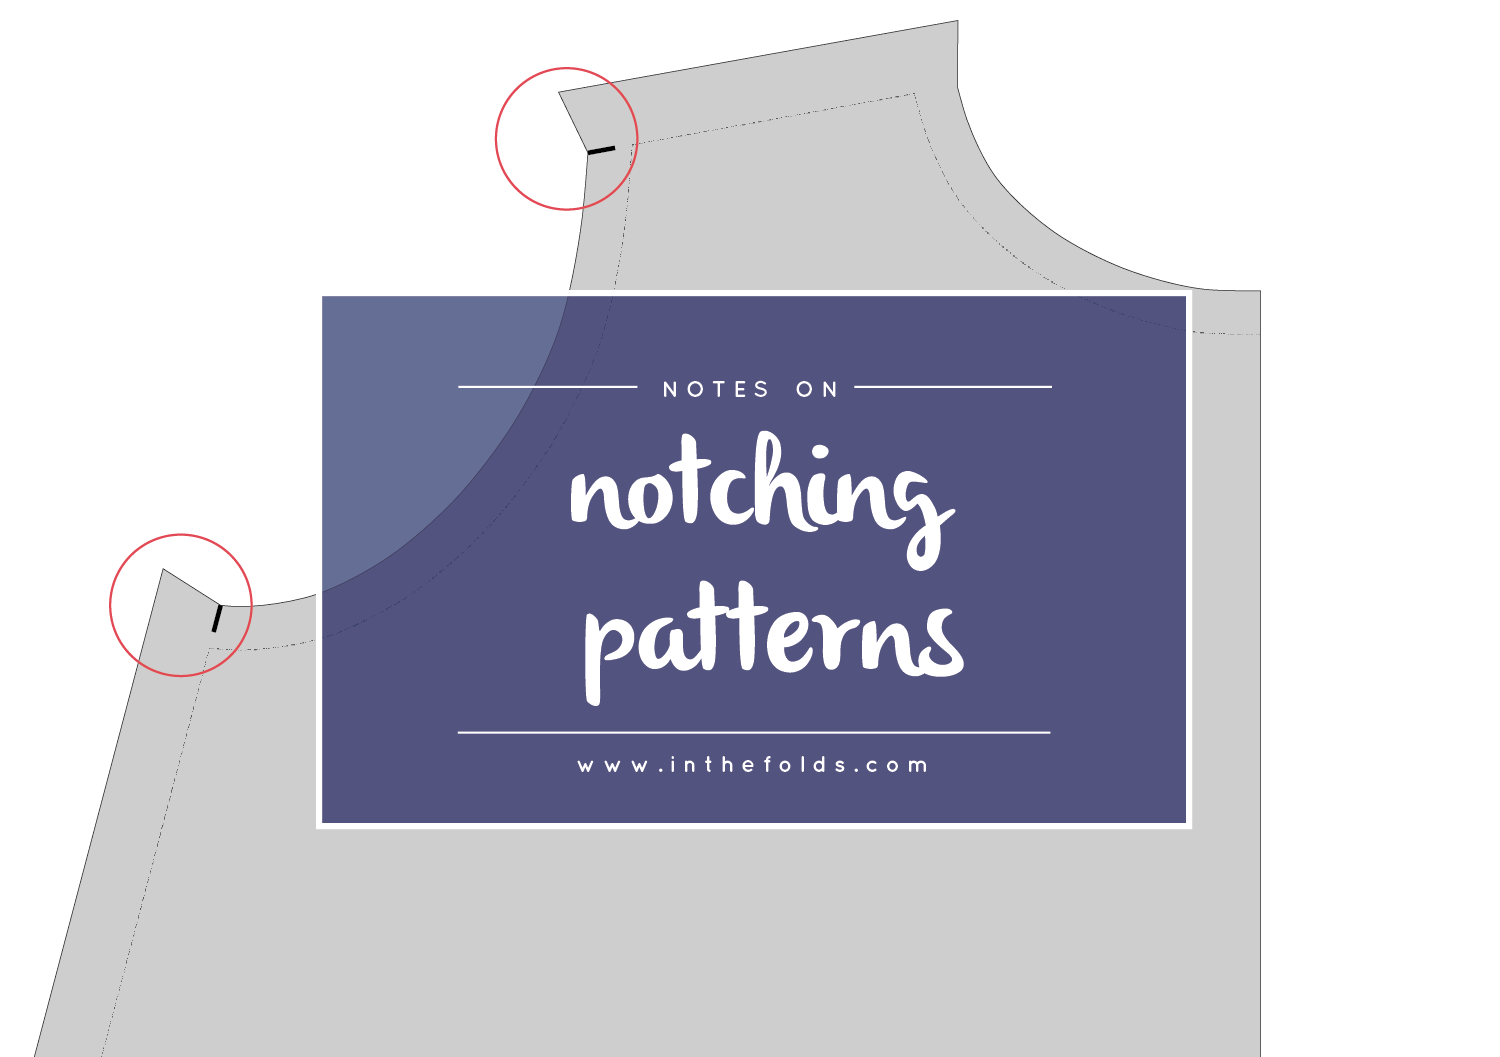
As I was creating the tutorials, I realised that I probably should provide some information on how to notch patterns correctly. Sometimes, when making alterations to patterns, you may displace a notch or two, so today I will show you how to re-mark notches, as well as add notches to your own patterns (if you are drafting from scratch).
Just in case you have no idea what I'm talking about, I thought I'd start by letting you know what a notch is, and then how to use them.
What is a notch?
A notch is a small cut in the fabric (or a triangle on some commercial patterns) that help guide you while you are sewing. They are used to indicate seam allowance, dart arms, the location of design details, such as pleats, tucks, gathers, hems and pockets, or indicate key points on the pattern (like the centre front or centre back). Notches are also used to indicate balance points (points on your pattern that help you sew the right pieces together, as well as help you when you are sewing long or curved seams).
Why use notches?
If you are drafting your own patterns, you will be wanting to add notches to your patterns to make it easier to assemble the garment. If you are clever about where you put them, having well placed notches can help you assemble a pattern without instructions (which is handy if you are drafting your own patterns, as you won't have any!). Notches will help you know which piece is the front or back, what seam allowance is required and if there are any special design details such as pleats.
If you are designing patterns for other people, I think it is even more important for you to take the time to notch patterns correctly. I know the way I notch my patterns is an aspect that people really like about my patterns. They act as little markers along the way that let you know you are putting the garment together correctly. I remember one of the women that tested the Rushuctter pattern for me said she felt that each time she reached a notch, she felt like it was a little tick to let her know she was going well. As designers, it's not just about making patterns that help sewists make beautiful clothing. It's also about making a pattern that creates an enjoyable and memorable making experience, and I believe that attention to detail is a great way to do this.
Where should I place the notches?
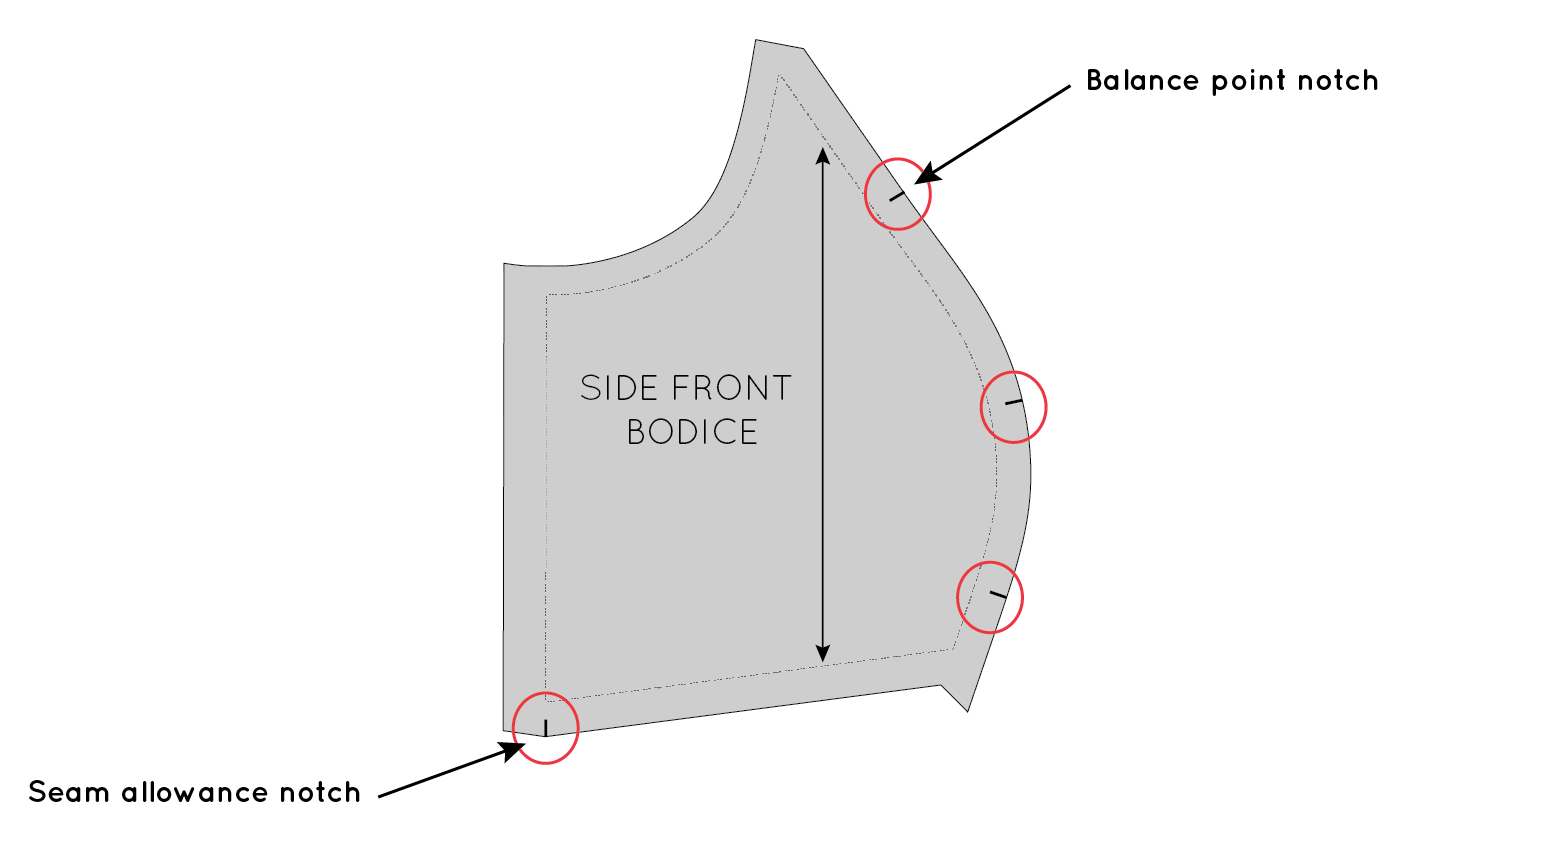
I thought it would make the most sense if I showed you one of my patterns and where each notch was placed, and why, and then you can apply this method to your own patterns. It really is very simple if you just add your notches in a methodical way. The pattern I am using for the example is the Peplum Top that I made in collaboration with Peppermint Magazine, that can be downloaded for free here.
Indicate seam allowance
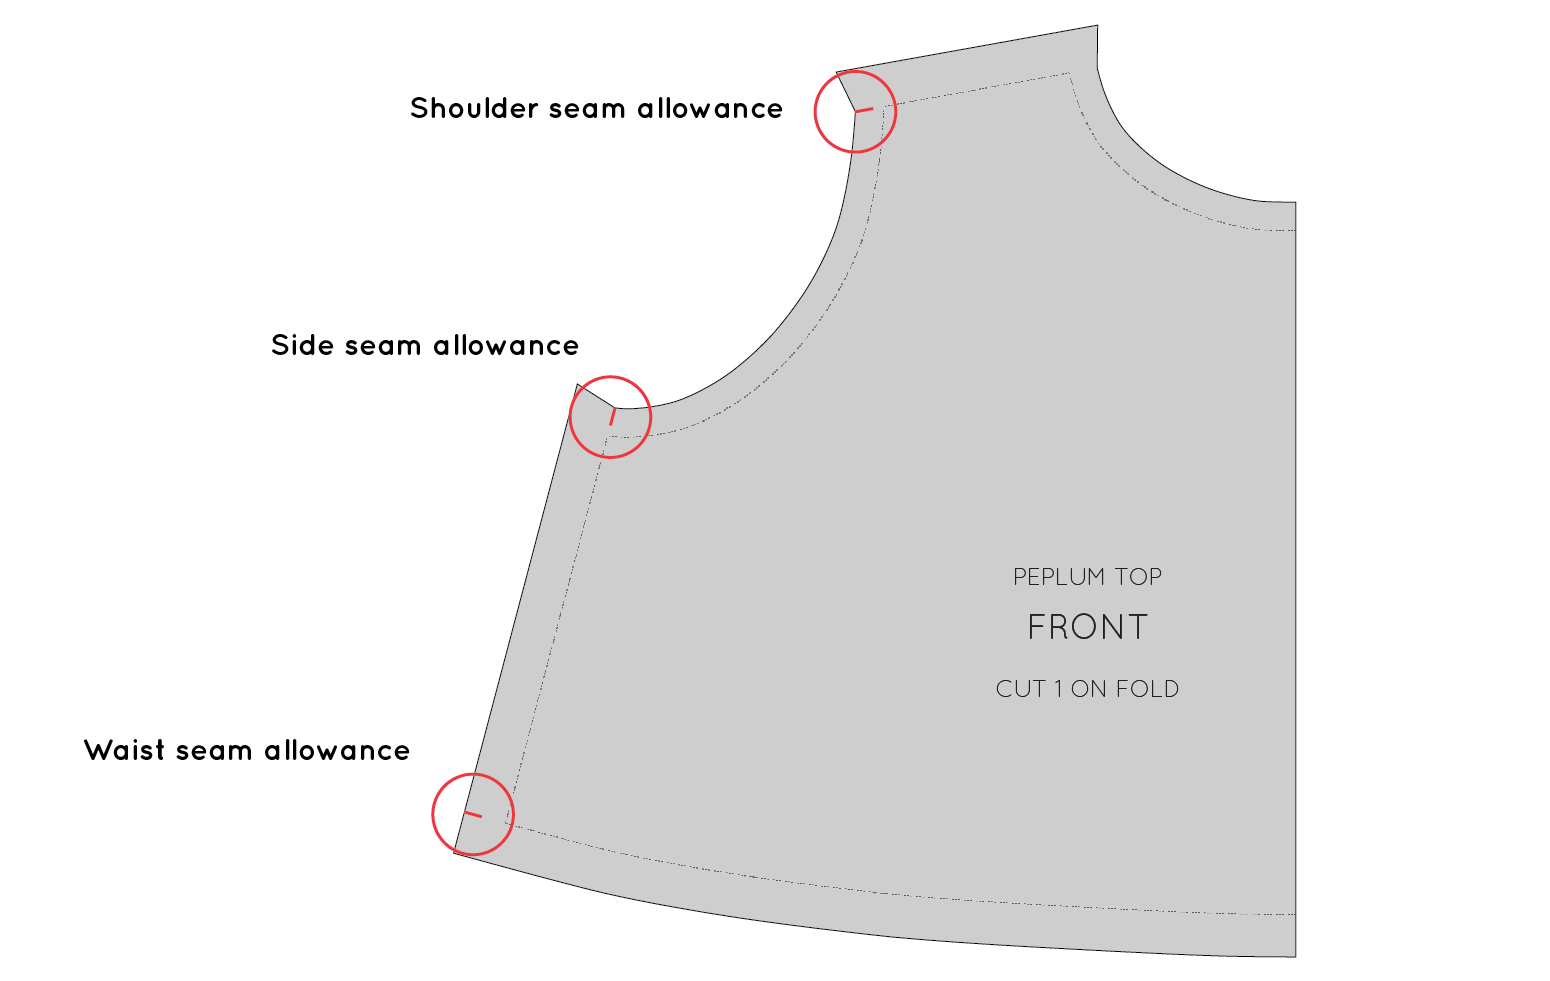
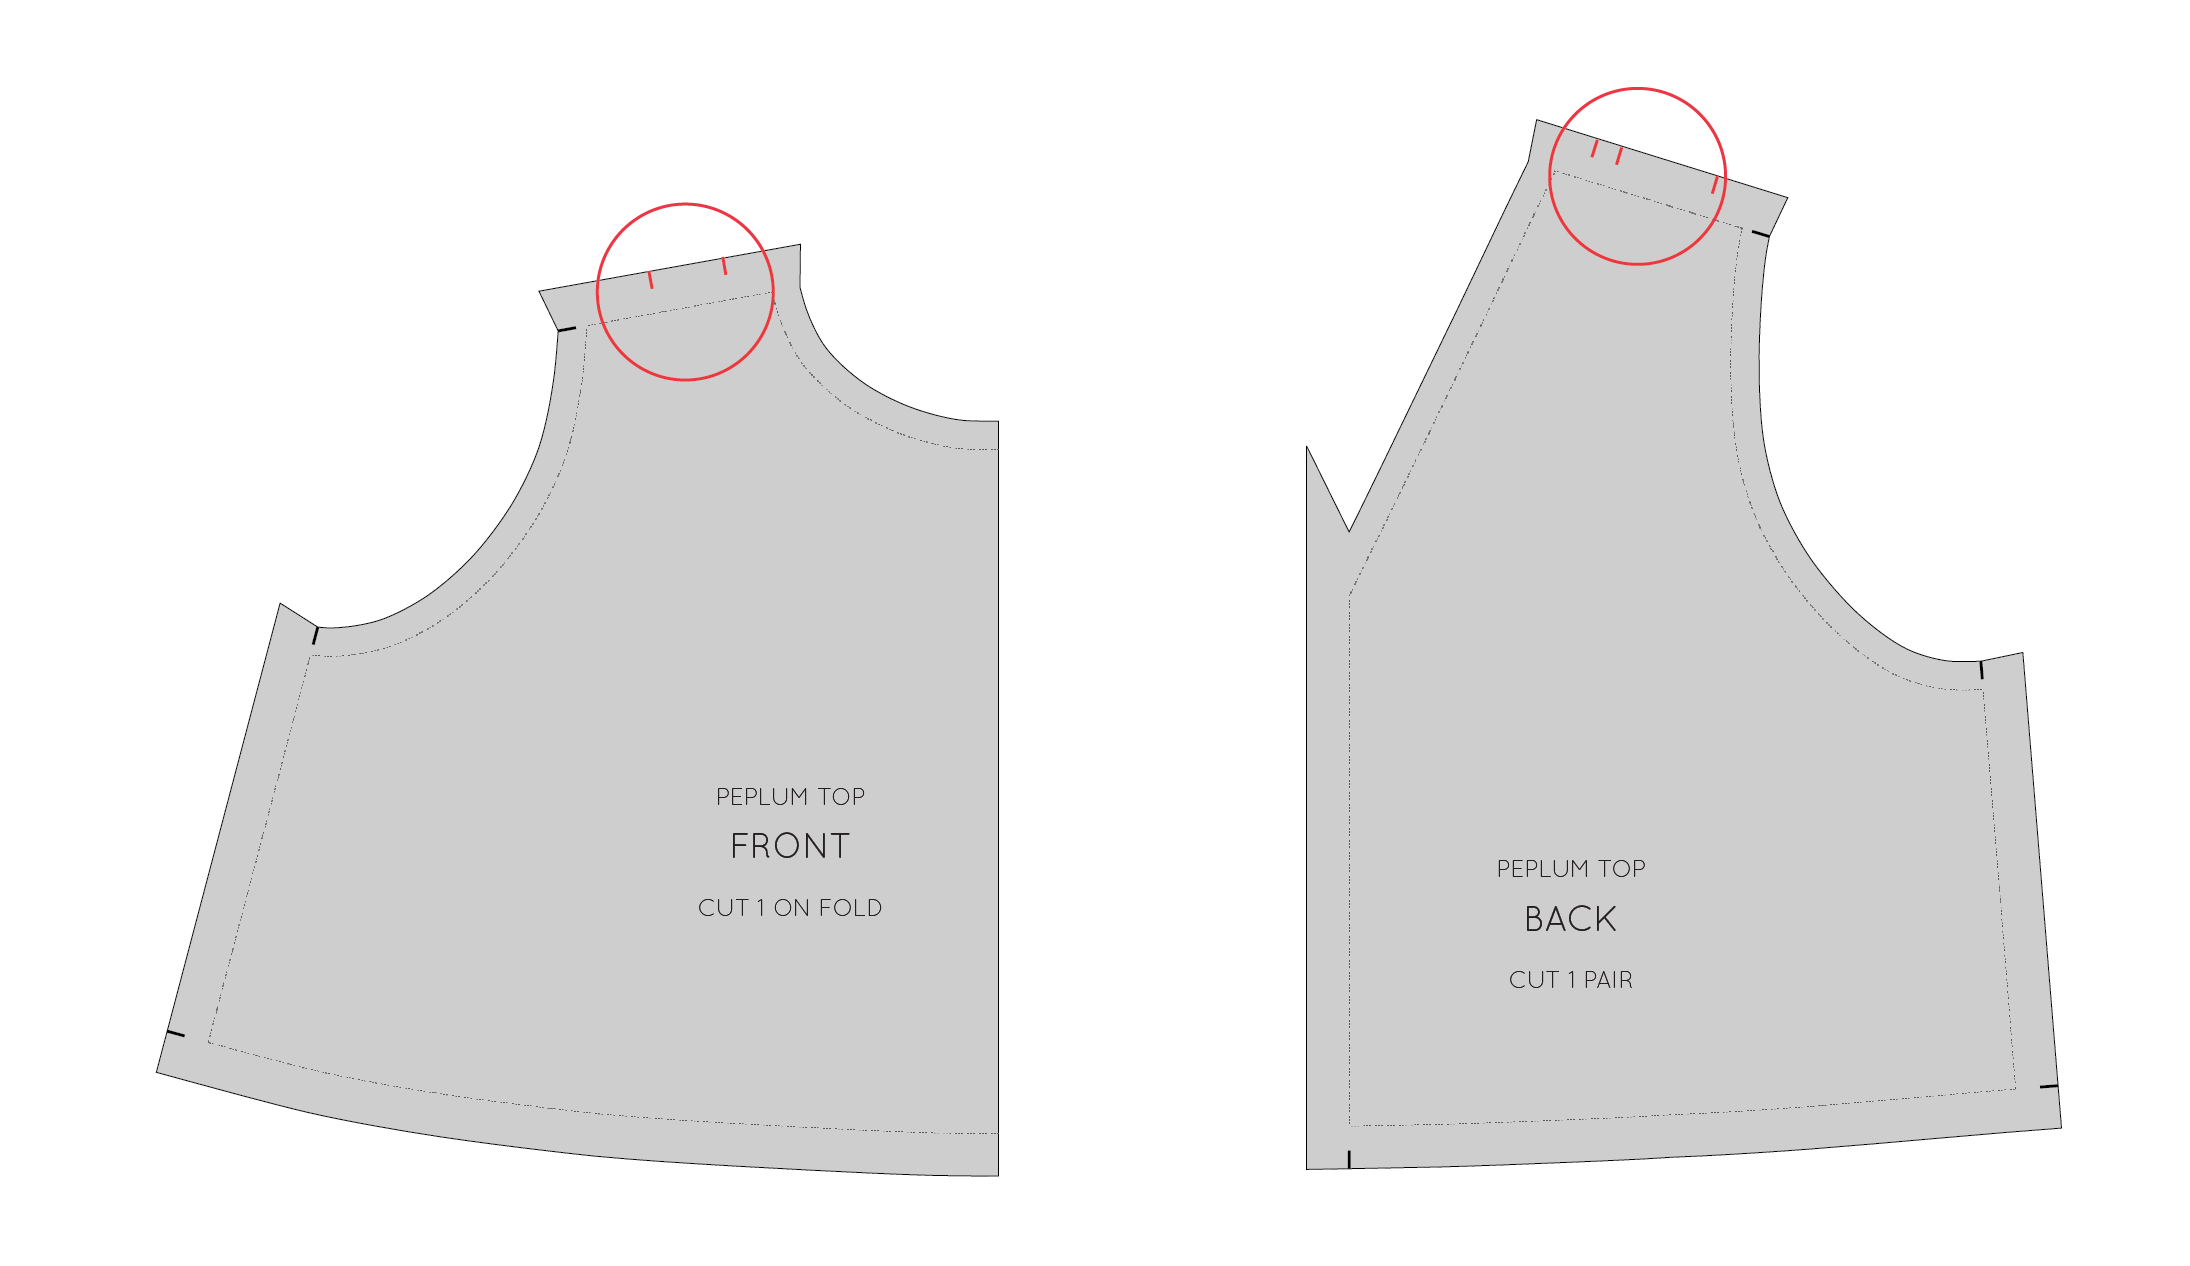
Start by using notches to indicate seam allowances. This is really helpful if you are using various seam allowances (which you should - find out more about seam allowances here) and struggle to remember what seam allowance is applicable where. Use a notch to indicate each seam allowance on your pattern. You will see in the example that I have used a notch to mark the shoulder seam, side seam and waist seam. You don't need to mark the seam allowance at both ends of the seam, just one will do. Consider the order of construction when positioning your notches. For example, I normally sew the side seams of a garment from the armhole down, so I will put the notch at that end of the seam.

You also want to avoid notching two sides of the same corner. This can weaken the pattern and the fabric.

Put notches in the same places on the back pattern piece, so that when you join the pieces, the notches will match. For example, when putting a notch on the side seam of the back pattern piece, I will put it in the same position as the front - which is at the top of the seam. The back pattern piece has a centre back seam, so I added a notch to indicate that too.
Add balance points
The next thing to do is to add 'balance point' notches. These are the notches that help you figure out what seam matches with what, and which way the pieces go, as well as help you ease pieces together, or sew ver long seams.
In the example, there is a shoulder panel piece that is attached to the front and back shoulder seams. It looks almost the same at both ends, so without these notches it would be really tricky to know which way to put the piece in. On the front pattern I used two single notches to indicate the front and on the back one single and one double notch (double notches are generally used to indicate the back pattern piece or back of a pattern piece).
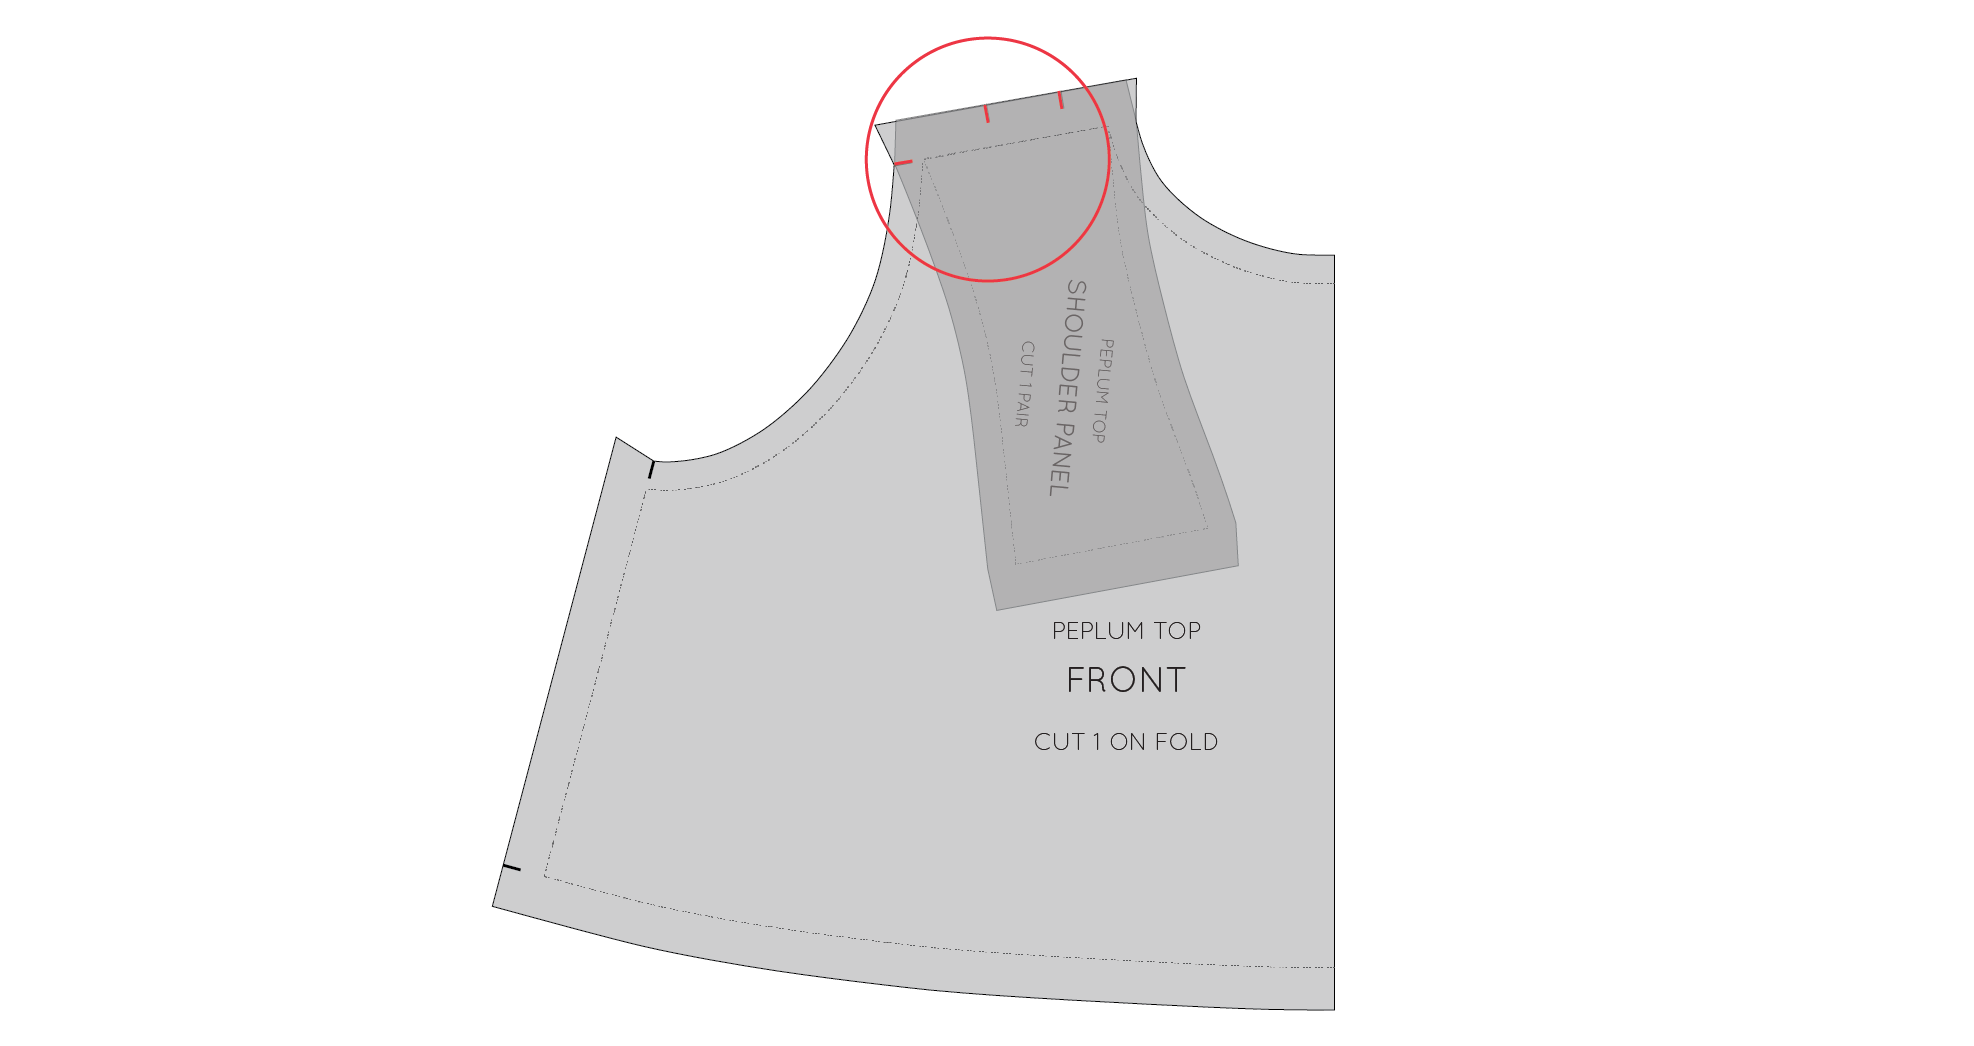
Transfer the notches from the shoulder seam to the shoulder panel. Do this by simply matching the seams together, as if they were being sewn, and transfer the notches onto the pattern piece (a tracing wheel can help with this step). You can also transfer the seam allowance notch at this stage.
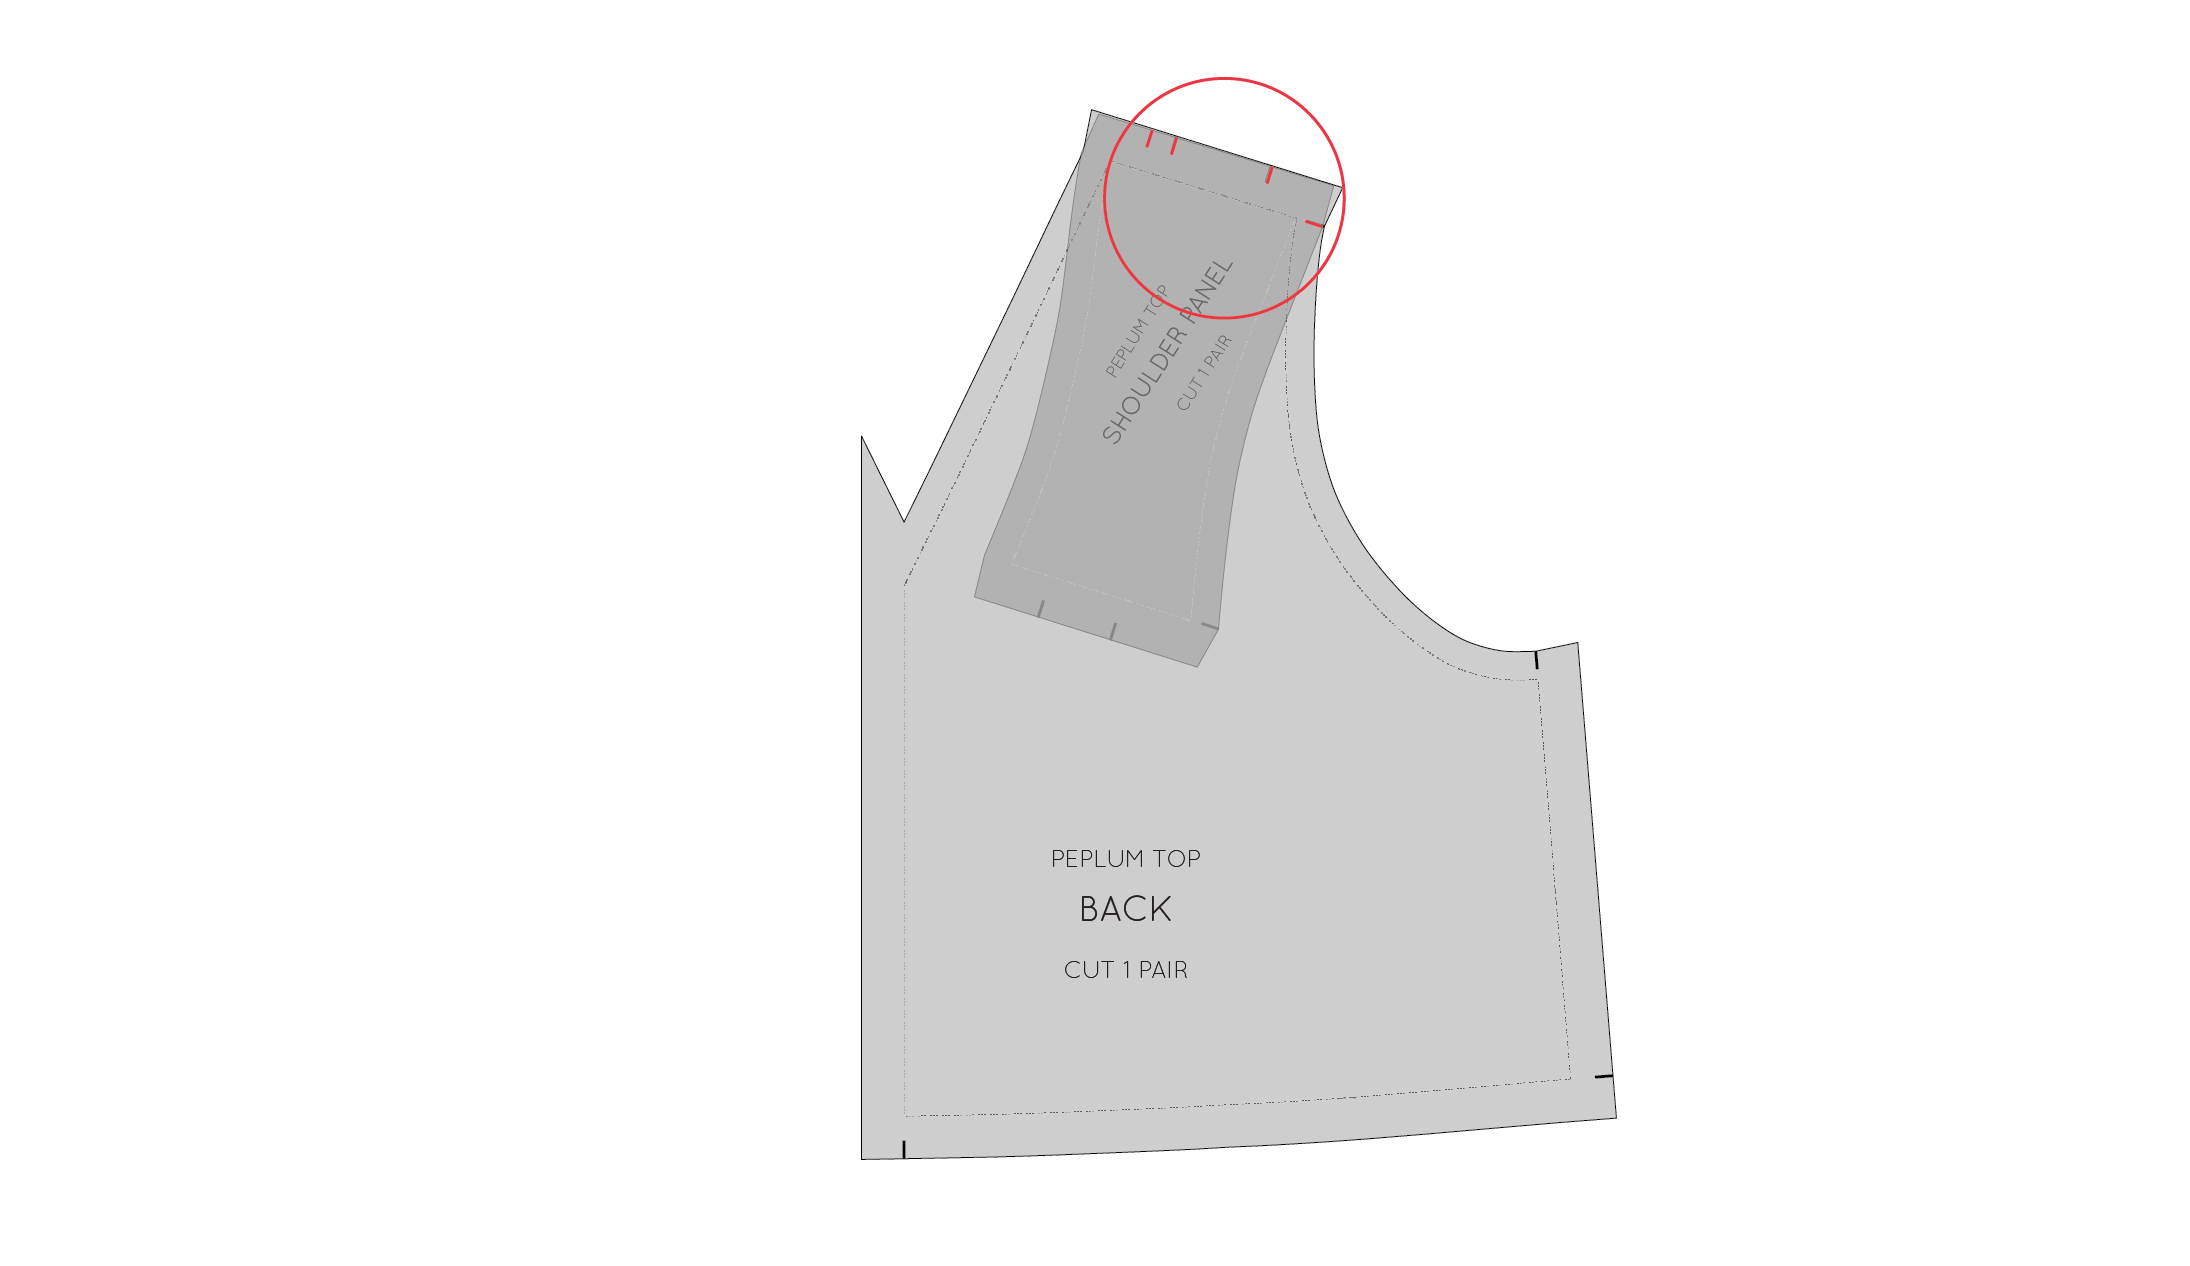
Do the same for the back.
Notch centre front and centre back
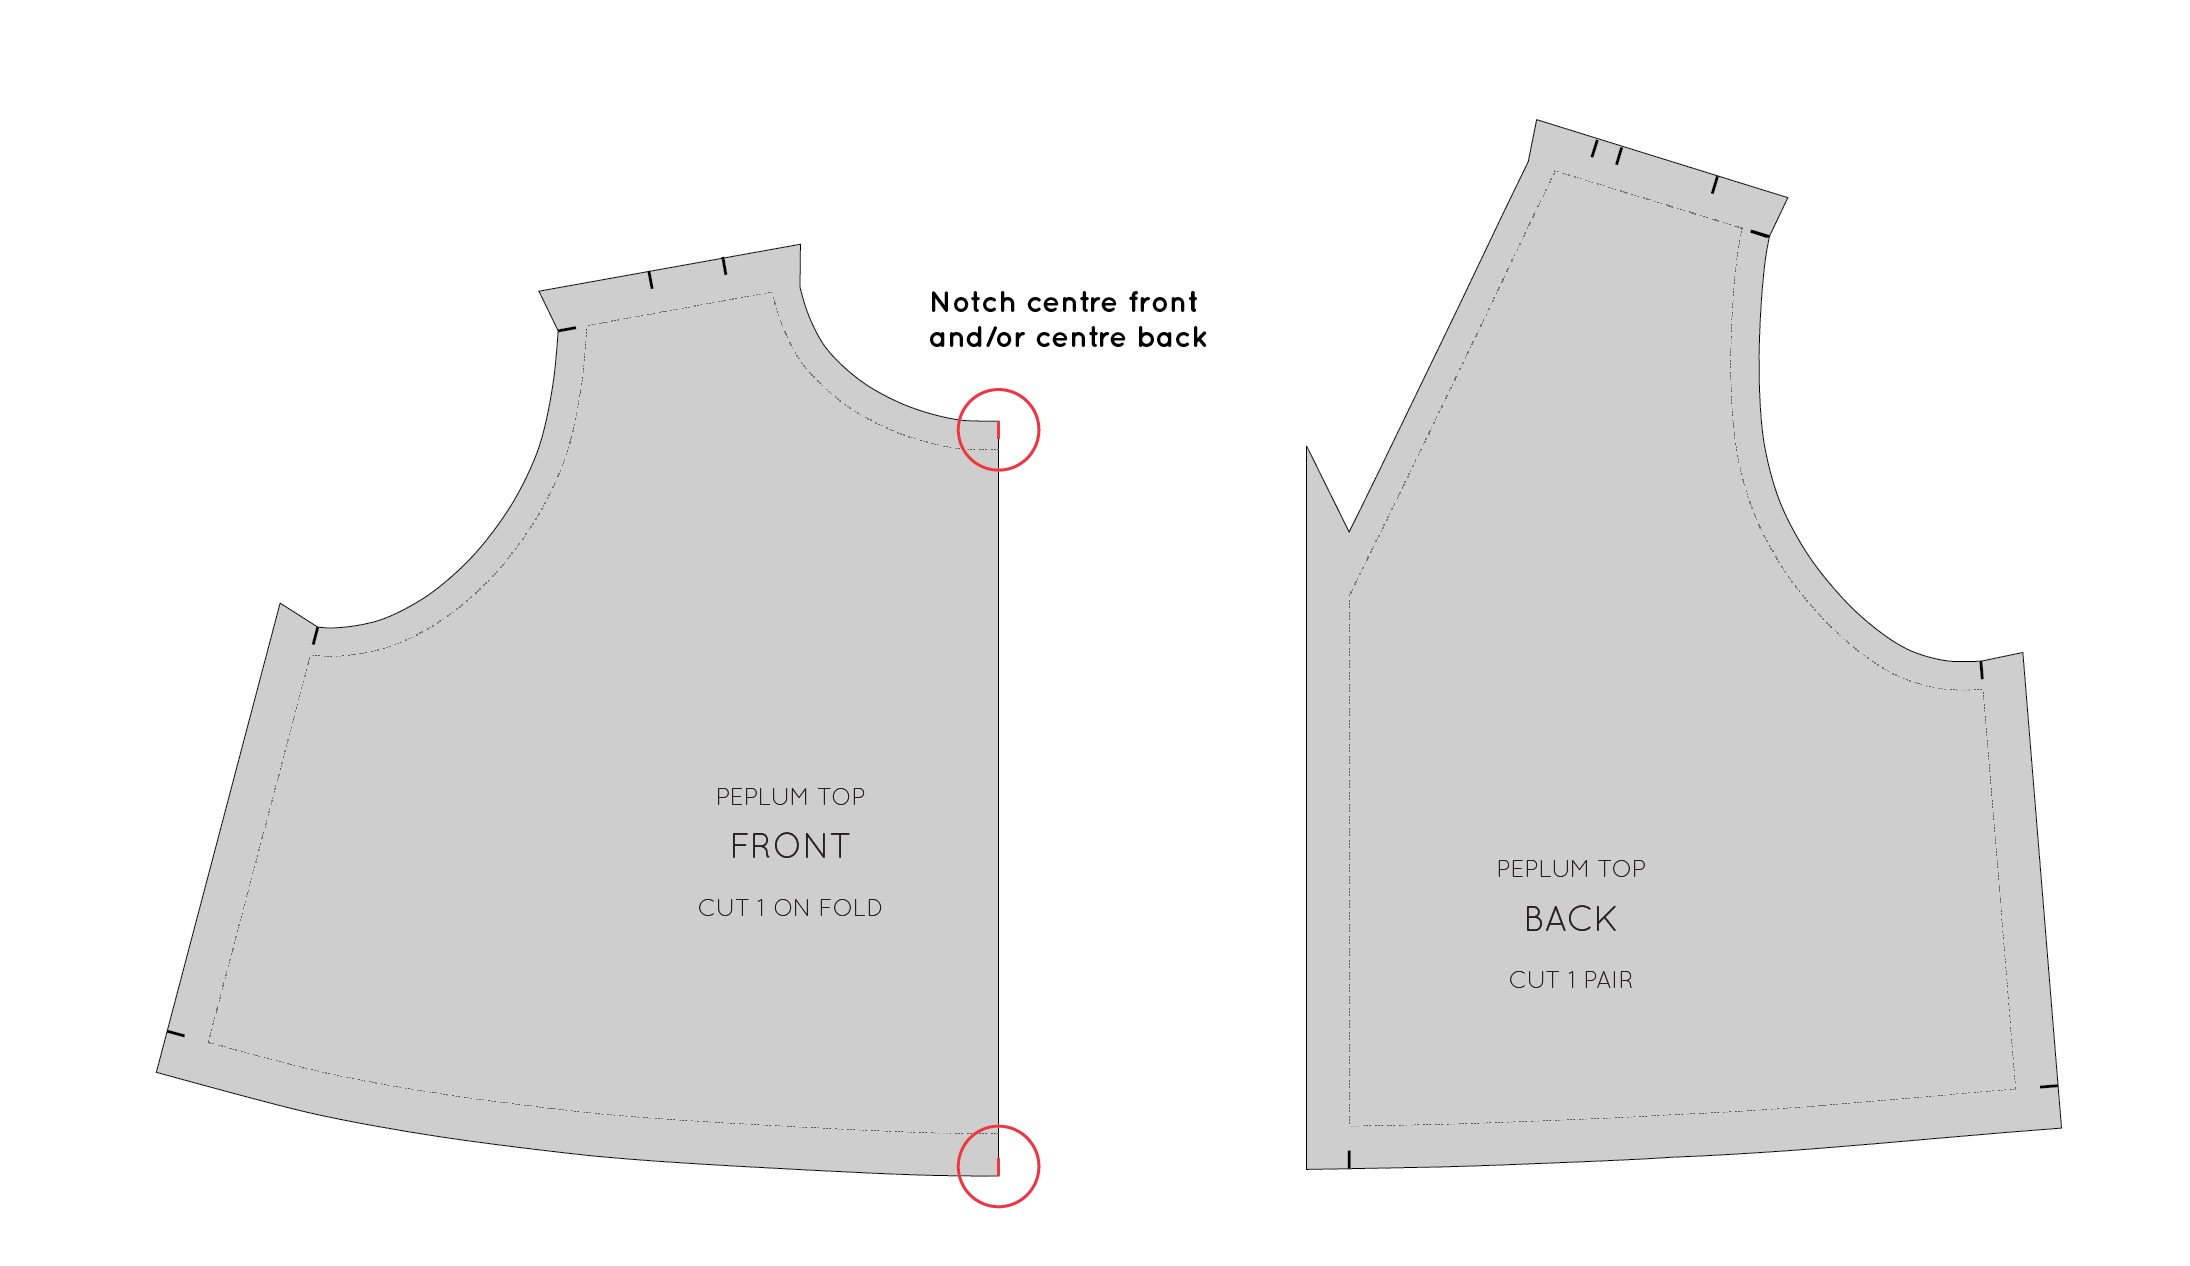
Use notches to indicate the centre front and / or the centre back of the pattern. As the Peplum Top has a seam in the centre back, only the centre front requires notches.
Mark any other details
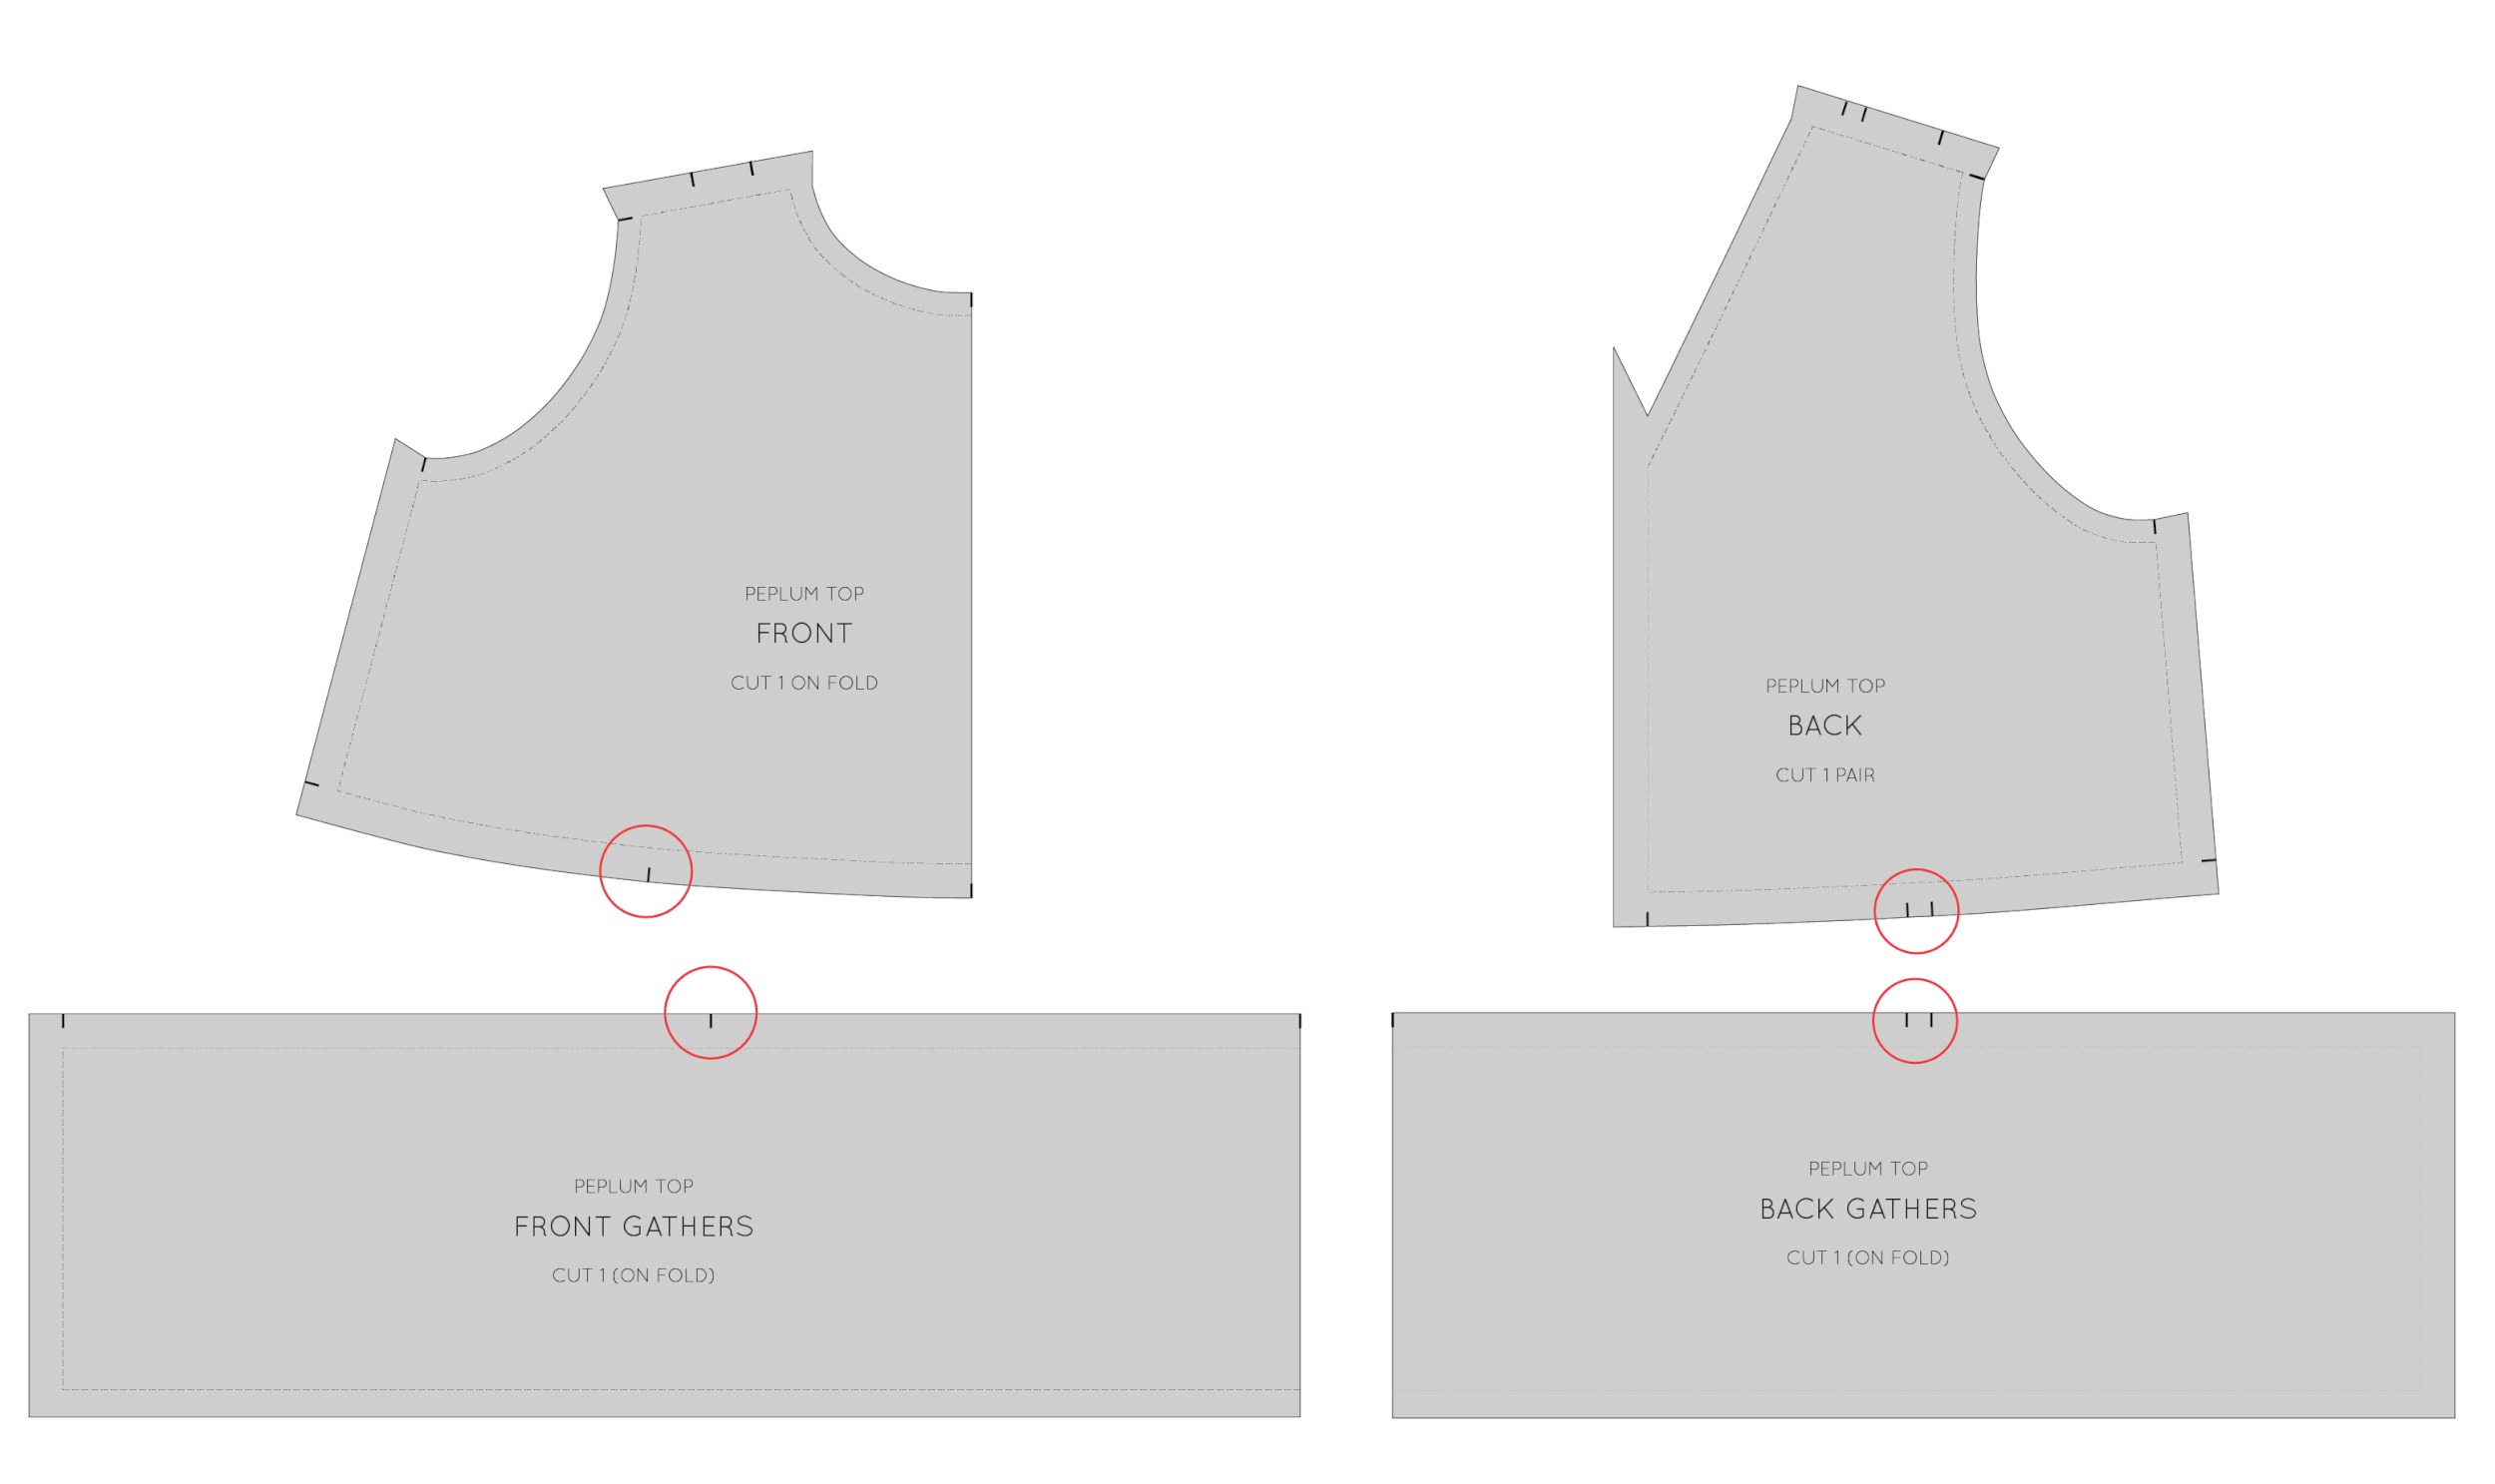
At this stage, use notches to mark any other design details, such as pocket location, dart arms etc. In the case of the Peplum Top, it has a gathered piece attached to the waist, so I added notches so that it is easy to know how much you need to gather the panel (it is a pet peeve of mine when patterns don't have notches for gathered panels).
Putting notches on curves
You may have noticed that there were no curved seams to add notches to in the example. When working with curves, you need to "walk" the curve into the seam it will be sewn to and transfer the notches along the way. This tutorial goes into more depth if you need to notch your curves - for example: sleeves, princess panels etc.
So, what do you think? Are you convinced that notches will help you sew better?