THE Q & A SERIES
How to sew bias binding on a V-neck
Hi Emily,
Great series on bias binding. I am just starting to master that. Next, I'd like to tackle a V-neck. Could you break down the steps for a V?
Thanks
Sam
Hi Sam,
Great question!
This month’s Curated by ITF pattern, the Stow dress, has a V-neck detail on the neckline. While designing the pattern, we took the time to experiment with a few different techniques to finish it because we wanted to make sure it gave a beautiful finish, and was an achievable approach.
The Stow dress has two Views. View A is a standard V-neck, while View B has a button placket at the front. We’ll show you how to finish a standard V-neck with binding in this tutorial, which is applicable to Stow dress View A.
BEFORE YOU START
We recommend using this technique to finish the neckline after sewing the shoulder seams of the garment. This will allow the garment to lay flat while adding the binding, making it easier to handle. You can then assemble the side seams afterwards.
NOTE: General In the Folds seam allowances have been included for your reference. If you have chosen different seam allowances (or are using another company's pattern), please be mindful of this.
PREPARE BIAS BINDING

Step 1
a Using a tape measure, measure around the neckline of the dress starting from the CENTRE FRONT V-neck on one side and continuing around the neckline until you reach the CENTRE FRONT again.
b Cut a piece of bias binding about 6cm (2⅜in) longer than your neck measurement. If you are making your own binding, it needs to be 32mm (1¼in) wide.
c If you have made your own binding, place it right side down and press one long edge of the binding under by 1cm (⅜in). It will look like the middle image above. Commercial bias binding will look like the bottom image above.

Step 2
Fold the binding in half to find the midway point. Finger press the fold.
Unfold and pin the right side of the binding (at the midway point) to the right side of the garment at the CENTRE BACK of the neckline.
Step 3
a Pin the binding onto the neckline, carefully working your way to the shoulder seam.
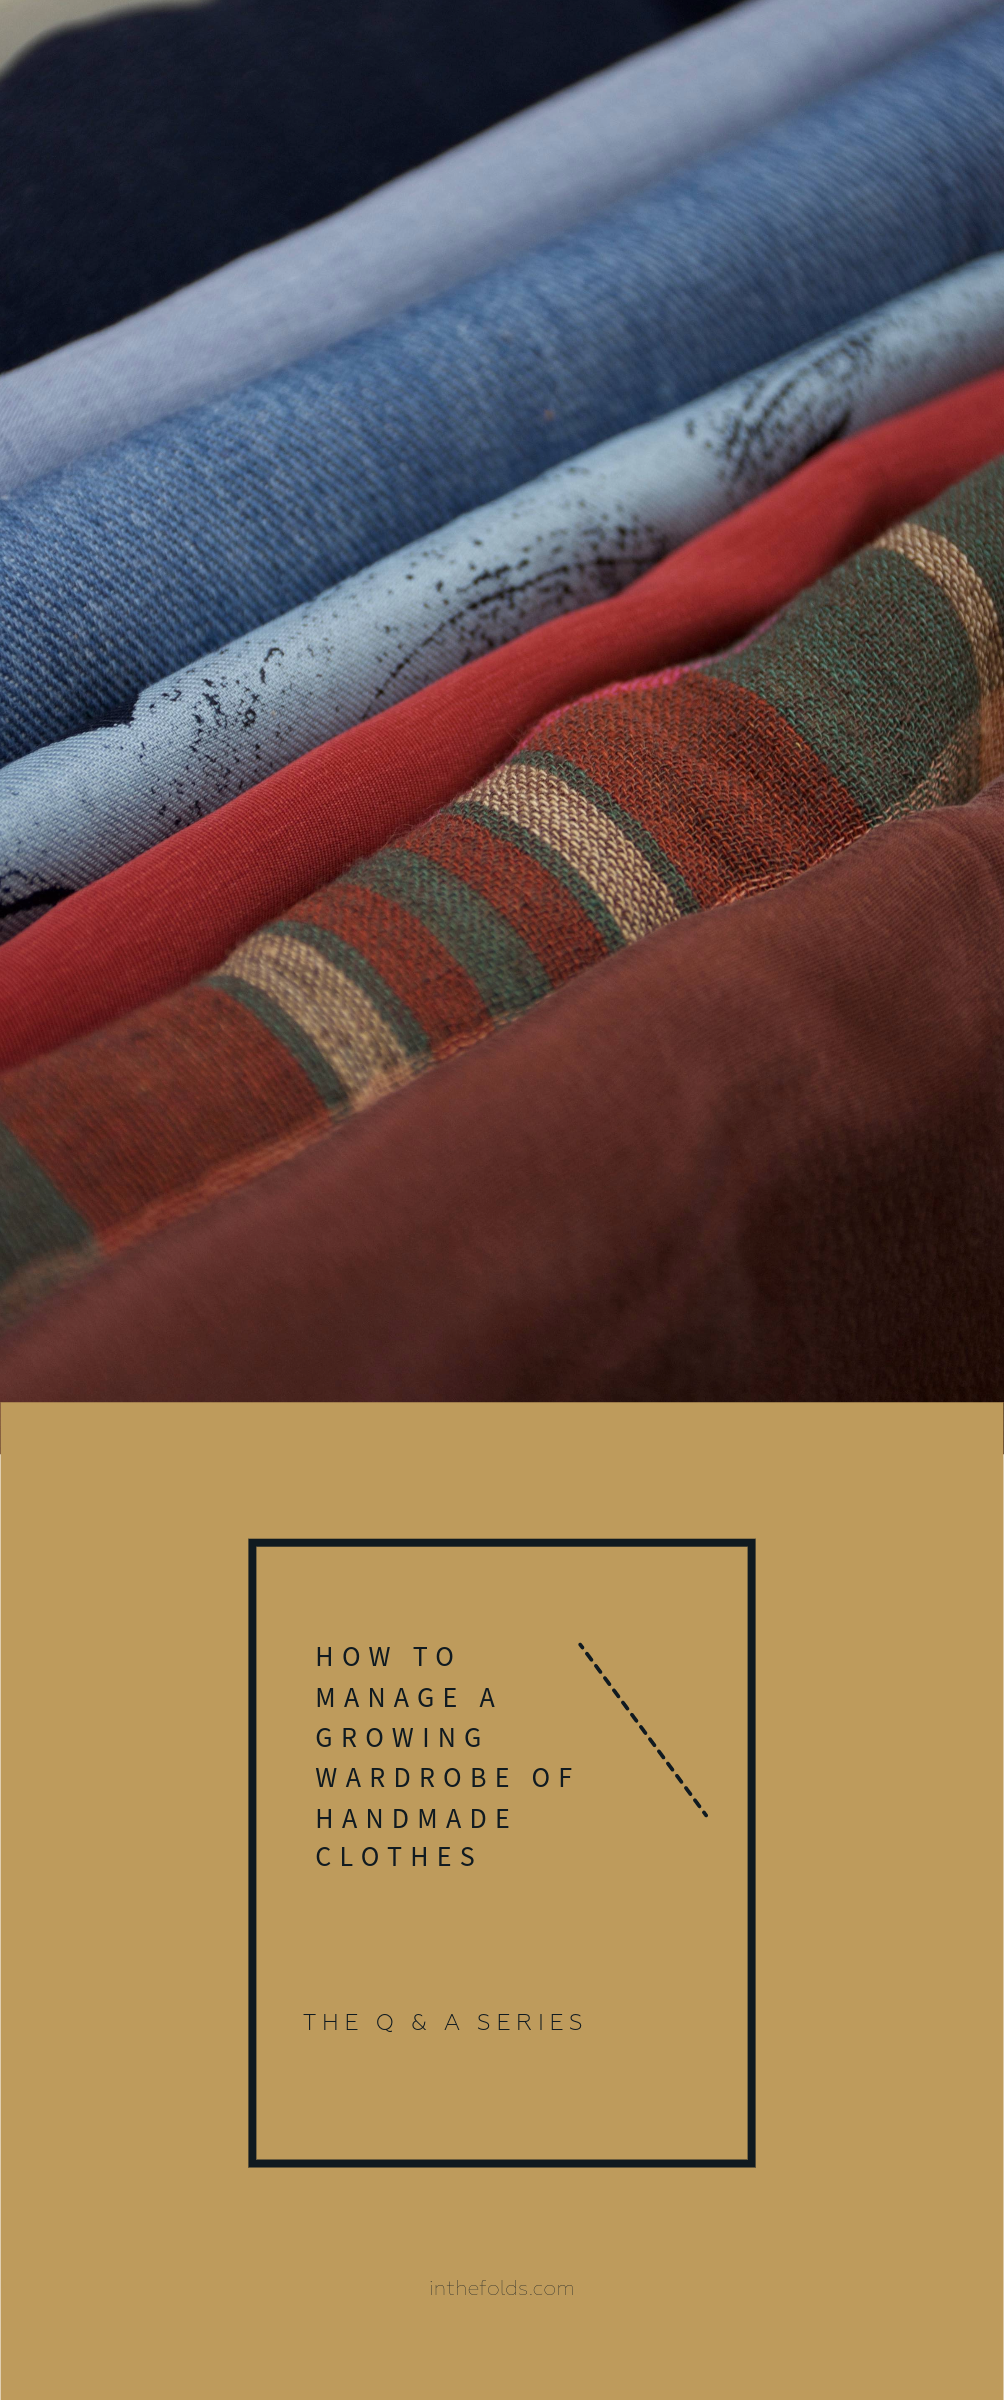
Flip the dress to the front. Continue pinning the binding around the neckline until you reach the CENTRE FRONT. When you get to the V-neck point, stop pinning and mark the CENTRE FRONT line onto the binding with chalk or erasable pen and a ruler.

b Going back to the binding at the CENTRE BACK, continue pinning the rest of the binding to the neckline. Again, mark the CENTRE FRONT line on the other side of the binding with chalk or erasable pen and a ruler.
Step 4
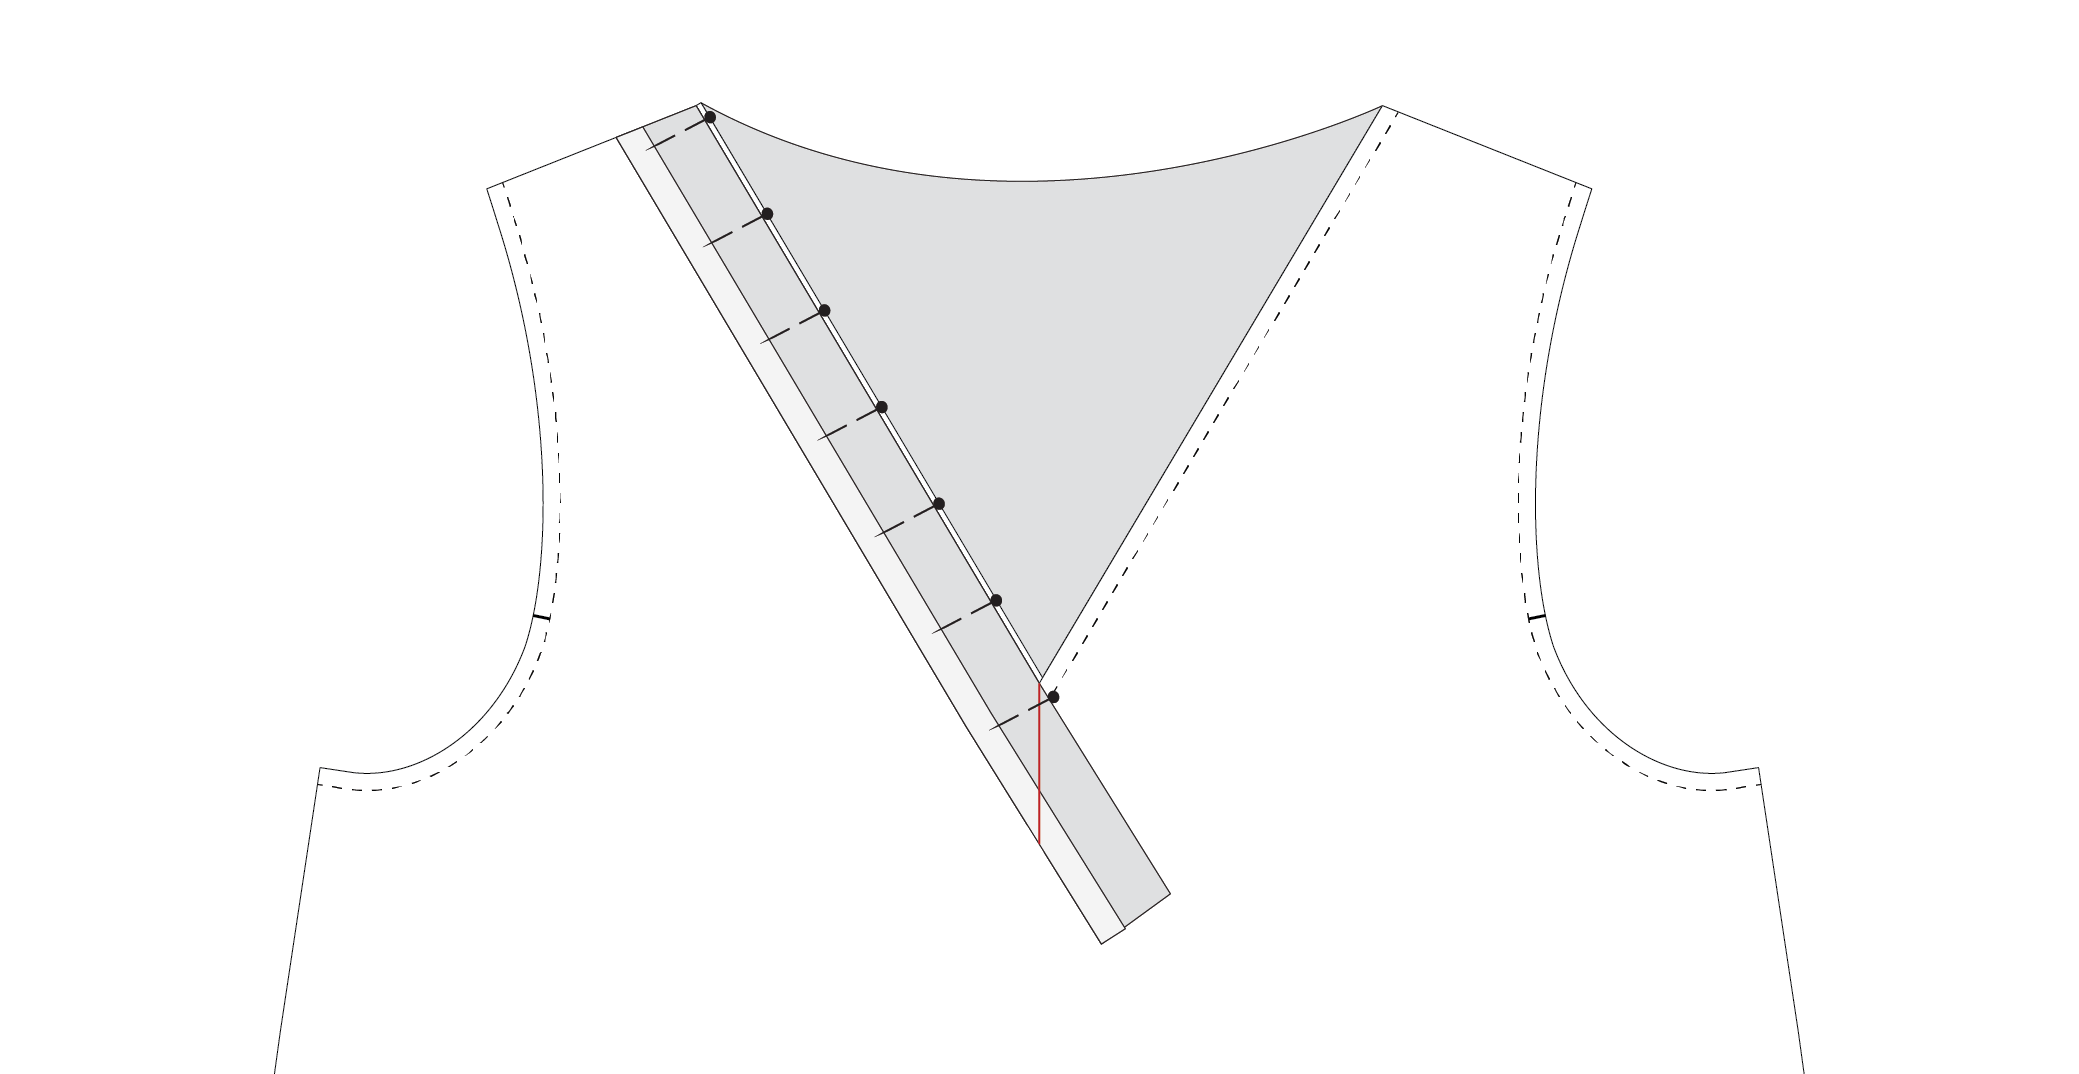
a Remove the last couple of pins so that you can lift the binding on either side of the CENTRE FRONT. (These pins were only used so you could ensure the CENTRE FRONT line you marked was precise).
b Place the binding right sides together, matching the two lines marked. The outer long edge of the binding should still be folded up. Pin. Stitch along the marked line.

c Trim back the seam allowance close to the stitch line. Press the seam allowance open.

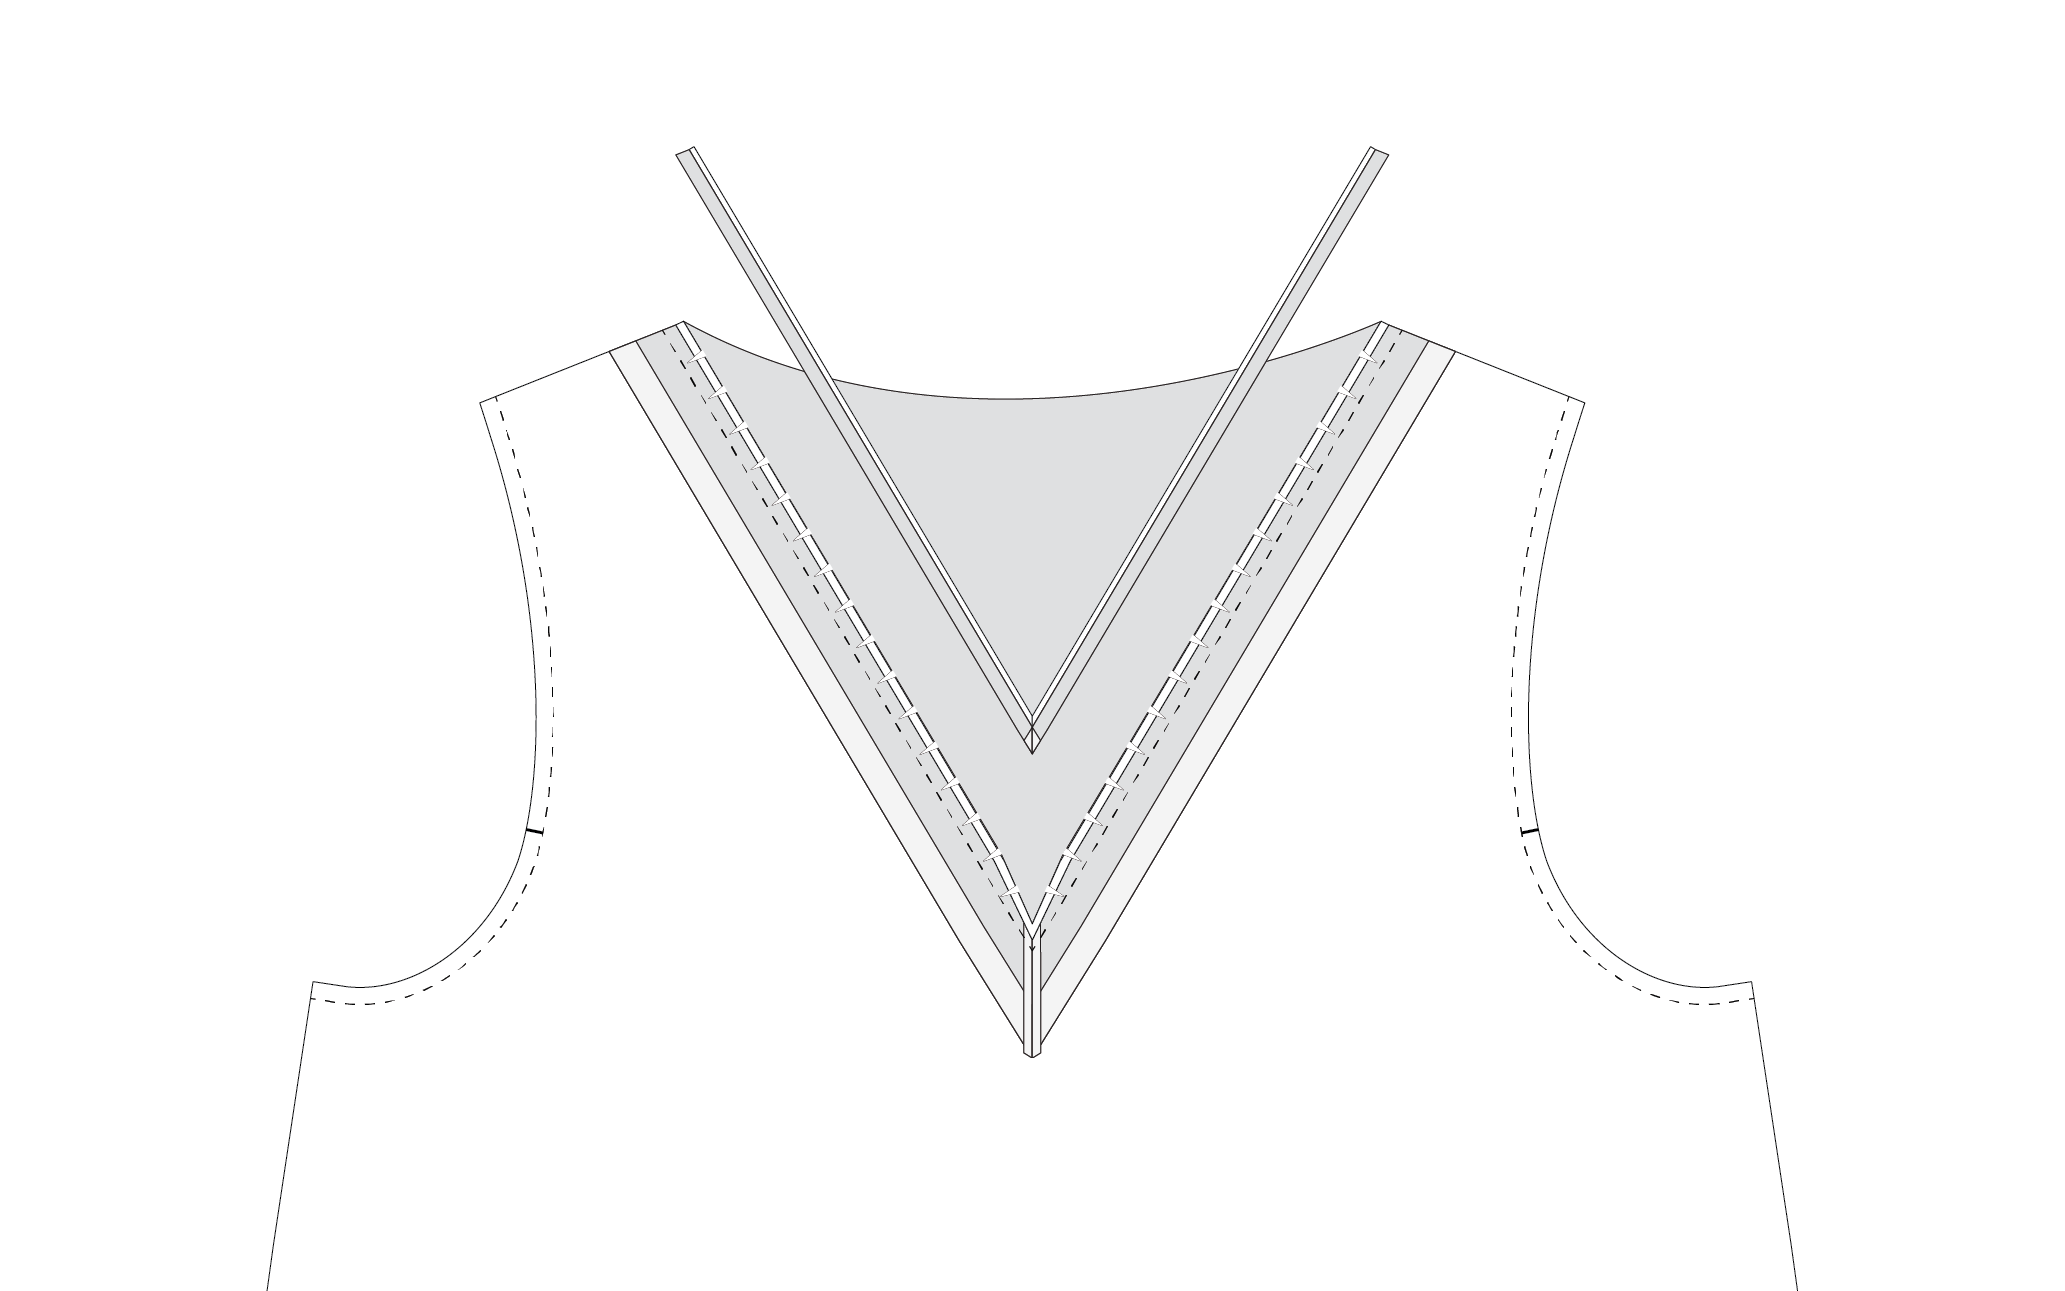
Step 5
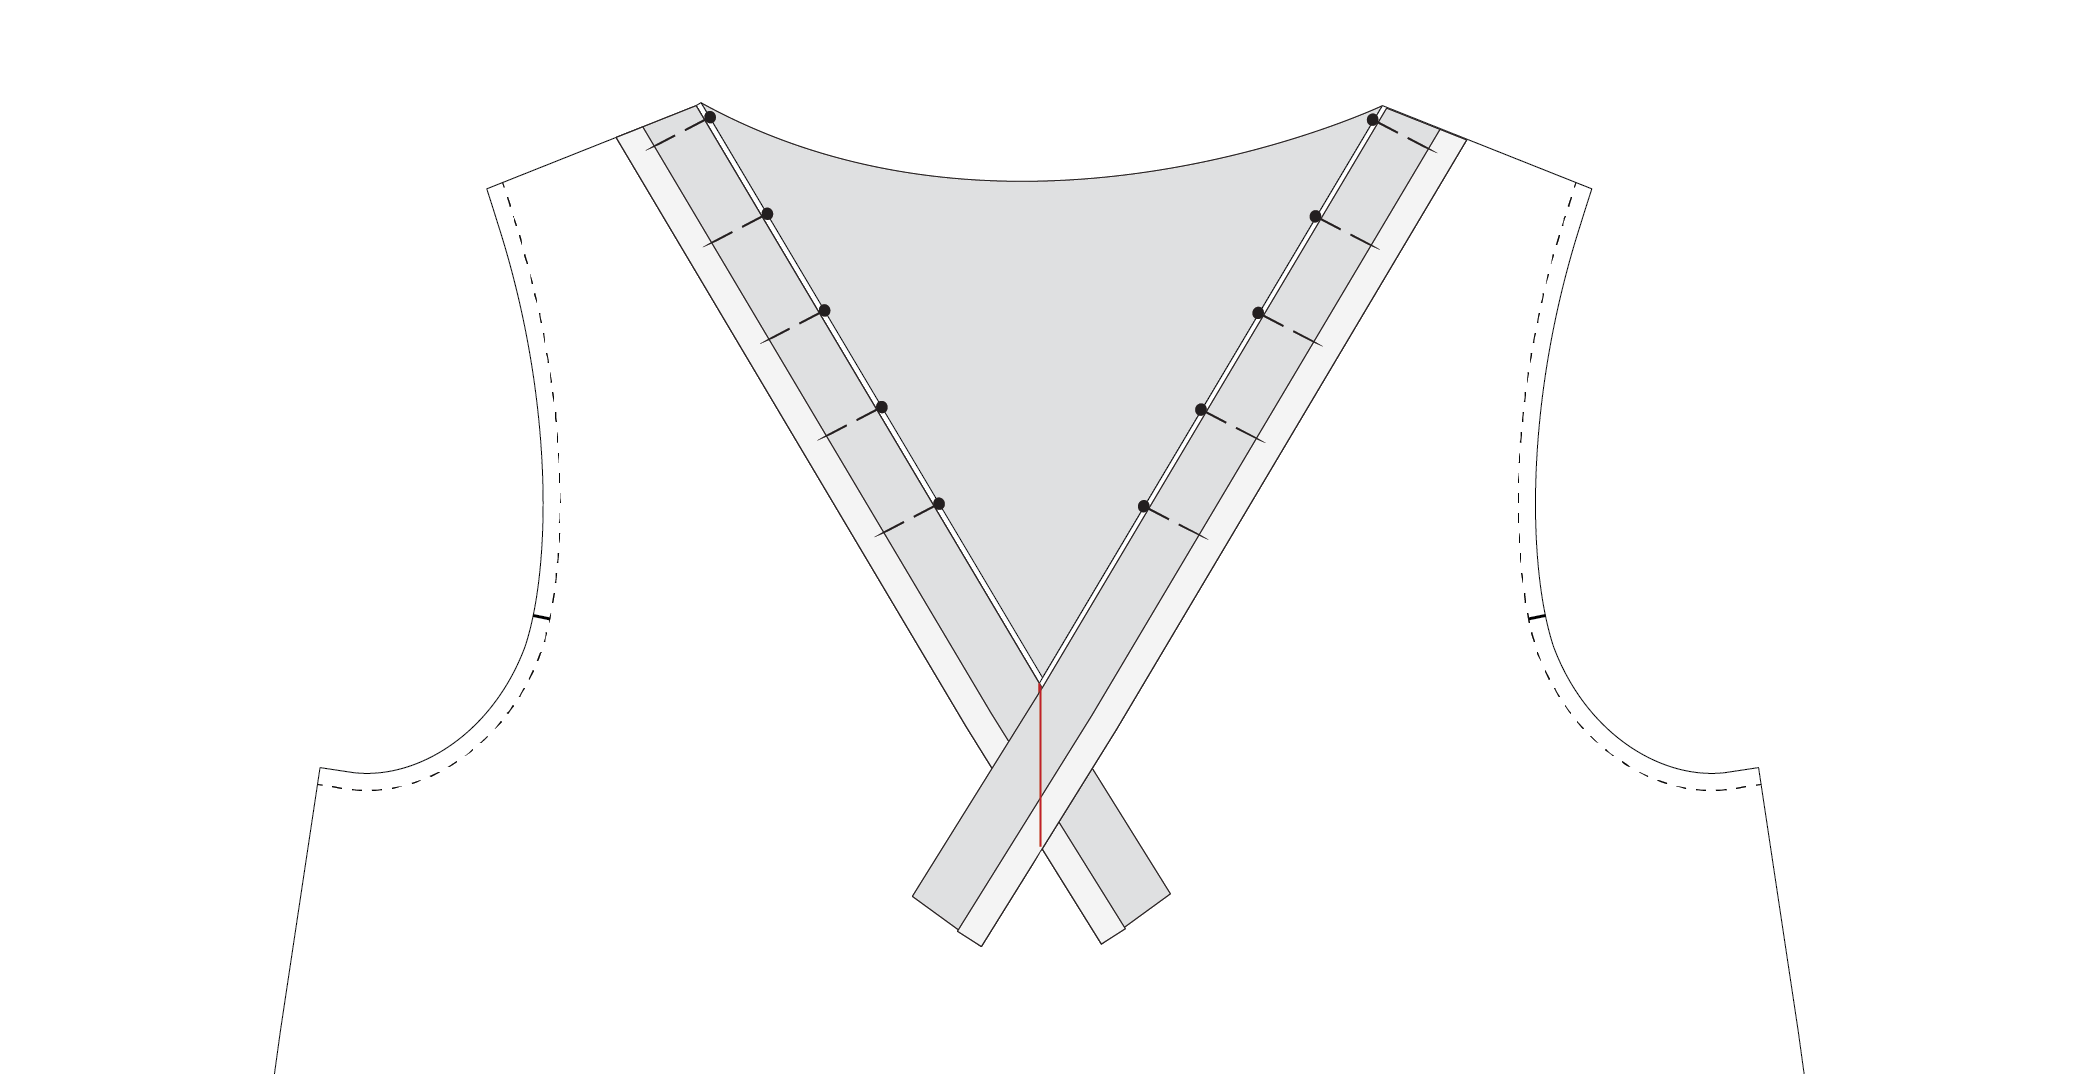
Repin the binding to the neckline, lining up the seam in the binding with the CENTRE FRONT V-neck point of the dress. The binding should sit flat on the garment at this point.

Step 6
a Sew binding in place with a 1cm (⅜in) seam allowance. Start at the CENTRE BACK or shoulder seam and work your way around to the CENTRE FRONT or opposite shoulder seam. Walk your stitches as you approach the CENTRE FRONT to ensure your needle lines up with the seam in the binding. Pivot to continue sewing around the neckline.
b Trim, clip and grade the seam allowance. Trim in nice and close to the point of the V at the front to minimise bulk as much as possible. Be careful not to cut through the stitching!

Step 7
Flip the binding to the right side and, using your finger to press the seam allowance towards the binding, understitch.
Start stitching about 1.2cm (½in) back from the points of the V on one side and then repeat on the other side.

Step 8
Turn the dress inside out and roll the binding to the inside. Press well and pin in place. Stitch in place close to the folded edge of the binding.
Happy sewing,
Emily
RESOURCES MENTIONED IN THIS ISSUE
The Stow dress pattern is currently available with a Curated by ITF subscription for the month of February 2023. More information can be found here.
How to make your own bias binding - tutorial here.
Attaching single-fold bias binding - tutorial here.
Attaching double-fold bias binding - tutorial here.
For more issues of the Q & A series, you can check out the archive here.
WHAT YOU’VE BEEN MAKING

Stow dress made by @mamasuesews

Hacked Stow top made by @shuaychong