THE Q & A SERIES
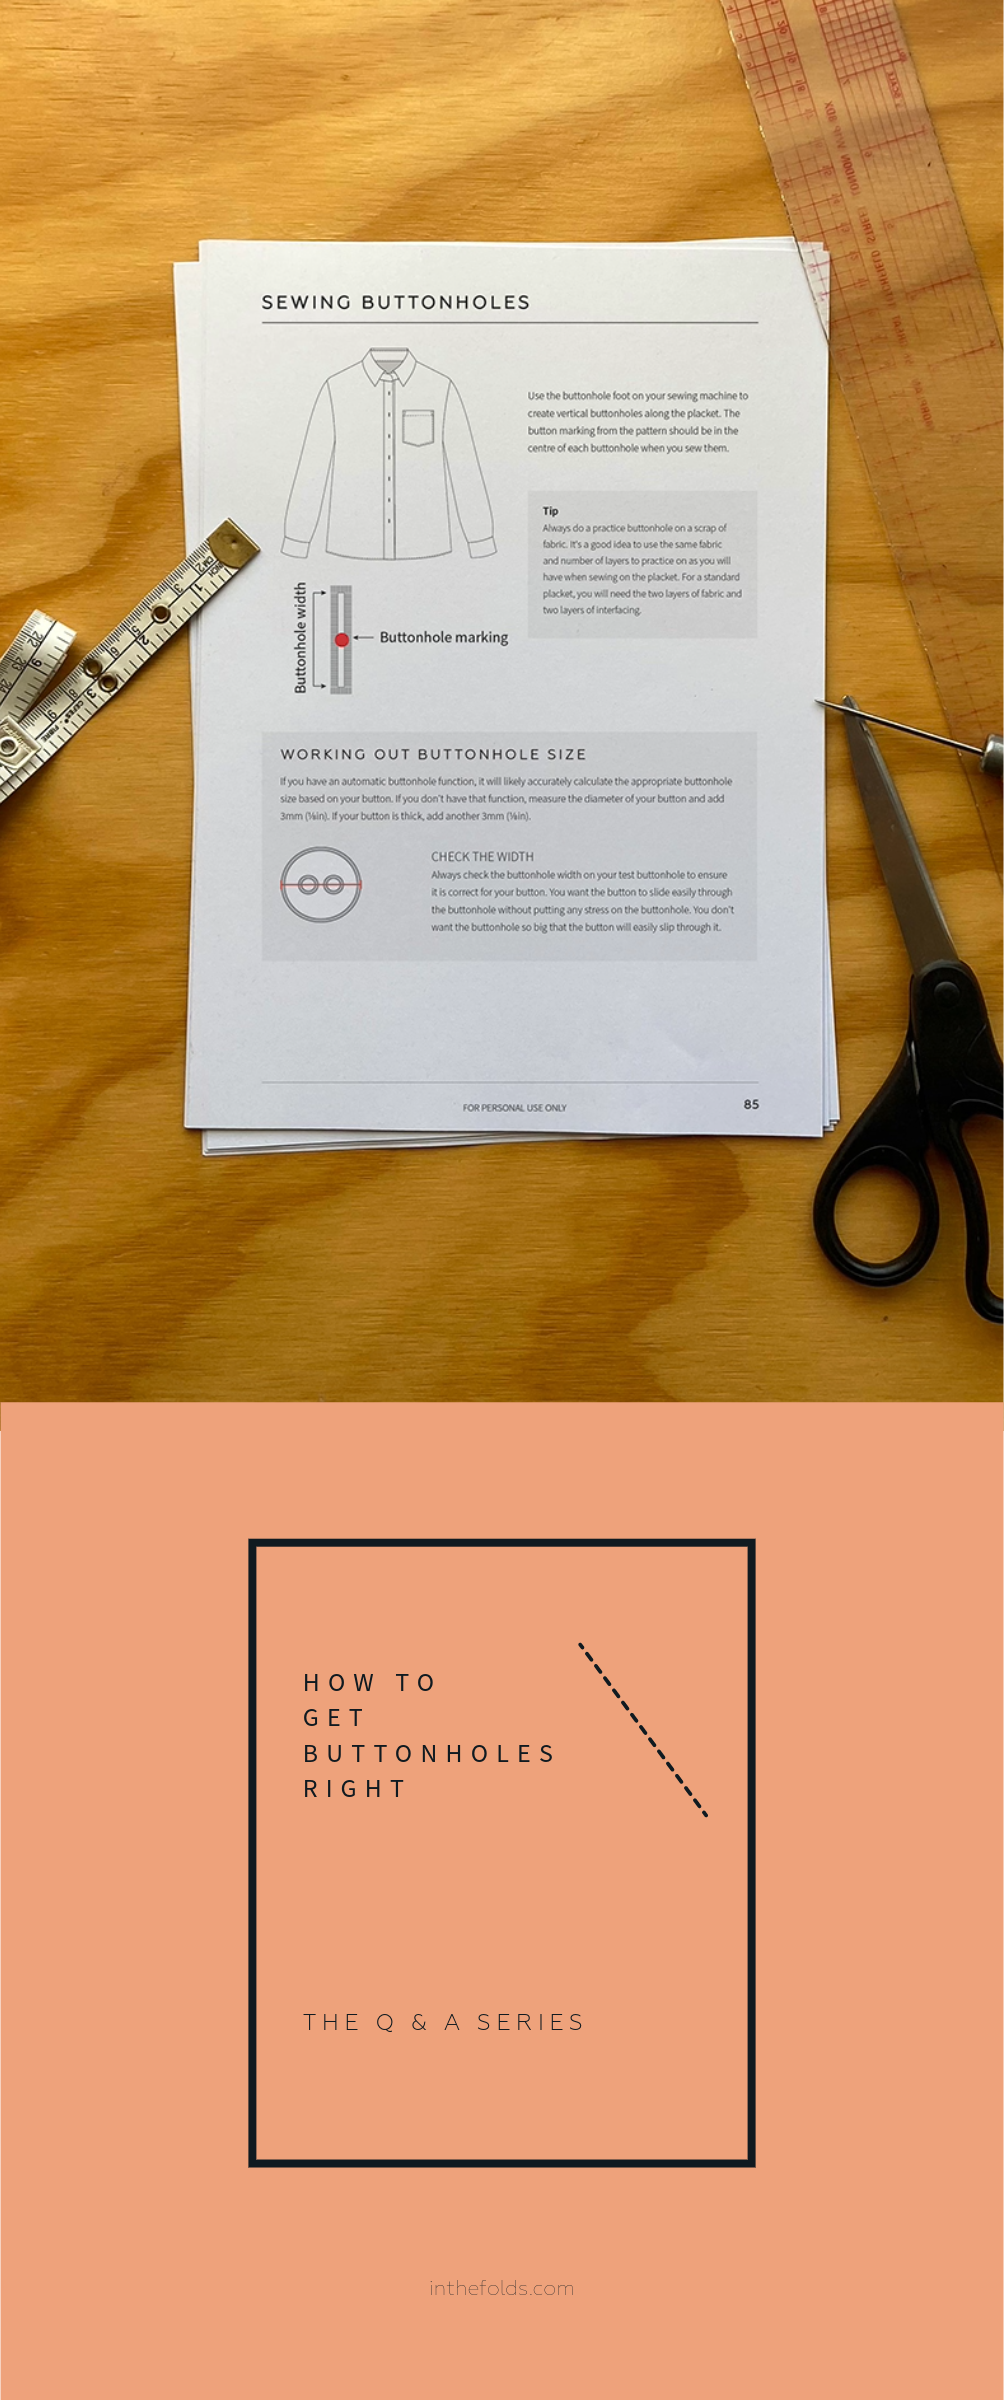
HOW TO GET BUTTONHOLES RIGHT
Hey Emily,
Do you have any tips please for buttonhole spacing & getting the buttons to sit flat on the fabric?
Thanks,
Sheila, Hobart
Hi Sheila,
Buttonholes can be tricky, hey.
There’s so many elements involved in getting them right… the spacing, the stitching, the cutting, the button sewing… And so much that can go badly wrong. (We’ve all experienced the fear of accidentally cutting right through the buttonhole stitching!)
With our Sewing Shirts Skills Kit for this month’s Curated by ITF project we cover everything you need to know, such as how to create a button template, how to mark button placement and how to sew buttons on correctly, but here’s a few tips that may help.
HOW TO MARK BUTTON PLACEMENT
There are a number of different methods you can use to transfer the button and buttonhole placement markings to your shirt. The most common are:
Mark the positions directly onto the finished button placket.
Mark the buttonhole positions on the placket pattern piece and use this to transfer the markings to the pattern.
Make a button template.
The most common method is marking the positions directly onto the finished button placket. This gives you flexibility when deciding on button position and allows you to see what the buttons will look like before sewing the buttonholes.
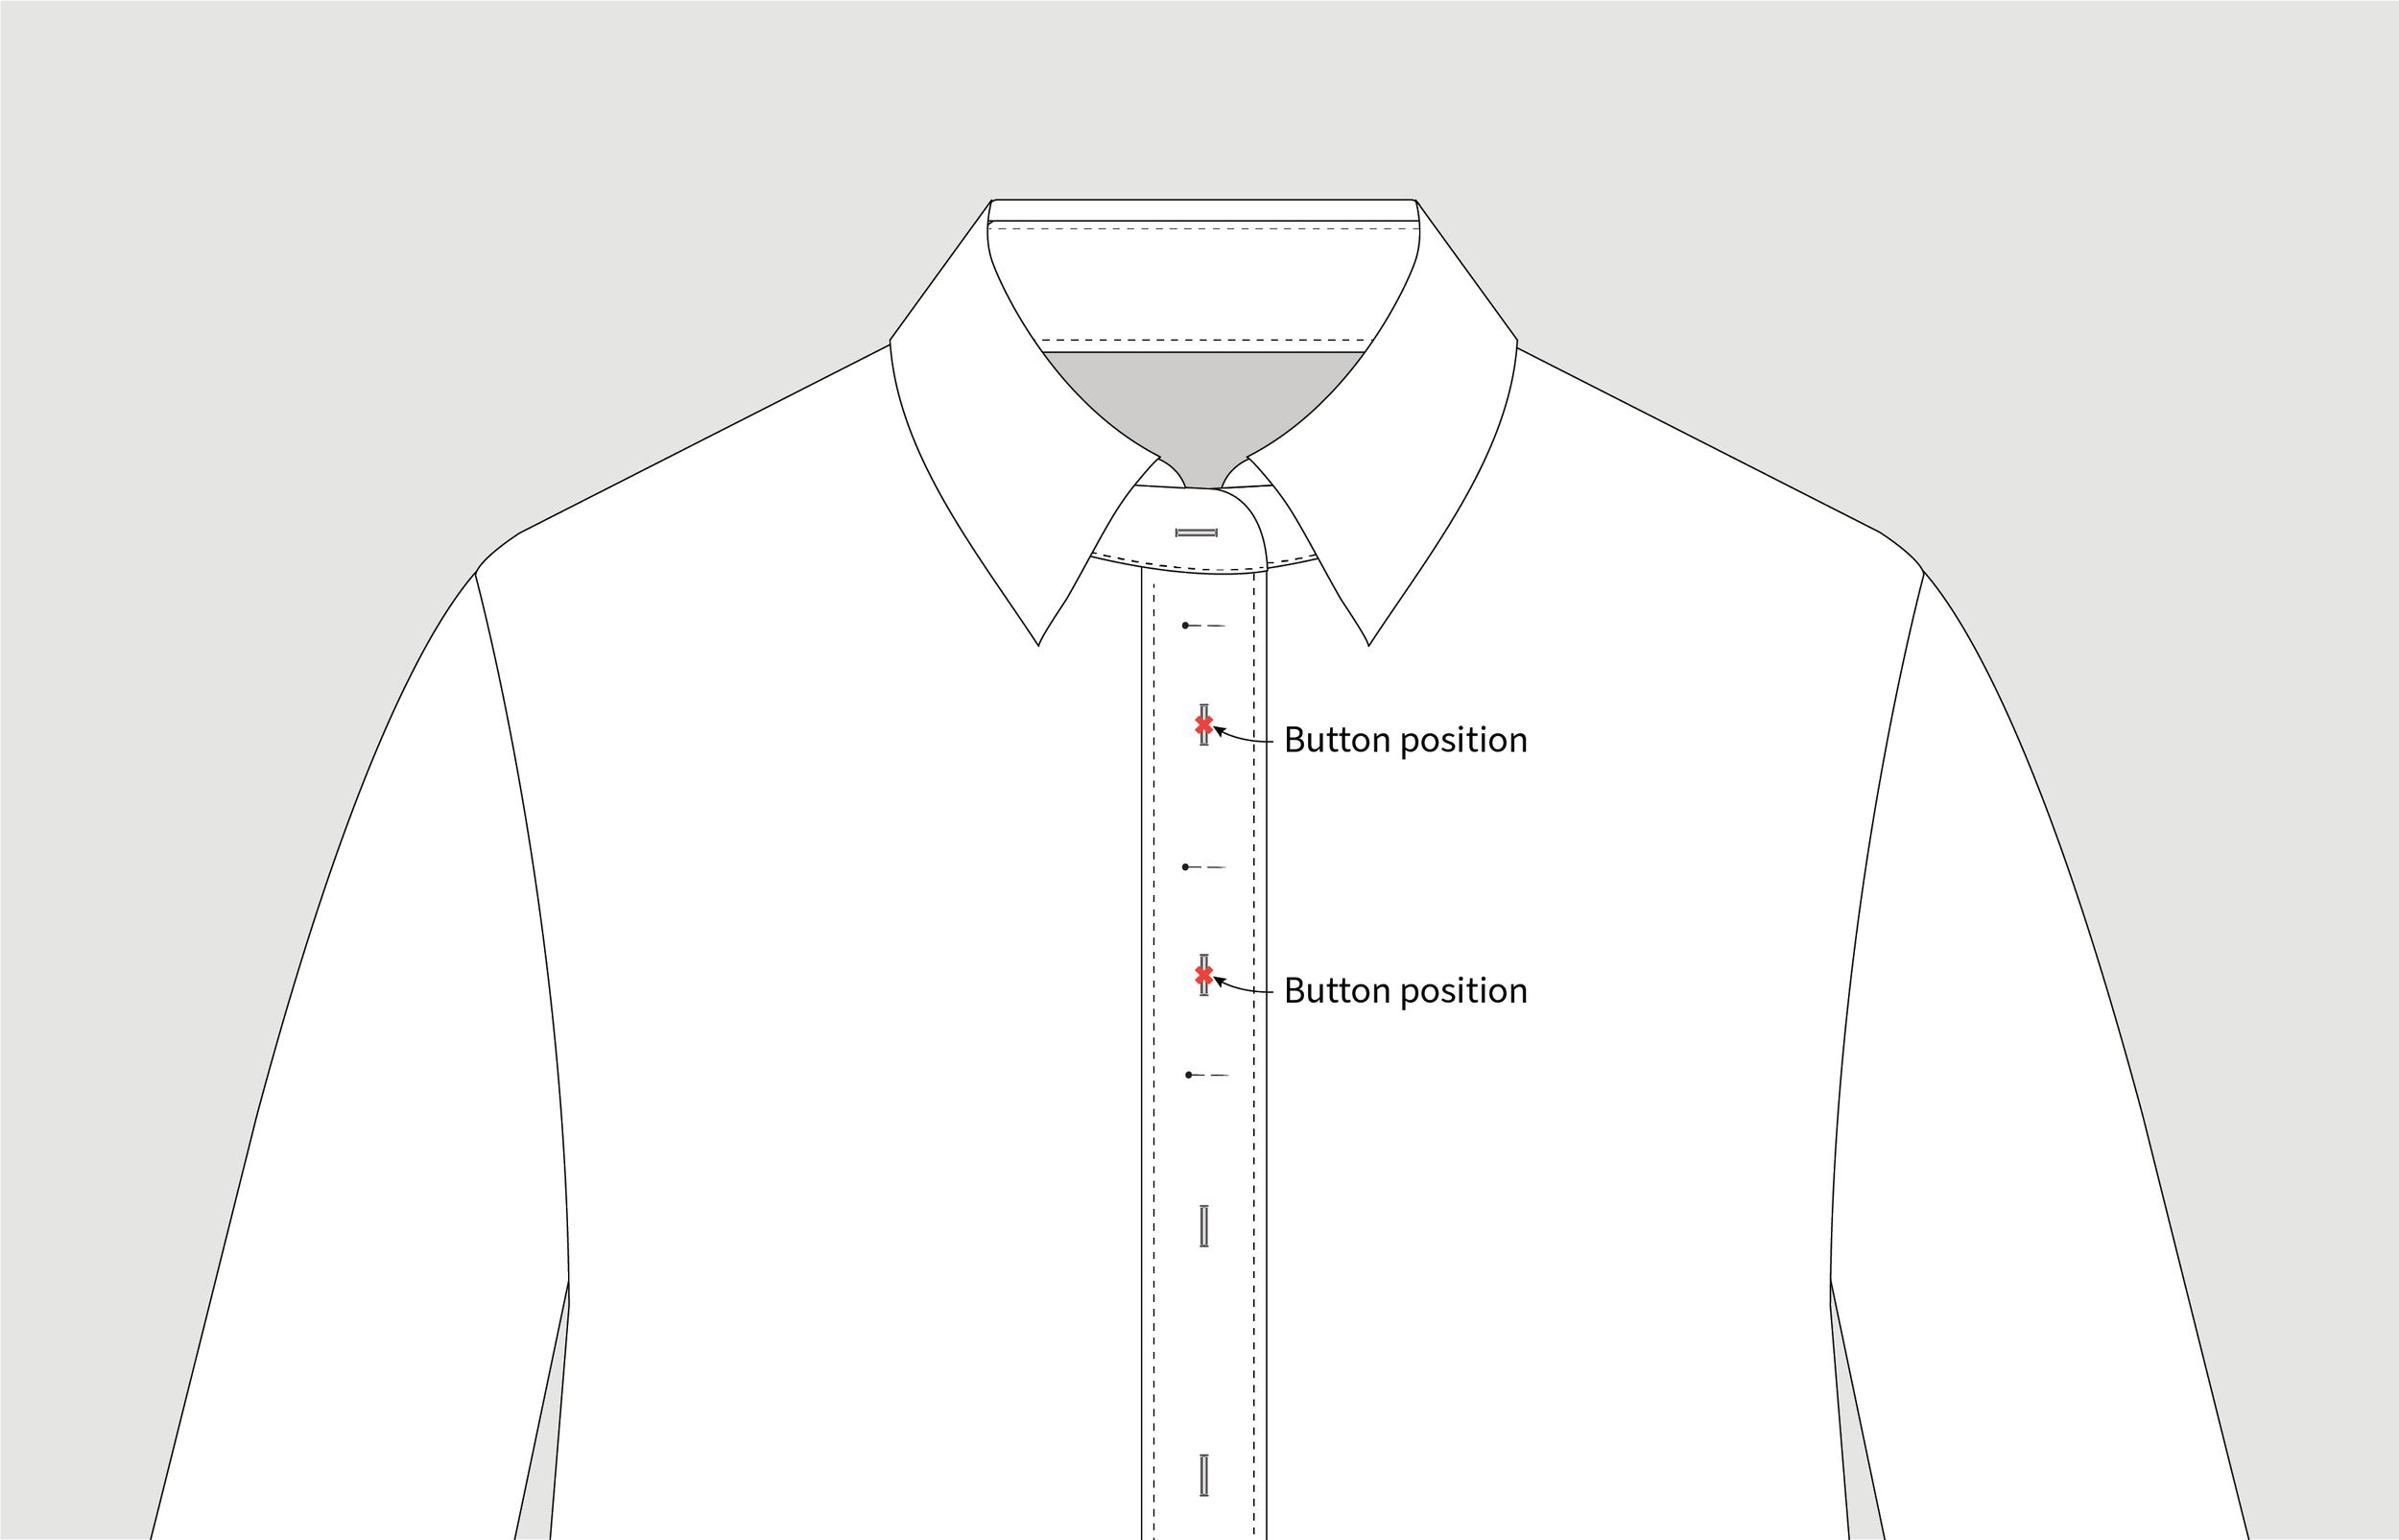
BUTTONHOLE SPACING
When marking button placement, start by marking the top button position. It will be placed closer to the top of the placket than the regular button spacing as it supports the collar stand. We recommend anywhere from 1.5cm (⅝in) - 5cm (2in) down from the top edge.
Mark the remaining button positions 9cm (3½in) from the top button. For the bottom button, keep in mind that you don’t want it to sit too close to the hem and normally there is a larger space between the bottom button and the hem than between the other buttons..
Tip! We like to take inspiration from our favourite garments that are already in our wardrobe and we recommend you do the same! Take some time to have a look at the shirts you love to wear and use a measuring tape to replicate the placement on the garment you’re making.

TAILOR BUTTON POSITION TO YOUR BODY
Because you’re making the garment, remember that you can put the buttons wherever you want, according to the needs of your body. To do this, try on the shirt and close the button placket. Place a horizontal pin at the bust line through the top placket only. This is the position where the shirt is most likely to gape. Take the shirt off and space the buttons evenly along the placket starting from the pin. Remember to leave a space at the bottom and ensure the top button is about 1.5cm (⅝in) - 5cm (2in) down from the top edge.
TIPS FOR SEWING BUTTONS
We’ve included a step-by-step tutorial for how to sew buttons onto a garment (specifically a shirt) in our Sewing Shirts Skills Kit, which you can access by joining Curated by ITF, our sewing subscription.
Otherwise, the main things to keep in mind are:
Before sewing a button in position, place a pin, needle or matchstick across the button and make your stitches over it. This will create some extra give in the thread for when you’re creating the shank under the button.
Be sure to use interfacing on your button placket as this will help give the area structure. If for some reason you choose not to use interfacing on the whole placket, cut a small circle of interfacing and fuse where the button will be stitched to create stability.
Select a button that isn’t too heavy for the fabric you are using. This may take some experimenting on samplers.
Use the same number of stitches on each button to keep things consistent.
Happy sewing,
Emily
RESOURCES MENTIONED IN THIS ISSUE
The Sewing Shirts Skills Kit is the first part of our Sewing Shirts project series, which is available through our Curated by ITF subscription. Past issues are now available for purchase by current subscribers. More information can be found here.
For more issues of the Q & A series, you can check out the archive here.
WHAT YOU’VE BEEN MAKING

Ruffle sleeve top made by @apple_franca

Hove jacket made by @janice.makes