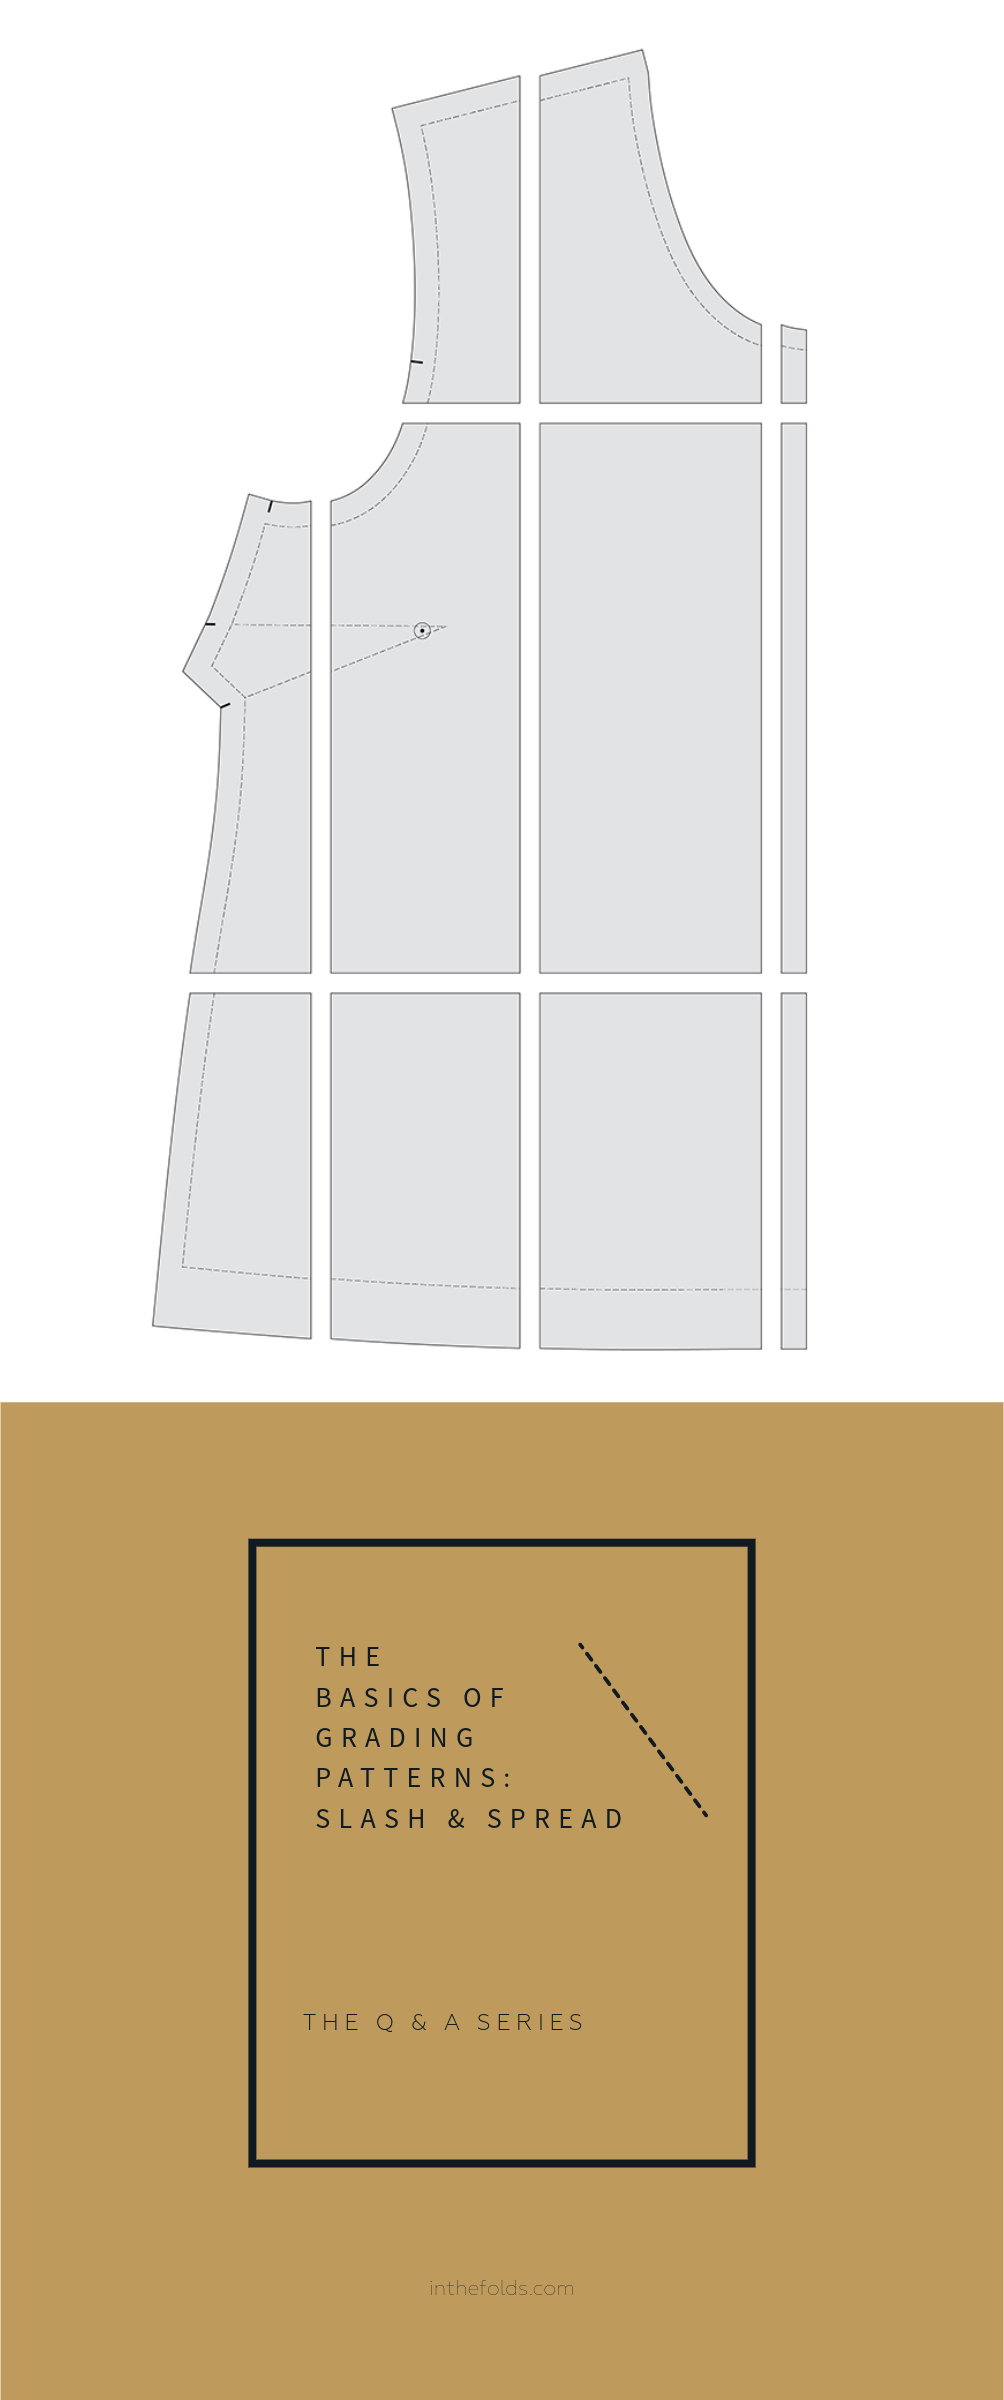
THE Q & A SERIES
How to lower the waist on a pants pattern
Hi,
I love the wide leg Pants pattern but prefer to wear all trousers much lower down, like on my hips, a low rise is it?!
How can I modify the pattern to sit on my hips? - just below my belly button! ;)
Really hoping you can help me as I really want to make these!!
Thanks you so much,
Janie :)
Hi Janie,
For the last three months of Curated by ITF we have been working on all things pants - sewing, fitting and designing. This includes adapting patterns so they suit your preferences, like lowering the waist.
ALWAYS START WITH A TOILE
If you want to lower where a pair of pants sit on the body, you can use a toile to work out how much to lower the waist by.
We strongly suggest making a toile to check the fit of the original pattern before going ahead and making large-scale pattern alterations. Once you're happy with the fit, you can draw on the toile where you'd like the new waistline and waistband to sit. You may like to refer to a pair of pants in your wardrobe to get an idea of the exact fit.
For your toile, if you’re using the Peppermint Wide Leg pants pattern (or a similar pattern that has pockets), we’d suggest converting the pattern into a block before you get started. This way you don’t have to worry about the pockets. Once you are happy with the fit and have lowered the waist, then you can add the pockets back in. We’ve got a tutorial showing you how to add pockets to a pants pattern in this month’s issue of Curated, but if you’re not a subscriber you can see this tutorial we created about adding pockets to a skirt pattern.
A STEP-BY-STEP TUTORIAL TO LOWER THE WAIST ON PANTS
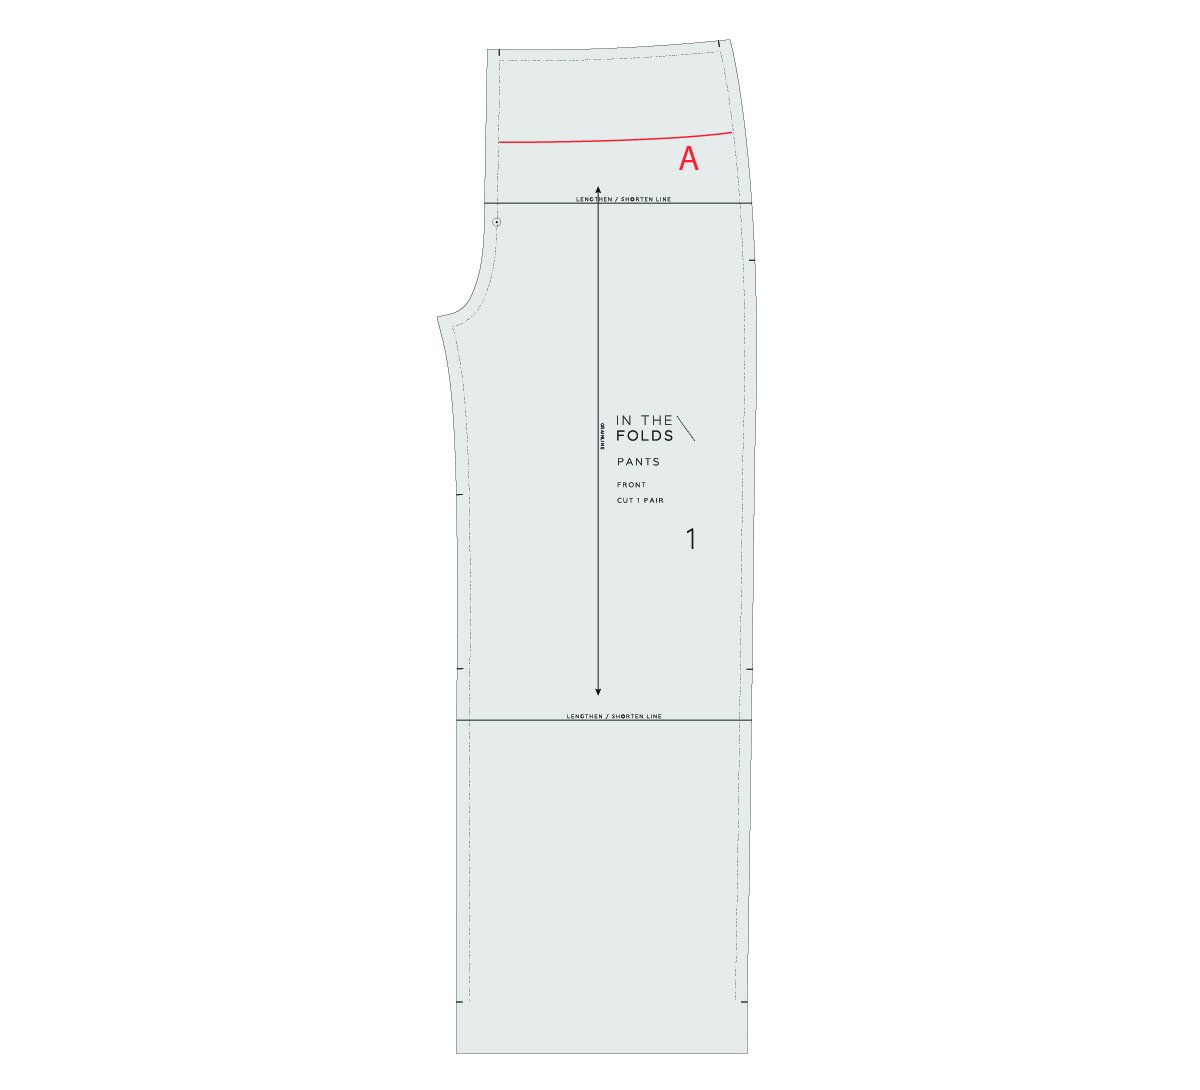
Step 1
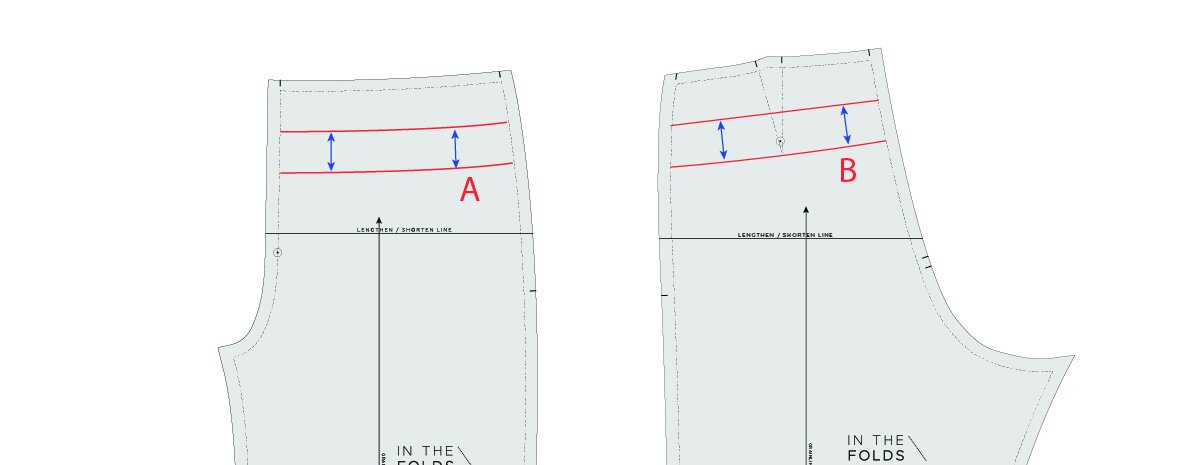
Using your toile as a reference, draw the desired waistline onto the pattern at the point where the pants meet the waistband (not at the top of the waistband). Let's call this line A.
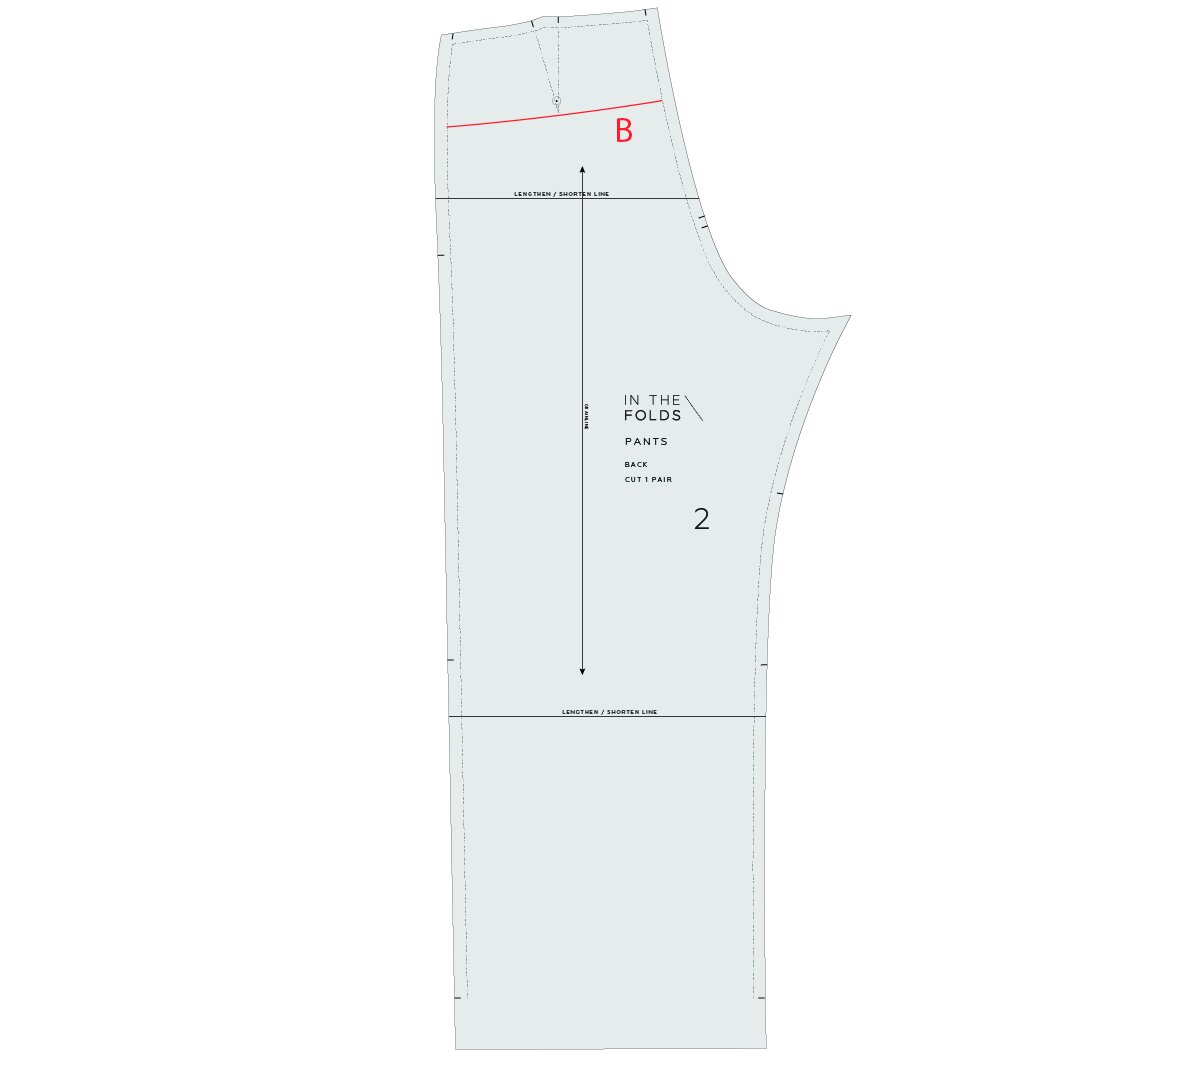
Step 2
Repeat for the back pattern. Let's call this line B. For the example we chose to lower the waist to a point below the dart, eliminating the need for a dart.
Step 3
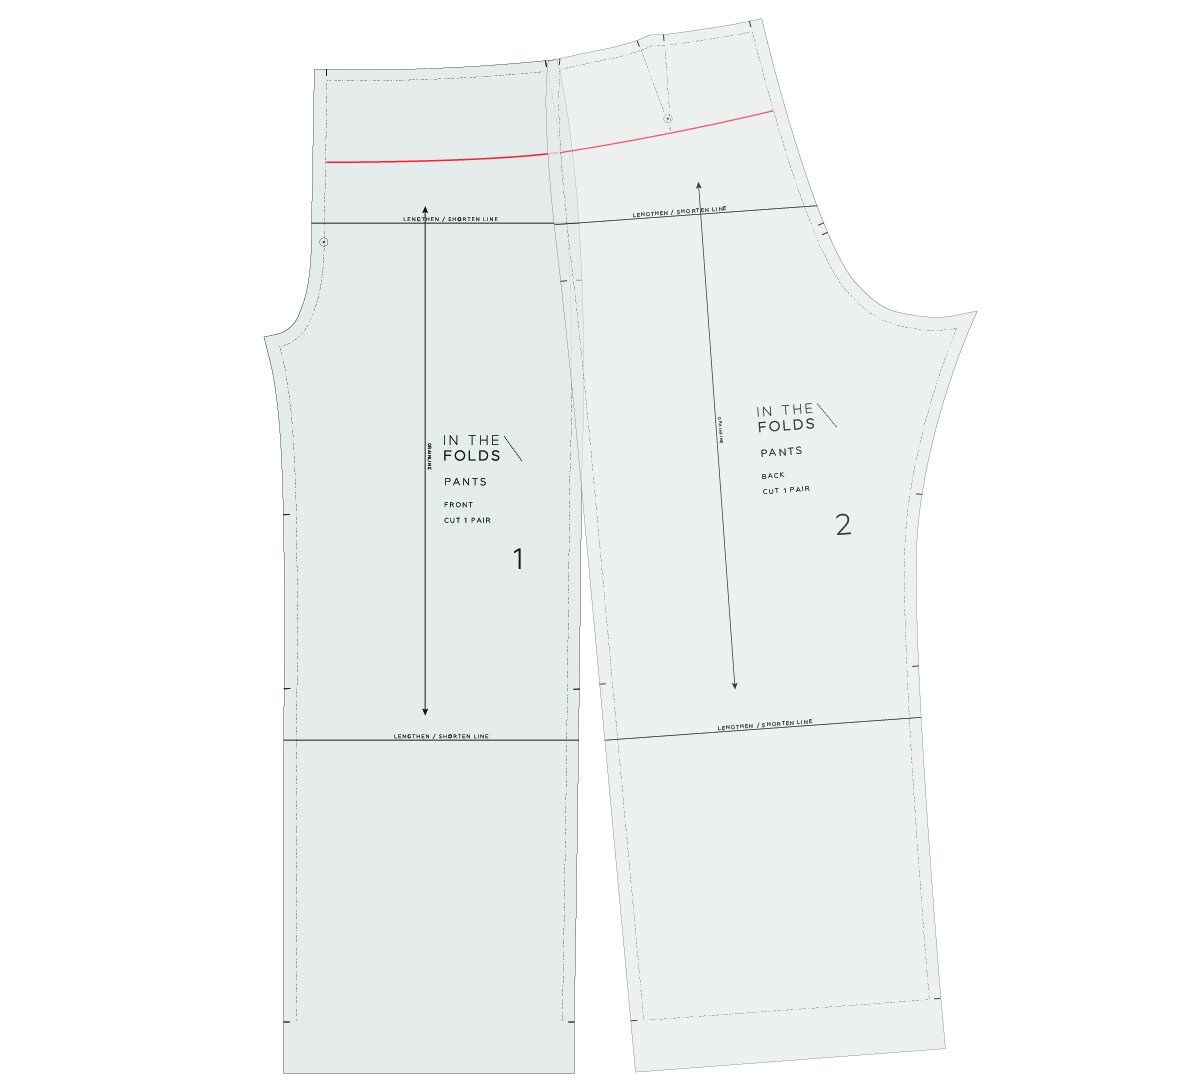
Line up the side seam STITCH LINES of the FRONT [1] and BACK [2] as if they have been sewn together (one on top of the other).
Check that the new waistline flows smoothly between the front and back. Adjust if necessary.
Step 4
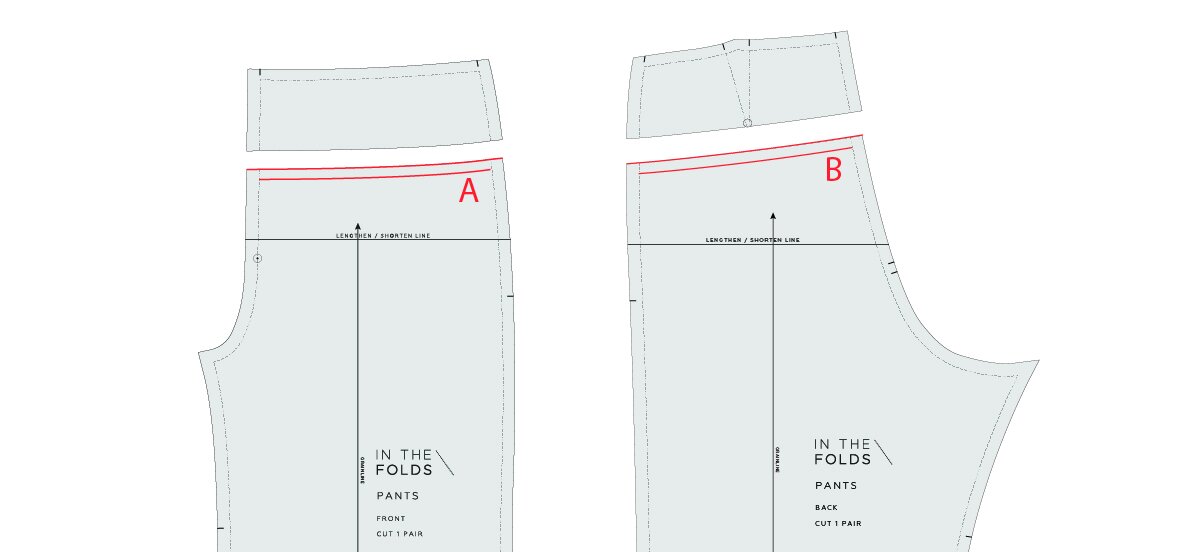
You will need to create a new waistband for the altered pattern. Draw lines parallel to lines A and B, at the desired height of the new waistband. We recommend a 3-4cm (1¼-1½in) waistband.

STEP 5
a Trace the front waistband shape. Add a grainline to the pattern parallel to the CENTRE FRONT.
b Trace another copy on the reverse side (with the waistband flipped). The reason we trace both sides is because the left and right waistband are not identical (we will add a fly front extension to the left waistband only).
c For the left waistband, add an extension for the FLY SHIELD. The extension needs to be the width of the FLY SHIELD (in this case 4.5cm (1¾in)) and the edge needs to be parallel to the CENTRE FRONT.

Step 6
Add 1cm (⅜in) seam allowance to the top and bottom edges of the waistband pieces. Add 1.2cm (½in) seam allowance to the CENTRE FRONT and side seam.
You can change the amount of seam allowance to your preferred width, but remember that the lower edge of the waistband should have the same amount as the top of the pants.
Make sure your patterns are labelled "CUT 1 PAIR + BLOCK FUSE" for both the right and left front Waistband.
Step 7
Trace the back waistband piece in the same way.
Trace the dart and we will show you how to remove it in the following steps.
Add a grainline to the pattern parallel to the CENTRE BACK.

Step 8
a Cut down one of the dart legs.
b Close the dart by moving the cut dart arm so that it meets the uncut dart arm. Tape / glue pattern in place.

Step 9
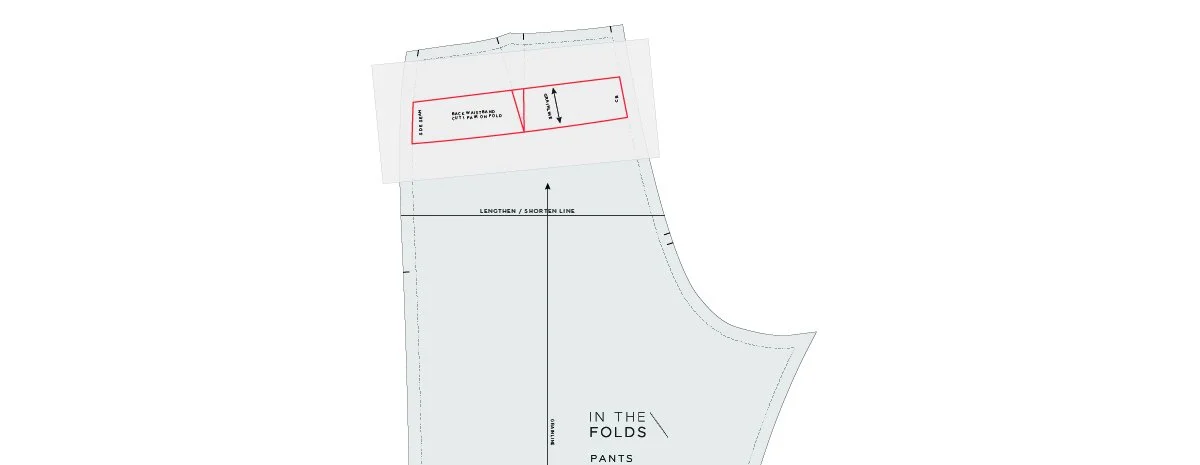
Fold a piece of pattern paper and line up the CENTRE BACK of the new BACK WAISTBAND with the fold.
Trace a copy of the piece, smoothing out the top and bottom edge where the dart was removed. Label the piece "CUT 1 PAIR + BLOCK FUSE".
Add seam allowance in the same way that you did on the front waistband pieces. Mark a notch at the CENTRE BACK on the top and bottom edge.
Step 10
Take the pants pattern and add 1cm (3/8in) seam allowance to lines A and B. You can choose whether to trace a copy to keep as a draft or cut off the excess.
Alter the fly pieces by lining up the piece on the pattern and shortening to reflect the new rise height. You will also need a shorter zip to fit the new lowered waist.
Happy drafting,
Emily
RESOURCES MENTIONED IN THIS ISSUE
The Pants Sewing Skills Kit, Pants Fitting pattern & Fit Kit and the Pants Design Kit are the first, second and third parts of our Pants Sewing project series, which is available through our Curated by ITF subscription. Past issues are also now available for purchase by subscribers. More information can be found here.
The Wide Leg Pants pattern is a free pattern and can be found here.
How to convert a pants pattern into a block - read the tutorial here.
How to draft side pockets - read the tutorial here.
For more issues of the Q & A series, you can check out the archive here.
WHAT YOU’VE BEEN MAKING

Rennie dress made by @crafted_by_ml

Peppermint Wide Leg pants made by @so.miio