THE Q & A SERIES
How to do a Full Bust Adjustment (FBA) on the Rushcutter dress
Hi Emily.
I would like to make the Rushcutter dress, but I'm fairly sure I'll need a full bust adjustment (I have a 3.5" difference between high and full bust).
I'm not sure how I'd do it on the Rushcutter, and I couldn't find a tutorial on your site. Is there a tutorial available?
Thanks!
Cindy
- Port Townsend, WA | USA
Hi Cindy,
I am happy to hear you would like to make the Rushcutter dress!
It's up to you about the Full Bust Adjustment (FBA). I think you may be able to get away with not doing it as there is a fair amount of ease at the bust (14cm / 5 1/2in). If you would like to make the alteration though, I have created a tutorial on how to do it.
This same method could be used for doing a SBA (small bust adjustment) - you would just be taking out volume rather than adding it in.
Getting started
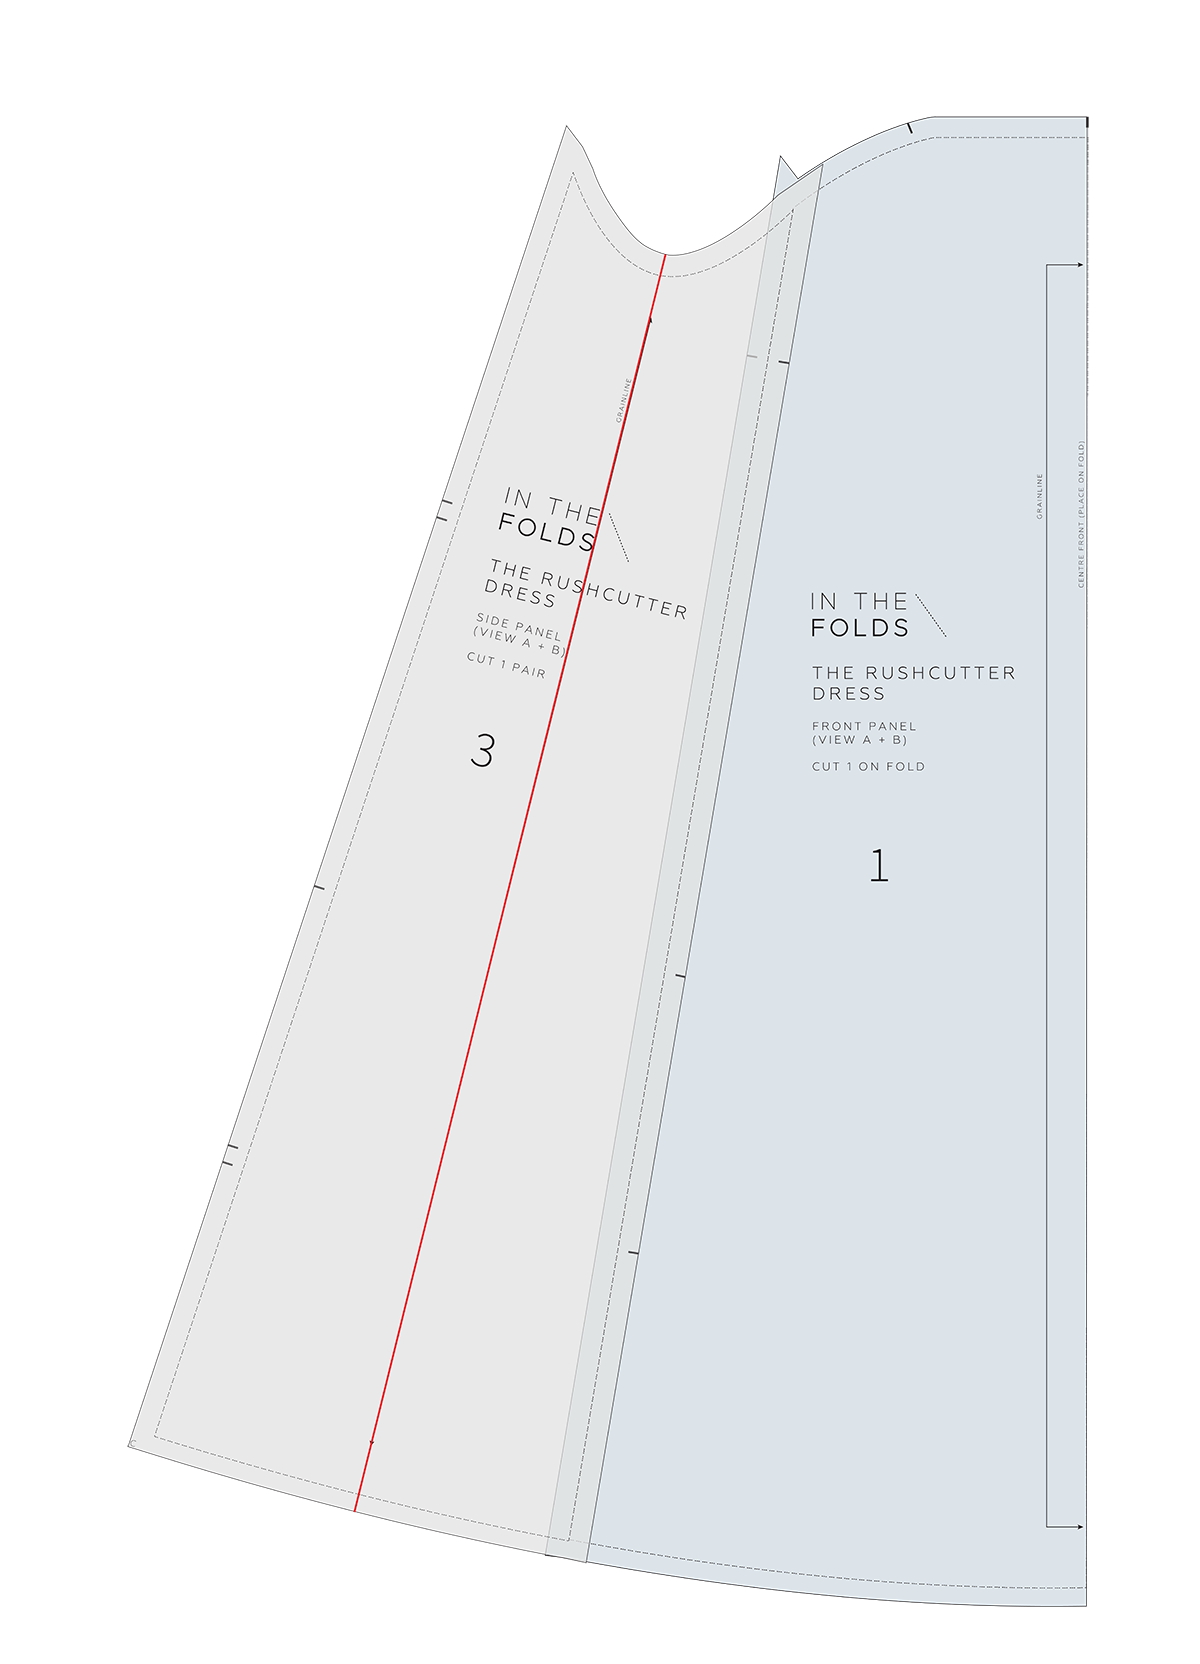
When it comes to the Rushcutter dress, the thing that makes it a little bit different when it comes to doing a FBA is that it doesn't have a dart, armhole or side seams on the FRONT PANEL [1]. The first thing we need to do is find a few reference points that will help us make the alteration.

Step 1
Take the FRONT PANEL [1] and SIDE PANEL [3] and line up STITCH LINE on STITCH LINE as if the two panels have been sewn together. Tape / pin in place.
Step 2
Mark in the side seam by extending the grainline on the SIDE PANEL [3] to the top and bottom of the piece.

Step 3
Take the YOKE [11]* and line it up as if it has been sewn. Use the side seam line as a guide and the side seam notch on the yoke. As you can see, there is shaping in this seam so you won’t be able to match it all the way along. You can also add the CENTRE FRONT PANEL [4] if it helps you visualise, but it isn’t required for the alteration. Tape / pin in place.
*This tutorial will also work for the sleeve version. If making the sleeve version, still use the YOKE to create the modification lines. This is just helping you get all the points of reference in place for the alteration.

Step 4
Extend the side seam line up to the YOKE. We have marked our armhole, shoulder, neckline and centre front in red so that the shape of the piece becomes clear. As you can see, the pattern now looks like a more regular dress shape and in a moment you will be able to a FBA as you normally would on a pattern without a dart.

Step 5
Mark in the regular SBA / FBA modification lines as illustrated (find your apex point by holding the pattern up to your body or referring to your toile if you have made one).
If making the sleeve version, remove the YOKE piece so that the armhole modification line only goes to the corner of the piece (point marked in illustration).
Step 6
Once you have the alteration lines marked on the pattern, you can then use our FBA tutorial for the Collins top for the rest of the process. You can find that tutorial here.
In this tutorial you can see that you have the option to add a dart to the dress or you can add the dart and then remove it by relocating the fullness.

I hope this tutorial helps you make a dress that you will wear and love!
Happy sewing,
Emily
For more issues of the Q & A series, you can check out the archive here.
What you’ve been making

Acton dress made by @threadbitchbrighton

Hove jacket made by @knitten

Hacked Peppermint Wrap top made by @des_airs_exotiques

Hove jacket made by @nuggetwithaneedle