
Today in the Flynn jacket pattern alteration series, I will be showing you how to lengthen or shorten the sleeves.
There are times when you can just add some (or remove) length to the hem of a sleeve (when the underseams of a sleeve are straight), but in the case of the Flynn jacket (and other patterns like it), you need to add/remove the length to the inside of the pattern piece, so that you can keep the shape intact - due to the tapered nature of the sleeve. As well as this, the Flynn jacket sleeve is finished with a hem facing, so by adding / removing length from the inside section of the sleeve, the hem facing will still fit and will not require any changes.
Lengthening the sleeve
Step 1

Take the SLEEVE [3] pattern piece. You can use the actual pattern piece, or trace a copy if you would prefer to keep the original piece intact.
Step 2

You will need to work out how much length you would like to add to the sleeve. You can do this by looking at your toile / muslin (for more details on making a toile / muslin look at this post from the Rushcutter sew-along), or holding the pattern pieces up to your body and getting an idea of where they will sit on your arm (keep in mind that the jacket has a dropped shoulder and the sleeve cap does not sit at your shoulder point).
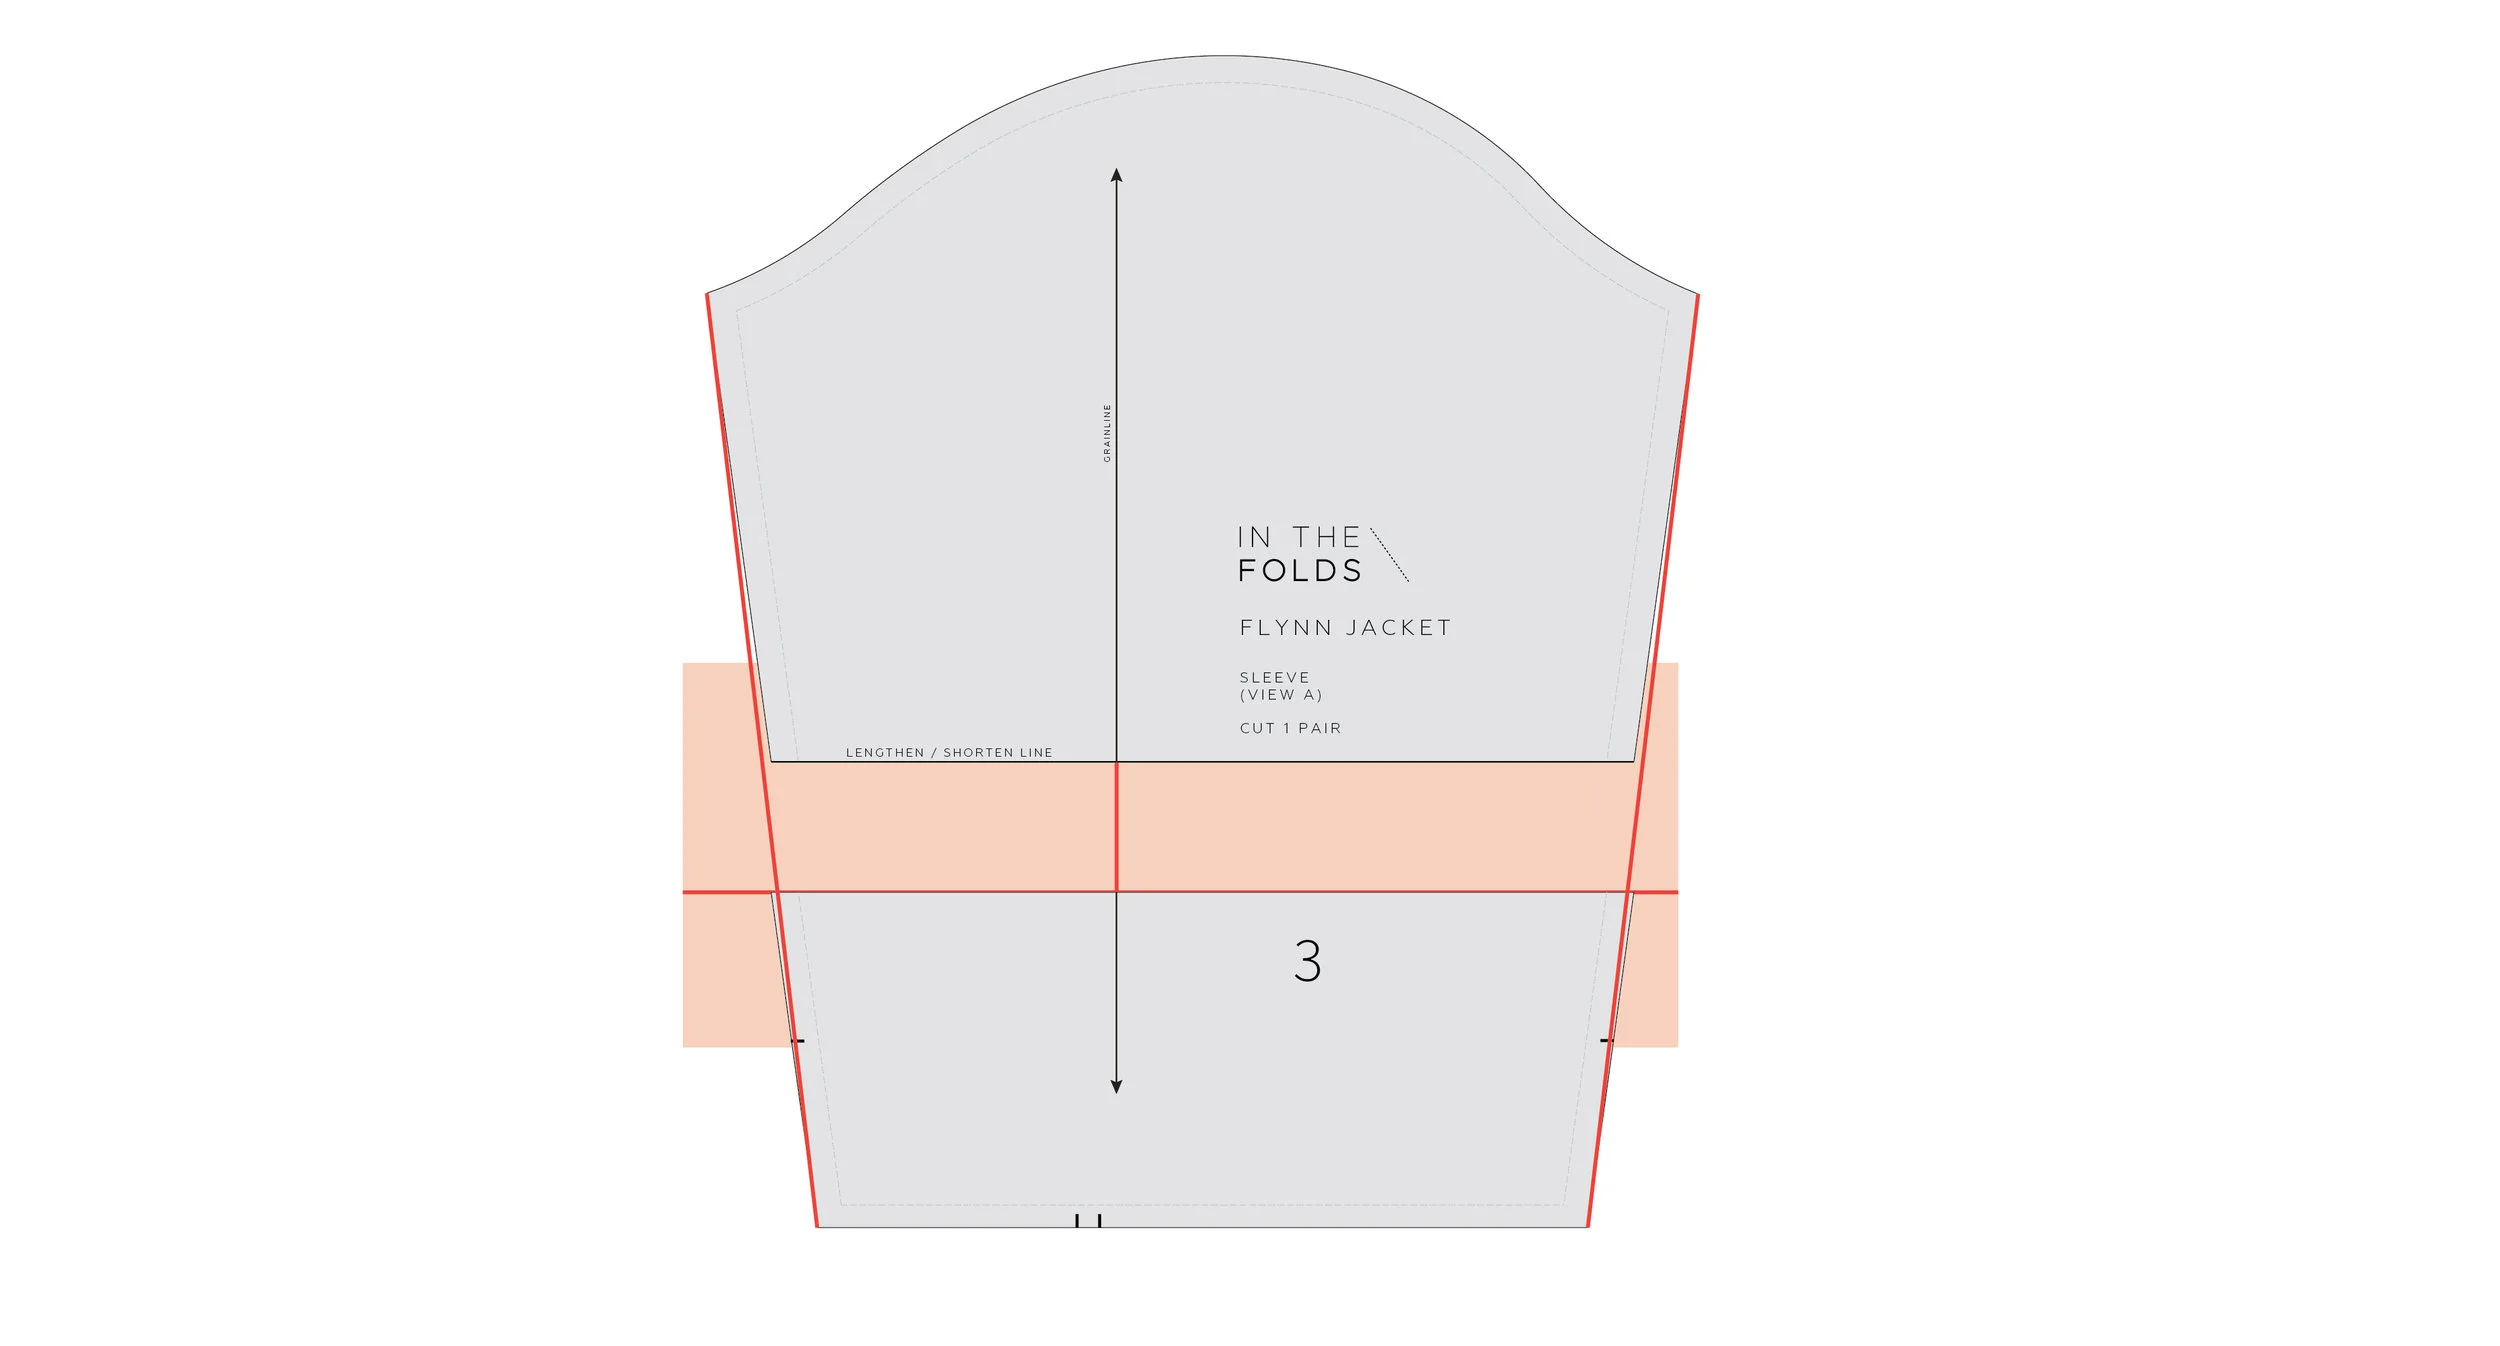
A - Cut through the lengthen/shorten line on the SLEEVE [3].
B - Take the upper section of the sleeve, and tape or glue a piece of paper to the lower section - with enough paper extending past the pattern to add your length extension. Leave some paper either side too.
C - Extend the grainline onto the attached paper and then mark a horizontal line on each piece of paper, measuring down from the cut line the distance equal to the amount of length you would like to add. In the example above, you can see the red line is 5cm (2in) below the cut line (which is how much length we will be adding to the sleeve).
Step 3

A - Attach the lower part of the sleeve to the added paper, lining up the cut edge with the line marked in the previous step. Use the grainline to ensure that you line the pieces up correctly.
B - Glue or tape in place.
Step 4
Re-draw the seam lines with a straight line over the adjustment.
You can choose to trace the pattern on to fresh pattern paper or tape on small pieces of paper / masking tape where you need to fill a small gap to complete the seam line.
Cut off any excess paper that is outside of the new lines.
Shortening the sleeve
Step 1

You will need to work out how much length you would like to remove from the sleeve. You can do this by looking at your toile / muslin (for more details on making a toile / muslin look at this post from the Rushcutter sew-along), or holding the pattern pieces up to your body and getting an idea of where they will sit on your arm (keep in mind that the jacket has a dropped shoulder and the sleeve cap does not sit at your shoulder point).
A - Cut through the lengthen/shorten line on the SLEEVE [3].
B - Measuring up from the cut line, mark a horizontal line on each pattern piece, the distance of the amount of length you would like to remove.
In the example, you can see the red line is 5cm (2in) above the cut line and the shaded section shows the amount of length that will be removed from the sleeve
Step 2

A - Move the lower part of each pattern piece up to the line marked in the previous step. Use the grainline to ensure that you line the pieces up correctly.
B - Glue or tape in place.
Step 3

Re-draw the seam lines with a straight line over the adjustment (you can cut off any excess paper that is now outside the lines).
Keep your eyes out for more posts over the coming days!
During this series I will show you how to:
Narrow / Broad shoulder adjustment
Remove the box pleat from the back piece on View A