In yesterday's post for the Acton sew-along, we joined the bodice to skirt to form a dress, and today we'll be inserting the invisible zip. For any of you who just ran away screaming, please come back! Once you know how to do them (and with a few little tricks under your belt, which I'll be showing you today) they really are a piece of cake.
Prepare the centre back seam

With the dress right side down, turn the centre back seam back by 2cm (¾in) and press . Repeat on the other side of the opening. This crease will help when you insert the zip.
Position the zip
And now it’s zip time! Take your zip and unzip it. Using a warm, dry iron, press the zipper teeth flat. Make sure you check your irons heat setting. You really don't want to melt the teeth!
Turn the dress right side up and unfold the centre back seam.
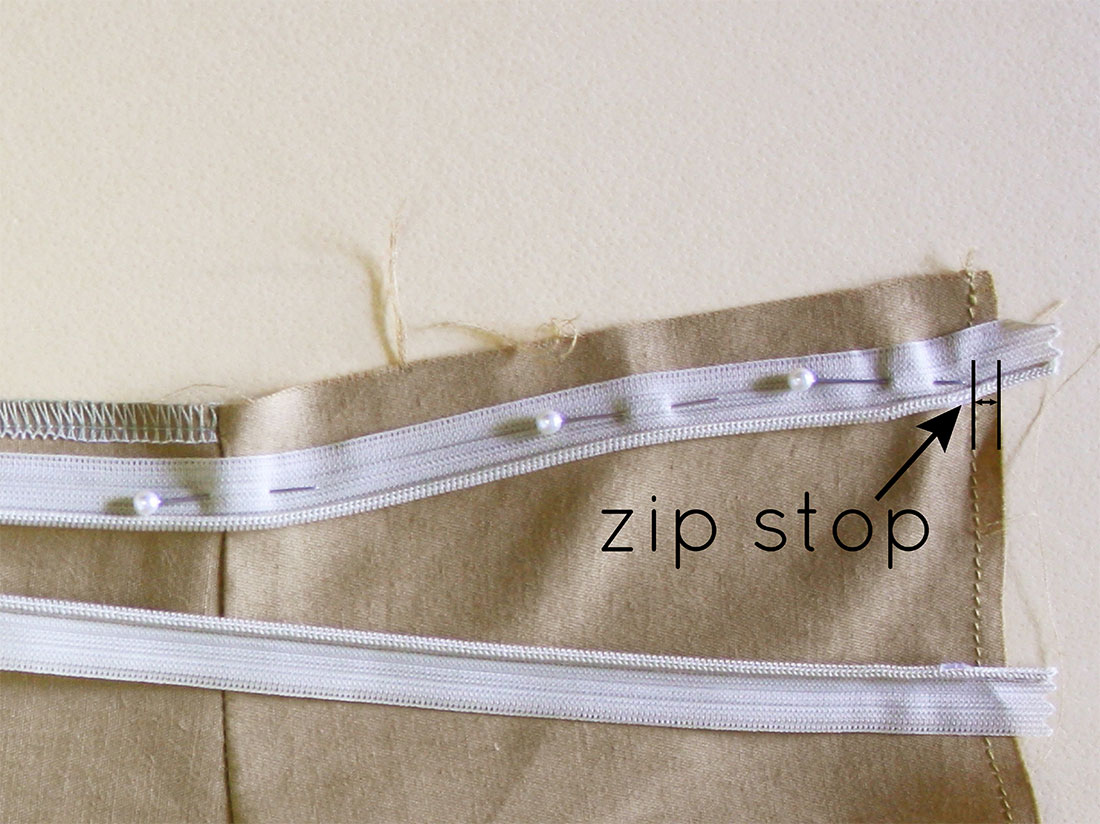
Starting at the right side of the centre back opening, take the zip and place it face down on the opening. Place the zip stop 1cm (⅜in) down from the bodice edge, and align the zip teeth with the creased line created in the previous step.

Pin the zip to the centre back, regularly checking that the zip teeth are aligned with the crease.
Baste zip in place (Top Tip #1 for sewing perfect invisible zips every time)

Take a needle and contrasting thread (a great chance to use all those strange coloured threads you have somehow accumulated over the years), and baste the zip tape to the dress by hand. This will ensure the zip does not shift while you are sewing it in. Remove the pins.
Stitch the first side in place

Using an invisible zip foot, stitch down the length of the zip, using your finger to uncoil the teeth as you sew. Try to get as close to the teeth as you can (without stitching them).
Backstitch just before you reach the end of the zip (you won’t be able to get past the zip pull).

With the dress right side out, turn the seam allowance under (flipping the zip tape to the inside of the dress) and press the fold nice and flat.
Line up the waist seam on either side of the zip (Top Tip #2 for sewing perfect invisible zips every time)

To ensure that the waist seam matches up on either side of the zip, take a pin and put it through the zip tape (on the side not yet sewn) horizontally, in line with the waist seam.
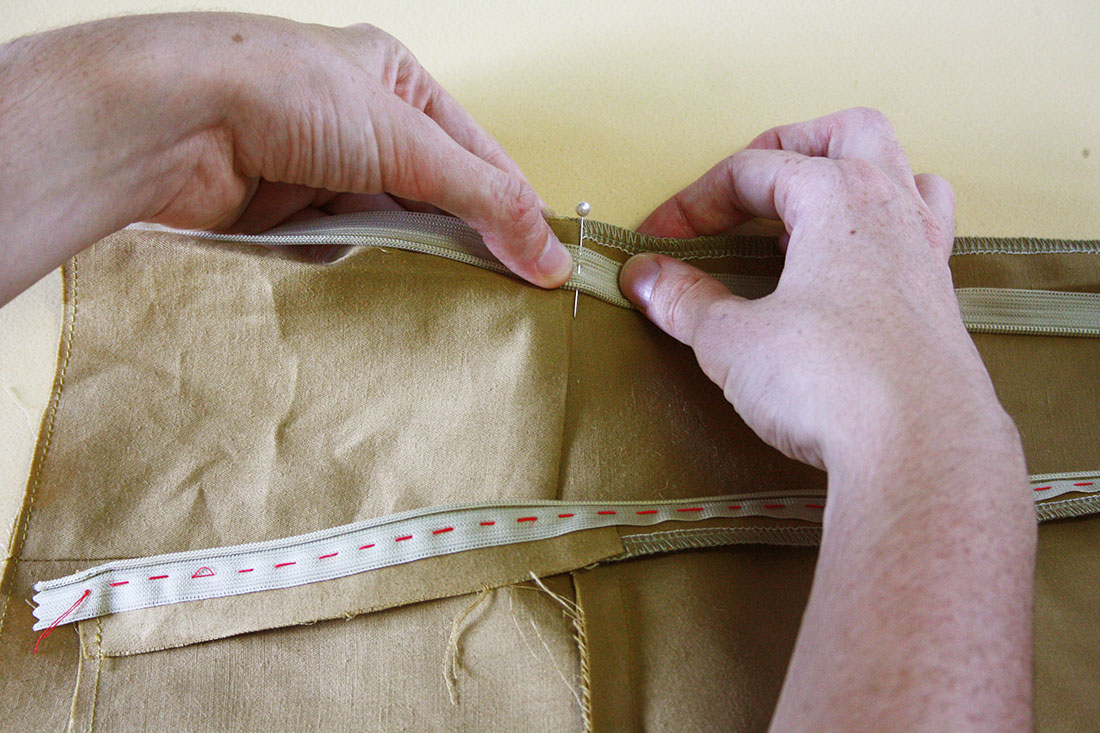
Now open the zip and place the tape face down on the left side of the back opening, aligning the
horizontal pin on the zip tape with the waist seam. Make sure the zip is not twisted. Pin in place.
Attach second side of zip

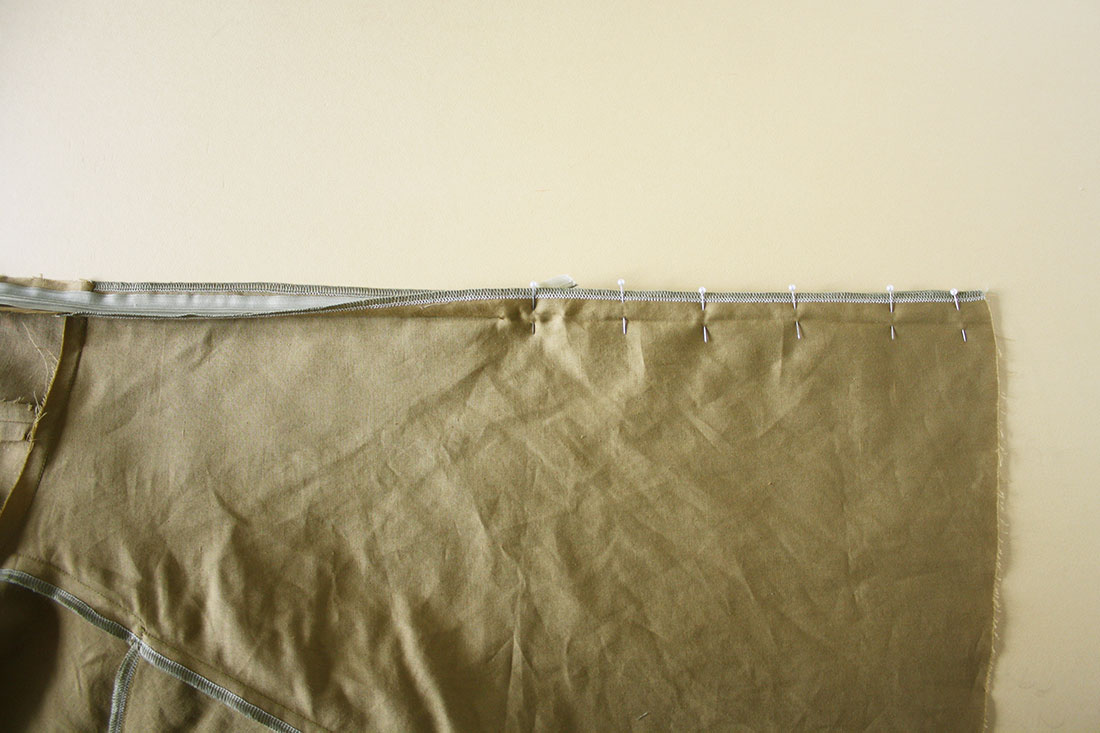
Place pins along the length of the zip, and again baste in place by hand.

Stitch in place with an invisible zip foot, again uncoiling the zip teeth with your finger and stitching as close as you can to the coil.
Job done. Your zip is inserted! Now to finish off the centre back seam.
Close the centre back seam
Turn the dress inside out and pin the remainder of the centre back opening closed, keeping the ends of the zip tape out of the way.

With an ordinary zip foot, stitch the centre back seam closed. Start by putting your needle in the
endpoint of the zip stitch line (or as close to it as you can get) and continue down the seam with a 2cm (¾in) seam allowance.
Give the centre back seam a good press, with the seam allowance pressed open.
And you have an invisible zip in your Acton dress!
How do you feel? Less daunted by invisible zips?