THE Q & A SERIES
How to draft a facing
Hi Emily,
Really loving your question and answers.
I would love to know any tips you have for altering the back and front of necklines and how they blend back into the shoulders. How you go about drafting the facing?
Thank you in advance
Love
Emma xx
- Hackney, United Kingdom
Hi Emma,
Lovely to hear that you are enjoying the Q&A series!
Last week we tackled the first part of this question (how to alter the neckline on a pattern), and today we're back to show you how to draft a facing for your newly altered pattern.
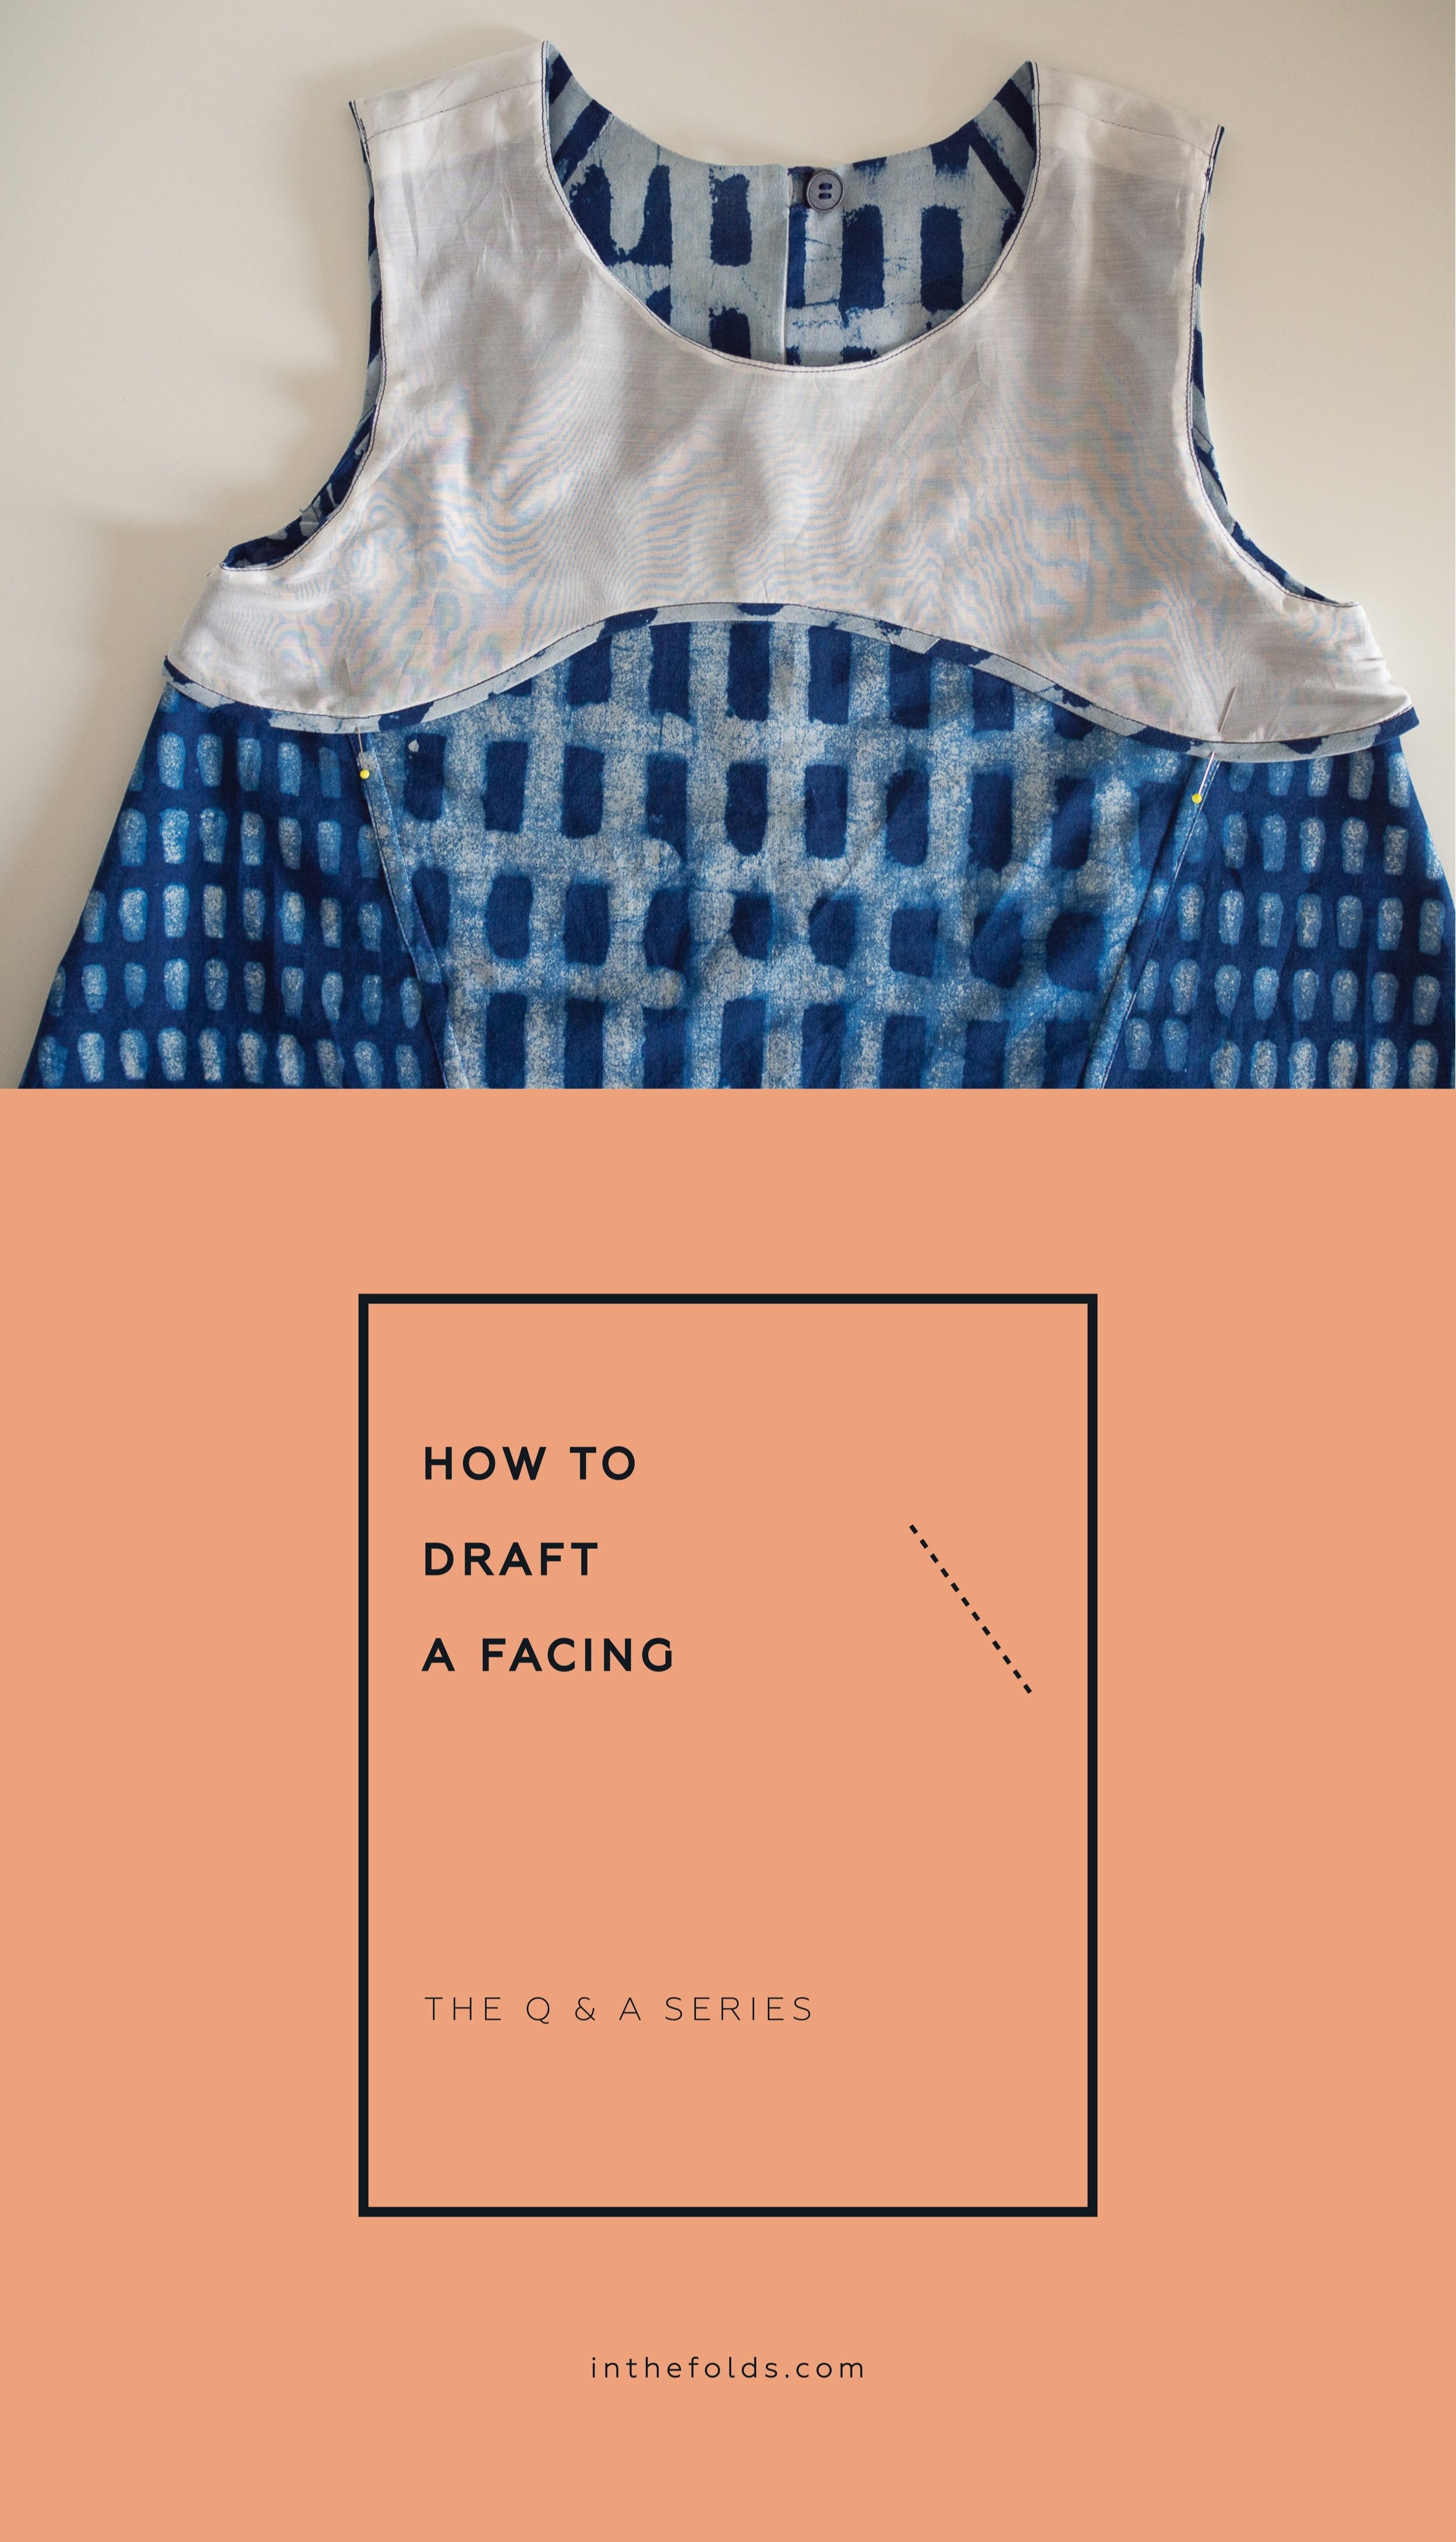
What is a facing?
A facing is a way to finish raw edges of a garment in a way that is really clean (and often almost invisible) from the outside. It is like lining a certain section of a garment and finishes the edges as well as provides stability in the area that has the facing.
Facings are most often used on armholes and necklines, but you can also use a facing to finish a hemline.
Why draft a facing?
You may need to draft a facing if you have hacked a pattern (for example, changed the neckline) and the original facing pieces no longer fit the pattern. The other reason you may need to draft a facing is because your pattern suggests using bias binding for finishing the armholes and neckline, but you would prefer the finish of a facing.
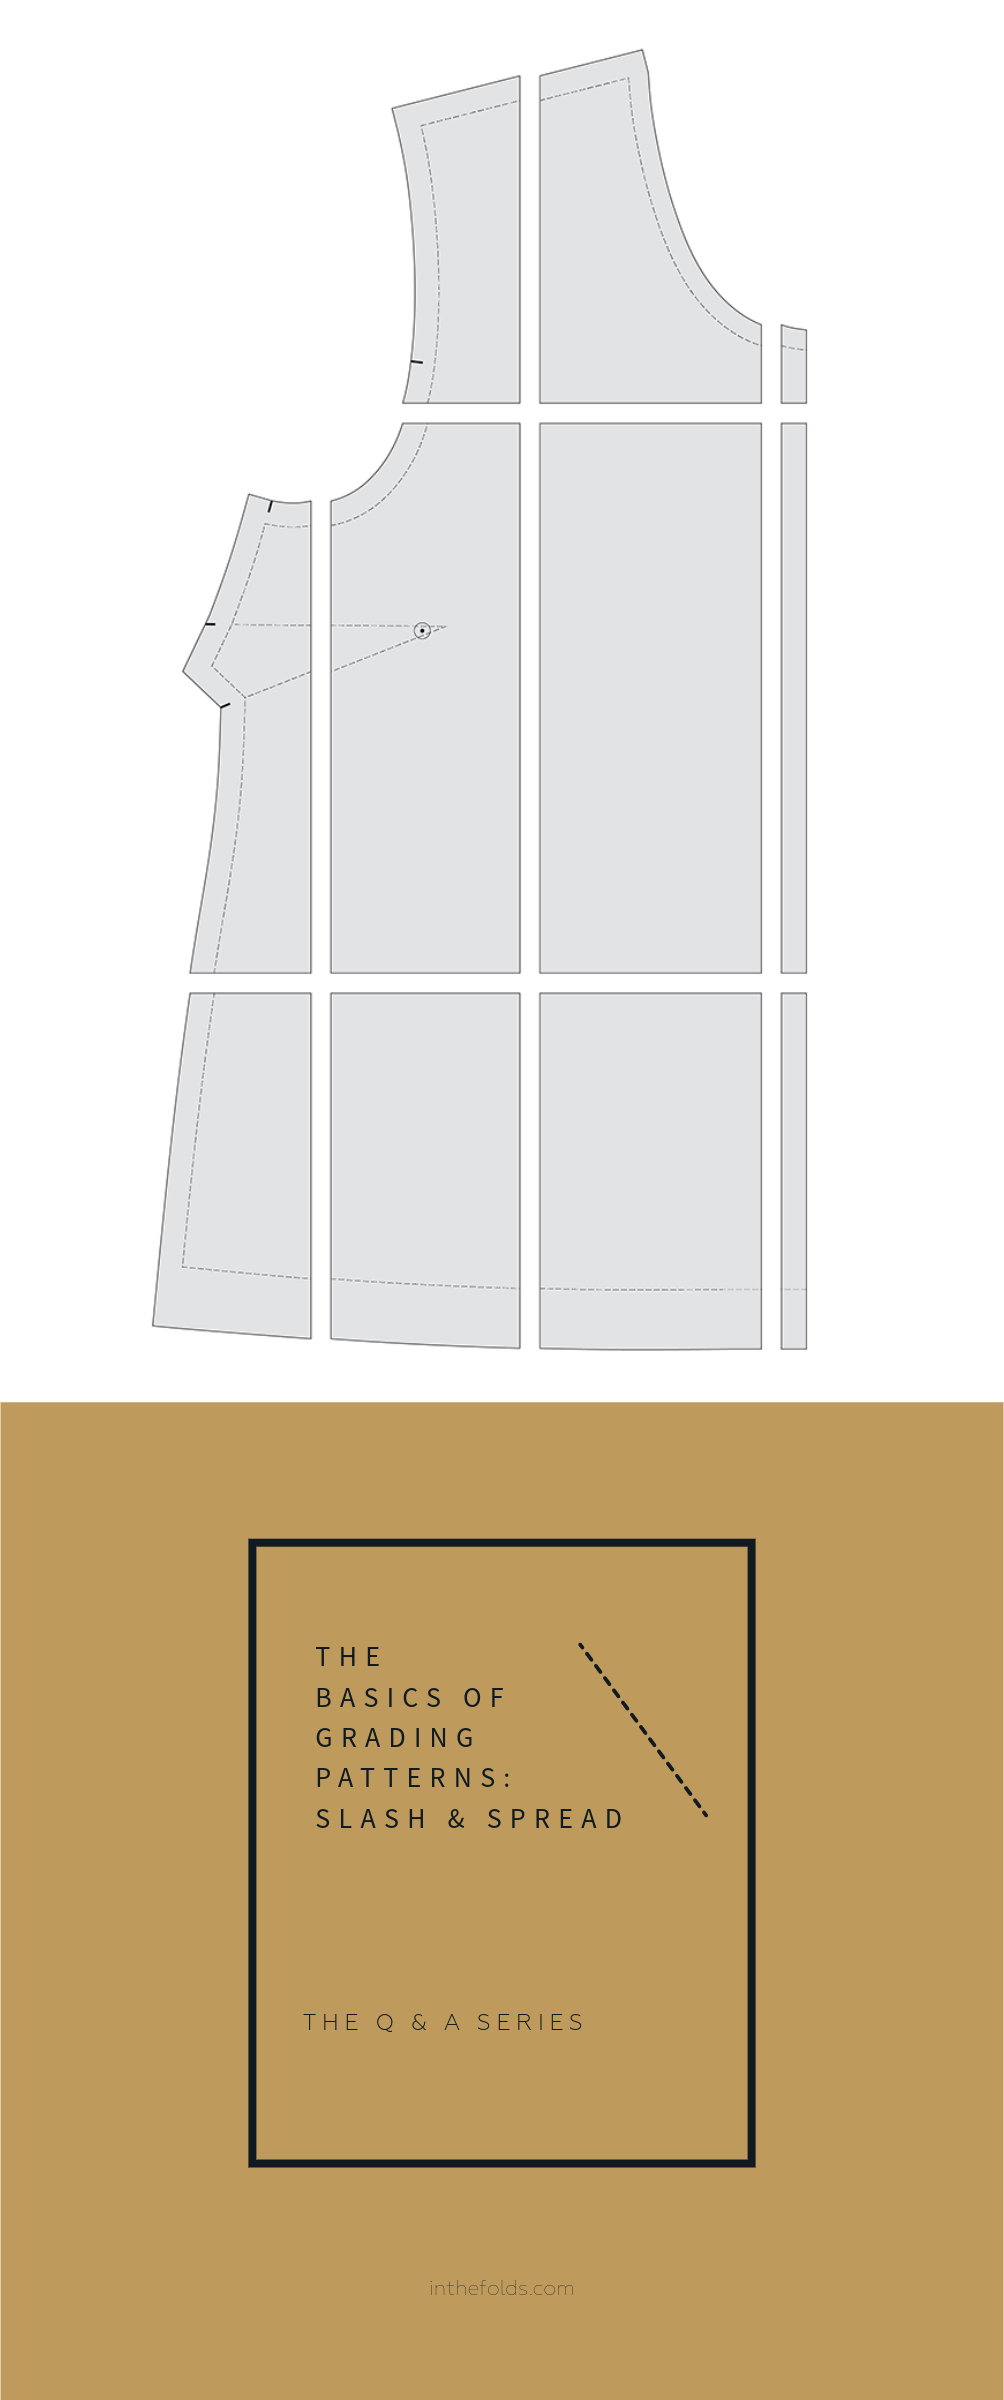
Facing considerations
It is a good idea to have as few design details or seams as possible on a facing. This is because the facing will be on the inside of the garment, and will be backing the outer layer of the garment. The aim is to create as little extra bulk as possible. For this reason, we will be removing the centre front and centre back seams when creating the facing pieces for the hacked jumpsuit. We will also be removing the dart - just like the front facing from the original Neale jumpsuit pattern.
Draft front facing

Step 1
Take the altered FRONT [1] pattern piece and trace a copy of the upper section only - approximately 35cm (13¾in) down the centre front will be fine. Be sure to transfer the STITCH LINE, cutting line, dart point and notches.
Mark the bust apex point on the piece (more info about how to do this can be found in Issue 2 of Curated by ITF). If you have already found your specific BUST APEX POINT, mark it on the pattern.
Re-draw the dart, using the BUST APEX POINT as the tip.

Step 2
Draw a line from the bust apex point down to the bottom of the pattern piece - parallel to the grainline.

Step 3
Cut up from the bottom of the pattern piece, through the line marked in STEP 2. Stop when you get 1-2mm from the bust apex point.
Cut along the lower dart arm towards the bust apex point. Again, stop 1-2mm away from the tip of the dart. This will create a small 'hinge' of paper. This will be used to manoeuvre the pattern, whilst keeping the seam lines intact.

Step 4
To remove the dart, rotate the lower dart arm (the cut line) so that it meets the upper dart arm. Tape or glue in place.
You will notice that this has relocated the fullness of the dart to the bottom of the pattern. Rather than creating a new dart, we will leave this fullness here. The facing will fit the FRONT [1] and the fullness in the lower section of the piece will create the room required for the bust..

Step 5
Fill the opening in the lower part of the pattern by taping or gluing a scrap piece of pattern paper behind the opening.
True the side seam by redrawing the STITCH LINE and cut line with a straight line.
Step 6
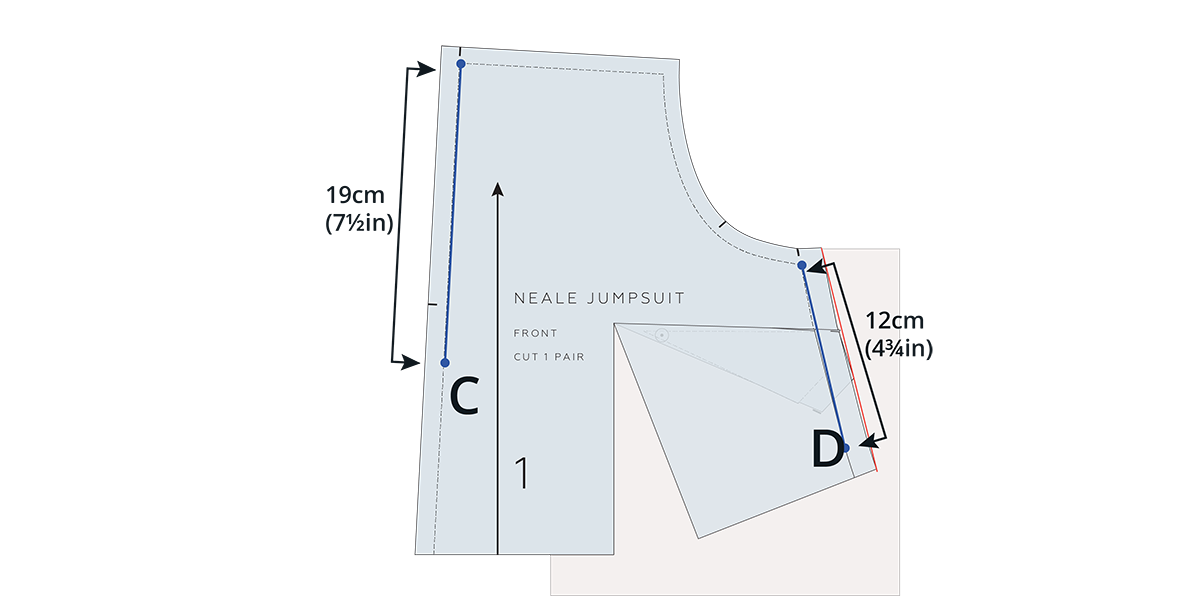
Consider the length you would like your facing to be. You may like to check some garments in your wardrobe to get an idea of your preference.
For the example, we will be making the facing 19cm (7½in) at the centre front and 12cm (4¾in) at the side seam.
Take a ruler and measure down the centre front STITCH LINE, to mark facing length. We will call this point C. On the side seam, measure down from the armhole and mark facing length. We will call this point D.

Step 7
Draw in a short (2.5cm / 1in is fine) line from point C - perpendicular to the centre front line towards the side seam. This will help when you are drawing in the bottom edge of the facing. You need the hem line to meet the centre front and centre back at a 90 degree angle.
Set the front facing piece aside for a moment.
Draft back facing

Step 8
We will now mark guidelines on the BACK [2] pattern piece to create the back facing piece. The guidelines should be the same length as the guideline you marked on the side seam on the front facing, as these two pieces will be joined at the side seam. In the example, this is 12cm (4¾in).
Take a ruler and measure down the side seam STITCH LINE, from the STITCH LINE at the top, the length of your facing. We will call this point E. On the centre back STITCH LINE, measure down the same amount and mark another point. We will call this point F.
Mark in a perpendicular guideline from point F.

Step 9
To create the bottom edge of the front and back facing pieces, we want a nice smooth curve that transitions smoothly at the side seam between pieces. To do this, take your front facing draft and place it on top of your BACK [2]. Line up the top sections of the side seam - STITCH LINE on STITCH LINE - as if it has been sewn together. Hold in place with a pattern weight.

Step 10
Draw a line from point C through point D and then over to point F. You need this line to be a nice smooth curve. At In the Folds, we like using a straight ruler to draw curves, by pivoting the ruler and drawing a broken line. Alternatively you can use a Patternmaster or French curve.
Use a tracing wheel to transfer the new line onto the overlapping section of the pattern.
Finalise facing pieces

Step 11
a Remove the pattern weight and separate the front and back pieces. Take the front facing piece and cut along the bottom line to create the shape of the piece.
b Remove the centre front seam allowance, by cutting along the centre front STITCH LINE. We are removing this as we do not need this seam in the facing and it will minimise bulk.
c Add a new grainline to indicate this piece is cut on the fold. Add cutting instructions. The new cutting instructions will be: FRONT FACING, CUT 1 ON FOLD.

Step 12
a Take a piece of pattern paper and trace off the back facing piece from the BACK [2], by following the line marked in STEP 10.
b Remove the centre back seam allowance, by cutting along the centre back STITCH LINE. We are removing this as we do not need this seam in the facing and it will minimise bulk.
c Add a new grainline to indicate this piece is cut on the fold. Add cutting instructions. The new cutting instructions will be: BACK FACING, CUT 1 PAIR.
We hope this has given you confidence to try adding a facing to your next top pattern!
Happy sewing,
Emily
For more issues of the Q & A series, you can check out the archive here.
What you’ve been making

Collins top made by @shuaychong

Peppermint Peplum top made by @studiosew_nl

Neale jumpsuit made by @sideshow_ali

Neale jumpsuit made by @greenstitchwitch