Today it's finally time to jump into The Rushcutter - View B sew-along, after concluding the sew-along for View A last week.
I decided to construct this version with french seams, so that I could offer an alternative finish for those sewers who don't own overlockers, and because French seams are oh-so-nice! If you are not making The Rushcutter, but would like to learn how to sew a french seam, then keep reading.
French seams are a good choice for you (even if you do have an overlocker), if your fabric is light to mid-weight. You get a lovely clean finish, which gives your garments a really high-end look. If you would prefer normal seams, just follow along, remembering to put right sides together (not wrong sides together, which is how you go about creating a french seam).
joining the front and back bodices
(sizes A & B only)

For sizes C - K, the front and back bodice pieces are all-in-one. This was not possible for size A and B, because the armhole is not big enough to allow it, so these pattern pieces need to be cut and stitched together before following along with the instructions for all sizes,
With wrong sides together, attach the FRONT UPPER BODICE to the BACK UPPER BODICE and stitch together with a french seam (if you don't know how to sew a french seam, don't worry - I'll explain it in the following steps).
Preparing the button placket

Place the UPPER BODICE face down, and fold back the centre back by 1cm (3/8 in), using the notches to guide you. Press in place.

Make a second fold, this time 2cm (3/4 in) from the first, using the notches as a guide. Press in place.
adding interfacing

If your fabric is lightweight, or quite flimsy, I suggest that you consider using interfacing to stiffen your button placket. I did not want to stiffen the whole stand, so decided to just use small pieces of interfacing to reinforce where the buttons and buttonhole will be sewn.You could consider cutting a strip of interfacing as long and as wide as the placket itself - depending on the fabric and finish you are going for.
Open up the folds, and place your piece/s of interfacing with sticky side down. The folds will help you position it correctly. Press in place.

Re-fold the fold lines and stitch close to the edge on both sides. Your pattern placket is done!
Attaching the centre front panel

With wrong sides together, join the CENTRE FRONT PANEL to the front sides of the UPPER BODICE pieces. Use the notch in the centre of the seam to help you place the pieces correctly. Stitch with a 6mm (1/4in) seam allowance.

Trim down the seam allowances on both sides of the CENTRE FRONT PANEL by about 2-3mm (1/16in). Open the seam, and press the seam allowances away from the centre front.

Fold the seam, with right sides together. You will see that this will enclose the raw edge and the original line of stitching inside the seam. Press and pin. Stitch the seam with a 6mm (1/4in) seam allowance.

Press seams away from the centre front.
Joining the shoulder seams

With wrong sides together, pin the front and back shoulder seams together. Pin in place.
Once again, stitch with a 6mm (1/4in) seam allowance, trim back, and enclose raw edge in a french seam.
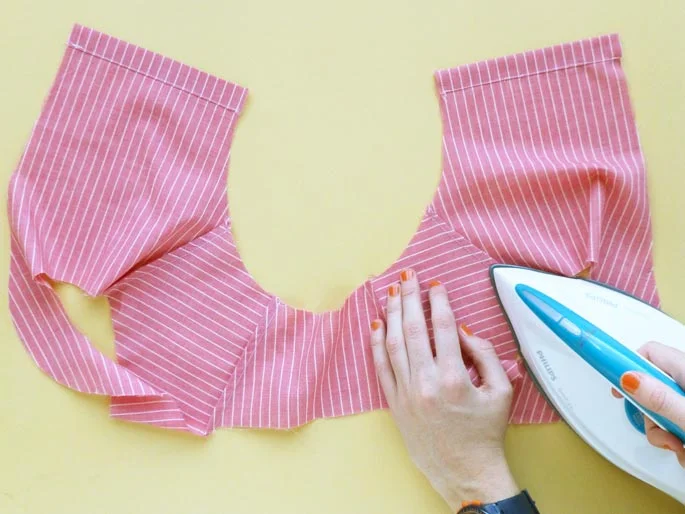
Press the shoulder seams towards the back, and then that's it for today.
Tomorrow I'll be walking you through using bias tape to bind the neckline.
Don't have bias tape? Make some yourself!