pattern making tutorials

Top tips for pattern hacking

Top tips for pattern hacking


Making clothing you love to wear is about having the ability to tailor garments to fit your body, your preferences and your needs. This is why, for Issue 2 of Curated by ITF, we are sharing the foundations of patternmaking with you.

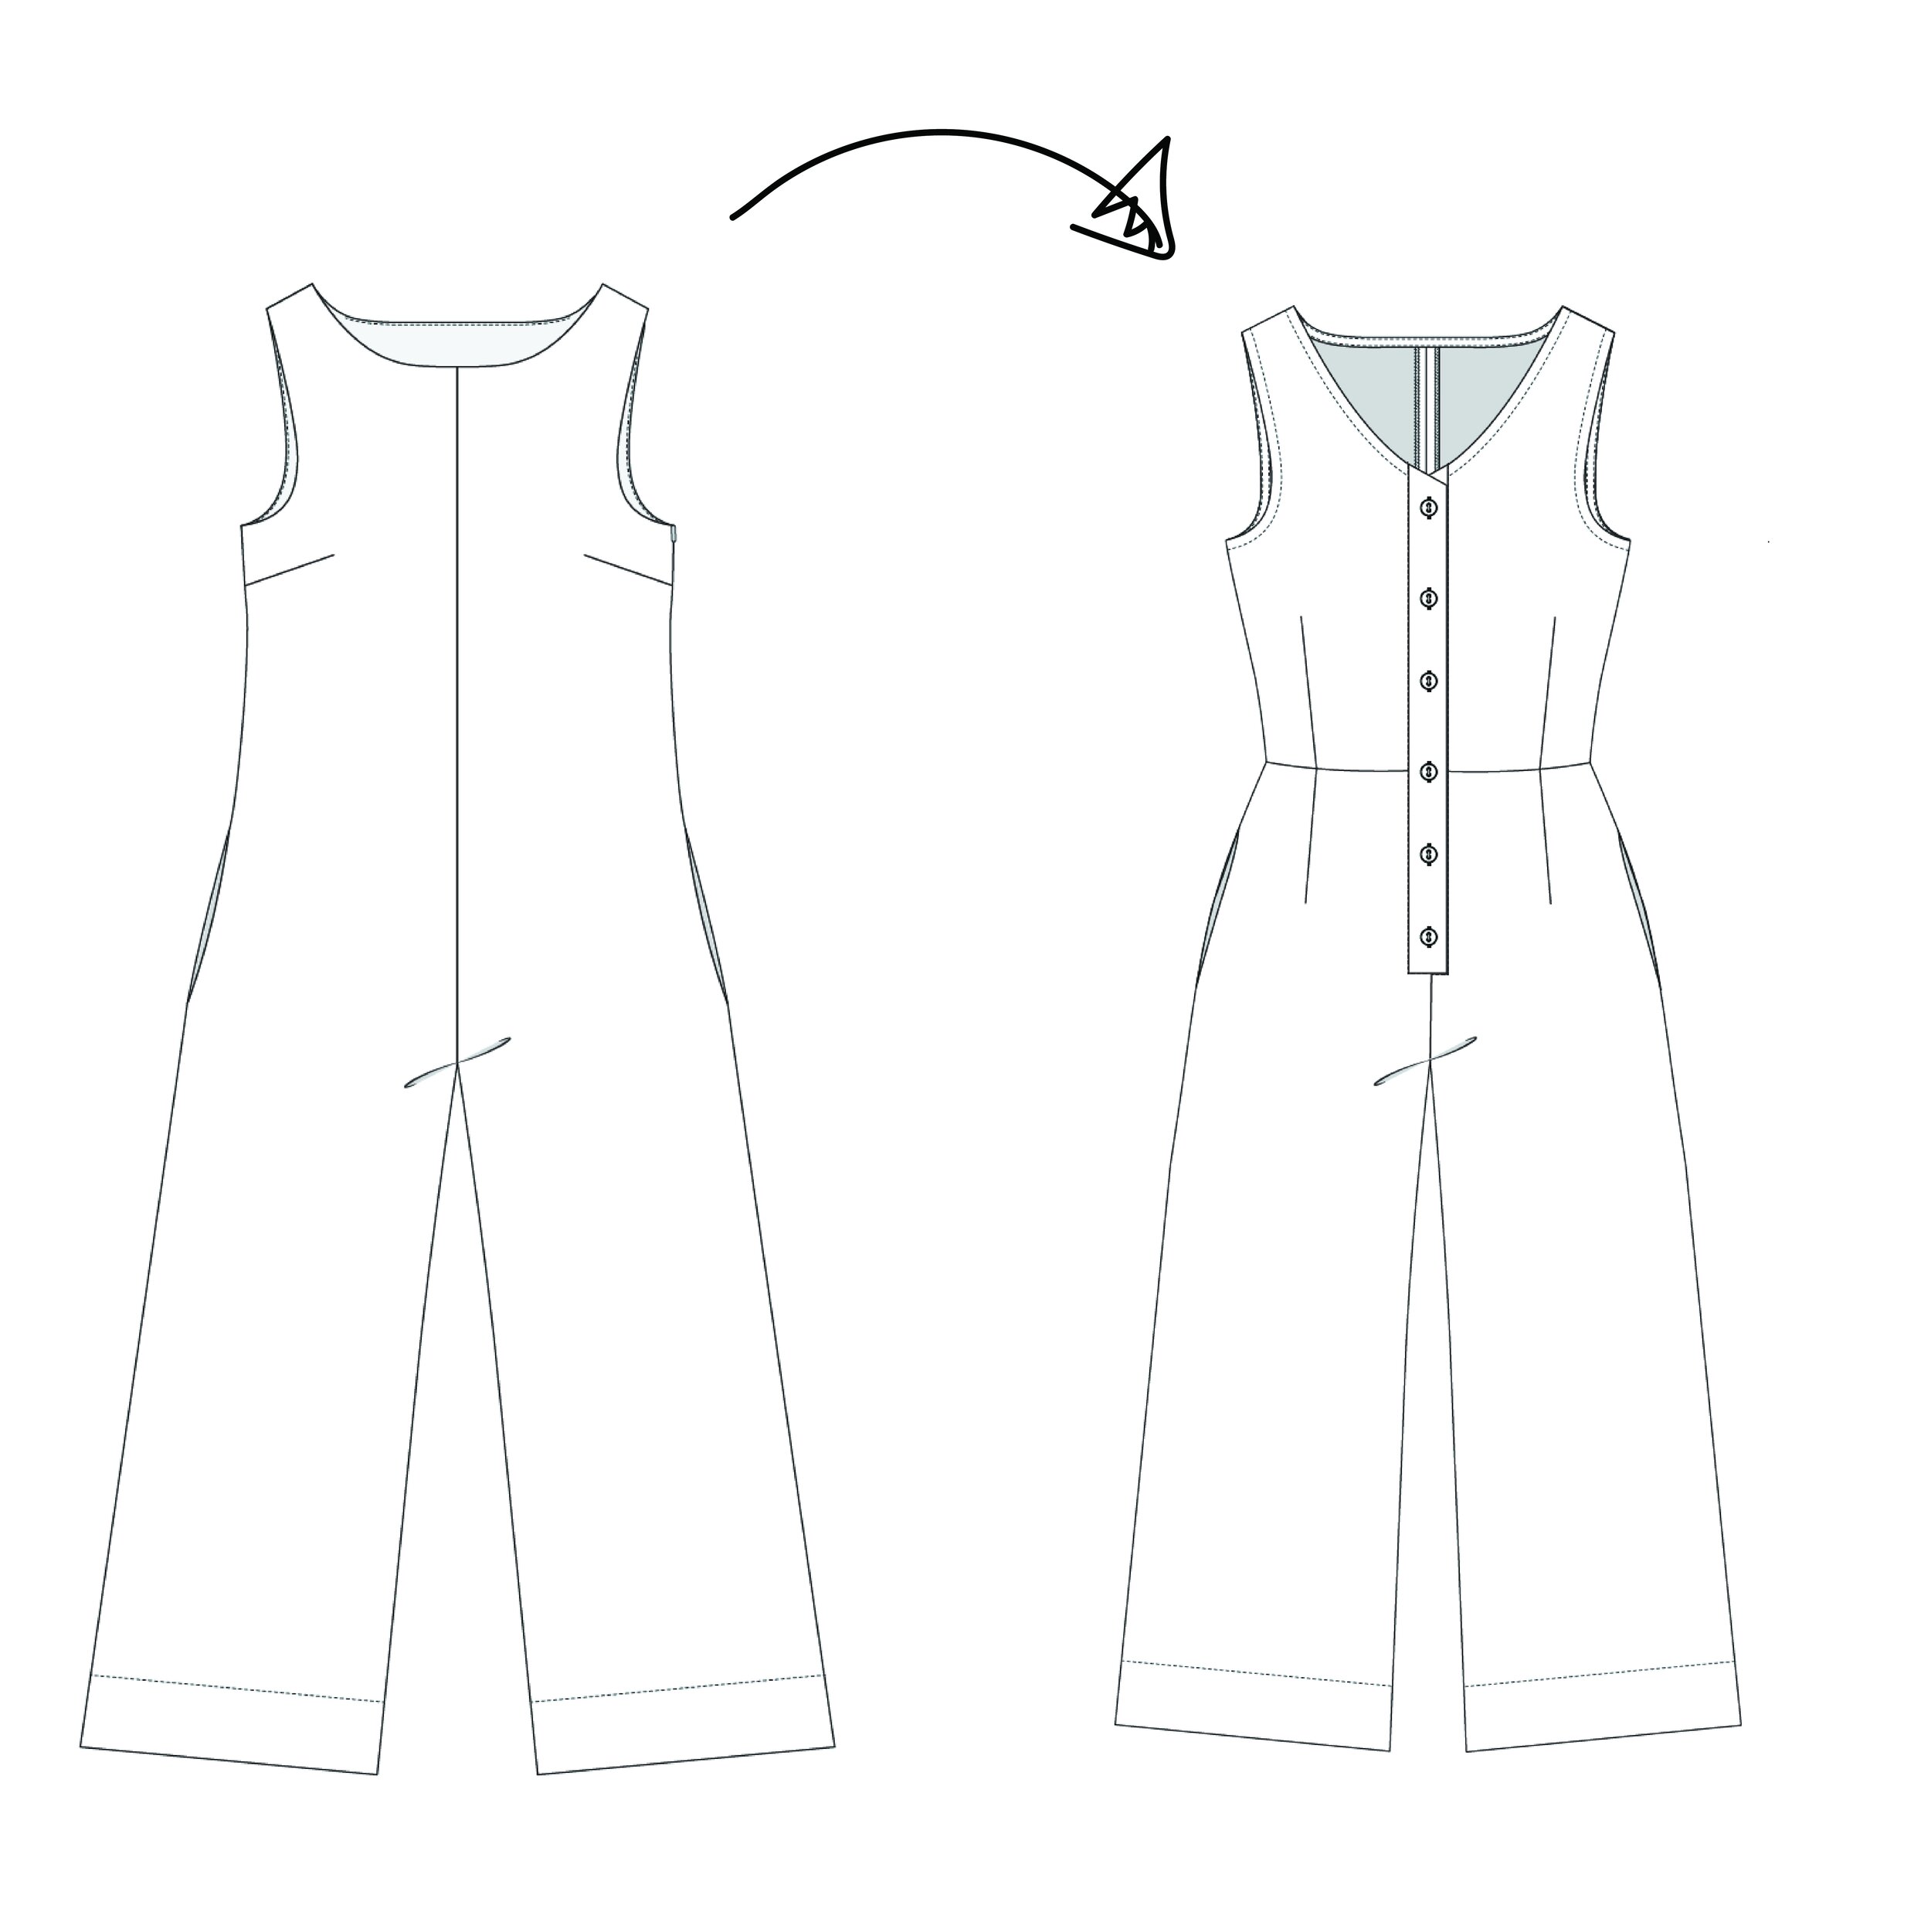
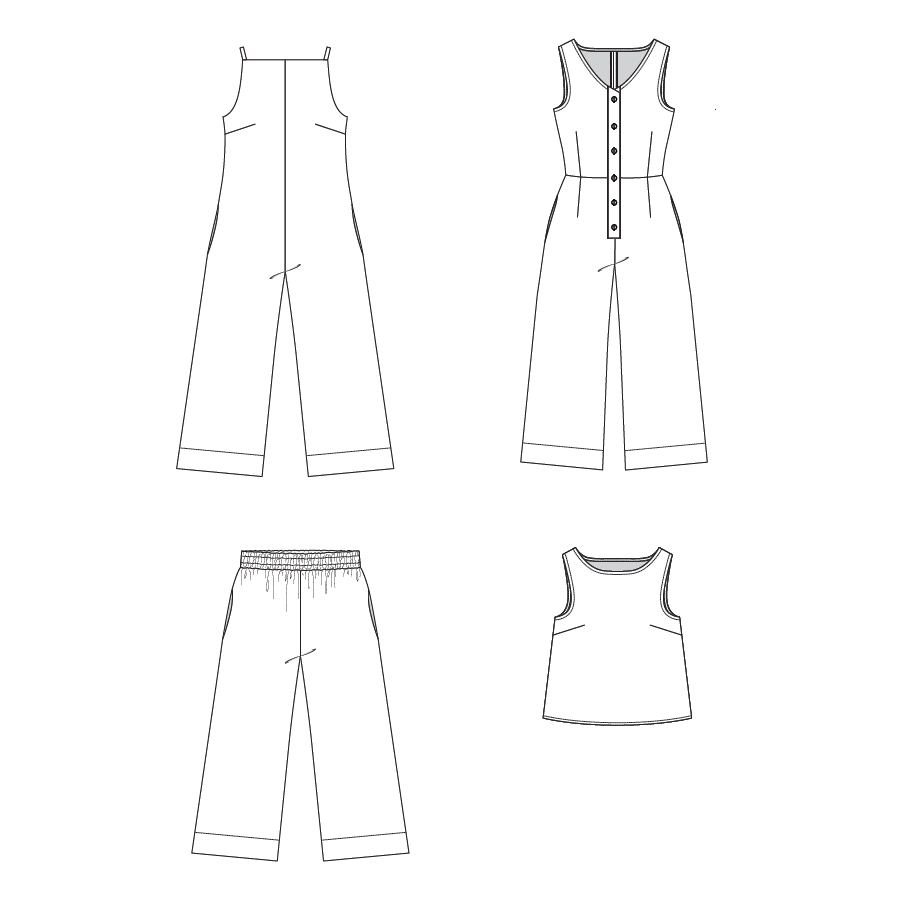
We'll be taking our Neale jumpsuit pattern that fits us so well and pattern hacking it into the designs below. So we thought that in today's email, we'd share a few of our top tips for successful pattern hacking with you.

What is pattern hacking?

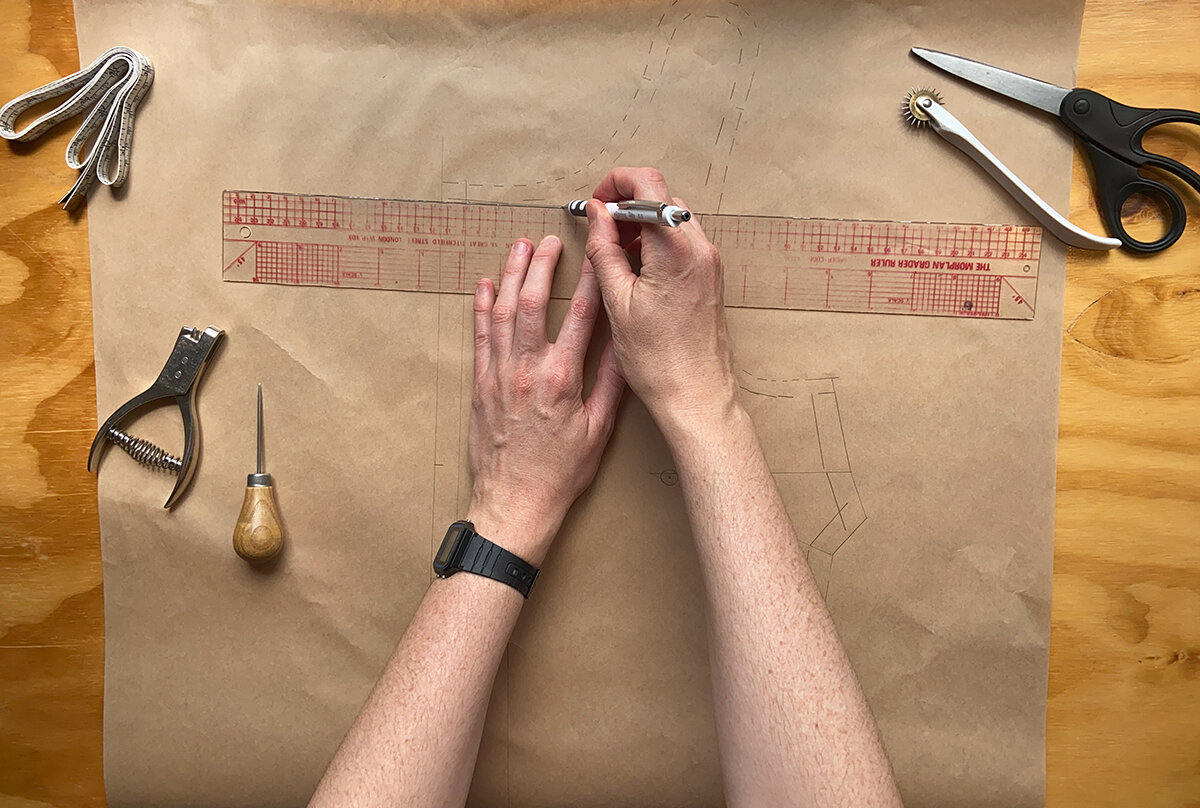
Pattern hacking means that you use an existing pattern to draft a new pattern. This could mean small changes, such as adding a pocket or changing the neckline. It could also mean large-scale changes such as adding a sleeve to a sleeveless pattern or combining multiple patterns to create a new design.


1. Choose a pattern that fits you well! 

The main benefit of pattern hacking is that you can take a pattern that you know fits you and create a new design. This means you don't need to dive back into assessing the fit all over again, as you have already done that work with the original pattern. For large scale hacks, you may still need to make some fit alterations after checking your toile, but this will be far less than if you had started with a new pattern.

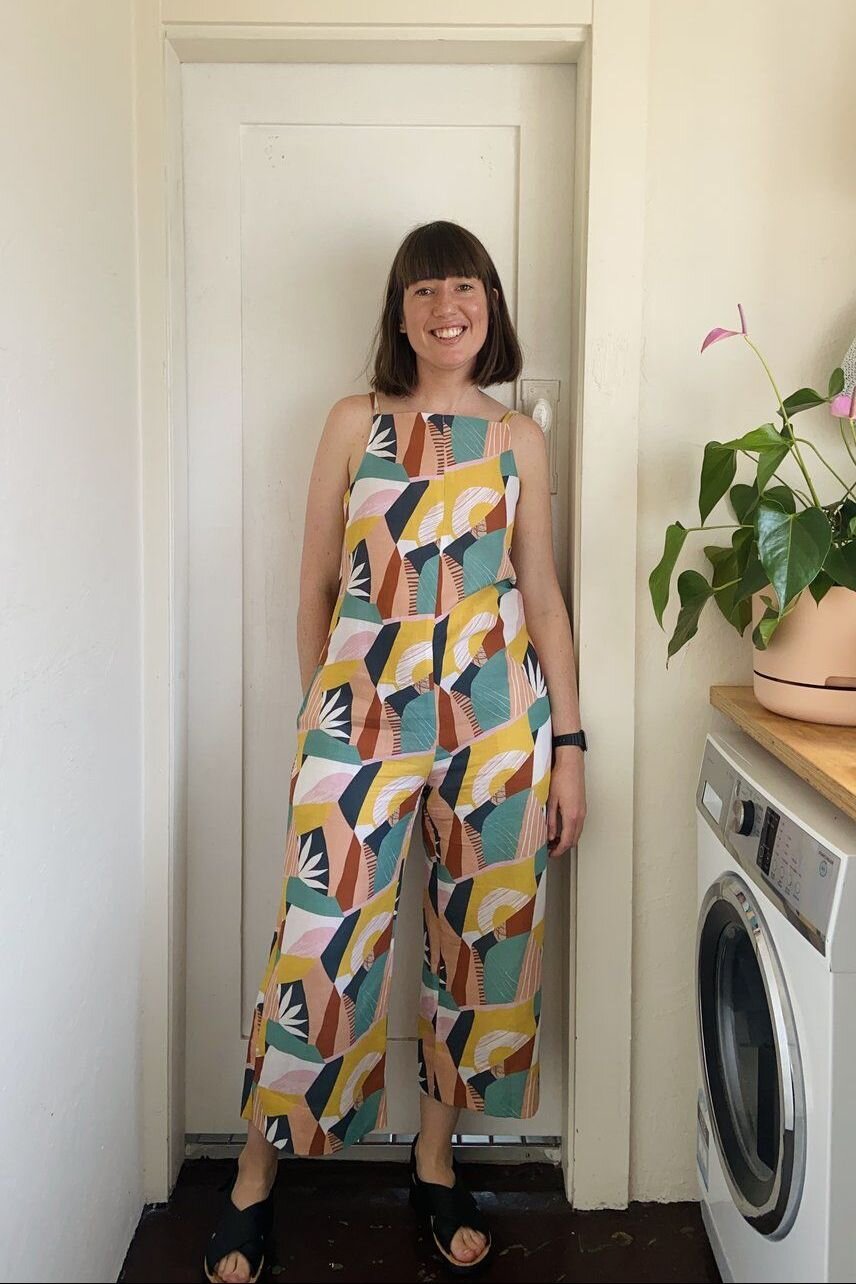
With Curated by In the folds - we teach you pattern hacking on patterns from previous issues, for example. Issue 1 focused on fitting the Neale jumpsuit and Issue 2 takes that pattern and creates 4 new designs! So you’re learning new skills as well as making clothes you know you’ll love!

Ready to join us but don't have the Neale jumpsuit pattern? Not a problem. After you sign-up, you will receive a link to purchase the jumpsuit pattern as a standalone pattern (for the same price as your monthly subscription).

2. Use the clothes you wear the most to determine what you sew

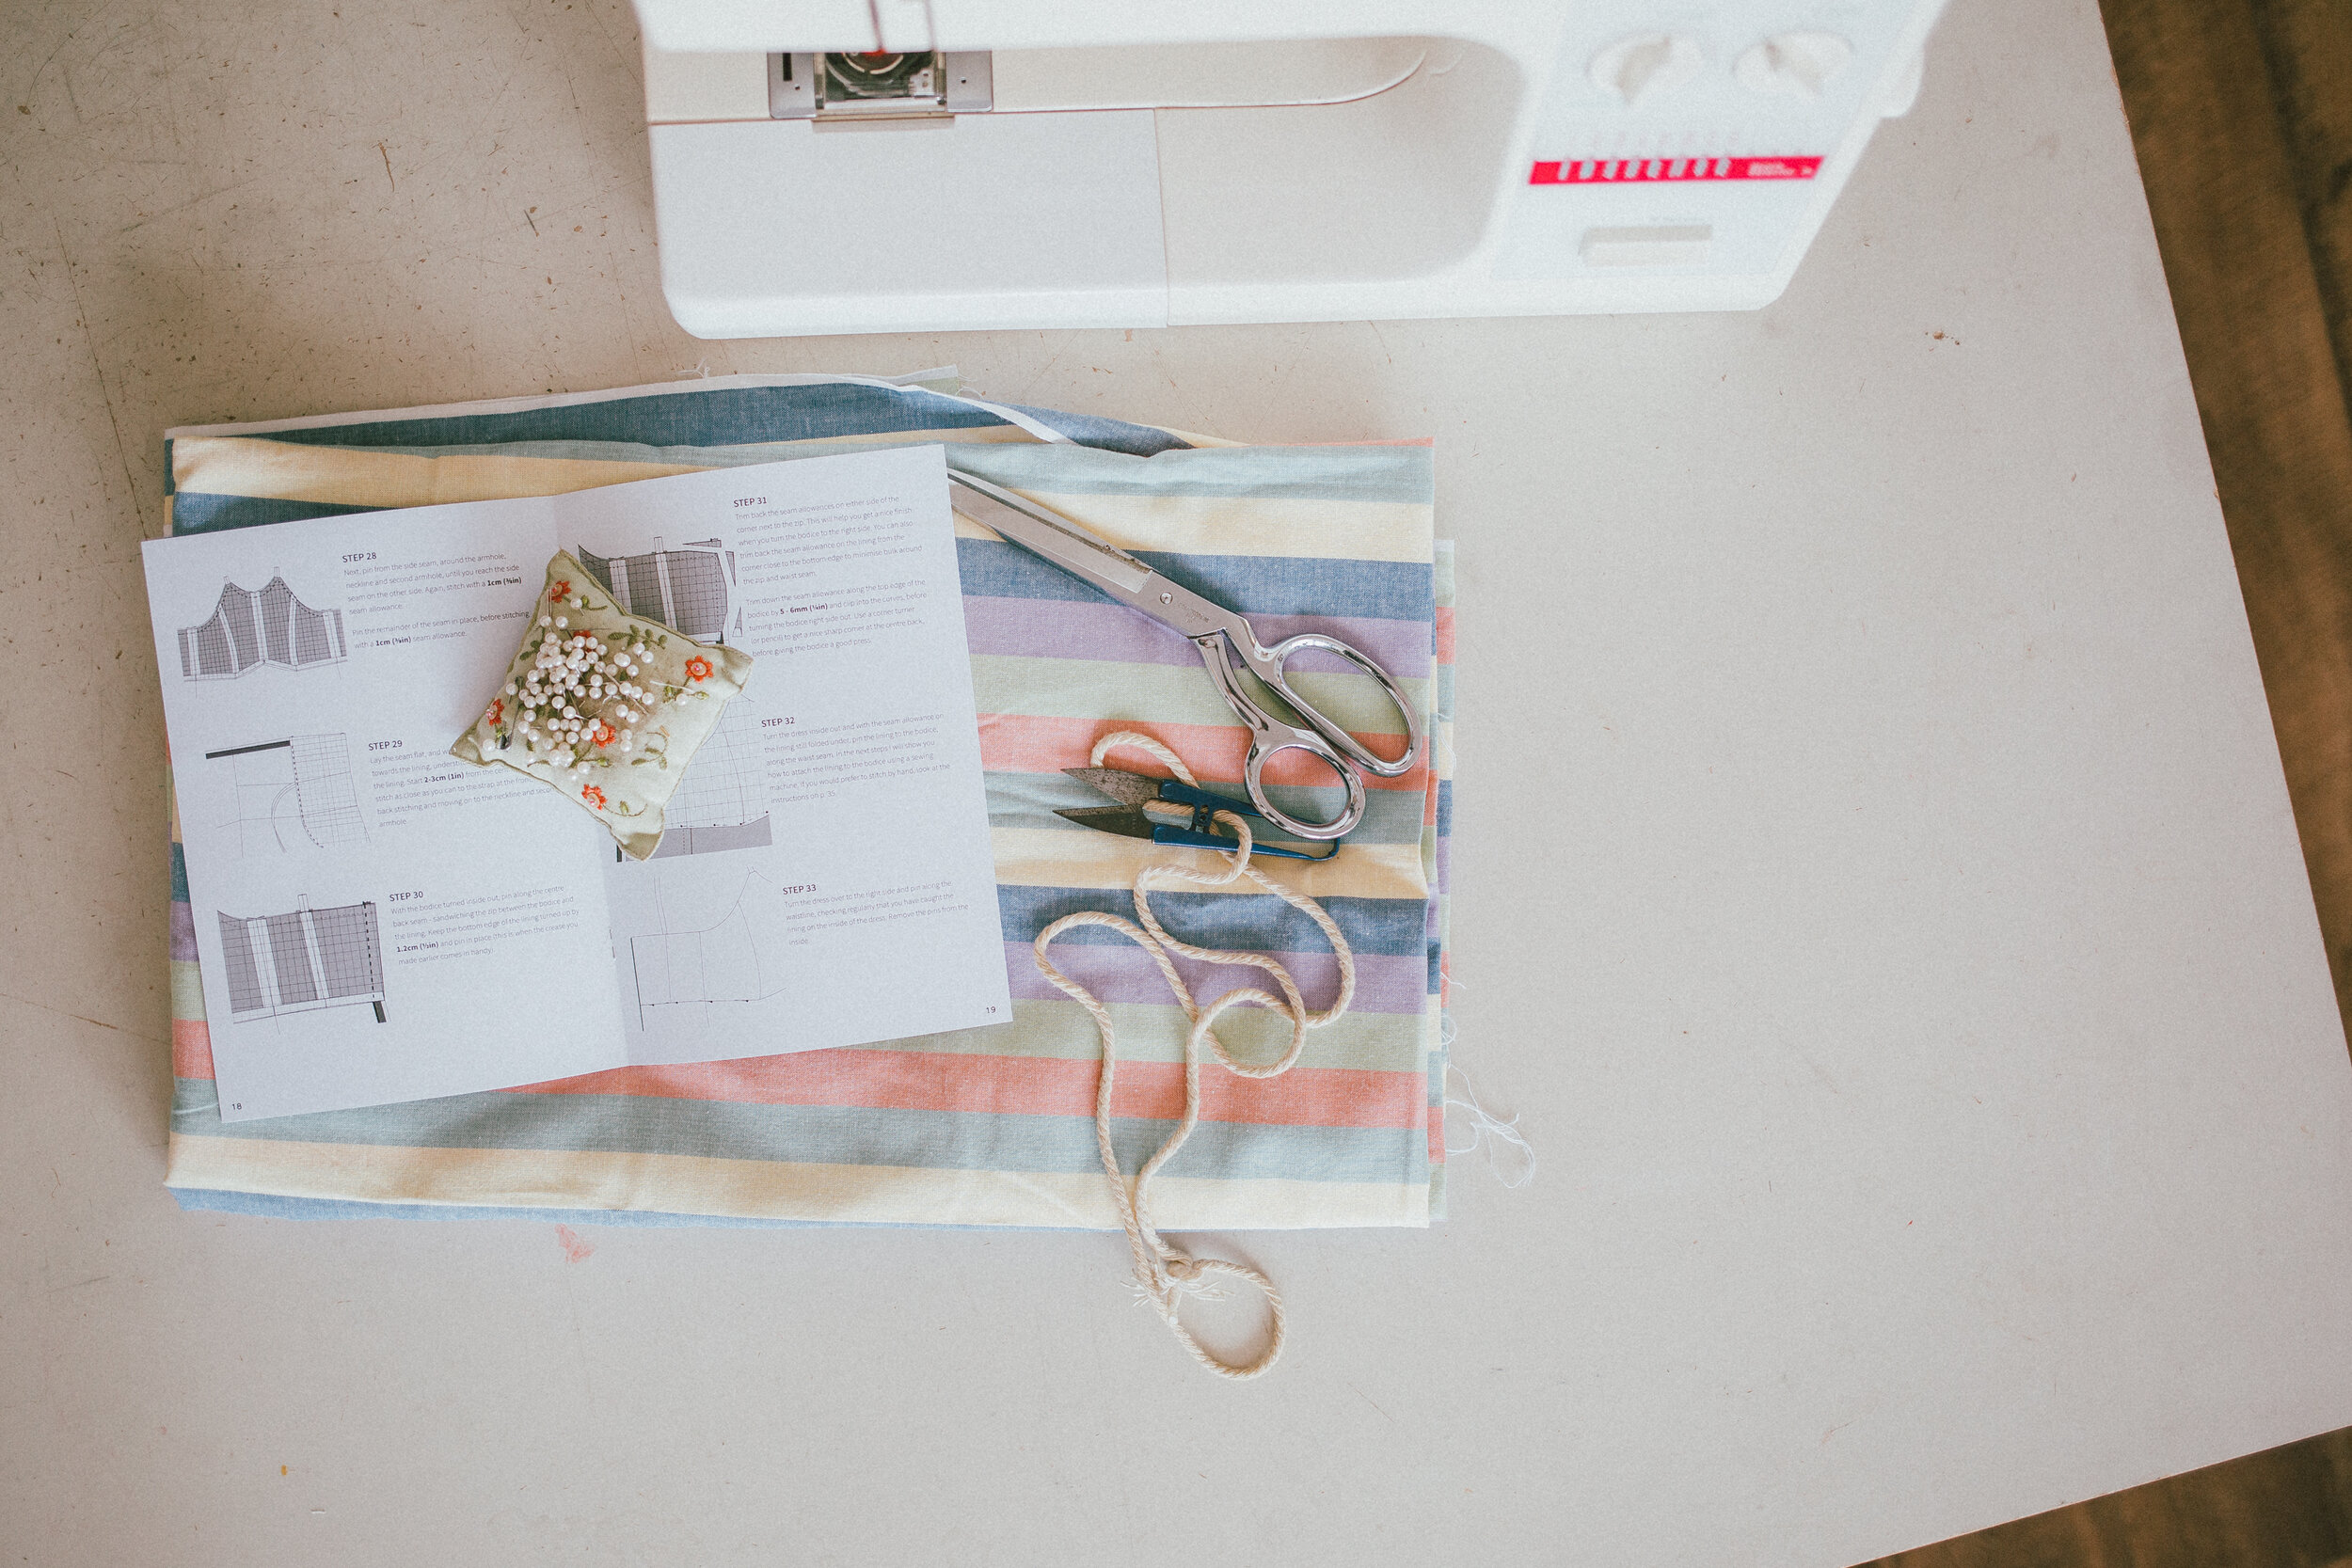
bb9812b0-d261-4af2-ba46-fb46aed22daf.jpeg

Another reason you might choose to hack a pattern is because sometimes it is difficult to know what changes you would like to make until after you have spent some time wearing a garment.

You may have worn a garment you have made and soon be thinking, 'if only it was longer' or 'if only it had pockets.' Pattern hacking gives you a chance to make the clothing you want to wear, without needing to draft patterns from scratch.

Learning pattern hacking will give you confidence to take ownership of the garments you sew and help you make exactly the kind of garment you want to wear.

3. Choose the right pattern to hack

It’s important to think about the main features of your design and cleverly pick which patterns you hack from. For example, if you want to make a dress with a big sleeve and a V-neck, you wouldn’t start with a sleeveless dress. You can always mash two patterns together if needed! 

In Issue 2 we’re using the Neale jumpsuit from Issue 1 and we’ve selected hacks that would work well using this jumpsuit or a similar one to start! (For example, you could apply some of these hacks to the Peppermint jumpsuit pattern).

4. Learn new skills at your own pace

Pattern making is a craft! It takes years to train and become a pattern maker. Pattern hacking is a great opportunity to learn pattern making skills and build on these skills gradually over time. Like any new skill or hobby, getting good at it will take time. Be patient and enjoy the process. That's what it's all about!

Start with simple hacks and work your way up to more complex ones. With Curated by ITF we introduce you to the basic concepts, techniques and tools for pattern hacking and take you through step by step until you’re ready to create your own! The hacks in this issue have been designed so that no matter what your patternmaking experience is, there will be something for you. Start with the beginner friendly hacks and work your way up to the more complex hacks if you are working on gradually building up your skills.

5. Always trace a copy and keep your drafts

When you are happy with the fit of the original pattern, trace a copy of the pattern so that you can always refer to or return to the original. In pattern making we also keep our drafts - which are the work in progress patterns, so we can have a ‘history’ of what we’ve done to the pattern. It's a good idea to put a date on each version of a pattern, so you always know which pattern is the most up to date.

Until the patterns are completely finalised (and beyond!) you never know when you might need to refer back to these previous versions.

6. Learn the basics

It's so important to learn the basics of patternmaking before you dive in. This will allow you to grasp the concepts and prevent you from getting overwhelmed when you get started. These techniques will take you a long way and once you learn a few basics you can get creative and have fun with the rest! 

We recommend knowing how to:

  • Add and remove seam allowance

  • Check seam lengths

  • True seams, curves and darts

  • Check patterns are squared off

  • How to move a dart

We cover all of these in our Hack kit for Issue 2 of Curated by ITF, as well as extra articles throughout the month with photos and videos in our community group. This is a great place to ask questions and see the process and questions from others as they’re working on the same thing.

7. Read through the instructions before you start

If you’re following instructions or a blog for a pattern hack then we recommend reading them through from beginning to end before you get started, so you can get an overview of what you are aiming to achieve. This will help when you come back to doing the earlier steps!

8. Make a toile to check you’re happy

Make a toile / muslin to check that you are happy with the design and fit of the garment before cutting the pattern from your final fabric. Because you’ve started with a pattern where you’re happy with the fit, this should help a lot when toiling. If you’re making small changes you can sometimes just go for it, but when you’re making bigger changes, especially adding volume etc. then it's always best to toile and check that you’re happy with style lines, silhouette and fit.

One of the challenges of pattern hacking is that you no longer have instructions for how to make the garment. We've solved this problem in Issue 2 of Curated by including a construction resource, that goes through everything from working out fabric yardage, order of construction for the hacks and then does a deep dive into specific dressmaking techniques.

9. As always, remember to enjoy the process!

b26c0b09-d9b8-4ac2-ad4a-ca42a0284f02.jpeg

Remember pattern making takes time, so be patient and enjoy the process!

The hacks we've created have been placed in order of difficulty and there is a skill rating on each hack's introduction page so that you can determine which hack you would like to try. Are you new to pattern hacking? Start with the Straight neckline jumpsuit or the Elastic waist pants. Ready to level up? Try the Sleeveless boxy top. Ready to get a lot of pattern making skills under your belt? Check out the Jumpsuit with waist seam and darts.

We start with introduction pages of the Hack Kit pdf to learn about concepts, techniques and tools for pattern hacking. Then you can use the rest of the Hack Kit to get started on the pattern hacks with step-by-step instructions.

If you’d like to learn more about pattern making and join us with our monthly subscription, Curated by ITF, you can do so via the link below.

Tips for getting a good fit on a jumpsuit

Getting+a+good+fit+on+a+jumpsuit+BLOG+HEADER.jpeg

Tips for getting a good fit on a jumpsuit

We are very excited to let you know that our new Neale jumpsuit pattern is here! This is the jumpsuit we've been dreaming about for a long time. It's the perfect piece to wear to work, to wear out, to relax on the weekend. It will make you feel put together, but incredibly comfortable and at ease to do the things you want to do in your handmade wardrobe.⁠⁠

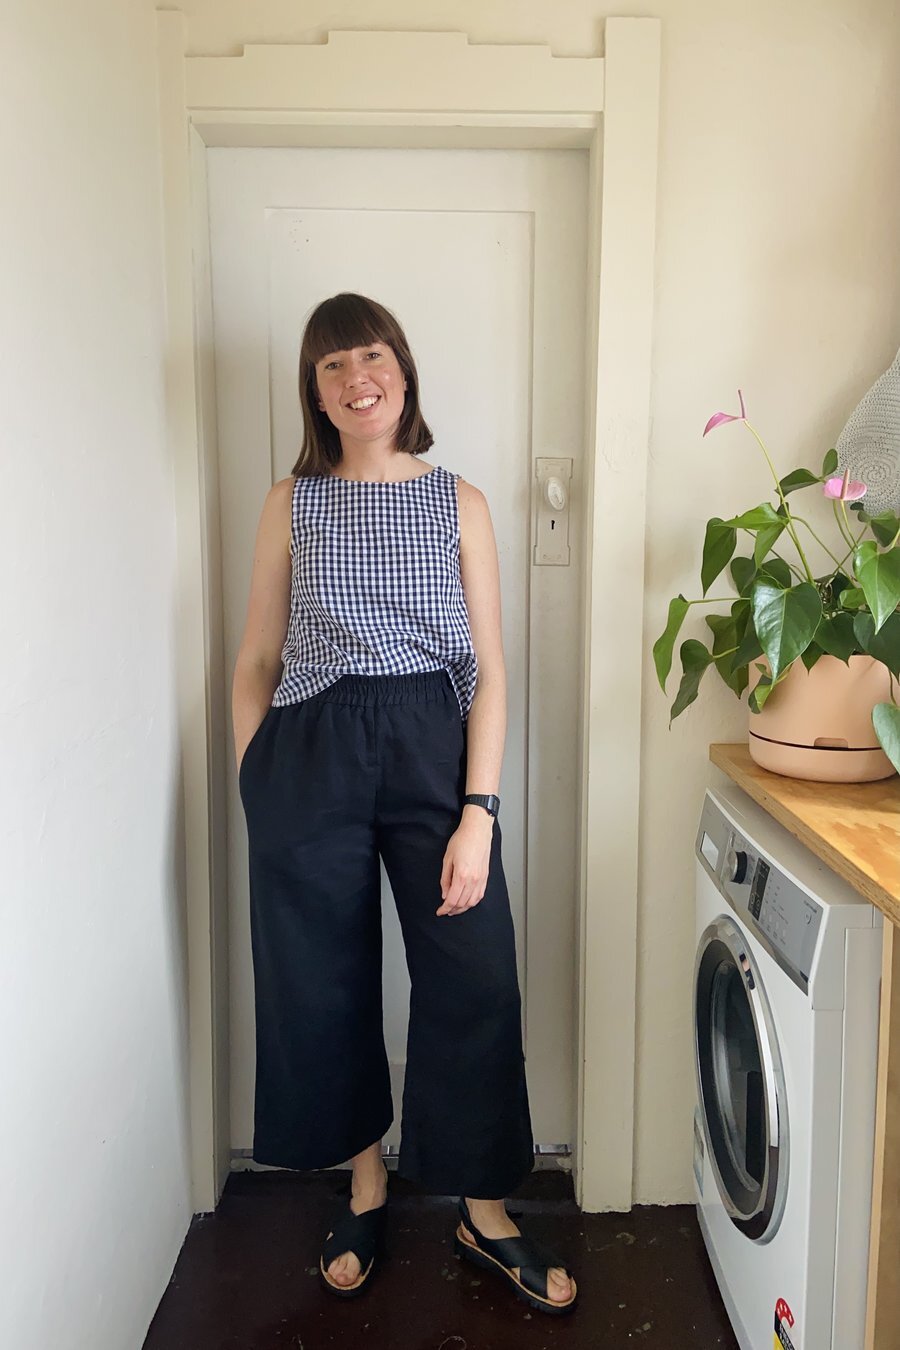
Neale jumpsuit-Swetha 3.jpg

The Neale jumpsuit is a a real skill builder of a pattern! Which is why we chose it to be our first Curated by In the Folds pattern.⁠ Sewing a jumpsuit means working with both the top and bottom of the body, which allows for the opportunity to learn more fitting techniques. We created a jam-packed Neale Fit Kit to go along with our first Curated by ITF pattern, so you can jump straight into it.⁠⁠ In today’s post, we would like to shares some of these great tips for getting a good fit on a jumpsuit.

Sewing a jumpsuit can be tricky as you are fitting both the top and bottom part of a pattern. But often as they have a looser fit, they are a great intro introduction to pants fitting and with this post we hope to make the process a lot more fun!


1. Pick the right size for you

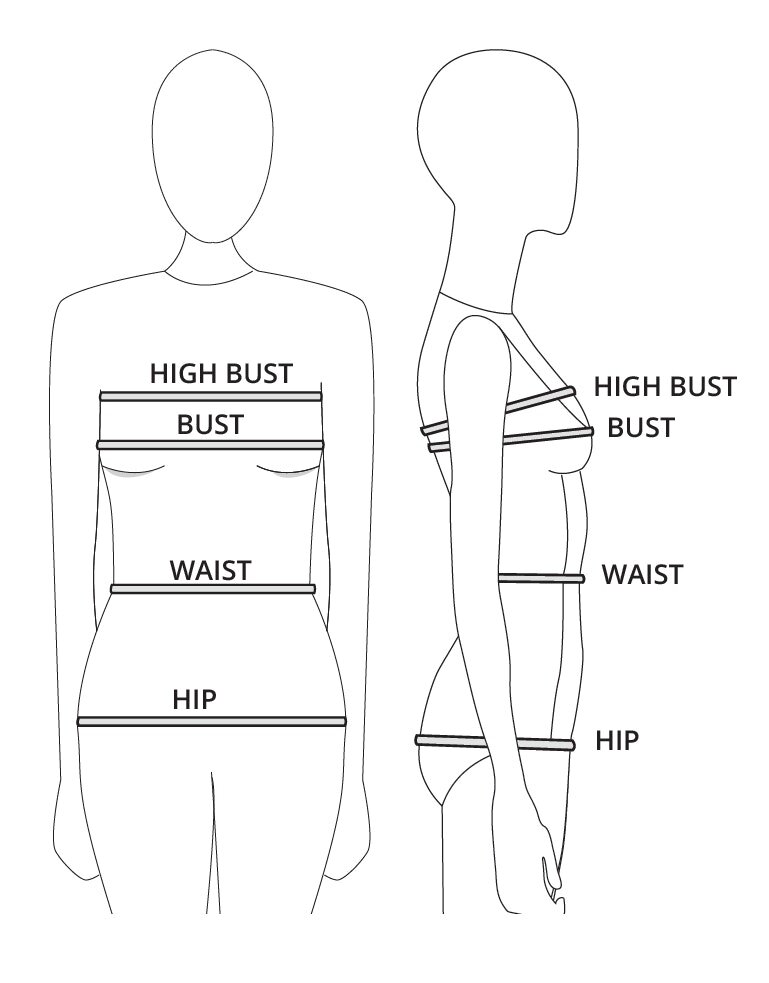
a. Take your measurements using a tape measure, check out our diagram to see exactly where you should measure! Make sure to measure at the fullest part of your hips. We suggest doing this in front of a full length mirror. 

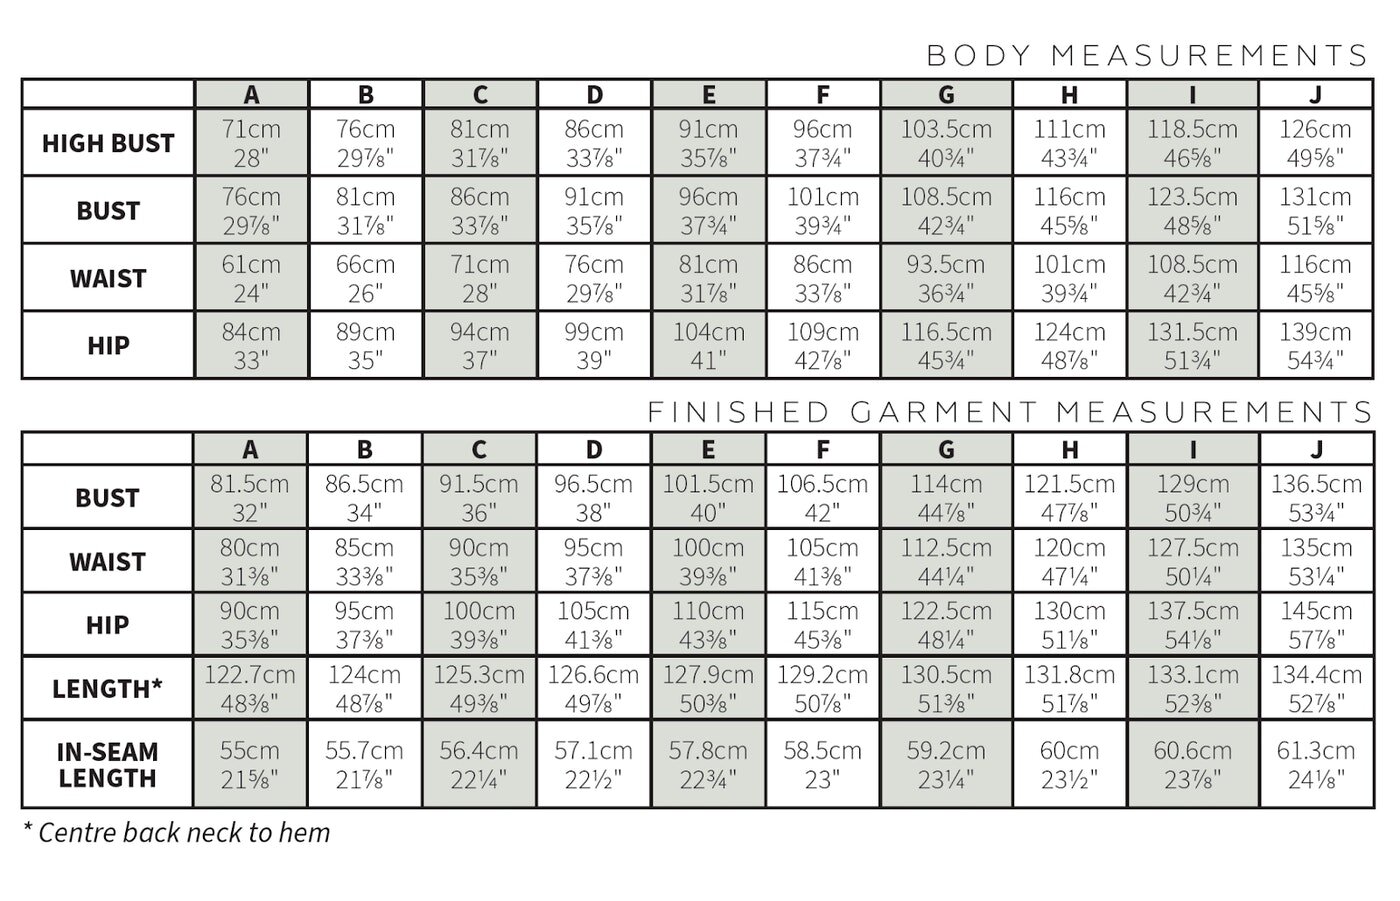
b. Check the size chart and circle or note the corresponding size for each pattern. If your measurements are between sizes, you could blend between the two. Before doing this, look at the finished garment measurements to decide if you could select the smaller or larger size. 

TIP: Use a tape measure and place it around your body to get a feel for how it will fit. (Remember to place yourself in the centre of the tape measure rather than pulling it forward or back.) This allows you to see the amount of ease in the pattern - as this is something that changes between patterns. For example the Neale jumpsuit has more ease in the waist than it does in the bust and hip.

2. Make all the adjustments you can before sewing

Before we get started with making our toiles / muslins, it's worth thinking about which alterations you can do beforehand.  You can make some alterations before making a toile / muslin using your measurements, while others are made when you have done a fitting of a toile and have the toile to refer to.

Some of you will have a good idea of the alterations that are usual for you to make to a pattern before getting started. We encourage you to make these standard alterations to the pattern before you make a toile so that you can achieve a good fit at the fitting stage.

One example of an alteration you can do beforehand is checking the length. Especially in a jumpsuit you need to consider the length between each section e.g bust to waist, waist to hip, hip to crotch, then add in or take away length at the appropriate section.

Capture.PNG

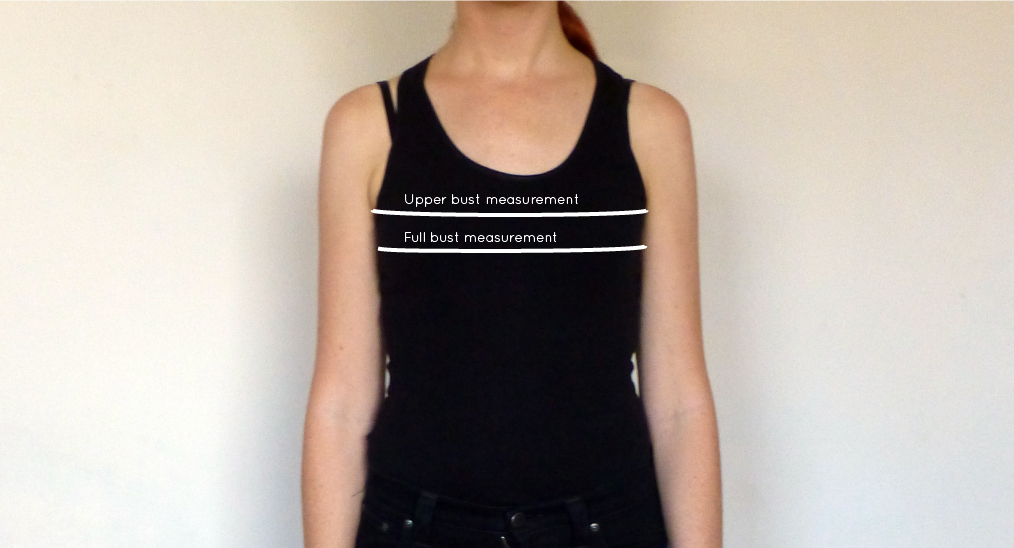
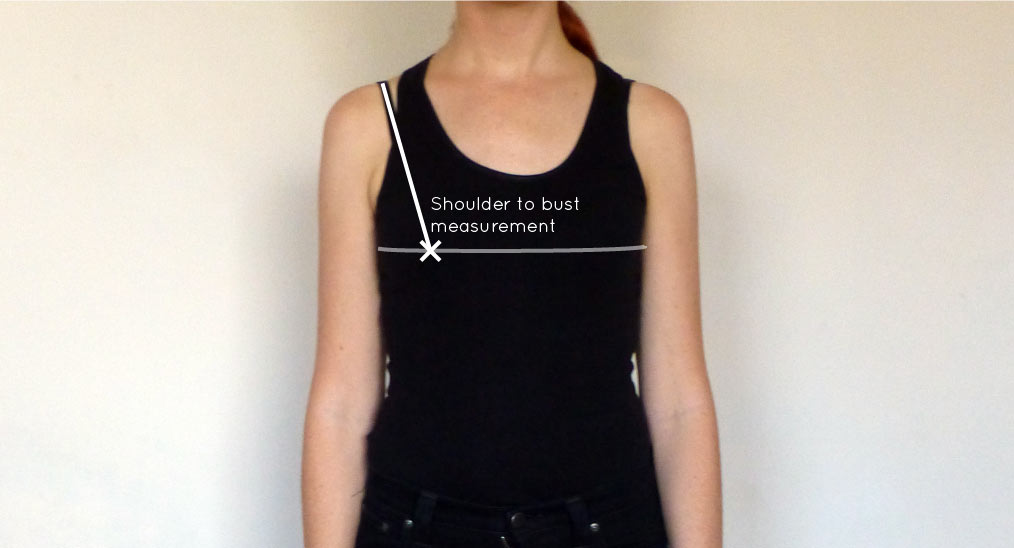
Another alteration that you may be able to do before making a toile is a SBA (Small Bust Adjustment) or FBA (Full Bust Adjustment). To check this, work out the difference between your high bust measurement and bust measurement. If the difference between your high bust measurement and your full bust measurement is 2.5cm (1") your bust is an A cup, 5cm (2") it's a B cup, 7.5cm (3") is a C cup, 10cm (4in) is a D cup and so on. Record your bust cup size.

1629161752414.jpg

Often pattern companies draft for a B cup, sometimes they will offer a range of cup sizes. It's best to check before you start sewing. In the Folds currently offers a B cup.

• If you have a B cup bust cup size you will not need to make a bust adjustment to the pattern.

• If you have an A cup bust (or smaller) you may need to do a Small Bust Adjustment.

• If you have a C cup bust cup size or larger you may need to do a Full Bust Adjustment

3. Sew a toile

A toile is a test version of a garment, made from a similar, but often cheaper, fabric that assists with the fitting process. By making a toile, you can check the fit, and make any adjustments before cutting into your 'real' fabric.

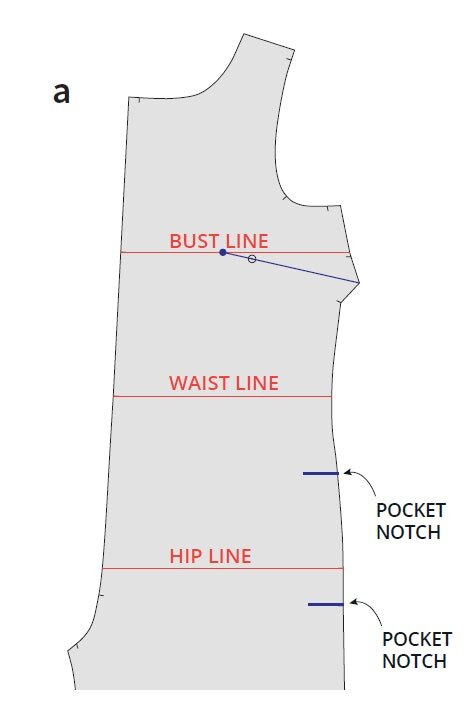
You only need to cut the front and back pieces, you don’t need to sew the zip, facing pieces, pockets or finish the seams. On the toile - mark the bust, waist and hip line on the fabric. On the Neale jumpsuit we’ve added notches so you can easily find these on your pattern!

You can also mark in the bust apex point by drawing a line from the centre of the dart, through the dart point and beyond the tip of the dart by 2.5cm (1in). Lastly extend the pocket notches on the toile with a marker so that you can check you are happy with the pocket positioning.

Other tips for sewing a toile are:

  • Remove the seam allowance from the neckline and armholes and add staystitching to stop them stretching.

  • Sew the toile with a longer stitch length than usual, so that when fitting the toile it is easy to release the seams if you need to.

  • Do not sew the hem. It is good to have the hem allowance available if you would like to experiment with length options. 

  • Remember, it is still important to press the toile well as you sew. This will help you when assessing the fit of the toile.


4. Assess the fit

Now it's time to assess the fit. Yay!

Get yourself set-up in front of a full length mirror with a notebook, pen, pins, seam ripper / snips and marker. If you have a friend who can help you - get them too! Work through the checklist below and take note of any issues. It’s also a good idea to take pictures on the front, side and back (you can use the timer on your camera). Sometimes you notice things on the photos that you may not see in real life. 

InTheFold_Edit-Still_07.jpg

Jumpsuit fitting checklist:

  • Check that your side seams appear straight and are perpendicular to the floor. If your side seam is pulling towards the front or the back, this normally means that you need more width in the area where it's pulling.

  • Lift your arms and check that the armhole sits in a comfortable position under your arm. Check that the armhole is a nice shape on the front and back.

  • Check that your BUST LINE, WAIST LINE and HIP LINE are in the correct position for you and are all parallel to the floor. If any of these lines are in the incorrect position, you will need to either shorten or lengthen the pattern. For a jumpsuit it’s important to notice where to add/take length because you are fitting both a top and pants in one.

  • Check the front and back crotch are not too tight or too loose. If they are, you will need to adjust the crotch length.

  • Move around. Check that you can move and sit comfortably in the jumpsuit. If a seam feels tight, let out the seam with your seam ripper and re-pin the seam with a smaller seam allowance to see if this helps.

You can find more fitting tips, the full checklist and instructions on how to make these adjustments in our first issue of Curated by In the Folds. Our September project, the Neale jumpsuit, comes with a bonus Fit Kit that will walk you through a range of different pattern alterations in detail. 


5. Grab a cup of tea and take a break!

InTheFold_Edit-Still_06.jpg

Fitting patterns at times can be hard. It’s important to take a break! Remember not to ‘over fit’, it’s easy to start obsessing over every wrinkle but in reality, we move around and we aren’t just a static image! 

You don’t have to make all of the adjustments at once. You can choose which are more important to you and if you like, you can build on these as you go. With Curated by In the folds we aim to help you through the fitting process, one step at a time, providing you with all the information (always tested by us!) in one place and hopefully have some fun with it! As part of the subscription, we also have a great online platform in which you can ask any questions and see what other people are making and learn from their fitting process too.

If you’d like to learn more about fitting and join us with our monthly subscription, Curated by ITF you can do so via the link below.
Drafting a bodice block - a few questions and answers

BODICE-BLOCK-ANSWERS.jpg

Drafting a bodice block - a few questions and answers

A few years ago, I created a blog post about how to draft a bodice block from your own measurements. Little did I know that this was going to become the most popular blog post on my website!

I have received a number of questions lately about the tutorial and I thought it could be a good idea to publish some of these questions and answers as an opportunity to help you on your own learning journey. I love the Q&A format - over the last year or so I have been sending a newsletter that includes a question from the community and my answer to it and I have loved all your responses to the series. I think it’s a great way to see what people actually need help with, rather than just producing the content that I assume people need. It’s also a fun challenge for me and I feel that I am constantly learning from these questions.

I will update this post as I receive more questions, so that hopefully, if you have a question, you will find a relevant answer here and can keep on going with your draft!

Update September 2021

Thank you so much for all the enthusiasm for my blog posts about bodice drafting. It has been my most popular blog post of all time! After 5 years of answering questions, I no longer have capacity to answer individual questions regarding bodice drafting. The comments have now been switched off and I will no longer be able to get back to emails regarding these blog posts.

The aim of pattern drafting

The first thing I’d like to talk about when it comes to making any pattern, is that we are not aiming for perfection right out of the gate. The idea is to get as close as you can to a good fit and then make a toile / muslin and check the fit on your body. It’s almost impossible to know if something is going to fit you properly by just looking at a flat pattern. You can get a good idea of how something will fit, but you just won’t know until you give it a go.

The aim when drafting or adapting patterns is to create a pattern that fits you. For example, in regard to the bodice block, you are aiming to get a bodice block that fits you closely so that you can use it to draft other patterns from it (for example, this simple summer top). If when you try on your toile, you realise that the shoulders are too wide, you can make a narrow shoulder adjustment. If you notice that the dart point is in the incorrect position, you can move it. Although following a tutorial down to the letter is a great first step, that is not the end goal. There will be a point where you need to assess your toile and make some changes to achieve a good fit. A tutorial like the bodice block tutorial I created, helps you get to a really good starting point, but then it’s about looking at your toile (and your pattern) and making some changes to get nice smooth lines, or get your lines in the right position. I hope that by sharing some of my questions and answers with you, you will know what I mean and can take something away from this post!


Question : Armhole curve

Hi Emily,

 Thank you so much for the well-written and detailed blog post on how to draft a bodice block! I am just starting to sew and really appreciate amazing resources like yours.

I have the same problem as Denise Palmones about the armhole: “On that note I am having some concerns on my shoulder area on draft. I notice that my TV line is too long that it is almost on the same column of my P on the darts. Having so makes a weird armhole that has a cross leading to look like an asymmetric infinity symbol and not an oblong (V, A2 crosses the O,Z line) and I can't make it sense out of it.”

Could you please let me know how to proceed?

Thank you!

- Crystal

bodice-block-armhole.jpg

Answer:

Hi Crystal,

It's looking great. I'd suggest just drawing your armhole as a nice smooth curve, don't worry too much that it's not hitting all the points (it’s much more important that you get a nice armhole shape). See example below:

bodice-block-armhole-2.jpg

I hope that helps!

Happy sewing,

Emily


Question : Armhole curve 2

Hi there,

Hope you are well.  I have been using your tutorial for how to draft a bodice block and everything seems correct apart from my armhole, which is looking very wonky!  Please could you offer me any advice on how to solve this problem?

I have attached pictures of my bodice block as it is.  

Thank you for the great tutorial, even as a beginner, I found it really straightforward to follow!

I look forward to hearing from you.

- Julia

bodice block-armhole 2.jpg

Answer:

Hi Julia,

Thanks for getting in touch.

I am pleased to see you're using my tutorial! Thanks for sending through photos, that really helps.

What I suggest you do is smooth out the armhole to get a nice curved shape on the front and back. See the photo below.

re-draft-bodice-block-armhole.jpg

You are then able to make a toile and see how it fits!

Happy sewing,

Emily


Question: Fitting the armhole

Hi there,

I continued to work on the block and finally got the fabric to make a blockout and see what edits needed to be made. Unfortunately there is some gaping in the armpit and despite looking online I can’t find how to fix it, a lot of what I see to fix it in the back of the arm would be a shoulder dart but nothing about the front. Would you have any advice on how to fix this?

Thank you so much,

 - Shayleen

Answer:

Hi Shayleen,

Nice to get an update and see your toile. It's looking good!

What I suggest you do is pin out some darts from the armhole (in both the back and the front if both are required) to get the armhole fitting more snugly. You will need to do this while it's on the body, so if you have someone who can help, it will be a little bit easier. Once you have pinned the darts, mark them with a marker and remove the pins. You can then transfer these new darts to your pattern. Once your darts are there, you can rotate the armhole dart value, so that it can be added to the waist or shoulder dart (or a little bit to each). This will help you get the correct shaping, without actually adding a third dart. I have a tutorial about rotating dart values that you can find here.

I hope that helps!

Happy sewing,

Emily


Question: Drafting the armhole

Hi Emily! 

I followed your bodice block tutorial to draft a block based on my measurements, and it was soooo much fun!  Thank you for the thorough and easy to follow tutorial ❤️  Unfortunately, I came across an issue when placing point V and drawing my line from T to V.  Based on your example in the tutorial, it looks as though point V should extend from point T, past the A1, A2 line.  Mine however falls short. 

When drawling the armsye, it looked strange to go from A2 to V, so I also drew a line from A2 to ? (You will see this ? point on my attached draft photos).  I have also included my measurements.  Do you know what I did incorrectly and how to fix it?

When measuring my shoulder length I stopped at the bony peak, however my shoulder socket extends well past that (approximately 5cm to the end of my shoulder to where my arm goes down to my elbow)... not sure if that could be the issue... 

Hopefully this makes sense to you! 

Warmly, 

- Kelly

armhole 3.jpg

Answer:

Hi Kelly,

I am so pleased to hear you had a good time following the tutorial!

I had a play in Illustrator and without having all your measurements and going through the whole process, it's a little bit tricky to see what's going to happen, but from what I can tell, what I suggest you do is:

  • I'd move point K slightly further away from the centre front

  • Rotate the angle of the dart slightly

  • Move point V so it's a bit further up / out. This just reduces the severity of the front shoulder angle

  • Check your front shoulder length. My suggested alteration might make your shoulder seam slightly longer - if so, you will need to add this onto the back too.

  • Draw armhole as illustrated below.

Artboard 12.jpg

This should be enough to get you to the point where you can make a toile, which is when you will really see what's working and not working.

Let me know how you go!

Happy sewing,

Emily


Question: Star Trek shoulders

Hi Emily, 

Thank you so much for your help, I’ve been scratching my head over this for the past 2 days! 

I’ve included photos, I traced the offending 80’s/Star Trek shoulder line in red to make it easier to see. 

I really appreciate the insight, I’m sure you get tons of cries for help. 

FYI I found your blog via WithWendy’s latest video and am *really* enjoying it, thank you for the quality content. 

High bust: 84cm 

Full bust: 87 cm (I’m obviously not very full chested! ^^) 

Best regards, 

- Silvia

bodice-block-shoulder.jpg

Answer:

Hi Silvia,

You're right! It was fantastic to get a shout-out on WithWendy's youtube channel, but it has made for quite a busy week! I don't follow anyone on youtube so it was nice to discover her and see how great her videos are!

I had a play in Illustrator and without having all your measurements and going through the whole process, it's a little bit tricky to see what's going to happen, but from what I can tell, what I suggest you do is:

answer.jpg
  • Move your point K slightly closer towards the centre front

  • reduce your shoulder dart size. I know the tutorial doesn't say to do this - but with your bust size, you can probably afford to make the dart smaller (and I can relate, you have similar full and high bust measurements to me! That's why it's so great to make your own clothes as you can avoid the baggy bit in the bust of fitted ready made clothes)

  • Reduce your shoulder length by about 1.5cm - you will need to remove this from the back shoulder too - as illustrated.

I think that should get you to the point when you can make a toile / muslin. You should be able to quickly see how things are looking and if you need to make an alteration. If you realise that you need that extra 1.5cm back on the shoulder, rather than extending the shoulder line I'd suggest you do a broad shoulder adjustment. I have a tutorial you can check out here.

I hope that helps Silvia. Let me know how you go!

Happy drafting,

Emily


Question: Shoulder lines overlapping

Hello Emily, 

I found your blog post via withwendy and try to make the bodice. 

Another person had the same problem as me regard to make a armhole. Because the lines JO and TV are crossing. 

Sorry for my poor english. I still hope you can understand my problem. 

Thank you very much. 

Best regards

Anhthu

bodice-block-shoulders.jpg

Answer:

Hi Anhthu,

 Thank you for getting in touch. I am pleased you're giving my tutorial a go!

 It's not a problem that your shoulder lines are crossing. Just keep working through the tutorial. When you get to the end you will trace the front and back bodice onto new pieces of paper, so the overlapping shoulders will no longer be a problem. Does that make sense?

Happy drafting,

Emily


Flynn jacket : Remove box pleat

REMOVE BOX PLEAT.jpg

Welcome back to the pattern adjustment series for the Flynn jacket!

I thought some of you might be interested in how to remove the box pleat from the Flynn jacket View A (sleeve version), and have it have a flat back like View B (sleeveless version). This is a really quick alteration to make and won’t take you longer than a couple of minutes.


Step 1

FLYNN - remove pleat-01.jpg

Take the BACK [2] and mark a vertical line down through the pattern - starting at the notch on the neckline that indicates the pleat stitch line - and drawing to the bottom of the pattern piece (through the drill hole marking). Be sure to keep the line parallel to the centre back.

Step 2

FLYNN - remove pleat-02.jpg

A - Cut along the line marked in STEP 1 to remove the pleat.

B - You will now be able to use the BACK HEM FACING [10] from View B. All you need to do is transfer the notch on to the top edge of the BACK HEM FACING [10] to the bottom edge of the BACK [2]. For more details on transferring notches - check out this post.

You will need to cut both the BACK [2] piece and the BACK HEM FACING [10] piece on the fold.


I hope you have enjoyed these posts! If there is a tutorial that would like to see, that wasn’t in the series, please leave me a comment or send me an email.

Posts in the series:

Flynn jacket : Narrow / broad shoulder adjustment

SHOULDER ADJUSTMENTS.jpg

Welcome back to the fitting series for the Flynn jacket!

Today we will be talking shoulder adjustments.

View B of the Flynn jacket is sleeveless and you will want the shoulder seam to end on the tip of your shoulder. (You might want to adjust View A (version with sleeves) for broad or narrow shoulders, but it will be more likely you will need it for the sleeveless version, so that is what I will be focusing on today).

If you have made a toile / muslin and noticed that the end of the shoulder seam is sitting beyond the tip of your shoulder, you may choose to do a narrow shoulder adjustment.

If the end of the shoulder seam does not reach the tip of your shoulder, you may choose to do a broad shoulder adjustment.


Step 1

FLYNN shoulder adjustment SMALL-01.jpg

Take the FRONT [8] pattern piece. You can use the original piece or trace a copy of it - depending on your preference. If you do choose to trace a copy, be sure to also trace the stitch line (the grey line on the pattern) of the shoulder seam and armscye.

A - Mark a point halfway along the shoulder (on the stitch line). Mark another point, approximately one third of the way down the armscye. Join these two points with a straight line running through the pattern piece [Line 1].

B - Join the corner of the shoulder and armscye to Line 1 with another line, this will be Line 2. Check that Line 2 is perpendicular to Line 1.

Step 2

FLYNN shoulder adjustment SMALL-02.jpg

A - Cut along Line 1, starting at the shoulder. Slow down as you approach the stitch line on the armscye. Stop cutting 1-2mm from the stitch line (indicated by the blue dot in the illustration).

B - Cut in from the other side of the line (through the seam allowance on the armscye), again stopping 1-2mm from the stitch line. This will create a small “hinge” that will allow the sections of the pattern to move quite flexibly without become detached.

FLYNN shoulder adjustment SMALL-03.jpg

A - Cut along Line 2, starting at the point that you just cut. Slow down as you approach the stitch line at the corner. Stop cutting 1-2mm from the stitch line (indicated by the blue dot in the illustration).

B - Cut in from the other side of the line (through the seam allowance on the corner), again stopping 1-2mm from the stitch line. This will create a small “hinge” that will allow the sections of the pattern to move quite flexibly without becoming unattached.


Broad shoulder adjustment

FLYNN shoulder adjustment SMALL-04.jpg

A - Take a piece of scrap paper and place it behind the shoulder section of the FRONT [8].

B - Carefully swing open the pattern (at the place that was Line 1), using the hinge to help you.

C - Measuring from the main section of the pattern piece (not the unattached triangles), mark the amount of width you would like to add to the shoulder. Remember to mark this on the stitch line and not the seam allowance line.

FLYNN shoulder adjustment SMALL-05.jpg

A - Use the hinges to manoeuvre the triangles back towards the shoulder. Line up the stitch line on the triangle with the mark you made in the previous step. You will notice that this requires the triangle sections to overlap.

B - Once the triangles are lined up with the point and all sections are sitting nice and flat, tape or glue in place onto the paper underneath.

FLYNN shoulder adjustment SMALL-06.jpg

Re-draw the seam lines - both the shoulder and the armscye - using a ruler (and a french curve if you have one).

Re-cut the pattern, removing the excess paper.

Repeat the process on the back piece.

Take the ARMHOLE FACING [11] piece and transfer the changes to the pattern piece.


Narrow shoulder adjustment

FLYNN shoulder adjustment SMALL-07.jpg

A - Take a piece of scrap paper and place it behind the shoulder section of the FRONT [8]. Carefully swing open the pattern (at the place that was Line 1), using the hinge to help you. On the main section of the pattern piece (not the unattached triangles), mark the amount of width you would like to remove from the shoulder. Remember to mark this on the stitch line and not the seam allowance line.

B - Use the hinges to manoeuvre the triangles back towards the shoulder. Line up the stitch line on the triangle with the mark you made. You will notice that this requires the triangle sections to overlap.

C - Once the triangles are lined up with the point and all sections are sitting nice and flat, tape or glue in place onto the paper underneath. Re-draw the seam lines - both the shoulder and the armscye - using a ruler (and a french curve if you have one). Re-cut the pattern, removing the excess paper.

Repeat the process on the back piece.

Take the ARMHOLE FACING [11] piece and transfer the changes to the pattern piece.


Keep your eyes out for more posts over the coming days!

During this series I will show you how to:

Flynn jacket : Full bust adjustment

FBA.jpg

The Flynn jacket is intended to have a substantial amount of design ease, to create an oversized shape, designed for layering. For this reason, I suggest focusing on your high bust measurement when selecting your size. The size chart for the Flynn jacket can be found here.

This pattern is drafted for a B cup bust. Due to the large amount of ease, it is unlikely you will need to do a full bust adjustment (or small bust adjustment) for View A. Check the finished garment measurements to ensure it will fit through the waist and hip.

For View B, which is closer fitting, due to its sleeveless nature, you may consider this alteration to achieve a better fit through the shoulders and armhole (and also so you can close it, if you would like to add a hook and eye). For today’s post, I will get you started for doing the adjustment and then will link to a past post that I wrote about full bust adjustments.

WHEN YOU'LL NEED TO DO A FULL BUST ADJUSTMENT 

Most indie pattern companies (including In the Folds) draft for a B cup bust. There are of course exceptions to this rule (such as Cashmerette and Colette Patterns), so make sure you check on your pattern before assuming the bust cup size.

In terms of the Flynn jacket, it is a loose style which means it is a little more forgiving than more fitted patterns (such as the Acton, for example) so in some cases you can probably get away with not making a bust adjustment. For example, if your bust is smaller than a B cup, it is unlikely you need to bother doing a Small Bust Adjustment. I have an A cup bust, but have not made adjustments to any of my Flynn jackets. Also if your bust is just slightly bigger than a B cup, it is also likely you will be okay without the adjustment.

Check the finished garment measurements and go from there. 

WORK OUT YOUR CUP SIZE

Your cup size in sewing patterns may not always correspond to the bra size you wear. To be safe, check your measurements before deciding if you need to make any adjustments to the pattern. 

To do this, measure your high bust measurement (the area above your breasts, under your arms) as well as your full bust  (the fullest part of your chest) and then take note of each measurement, as well as the difference.

If the difference is 2.5cm (1") your bust is an A cup, 5cm (2") it's a B cup, 7.5cm (3") is a C cup and so on. 

CHOOSE YOUR SIZE

Now, go back to your high bust measurement and add 5cm (2"). This is what your bust measurement would be if you were a B cup and therefore the size you should be choosing from the pattern.

For example, let's say your upper bust measures 81cm (32"). Add 5cm (2") to this measurement to find out what size your bust measurement falls into on the In the Folds sizing chart (and what size you would be if you had B cup breasts). 81cm + 5cm = 86cm which corresponds to a size C. Your actual bust measurement is 89cm  though - 3cm (1") larger than the cup size of the pattern. This means you need to do a FBA and add this 3cm (1") to your pattern. 

As the front pieces are cut as a pair, you need to take the measurement you will be adding and divide it by two. For example, this 3cm (just over 1") mentioned in the example, will be split between either side of the front - 1.5cm (1/2") on each side. 


Step 1

FLYNN FBA-01.jpg

For the sake of the example, I will be making the adjustment to the pieces of View B (as this is the style most likely to require the adjustment), but you can follow this tutorial for View A too.

Take the two pieces that make the front of the Flynn jacket - the FRONT HEM FACING [5] and the FRONT [8]. The first step will be to turn these pieces into one pattern piece (removing the panel line) as this will make the adjustment much easier to manage. At the end, we'll put the panel line back in place, so there won't be any change to the design (except for the addition of the dart - which can be removed later on, if you prefer). 

Step 2

FLYNN FBA-02.jpg

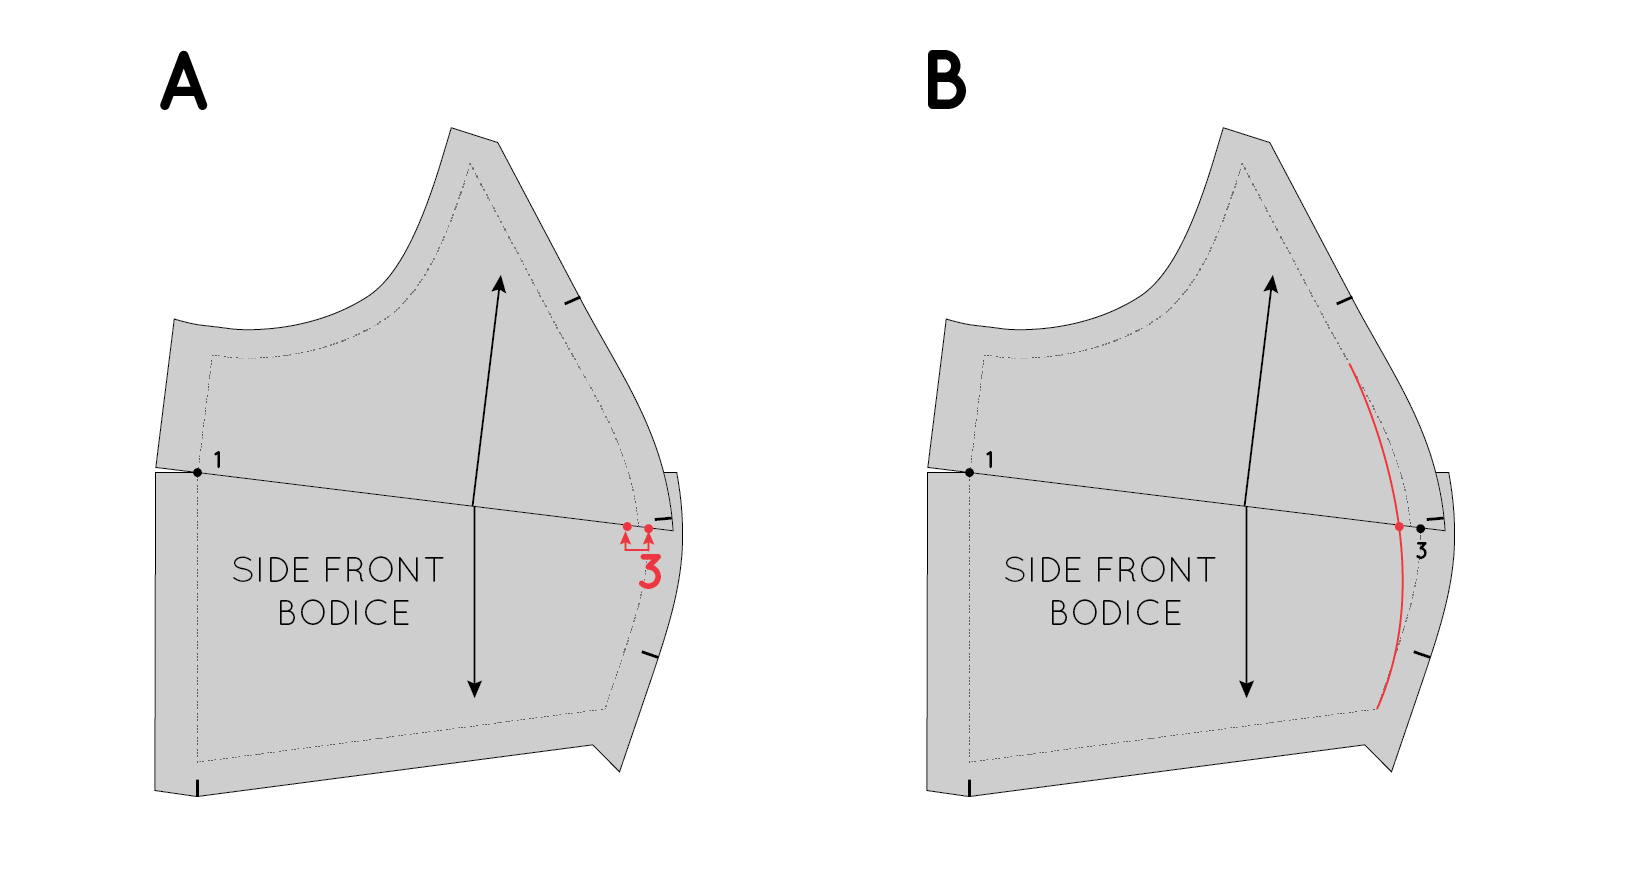
A - Take the SIDE FRONT [8] piece and place it on top of the FRONT HEM FACING [5], lining up the stitch lines (the grey line on the pattern), as if the pieces have been sewn together. If you are struggling to see the lines, it can help to put the pieces up to a window and see through the paper that way (or a lightbox, if you have one). Once the pieces are correctly lined up, use masking tape (or similar) to hold the pieces in place. 

As you can see in the example, you won’t be able to align the stitch line for whole seam, as the lines slightly change directions towards the shoulder (which is what gives you a nice shape in that area). Just focus on lining up the stitch line in the lower section of the pattern (as illustrated).

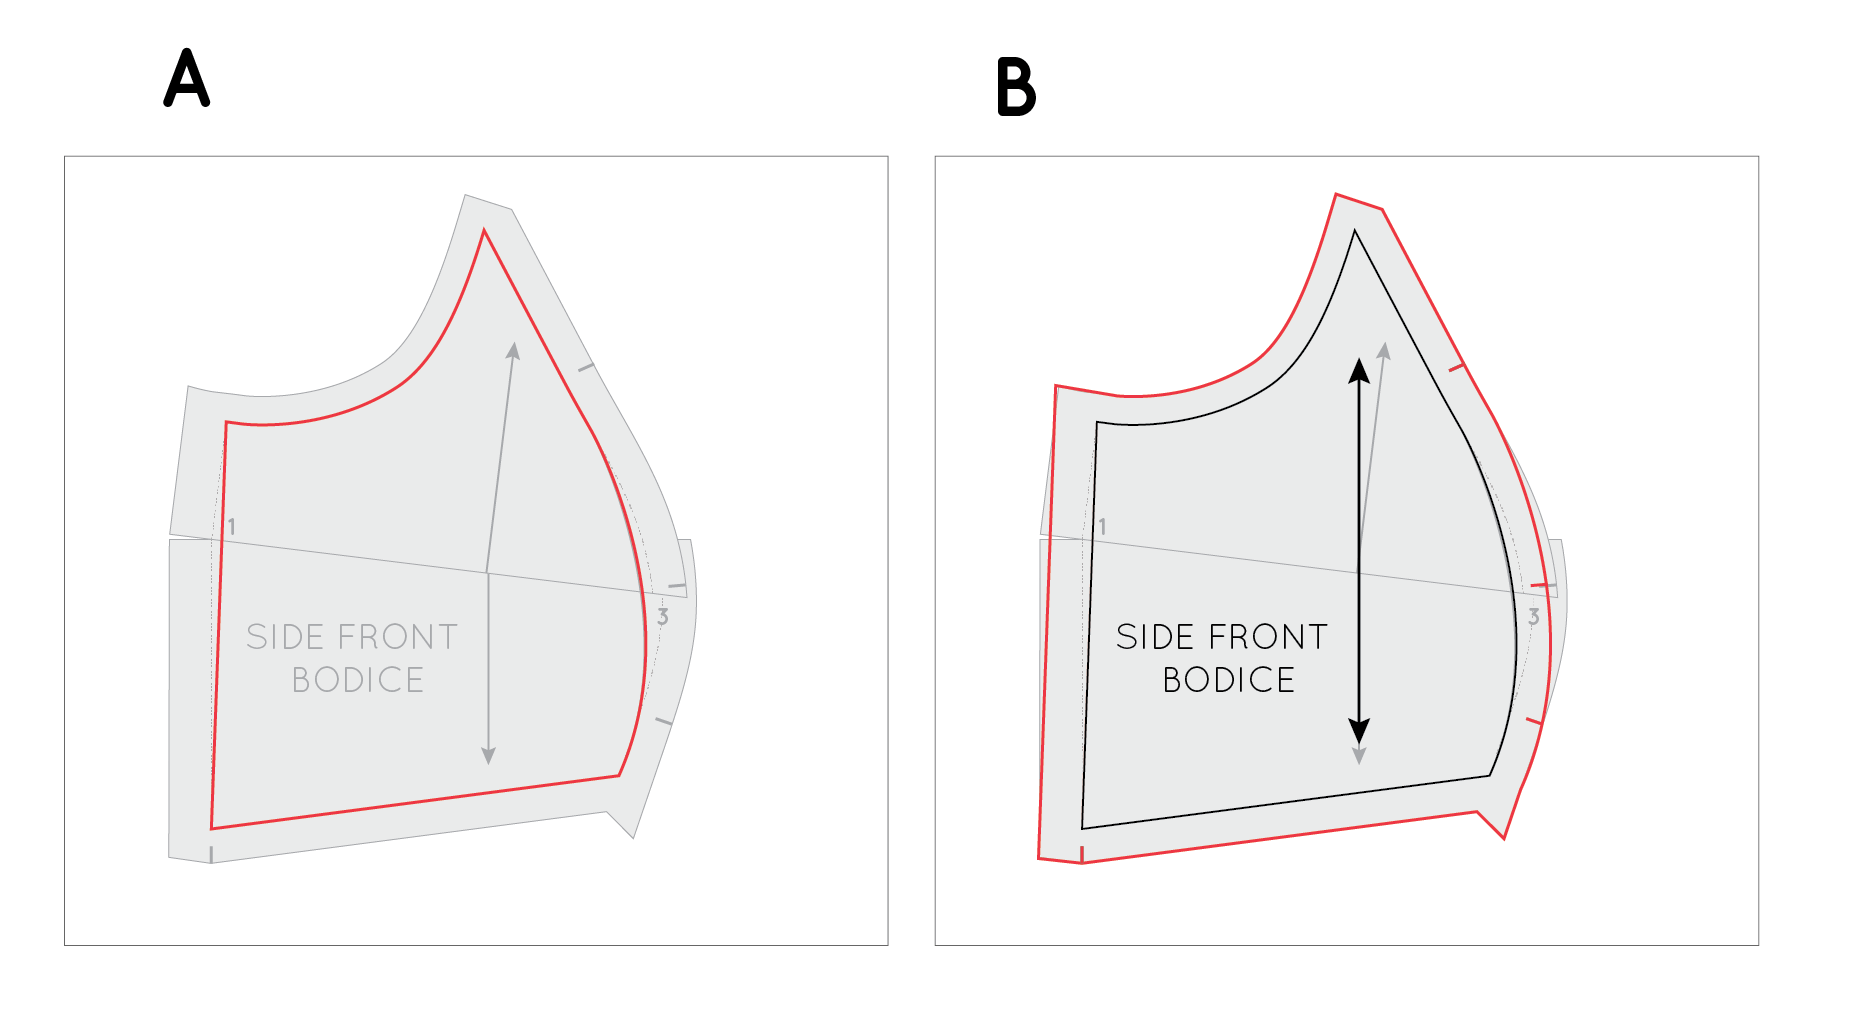
B - Take a piece of pattern paper and trace the piece - being sure to include all pattern markings (in this case: the grainline and notches). Also trace the panel line.

Make sure you trace both the cutting line and the stitching line - this is really important. In the Folds patterns include the stitching line on each pattern piece so that it is easier for you to make alterations to your pattern. I know we would all love to be able to cut a pattern in a straight size and for it to fit perfectly, but unfortunately that's not the way it is (I even have to make adjustments to In the Folds patterns so they fit my figure properly), so having the stitch lines can help you make adjustments more quickly and easily. When making pattern alterations, I normally suggest removing the seam allowance, but because the stitch line is marked on the pattern, you can leave it on. 

From this point you are ready to make the adjustment. Head over to this tutorial - starting at STEP 3 and work through the tutorial.


Keep your eyes out for more posts over the coming days!

During this series I will show you how to:

Flynn jacket : Shortening / Lengthening the sleeves

ADJUST SLEEVES.jpg

Today in the Flynn jacket pattern alteration series, I will be showing you how to lengthen or shorten the sleeves.

There are times when you can just add some (or remove) length to the hem of a sleeve (when the underseams of a sleeve are straight), but in the case of the Flynn jacket (and other patterns like it), you need to add/remove the length to the inside of the pattern piece, so that you can keep the shape intact - due to the tapered nature of the sleeve. As well as this, the Flynn jacket sleeve is finished with a hem facing, so by adding / removing length from the inside section of the sleeve, the hem facing will still fit and will not require any changes.


Lengthening the sleeve

Step 1

LENGTHENING + SHORTENING SLEEVE-SMALL-01.jpg

Take the SLEEVE [3] pattern piece. You can use the actual pattern piece, or trace a copy if you would prefer to keep the original piece intact.

Step 2

LENGTHENING FLYNN-SMALL-01.jpg

You will need to work out how much length you would like to add to the sleeve. You can do this by looking at your toile / muslin (for more details on making a toile / muslin look at this post from the Rushcutter sew-along), or holding the pattern pieces up to your body and getting an idea of where they will sit on your arm (keep in mind that the jacket has a dropped shoulder and the sleeve cap does not sit at your shoulder point).

A - Cut through the lengthen/shorten line on the SLEEVE [3].

B - Take the upper section of the sleeve, and tape or glue a piece of paper to the lower section - with enough paper extending past the pattern to add your length extension. Leave some paper either side too.

C - Extend the grainline onto the attached paper and then mark a horizontal line on each piece of paper, measuring down from the cut line the distance equal to the amount of length you would like to add. In the example above, you can see the red line is 5cm (2in) below the cut line (which is how much length we will be adding to the sleeve).

Step 3

LENGTHENING + SHORTENING SLEEVE-SMALL-03.jpg

A - Attach the lower part of the sleeve to the added paper, lining up the cut edge with the line marked in the previous step. Use the grainline to ensure that you line the pieces up correctly.

B - Glue or tape in place.

Step 4

LENGTHENING + SHORTENING SLEEVE-SMALL-04.jpg

Re-draw the seam lines with a straight line over the adjustment.

You can choose to trace the pattern on to fresh pattern paper or tape on small pieces of paper / masking tape where you need to fill a small gap to complete the seam line.

Cut off any excess paper that is outside of the new lines.


Shortening the sleeve

Step 1

LENGTHENING + SHORTENING SLEEVE-SMALL-05.jpg

You will need to work out how much length you would like to remove from the sleeve. You can do this by looking at your toile / muslin (for more details on making a toile / muslin look at this post from the Rushcutter sew-along), or holding the pattern pieces up to your body and getting an idea of where they will sit on your arm (keep in mind that the jacket has a dropped shoulder and the sleeve cap does not sit at your shoulder point).

A - Cut through the lengthen/shorten line on the SLEEVE [3].

B - Measuring up from the cut line, mark a horizontal line on each pattern piece, the distance of the amount of length you would like to remove.

In the example, you can see the red line is 5cm (2in) above the cut line and the shaded section shows the amount of length that will be removed from the sleeve

Step 2

LENGTHENING + SHORTENING SLEEVE-SMALL-06.jpg

A - Move the lower part of each pattern piece up to the line marked in the previous step. Use the grainline to ensure that you line the pieces up correctly.

B - Glue or tape in place.

Step 3

LENGTHENING + SHORTENING SLEEVE-SMALL-07.jpg

Re-draw the seam lines with a straight line over the adjustment (you can cut off any excess paper that is now outside the lines).


Keep your eyes out for more posts over the coming days!

During this series I will show you how to:

Flynn jacket : Lengthening the pattern

LENGTHEN FLYNN.jpg

As I have just released a new pattern (yay for the new Flynn jacket), I thought it would be helpful to post a few tutorials about making alterations to the pattern. Yesterday I showed you how to shorten the pattern, so today I thought I would show you how to lengthen the pattern.

All In the Folds patterns are drafted for a height of 170cm (5'7") , so you might need to shorten or lengthen my patterns if you are taller or shorter than this height (although it does sometimes come down to preference).


GETTING STARTED

Step 1

SHORTENING FLYNN-01.jpg

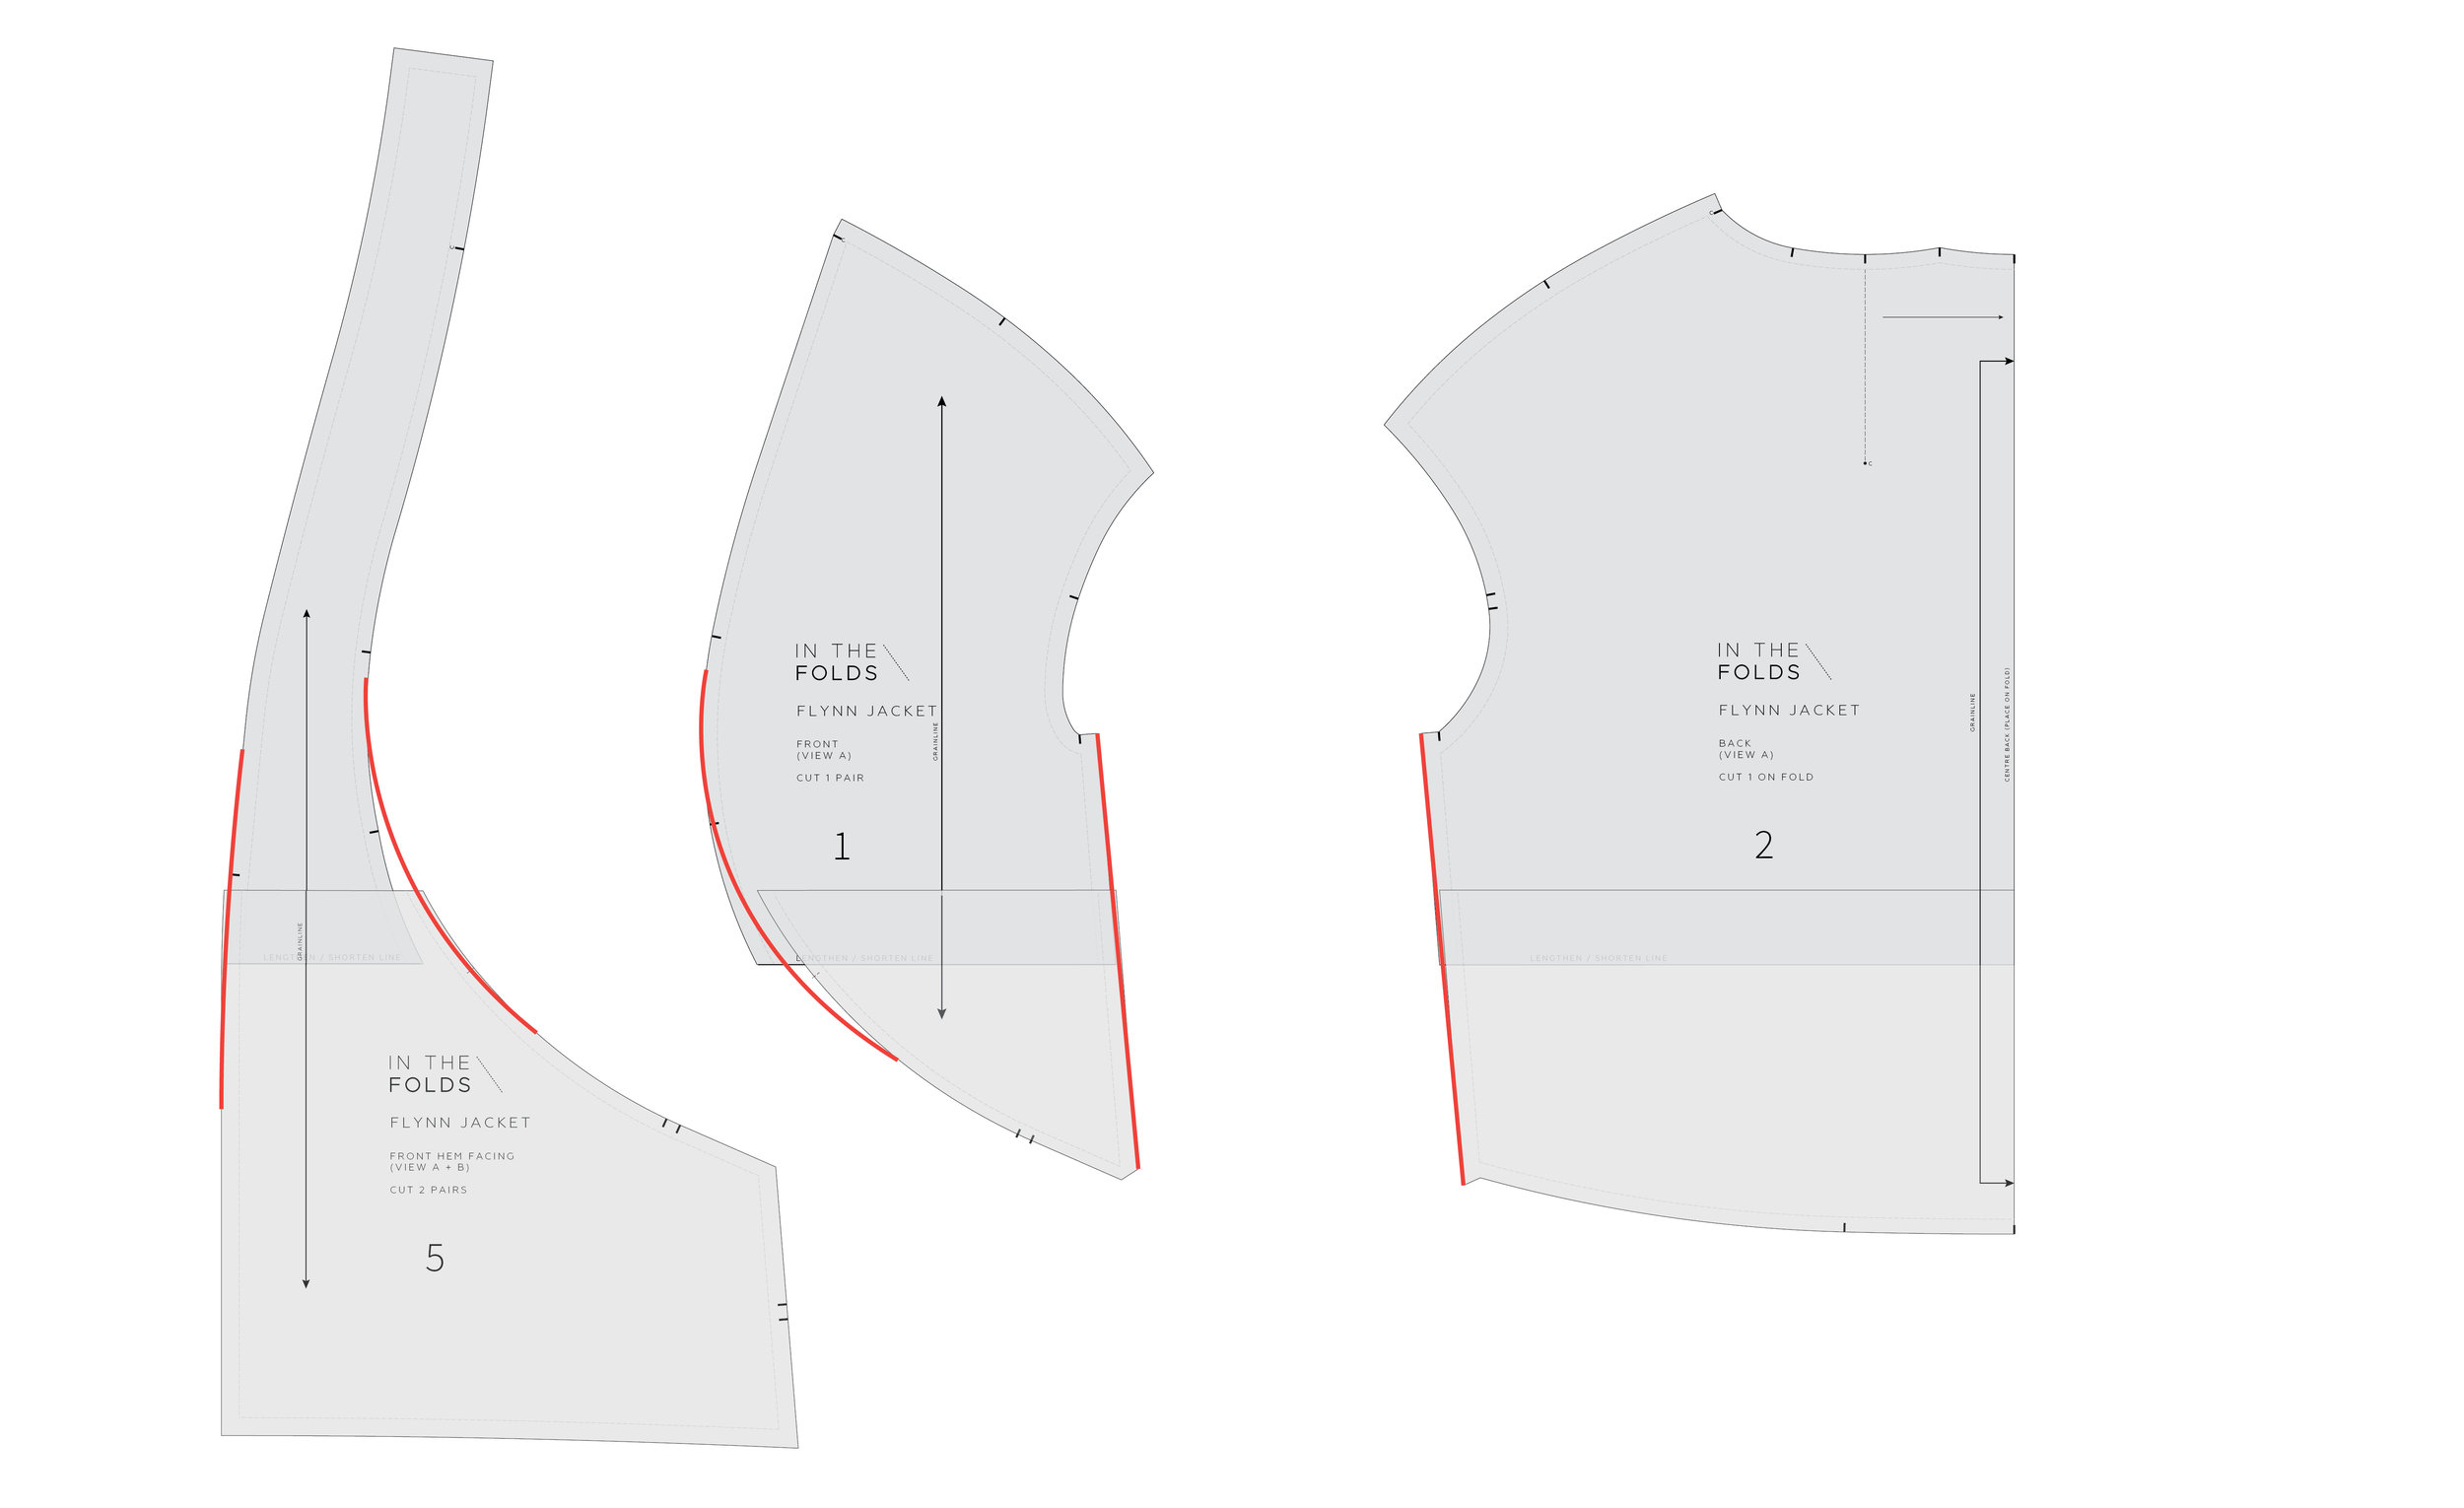
The pieces you will need for this adjustment are the FRONT HEM FACING [5], FRONT [1] and BACK [2] (or the corresponding pattern pieces from View B). You can use the actual pattern pieces, or trace a copy if you would prefer to keep the original pieces intact.

Step 2

LENGTHENING FLYNN-SMALL-01.jpg

You will need to work out how much length you would like to add to the pattern. You can do this by looking at your toile / muslin (for more details on making a toile / muslin look at this post from the Rushcutter sew-along), or holding the pattern pieces up to your body and getting an idea of where they will sit on your body.

If you would like to add any more than 7.5cm (3in), I’d suggest adding 5cm - 7.5cm (2in - 3in) to the mid-section of the pattern (where the LENGTHEN / SHORTEN lines are) and then adding the remainder to the hem facing (more on this in STEPS 5 + 6).

Also keep in mind that by lengthening the pattern, you will be moving the placement of the pockets down. If you are lengthening the pattern to change the jacket into a longer style, I would recommend adding more length (or all length) to the hem facing (rather than the mid-section), or moving the pocket placement so they don’t become too low.

A - Take the upper part of each pattern piece, and tape or glue a piece of paper to the lower section - with enough paper extending past the pattern to add your length extension. Leave some paper either side too.

B - Extend the grainline onto the attached paper and then mark a horizontal line on each piece of paper, measuring down from the cut line the distance equal to the amount of length you would like to add. In the example above, you can see the red line is 5cm (2in) below the cut line (and 5cm length will be added to the pattern in the example).

Step 3

LENGTHENING FLYNN-SMALL-02.jpg

A - Attach the lower part of each pattern piece to the added paper, lining up the cut edge with the line marked in the previous step. Use the grainline to ensure that you line the pieces up correctly.

B - Glue or tape in place.

Step 4

LENGTHENING FLYNN-SMALL-03.jpg

Re-draw the seam lines with smooth lines over the adjustment. You will notice that in some cases you will be adding a little bit on to create the line of best fit, while in other cases you will need to shave a bit off. This will even out as you go around the pattern.

When marking a line over the area that has been altered, there might be a large gap between the two sides of the line. In this case - split the difference by marking a point in the centre of the area and drawing the line across this point.

You can choose to trace the pattern on to fresh pattern paper or tape on small pieces of paper / masking tape where you need to fill a small gap to complete the seam line.

Cut off any excess paper that is outside of the new lines.

Check all seams are the correct length by "walking" the pattern pieces, as if you were sewing them together. For more details on how to do this, check out this tutorial.

Transfer / re-draw any notches that have been misplaced. Due to the shape of the pieces, some notches may not line up due to the different points the alteration was made. After checking that the seam is the correct length, transfer one notch to the other piece (and cross out the notch that is no longer in the correct position).

If you need to add more than 7.5cm (3in) and have opted to add some length to both the mid-section of the pattern and the hem facing, continue to STEP 5. Otherwise, you are ready to cut your fabric with your new altered pattern pieces!

Step 5

LENGTHENING FLYNN-SMALL-04.jpg

A - To add more length to the jacket, mark a horizontal line through the bottom section of the FRONT HEM FACING [5] and the BACK FACING [6]. Make sure the lines are perpendicular to the grainline. When making alterations like this, I try to stay away from notches when possible, so advise that you draw you horizontal line slightly above, or slightly below, the notches on the side of each piece.

B - Check the position of the grainline in relation to the horizontal line you just marked. If the grainline does not cut through the horizontal line, extend the grainline (as I have done on the FRONT [5] in the example). This will help you keep things straight when making the adjustment.

Cut through the horizontal line and stick a piece of scrap paper to the lower section of each pattern piece.

Step 6

LENGTHENING FLYNN-SMALL-05.jpg

A - Again, attach the lower part of each pattern piece to the added paper, lining up the cut edge with the line marked in the previous step. Use the grainline to ensure that you line the pieces up correctly.

B - Glue or tape in place.

C - Re-draw the sides that have been impacted and check that the notches still line up correctly.


And that’s it! You’re done!

During this series I will show you how to:

Flynn jacket : Shortening the pattern

SHORTEN FLYNN.jpg

As I have just released a new pattern (yay for the new Flynn jacket), I though it would be helpful to post a few tutorials about making alterations to the pattern.

If you’re shorter than 170cm (5'7") this tutorial might be a good one for you! All In the Folds patterns are drafted for this height, so you might need to shorten or lengthen my patterns if you are taller or shorter than this height (although it does sometimes come down to preference).

There are a couple of other reasons why you might also want to do this adjustment to the Flynn jacket:

  • You might be 170cm (5'7") but have a shorter torso and longer legs than the pattern was designed for

  • You would prefer more of a cropped style than the original design

The Flynn jacket is designed to finish at the top of the thighs (and just below your bum at the back). Due to the design of the hem band and curved front panel, you can’t just simply cut length off the bottom of the jacket pattern as it will change the proportions of the jacket. Instead, you need to take length out from the middle of the pattern pieces, so that the proportions remain intact, and today that is what I am going to show you how to do!

As is becoming quite common with my patterns, the Flynn jacket has some very unique panel lines. This means that making alterations to the pattern is slightly different to what you would need to do with a straight cut jacket. It’s not difficult at all, and the principle is the same, there is just a few extra steps you have to do!


GETTING STARTED

Step 1

SHORTENING FLYNN-01.jpg

The pieces you will need for this adjustment are the FRONT HEM FACING [5], FRONT [1] and BACK [2] (or the co-ordinating pattern pieces for View B). You can use the actual pattern pieces, or trace a copy if you would prefer to keep the original pieces intact.

Step 2

SHORTENING FLYNN-02.jpg

You will need to work out how much length you would like to remove from the pattern. You can do this by looking at your toile / muslin (for more details on making a toile / muslin look at this post from the Rushcutter sew-along), or holding the pattern pieces up to your body and getting an idea of where they will sit on your body.

If you would like to remove any more than 7.5cm (3in), I’d suggest taking 5cm - 7.5cm (2in - 3in) from the mid-section of the pattern (where the LENGTHEN / SHORTEN lines are) and then removing the remainder from the hem band (more on this in STEPS 5 + 6).

A - Cut through the 'LENGTHEN / SHORTEN' line on the FRONT HEM FACING [5], FRONT [1] and BACK [2].

B - Measuring up from the cut line, mark a horizontal line on each pattern piece, the distance of the amount of length you would like to remove. In the example, you can see the red line is 5cm (2in) above the cut line and the shaded section shows the amount of length that will be removed from the pattern piece.

Step 3

SHORTENING FLYNN-03.jpg

A - Move the lower part of each pattern piece up to the line marked in the previous step. Use the grainline to ensure that you line the pieces up correctly.

B - Glue or tape in place.

Step 4

SHORTENING FLYNN-04.jpg

Re-draw the seam lines with smooth lines over the adjustment. You will notice that in some cases you will be needing to add a little bit on to create the line of best fit, while in other cases you will need to shave a bit off. This will even out as you go around the pattern.

SHORTENING FLYNN-CLOSE-UP-04.jpg

When marking a line over the area that has been altered, there might be a large gap between the two sides of the line. In this case - split the difference by marking a point in the centre of the area and drawing the line across this point. You can choose to trace the pattern on to fresh pattern paper or tape on small pieces of paper / masking tape where you need to fill a small gap to complete the seam line.

Cut off any excess paper that is outside of the new lines.

Check all seams are the correct length by "walking" the pattern pieces, as if you were sewing them together. For more details on how to do this, check out this tutorial.

Transfer / re-draw any notches that have been misplaced. Due to the shape of the pieces, some notches may not line up due to the different points the alteration was made. After checking that the seam is the correct length, transfer one notch to the other piece (and cross out the notch that is no longer in the correct position).

If you need to remove more than 7.5cm (3in) and have opted to remove some length from both the mid-section of the pattern and the hem band, continue to STEP 5. Otherwise, you are ready to cut your fabric with your new altered pattern pieces!

Step 5

SHORTENING FLYNN-05-05.jpg

A - To remove more length from the jacket, mark a horizontal line through the bottom section of the FRONT HEM FACING [5] and the BACK FACING [6]. Make sure the lines are perpendicular to the grainline. When making alterations like this, I try to stay away from notches when possible, so advise that you draw the horizontal line slightly above, or slightly below, the notches on the side of each piece.

B - Check the position of the grainline in relation to the horizontal line you just marked. If the grainline does not cut through the horizontal line, extend the grainline (as I have done on the FRONT [5] in the example). This will help you keep things straight when making the adjustment.

Cut through the horizontal line in the same way you did in STEP 2.

Step 6

SHORTENING FLYNN-06-06.jpg

A - Again, measuring up from the cut line, mark a horizontal line on each pattern piece, the distance of the amount of length you would like to remove.

B - Move the lower part of each pattern piece up to the line marked. Use the grainline to ensure that you line the pieces up correctly.

C - Re-draw the sides that have been impacted and check that the notches still line up correctly.


And that’s it! Not too tricky, right?

In the following days I will show you how to:

The Collins Top Sew-Along : Lengthening the pattern

collins_top_lengthen_cover.gif

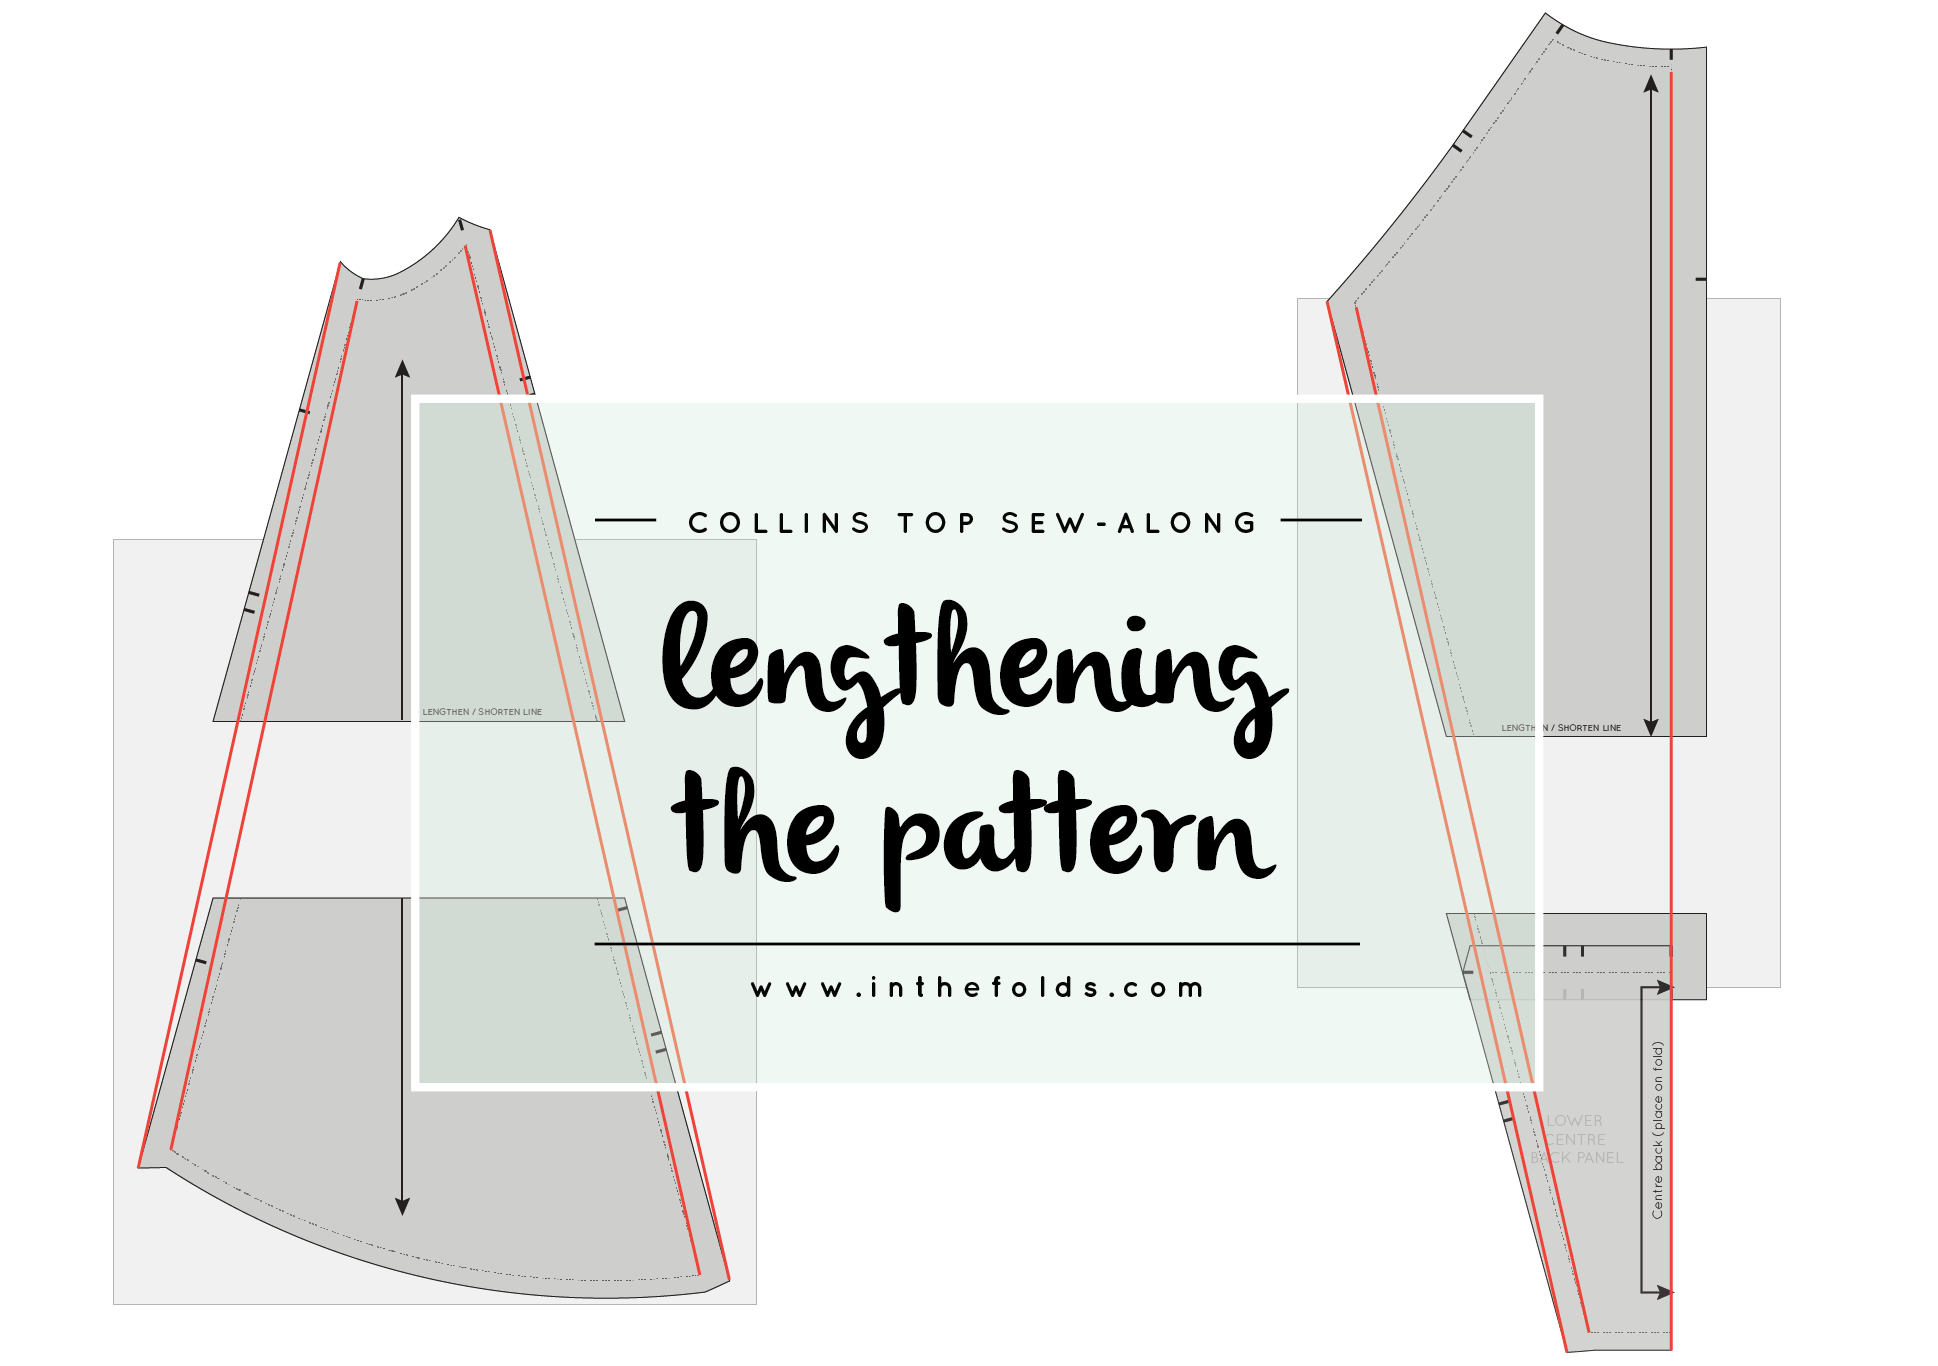
I have a feeling this post in the Collins Top sew-along might be of interest to quite a few of you! When I was designing the Collins Top, I really wanted a top that worked with high waisted trousers and skirts. I wear a lot of high waisted garments, and I know a lot of you do too. But if you don't, you may consider lengthening the Collins Top, to avoid flashing too much skin when you lift your arms (it's happened to all of us, right?) The pattern is drafted for height of 170cm (5'7"), with the front hem finishing close to the high hip (approximately in the position where mid-rise jeans would sit) - the back hem is lower (due to the hi-low hem design).

Lengthening a pattern is a really simple adjustment to make, but due to the panel lines of the Collins Top, it does make the process slightly (just slightly, I promise!) trickier.

There are times when you can just add some length to the hem of a pattern (when the side seams of a garment are quite straight, for example, a pencil skirt), but in the case of the Collins Top (and other patterns like it), you will be wanting to add the length to the inside of the pattern piece, so that you can keep the shape intact. If you were to just add length to the hem of this pattern, you would end up with quite a lot of volume in the hem, which is probably not ideal in a pattern that is already a trapezium shape. Due to the shape of the panels, I understand that this can seem a little daunting. But I promise, it really isn't!


Getting started

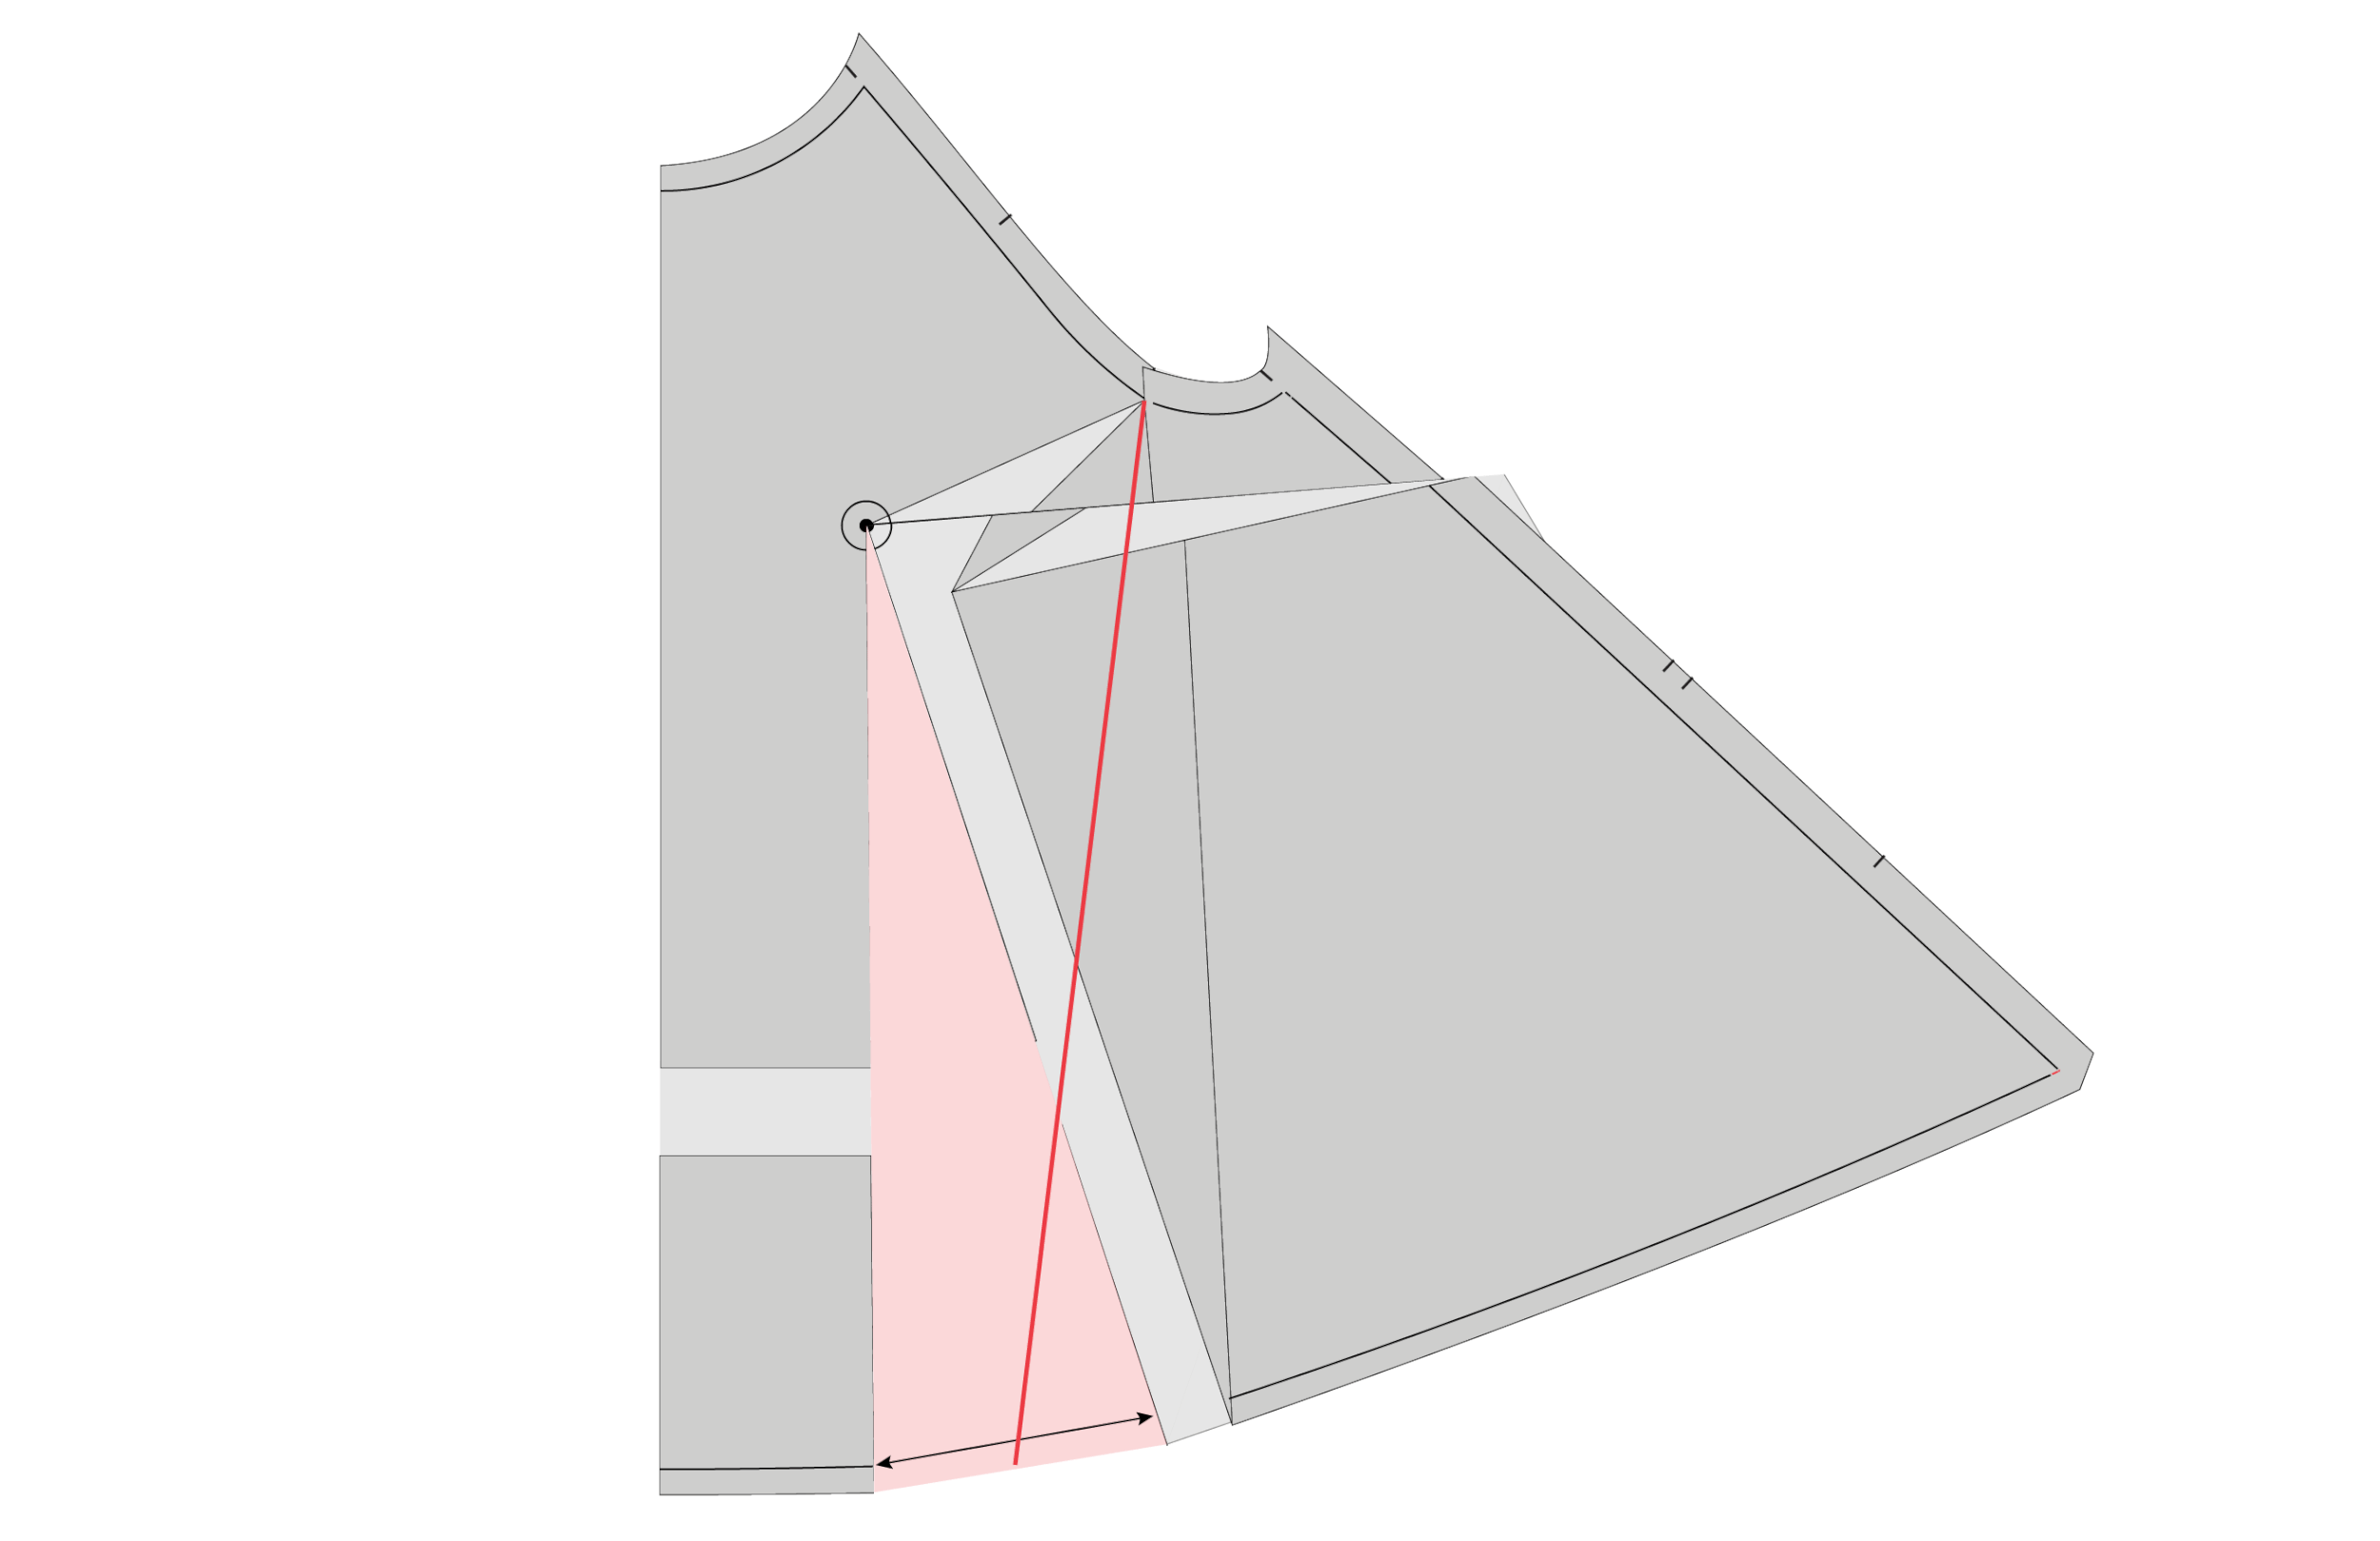
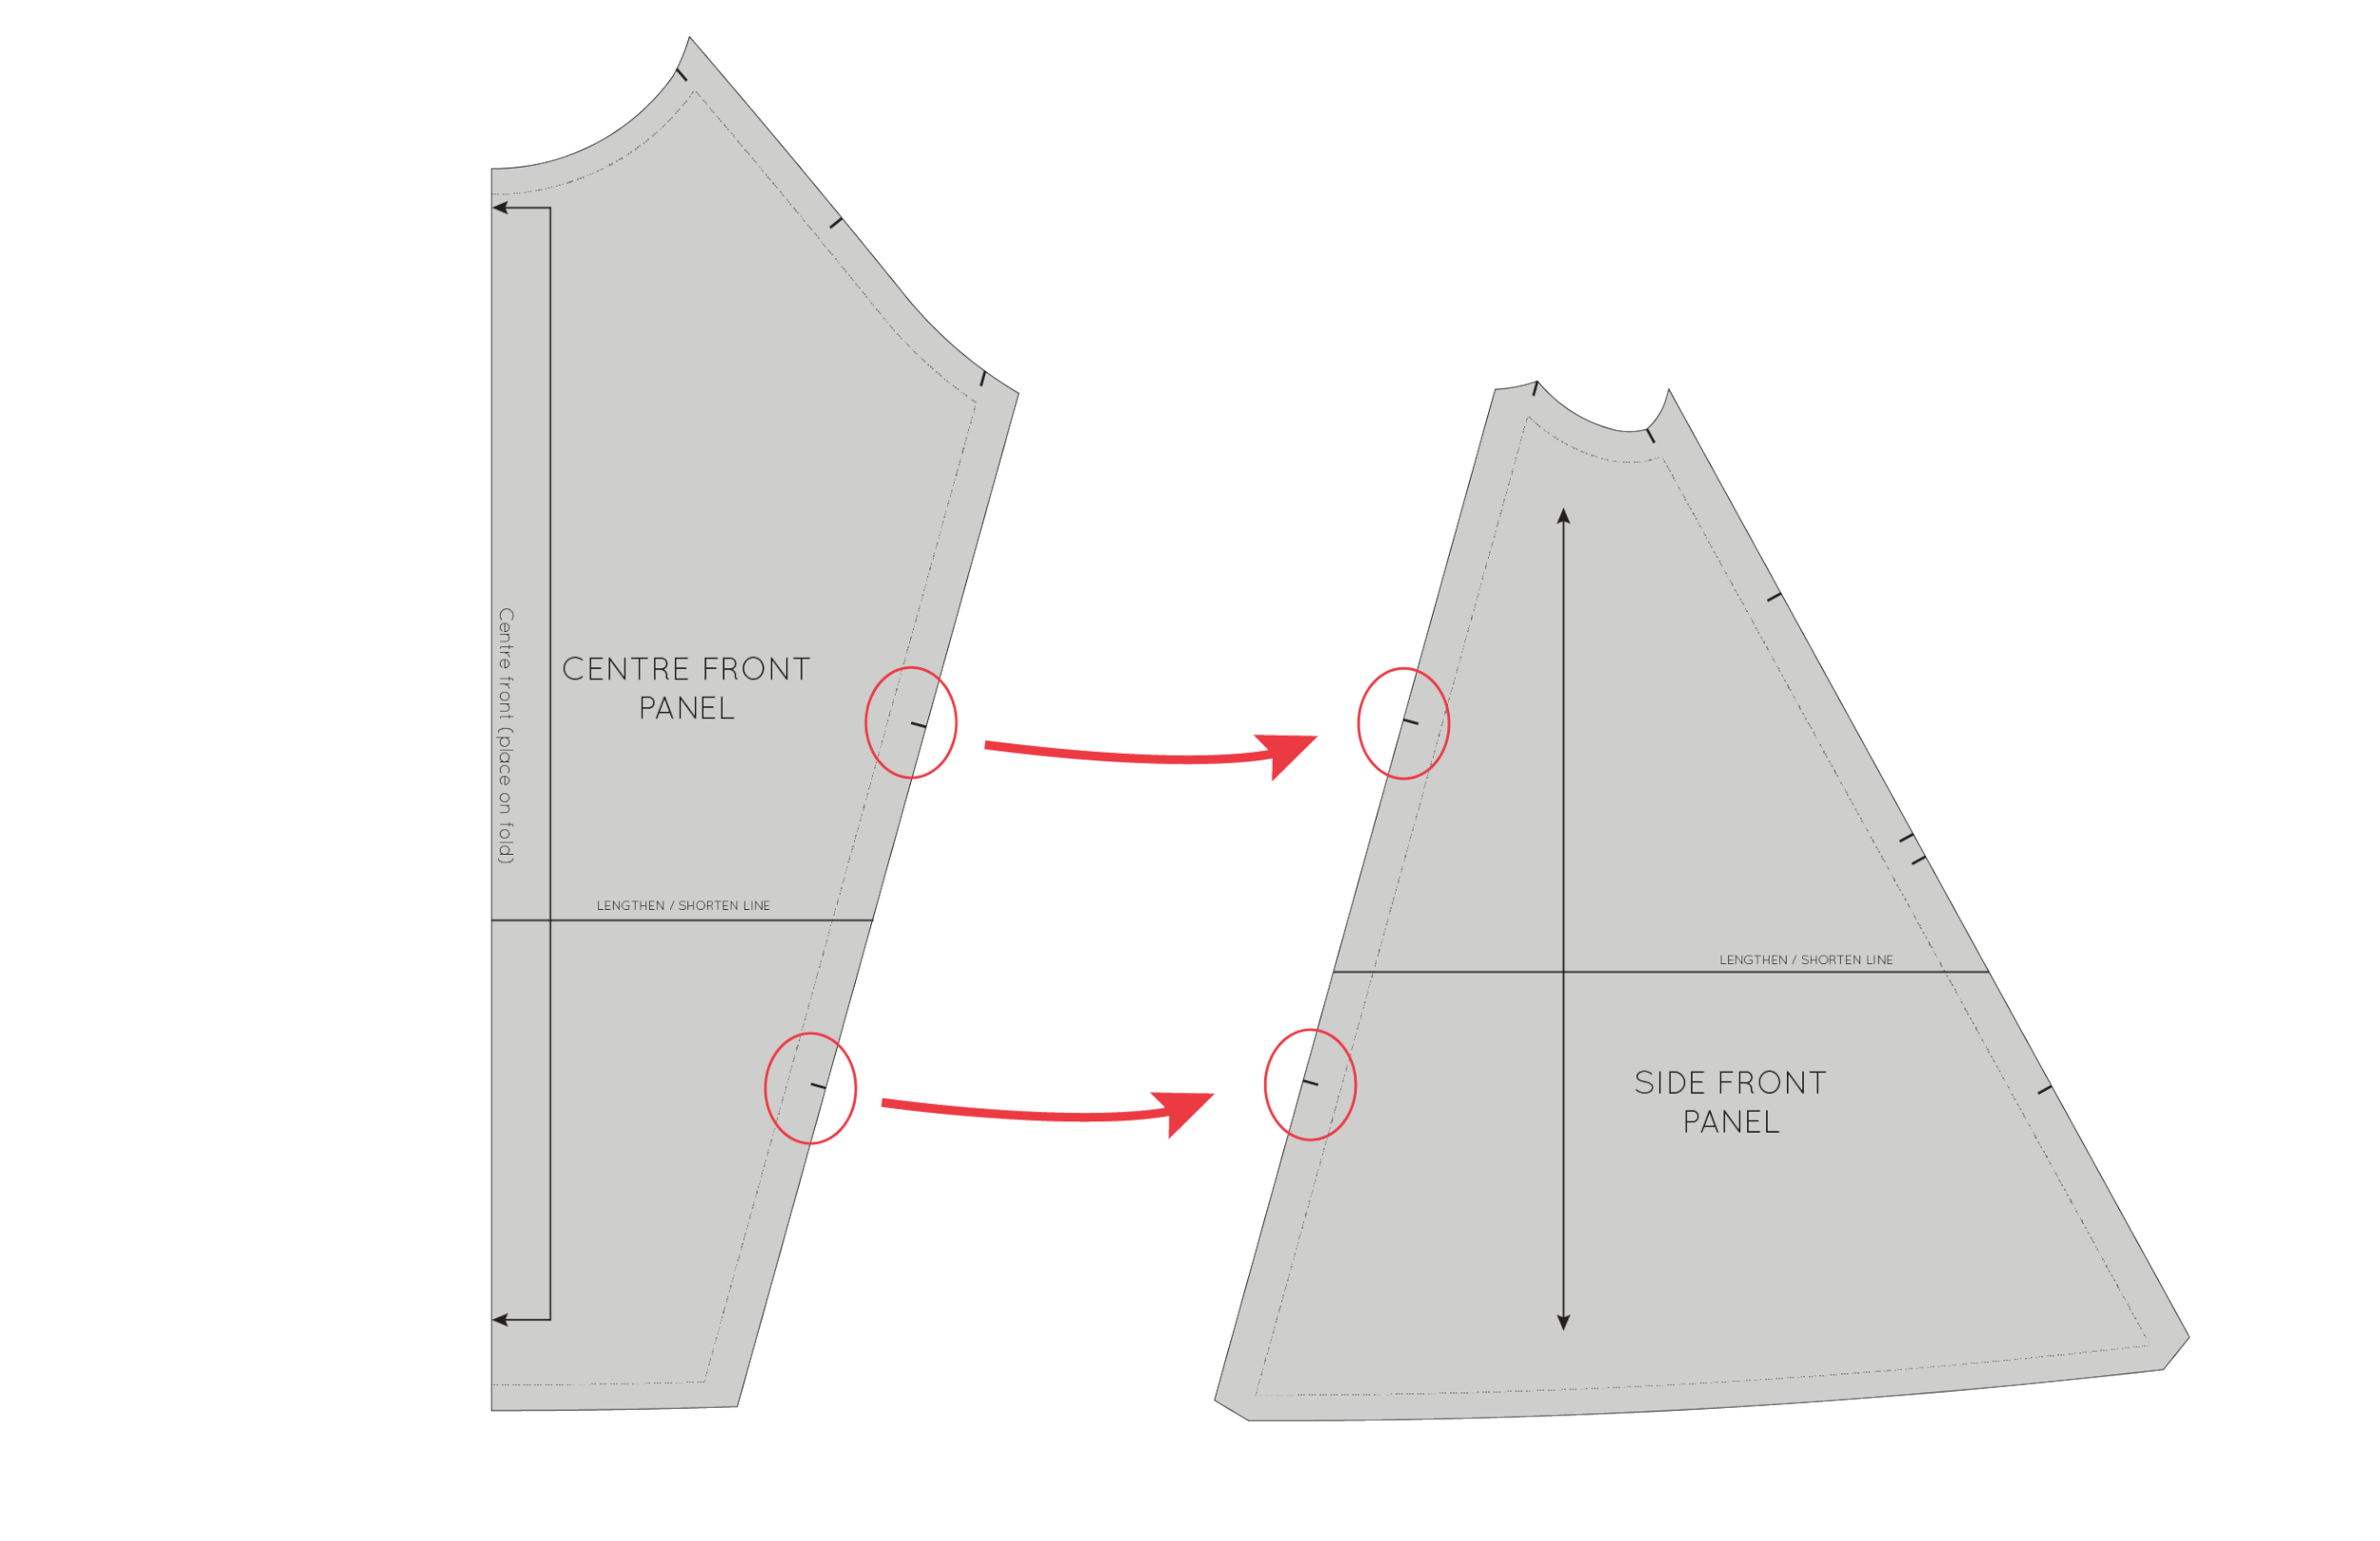
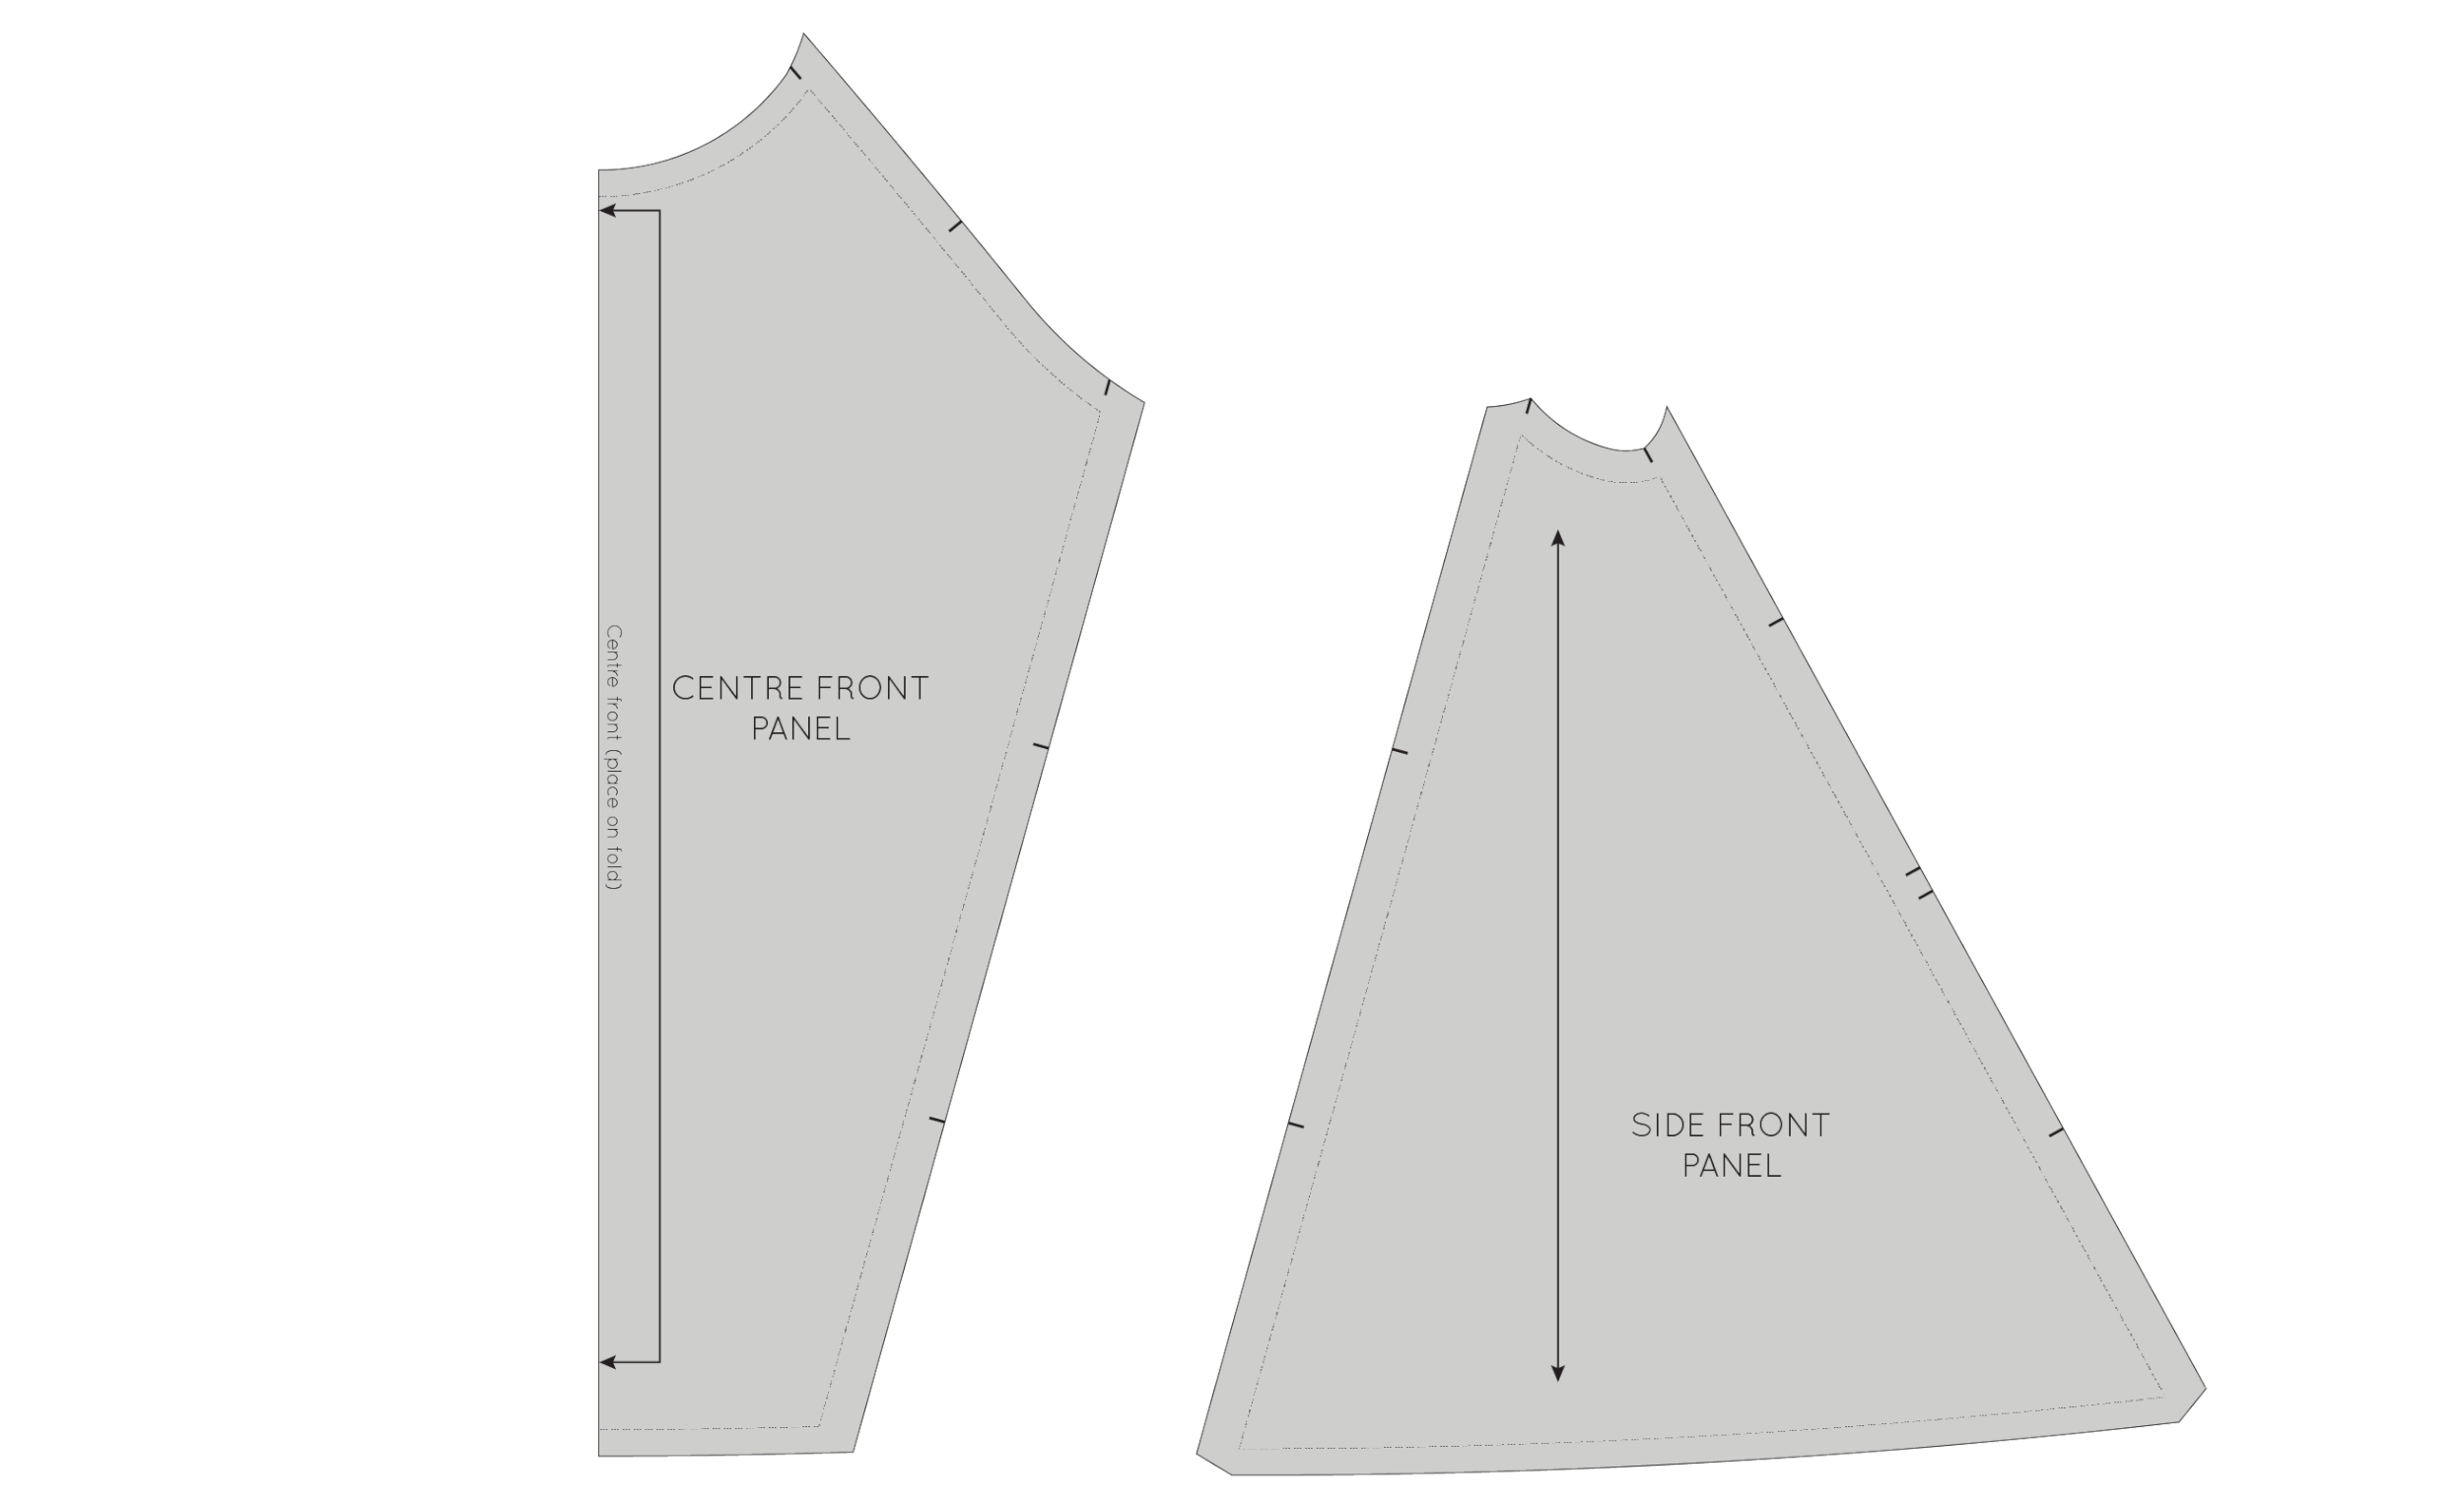
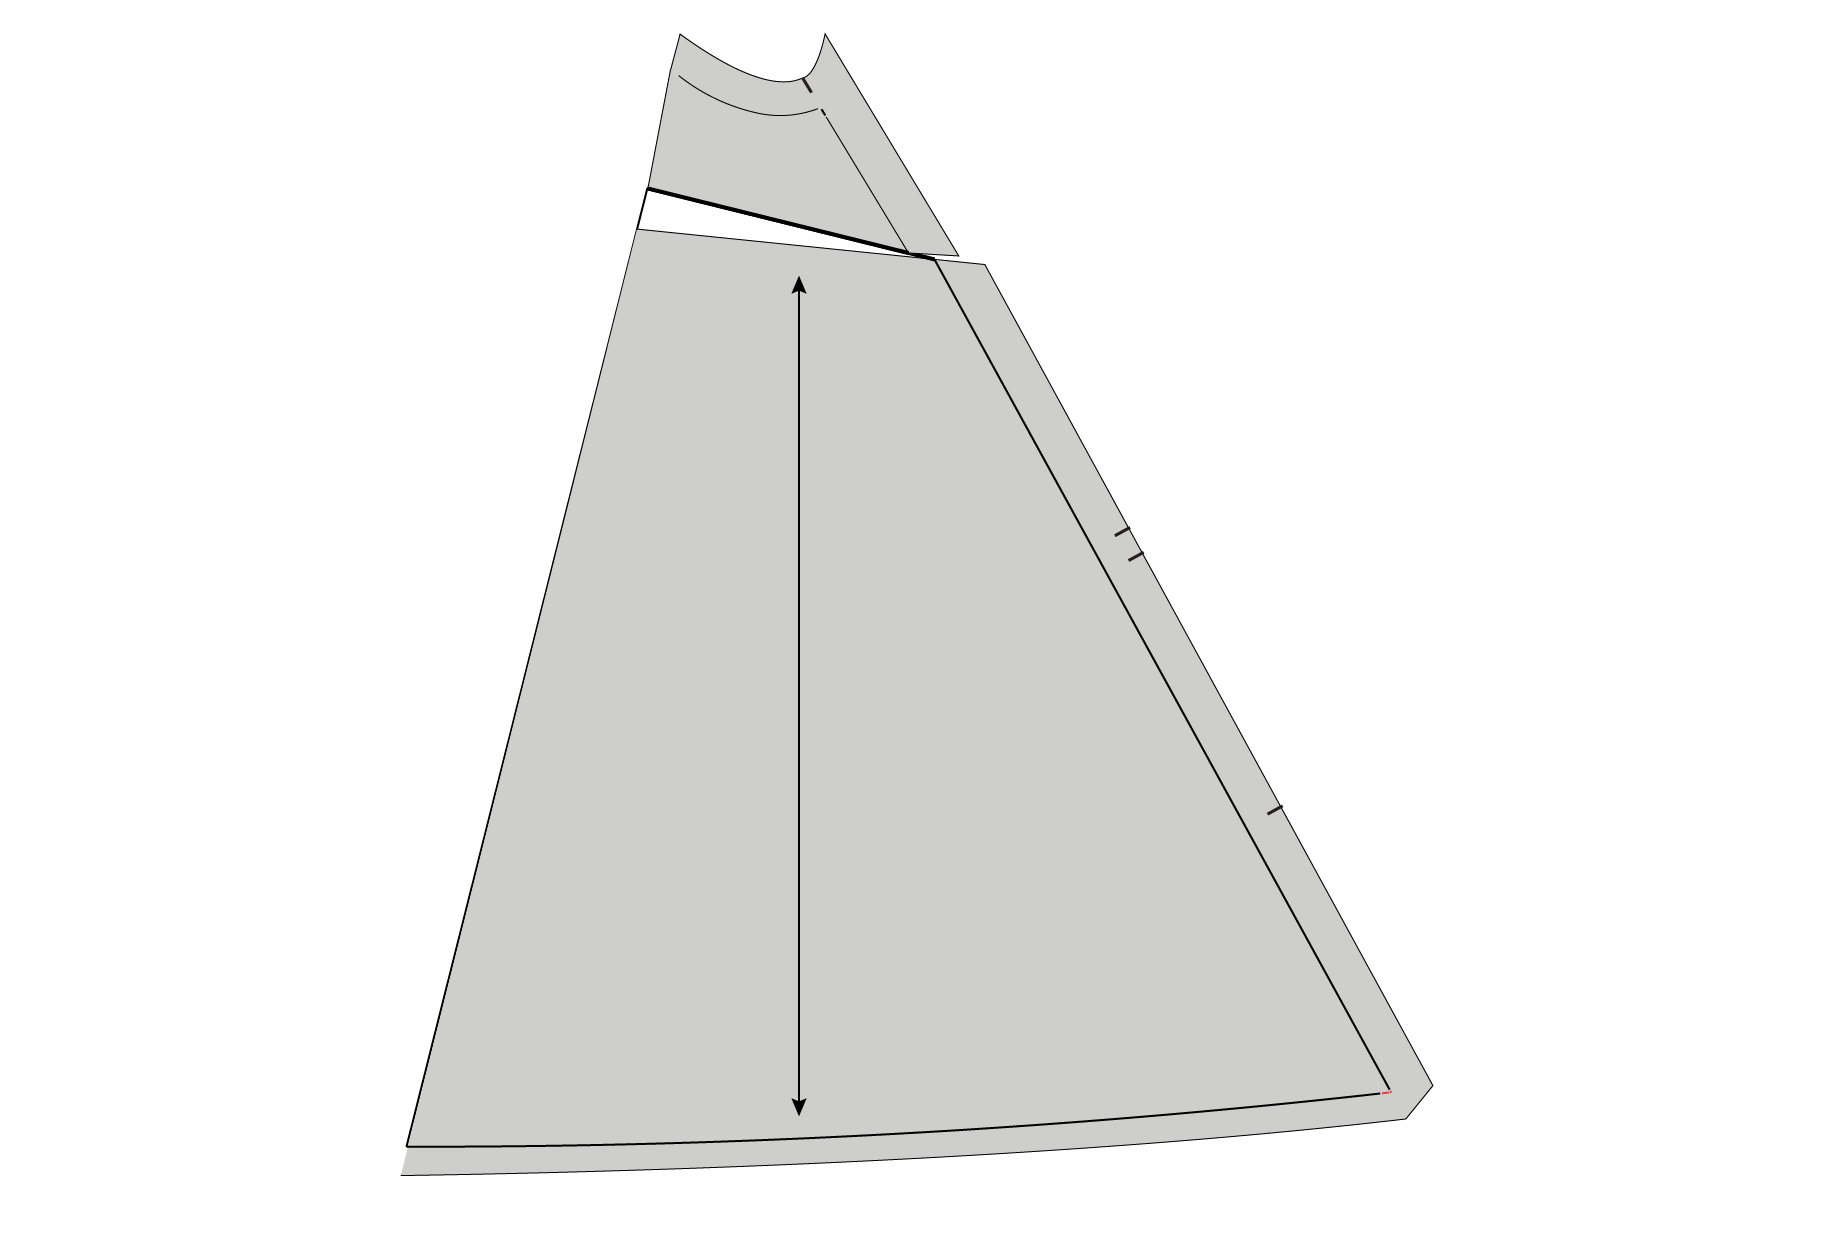
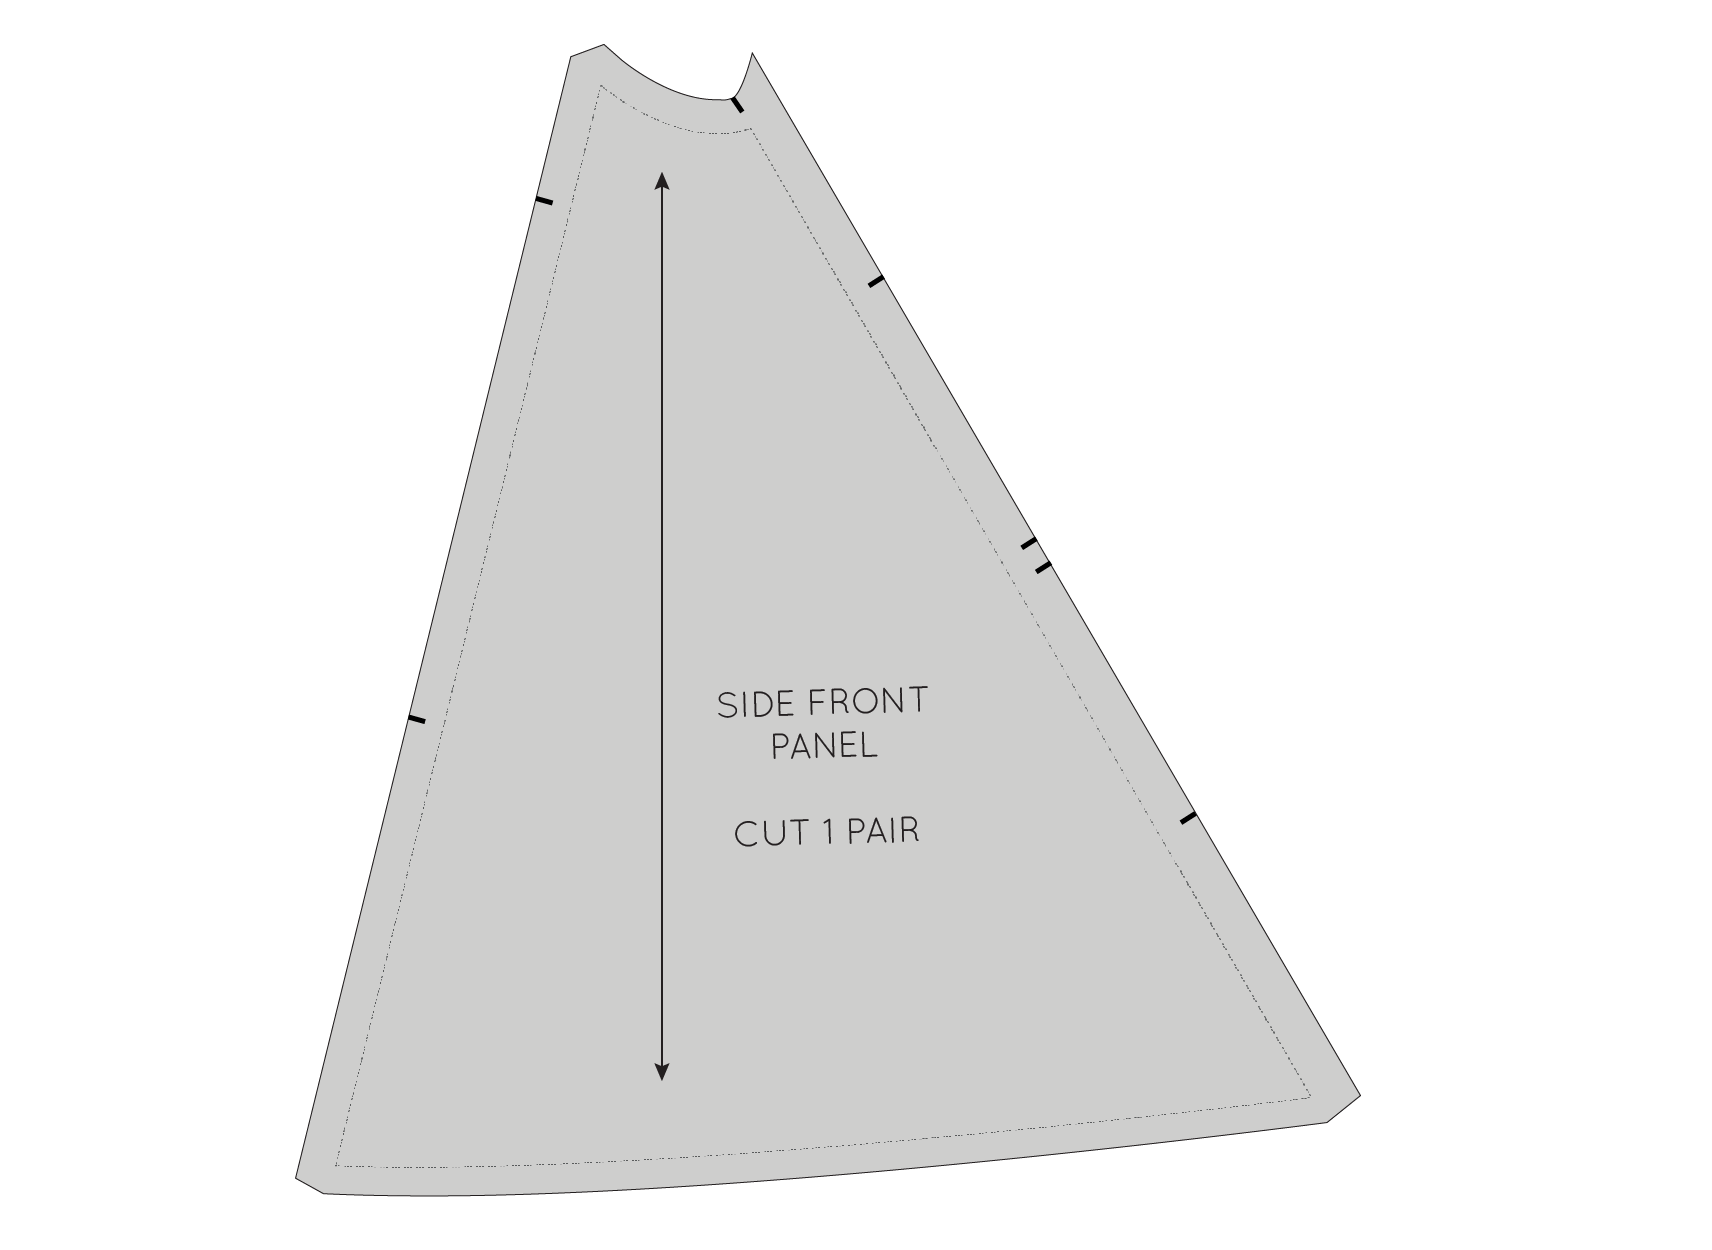
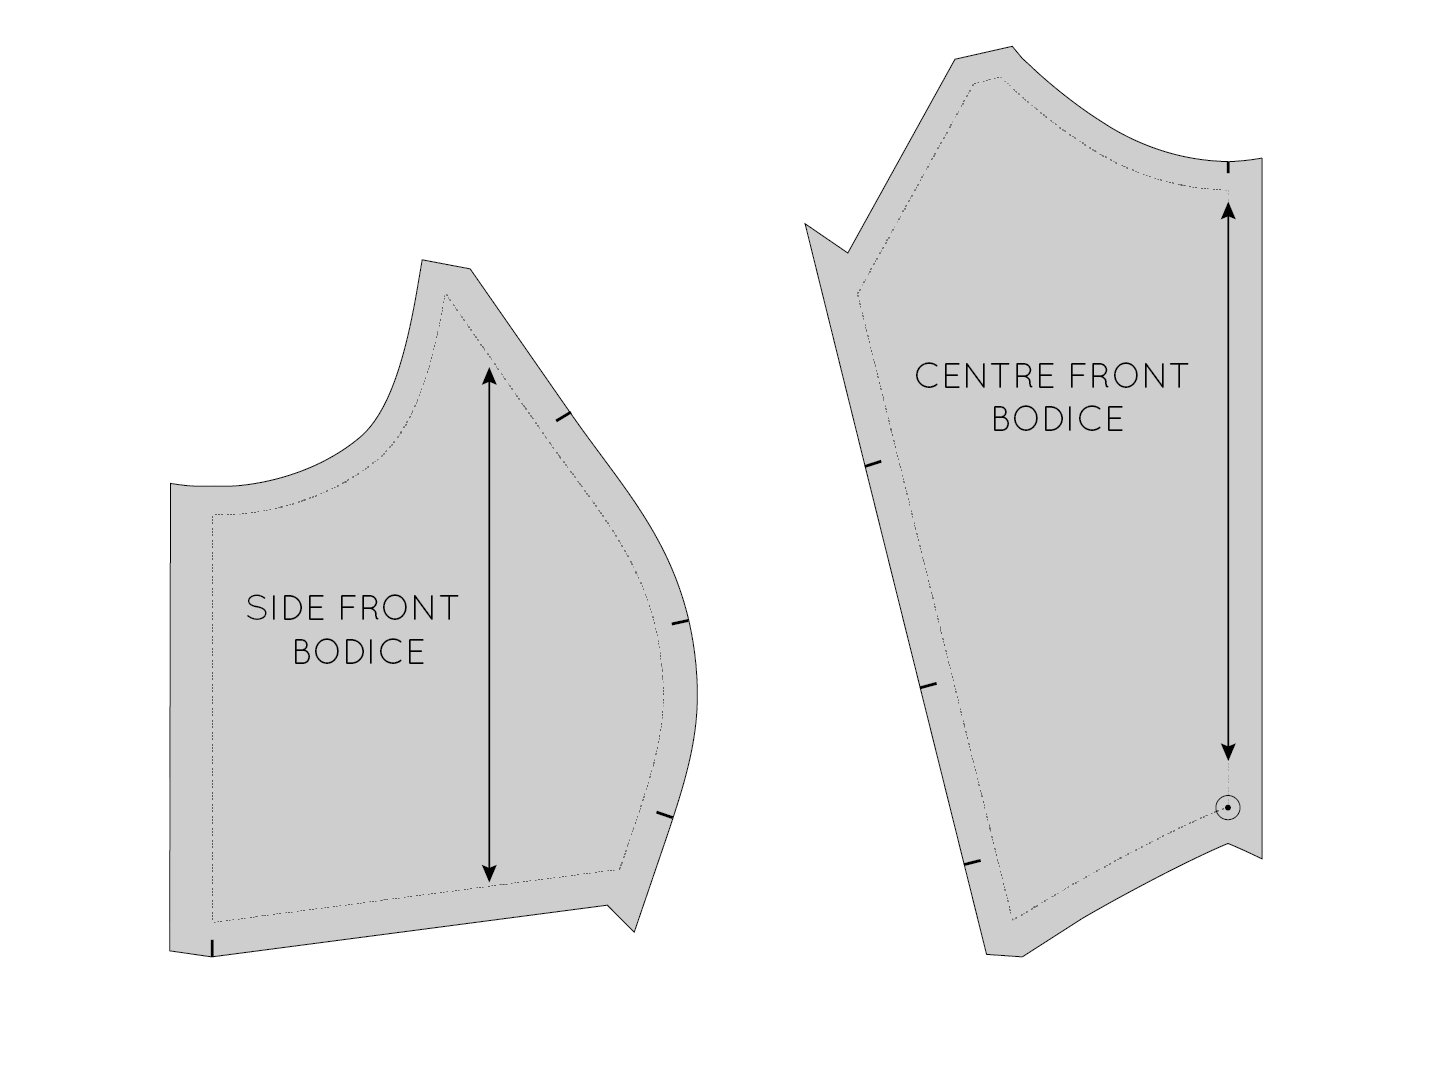
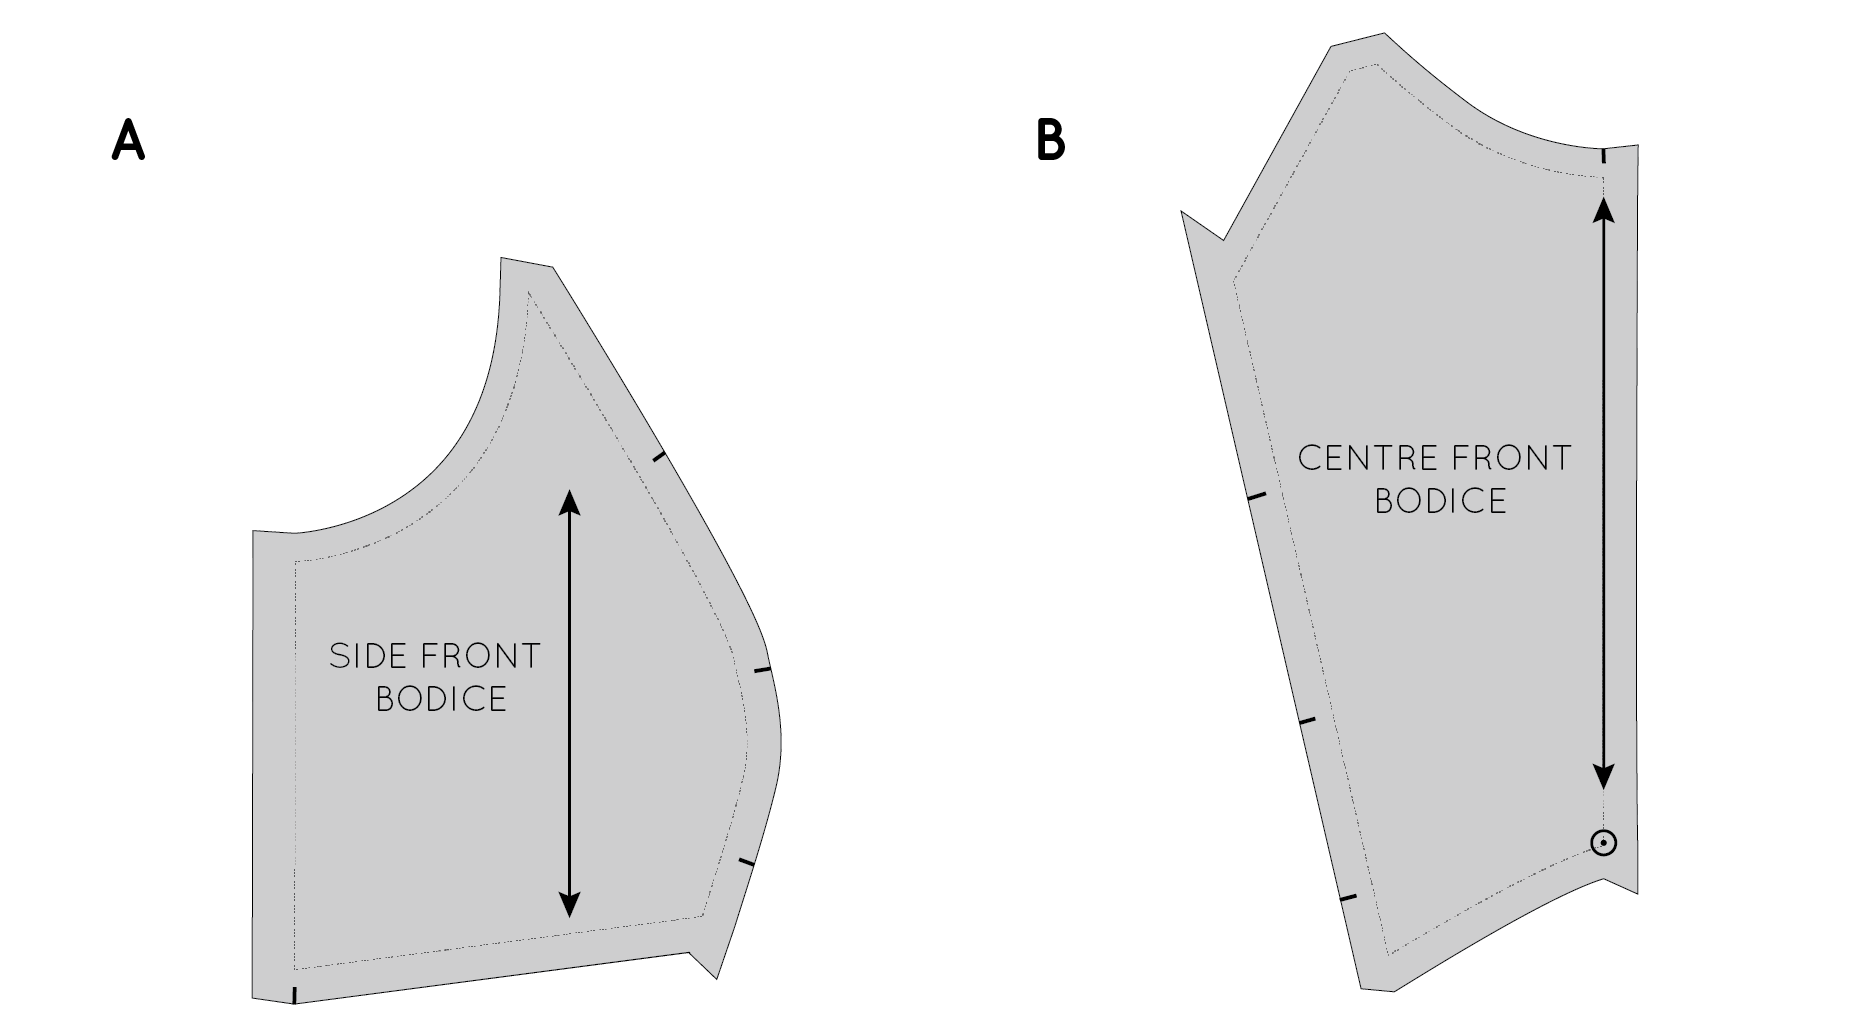
We'll start by making the adjustment to the front panels and then once that's done we'll move onto the back. To start, take the CENTRE FRONT PANEL piece and the SIDE FRONT PANEL piece. You can use the actual pattern pieces, or trace a copy if you would prefer to keep the original pieces intact.

Lengthen the pattern piece

You will notice that there is a 'Lengthen and shorten' line on each pattern piece. Take the pieces you are adding length to and cut through each of these lines - separating each piece into two. 

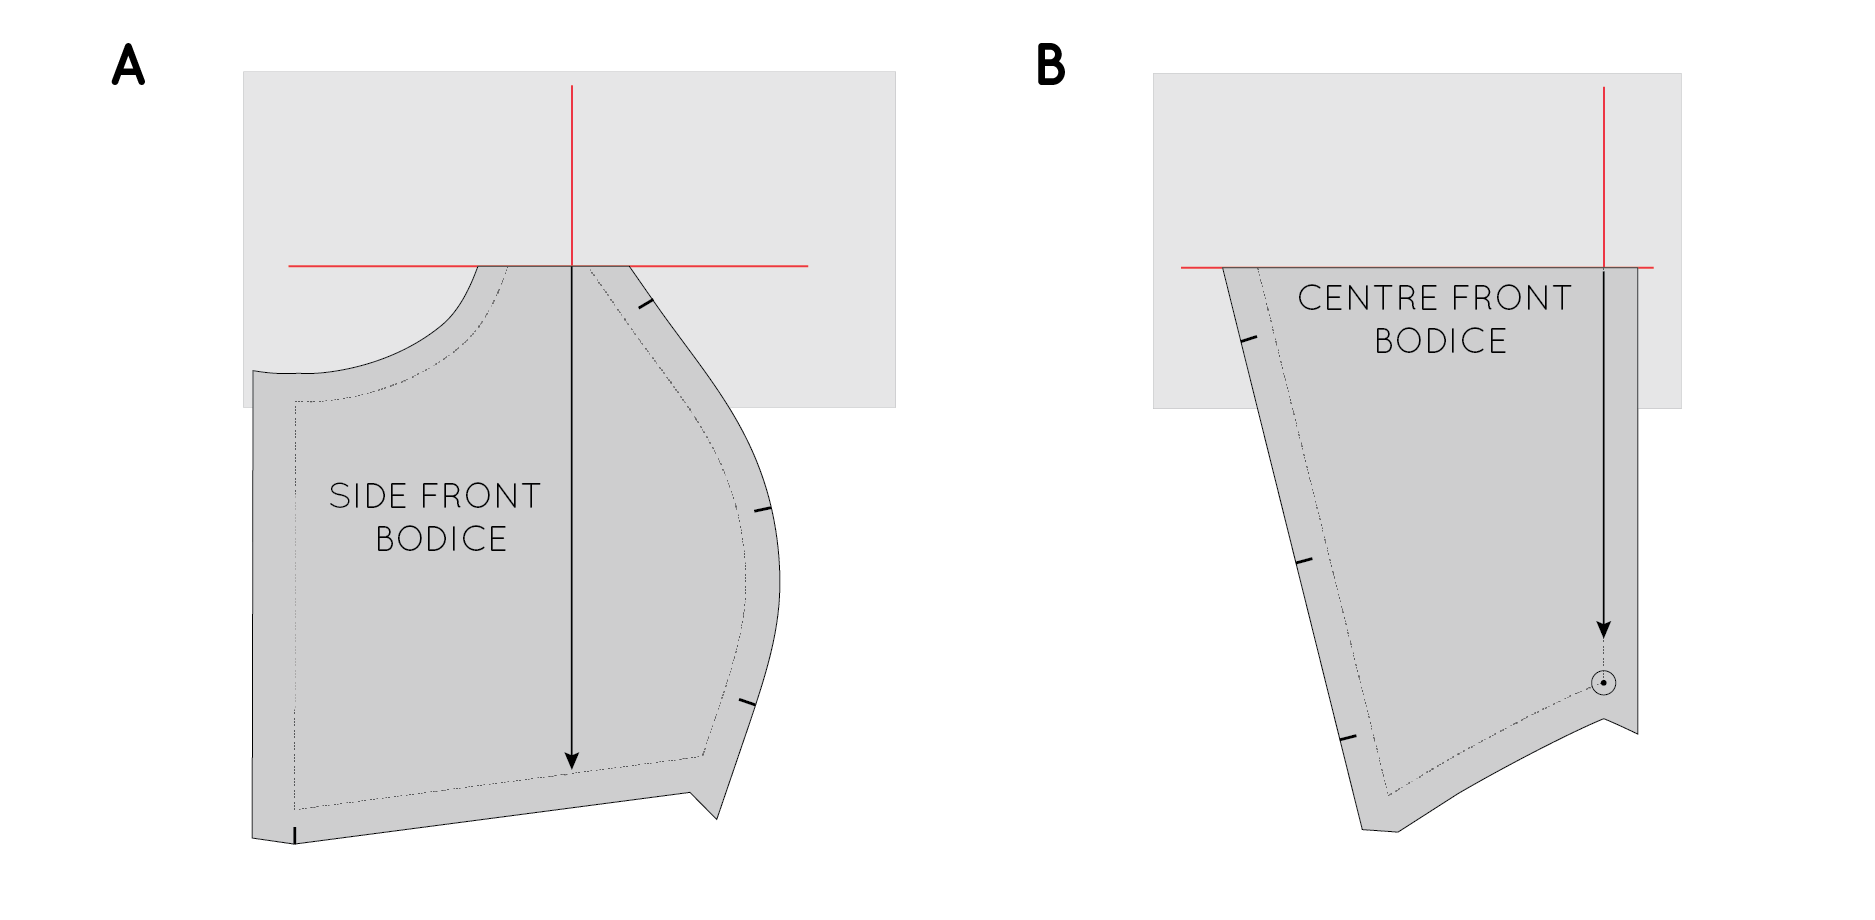
Take a blank piece of pattern paper (the amount you need will depend on how much length you are adding to your pattern) and mark a grainline on the left-hand side of the paper.

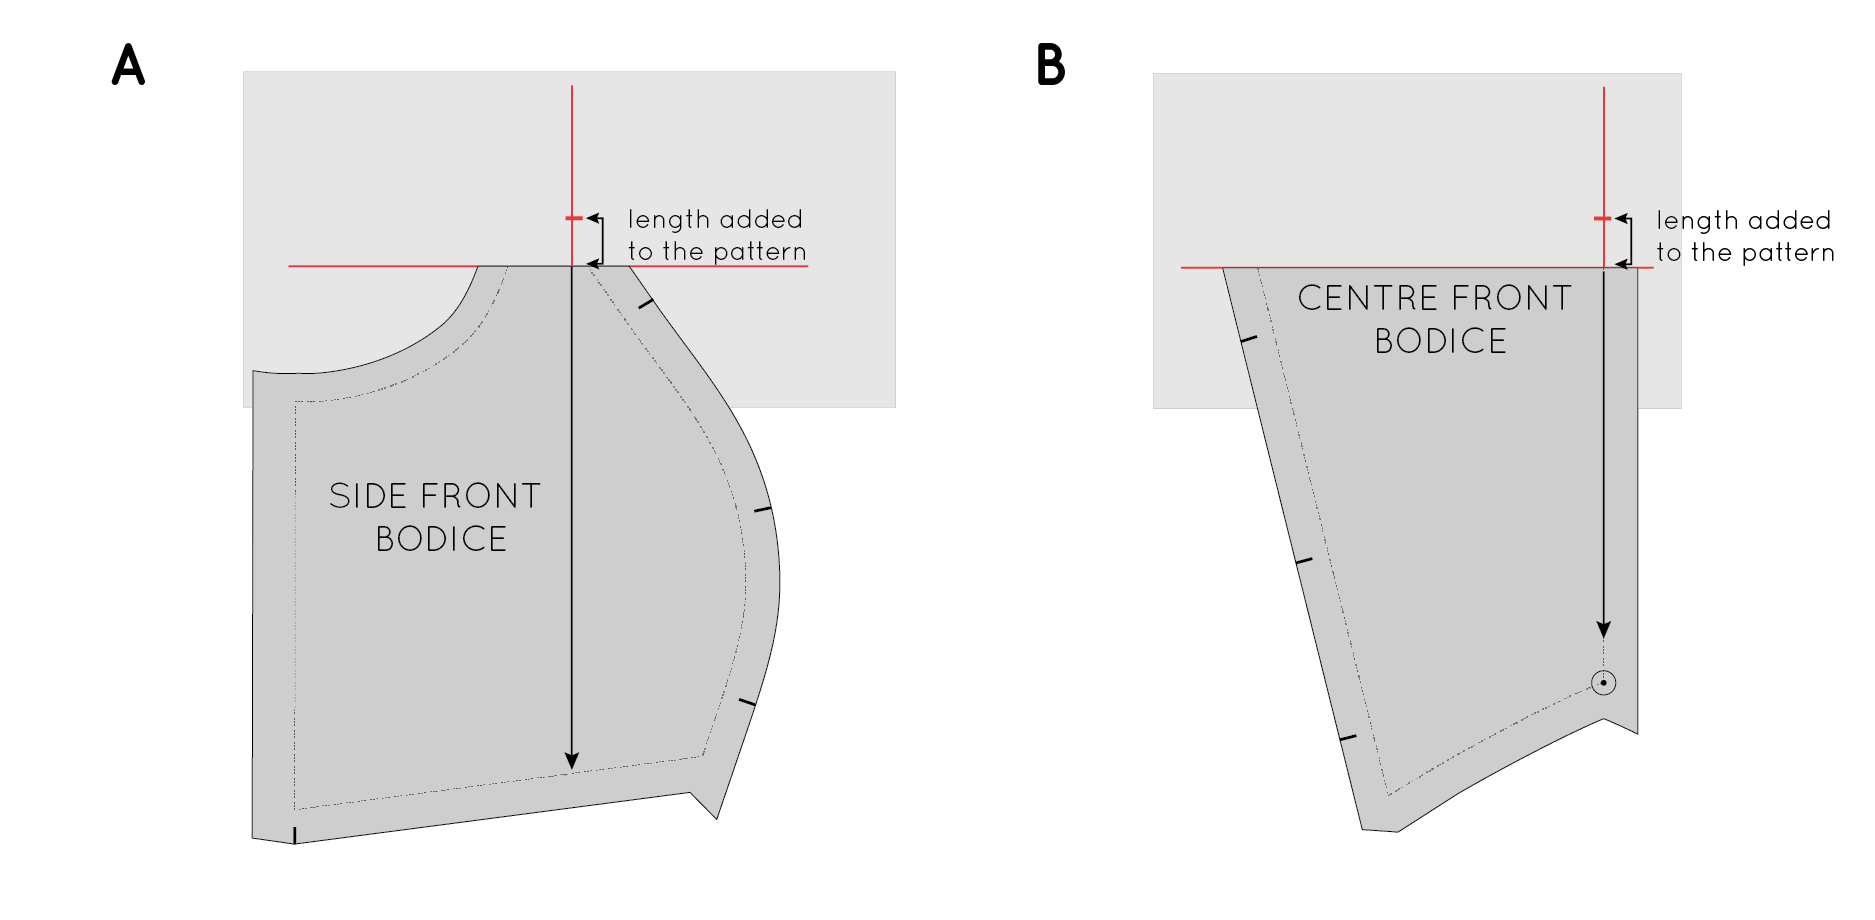
Now mark two horizontal lines, close to the bottom of the paper. You need to space the lines apart by the length you would like to add to the pattern. For example, if you would like to add 10cm (4in) to the pattern, space the lines 10cm (4in) apart, making sure they are parallel to each other, and perpendicular to the grainline.

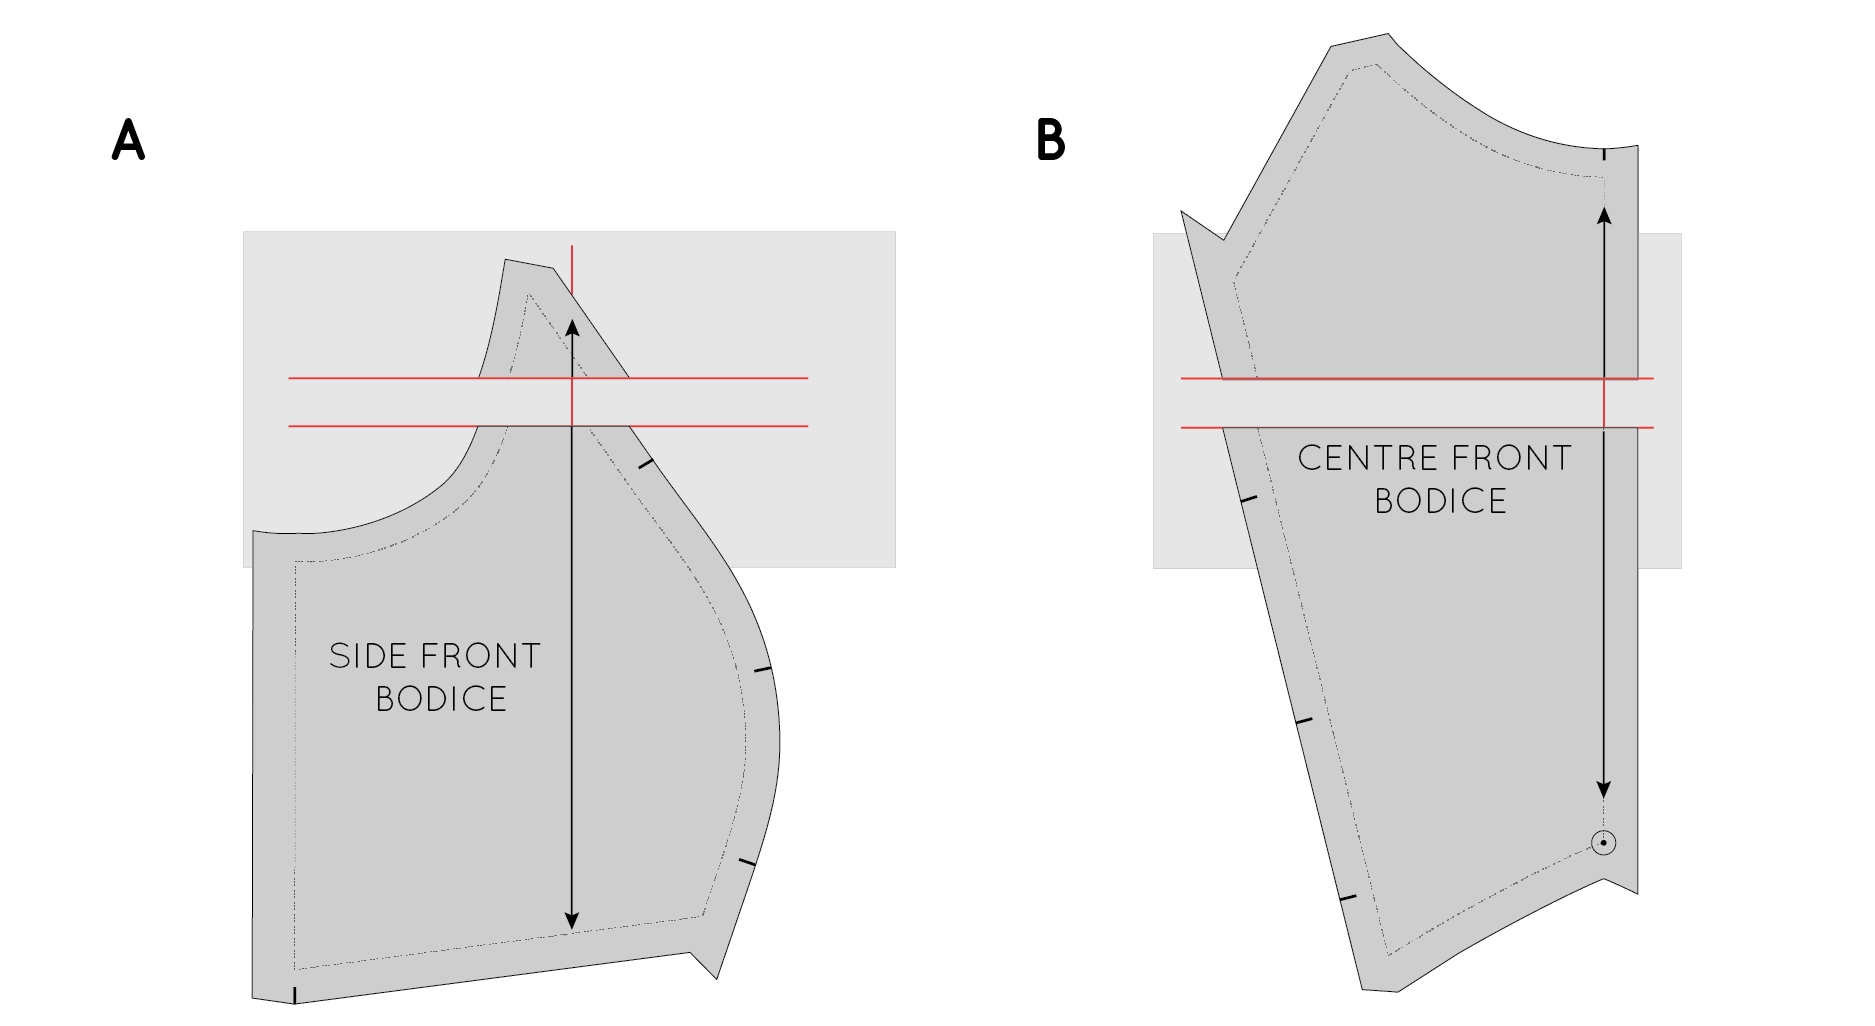
Now, starting with the CENTRE FRONT PANEL pieces, line up the bottom section of the piece with the lower line, and the top section of the pattern with the upper line. Make sure the grainline (in this case the centre front) lines up with the grainline you marked on the pattern paper. Tape or glue pieces in place. 

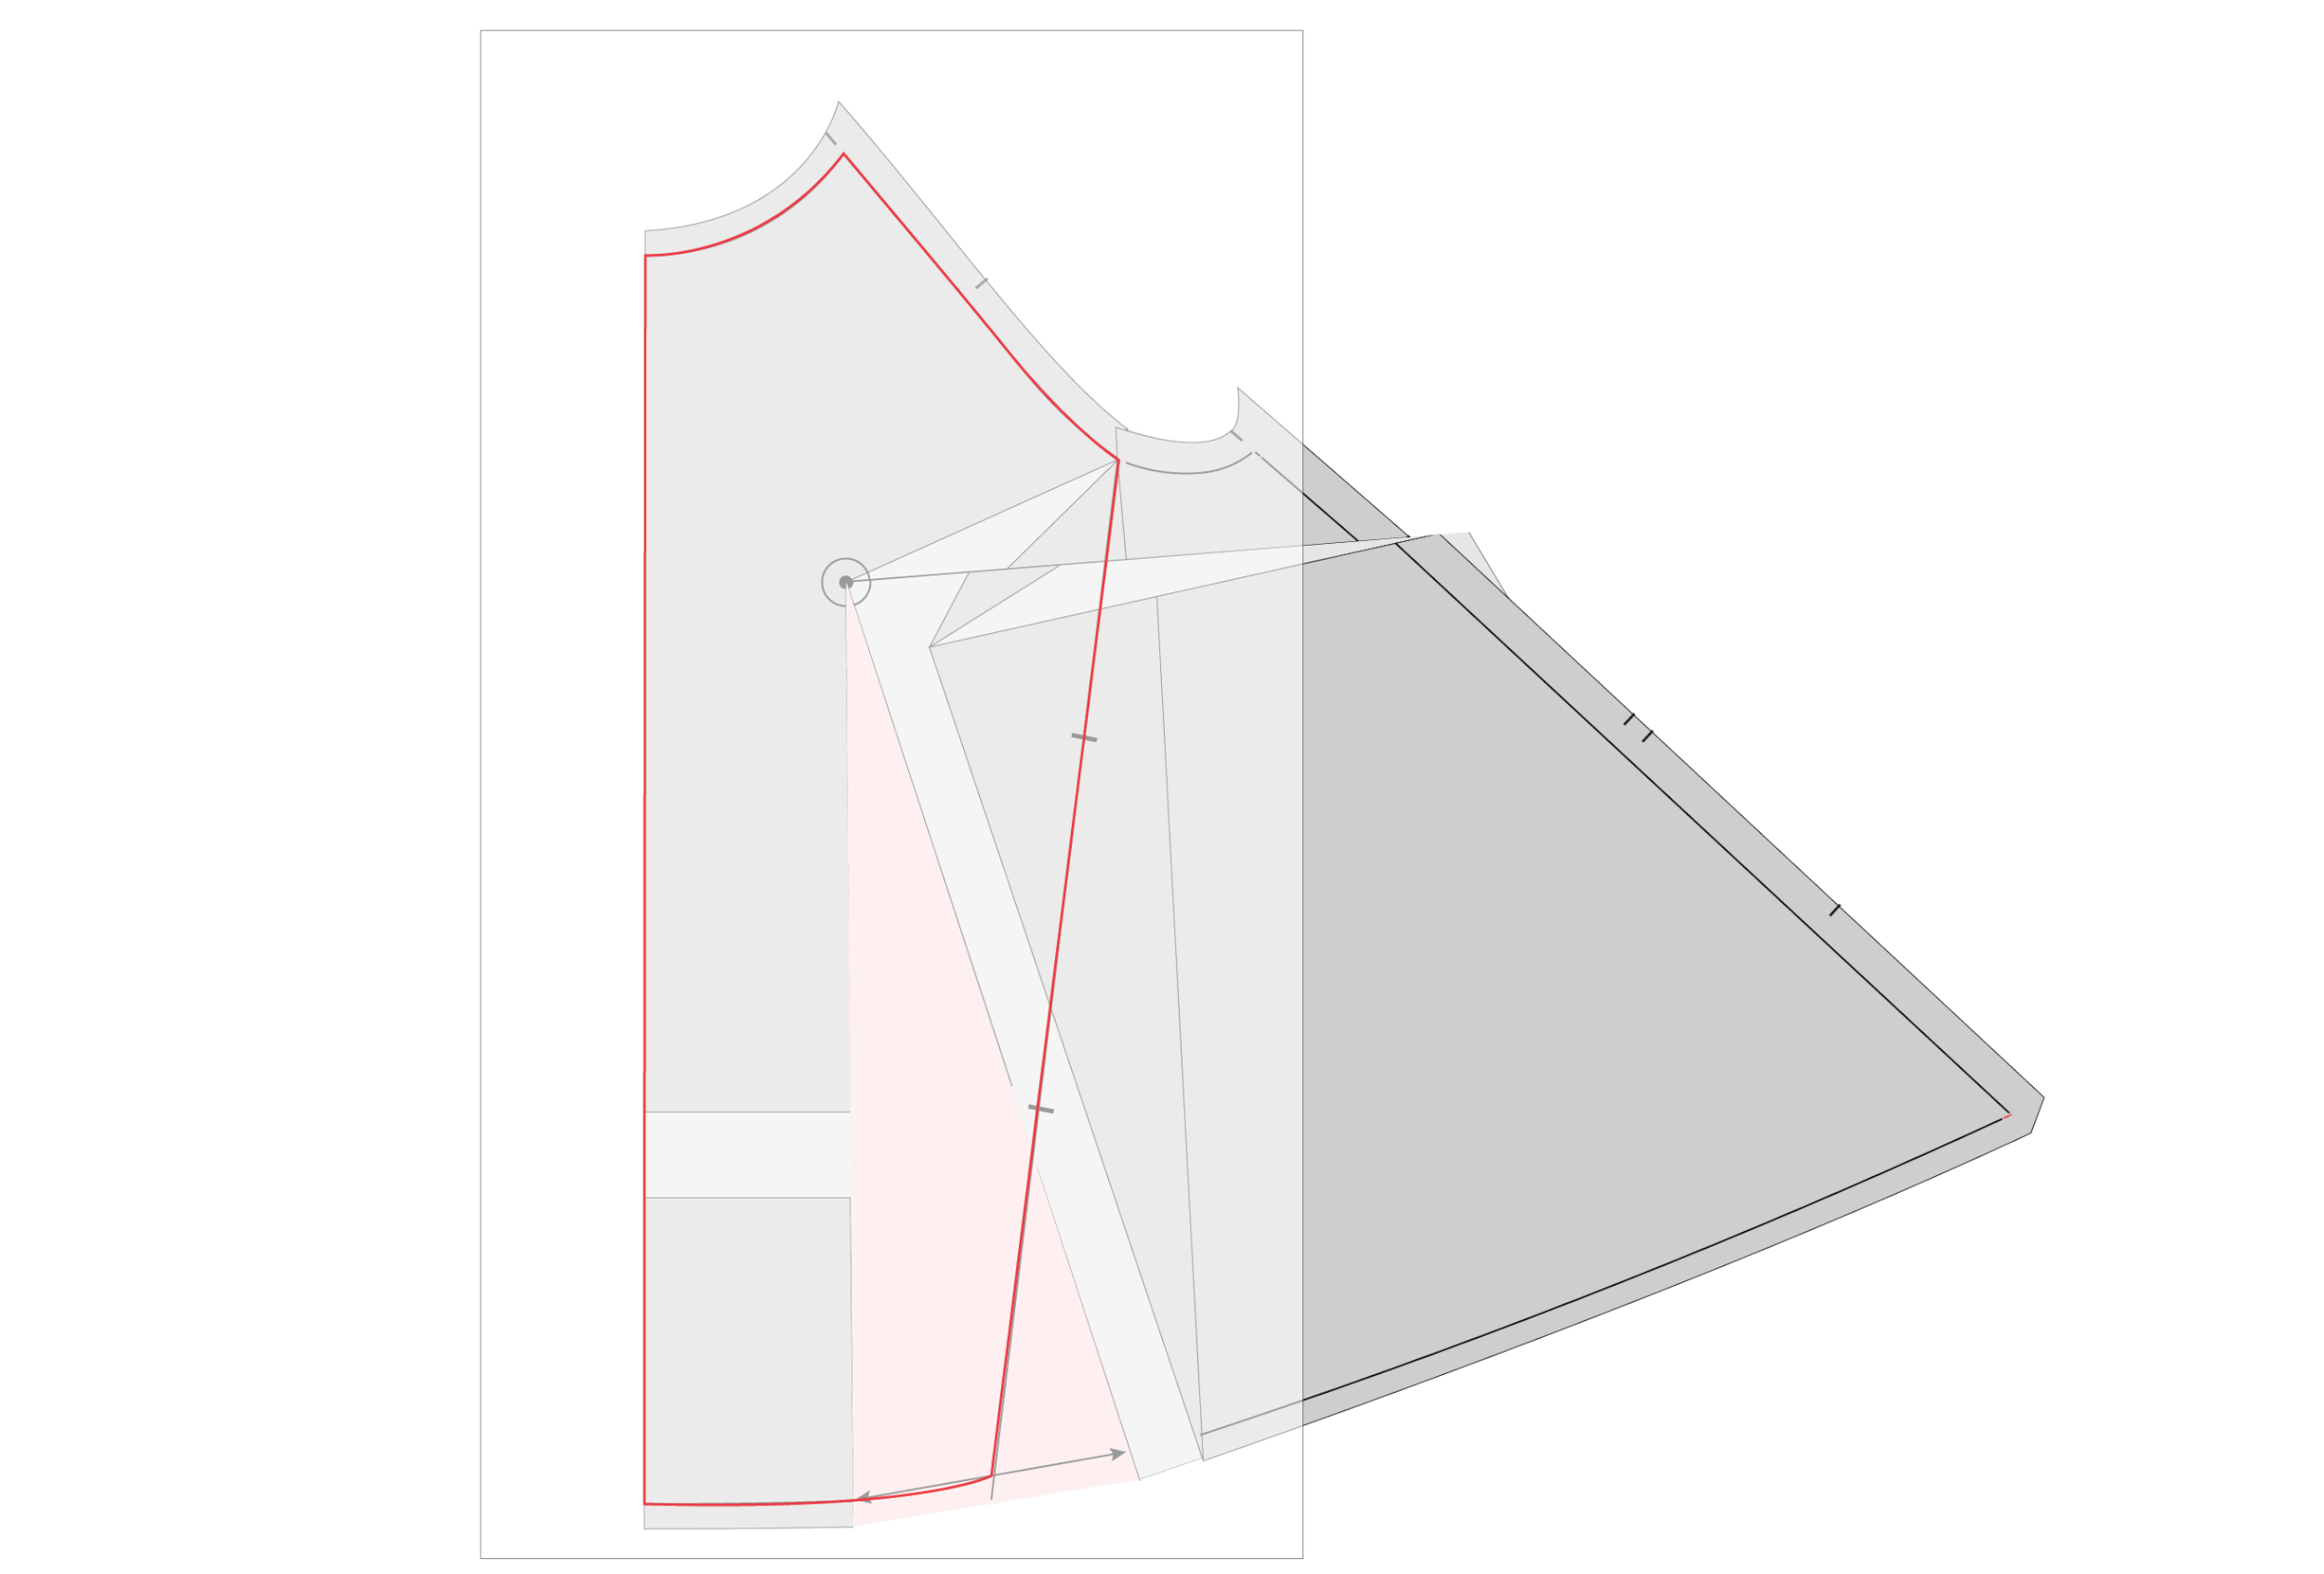
Re-draw the seams

We now need to re-draw the panel lines to fill the gap that was created by adding length to the pattern. To do this, take a ruler and draw a straight line from the stitch line (marked by a grey line on each pattern piece) at the top of the pattern piece, to the stitch line at the hem. 

Do the same thing for the cutting line (draw a straight line from the top of the cutting line at the top of the pattern to the cutting line at the hem).

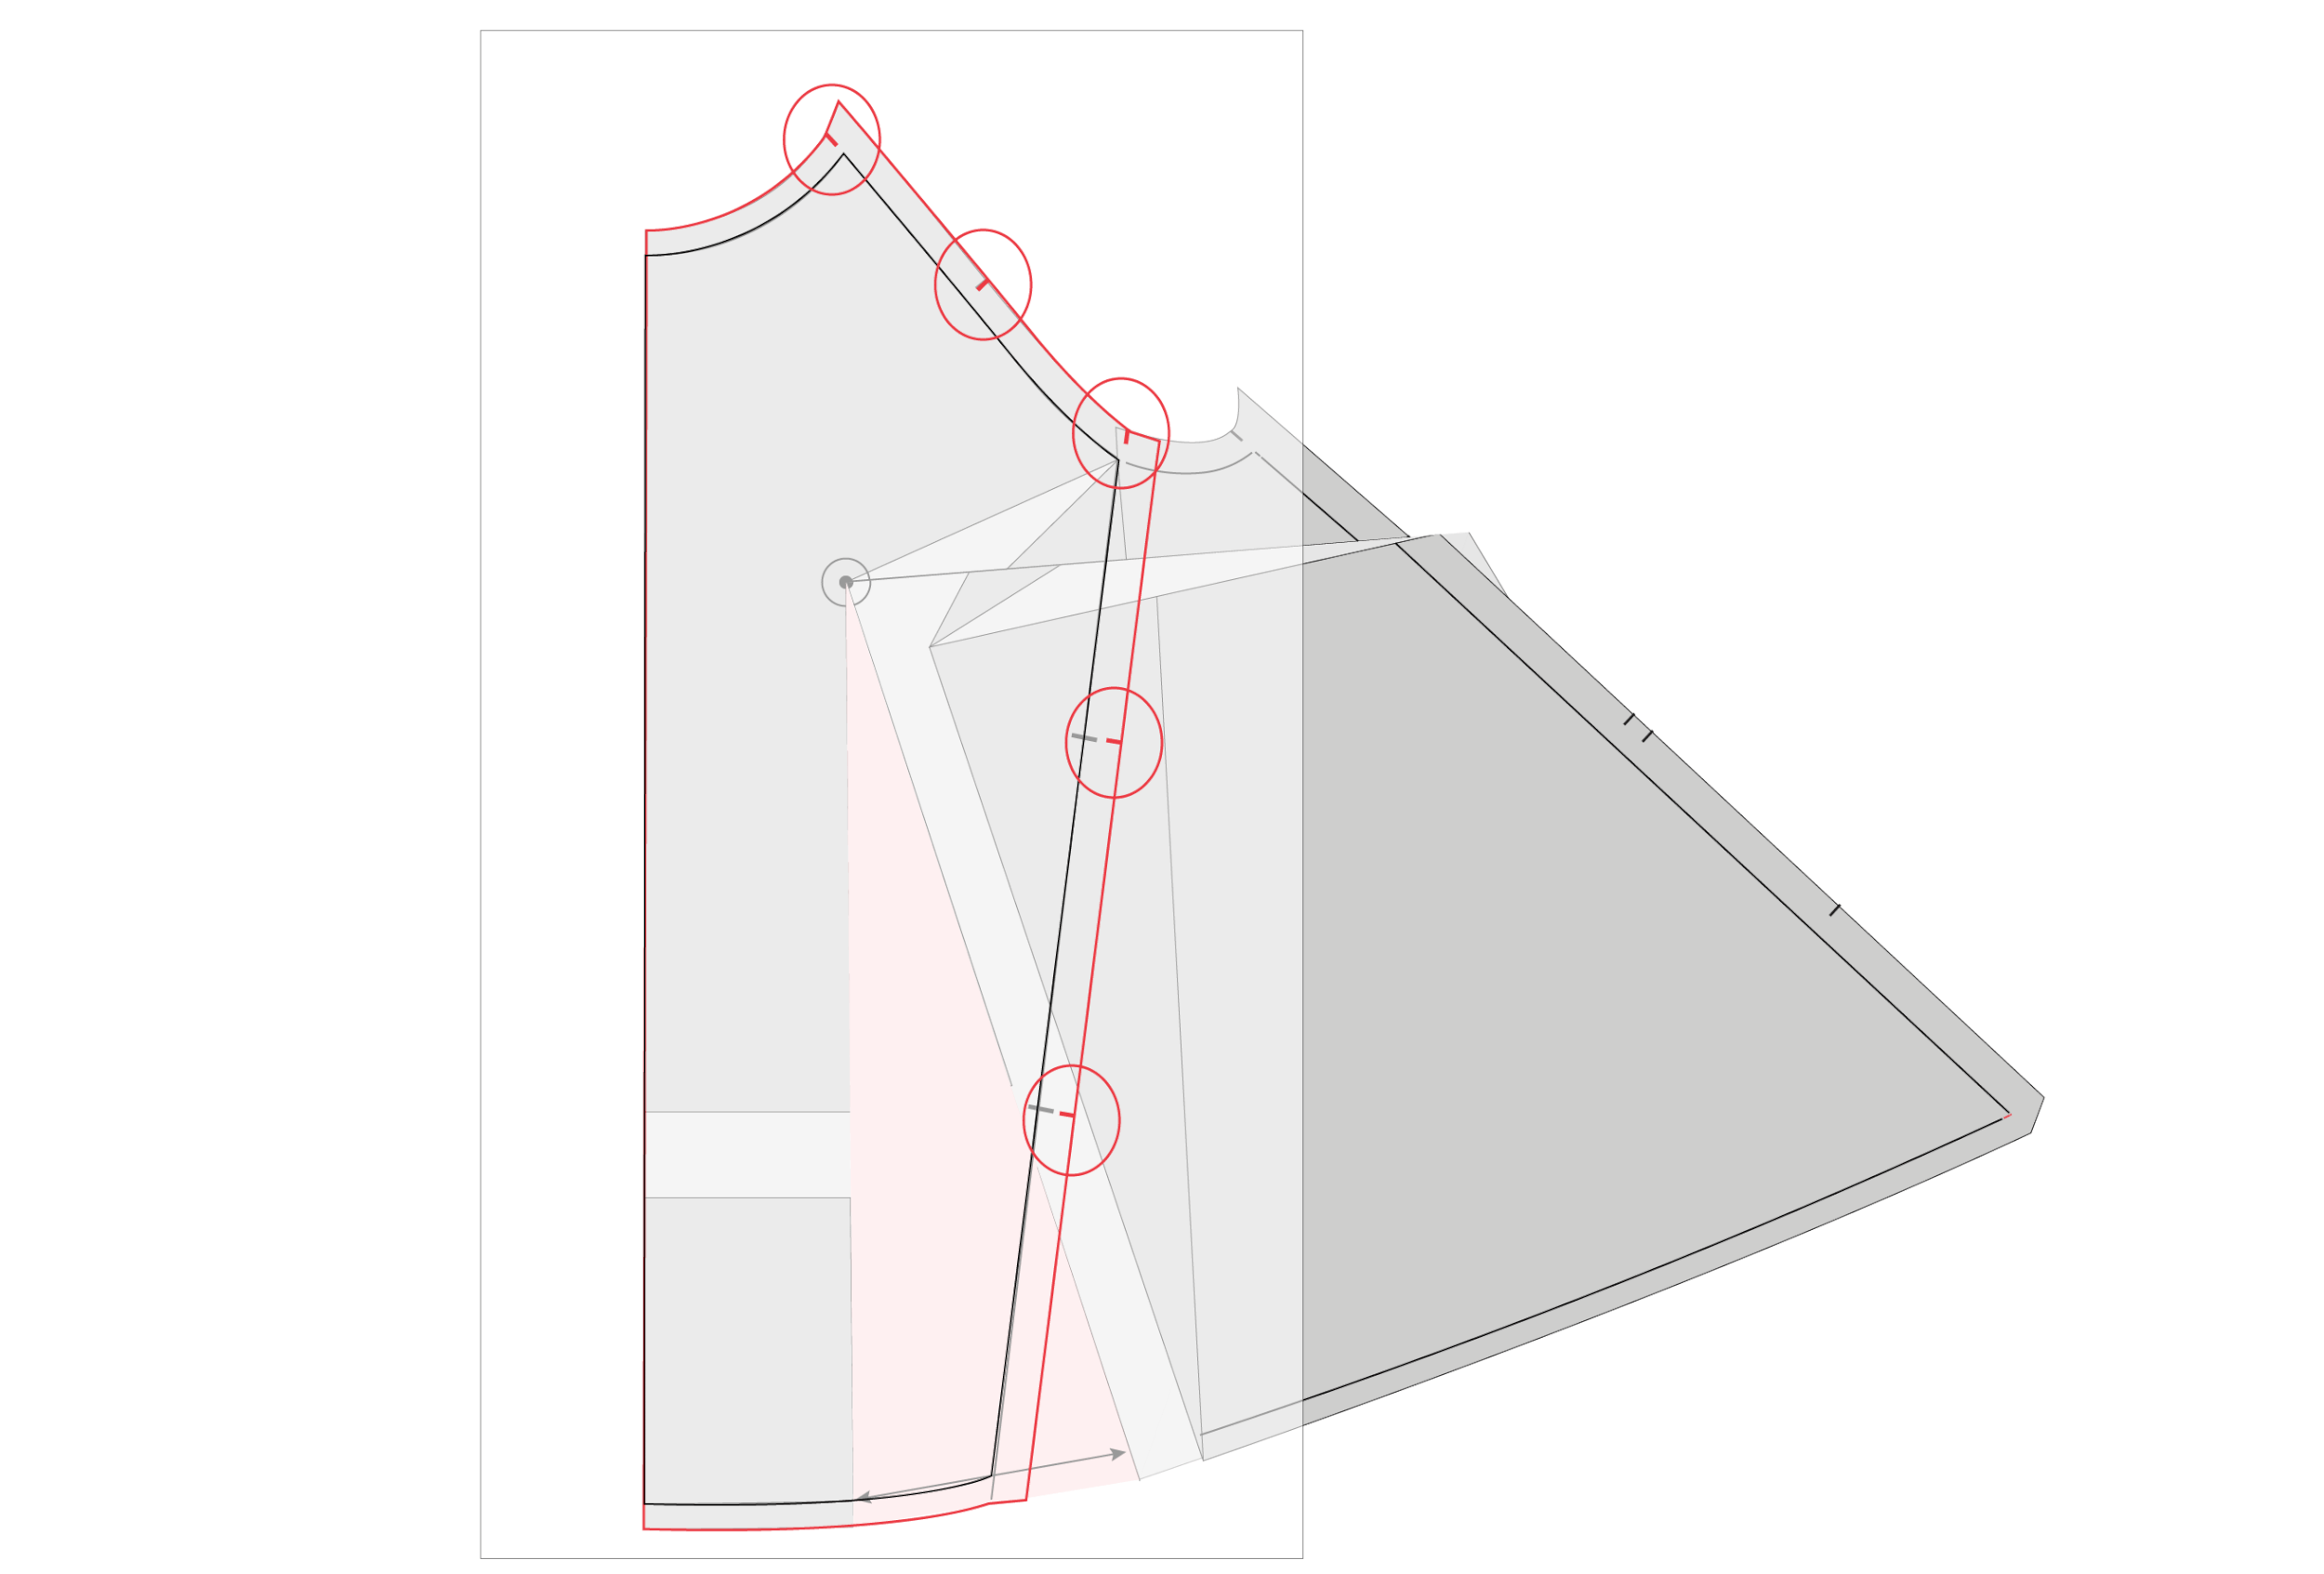
You will notice that with your new seam, the notches have become slightly displaced. Extend the original notches until they meet the new seam line. 

At this point you can either cut off the excess paper on the pattern piece, or trace the new lines to create a completely new pattern piece. 

Repeat for side panel

Repeat the process for the side panel. In this case, you will need to draw the grainline in the centre of the pattern paper. Make sure you add the same length to each piece. For example, if you added 10cm (4in) to the CENTRE FRONT PANEL, you will need to add 10cm (4in) to the SIDE PANEL. 

Re-draw the panels in the same way you did on the front piece. 

Move the notches so they are in line with the new seam lines. Cut out the piece or trace onto a separate piece of pattern paper. 

Check pattern pieces

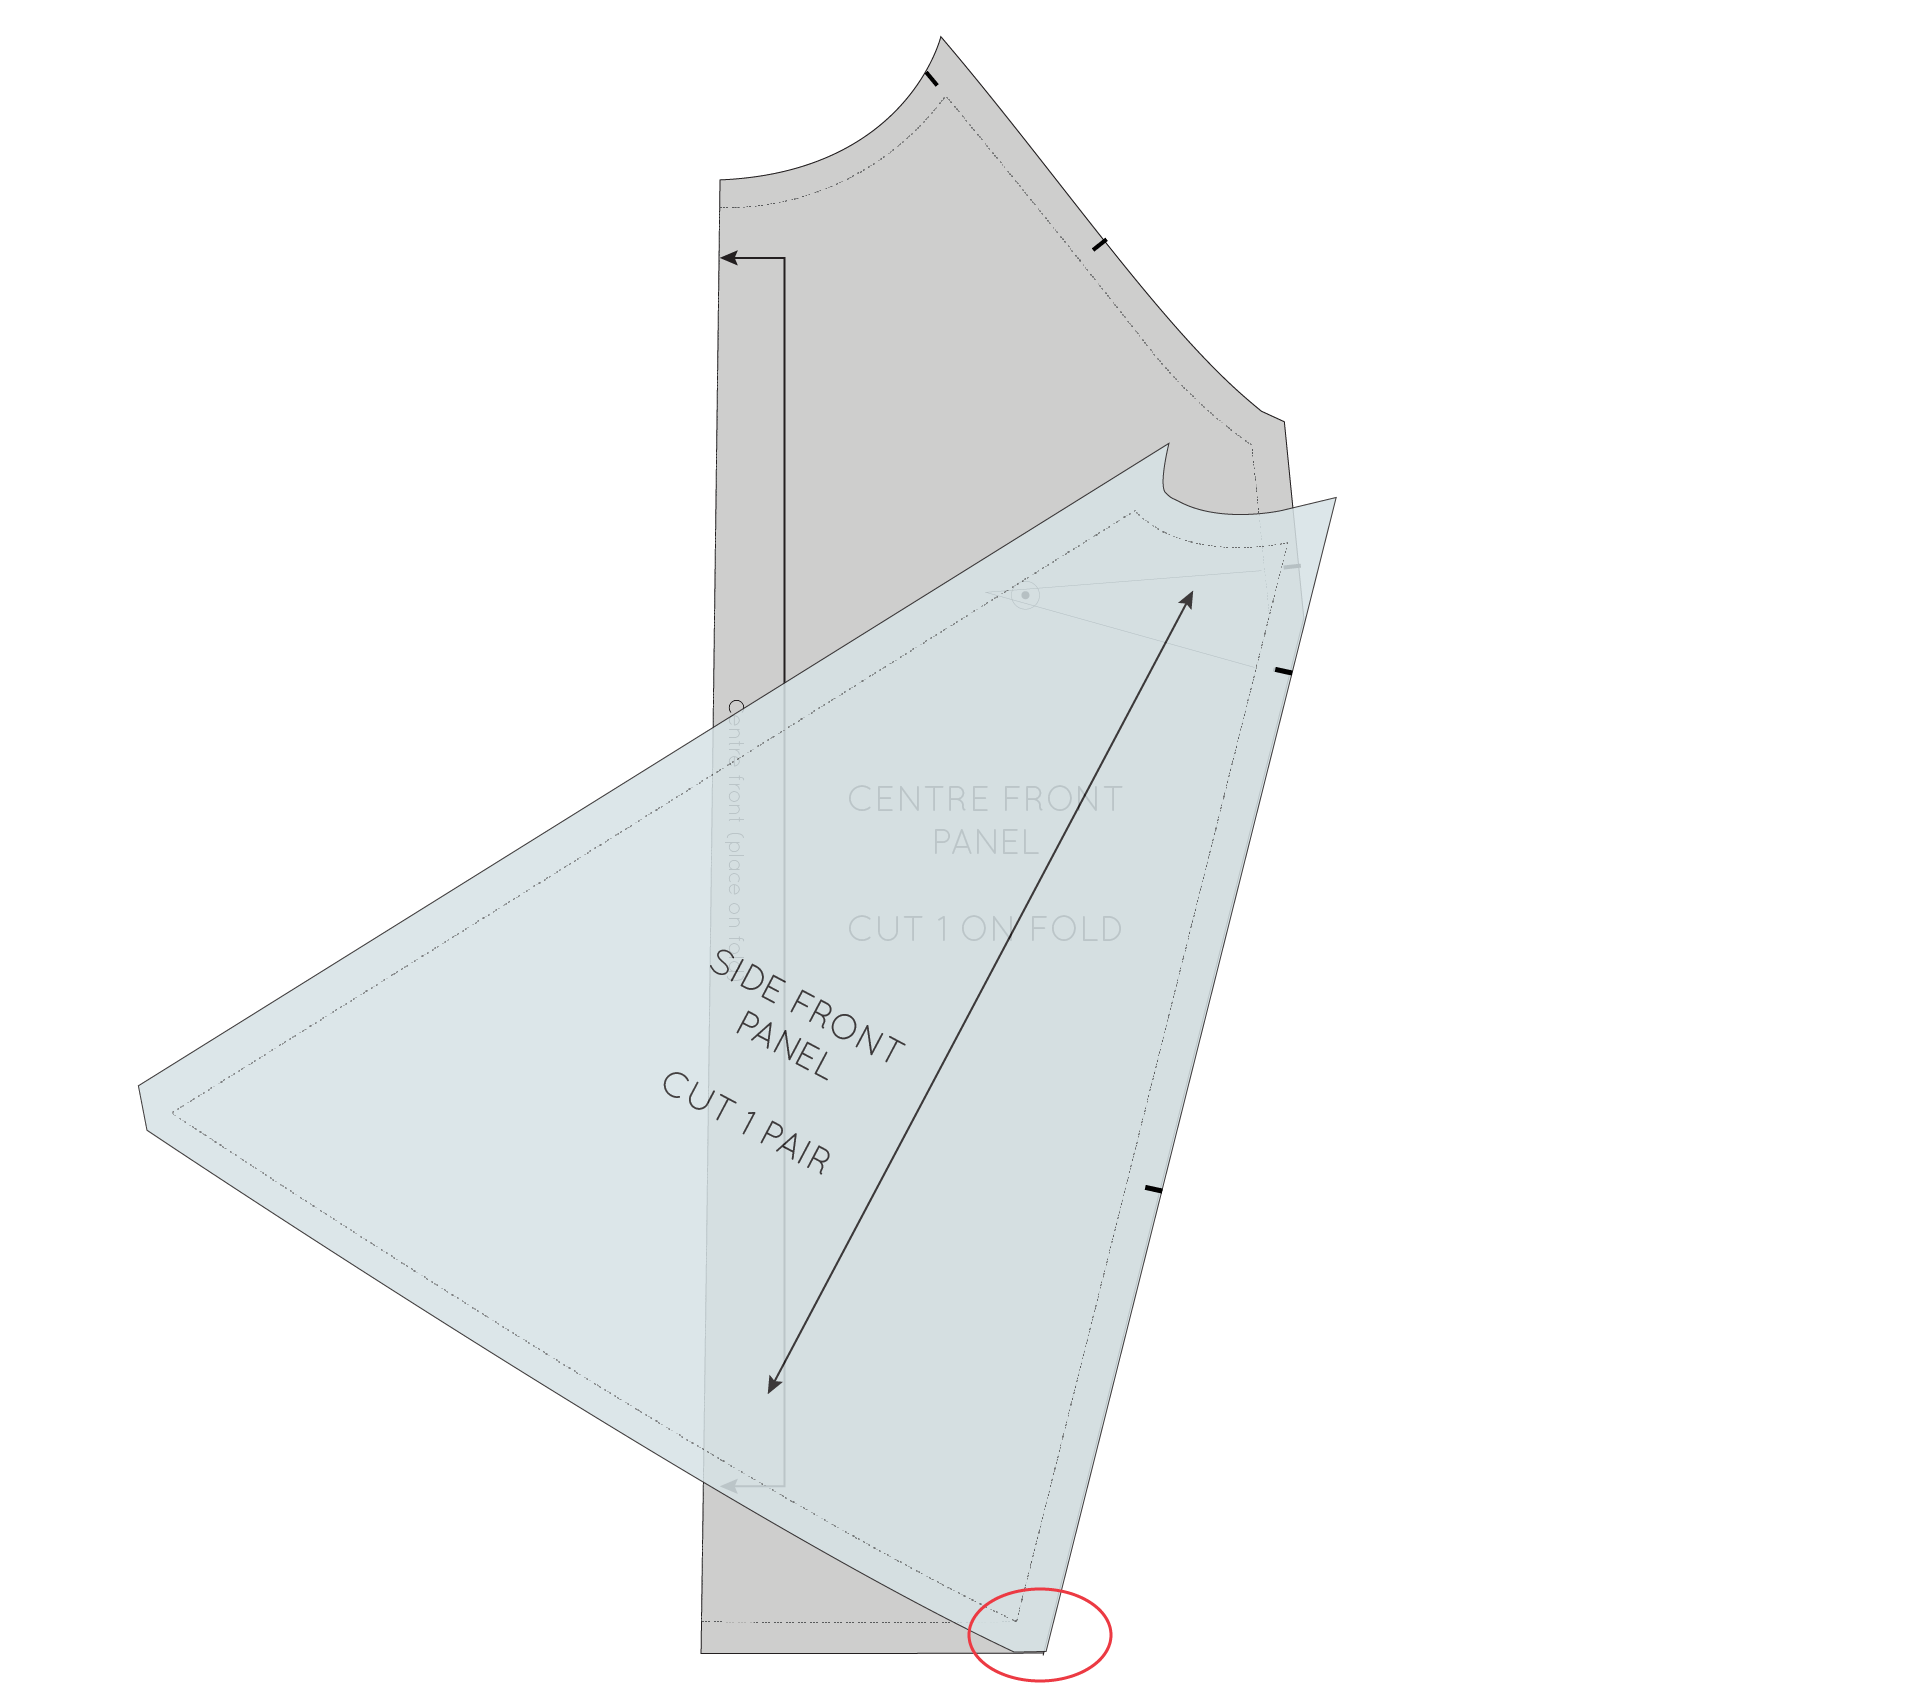
Before going any further, check that the pattern pieces fit together properly and that the notches line up correctly. To do this, place one piece on top of the other, aligning the stitch lines as if you were sewing the pieces together (you will need to flip the SIDE FRONT PANEL so that it's right side down).

For more detail about how to go about checking that your patterns fit together nicely, you can check out this tutorial

Add length to the back panels

collins_lengthen_pattern_13.gif

To add length to the back pieces, you will first need to tape the LOWER CENTRE BACK PANEL to the UPPER CENTRE BACK PANEL. This way you can make the adjustment and then re-cut the LOWER CENTRE BACK PANEL piece, so that everything remains in proportion (you don't want to add all the length to the UPPER CENTRE BACK PANEL as it would really change the design of the top). To do this, align the stitch lines of each piece, one on top of the other, and tape place.


Cut through the 'Lengthen / Shorten lines' on each piece, in the same way you did for the front pieces. Add length to each piece (the same amount you added to the front) and then re-draw each seam line. 

Re-draft back panel pieces

Measure the stitch line on the panel line. On the original pattern (before the adjustment), the panel line cuts the seam about three-fifths down the seam line, which means we need to find three-fifths of this new panel line. To do this, measure the line and then multiply it by 0.6 (three-fifths as a decimal). 

Measuring down from the top of the panel seam, mark a point three-fifths down from the top (the measurment you found in the prvious step).

collins_lengthen_pattern_15.gif

Mark a horizontal line (perpendicular to the centre back) through the point marked in the previous step. 

This will be your new panel line. 

Before splitting the piece into two separate pieces, mark a double notch on the seam line. This means that when you separate them, you will have a marking for how they go back together. 

Cut through the new seam line - separating the pattern back into two pieces. 

Add seam allowance

Add 1.5cm (5/8in) seam allowance to each side of the cut line - moving the notches to meet the edge of the pattern. For more detail on adding seam allowance to a pattern, check out this tutorial.

You will notice that on the LOWER CENTRE BACK PANEL piece, the seam allowance doesn't follow the same angle as the panel line. This is so that when this seam is stitched and the seam pressed down towards the lower panel, the seam allowance will sit flush with the seam and not stick out. For more notes on this and a detailed explanation of how to use this technique yourself, you can take a look at this tutorial

Check back pattern pieces

Again, you will be wanting to check that the pieces fit nicely together and that the notches are in the right place. You may have realised that the middle notch on the SIDE BACK PANEL will no longer be in the correct position as we have added length to the LOWER BACK PANEL piece. 

A : Place the SIDE PANEL on to the BACK PANELS, lining up the stitch lines, one on top of the other. First, check that they are the same length. If they are not, have a look at this tutorial on checking and truing sewing patterns, for how to adjust the seam. 

B : Check that the notches are in line (and if they are not, move one set of notches so they are in the same position). Mark a new notch at the point where the horizontal seam in the back panels meets the BACK SIDE PANEL.

And the last thing you will want to do, is also check that the front and back side panels match correctly (do this in the same way you checked the pattern pieces above).

Lengthening the sleeves


If you would like to add length to the sleeves of the Collins Top, you can do it in exactly the same way as we did for the body pieces. Here you can see an example of this. 

I hope this helps and you are feeling less daunted about adding length to the Collins Top!

See all the posts in the Collins Top Sew-along.


You may also like:

The Collins Top Sew-along : Re-drafting the facing (required after full bust adjustment)

front_facing_adjustment_cover.gif

Over the last couple of days I have shown you how to perform a Full Bust Adjustment (FBA) on the Collins Top to start off the Collins Top sew-along. The process is a little different to what you might be used to, due to the fact that the top doesn't have a dart or bust shaping through a panel and it also has a panel line. You can find the tutorial here (this tutorial guides you through the process of creating a bust dart in the centre front panel). If you would like to know how to make the adjustment without the dart, then take a look at this tutorial (you will need to create the dart and then redistribute the fullness of the dart to the hemline). 

In today's post, I'd like to show you how to re-draft the front facing piece. By making changes to the centre front panel and the side front panel of the Collins Top, the original front facing will no longer fit the pattern. You will only need to do this if you are making View B of the Collins Top (the sleeveless version) and have made a Full Bust Adjustment.


Getting Started

re-draft_front_facing_1.gif

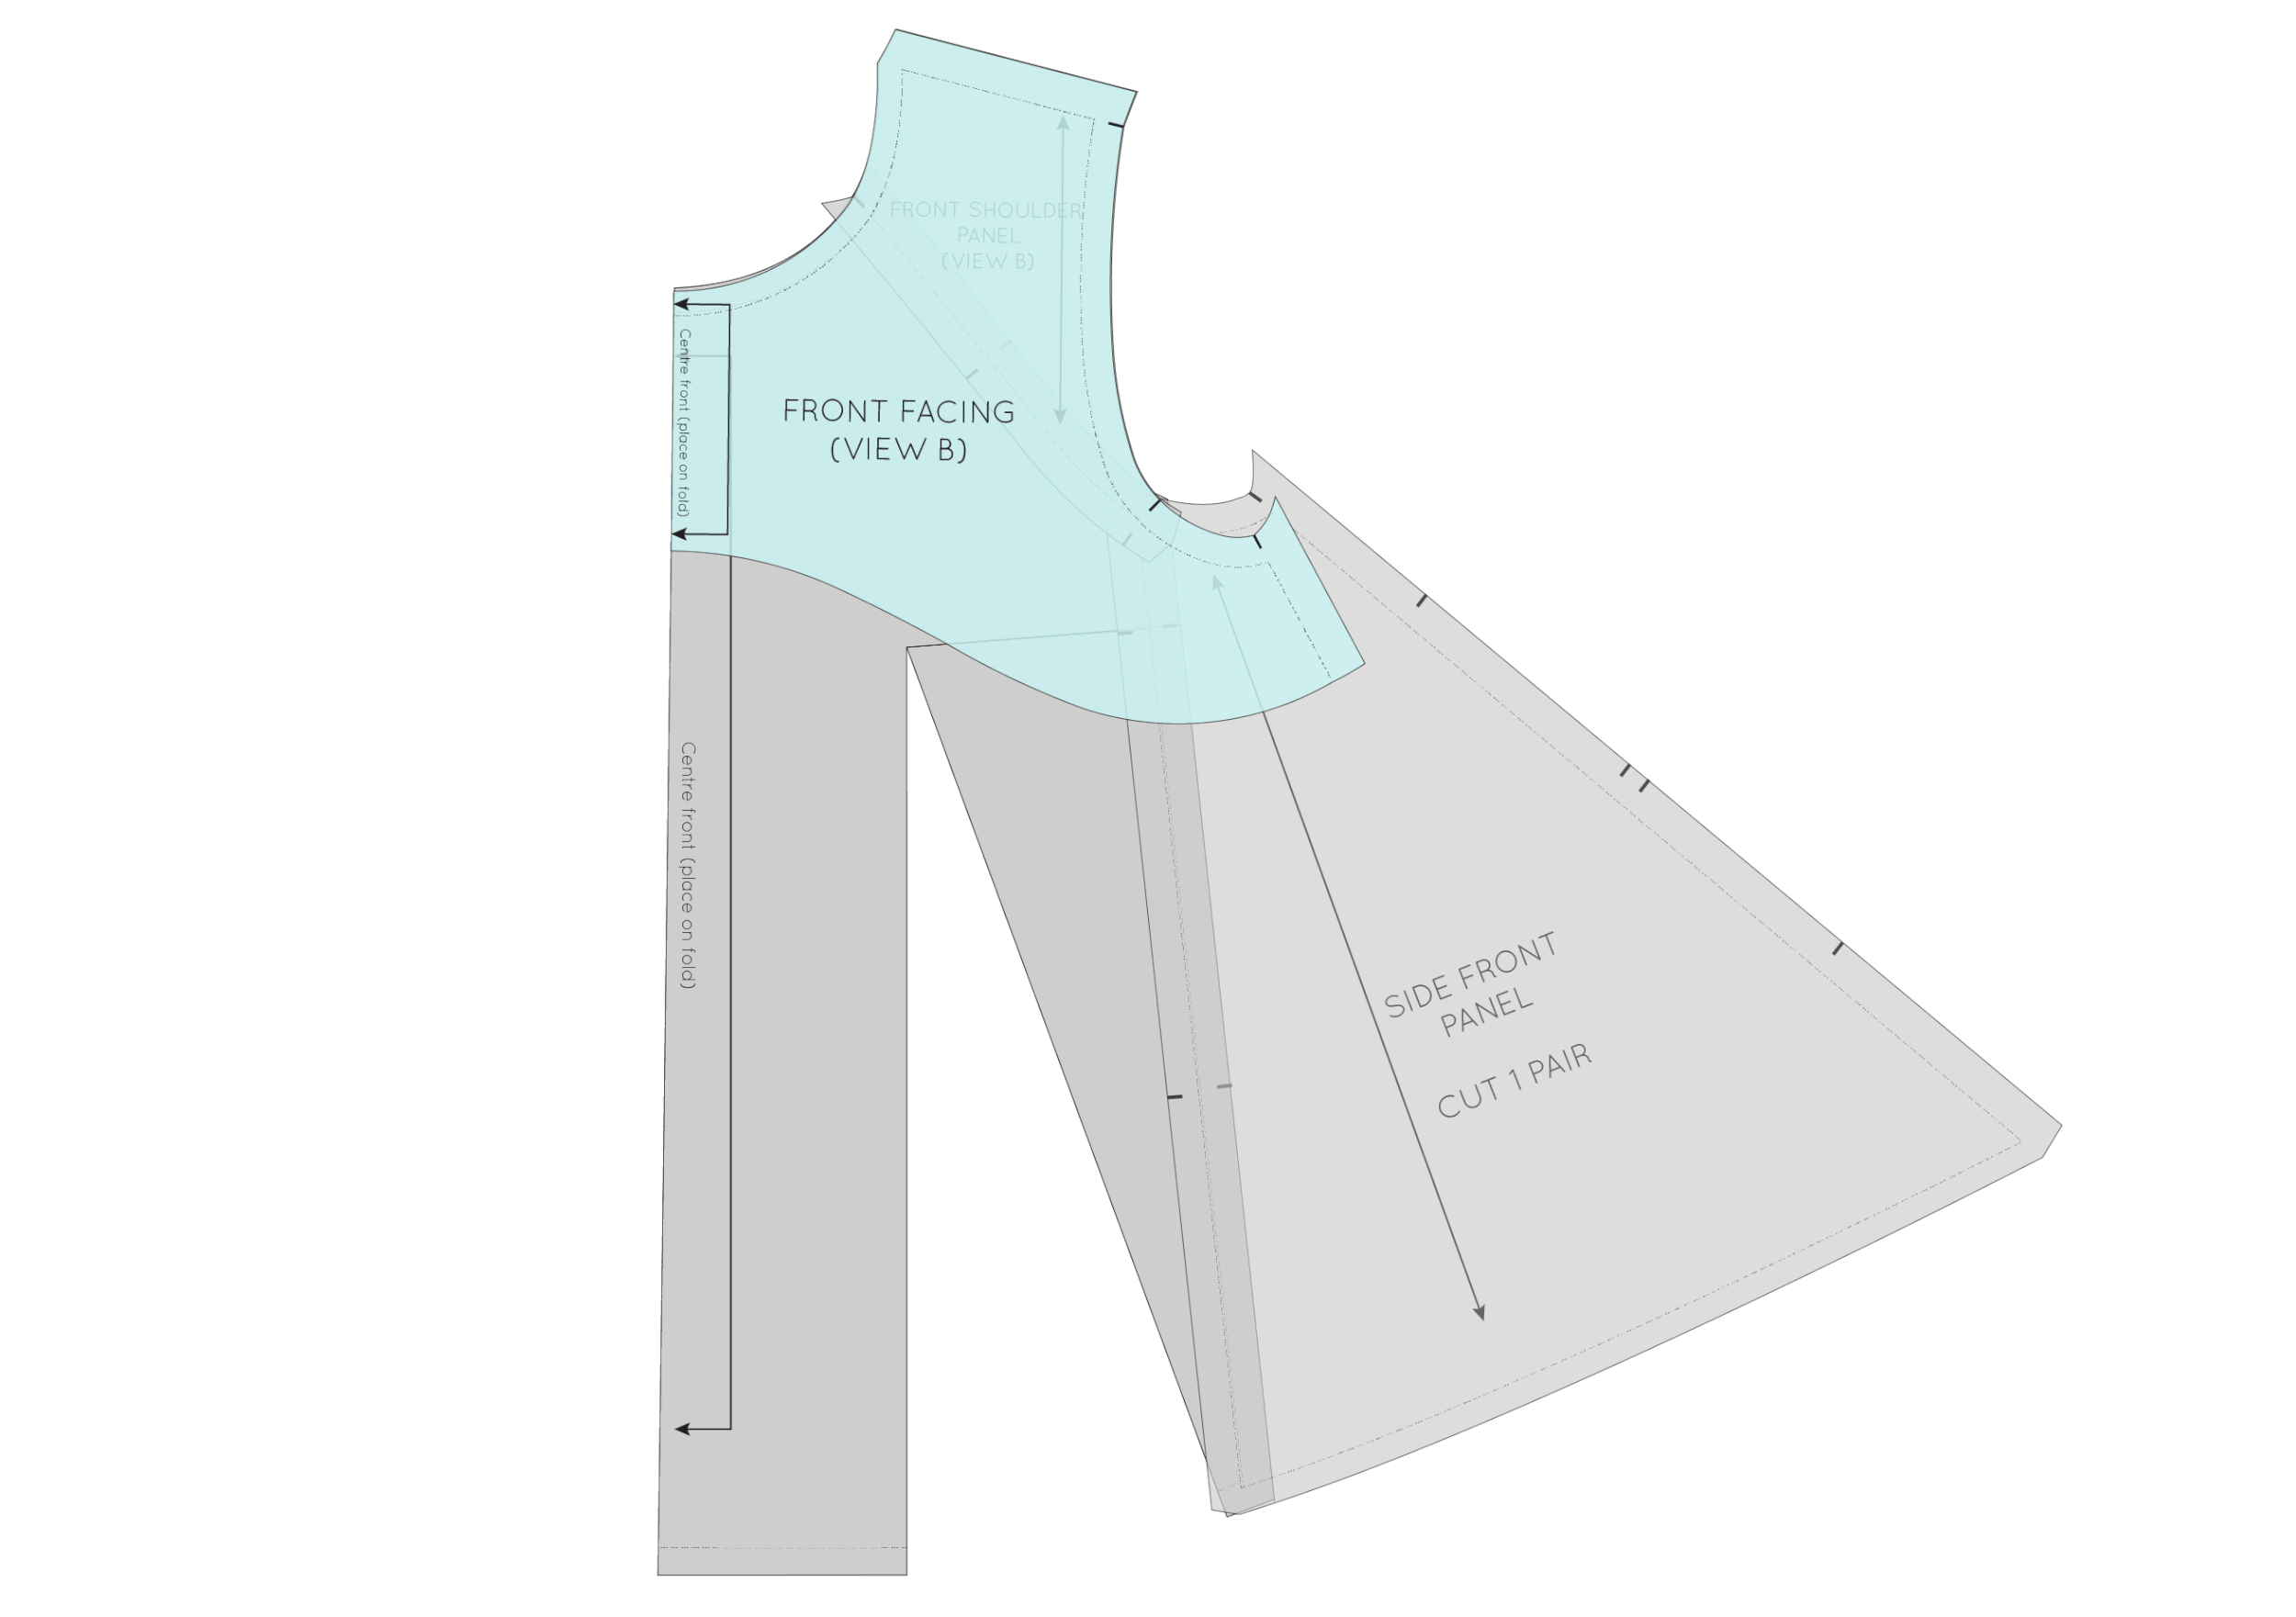
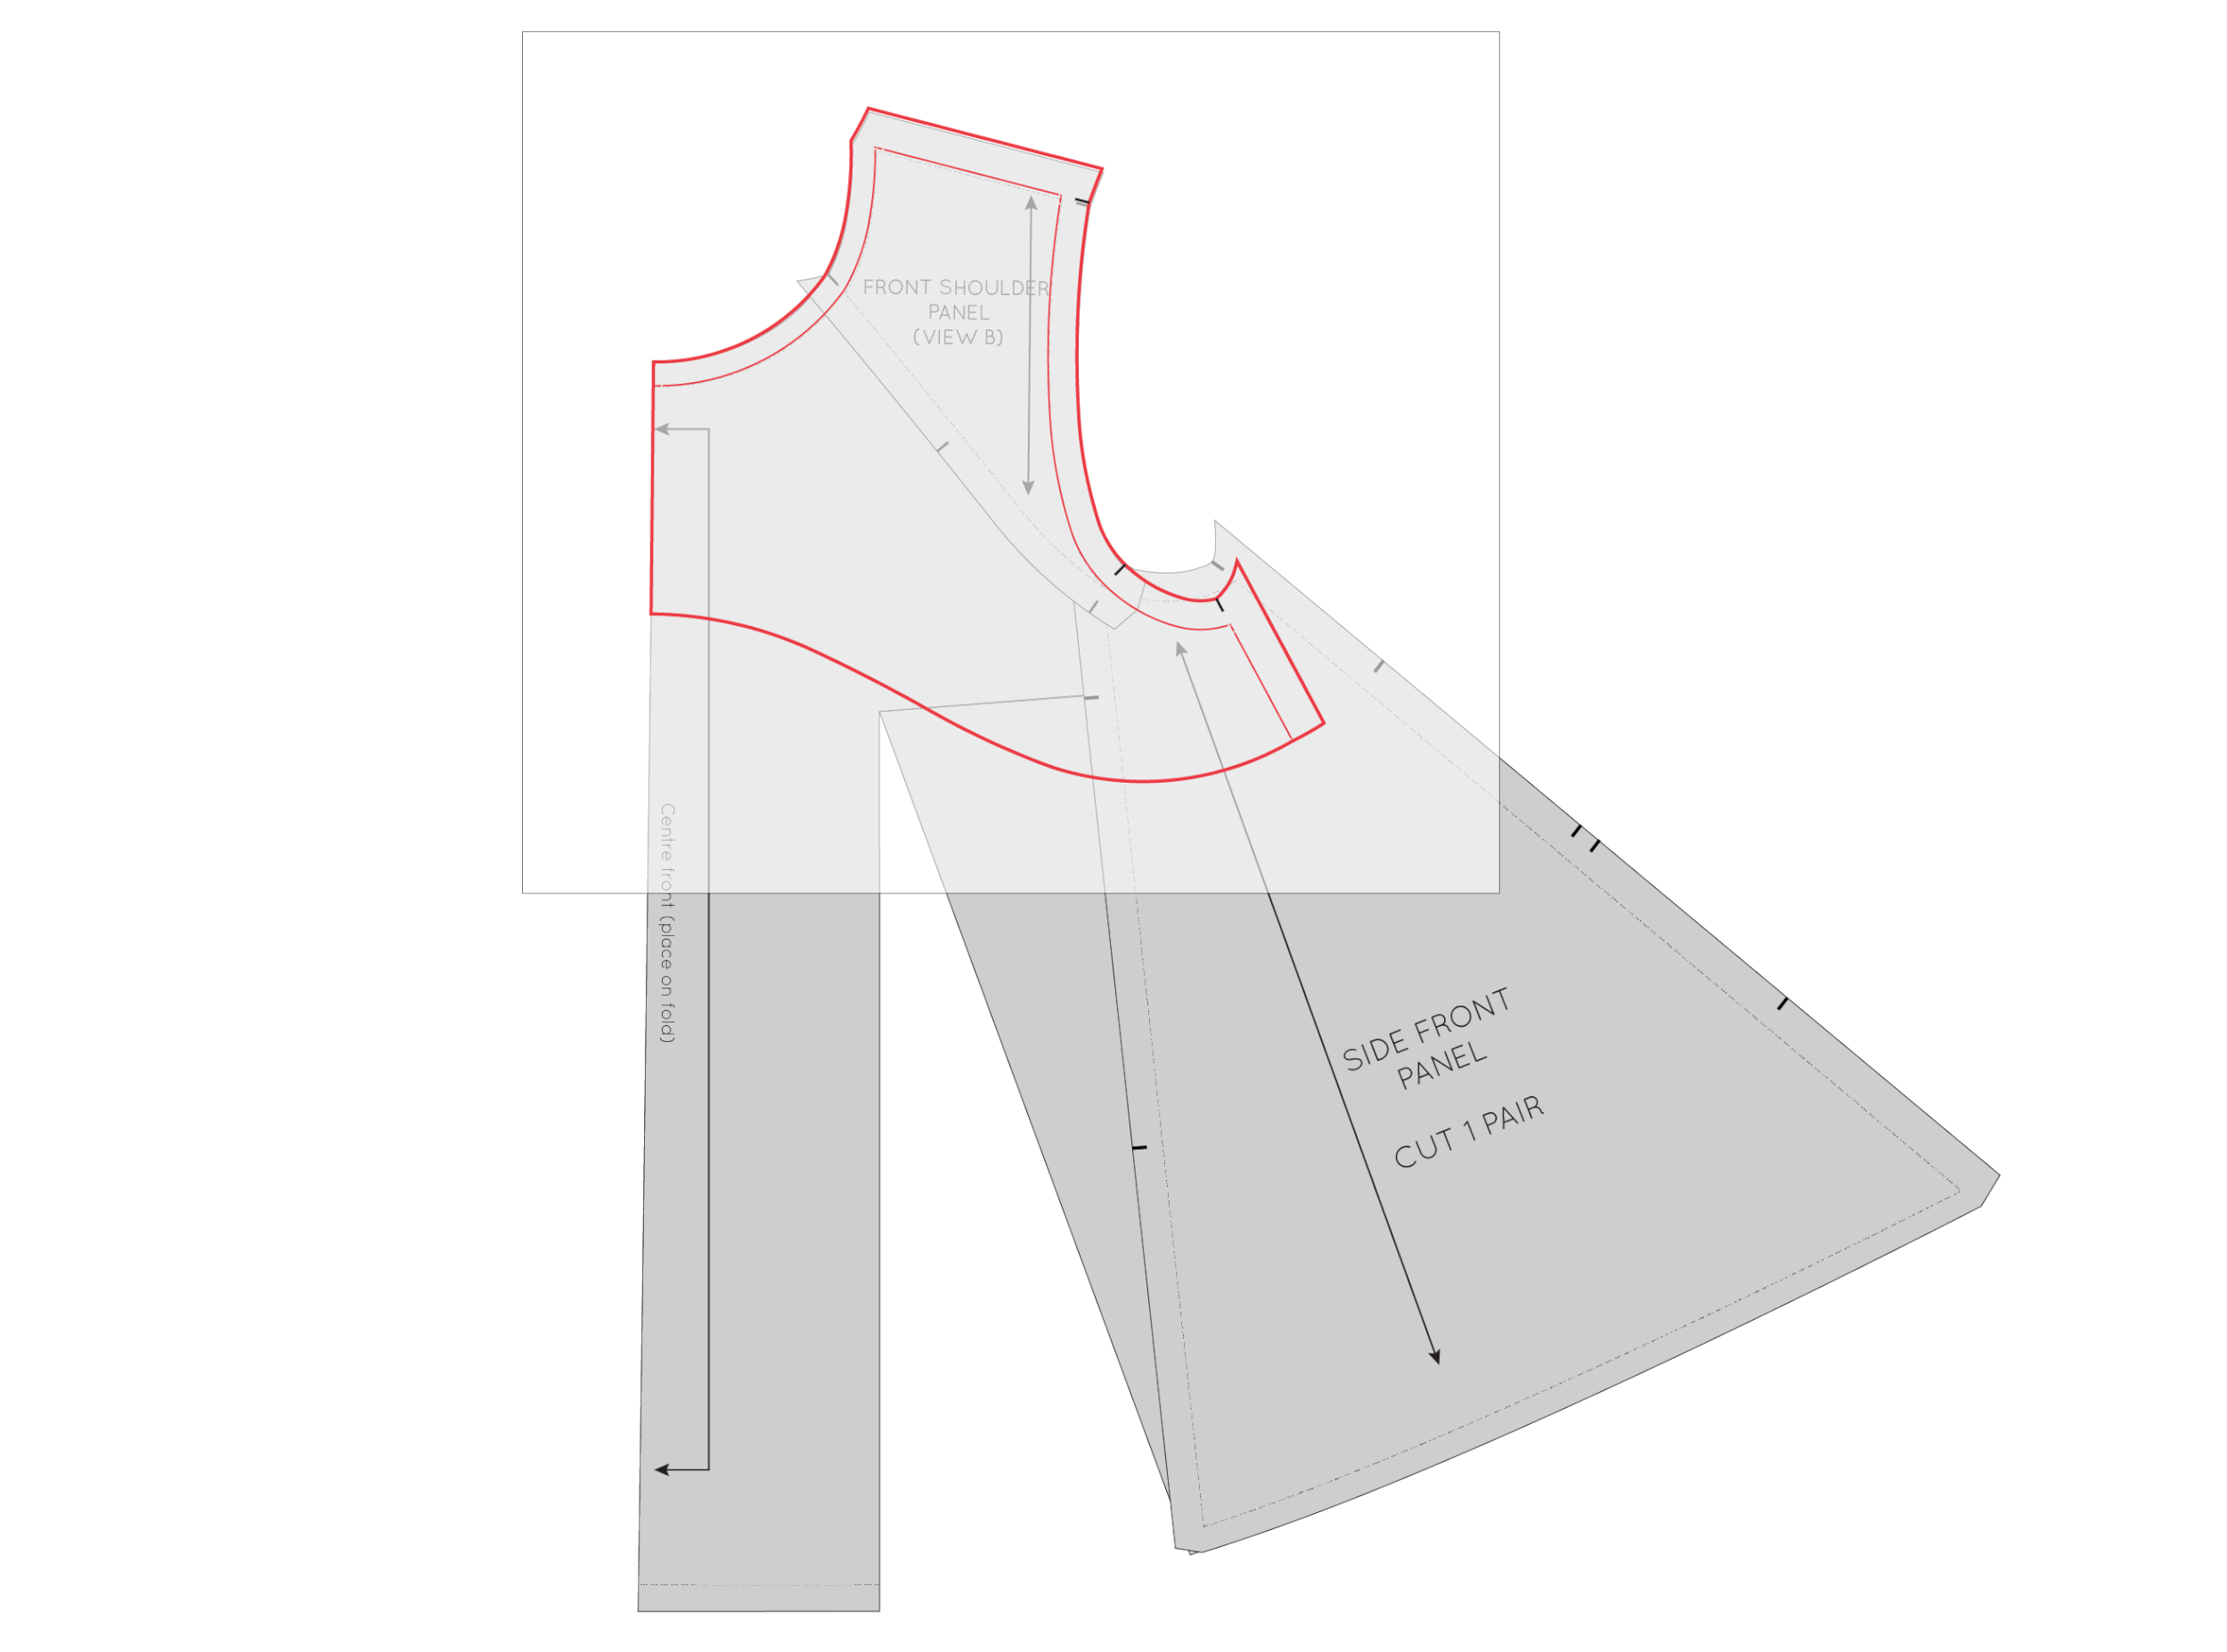
To start, grab your CENTRE FRONT PANEL piece, SIDE FRONT PANEL piece, FRONT FACING and FRONT SHOULDER PANEL piece. These are the pieces you will need to create your new facing piece. 

Relocate the dart (temporarily)

If you have created a dart, we will first need to remove it (don't worry, we will put it back once we make the new facing piece), as where possible, it's best to not have darts in a facing (as it just creates unnecessary bulk). You could fold out the dart - like in this dart shaping tutorial - and then draft the piece, but it becomes quite awkward to do it that way as the centre front piece becomes three dimensional, which makes if really tricky to trace a new piece. The most accurate way to do it is to remove the dart, draft the facing and then put the dart back (don't worry it's less of a cumbersome process than what it sounds like). If you already removed the dart using yesterday's tutorial, then you can simply jump to the next step. 

re-draft_front_facing_2

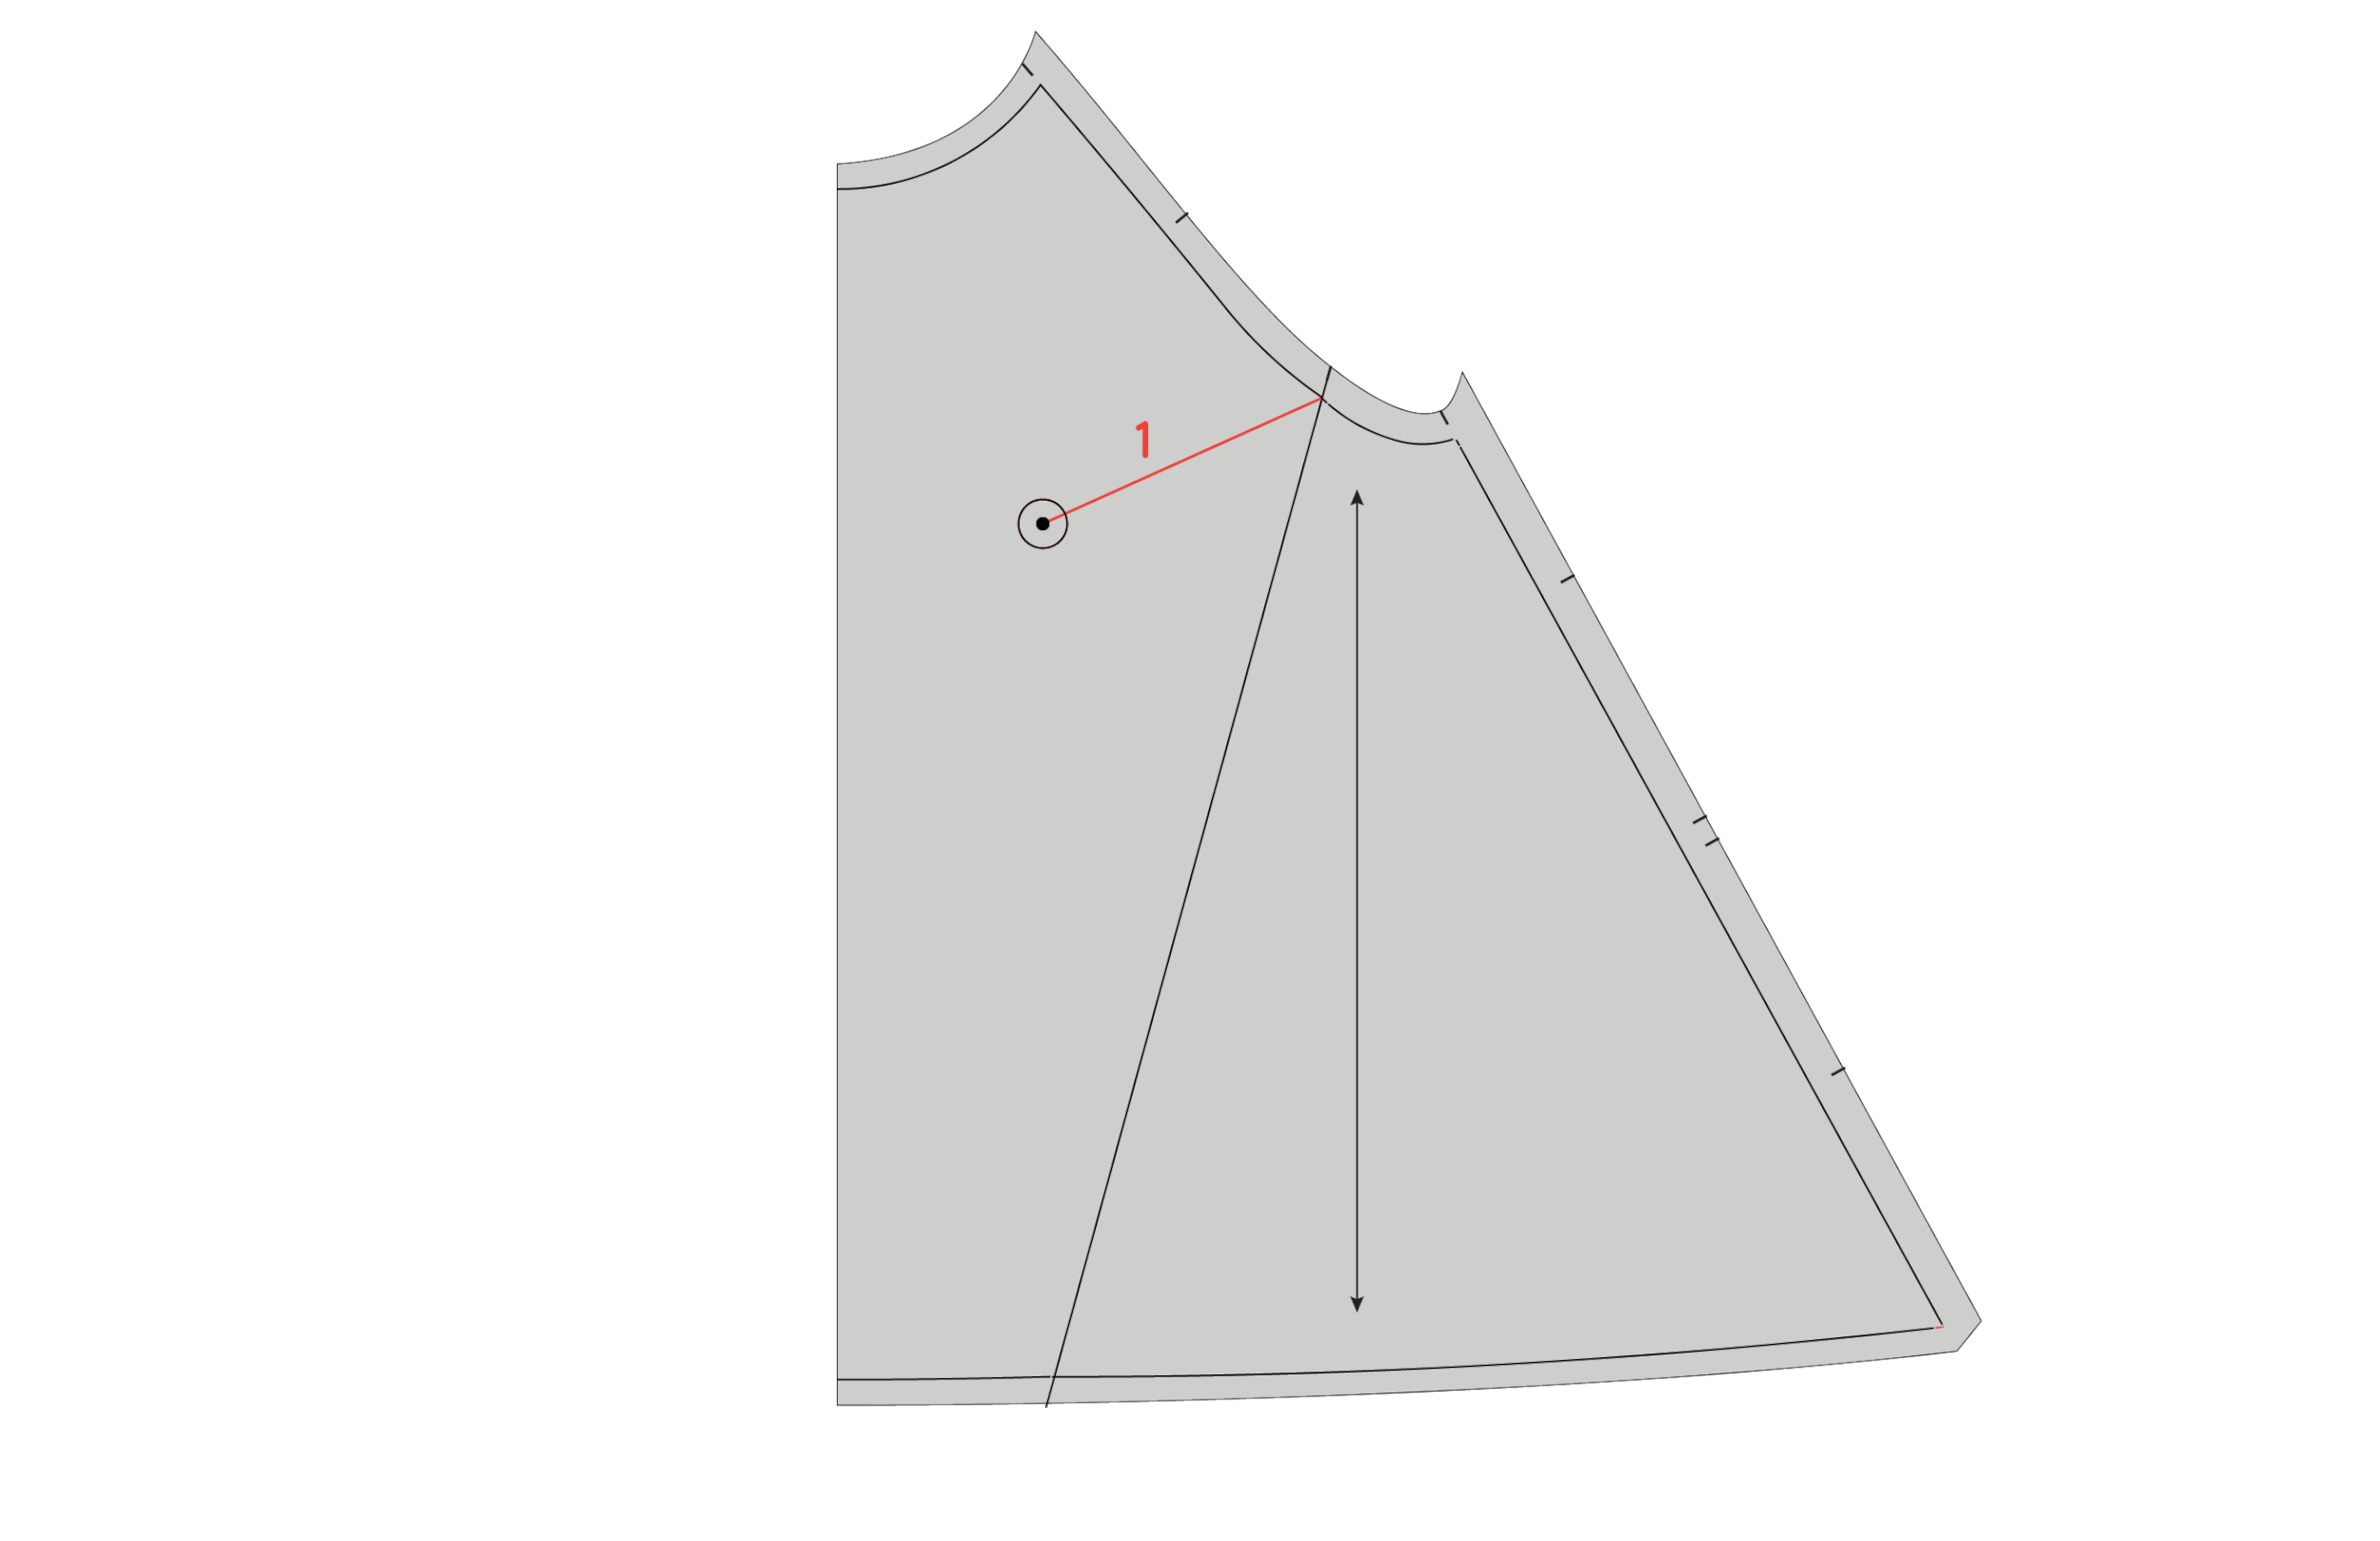
A : Draw a vertical line (parallel to the centre front line) down from the apex point (the tip of the dart) down to the hem. Cut along this line, from the hemline, up to the apex point. Stop cutting when you are 1-2mm from the apex point. Now cut along the lower dart arm (the one highlighted in the illustration) towards the dart arm. Again, stop 1-2mm from the apex point, creating a small hinge. 

B : Close out the dart by carefully pivoting the lower corner of the pattern so that the lower dart arm overlaps the upper dart arm. Tape in place (I suggest using masking tape so it is easy to remove later on when we want to get our dart back).

If you would like further explanation on this process, check out yesterday's post, where I went into it in a bit more detail.

re-draft_front_facing_3

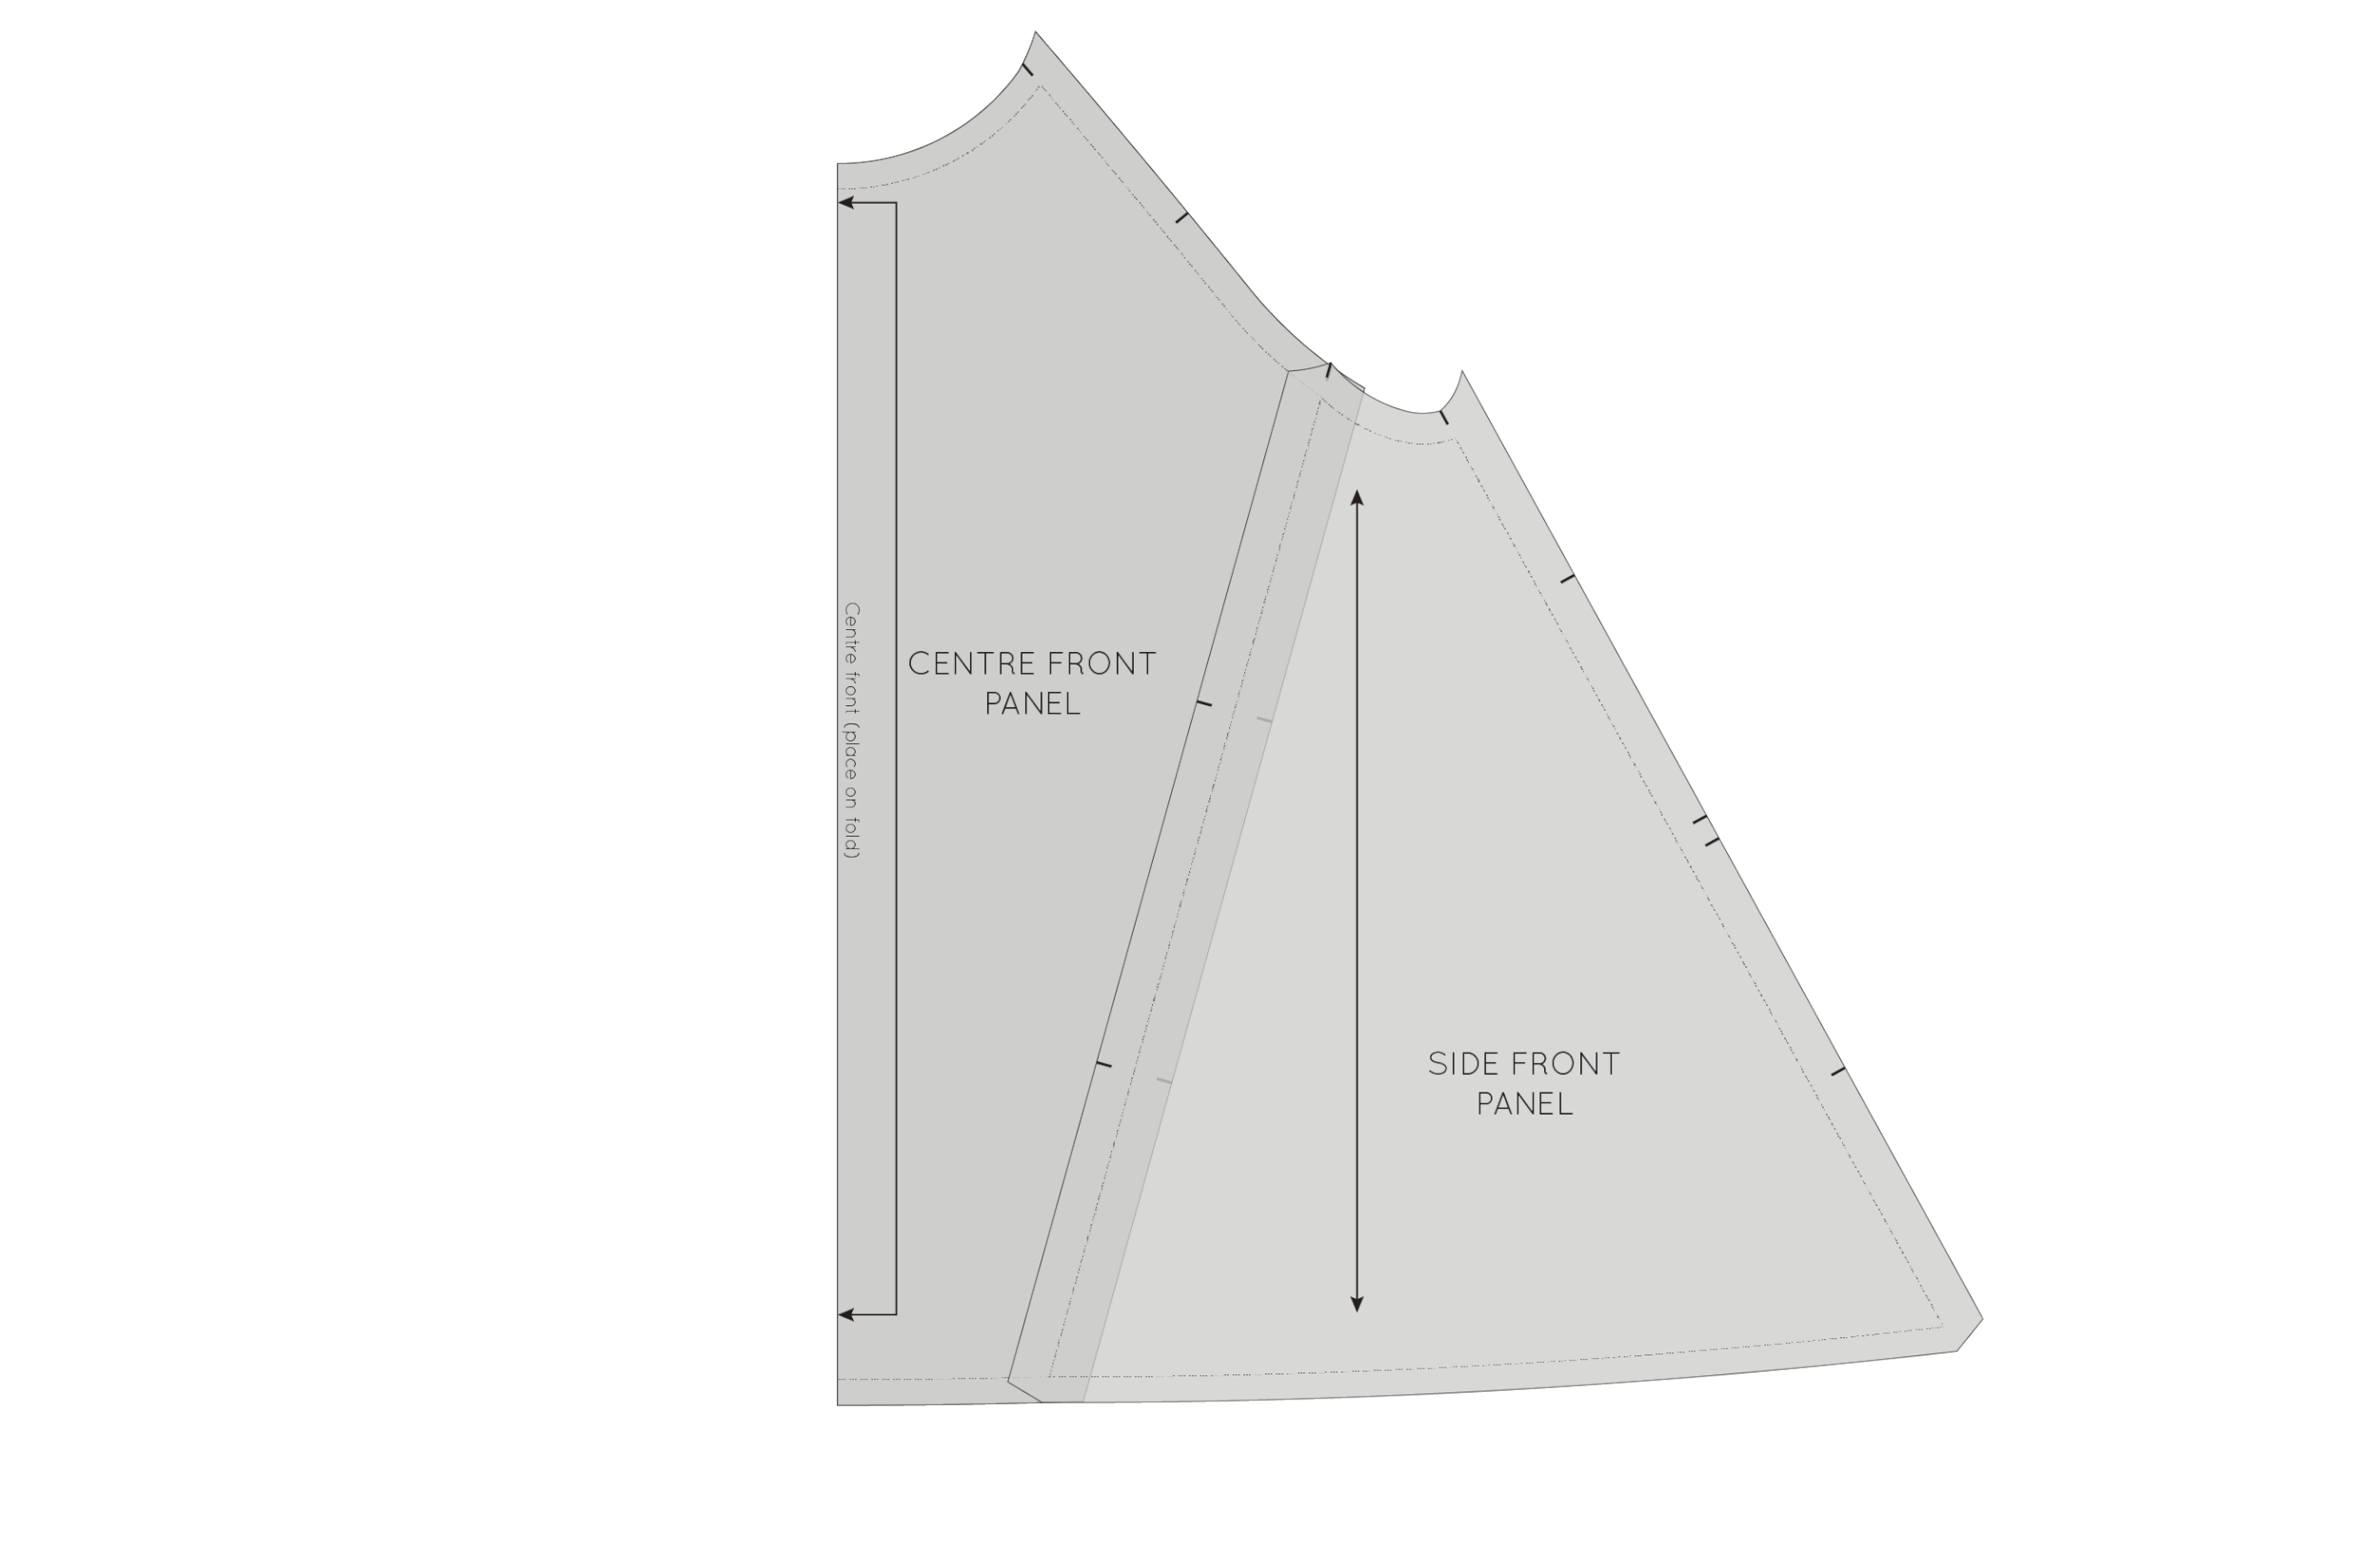
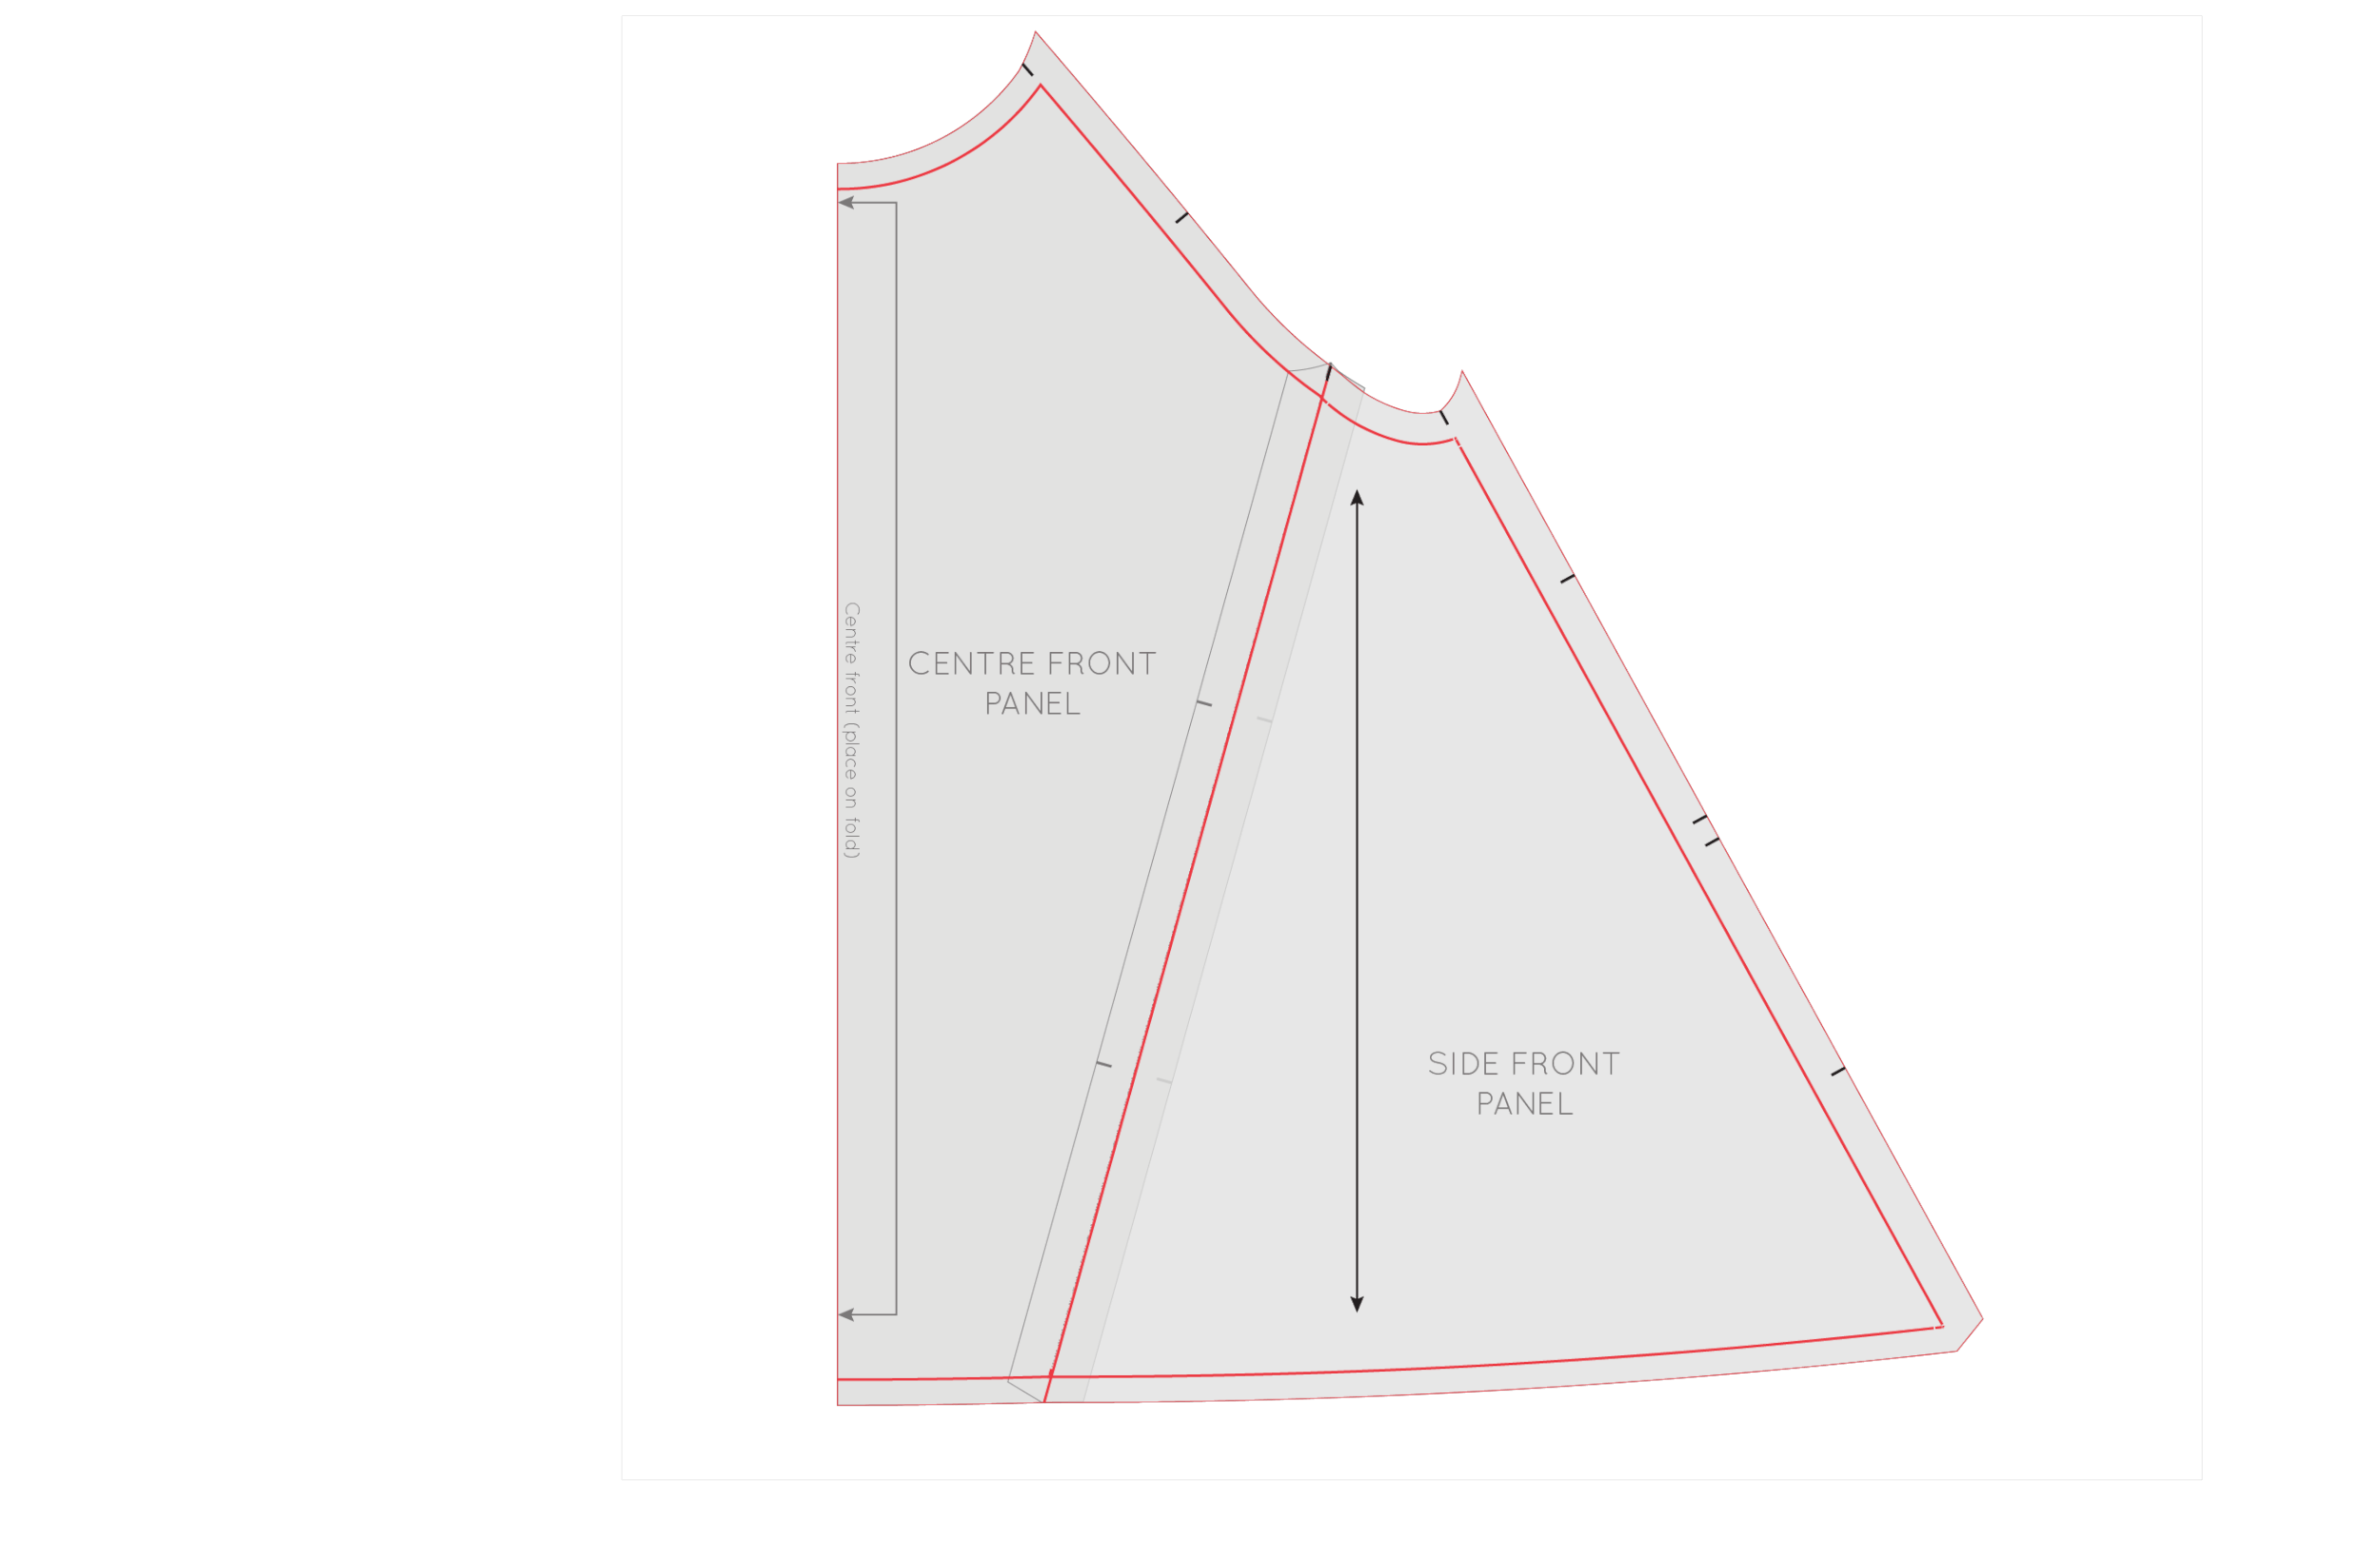
Take the SIDE FRONT PANEL piece and line the stitching line up with the stitching line on the CENTRE FRONT PANEL, as if the two pieces have been sewn together. Hold in place with a couple of small pieces of masking tape (or even pins). You are going to want to be able to detach these pieces later. 

re-draft_front_facing_4

Now, position the FRONT SHOULDER PANEL onto the CENTRE FRONT PANEL, again matching stitch lines as if the two pieces have been sewn together. Tape in place. 

re-draft_front_facing_5

Place the FRONT FACING piece on top of your panels, lining up the neckline, shoulder seam and centre front. You will notice that the front facing no longer matches the pieces it needs to (due to the full bust adjustment we made).

re-draft_front_facing_6

You can see that if we cut this piece we would be missing fabric at the side seam and under the arm. 

Re-draft the facing piece

re-draft_front_facing_7

Take a piece of pattern paper and trace off the original FRONT FACING piece in pencil (you are going to need to erase part of the line in a minute), being sure to trace the stitch line and the cutting line, as well as the notches. 

re-draft_front_facing_8

Place the traced FACING piece on top of your panels, again lining up the neckline, shoulder seam and centre front.

re-draft_front_facing_9

We will need to know the length of the side seam on the FACING so that when we make the new piece, it will have the same length side seam as the original, so that it still fits correctly with the back facing piece (that does not need any adjustments). Measure the side seam (on the stitch line) and take note of this measurement. 

re-draft_front_facing_10

Now, erase the lines that do not match the shape of the pattern underneath (the underarm and side seam), so that you can draw the correct shaping on the piece. 

re-draft_front_facing_11

To start, trace the side seam from the SIDE FRONT PANEL, making the line the length of the original facing side seam (found a moment ago).

re-draft_front_facing_12

Trace the armhole line as well as the side seam (both stitch line and cutting line) from the pattern underneath. 

re-draft_front_facing_13

Join the endpoint on the side seam with the bottom edge of the facing. You want it to be a nice and smooth curve. 

re-draft_front_facing_14

Transfer notches, cut out the pattern piece and add grainline and cutting instructions.

Go back to your CENTRE FRONT piece and remove the tape from the dart so you can put the dart back in place. 

And voila! You have a new facing piece that fit your adjusted panels. 

See all the posts in the Collins Top Sew-along.


you may also like:

The Collins Top Sew-along : Full bust adjustment - removing the bust dart

full_bust_adjustment_cover.gif

In yesterday's post, I showed you how to do a Full Bust Adjustment (FBA) on the Collins Top pattern to start off the Collins Top Sew-along. The process is a little different to a usual FBA because of the panel line in the front piece, as well as the lack of dart or bust shaping in the pattern. 

In yesterday's tutorial I showed you how to add a dart to the centre front panel of the Collins Top to get some extra width across the bust, if your bust measurement is larger than the B cup In the Folds patterns are drafted for. 

In today's post, I want to show you how to remove that dart, if you would prefer to keep the pattern dartless.

If you have done a little pattern making (or pattern adjusting) yourself though, you will know it is not as easy as just removing a dart. You cannot actually remove a dart, but you can relocate it or redistribute it. So basically, what we are going to do in the case of the Collins Top, is that we are going to relocate the dart to the hemline and then use it as extra fullness in the hem. I have done a tutorial on this process in the past, so if you would like to take a look you can have a look at this tutorial.

I know that the Collins already has quite a bit of ease in the hem (it is a trapeze shaped silhouette after all), so I will also show you how to remove the extra fullness later in the tutorial too. Please bear with me, it is quite a long tutorial, but the process isn't complicated. Just take it one step at a time.


Getting started

remove_dart_fba_1

Step 1 :

Use the first Full Bust Adjustment tutorial to add a dart to your Collins Top. You will only need to follow steps 1 - 14 of the tutorial to get to where you need to be to follow this tutorial.  

Remove the dart

remove_dart_fba_2

Step 2 :

To remove the dart, cut in from the side seam, along the lower dart arm towards the apex point. Stop cutting when you are 1-2mm from the apex point.

remove_dart_fba_3

Step 3 :

Cut up from the hem of the top, along line 2, towards the apex point. Again, stop cutting 1-2mm from the apex point, to create a small hinge. 

Close the dart

remove_dart_fba_4

Step 4 : 

A : Now, swing the side section of the pattern on the little hinge you created, so that the lower dart arm moves towards the upper dart arm. 

B : Continue swinging that section of the pattern around, until the lower dart arm meets the upper dart arm. Once the dart arms are aligned, tape in place. 

remove_dart_fba_5

Step 5 :

As you will know, if you have made pattern adjustments before, there is really no such thing as removing a dart. By closing the dart in the side seam, you are opening up a "dart" at the hemline. You will see that indicated in the illustration above. By closing the dart in the side seam, we have made a large dart in the hem. 

Tape some pattern paper behind the working pattern to fill the gap created in the hemline.

You can choose to leave the top as is - now with the trapeze shape more pronounced or you can choose to remove this extra width from the side seam. If you have chosen to keep the extra fullness, continue working your way through the tutorial. 

If you would like to remove the extra fullness from the side seam, skip the following steps and jump to step 14.

Re-draw the panel line

remove_dart_fba_6

Step 6 :

Measure the opening at the hemline (making sure you take the measurement on the stitch line (1cm / 3/8" up form the edge of the pattern) and take note of this measurement.

remove_dart_fba_7

Step 7 :

We will distribute the added fullness to either side of the panel line, so you will need to mark a point on the hemline at the centre of the opening. 

remove_dart_fba_8

Step 8 :

Draw a straight line from the point you just marked on the hemline, up to the point where the original panel line intersects the armhole. There you have your new panel line!

Mark balance points

Balance points are pointers on your pattern that help you put pieces together correctly, as well as help you when you are sewing a very long, or curved seam.

If you have sewn one of my patterns before, you will know I love a balance point! I really love using them as they basically give you a little reinforcement each time that you are assembling your garment correctly. I loved when one of my pattern testers once said "The notches are like little ticks you get all the way through the process to let you know that you're on the right track." That's exactly what I am going for with all the notches!

remove_dart_fba_9

On the Collins Top, you will notice that there are two single notches on the centre front panel line, so that you know which side of the SIDE FRONT PANEL should be sewn to the CENTRE FRONT PANEL. During the process of the adjustments, we lost those two notches. So now it's time to put them back.

remove_dart_fba_10

Step 9 :

Mark two notches on the panel line. It doesn't really matter where you put them, as these two pieces will be sewn together.

Trace your new pattern pieces

remove_dart_fba_11

Step 10 :

Take a piece of pattern paper and trace your new CENTRE FRONT PANEL piece by tracing around the original neckline, and then down the new panel line. Trace along the centre front line and hemline. 

Add seam allowance + notches

remove_dart_fba_12

Step 11 : 

Add seam allowance to your new pattern piece. You can trace the seam allowance from the neckline, armhole and hem and then add 1.5cm (5/8") to the panel line. For more detail on adding seam allowance to a pattern, check out this tutorial

Transfer the notches onto your new pattern piece, from the working pattern. 

remove_dart_fba_12

Step 12 :

Finalise the pattern piece by adding cutting instructions and grainline.

For more detail about adding cutting instructions to your pattern, take a look at this tutorial.

Side front panel

remove_dart_fba_13

Step 13 :

Repeat process for the SIDE FRONT PANEL. You will notice that you will need to redraw the side seam with a straight line. Draw the line from the top of the original seam line to the bottom of the original seam line. 

True the seam allowances on your new pattern pieces, and check the SIDE FRONT PANEL and the SIDE BACK PANEL still match together properly at the side seam. 

Add grainline and cutting instructions (SIDE FRONT PANEL - CUT 1 PAIR).

And you're ready to start sewing!


Remove fullness from the hem

If you would prefer to remove the extra fullness from the hemline of your Collins Top after your Full Bust Adjustment, then this part of the tutorial is for you!

remove_dart_fba_14

Step 14 :

A : On the stitch line, measure the length of the opening at the hem. Take note of this measurement.

B : Measuring in from the side seam, mark a point the distance found in step A. For example, if the opening is 10cm, mark a point 10cm in from the side seam on the stitch line. 

remove_dart_fba_15

Step 15 :

A : Re-draw the side seam by joining the top of the original side seam to the bottom with a straight line.

B : Now draw a straight line from the point marked on the hemline (in step 14B) to the point on the line you just marked, at the point where you closed out the dart. Extend the line a few centimetres (1" or so) beyond the intersection point. This line will become your new side seam. 

Note : If we simply drew a stright line between the top of the side seam and the new point on the hem, we would lose too much width across the bust from the side seam. 

remove_dart_fba_16

Step 16 :

You will notice that the new side seam deviates from the original side seam a little bit at the top. We need to check how much has been added so we can add that same amount to the front sleeve piece. Take a ruler or tape measure and measure from the original side seam to the new side seam, on the stitch line. In the example, the new side seam is 1.9cm away from the original side seam at the underarm point. This means I need to add 1.9cm to the sleeve piece as well. 

To complete the front and side pattern pieces, draw in your panel line and then trace off the pieces. You can find out how to do this by scrolling back up to steps 6 - 13.


Making the adjustment to the sleeve piece. 

remove_dart_fba_17

Step 17 :

A : Trace a copy of the FRONT SLEEVE pattern.

B : Draw a diagonal line down from the underarm point on the stitch line down to the hem. 

C : Cut down the line from the top towards the hem. Stop when you get 1-2mm from the stitch line at the hem. Cut up from the hem towards the point where you stopped cutting. Leave a 1-2mm hinge in place.

D : Swing open the pattern with the hinge, opening up the sleeve curve by the amount you need to add to the pattern (this is the same technique you learned earlier in this tutorial). For example, 1.9cm was added to my side front panel (step 16), so I will open up this piece by 1.9cm.

remove_dart_fba_18

Step 19 :

Take some scraps of pattern paper and fill in the gaps on your pattern piece. Redraw the armhole curve (and seam allowance) and the hem line (and seam allowance). There you have it. Your sleeve piece will now fit into the armhole on your top. 

If you are making View B of the Collins Top (sleeveless version), tomorrow I'll be going through how to make adjustments to your front facing to fit with your newly adjusted bodice.


You may also like:

The Collins Top Sew-along : Full bust adjustment (FBA for a dartless bodice)

full_bust_adjustment_cover.gif

Welcome to the first tutorial in the Collins Top Sew-along! In today's post, we're talking Full Bust Adjustments (FBA), which is one of the most frequently used adjustments. A few of you have already contacted me about how to do a FBA on the Collins Top, so I know this tutorial will be helpful to a lot of you!

During the Acton Sew-along I showed you how to do a FBA on a princess seam, but for the Collins Top you'll need a slightly different technique as it doesn't have a princess seam (or a dart).

You will be able to use this tutorial on any pattern that has a flat front (doesn't have a princess seam or dart).

We'll be making the FBA by adding a dart to the CENTRE FRONT PANEL only. We will do this by adding a dart to the front (with the side panel and centre front panel as a whole piece) and then removing it from the side panel - leaving you with just a small dart in the centre front panel. If you like, you can then close out the dart altogether and redistribute the fullness to the hem. You can find out how to do that by looking at the next post in the Collins Top sew-along


WHEN YOU'LL NEED TO DO A FULL BUST ADJUSTMENT 

Most indie pattern companies (including In the Folds) draft for a B cup bust. There are of course exceptions to this rule (such as Cashmerette and Colette Patterns), so make sure you check on your pattern before assuming the bust cup size.

In terms of the Collins Top, it is a loose style which means it is a little more forgiving than more fitted patterns (such as the Acton, for example) so in some cases you can probably get away with not making a bust adjustment. For example, if your bust is smaller than a B cup, it is unlikely you need to bother doing a Small Bust Adjustment. I have an A cup bust, but have not made adjustments to any of my Collins tops. Also if your bust is just slightly bigger than a B cup, it is also likely you will be okay without the adjustment. By checking the finished measurmentes, you will see that there is a lot of ease in this pattern. 

Check the finished garment measurements and go from there. 

WORK OUT YOUR CUP SIZE

Your cup size in sewing patterns may not always correspond to the bra size you wear. To be safe, check your measurements before deciding if you need to make any adjustments to the pattern. 

full_bust_adjustment_fba_dartless_bodice_1

To do this, measure your high bust measurement (the area above your breasts, under your arms) as well as your full bust  (the fullest part of your chest) and then take note of each measurement, as well as the difference.

If the difference is 2.5cm (1") your bust is an A cup, 5cm (2") it's a B cup, 7.5cm (3") is a C cup and so on. 

CHOOSE YOUR SIZE

Now, go back to your high bust measurement and add 5cm (2"). This is what your bust measurement would be if you were a B cup and therefore the size you should be choosing from the pattern.

For example, let's say your upper bust measures 81cm (32"). Add 5cm (2") to this measurement to find out what size your bust measurement falls into on the In the Folds sizing chart (and what size you would be if you had B cup breasts). 81cm + 5cm = 86cm which corresponds to a size C. Your actual bust measurement is 89cm  though - 3cm (1") larger than the cup size of the pattern. This means you need to do a FBA and add this 3cm (1") to your pattern. 

As the bodice is cut on the fold, you need to take the measurement you will be adding and divide it by two. For example, this 3cm (just over 1") mentioned in the example, will be split between either side of the front bodice - 1.5cm (1/2") on each side. 


GETTING STARTED

full_bust_adjustment_fba_dartless_bodice_2

Step 1:

Take the two pieces that make the front of the Collins Top - the CENTRE FRONT PANEL and the SIDE FRONT PANEL. The first step will be to turn these pieces into one pattern piece (removing the panel line) as this will make the adjustment much easier to manage. At the end, we'll put the panel line back in place, so there won't be any change to the design of the top (except for the addition of the dart - which can be removed later on, if you prefer). 

TRACE PIECES

full_bust_adjustment_fba_dartless_bodice_3

Step 2:

Take the SIDE FRONT PANEL piece and place it on top of the CENTRE FRONT PANEL, lining up the stitch lines (the grey line on the pattern), as if the pieces have been sewn together. If you are struggling to see the lines, it can help to put the pieces up to a window and see through the paper that way (or a lightbox, if you have one). Once the pieces are correctly lined up, use masking tape (or similar) to hold the pieces in place. 

full_bust_adjustment_fba_dartless_bodice_4

Step 2:

Take a piece of pattern paper and trace the piece - being sure to include all pattern markings (in this case: the grainline and notches). Also trace the panel line.

Make sure you trace both the cutting line and the stitching line - this is really important. In the Folds patterns include the stitching line on each pattern piece so that it is easier for you to make alterations to your pattern. I know we would all love to be able to cut a pattern in a straight size and for it to fit perfectly, but unfortunately that's not the way it is (I even have to make adjustments to In the Folds patterns so they fit my figure properly), so having the stitch lines can help you make adjustments more quickly and easily. When making pattern alterations, I normally suggest removing the seam allowance, but because the stitch line is marked on the pattern, you can leave it on. 

MARK APEX POINT ON THE PATTERN

full_bust_adjustment_fba_dartless_bodice_5

Step 3:

The next step is to mark your apex point on the pattern. Your apex point is the peak of the fullest part of your breast... which basically means your nipple! This point varies from person to person, so you can work it out by holding the pattern piece up to your body and working it out, or by referring to a toile (if you have toiled your Collins Top before working on any adjustments). 

PREPARE PATTERN PIECE FOR THE ADJUSTMENT

full_bust_adjustment_fba_dartless_bodice_5_1

Step 5:

Take a ruler and draw a line from where the panel line intersects the armhole to your apex point. You can label this line as line 1. 

full_bust_adjustment_fba_dartless_bodice_6

Step 6:

Now draw a line from the apex point straight down to the hemline - parallel to the centre front. This is line 2. 

full_bust_adjustment_fba_dartless_bodice_7

Step 7:

Draw a line from the apex point to the side seam. You'll want it to meet the side seam about 5cm (2in) down from the armhole. I chose to rule the line to the first notch on the side seam. This is line 3.

full_bust_adjustment_fba_dartless_bodice_8

Step 8:

Draw the last guideline (4) perpendicular to line 2 about 12cm (3in) up from the hemline.

Cut

full_bust_adjustment_fba_dartless_bodice_9

Step 9:

Now it's time to start making that adjustment!

A: From the hem of the top, cut up line 2, towards the apex point. From the apex point turn and continue cutting, this time along line 1. Stop when you are about 1-2mm away from the armhole line (stitch line).

B: Cut in towards the armhole stitch line from the seam allowance, stopping about 1-2mm from where you stopped cutting in step A - creating a small "hinge."

full_bust_adjustment_fba_dartless_bodice_10

Step 10:

Cut along line 3 from the side seam towards the apex point. Stop 1-2mm from the apex point, again creating a small "hinge."

Add width to the pattern

full_bust_adjustment_fba_dartless_bodice_11

Step 11:

Take a piece of pattern paper (about the size of your front piece) and draw a vertical line in roughly the centre of the paper.

By this stage you should know how much width you need to add to the bust. Take this measurement and divide it by two (you will add half the extra width to either side of the front piece, so in total it equals the whole amount you need). Draw a second line - parallel to the first - this distance away from the first line. For example, if you need to add a total of 5cm (2in) to the bust, you will be drawing the line 2.5cm (1in) away from the first. 

full_bust_adjustment_fba_dartless_bodice_12

Step 12:

Carefully place your pattern piece on top of the paper underneath.

Now that you have cut through the lines, you will be able to manoeuvre the pieces so that you can the extra width you need to add around the bust. Carefully place the pattern onto the guidelines you drew in the previous step. Line up the the left-hand side of your pattern with the first line (line on left side), and carefully tape in place. Only tape above line 4, as in a moment we will be cutting along that line.

Now, carefully spread open the cut (line 2), spreading the side of your bodice until the apex point intersects with the second line (right hand side). As you do this, you will see a dart open up at the side seam (line 3). 

Add length to the pattern

full_bust_adjustment_fba_dartless_bodice_13

Step 13:

Cut along line 4, detaching that piece of the pattern. Move this section down until it is in line with the rest of the pattern (horizontally). Tape or glue in place. You can see that this adjustment has not only added width to the pattern, but length as well. When making a full bust adjustment you need to add extra length so that there is enough fabric to comfortably go over the breasts, without making the garment too short. 

Create a dart

full_bust_adjustment_fba_dartless_bodice_14

Step 14:

You will see that through making the adjustment, you have made a dart at the side seam. Draw in two dart arms, one from each side of the opening on the side seam to the apex point.

full_bust_adjustment_fba_dartless_bodice_15

Step 15:

We will call the dart arms the 'upper dart arm' and the 'lower dart arm.'

Re-draw Panel line

full_bust_adjustment_fba_dartless_bodice_16

Step 16:

The next thing we need to do is work out what this adjustment has done to the panel line and if any adjustment to the line needs to be made. To do this, we will need to fold out the dart as if it has been sewn. To do this, fold along the lower dart arm.

You will notice this tutorial has shifted from illustrations to photographs. Unfortunately my illustration skills leave me hanging a bit when it comes to illustrating three dimensional techniques, so I thought the clearest way to illustrate this technique would be through photographs. I used a print out of one of the illustrations to keep things consistent, and hopefully not confuse you too much!

full_bust_adjustment_fba_dartless_bodice_17

Step 17:

Take your working piece to a corner of your table. By using a corner, you will be able to fold out your dart as if the piece has been sewn. Align the apex point (the dart point) with the corner of the table, and move the folded line (lower dart arm) towards the upper dart arm. 

full_bust_adjustment_fba_dartless_bodice_18

Step 18:

When the lower dart arm is in line with the upper dart arm, finger press (making sure the dart is sitting flat) and then tape or pin in place. 

full_bust_adjustment_fba_dartless_bodice_19

Step 19:

You will notice that the panel line is no longer a continuous line, and it is also no longer straight. 

full_bust_adjustment_fba_dartless_bodice_20

Step 20:

To rectify this, take a ruler and draw a straight line from the top of the panel line (the point that intersects the armhole) to the bottom of the panel line (where the line intersects the hem). This can be a little awkward to do, having the pattern still on the corner of the table, so just be careful and take your time to get it right.

Before removing the pin, take a tracing wheel and run it over the line at the point where the dart is folded (this will transfer the date shaping to the bulk of the dart). If you don't have a tracing wheel, simply take a pin and make pin points every 2-3mm along the panel line over the folded dart. 

full_bust_adjustment_fba_dartless_bodice_21

Step 21:

Unfold the dart.

You will now have the correct dart shaping marked on your piece (so that when your dart is folded and then sewn, the dart will sit flush with the panel line).

full_bust_adjustment_fba_dartless_bodice_23

Step 22:

Take a ruler and join the dots to finalise the dart shaping.

For more detail on the process, check out this tutorial on How to Add Dart Shaping

Finalise the centre front panel piece

full_bust_adjustment_fba_dartless_bodice_23

Step 23:

Take a spare piece of pattern paper and trace off the centre front panel, being sure to trace the new panel line and not the original line.

full_bust_adjustment_fba_dartless_bodice_24

Step 24:

Now, mark the dart. You will want to make the point of the dart about 1.5cm (5/8in) from the apex point (inside the dart), to avoid the dart point sitting right on top of your nipple (not a great look).  

Add seam allowance

full_bust_adjustment_fba_dartless_bodice_25

Step 25:

Add seam allowance by tracing the original seam allowance on the neckline, armhole and hem and then adding 1.2cm (1/2in) to the panel line.

For further explanation about adding seam allowance to a pattern, check out this tutorial

Mark notches

full_bust_adjustment_fba_dartless_bodice_26

Step 26:

Mark in your notches by tracing the original notches and then adding one at either dart arm. Add another notch on the panel line (this will act as a balance point for when you are joining the FRONT SIDE PANEL). You can place it wherever you like as we will mark it on the FRONT SIDE PANEL piece a little later in the tutorial. 

You will also need to mark the dart point. I like to mark dart point 1.5cm (5/8in) inside the dart so that when I am sewing it, I sew 1.5cm (5/8in) beyond the marking and the marking gets hidden inside the dart. 

full_bust_adjustment_fba_dartless_bodice_27

Step 27:

Finalise the pattern piece by adding cutting instructions, marking the grainline and the centre front. You can then cut out your pattern piece, ready for fabric cutting!

For more information on adding pattern markings, take a look at this tutorial, which covers all you need to know about notches, grainlines and cutting instructions.  

Finalise the SIDE FRONT panel

full_bust_adjustment_fba_dartless_bodice_28

Step 28:

Move back to your working piece.

Cut along the panel line (being sure it's the new panel line and not the original panel line) - separating the piece into two, so that we can focus on the SIDE FRONT PANEL.

full_bust_adjustment_fba_dartless_bodice_29

Step 29:

Cut along the dart arms that intersect the FRONT SIDE PANEL (we will be removing the dart from the FRONT SIDE PANEL, as we only need the dart in CENTRE FRONT PANEL) to create two separate pieces. 

full_bust_adjustment_fba_dartless_bodice_30

Step 30:

Tape the two pieces together by lining up the cut edges. You have now closed out the section of the dart that was on this panel. 

Create a new pattern piece

full_bust_adjustment_fba_dartless_bodice_31

Step 31:

Take a piece of pattern paper and trace the new pattern piece. Your side seam is likely to be a little disjointed since making the adjustment (like mine is in the example). Re-draw the seam by drawing a straight line from the top to the bottom of the seam - on the stitch line. This is called "truing" a pattern.

Add seam allowance

full_bust_adjustment_fba_dartless_bodice_32

Step 32:

Add seam allowance in the same way that you did on the front panel. The side seam has 1.5cm (5/8in) seam allowance and the panel line has 1.2cm (1/2in).

full_bust_adjustment_fba_dartless_bodice_33

Step 33:

Transfer the grainline and add cutting instructions.

You will notice that we have lost almost all the notches in the process of making the adjustment. I'll show you how to get those back now. 

Marking notches

full_bust_adjustment_fba_dartless_bodice_34

Step 34:

Place the SIDE FRONT PANEL on top of the CENTRE FRONT PANEL, lining up the stitch line - as if the two pieces were being sewn (this is when transparent pattern paper is really helpful). The CENTRE FRONT PANEL will be right side up and the SIDE FRONT PANEL will be right side down. 

full_bust_adjustment_fba_dartless_bodice_35

Step 35:

Transfer the notches from the CENTRE FRONT PANEL onto the SIDE FRONT PANEL. Only transfer the notch from the lower dart arm, not the upper dart arm (as when the dart is sewn, the dart will be what lines up with the notch on the SIDE FRONT PANEL).

True the seam allowance

full_bust_adjustment_fba_dartless_bodice_36

Step 36:

While you have the pattern there, true the seam allowance at the hem (so that when the seam is pressed it will sit flush with the hem).

For more detail on why we do this and how to do it, check out this tutorial on truing patterns

full_bust_adjustment_fba_dartless_bodice_37

Step 37:

Now we can true the top of the seam allowance by aligning the top of the panel seam (above the top notch) with the CENTRE FRONT PANEL. You will notice that the rest of the seam no longer matches up. This is because of the dart. When the dart is sewn, the angle of the seam will change and match perfectly with the SIDE FRONT PANEL.

full_bust_adjustment_fba_dartless_bodice_38

Step 38:

True the seam allowance in the same way that you did for the other end of the seam. 

Add notches to the side seam

full_bust_adjustment_fba_dartless_bodice_39

Step 39:

Now it's time to add notches to the side seam. Take the SIDE BACK PANEL so that we can transfer the notches from this piece onto the SIDE FRONT PANEL (as these pieces will be sewn together and therefore need to match). 

full_bust_adjustment_fba_dartless_bodice_40

Step 40:

Again, line up the stitching lines, as if you were sewing the pieces together. Transfer the notches from the SIDE BACK PANEL to the SIDE FRONT PANEL. 

Please note : If there is a discrepancy between the lengths of the side seams (which there could be due to the alteration we made to the SIDE FRONT PANEL), use this tutorial to true the seams so that they are the same length. 

full_bust_adjustment_fba_dartless_bodice_41

And there you have it, the finished SIDE FRONT PANEL!

Now you can go ahead and make your Collins Top! The process will be the same as the instructions that come with the pattern, except you will need to start by sewing your darts in the CENTRE FRONT PANEL. 


I know that turned out to be a very long tutorial. What did you think? Easy process?


You may also like:

Notes on : Notching patterns

notching_sewing_patterns_1

During the Acton sew-along, I showed you a range of different alterations you may need to make to your Acton dress pattern.

As I was creating the tutorials, I realised that I probably should provide some information on how to notch patterns correctly. Sometimes, when making alterations to patterns, you may displace a notch or two, so today I will show you how to re-mark notches, as well as add notches to your own patterns (if you are drafting from scratch).

Just in case you have no idea what I'm talking about, I thought I'd start by letting you know what a notch is, and then how to use them. 

What is a notch?

notching_sewing_patterns_2

A notch is a small cut in the fabric (or a triangle on some commercial patterns) that help guide you while you are sewing. They are used to indicate seam allowance, dart arms, the location of design details, such as pleats, tucks, gathers, hems and pockets, or indicate key points on the pattern (like the centre front or centre back). Notches are also used to indicate balance points (points on your pattern that help you sew the right pieces together, as well as help you when you are sewing long or curved seams).

Why use notches?

If you are drafting your own patterns, you will be wanting to add notches to your patterns to make it easier to assemble the garment. If you are clever about where you put them, having well placed notches can help you assemble a pattern without instructions (which is handy if you are drafting your own patterns, as you won't have any!). Notches will help you know which piece is the front or back, what seam allowance is required and if there are any special design details such as pleats.

If you are designing patterns for other people, I think it is even more important for you to take the time to notch patterns correctly. I know the way I notch my patterns is an aspect that people really like about my patterns. They act as little markers along the way that let you know you are putting the garment together correctly. I remember one of the women that tested the Rushuctter pattern for me said she felt that each time she reached a notch, she felt like it was a little tick to let her know she was going well. As designers, it's not just about making patterns that help sewists make beautiful clothing. It's also about making a pattern that creates an enjoyable and memorable making experience, and I believe that attention to detail is a great way to do this.

Where should I place the notches?

I thought it would make the most sense if I showed you one of my patterns and where each notch was placed, and why, and then you can apply this method to your own patterns. It really is very simple if you just add your notches in a methodical way. The pattern I am using for the example is the Peplum Top that I made in collaboration with Peppermint Magazine, that can be downloaded for free here

Indicate seam allowance

notching_sewing_patterns_3

Start by using notches to indicate seam allowances. This is really helpful if you are using various seam allowances (which you should - find out more about seam allowances here) and struggle to remember what seam allowance is applicable where. Use a notch to indicate each seam allowance on your pattern. You will see in the example that I have used a notch to mark the shoulder seam, side seam and waist seam. You don't need to mark the seam allowance at both ends of the seam, just one will do. Consider the order of construction when positioning your notches. For example, I normally sew the side seams of a garment from the armhole down, so I will put the notch at that end of the seam. 

notching_sewing_patterns_4

You also want to avoid notching two sides of the same corner. This can weaken the pattern and the fabric. 

notching_sewing_patterns_6

Put notches in the same places on the back pattern piece, so that when you join the pieces, the notches will match. For example, when putting a notch on the side seam of the back pattern piece, I will put it in the same position as the front - which is at the top of the seam. The back pattern piece has a centre back seam, so I added a notch to indicate that too.

Add balance points

notching_sewing_patterns_7

The next thing to do is to add 'balance point' notches. These are the notches that help you figure out what seam matches with what, and which way the pieces go, as well as help you ease pieces together, or sew ver long seams.

In the example, there is a shoulder panel piece that is attached to the front and back shoulder seams. It looks almost the same at both ends, so without these notches it would be really tricky to know which way to put the piece in. On the front pattern I used two single notches to indicate the front and on the back one single and one double notch (double notches are generally used to indicate the back pattern piece or back of a pattern piece). 

notching_sewing_patterns_8

Transfer the notches from the shoulder seam to the shoulder panel. Do this by simply matching the seams together, as if they were being sewn, and transfer the notches onto the pattern piece (a tracing wheel can help with this step). You can also transfer the seam allowance notch at this stage.

notching_sewing_patterns_9

Do the same for the back. 

Notch centre front and centre back

notching_sewing_patterns_10

Use notches to indicate the centre front and / or the centre back of the pattern. As the Peplum Top has a seam in the centre back, only the centre front requires notches. 

Mark any other details

notching_sewing_patterns_11

At this stage, use notches to mark any other design details, such as pocket location, dart arms etc. In the case of the Peplum Top, it has a gathered piece attached to the waist, so I added notches so that it is easy to know how much you need to gather the panel (it is a pet peeve of mine when patterns don't have notches for gathered panels).

Putting notches on curves

You may have noticed that there were no curved seams to add notches to in the example. When working with curves, you need to "walk" the curve into the seam it will be sewn to and transfer the notches along the way. This tutorial goes into more depth if you need to notch your curves - for example: sleeves, princess panels etc.

So, what do you think? Are you convinced that notches will help you sew better?


You may also like:

Pattern hack : How to add a full skirt to the Acton dress

Hello, hello, I hope you enjoyed the Acton sew-along! Today I thought I'd show you a little pattern hack. A customer got in touch to tell me she was planning on using the Acton pattern to make her bridesmaids dresses (swoon!) and wanted to know how she could go about adding a full circle skirt, instead of the standard A-line skirt (view A). I thought it would be a good tutorial to share on the blog, as I'm sure many of you would love an Acton with a full skirt, while some of you may also be interested in how you add a full circle skirt to a pattern that doesn't have a straight waist seam - and this tutorial fits the bill for both!

Getting started

To start, trace a copy of the front skirt pattern piece with seam allowance - be sure to also trace the stitch line (the grey line on the pattern) and transfer the notches, grainline and drill hole. Cut out the pattern piece. 

Take a large piece of pattern paper and draw a vertical line down the right hand side. Label line as "Centre Front."

Take your pattern piece and line up the centre front of the skirt, with the line marked as Centre Front on the paper. Tape in place (only down the centre front).

Mark in your 'Cut and Spread' lines

We will be using the 'Cut and Spread' method to add the extra fullness to the skirt.

Draw two straight lines from the top of the skirt to the bottom - roughly splitting the skirt into thirds. 

Starting at the hem of the skirt, carefully cut up each of the lines. Cut up to the stitch line, but do not cut through the stitch line. 

Cut the remainder of each line from the top edge (cutting down towards the stitch line). Don't cut all the way through though, stop a few millimetres from the stitch line, leaving a 1-2mm "hinge" to keep the pieces together (if they do accidentally come apart, just tape back in place). 

Cut and spread

Slowly open up the hemline of the skirt by swinging the section closest to the side seam out from the cut. You will see that the small hinge created will allow you to open (or close) the cut lines by the desired amount. 

Open up the second cut line (closest to the centre front) and then play around with the openings until you are happy with how much you are adding to the hemline overall (and both are opened evenly). 

When you are happy with the result, tape or glue the pieces in place on the backing paper. 

Re-draw the waistline

You will now notice that the waistline is looking a little scary! We will need to rectify that now. 

Re-draw the waistline with a smooth curve (on the stitch line). Be careful not to let the line stray too far from the original stitch line. The new line needs to be the same length as the original waistline so that the new skirt piece will still fit with the original bodice. 

Re-draw the hemline

Re-draw the hemline with a nice smooth curve. 

Trace the pattern

Take another large piece of pattern paper and trace a copy of the new pattern piece. Start by tracing the stitching line - centre front, new hemline, side seam and new waistline. 

Add seam allowance

Add seam allowance to the new pattern piece - either using the original cutting lines as a guide, or adding it yourself - 1.5cm at the side seam, 1.2cm at the hem and waistline. If you are wondering why the seam allowance sits at an angle on the side seam, check out this post

Add notches, grainline and drill hole

Transfer the notches from the original pattern, as well as the grainline and drillhole in the centre front. 

Finalise the pattern

Cut out your new pattern piece and add cutting instructions (i.e. "Cut 1 on fold"). Repeat process for the back pattern piece (opening up each cut and spread line by the same amount as you did on the front piece).

One last tip

Tip: Be sure to let your full skirt hang for a few days before you hem it. Due to the nature of a full skirt, some parts of the skirt are cut on the bias, which means they stretch (or "drop") more easily that other sections of the skirt, which means that if you hem it straight away, you are likely to end up with a wobbly hemline. Let your skirt hang and then re-cut the hemline before hemming. 

The Acton sew-along will continue tomorrow. Hope you are enjoying these posts and learning lots!


You may also like:

The Acton sew-along : How to grade between pattern sizes

For many women, your measurements will range across several sizes, and you will need to grade between sizes after you print your pattern. For example, in most patterns, my hip measurement is usually a size or two bigger than my waist measurement, which means I need to grade up from the waist to the hip to account for this difference. It's a really easy adjustment to make, and makes the world of difference when achieving a great fit (and that's one of the main reasons we all sew, right?)
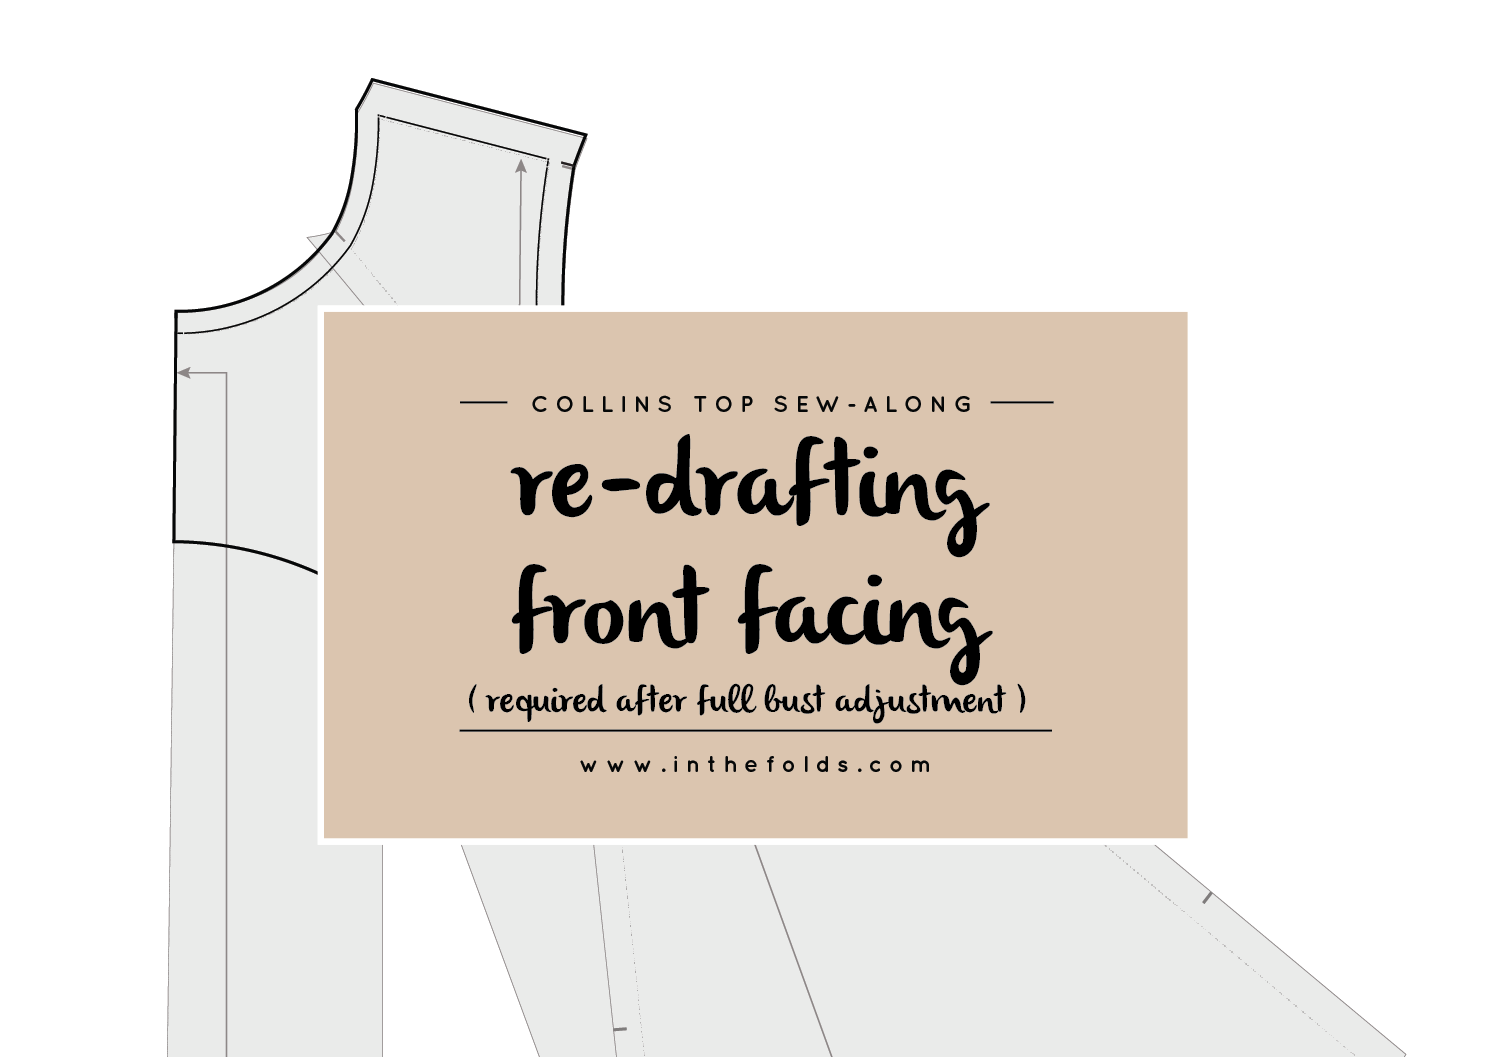
So today, to coincide with the Acton sew-along, I thought I'd show you how it's done!

Print the pattern

acton_grading_sizes_1.gif

To start, take your measurements to work out what size/s you need. Print the Acton dress pattern. In the Folds digital patterns are layered, so you can just print the size/s you need. Check out this tutorial if you need some help with this step (please note : for the Acton, there is just a "Pattern Info" layer that includes the grid and tags). Assemble the pattern as normal.

Mark hip line on the pattern

acton_grading_sizes_2.gif

Mark the hip line on the pattern. You can do this by holding the pattern piece up to your body and marking your hip location. 

Grade between sizes

acton_grading_sizes_3.gif

In the case of the example, I am grading between a size C at the waist, up to a size D at the hip. To do this, simply draw a diagonal line from the size you are at the waist, to the size you are at the hip. As you can see in the illustration, the top of the pattern is still a size C (which means it will still fit together with the size C bodice), but at the waist it is now a size D.

Complete the pattern

acton_grading_sizes_4.gif

Now, there are a couple of options for what to do next. You can either continue the side seam on the size you have reached on the hip, or continue the straight line created by the diagonal line. You can see that the first option creates a shallow point at the hip, but when just grading up one size, it's no big deal - it won't effect the shape of the skirt.

acton_grading_sizes_5.gif

If you're grading between more than one size (or don't mind a little more volume in the hem), then you can just continue the diagonal line, until you reach the hem. 

acton_grading_sizes_6.gif

Complete the hem, by extending the original hemline (you choose which size you prefer at the hem line - according to the length you want) until it intersects the new side seam. 

acton_grading_sizes_7.gif

Move any notches that have been displaced by the new side seam... And you're done!

Cut out the new pattern piece and get sewing.


You may also like:

The Acton sew-along : Small Bust Adjustment

small_bust_adjustment_acton_1

Today, for the Acton sew-along, I'll be showing you how to do a small bust adjustment. Although the pattern I have used for the example is the Acton dress, you can adapt this tutorial to any pattern that includes princess seams. 

WHEN YOU'LL NEED TO DO A Small BUST ADJUSTMENT 

Most indie pattern companies (including In the Folds) draft for a B cup bust. There are of course exceptions to this rule (such as Cashmerette and Colette), so make sure you check on your pattern before assuming the bust cup size.

This means that if your bust cup size is smaller than a B you will need to do a Small Bust Adjustment, otherwise known as a SBA, and if your bust cup size is larger than a B you will need to do a Full Bust Adjustment or FBA

WORK OUT YOUR CUP SIZE

Your cup size in sewing patterns may not always correspond to the bra size you wear. To be safe, check your measurements before deciding if you need to make any adjustments to the pattern. 

small_bust_adjustment_acton_2

Measure your high bust measurement (the area above your breasts, under your arms) as well as your full bust (the fullest part of your chest / horizontal measurement across your nipples) and then take note of each measurement, as well as the difference.

If the difference is 2.5cm (1") your bust is an A cup, 5cm (2") it's a B cup, 7.5cm (3") is a C cup and so on. 

CHOOSE YOUR SIZE

Now, go back to your high bust measurement and add 5cm (2"). This is what your bust measurement would be if you were a B cup and therefore the size you should be choosing from the pattern.

For example, let's say your upper bust measures 81cm (32"). Add 5cm (2") to this measurement to find out what size your bust measurement falls into on the In the Folds sizing chart (and what size you would be if you had B cup breasts). 81cm + 5cm = 86cm which corresponds to a size C. Your actual bust measurement is 83cm though - 3cm (just over 1") smaller than the bust measurement of the pattern. This means you will need to do a SBA and remove this 3cm (1") from your pattern. 

small_bust_adjustment_acton_3

Just like when we did the FBA, we will also need to remove some length from the bust panel, not only width.

To work out how much length you need to remove, measure from your shoulder down to your bust point. Take note of the measurement. The pattern has been drafted to accommodate the following shoulder to bust length:

Size A - 25cm / Size B - 25.5cm / Size C - 26cm / Size D - 26.5cm / Size E - 27.5cm / Size F - 28.5cm / Size G - 29cm / Size H - 29.5cm / Size J - 30cm / Size K - 31cm

Select the pattern size you will be using and deduct your shoulder to bust measurement from the relevant measurement. For example, my shoulder to bust measurement is 24cm, my measurements put me into a size C bust (although my bust measurements tells me I need an SBA) which is designed for a 26cm shoulder to bust length. This means I will need to reduce the bust seam by 2cm. 

GETTING STARTED

small_bust_adjustment_acton_4

Trace a copy of the SIDE FRONT BODICE and CENTRE FRONT BODICE. I always suggest to trace a copy of the pattern, so if you make a mistake you always have the original to go back to (although with digital patterns you can just print another copy if necessary). Be sure to include all pattern markings (in this case: grainline, notches and drill hole) and make sure you trace off the stitching line (the grey line on the pattern) - this is really important. When making pattern alterations, I normally suggest removing the seam allowance, but because the stitch line is marked on the pattern, you can leave it on if you like. 

Mark the bust line

small_bust_adjustment_acton_5

A : Draw a horizontal line across the fullest part of the bust on the SIDE FRONT BODICE. Mark the point where the horizontal line intersects the stitching line at the side seam as point 1

B : Mark this horizontal line (in the same position) on the CENTRE FRONT BODICE. Mark the point where the  the horizontal line intersects the stitching line at the centre front seam as point 2. 

Remove length from the bust

small_bust_adjustment_acton_6

A : From the bust seam, cut into the line you just marked. Cut towards point 1 and stop right on the side seam stitch line. (This will help us remove length from the bust, but not the side seam).

B : Cut in from the other side of the line now (from the side seam), towards point 1, leaving a 1-2mm "hinge" to keep the two parts of the pattern attached (this techniques is called 'Cut and Spread' - for more info on this technique, check out this tutorial).  

small_bust_adjustment_acton_7

A : On the stitching line of the bust seam, measure down from the cut line the the amount you need to remove from the bust length. Mark with a dot or small line and label as point 3. For example, I am removing 2cm from the bust length, so I marked a point 2cm below the cut line.

B : Gently pull the top section of the pattern down, so that it overlaps the lower section, until the cut line intersects point 3. Tape or glue in place.

Repeat process for the centre front bodice panel

It is now to make the same changes on the CENTRE FRONT BODICE piece, so that the CENTRE FRONT and the SIDE FRONT bodice pieces still fit together. 

small_bust_adjustment_acton_8

A : From the bust seam, cut into the horizontal line on the CENTRE FRONT BODICE. Cut towards point 2 and stop right on the centre front stitch line. 

B : Cut in from the other side of the line now (from the centre front seam), towards point 2, leaving a 1-2mm "hinge" to keep the two parts of the pattern attached.

small_bust_adjustment_acton_9

A : On the stitching line of the bust seam, measure down from the cut line the the amount you need to remove from the bust length. Mark with a dot or small line and label as point 4. For example, I am removing 2cm from the bust length, so I marked a point 2cm below the cut line.

B : Gently pull the top section of the pattern down, so that it overlaps the lower section, until the cut line intersects point 4. Tape or glue in place.

small_bust_adjustment_acton_10

A : Re-draw the centre front seam with a straight line (by joining the top of the original centre front stitch line with the bottom).

B : Re-draw the bust seam line with a straight line (by joining the top of the original seam stitch line with the bottom).

C : You will notice that you removed width from the pattern piece when you re-drew the centre front seam and added width when you re-drew the panel seam - which now cancels each other out. 

Remove width from the side front bodice

Now that we've removed some length from the bust, it's time to remove some width. Take your bust measurement and remove it from the pattern's original bust measurement (found on the sizing chart). For example, as I mentioned at the beginning of the tutorial, I am using a size C bodice - which has a 86cm bust. I have a 83cm bust measurement, so I need to remove 3cm overall. 

Remember, we are doing things on the half (as each piece is cut as a pair), so that means we need to remove half of this overall difference from the SIDE FRONT BODICE and CENTRE FRONT BODICE. I will be removing half of 3cm (i.e 1.5cm) from each side of my bodice, which means I need to remove half of that (8mm) from each of the front bodice pieces.

small_bust_adjustment_acton_11

A : Measuring inward from point 3, mark a point the distance you are removing from the SIDE FRONT BODICE. As mentioned in the example, I will be removing 8mm from the width of each pattern piece, so I will mark a point 8mm in from point 3

B : Now re-draw the bust curve, by drawing a line from the original stitch line, through the point marked in part A, and then down to the stitch line at the waistline. As you can see, the bust line is getting a lot flatter, which is what us small busted ladies like to see! 

Re-draw the side seam

small_bust_adjustment_acton_12

A : You will notice that the side seam is no longer a straight line, since we removed some width from the bust. Re-draw as a straight line by joining the top of the original side seam stitch line with the bottom.

B : This will remove a little more width from your bust width. Take a ruler and check how much this new side seam will skim off. 

Trace the new pattern piece

small_bust_adjustment_acton_13

A : Take a fresh piece of pattern paper and trace the SIDE FRONT BODICE. Start by tracing the stitch line. Be careful to check that you are tracing the new side seam line and new bust curve.

B : Add seam allowance to the pattern. You can do this by transferring the original seam allowance lines, or just add yourself - 1.5cm at the side seam, 1.2cm at the waist and bust seam and 1cm around the armhole. Transfer the notches and grainline. 

By this point we have removed width from both sides of the SIDE FRONT BODICE. For example, I removed 8mm from the width at the bust line, and then a further 3mm when I straightened out the side seam. This means that when I cut a pair of this piece, I would have reduced the bust measurement by a total of 22mm {(8mm + 3mm) x 2}. Overall I need to remove 3cm, which means I just have to remove 8mm from the CENTRE FRONT BODICE (half for each piece - i.e. in the case of the example, 4mm either side).

Remove width from the centre front bodice

small_bust_adjustment_acton_14

A : Take the CENTRE FRONT bodice, and measuring from the new bust seam line, on the cut line, mark a point the distance inwards that you still need to remove. For example, I need to remove 4mm from the piece, so I marked a point 4mm in from the new bust stitch line.

B : Re-draw the seam line intersecting this point. You will need to make it slightly curved to intersect. 

Trace the new pattern piece

small_bust_adjustment_acton_15

A : Take a fresh piece of pattern paper and trace the CENTRE FRONT BODICE. Start by tracing the stitch line. Be careful to check that you are tracing the new bust seam line and new centre front.

B : Add seam allowance to the pattern. You can do this by transferring the original seam allowance lines, or just add it yourself -  1.2cm at the waist and bust seam and 1cm around the armhole. Transfer the notches and grainline. You will notice that that we have almost lost the notches on this piece. Transfer the notches from the SIDE FRONT BODICE piece to ensure the notches are in the right place (if you're not quite sure how to do this, don't worry, I've got a tutorial on it coming tomorrow!)

All done! Can you believe it?! It was quite a long post...

Now, before cutting into your real fabric, I suggest making one more toile. Better to be safe than sorry, right?  


You may also like:

The Acton sew-along : Full Bust Adjustment (FBA) on princess panels

cover.gif

Over the past week or two, I've been running through a number of pattern adjustments (such as making a toile or lengthening or shortening the bodice) for the Acton sew-along. Now it's time to get to the juicy ones - the Full Bust Adjustment (FBA) and the Small Bust Adjustment / SBA (coming tomorrow). 

When you'll need to do a Full bust adjustment 

Most indie pattern companies (including In the Folds) draft for a B cup bust. There are of course exceptions to this rule (such as Cashmerette and Colette Patterns), so make sure you check on your pattern before assuming the bust cup size.

This means that if your bust cub size is smaller than a B you will need to do a Small Bust Adjustment, otherwise known as a SBA (tutorial coming tomorrow), and if your bust cup size is larger than a B you will need to do a Full Bust Adjustment or FBA. 

Work out your cup size

Your cup size in sewing patterns may not always correspond to the bra size you wear. To be safe, check your measurements before deciding if you need to make any adjustments to the pattern. 

measurement.jpg

Measure your high bust measurement (the area above your breasts, under your arms) as well as your full bust  (the fullest part of your chest) and then take note of each measurement, as well as the difference.

If the difference is 2.5cm (1") your bust is an A cup, 5cm (2") it's a B cup, 7.5cm (3") is a C cup and so on. 

Choose your size

Now, go back to your high bust measurement and add 5cm (2"). This is what your bust measurement would be if you were a B cup and therefore the size you should be choosing from the pattern.

For example, let's say your upper bust measures 81cm (32"). Add 5cm (2") to this measurement to find out what size your bust measurement falls into on the In the Folds sizing chart (and what size you would be if you had B cup breasts). 81cm + 5cm = 86cm which corresponds to a size C. Your actual bust measurement is 89cm  though - 3cm (1") larger than the cup size of the pattern. This means you need to do a FBA and add this 3cm (1") to your pattern. 

As the bodice is cut on the fold, you need to take the measurement you will be adding and divide it by two. For example, this 3cm (almost 1") mentioned in the example, will be split between either side of the front bodice - 1.5cm (1/2") on each side. 

Getting started

Trace a copy of the SIDE FRONT BODICE and CENTRE FRONT BODICE. I always suggest to trace a copy of the pattern, so if you make a mistake you always have the original to go back to (although with digital patterns you can always just print another copy if necessary). Be sure to include all pattern markings (in this case: grainline, notches and drill hole) and make sure you trace off the stitching line (the grey line on the pattern) - this is really important. When making pattern alterations, I normally suggest removing the seam allowance, but because the stitch line is marked on the pattern, you can leave it on. 

Prepare the bodice for the adjustment

A: On the SIDE FRONT BODICE, draw a straight line from the bottom corner of the pattern, close to the princess panel (1) to the fullest part of the bust curve (2.) The points need to be on the stitch line - not the edge of the pattern. 

B: Mark a point (3) approximately two-thirds of the length of the armhole curve (the portion on the SIDE FRONT BODICE), measuring in from the side seam. Join point 2 to point 3 with a straight line. 

C: Draw a line from point 2 to the side seam (point 4), about 1cm down from the armhole. This line should be on the cut line of the pattern, not the stitch line. 

Transfer guidelines onto centre front bodice

Before getting started on the alteration, you need to transfer the guidelines from the SIDE FRONT BODICE to the CENTRE FRONT BODICE, so that you will be able to make changes to the same areas on each pattern piece. 

A: With your pattern pieces side-by-side and correctly aligned (as if they were being sewn together), draw a horizontal line on the CENTRE FRONT BODICE in line with point 2. Label this line with a 5. 

B: Draw a second line (Line 6) 3-4cm below Line 5 (parallel). Transfer the position of this line onto the SIDE FRONT BODICE, just until the line intersects the line that runs from point 1 to point 2. For the time being, put the CENTRE FRONT BODICE to the side. 

Cut into the bodice

Before cutting into the pattern, place the pattern on top of a piece of pattern paper. This will make it easier when you need to stick the pieces down after you have made the adjustment (it will get really flimsy).

A: Take a pair of scissors and cut into the pattern from the seam allowance below point 1. Cut up to point 2 and then over to point 3.

B: Next, cut in from the armhole towards point 3, being careful to leave a 1-2mm "hinge" intact (it's not a big deal if you accidentally cut through, you can always tape the hinge back together). 

C: Next, cut in from the side seam (point 4) to point 2 - again, leaving a small hinge intact at point 2. Your pattern piece should be very malleable by now! All ready to make the adjustment. 

Make the adjustment

Gently spread the pattern open from point 1 - using point 3 as a hinge. Continue spreading until you have opened up the bodice by the desired amount. Remember, as the bodice is cut on the fold, you need to take the measurement you want to add to the bust measurement and divide it by two. For example, if I wanted to add 3cm (just over 1") I would add - 1.5cm (1/2") on each side. 

Be careful to check that the increase is consistent down through the opening. 

You will notice that when you open this part of the pattern a dart is created at the side seam (point 4). We don't need a dart there, but we'll deal with that later on!

A: Cut through line 7

B : Place a ruler on the waist seam of the pattern (on the stitch line) and continue the line beyond the pattern piece. Line up the detached piece with this line.

Remove the dart

Tape or glue the pattern down onto the pattern paper underneath.

Now it's time to get rid of the "dart" that we created in the previous steps. For ease, I will refer to the wedge created in the side seam as a dart, and will refer to the sides of the opening as the upper and lower dart arms. 

6_3.gif


A: Cut into the pattern through the upper dart arm towards point 2. 

B: Now cut towards point 2 from the opposite side of the pattern - leaving a 1-2mm hinge intact. 

step_7.gif

A: Close the dart by gently pulling the upper dart arm towards the lower dart arm.

B: When the upper dart arm is in line with the lower dart arm, tape or glue in place. You will see that a small wedge has opened up on the bust curve (the fullness from the side seam has been relocated to the bust seam).

Reduce waist back to original length

A: At this stage you will notice that by adding fullness to the bust, we also added fullness to the waist seam (the opening at point 1). In the case of a FBA, you are wanting to increase the bust measurement, without adding any extra to the waist - so this will need to be removed.

B: Remove the excess length from the waist at the side seam. Measure how much was added at point 1 and then remove this from the waistline at the side seam. Redraw the side seam with a straight line up to the pattern's original armhole. 

Make alterations to the centre front panel

It's now time to transfer the changes we have made to the SIDE FRONT BODICE to the CENTRE FRONT BODICE (so that they can be sewn together).

Take another piece of pattern paper and draw a straight line down the right hand side. Label "Centre Front." Take the top section of the CENTRE FRONT BODICE and tape or glue in place, lining up the centre front of the pattern piece with the line marked on the paper. 

step_10_2.gif

A: On the SIDE FRONT BODICE, measure the length of the smaller opening. Take note of the measurement.

B: Now, move to the CENTRE FRONT BODICE and place the middle section of the pattern, the same distance down (as the measurement noted) from the upper section of the pattern. Tape or glue in place. 

A: On the SIDE FRONT BODICE, measure the length of the larger opening. Take note of the measurement. 

B: Now, move to the CENTRE FRONT BODICE and place the lower section of the pattern, the same distance down (as the measurement noted) from the middle section of the pattern. Tape or glue in place. 

Trace the new pattern pieces

Your alterations are done! Now you just need to trace new versions of each piece. 

step_10.gif

A: Take a fresh piece of pattern paper and trace the SIDE BACK BODICE, starting at the stitch line. Be careful to check that you trace the new side seam and not the original side seam.

B: Add seam allowance to the piece - 1.5cm to the side seam, 1.2cm to the bust seam and waist seam and 1cm to the armhole seam (use this tutorial if you need some tips). If you are wondering why the seams meet at different angles - you can learn more about seam returns here. Transfer the notches. 

C: Label the pattern and add the grainline (you can work this out by placing the new piece on the original pattern piece and transferring the grainline). 

Repeat process for the CENTRE FRONT BODICE.

And that's it! Your bodice is bosom ready! 

Keep your eye on the blog for more Acton sew-along posts coming in the next couple of weeks. 


You may also like:

The Acton sew-along : How to lengthen the bodice (above the bust)

acton_lengthen_bodice_1

If you have been following the Acton sew-along, you will know that we're now onto making pattern alterations! The bodice of the Acton is quite fitted, so making some alterations to get the bodice just right for you, is really important (if the pattern doesn't fit you straight out of the packet).

I know a lot of people get quite daunted about pattern alterations, but the ones required for the Acton aren't too scary at all, as it doesn't have sleeves or shoulder seams - which simplifies it quite a bit. I showed you how to make a toile a few days ago, and now from doing a fitting, you should know what changes you need to make. Lengthening or shortening the bodice is a common adjustment to make, so I thought I'd show you how to add length in two different spots. By referring to your toile, you should be able to tell where you need to add length - it could be from below the bust line, above the bust line, or even a bit from both. 

Getting started

acton_lengthen_bodice_2

To start, trace a copy of the CENTRE FRONT BODICE and SIDE FRONT BODIE of the Acton pattern (it's always a good idea to trace a copy of the pattern, rather than using the original, in case you make a mistake. Although with a digital pattern you can always print another copy if necessary!), including all pattern markings (in this case the stitch line, grainlines and notches). 

Normally I suggest removing the seam allowance when making pattern alterations, but when it's as simple as this alteration, there really is no need. 

acton_lengthen_bodice_3

Draw a horizontal line (perpendicular to the grainline) through each pattern piece the location you need to add length. On the SIDE FRONT BODICE piece, extend the grainline so that it crosses the horizontal line and is on the top part of the pattern piece. As I said, for this tutorial I will be showing you how to add length above the bust line. If you need to add length below the bust line, check out this tutorial.

Cut through the pattern pieces

acton_lengthen_bodice_4

Carefully cut through each line, separating each piece into two. 

lengthen the bodice

acton_lengthen_bodice_5

Take two pieces of pattern paper (this is a great time to use up some of your paper scraps!).

A : For the SIDE FRONT BODICE you will need your piece of paper to be slightly wider than the one for CENTRE FRONT BODICE. Draw a horizontal line straight through the (roughly) middle. In the centre, draw a line perpendicular to the horizontal line, creating a right angle. This will be the grainline of the new SIDE FRONT BODICE piece. 

B : Draw a horizontal line straight through the (roughly) middle. On the right hand side, draw a line perpendicular to the horizontal line, creating a right angle. This will be the grainline of the new CENTRE FRONT BODICE piece. 

acton_lengthen_bodice_6

A : Take the lower section of the SIDE FRONT BODICE and line it up with the horizontal and vertical line you just drew - the grainline matching up with the vertical line (you can now see why this line had to be closer to the middle) and the cut edge aligned with the horizontal line. Tape or glue in place. 

B : Take the lower section of the CENTRE FRONT BODICE and line it up with the horizontal and vertical line you just drew - the centre front matching up with the vertical line and the cut edge aligned with the horizontal line. Tape or glue in place. 

acton_lengthen_bodice_7

By looking at your toile, work out how much extra length you need to add to the pattern. For the case of the example, I will be adding 1.5cm (5/8").

On the vertical line on each pattern piece, mark a point 1.5cm /5/8" (or whatever length you are adding to the pattern) above the cut edge. 

acton_lengthen_bodice_8

Draw a line parallel to the cut edge of the pattern running from the point you marked in the previous step on both the SIDE FRONT BODICE (A) and CENTRE FRONT BODICE (B).

acton_lengthen_bodice_9

A : Take the upper section of the SIDE FRONT BODICE and place the cut edge on the second horizontal line, aligning the grainline with the vertical line. Tape or glue in place. 

B : Take the upper section of the CENTRE FRONT BODICE and place the cut edge on the second horizontal line, aligning the centre front with the vertical line. Tape or glue in place. 

Trace the pattern pieces to create the new pieces

acton_lengthen_bodice_10

Take two pieces of pattern paper to trace the new pattern pieces. 

A : Trace the stitch lines on the SIDE FRONT BODICE. Re-draw the armhole line and princess seam line, by finding a line of best fit between the original stitch lines. 

B : Trace the stitch lines on the CENTRE FRONT BODICE. Re-draw the princess seam line by joining the top of seam to the bottom with a straight line. 

acton_lengthen_bodice_11

Add seam allowance to both pieces - by using the original pattern edges as a guide.

A : Add 1.5cm (5/8") to the side seam, 1.2cm (1/2") to the waist seam and princess seam and 1cm (3/8") to the armhole.

B : Add 1.2cm (1/2") seam allowance to the waist seam, princess seam and centre front. Add 1cm (3/8") to the armhole and neckline. 

acton_lengthen_bodice_12

Be sure to also transfer all pattern markings - notches, drill hole and grainline. 

acton_lengthen_bodice_13

Label the pattern for safe-keeping. You can now cut out your new pattern pieces. Repeat process for the back pattern pieces (if you also need to add length to the back of the bodice).


You may also like:

The Acton sew-along : How to lengthen the bodice

Welcome back to the Acton Sew-along.

In yesterday's tutorial, I gave you all the reasons why you should always make a toile (especially when you're making a fitted garment like the Acton) and showed you how to go about it. In the next few tutorials, I'm going to show you what to do if you have realised that you need to shorten or lengthen the bodice. This is probably one of the simplest pattern alterations you can make, so please don't be daunted by it if you've realised that you'll get a better fit by changing the length of your bodice. 

By referring to your toile, you will be able to know whether you need to remove length below the bust, or above the bust. The method is exactly the same, just the location of the cut is different. This tutorial will show you how to remove excess from below the bust, and later today I'll show you how to remove length from above the bust. 

Getting started

To start, trace a copy of the CENTRE FRONT BODICE and SIDE FRONT BODIE of the Acton pattern (it's always a good idea to trace a copy of the pattern, rather than using the original, in case you make a mistake. Although with a digital pattern you can always print another copy if necessary!), including all pattern markings (in this case the stitch line, grainlines and notches). 

Normally I suggest removing the seam allowance when making pattern alterations, but when it's as simple as this alteration, there really is no need. 

Draw a horizontal line (perpendicular to the grainline) through each pattern piece between the lower notches (below the bust line). On the CENTRE FRONT BODICE piece, make sure the line is far enough up the piece that it intersects the centre front of the piece and not through the bottom edge.

Cut through the pattern pieces

Carefully cut through each line, separating each piece into two. 

lengthen the bodice

Take a piece of pattern paper (this is a great time to use up some of your paper scraps!) and draw a horizontal line straight through the (roughly) middle. On the right hand side, draw a line perpendicular to the horizontal line, creating a right angle. This will be the grainline of the new pattern piece. 

Take the lower section of the CENTRE FRONT BODICE and line it up with the horizontal and vertical line you just drew - the centre front matching up with the vertical line and the cut edge aligned with the horizontal line. Tape or glue in place. 

Add length to the pattern piece

By looking at your toile, work out how much extra length you need to add to the pattern. For the case of the example, I will be adding 2.5cm (1").

On the vertical line, mark a point 2.5cm / 1" (or whatever length you are adding to the pattern) above the cut edge. 

acton_dress_shorten_bodice_3_5.gif

Draw a line parallel to the cut edge of the pattern running from the point you marked in the previous step. 

Take the upper section of the CENTRE FRONT BODICE and place the cut edge on the second horizontal line, aligning the centre front with the vertical line. Tape or glue in place. 

Trace the new pattern piece

A : Take another piece of pattern paper and trace your new pattern piece. Start by tracing the original lines of the pattern which have not been affected by the changes.

B : Redraw the panel seam by drawing a line from the top of the pattern piece, down to the bottom - meeting the original line at each end. Do this for both the cutting line and the stitching line. 

Be sure to trace all pattern markings - notches, drill hole and grainline. Label the pattern for safe-keeping. You can now cut out your new pattern piece. 

Repeat Process for the side front bodice

For the SIDE FRONT BODICE you will need your piece of paper to be slightly wider than the one you used for the CENTRE FRONT BODICE. Again, mark the horizontal and vertical lines on the paper - but this time, place the vertical line closer to the centre of the paper. 

Take the lower section of the SIDE FRONT BODICE and line it up with the horizontal and vertical line you just drew - the grainline matching up with the vertical line (you can now see why this line had to be closer to the middle) and the cut edge aligned with the horizontal line. Tape or glue in place. 

On the vertical line (the grainline in this case), mark a point 2.5cm / 1" (or whatever length you are adding to the pattern) above the pattern edge. This distance needs to be the same amount that you added to the CENTRE FRONT BODICE.

Draw a line parallel to the cut edge of the pattern running from the point you marked in the previous step. 

Take the upper section of the SIDE FRONT BODICE and place the cut edge on the second horizontal line, aligning the grainline with the vertical line. Tape or glue in place. 

You will see that the changes are limited to area where the paper was added, so there is no need to trace the pattern. Simply re-draw the side seam and princess seam and cut the piece out.

Repeat process for the back panels and that's it!

Are you enjoying the Acton sew-along? There are still plenty of posts to come!


You may also like: